OP
OP
kal
Well-Known Member
Yup. Most likely is. Just wanted to point out a faster/easier/more consistent way to do it.
Kal
Kal

But which do you think is better - hole saw or punch?
http://morebeer.com/view_product/8767/beerwinecoffee/MPT_Stainless_Steel_Male_Quick_Disconnect
Another problem, MoreBeer a/k/a B3 is out of stainless male QD's and won't have any until Mid March. Are these identical to any sold at McMaster Carr. McMaster Carr has some high flow liquid ones that look similar, but for 1/2 inch NPT size, they are $18 vs. $12.
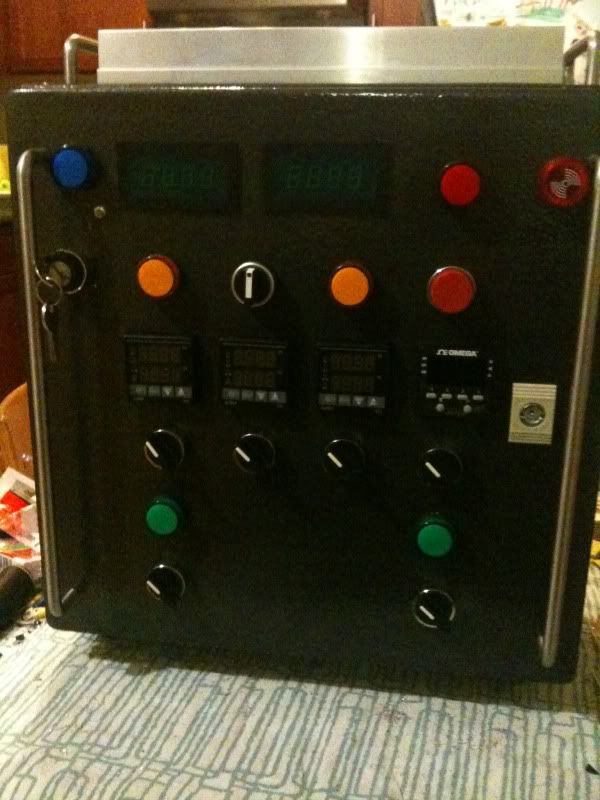
This is quite possibly the coolest thing I have ever seen that was a home built unit! This surpasses many commercial controllers that I have seen. I too would opt for computer controlled via Linux Ubuntu but that is a personal option.
I certainly don't have $6000 just for a controller but this is something I can set my sights on. Just superb build and quality!

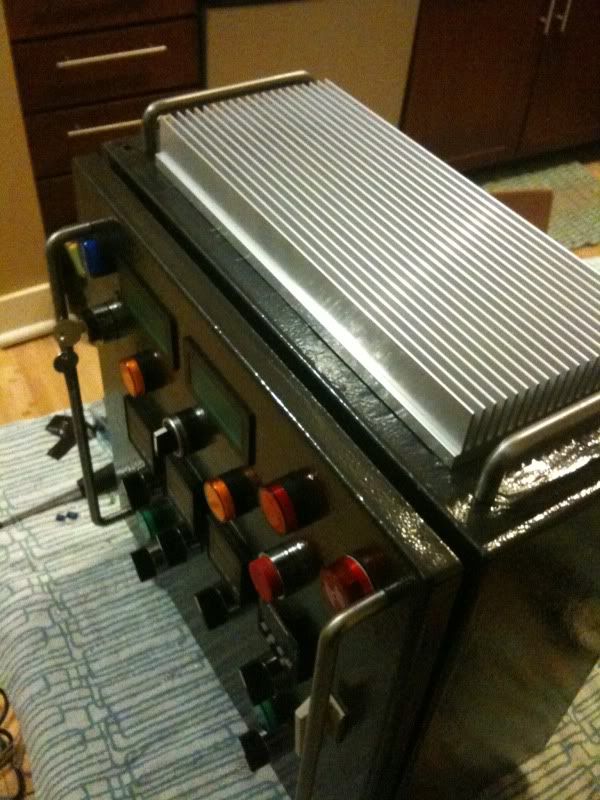
holy heat sink!
") Although, mine is still smaller than Kal's!
Although, mine is still smaller than Kal's!LOL! Yeah, I went with a longer heatsink mostly because I thought it looked nicer than the smaller ones. I found a guy on ebay who makes custom sizes so I just got one that fit the space well. Plus, I didn't want a super tall one thats why I ended up with that size. I'm sure I won't have any problems with overheating
Kal is single handedly responsible for several suppliers going out of stock.
I'm sure people will still use it. It still has a purpose for some people and may be better than using nothing.OTOH, he may have just killed Five Star's 5.2 product.
OTOH, he may have just killed Five Star's 5.2 product.
Is this from another thread?
C'mon now! Give credit where credit is due... I learnt everything about water adjustment right here using the EZ water calcuator and Kai's math. Bobby M's done a lot of work to explain it well to the layperson. I'll be doing the same (I hope).The gist of it is, if you are someone who just completed a clone of his brewery and think you've caught up to Kal in technology, it's another kick in the ego.
http://morebeer.com/view_product/8767/beerwinecoffee/MPT_Stainless_Steel_Male_Quick_Disconnect
Another problem, MoreBeer a/k/a B3 is out of stainless male QD's and won't have any until Mid March. Are these identical to any sold at McMaster Carr. McMaster Carr has some high flow liquid ones that look similar, but for 1/2 inch NPT size, they are $18 vs. $12.
Not to take away from Kal's links, but why not use camlocks from BF or ProFlow
Not to take away from Kal's links, but why not use camlocks from BF or ProFlow
http://www.bargainfittings.com/index.php?route=product/category&path=36_39&page=4
http://store.proflowdynamics.com/modules/store/316-Stainless-Steel_C68.cfm
Mid-March is a long time to wait...


FYI: I've updated the amp/volt meter page a bit with a warning to cover some of the problems people have been having... take a read.
Re: the pause button - What are you guys using it for? I use the timer mostly for boiling and for mashing. Neither function can actually be "paused". Sure, you can pause the timer, but that doesn't stop the physical boiling nor does it stop the starch to sugar conversion in the mash. So I never bothered adding a larger "pause" button as it didn't make sense to me.
Kal
The Omega's the same as the AuberIns one: you hit reset and it resets and starts to count down right away.Kal, I don't know how the Omega timer works. On the Aubin one, if you just have the reset, it starts to tick down as soon as you hit it.
But doing reset/pause and then unpausing does the same thing as just hitting reset when you want to start. That's what I do. I want to count down from 60 mins, I hit the reset button when I'm ready to start the 60 mins.I like to reset/pause, and then unpause to start the timer.
Possibly. But that only works if you *only* have really early (60 mins+) additions. If you add anything later (like 45 or 30 min additions) you can't 'pause' the process since it'll alter the outcome. Those 45 or 30 minute hops will no longer be 45 or 30 minute hops.Also, when I boil there may be a reason to pause if you haven't achieved the expected evaporation and don't want to add the aroma/flavor hops to early.
Hopefully! I've never had to do this. The boil off rate is extremely consistent since with electric the energy you're putting is very controlled, and since it's indoors the temp/humidity/wind is always the same.With my old setup, I would routinely have to make adjustments for this. With the new one, perhaps its a more controlled environment and I won't.

Nice work!
That is one *massive* box! What's it measure? Mine 16x16x8. Yours looks more like 24x24x12. Am I close?
Kal
I haven't received my box yet, but I'm sure eager to start planning the butcher job on the box I'm getting from Pioneer Breaker/electrical_parts!! ;^)
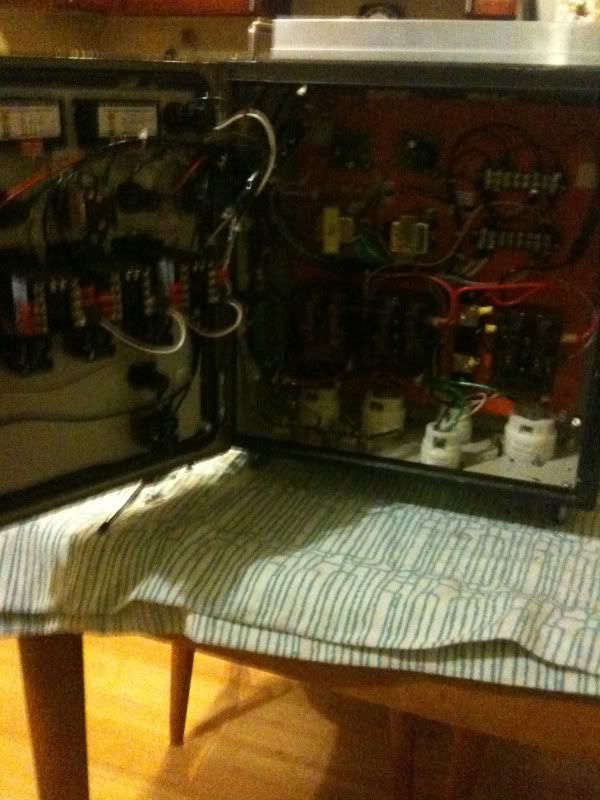
I have a question - how thick is the metal in the door and sidewalls?
I know that we've been talking about using a variety of punches and bi-metal hole saws and such, but couldn't the 45mm x 45mm squares for the PIDs be just as easily cut using a Dremel and an assortment of 15/16" and/or 1-1/2" metal cutting wheels?
Just curious...
Enter your email address to join:
