Happiness is: Home malting

Homebrew Talk - Beer, Wine, Mead, & Cider Brewing Discussion Forum

Help Support Homebrew Talk - Beer, Wine, Mead, & Cider Brewing Discussion Forum:

This site may earn a commission from merchant affiliate links, including eBay, Amazon, and others.
I'm struggling to keep the grains from molding during the germination phase. Do you have this problem? If so, do I just ignore the mold - because it dies in the drying process? I don't know!!!

El Zorro Sir;

It's hard to tell without specifics but, a few thoughts:

1. Ideally the germination process needs appx. 65F temperature with moist air blowing through it (These are IDEAL conditions and hard to control in hot/dry weather) I have not tried to malt anything in temperature that was sustained above 70F yet.

2. Keep in mind germinating seeds will also create heat as they grow so you need to measure the temperature within the couching seeds. You might need to have a fan gently blowing on them. Also if you have a basement or cellar or some cool cement floor to put it on, it will help.

3. One other thing that may help is to add bleach to the water during steeping and couching (1/4 tsp bleach to 5gal water should be sufficient) I have not tried this because I did not have the problem.

4. Is your water good? Do you drink it without any treatment? This will also matter.

I only have access to corn and wheat where I live. I haven't found any barley yet. So, for my first batch I purchased about 75 lbs of wheat for $5 at the local grain elevator. I took about 15 pounds put them in my brewing pot and covered them with water overnight. The next day, I spread them in the malting floor the next day. Each day I stirred them and dumped about a glass or two of water on them to keep them moist - maybe this was too much. How moist do you keep your grains during the germination phase?

5. I have not tried corn or wheat yet, I assume you got them to grow? I don't believe that amount of water is too much. You just want to keep them moist enough to keep growing and not dry out while also allowing them to breath.

6. I see nothing wrong with this part of your process (hopefully you are not sealing the couching floor too tightly?), however you do want to keep them cool as stated above, this will help keep the mold and bacteria/organisms at bay.

I got the grains to dry and then the next day I poured 5 gallons of hot water over them and let them sit in a thermos/cooler at about 140 degrees F. I didn't get much specific gravity improvement over plain water. I let it sit overnight and the next day it smelled sour, but a little better (but not good) on the SG ~ 1.01 . I ended up throwing out the batch, fearing contamination.

7. Was this wheat or corn? If wheat you are definately going to need to do one or more protein rests (i.e. 105F, 120F, 150F) as wheat does not have enough enzymes to convert it's own starch (typically). I wouldn't expect your S.G. to be large with wheat unless it is mashed with barley malt or other high enzyme producing malt to assist with it's conversion. (I don't use wheat very much so someone please correct me on this if it is awry) Also isn't 140 a tad bit low for conversion, typically it is 149 to 160ish?

8. Are you certain you got close to full modification? I think it is the same as barley and the growing shoot (not the roots) needs to be 75%-100% the length of the seed inside the hull, although wheat does not have much of a hull.

The only things I could think of which I didn't do correctly were:
1. I had some mold in the germination phase
2. I didn't crack the wheat before mashing.

9. See above for mold.
10. I believe any malt is always crushed/ground before mashing to aid in releasing the sugars.

Hope some of this helps, keep on malting!:rockin:
Note: Any or all of this may be in error as I am not a professional maltster.
 
7. Was this wheat or corn? If wheat you are definately going to need to do one or more protein rests (i.e. 105F, 120F, 150F) as wheat does not have enough enzymes to convert it's own starch (typically). I wouldn't expect your S.G. to be large with wheat unless it is mashed with barley malt or other high enzyme producing malt to assist with it's conversion. (I don't use wheat very much so someone please correct me on this if it is awry) Also isn't 140 a tad bit low for conversion, typically it is 149 to 160ish?

Commercial wheat malt (except for the dark wheat malt) tends to have enough diastatic power to convert itself with power to spare. Wheat Malt - Home Brewing Wiki I have never done an all-wheat batch... but I have done some where I was 75% wheat (some was flaked wheat) without any problems. I had a rest at 120 for the flaked wheat, but stuck at 150-155 for the rest of the mash.
 
El Zorro Sir;

3. One other thing that may help is to add bleach to the water during steeping and couching (1/4 tsp bleach to 5gal water should be sufficient) I have not tried this because I did not have the problem.

4. Is your water good? Do you drink it without any treatment? This will also matter.

#3. Instead of bleach, I tried H2O2 - hydrogen peroxide. I've heard benefits of using it over bleach i.e. 1. no smell 2. H2O2 breaks down into water and oxygen while boiling, thus leaving no harmful tastes.
#4. The water here is great. No problems whatsoever.


5. I have not tried corn or wheat yet, I assume you got them to grow? I don't believe that amount of water is too much. You just want to keep them moist enough to keep growing and not dry out while also allowing them to breath.

6. I see nothing wrong with this part of your process (hopefully you are not sealing the couching floor too tightly?), however you do want to keep them cool as stated above, this will help keep the mold and bacteria/organisms at bay.

#5. Actually, your couching floor method was wonderful. I had absolutely ZERO problem getting the wheat to grow.

#6. It has been cool here lately, but as you said, i need to keep the grains cool. We had a hot spell last week when I was germinating...and sure enough, that's when I had the mold issue. I have some little desk fans. I'll set up something so that the grains have a constant flow of air on them.


10. I believe any malt is always crushed/ground before mashing to aid in releasing the sugars.

Hope some of this helps, keep on malting!:rockin:
Note: Any or all of this may be in error as I am not a professional maltster.

#10. This may be a stupid question, but I don't have a grain cracker / mill. Any suggestions here? Have you ever done without a mill by using a blender / a rolling pin?


Finally, thanks for being SO helpful! I'm going to give this a try again.
1. I'm going to add some malted barley to my mash to see if I can't get a better SG.
2. I'm going to make absolutely sure that my grain stays cool.
I'll let you know the results.

Thanks again! :mug:
 
Zorro, my .02 is that your SG will remain low until you can get them milled... if you use a brew software like beersmith, you will see that when you steep grains, you really do not gain any gravity in your brew. And steeping the wheat is exactly what you are doing if it has not been milled.

So, find someone with a mill! :) If you want to just test for conversion, you could PROBABLY use a blender/food processor. However, you do NOT want to do this on something you actually intend to brew with. And a rolling pin is just not practical for anything more than a 1/2lb or 1 lb IME.

Just throwing it out there. Good luck.
 
I agree with cyberbackpacker, a blender will destroy the grain. If you are doing a few handfulls a rolling pin in a bag might work but look into a mill which will crack open the grains but leave the husks relatively intact, you don't want a bunch of flour.
 
#3. Instead of bleach, I tried H2O2 - hydrogen peroxide. I've heard benefits of using it over bleach i.e. 1. no smell 2. H2O2 breaks down into water and oxygen while boiling, thus leaving no harmful tastes.

I've had excellent luck with a light solution of iodophor.

My first good batch of feed-store barley (50-lbs for $23) was 10-lbs in a large plastic storage bin, kept at cooler temps (not easy to do in this climate) by leaving it in front of the A/C output for roughly a week, followed by a 6 hour sun drying on my own personal piece of the Mir space station (lovingly handcrafted from heavy duty aluminum foil and foil duct tape), and finished by 20 minutes in a large pillowcase in the drier. I then used a large mesh screen and hand pressure to remove the rootlets and stems from the seeds. Similar results with wheat.

Looks and smells just like the 2-row from BMW.

Just thought I'd chime in with my methods
 
*subscribe* Holy crap, it's late and I can't get through this whole thread... OMG THIS IS AWESOME!!!! You are my hero!!!
 
Hey guys,

Came across this thread the other day and mentioned it to a scientist friend of mine who is barey breeder at Washington State University. He gave me the following information that he obtained from the USDA Malting Lab in MAdison, WI on their malting procedures.. This is straight from them.. Maybe this will help someone on this thread... FYI, this is the lab where all WSU's barley samples are sent for malting analysis...

2.2.2. Micro-malting protocol
The barley prior to micro-malting was passed over a 2.2 mm screen. The malting schedule consisted of an initial wash for 15 min to remove surface dust from the barley kernel followed by a 7 h steep, 8 h germination, 9 h steep, 6 h germination, and a final 0.5 h steep. The barley undergoes germination for an additional 88.5 h where the temperature was held at 15 °C with constant air passing through revolving drums. At the conclusion of the germination, the green malt was kilned using the following protocol: 9 h at 50 °C, ramping for 4 h at 60 °C, ramping for 2 h at 70 °C, ramping for 4.5 h at 80 °C and a cooling stage for 0.5 h at 25 °C.
 
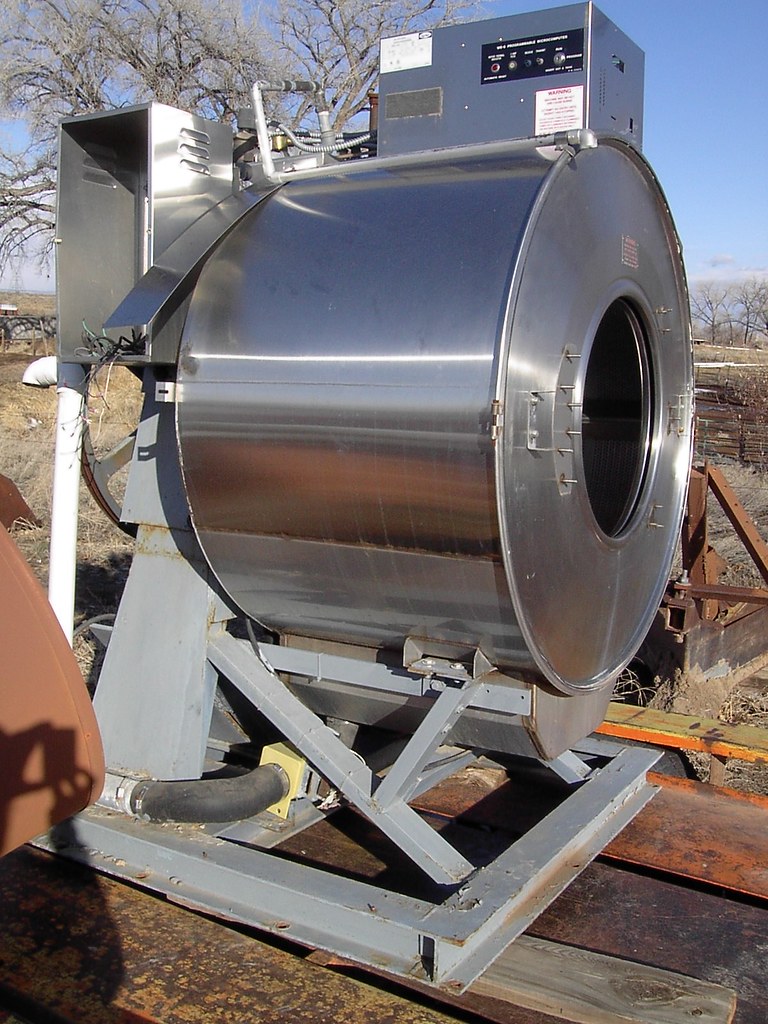
Its been a while since i've had anything new for this thread. This is what I'll be working on in the next month or so, it will be an all in one malting bin. From steeping through couching/drying/kilning/mashing(for crystal) and possibly smoking when I want to.
4417367933_4e7554e582_b.jpg

It started its life as a commercial washing machine, I found it setting outside a laundry mat along with another smaller one and I procured them for $200. It has an inside drum that rotates inside a water tight outer drum, all stainless.
My plans for modifications include:
1. Attaching screen sections to the inside drum (the current holes are too big)
2. Procuring a drive system to rotate inner drum very slowly, possibly drive from an old treadmill.
3. Procure ducting for the air heater connection(s).
4. Procure water heating system, onboard or external heat, since I'm planning on making crystal malt it will need to be able to heat to mashing temps.
5. Reattaching the door somehow, the hinge and latch are the only mechanical parts missing that I need, I'll probably fabricate them.

I'll post some more pics with plans later.

Brew on my friends:mug:
 
Just when I thought this thread couldn't get better!

I'm going to have to keep watching!
 
damn, that thing looks intense. good luck with the mods, can't wait to see what becomes of it.
 
And I always thought happiness was a warm gun...
A warm gun usually makes me happy.:rockin:

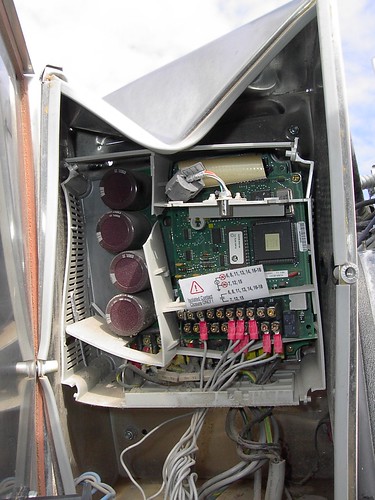
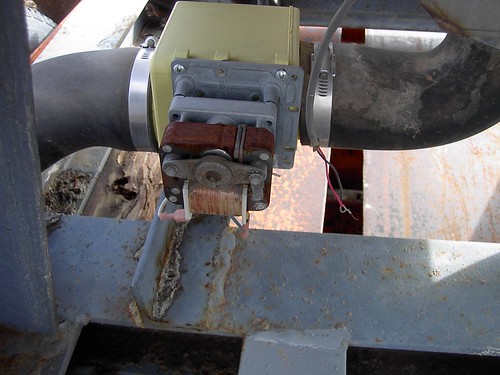
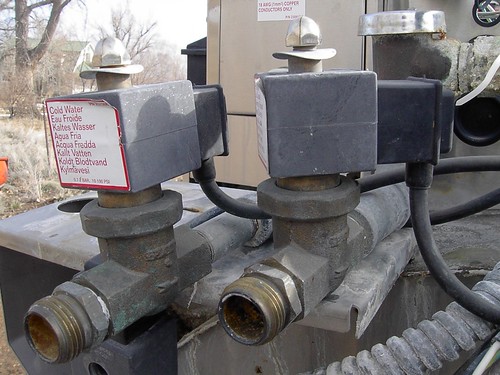
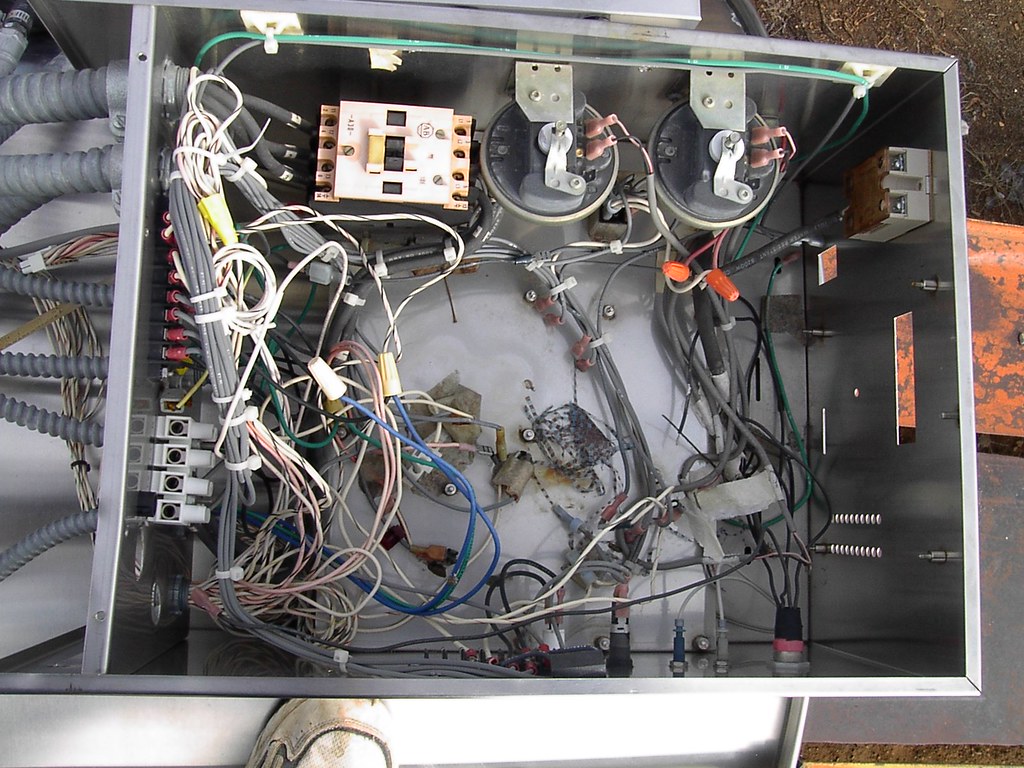
Ok, on task, first off we salvage what is useable from the washers, At first glance I see two SSRs, numerous contactors, switches, etc. 3 - 3" solenoid valves, 6 - 3/4" solenoid valves, 1 - 3/4" to 3/8" 1way-4way solenoid valve, interesting.

Large washer top controls:
4419910863_5b86173332_b.jpg


Small washer, side controls (smashed):
4419910277_f794c4f5ba.jpg

VSD I presume?

Hopefully some of this stuff is useable, it's been open to the weather for numerous years. I'll be junking all the PC boards as they are not what I need and all the wires were cut between each control box anyway.

3" valve:
4419910561_91623cca1e.jpg


3/4" valves:
4419911155_a674b2deff.jpg


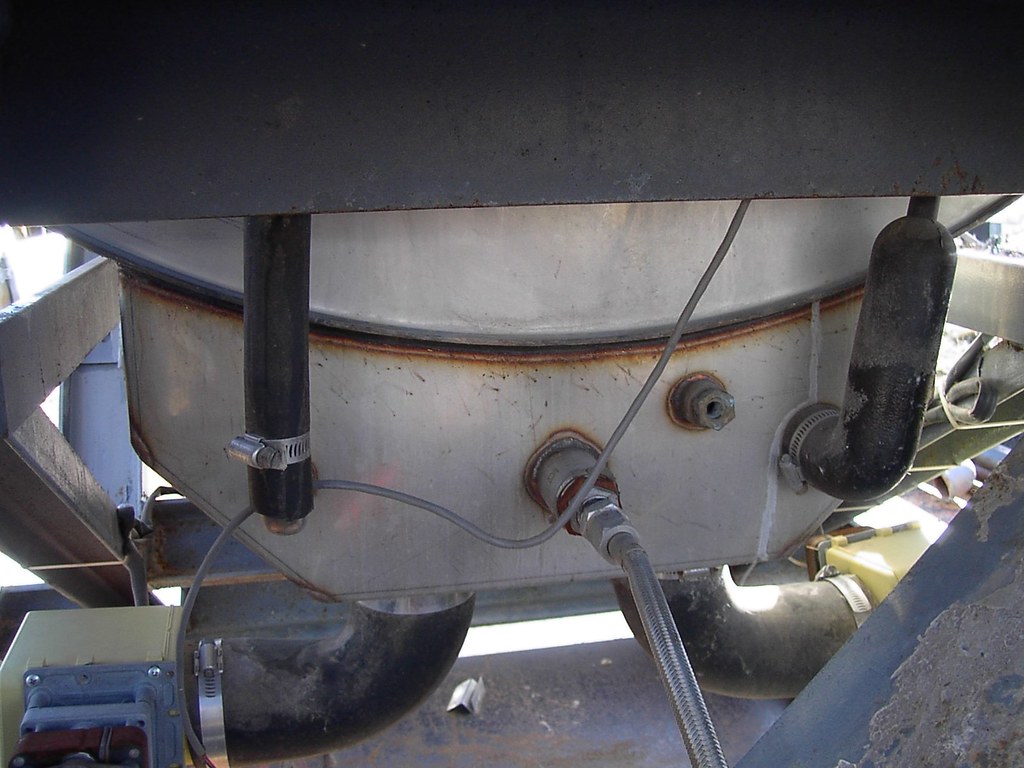
Here's the back underside of the large unit, this is where my temp probe, electric heating element, water inlet and drain will be, there is also another 2" port halfway up on the rear and a large rectangular port on the upper right side that I can use for air flow.
4418133700_2e0103872f_b.jpg


A few useless photos huh.:cross:

I'll wait till there is progress for the next photos. unless someone wants to see any more pre-photos.
 
There's a lull on the action in this thread so I'll pitch in. I'd like to add a couple of bits of info if it helps anyone here connect the dots. I started home-malting because the price for 2-row here is about 4.50 a pound! DME is 8 dollars a pound!

1) I've been able to achieve efficiency in the low 50%'s consistently by allowing acrospire length to grow to the 80-100% range. Earlier I'd been jumping the gun at acrospire growth length of 60-75% previously. My worst was efficiency was 37% but I was also BIAB'ing at the time so take that with a grain of salt.

2) I'm an apt dweller here in Korea. Space is a premium so I'm only able to malt 5kg at a time. I have a dish dryer that I do my "kilning" in. My kilning temps are between 40-45c. That's my only kiln session and I do that for 36 hours.

3) I then spread them in a thin layer on the floor of my apartment and hit them with a fan to dry them out for 2 days.

4) I read somewhere, maybe this thread actually, that you should let them sit for a week before you use them. Something to do with off flavors.

5) If your eff% is low (it will be until you know your process) just use some DME to hit your gravity.

For what it's worth, I'm making the best beer of my life. I'm not sure if I'd home malt on such a small scale back home in Montana, but here in Korea, it's necessary. Don't let that talk you out of it though. COLObrewer has been doing some really great things with his home malting project. I think what talks a lot of people out of it is there are a lot of variables. My advice is to just go for it! Like I said, the best beer in my life! It's really nice to get one step closer to completely "home made". Malt on!

P.S Even though it's pretty specific to Korean conditions, this is my home malt contribution. If anything, it should definitely be able to help you out if you're in an apartment.

http://www.homebrewkorea.com/forums/viewtopic.php?f=2&t=394


hey i have so far malted two 55lbs sacks of barley and my effiency has been better than store 2row, here is what i do diffrent than you, i dry first with big fans and sunshine if avalabe, then i load the dry malt in to pillow sacks and tumble in the dryer on the highest heat setting for about 2-3 hrs. no other drying needed just pore out of a bucket in to a bucket in front of a fan to blow away the rootletts . also i store the sack in the freeze
 
i dry first with big fans and sunshine if avalabe, then i load the dry malt in to pillow sacks and tumble in the dryer on the highest heat setting for about 2-3 hrs.

Thanks for the tips! How long do you dry for with your big fan? Also, do you have a temperature estimate that your high setting on your dryer dries for? Malt on!
 
Thanks for the tips! How long do you dry for with your big fan? Also, do you have a temperature estimate that your high setting on your dryer dries for? Malt on!

i was drying 55lbs at a time on a large concreat floor, and i let the fans run for about 48hs , by that time its was dry.

i dont know how hot the dryer gets, i would say around 200F
after 2 60min cycles all the roots are knocked off and the kernals are very dry but not dammaged
 
I've read it the other way though I'll try it your way to see if I get an improvement; dry first THEN heat.
 
I was under the assumption that crystal malt was soaked in warm water then heated for 2-3 hours at 275f to "crystalize". Isn't a low temp kiln (90-130f) simply meant to halt conversion. At any rate, I'll try drying first then a short kiln.
 
I was under the assumption that crystal malt was soaked in warm water then heated for 2-3 hours at 275f to "crystalize". Isn't a low temp kiln (90-130f) simply meant to halt conversion. At any rate, I'll try drying first then a short kiln.

The way I understand crystal/caramel is that it is first malted, then dried enough to get the surface moisture off, then mashed green and whole (I. E. 155F for 1 hr. to convert the starch to sugar), then it is dried again, then kilned at differing temperatures (or different durations at 240-250F? unsure about this yet) for the differing lovibond ratings.

In other words crystal/caramel malt has one more step than pale malt, the crystallizing step before it is kilned, some people have had success mashing whole pale, then kilning it to make crystal. Professionally it is not done this way, it is mashed green (the way I understand it)

Malt on my friends:mug:.
 
Here's more info on crystal/caramel malting:

Crystal and Cara-pils (dextrin) malt are produced in a somewhat different manner in that the malt does not go through the initial drying phase. The green malt is placed in a kiln and the temperature is raised to 150-170° F (66-77° C) for 1.5-2 hours. The malt is heated without ventilation so as to prevent evaporation. During this "stewing" period the relatively high water content of the malt combined with the kiln temperature result in enzymatic reactions taking place within the individual malt kernels that are normally associated with mashing (i.e. starches are converted to sugars). This process is incomplete so not all the starches are actually converted to sugars and those sugars that are present tend to be complex and therefore, are not fermentable. After the stewing period the vents are opened and the malt is further roasted. In the case of crystal malt, the temperature is raised to at least 250° F(121° C) and the malt is roasted until the desired color is obtained. During this process the converted sugars are caramelized and the husks are darkened. In the case if cara-pils malt, after the vents are opened the roasting temperature is raised to no more than 240° F (116° C). Using crystal malt imparts sweetness as well as a reddish hue to the finished beer whereas the use of cara-pils adds body and some residual sweetness without affecting beer color.
Gleened from here: http://www.mosquitobytes.com/Den/Beer/Hmbrewing/Malt.html

Also some good info here under Ingredients/malt: http://brewery.org/library/

Malt on my friends. :)
 
Hey guys
Italy here. It seems this is becoming a worldwide thread!! I'm also going to malt some barley. I recently harvested about 60 kg of 2-row barley I grew in my garden, so since it cost some money and lots of energy (did everything manually except ploughing and threshing) I'm a bit careful trying not to waste everything. But what a satisfaction will be having nearly 100% homemade beer!!!

First of all, many thanks to COLObrewer, I'd never had done this without reading your posts in middle winter. I'm thinking about building a malting machine, something between COLObrewer's and this

http://www.trash.net/~stmoser/beerbrewing_main.en.html

but this will be during next winter, so just now I'll go for "natural power" for the first tests, that is drying in a greenhouse since temperatures outside at the moment is about 30° C during the day.

So I was collecting posts on the net, and here comes my first doubt: I found the most different and strange times of steeping and "breathing", some say 2 hours steep, others 8 hours, I even found a page where they say almost 24 hours!! Does it make any sense to you guys? What do you suggest?

And about the germination stage: any hint about how often spray your barley with water? I found a page where a guy says he closes the soaked barley in a black plastic bag, seals airtight and leave it alone for few days...

I know it's a difficult task, but big problems, big satisfactions! Malt on!
 
Brewbecca, congratulations on your barley growing and harvest, that's a nice accomplishment.

. . . . . .
So I was collecting posts on the net, and here comes my first doubt: I found the most different and strange times of steeping and "breathing", some say 2 hours steep, others 8 hours, I even found a page where they say almost 24 hours!! Does it make any sense to you guys? What do you suggest?
!

I found the same thing when I started, I think some of them are using an air stone (or other method) to aerate the water while steeping. Basically you just want to make certain they get a good soak to start with, then make sure they don't dry out after that (while making sure they can "breath"), you shouldn't soak for more than 6-8 hrs without aeration because the barley will drown. Conversely, if you soak for only two hours, you will want to soak them again for at least two hours after maybe 2 hrs rest because you want them to start germinating. You're fooling them into growing

And about the germination stage: any hint about how often spray your barley with water? I found a page where a guy says he closes the soaked barley in a black plastic bag, seals airtight and leave it alone for few days...

The couching phase is basically the same as steeping except they are more spread out to keep from heating up and to allow mixing to keep them from becoming a mat of conglomerated barley/roots, also I've found the more you can move them around the more consistent the growing will be, try to keep the whole mass at the same temperature and moisture content.

It depends on temperature and humidity how much you need to spray them, also if they are covered loosely or not covered, I would definately not seal them in anything air tight for an hour, let alone a few days, they will die (and/or mold). You just need to make certain they don't dry out, I think I sprayed mine every 3 hours. You're still fooling them into growing.

Keep on malting my friends:mug:
 
I found the same thing when I started, I think some of them are using an air stone (or other method) to aerate the water while steeping.

What if I leave the water running through the bucket? The flow of water should keep the seeds aerated. I think.
 
What if I leave the water running through the bucket? The flow of water should keep the seeds aerated. I think.

Sure, the new water coming in will bring new oxygen with it, may be a waste of water though. Just a trickle would work but you don't want it too cold or hot, ideally 40F to 60F, also the more consistent temperature throughout the better.

Keep on malting my friends:mug:
 
I started the malting process today. I'll try the flowing water instead of steeping-aerating, since I have a well that is supposed to be always trickling, otherwise it will get obstructed.

I lost A LOT of seeds that were floating during the washing phase: could it be because I grew the barley myself? No idea.

Anyway, I don't know whether anyone will ever do as I did, grewing some barley on a "manual" scale, but just something from my experience: I didn't use any chemical against weed, I was and still I am a bit against it, but guys, I think I'll do it next time. Weed is a real pain in the arse: not only it will take nourishment supposed to feed the barley, it will chock some barley, it complicates the harvest, the collecting, the threshing, and eventually you'll have barley full of dirt, small leaves, stalks etc.

Ok let's see the result of this first batch. Is there any way to judge the quality of malt, besides brewing it? :mug:
 
. . . . . . . .
I lost A LOT of seeds that were floating during the washing phase: could it be because I grew the barley myself? No idea.
. . . . . . . . .
Ok let's see the result of this first batch. Is there any way to judge the quality of malt, besides brewing it? :mug:

I would expect alot of unviable seeds and chaff etc. The barley I used was run through the cleaning process at a batch plant and I still got about 1 lb of weed seeds and unviable barley seeds out of 50lbs, If the seeds floated they were bad anyway.

Without any laboratory testing and or sizing there is no other way I know of, if you're able when you mash it, you should use a step mash process. Let us know how it turns out.

Keep on malting my friends:mug:
 
What an awesome threat, just read it all and its interesting stuff. A definite Prost!

P.S. Hows that laundry machine conversion going?
 
Hello fellow maltsters
a quick update on my malting. Things could go better! :)

The seeds are germinating, and in my opinion are at 50% of the process, but:

1) the rootlets are of a greyish, weak color, I'd call it a dead color, very far from the lively white of the pics posted by COLObrewer; they are also quite dry. Is it because of the barley? Or more probably they drowned in the steeping process? The water has been flowing, but probably couldn't reach every point of the bucket; it should have been bubbling, but it would have required too much water.

2) I'm using two malting floors, since they're quite small and I wanted the layer to be thin in order to keep the seeds cool. So one malting floor has a quite homogeneous layer about 1" thick, the other, due to lack of seeds, is not fully covered, so there are areas with "isolated" seeds: so in the end, seeds in the latter floor haven't germinated almost at all. I think they dry very quickly, whereas a thick layer keeps the moisture longer.

I will go on anyway, drying the seeds when the times come, to keep discovering wrong procedures. Hope this will help others to come.

Cheers! :tank:
 
. . . . . . 1) the rootlets are of a greyish, weak color, I'd call it a dead color, very far from the lively white of the pics posted by COLObrewer; they are also quite dry. Is it because of the barley? Or more probably they drowned in the steeping process? The water has been flowing, but probably couldn't reach every point of the bucket; it should have been bubbling, but it would have required too much water. . . . . . .

I would have thought a spring would work, I saw a utube video of an old timer making whiskey and he malted his corn in a sack in a stream, left it in there for two days, then removed it and sprayed with warm water, etc.

You say it was in a bucket? How did the water circulate in the bucket? If they are still growing they may come out of it. I don't think it was a problem with your barley.

Keep on malting my friends:mug:
 
Back
Top