Got a welder, now the fun begins...

Homebrew Talk - Beer, Wine, Mead, & Cider Brewing Discussion Forum

Help Support Homebrew Talk - Beer, Wine, Mead, & Cider Brewing Discussion Forum:

This site may earn a commission from merchant affiliate links, including eBay, Amazon, and others.
Clamps, lots of Bessy quick adjust and Kant twist (sp) clamps. If every storage space in your shop is filled with clamps then you might be getting close to having enough.
Here is what I am talking about for anyone interested.
http://www.amazon.com/Bessey-6-Inch-Super-Quick-Sliding/dp/B0006694B4/ref=pd_bxgy_hi_text_b

http://www.amazon.com/dp/B0007KXNJS...e=asn&creative=395105&creativeASIN=B0007KXNJS

Ed's screwed if he ordered 8 to 10 Bessy clamps at $28 a pop at one time. Ed should sneak a couple purchases at a time home all
is well then.
I've twisted a few Bessy clamps in my time, shop tools not mine with them pushing beyond their capacity.

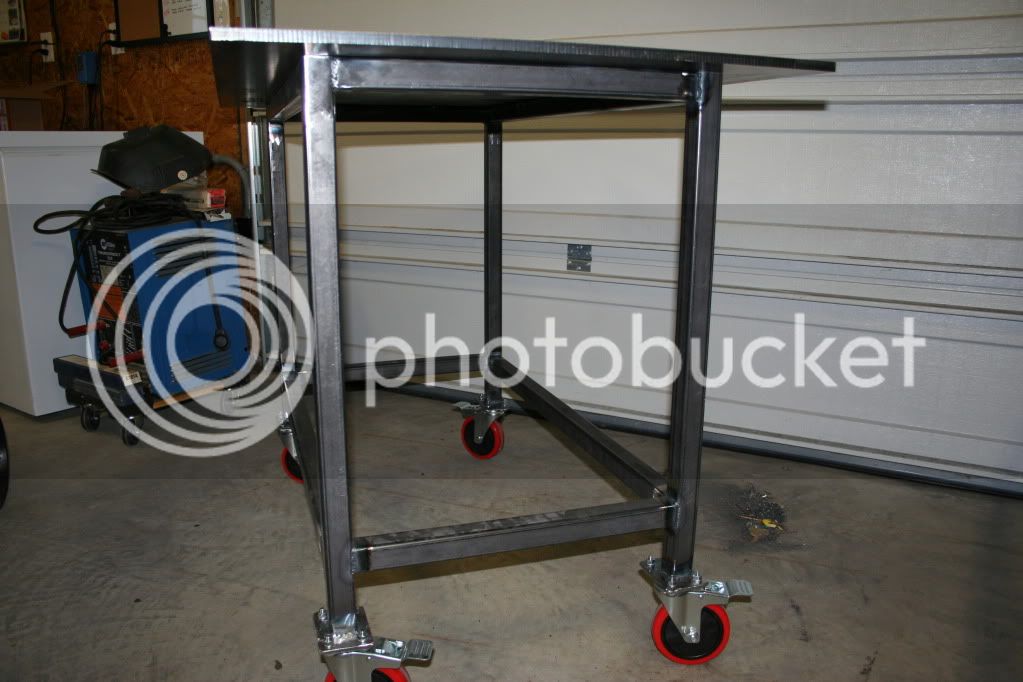
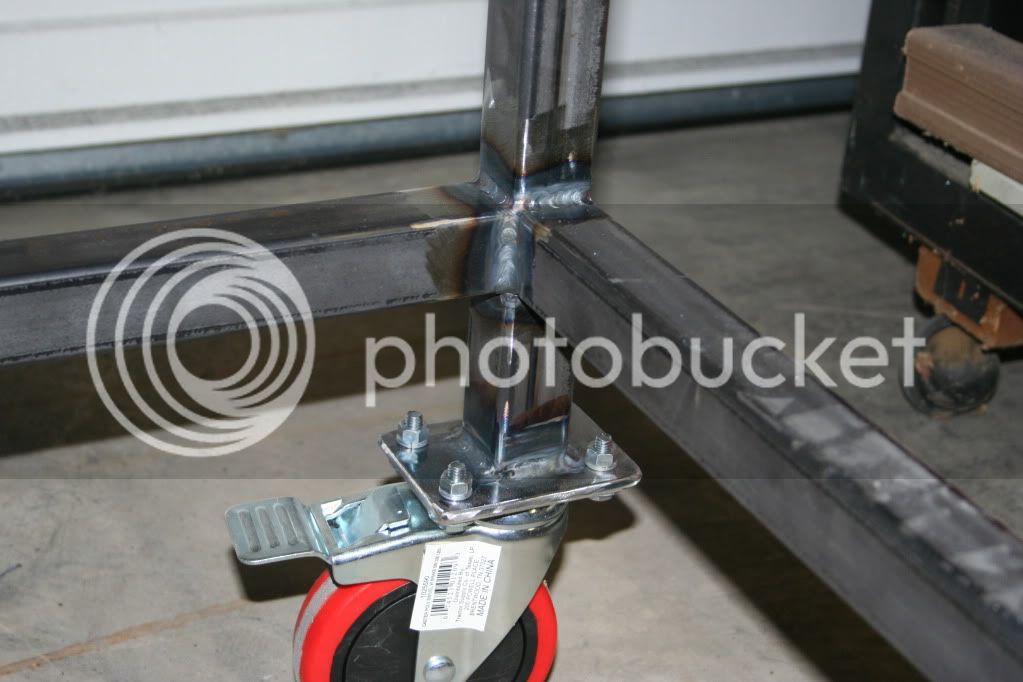
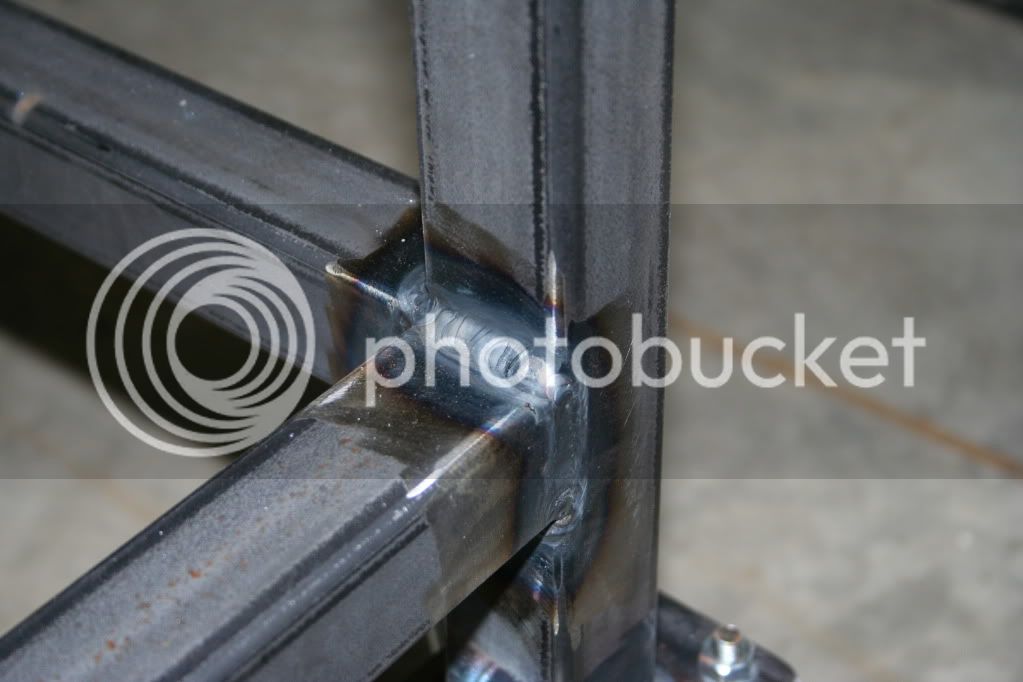
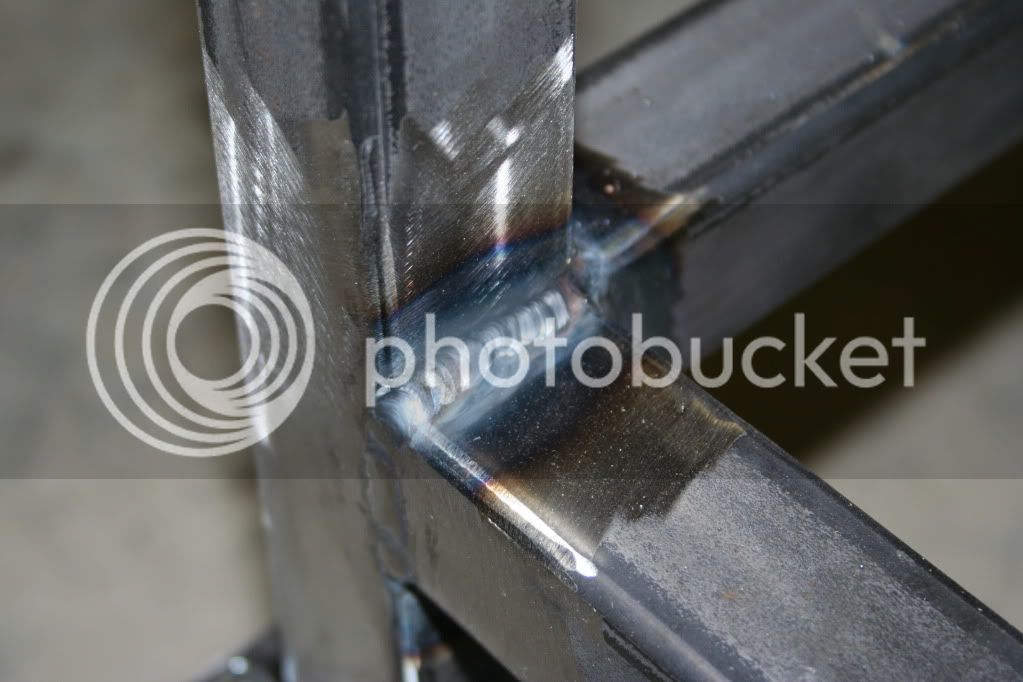
I know about never being able to have too many clamps... I have several Bessy wood working clamps and agree they are nice. I actually used some pipe clamps to square up the table frame after I tacked it, before finishing the welds.

Like BrewBeemer said, I'll "sneak" a few things in at a time ;)

In the meantime, I bought 4 of these: http://www.harborfreight.com/11-inch-swivel-pad-lock-grip-pliers-set-37006.html

When I buy anything from Harbor Freight, I assume it is disposable and if it holds up it's a bonus. These clamps seem to be decent and at $2 each defiantly not much of an investment. I may pick up some more and I saw they have some "F Style" clamps I might try too.

Ed
 
Have a few clamps like that, but with auto sizing at work. No need to turn the screw. Just clamp it up and it automatically adjusts to the thickness. I think they were $25 each though...
 
I tried a few auto adjust clamps, gave them away I rather work with Vice Grip style I adjust.
Ed, what's there to lose those clamps look good as well I bet will do the job plus that price no worries should you break or even modify one for that special job.
Have you gripped something really tight like you can with Vice Grips and it survived vs a mangled clamp after? Just asking.
Think they still made a profit selling them that cheap bet shipped from far away also. Prost.
 
Harbor freight rocks for cheap clamps! They do what they're sposed to do as long as you don't melt/abuse them. If you need to crank things down with skull crushing pressure, consider using your vise instead. I like the trailer hitch idea....that way you can extend it away from the table.....also be sure to get one that swivels. I love vises (visii?), they're one of those tools you'll use for so many things...like a bench grinder.
 
I tried a few auto adjust clamps, gave them away I rather work with Vice Grip style I adjust.
Ed, what's there to lose those clamps look good as well I bet will do the job plus that price no worries should you break or even modify one for that special job.
Have you gripped something really tight like you can with Vice Grips and it survived vs a mangled clamp after? Just asking.
Think they still made a profit selling them that cheap bet shipped from far away also. Prost.

I have not really gorilla gripped any thing with them, but I suspect they will hold up fairly well. I like the idea of modifying them, I think I will definitely grab some more just for that if nothing else... Great idea BrewBeemer.

I may see just how much abuse they can take, now you have me interested.

Ed
 
Harbor freight rocks for cheap clamps! They do what they're sposed to do as long as you don't melt/abuse them. If you need to crank things down with skull crushing pressure, consider using your vise. I like the trailer hitch idea....that way you can extend it away from the table.....also be sure to get one that swivels. I love vises (visii?), they're one of those tools you'll use for so many things...like a bench grinder.

I have a wood vice, just not a bench/pipe vice. As for the trailer hitch, I just wonder it it would feel "sloppy" because of any play in the receiver? I also thought of just bolting one to the table and can un-bolt it if it;s ever in the way...

I gotta ask... How do you use a vice like a bench grinder ? :D (just kidding, I know what you meant)

Ed
 
Ed,

No worries on the tungsten. I'll toss in a box of 1/16 and 3/32 2% for you. I should hit up the post office this afternoon or tomorrow morning. Been busy with the honey do list. That and a little relaxation.:D

I used to have a vise attached to something similar to what your talking about. I had a piece of tubing welded to the end of the bench, flush with the top. The vise was bolted to a plate that was welded to a piece of tubing. Just like the receiver your talking about. I just dropped the vise in when I needed it.


What kind of table saw do you have?
I have a Delta 10" cabinet saw. I got the mobile base, the folding out feed table, and the 52" fence. I went with the uni-fence.
 
GreenMonti,

WOW, THANK YOU!!

I understand the HoneyDew list, I've put mine off about as long as possible. I think I am gonna HAVE to take care of some things or the SWMBO may cut the cord off Mr. Miller (the welder, not the neighbor).

Sounds like you had a vice mounted with the "receiver tube" vertical? Did the vice seem solid enough the way you had it mounted? I definitely need to think about how to add a vice.

I have a Delta Unisaw with a 52" unifence (sounds like the same saw you have). I have a 4' x 4' fixed outfeed table attached. No mobile base. That saw and a lathe are about the only things in my shop that's not on wheels. I also have a Rigid 10" direct drive portable table saw that I used to haul around in a trailer.

Ed
 
OK BrewBeemer, I promised some pictures;

IMG_3483.jpg


IMG_3491.jpg


IMG_3484.jpg


IMG_3485.jpg


IMG_3489.jpg


IMG_3490.jpg


IMG_3492.jpg


IMG_3493.jpg
 
Holy Crap!
You're getting the hang of it fast. Great job!
Your welds look solid. Pretty, of course comes with time under the hood.
Congrats!
 
Holy Crap!
You're getting the hang of it fast. Great job!
Your welds look solid. Pretty, of course comes with time under the hood.
Congrats!

Thank you.

Every time I pick up the torch, it's a new learning "opportunity"... inside corners, left handed, different thicknesses, overlapping beads... on and on. I have a long way to go.

Ed
 
Your a quick learner Ed, congrats on your progress.

Your welding table looks sharp, afraid to weld on it now.

A friend of mine after 24 years owning a tig he can't weld 1/4 as good as you.

Yeah get on the wifey projects especially flowerpot hangers for the yard then she'll forgive you about the Miller costs.

Rear sub frames on pumped up BMW's having built up tight limited slips with sticky tires will tear metal out at the diff mountings.
My son the golden example of this many times. Since repaired and torture tested with success word got out on the repairs with reinforcements added. The autocross crowd I was involved with want my services.
Mr. Miller is a money maker.
 
Wow Ed at this rate you'll be an expert before I start brewing. I know who I'll contact bout SS welding I'll need done when I'm ready to move on from extract. :)
 
When it comes to different thicknesses it helps to direct your arc towards the thicker piece and wash your weld over to the thinner material. Takes a little practice, but keeps from burning away edges, and burn throughs.
You usually only have to do this when the difference in thickesses are substantial.
 
Wow! Congrats. I've been following this thread since the beginning. I'm amazed at how quickly it seems you've picked up on this. It gives me confidence to do it myself. I'm looking forward to seeing how you progress. Always looking forward to more pics!!!:mug:
 
Wow! Congrats. I've been following this thread since the beginning. I'm amazed at how quickly it seems you've picked up on this. It gives me confidence to do it myself. I'm looking forward to seeing how you progress. Always looking forward to more pics!!!:mug:

Thanks, I'm really having fun.

I'm not a golfer, but I have a friend that is an outstanding golfer and he told me something once that applies to many situations this one included.
He said, that if I went out and played a round of golf, that with only very little instruction I could probably improve my next round by 50%.
Each improvement after that gets smaller and harder and harder to make. It takes a lot of improvement to be "good" and by the time a golfer is a pro, improvements are almost impossible to come by.

I think that is the same with most skills.

I appreciate the compliments from everyone, but I know I'm not even half way through my first round ;)

Ed
 
Ed, how's your vision?
If yours is as bad as mine,(probably not) I have another suggestion that might be of help.
I use a cheater lens in my hood to help me see better while welding.
My eyes are not what they used to be so I depend on the cheater these days.
I don't know if I could do my job without it.
Your local welding supply caries them. They come in several diopters, kind of like reading glasses.
 
Robert, your reply fits me to the "T", I have special reading glasses with 14" focal point in clear just for tigging.
It happened one day that old age distance focussing or lack of.
Inside the dark hood life became a total blur one of those WTF happened moments.
 
Ed, how's your vision?
If yours is as bad as mine,(probably not) I have another suggestion that might be of help.
I use a cheater lens in my hood to help me see better while welding.
My eyes are not what they used to be so I depend on the cheater these days.
I don't know if I could do my job without it.
Your local welding supply caries them. They come in several diopters, kind of like reading glasses.

Robert, your reply fits me to the "T", I have special reading glasses with 14" focal point in clear just for tigging.
It happened one day that old age distance focussing or lack of.
Inside the dark hood life became a total blur one of those WTF happened moments.

Good input guys.

I definitely fall into this category, my vision is certainly not what it used to be. I'll have to check out the cheaters. This may require me to upgrade helmets. I bought a cheap auto darkening helmet from Harbor Freight, with the expectation I'd upgrade when I had a better idea of what I wanted or needed. So far, I'm impressed it's done a fine job but I don't know if the "glass" is standard size and whether or not I can get a cheater.

I will check it out and add a cheater to the list.

Thanks,
Ed
 
Welding by braille with Ed? Heard it first here.

All hoods should be standard size no worries.
I use a old 9000X Speedglas hood, it has a wider viewing area I find handy.
Look around at different LWS to find what you like then shop on line for the best price as hoods are not cheap.
I saves $132 for the exact same hood, foolish to pay LWS prices unless your too rich, I ain't.
 
Somewhere in the two months between my last job as an ornamental iron welder, and my new one doing TIG on machine tools, my eyesight apparently went to crap.

I did my keggle at work without a cheater lens, as I've never needed one before, and couldn't see a thing. It didn't help that I was out of practice on SS TIG. I picked one up a couple of weeks ago and it's helped a ton. Did my buddy's keggle and it was much easier!
 
Ed,

No worries on the tungsten. I'll toss in a box of 1/16 and 3/32 2% for you. I should hit up the post office this afternoon or tomorrow morning. Been busy with the honey do list. That and a little relaxation.:D

...

GreenMonti,
The box you shipped me arrived today. One of the greatest, unprovoked acts of generosity I have seen!!

It was like Christmas morning when I was a kid, I really appreciate it.

The mesh material is really cool. I'm thinking of cutting the coupling off a keg (from a cutout I have), and closing one end to make a purge. Is a single layer of the mesh enough of a "baffle" or do you have something else inside your purge?

I'm still working on getting a second gas line for the purge. I called the local Airgas two days ago about a "Tee" for my bottle but haven't heard back from them.

I found the item I think I need...its a "T-92" from Western Enterprises like the one on the right in this pic;
T-82%20&%20T-92CV%20-%20Manifold%20Coupler%20Tees.jpg


Then I can find a cheap flowmeter on ebay and should be set.

Ed


Sweet. Its all ok right? I know they like to get rough with packages.LOL I have been worried about the tungsten and the cups.

What I like to do on the purges is, have the 1/4" tubing go into the block. I weld the end shut and cut little slots in the 1/4" tube in the area inside the purge block. I aim the slots toward the back of the purge block. I then like to loosely fill the purge with steel wool. Then I finally weld on the mesh. I can mock up a purge build if you would like. I forgot to get you some pieces to build a purge too. Sorry. I'll send you some other pieces for the purge. Some thinner strips of sheet stock, and some small pieces of tubing drops. They will be Inconel so, you can use the bigger sheets you have for the back of the purge. Unless I come across a couple more.:D

Did the gas lens fit your torch?

GreenMonti,

Yep, it all made it just fine.

I was shocked how much stuff you had in that box! What is that about 10 pounds of $hit in a 5 pound box?

I'll have to pick up some filler for the Inconel and titanium. I have some SS filler, so I'm set there. That's why I was wondering about making a purge from SS.

With your purge, do you "seal" the purge against the back side or does the diffusion from the mesh, wool, and design mean that it just has to be close to the weld? If so, how close? About what diameter is your purge?

The lens fits perfect.

Thanks,
Ed

I don't think you are going to want to see the price on those filler rods. A bit pricey IMO for practice. I'll get you some. Its a little tricky.;) You can use the SS wire and be just fine too. It will just look a little dirty. But all of the feel will be there.

The purge is mostly just placed directly on the back side of the weld. I'll hold it in place with a piece of tape, or I'll spring clamp it. In the case of the keggles, I use a piece of wood and wedge the purge in place. Sometimes you will want to tape it all off and get the best possible purge. That's just going to depend on the situation at hand. I'll measure my purge blocks and take a pic of them for you. Right now I have 3 that use for my projects. When I did the coupler for birdgunner, I tapped the whole thing off on the back. I had zero discoloration on the back and on the inside of the coupling. I only wire brushed my weld. That was on a 1" coupling too.
I would be interested in seeing pics of your purges. I figured that if I ever found a keg I could afford I would purge the whole keg, but that's a few cubic feet of gas that I could save and it seems to go fast when back purging anyway.
 
Ed
Thats the one. I found that listing on the net but was afraid they would send the one on the left so I didnt order it. I think that airgas was cheaper anyway.l You need to walk into those places. They get busy and forget about phone calls.
 
I don't think you are going to want to see the price on those filler rods. A bit pricey IMO for practice. I'll get you some. Its a little tricky.;) You can use the SS wire and be just fine too. It will just look a little dirty. But all of the feel will be there.

The purge is mostly just placed directly on the back side of the weld. I'll hold it in place with a piece of tape, or I'll spring clamp it. In the case of the keggles, I use a piece of wood and wedge the purge in place. Sometimes you will want to tape it all off and get the best possible purge. That's just going to depend on the situation at hand. I'll measure my purge blocks and take a pic of them for you. Right now I have 3 that use for my projects. When I did the coupler for birdgunner, I tapped the whole thing off on the back. I had zero discoloration on the back and on the inside of the coupling. I only wire brushed my weld. That was on a 1" coupling too.

Crap! You're not kidding, I finally found Inconel wire online, just to get an idea... $50 / pound and $80+ for titanium... GULP :drunk:

I remember a picture of one of your purges in my Welding Questions thread, but the picture link is no longer valid. I can picture it in my mind, but don't remember the details... diameter, depth, how far the mesh set back. Any pics you can share would be great.

So, I assume a fusion weld (if I could manage it) would be ok with the inconel and the titanium? Is there a substitute filler for the titanium (you said I can use SS for the inconel, but it would be "dirty")?

Ed
 
Ed
Thats the one. I found that listing on the net but was afraid they would send the one on the left so I didnt order it. I think that airgas was cheaper anyway.l You need to walk into those places. They get busy and forget about phone calls.

As far as I can find, the one on the right in the picture is a "T-92" and it would be a "T-92CV" with check valves. But you are right, the only pictures I have seen of it, shows both fittings, so it could easily be swapped.

Ed
 
Ed,
I got a syncrowave 250 the same time you did. My goal is to do stainless coupler work. I love this thread. I'm about to weld up a table also. My skill level is well below yours right now with limited practice time. What amps did you use on your stand. Also, i assume you used 3/32 filler and tungsten for the job? Is your table 3/8's or 1/2 ? Keep the pics rolling. I want to see some keg couplers!!!
Bartman

The max I had the welder set at was 175 amps when I was welding the 1/4" plates to the bottom of the legs for the casters. That said, I really don't know how much power I was using because I never "floored" the pedal.

I used 3/32 tungsten and 1/16" filler. I could have used 1/8" filler when I was welding the plates but all I have right now is 1/16".

My table top is 1/2" plate. The frame is 1.5" square tubing with 1/8" thick walls. With the frame and casters, the table probably weighs close to 300 lbs.

I think I have a lot of practice before I'll be trying any couplings in kegs. I have some keg cutouts and some spare couplings, so when I get a purge setup, I might try a couple practices, but I'm going to take my time.

Just welding the 1/4" plates to the bottom of the 1/8" wall on the legs was a challenge because of the difference in thickness... a keg and a coupling will be way more difficult.

Ed
 
Thanks Ed,
I haven't dialed that much amperage in yet. I've been around the 100 mark just getting the feel of the pedal. The rig we have sure is awesome though. Your table is primo, I'm envious. I'm just about ready to pull the trigger and start another Brutus. The real reason I bought my tig rig was to build stainless inserts which protect my powder coated frame. Anyway, thanks again for the info. I will continue watching this thread. Maybe someday I'll be able to contribute.
Bartman
 
I floored my tig welder once on 1/2" aluminum plate, welder amp gauge hovered at 387 amps for 20 seconds I had to back out of it the as the heat went thru all my clothing and gloves. Welder input current reading hit 132.5 amps.
 
Thanks Ed,
I haven't dialed that much amperage in yet. I've been around the 100 mark just getting the feel of the pedal. The rig we have sure is awesome though. Your table is primo, I'm envious. I'm just about ready to pull the trigger and start another Brutus. The real reason I bought my tig rig was to build stainless inserts which protect my powder coated frame. Anyway, thanks again for the info. I will continue watching this thread. Maybe someday I'll be able to contribute.
Bartman

I have mine connected to a 50amp breaker so I don't know just how far I can push it.

The table was pretty simple, the material is thick enough that it is pretty forgiving.

You might as well jump in, you know how much we all love pictures :D

Ed
 
I floored my tig welder once on 1/2" aluminum plate, welder amp gauge hovered at 387 amps for 20 seconds I had to back out of it the as the heat went thru all my clothing and gloves. Welder input current reading hit 132.5 amps.

Wow... one day, I'm sure I'll find the limit on the 50amp breaker, but I can't imagine pushing even my little 250 to it's max. even if I had the input capacity.

Ed
 
OK, so I was playing a bit tonight...

This is a piece of 1/2", .020 wall SS tube. I have no purge so the inside looks as bad as you'd expect. I was just running up and down the length about 2-3". I ended up burning about a 1/4" hole, and then filled it!! I took a flap sander to see if I could find where the hole had been. The "pits" you see are not all the way through, just where I sanded down the beads.

IMG_3498.jpg


IMG_3499.jpg


IMG_3501.jpg
 
My next, let's just see what happens...

This is a copper coupling fusion welded to a 1/2" copper pipe, no filler.

IMG_3495.jpg


IMG_3497.jpg
 
My next, let's just see what happens...

This is a copper coupling fusion welded to a 1/2" copper pipe, no filler.

IMG_3495.jpg


IMG_3497.jpg

AHA!! Now you are getting to the fun part.
I made some special brass fittings using some silicon bronze filler when I couldn't find exactly what I wanted in the hardware store. They came out great didn't leak even though it was my first time welding that stuff.
 
Back
Top