I just got mine in the mail and wired up into a 6x6x4 pvc box from Home Depot.
I do have one questions regarding the wiring after unsuccessfully finding an answer in the thread (may have overlooked given the length of this monster thread).
Here goes... when I set the unit and it clicks on (I hear the audible click) for either heating or cooling, I get power to both outlets, which seems counterintuitive as only one should get power, either heating or cooling. Just testing using a lamp and it lights on both outlets!
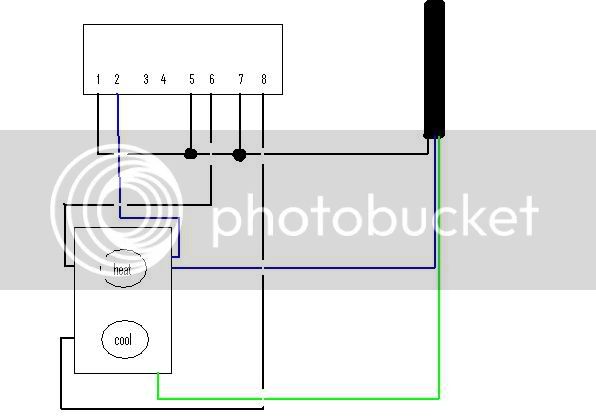
Here is a pic of my wiring...
Any help is appreciated

I do have one questions regarding the wiring after unsuccessfully finding an answer in the thread (may have overlooked given the length of this monster thread).
Here goes... when I set the unit and it clicks on (I hear the audible click) for either heating or cooling, I get power to both outlets, which seems counterintuitive as only one should get power, either heating or cooling. Just testing using a lamp and it lights on both outlets!
Here is a pic of my wiring...
Any help is appreciated