
revco
Well-Known Member
Men don't use sewing machines. We use benchtop thread injectors. Now, with that out of the way...
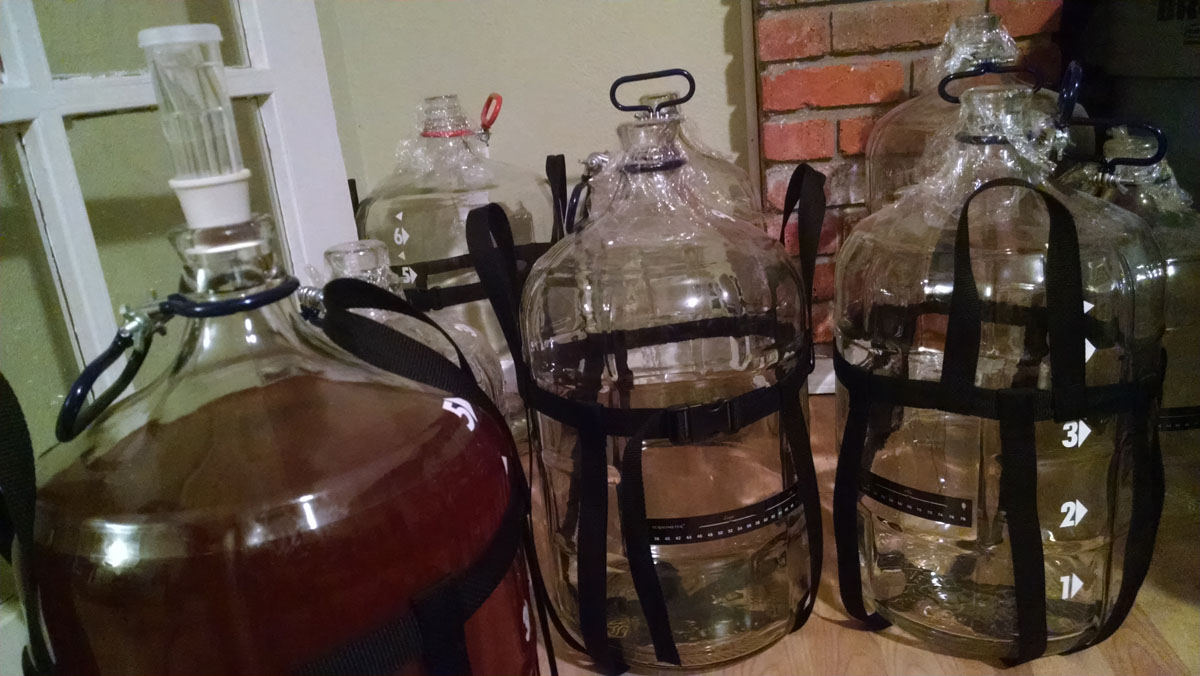
I have a few carboys...12 at last count. Anyone familiar with carboys knows they can be a bit awkward to move around and handle, especially when filled with our precious wort or beer! I bought a couple brew haulers quite some time ago and I love them, they definitely go in the must have list of essential brew gear. That said, it's a bit of a bother to dress them up in their carboy suit each time I go to use them, they're just awkward and get twisted about a lot, or maybe I'm a bit lit and forget to put it on before filling the carboy and I have to slosh the beer around to get the hauler on. Rather than buy another 10 brew haulers to the tune of $125+ to outfit all my carboys, I figured I'd just make my own.
Surprisingly, though, there were very few DIY brew hauler designs to work from here and on the web (at least that were made correctly)...so figured it was either time for a tutorial or this is such a stupid topic that no one ever needs instruction. Still not sure which. The quality of the commercial units are only OK...I worry about the stitching because it's not that good. For roughly $2.50 a piece and 10 minutes work per hauler, you can belt these out quite easily and I can make a dozen for the cost of two commercially bought haulers.
I make a lot of my own outdoor gear, so I'm comfortable using a sewing machine...but this is really one of the simplest projects I've ever done and would be a great novice project for someone who's never used a machine. Nonetheless, if you're intimidated by a sewing machine and/or have no desire to learn, SWMBO might be willing to help out here, just make sure you at least pretend that you have the slightest bit of interest. These are really very easy to make and don't take much time. If you don't have a sewing machine, I'd just buy them unless you have other projects that can justify the expense of the machine.
[ame="https://www.youtube.com/watch?v=TZk4N0N95qw"][YOUTUBE]TZk4N0N95qw[/YOUTUBE][/ame]
Materials:
5.2 yards 1" Polypropylene Webbing - $0.65/yard
1" Side Release Plastic Buckle - $0.75/ea
Good Quality Polyester Thread - $4.50 for 100+ carboy haulers
Tools:
Sewing machine
Total cost: ~$4.00 each, on the high side, $2.50/ea or less if buying in bulk
Notes & Comments:
I buy most of my materials in bulk from Rockywoods.com. There might be other cheaper places, but this place always has what I want/need for my various projects. All the parts involved here I typically use for other projects as well, suprising how handy poly strap and buckles are when you have them around, almost the same as paracord. Shipping is a bit of a bear, but their items are packed well every time and the one time I had an issue with an order, they made it right no questions asked. They carry a lot of cool fabric, hardware and other materials that are great for outdoor adventure gear, gifts or DIY projects too.
Regarding webbing, you could use either nylon or polypropylene and it can be any of the myriad of colors available. Poly is a little bit cheaper and is generally rated a bit less strenghtwise than nylon, but poly won't expand if exposed to water or beer. We're talking breaking strengths of 600lbs vs. 1000lbs here, both are more than enough for our concerns. As for thread, I recommend a good quality polyester thread, I use Gutermann Tera 80 and it works great. More than likely, what's at your fabric store is garbage thread, but it would probably work too...but I would go with something "heavy duty" if you go with fabric store thread.
As for the tools, I use a benchtop thread injector (sewing machine) myself. You could probably do this by hand, but it will be more challenging to get good stiching and will take much longer. It doesn't have to be a heavy duty model machine, poly webbing isn't that tough to work with...but it has to be capable of stitching, say, 3-4 layers of denim together (to put it into female terms) or like a medium duty. Borrow your SWMBO's if you can and have her show you how to thread a bobbin and the machine, as well as how the basic forward and back controls work...it's really not that hard. (Most machines even have instructions printed on it or you might also be able to find a video online.) It should hopefully have a zig-zag stitch, but even a straight stitch would work. As for needles, most anything will work here, but it should be of good quality and relatively sharp. Although this isn't super important, the settings I use for the zig zag stich are a 2.0mm stitch length and a 2.0mm width. This is a pretty tough stitch when it comes down to it. The key is not to use stitches that are too big (won't hold well) or too small (won't stitch well on webbing).
These units will fit a 5, 6 and 6.5 gallon carboy with ease, thanks to the adjustable strap. If desired, you can adjust the sizes of the straps to be more precise or to your own preferences, but the provided measurements are a pretty flexible design while using a minimal amount of materials. I'll be designing a properly sized brew hauler for a 3 gallon carboys that I use for experimentals and will post the alternate pattern measurements sometime later. I don't see any reason that these wouldn't work for Better Bottles, either, but all my gear is glass so I don't know for sure.
The Written Process For People Who Hate Video:
Step 1:
Cut 1 piece of webbing at 44" for the horizontal piece
Cut 3 pieces of webbing at 36" for the vertical pieces
Cut 2 pieces of webbing at 19" for the handles
Step 2:
Melt the cut edges of webbing with a lighter, propane torch or fire up your brewery's burner if you really want to get the job done. This will insure the webbing doesn't unravel on you. If you really wanted to get fancy here, you could technically do a double rolled straight stitch, but I haven't found this necessary.
Step 3:
Loop one end of the 44" horizontal strap through the non-adjustable end of the side release buckle. I use about 1.25"-1.5" of overlap here. Sew the two pieces together with your zig-zag stitch. Since I'm making these and want them bomb proof, I go over the stiching forward and reverse about 3-4 times...I might do more if I were using a lower quality thread. I also do traditional back stitch when I start and finish the line to keep things tidy. This piece will be the upper support loop that wraps around the carboy.
Step 4:
Create a loop in one end of the 36" vertical straps and wrap one around the horizontal strap you partially finished above. I use about a 1/2" overlap here, enough for a bit of support and room to fit your zig-zag stitch. Sew the piece to iteslf, wrapped around the horitzontal support strap with a zig-zag stich where they come together. Again, go over the stitching 3-4 times. Continue this same process with additional three 36" vertical straps.
Step 5:
On the center 36" vertical strap, sew the other end to the horizontal piece opposite of the existing stitching. Take a little bit of care here to make sure the overlap and stitching is where you want (I put the flap towards the inside of the carboy) and that you're not twisting the webbing. Again, use about a 1/2" overlap and go over the stitches 3-4 times.
Step 6:
For the other two vertical straps, you want to sew them on opposite sides of the opposing center strap you stitched above. This is what creates the "holding effect" of the hauler. Again, make sure your webbing is not twisted and the flap side is the direction you desire. Again, I put the flap towards the inside of the carboy and go over the stiching 3-4 times. Note that it's not "wrong" to not cross the straps and things will come out just fine. In my tests, doing things with the cross places strain on the webbing, whereas without it puts strain on the less strong stitching.
Step 7:
Bring each of 3 vertical straps together on each side. Match the two sets of three up to each other and find the center of all these straps where they all join at the bottom of the loop. Hold these together and put a small stitch in the center point where all the webbing comes together. You don't really want to sew across the entire webbing here as they need to be a little bit moveable. My stich is usually about 1/4" or so, but it doesn't have to be precise.
Step 8:
Using the same methods as above, sew the two 19" handle pieces, overlapping the center strap on each side, but facing the opposite direction (up as opposed to down) as the vertical straps. Again, I use about a 1/2" overlap, keep the flap towards the inside of the carboy and will usually increase the stitching here since this is probably the least strong and most strained point of the entire piece.
Step 9:
Fit the hauler to the carboy and marvel (privately) that you can freakin' sew. If anyone asks, just tell them it was done through the magic of hydraulics or something.


