Deleting the Divide between the Freezer and Fridge

Homebrew Talk - Beer, Wine, Mead, & Cider Brewing Discussion Forum

Help Support Homebrew Talk - Beer, Wine, Mead, & Cider Brewing Discussion Forum:

This site may earn a commission from merchant affiliate links, including eBay, Amazon, and others.

Laphroaig

I Love Scotch. Scotchy, Scotch, Scotch.
Joined
Jul 18, 2019
Messages
16
Reaction score
9
Location
North Liberty, IA
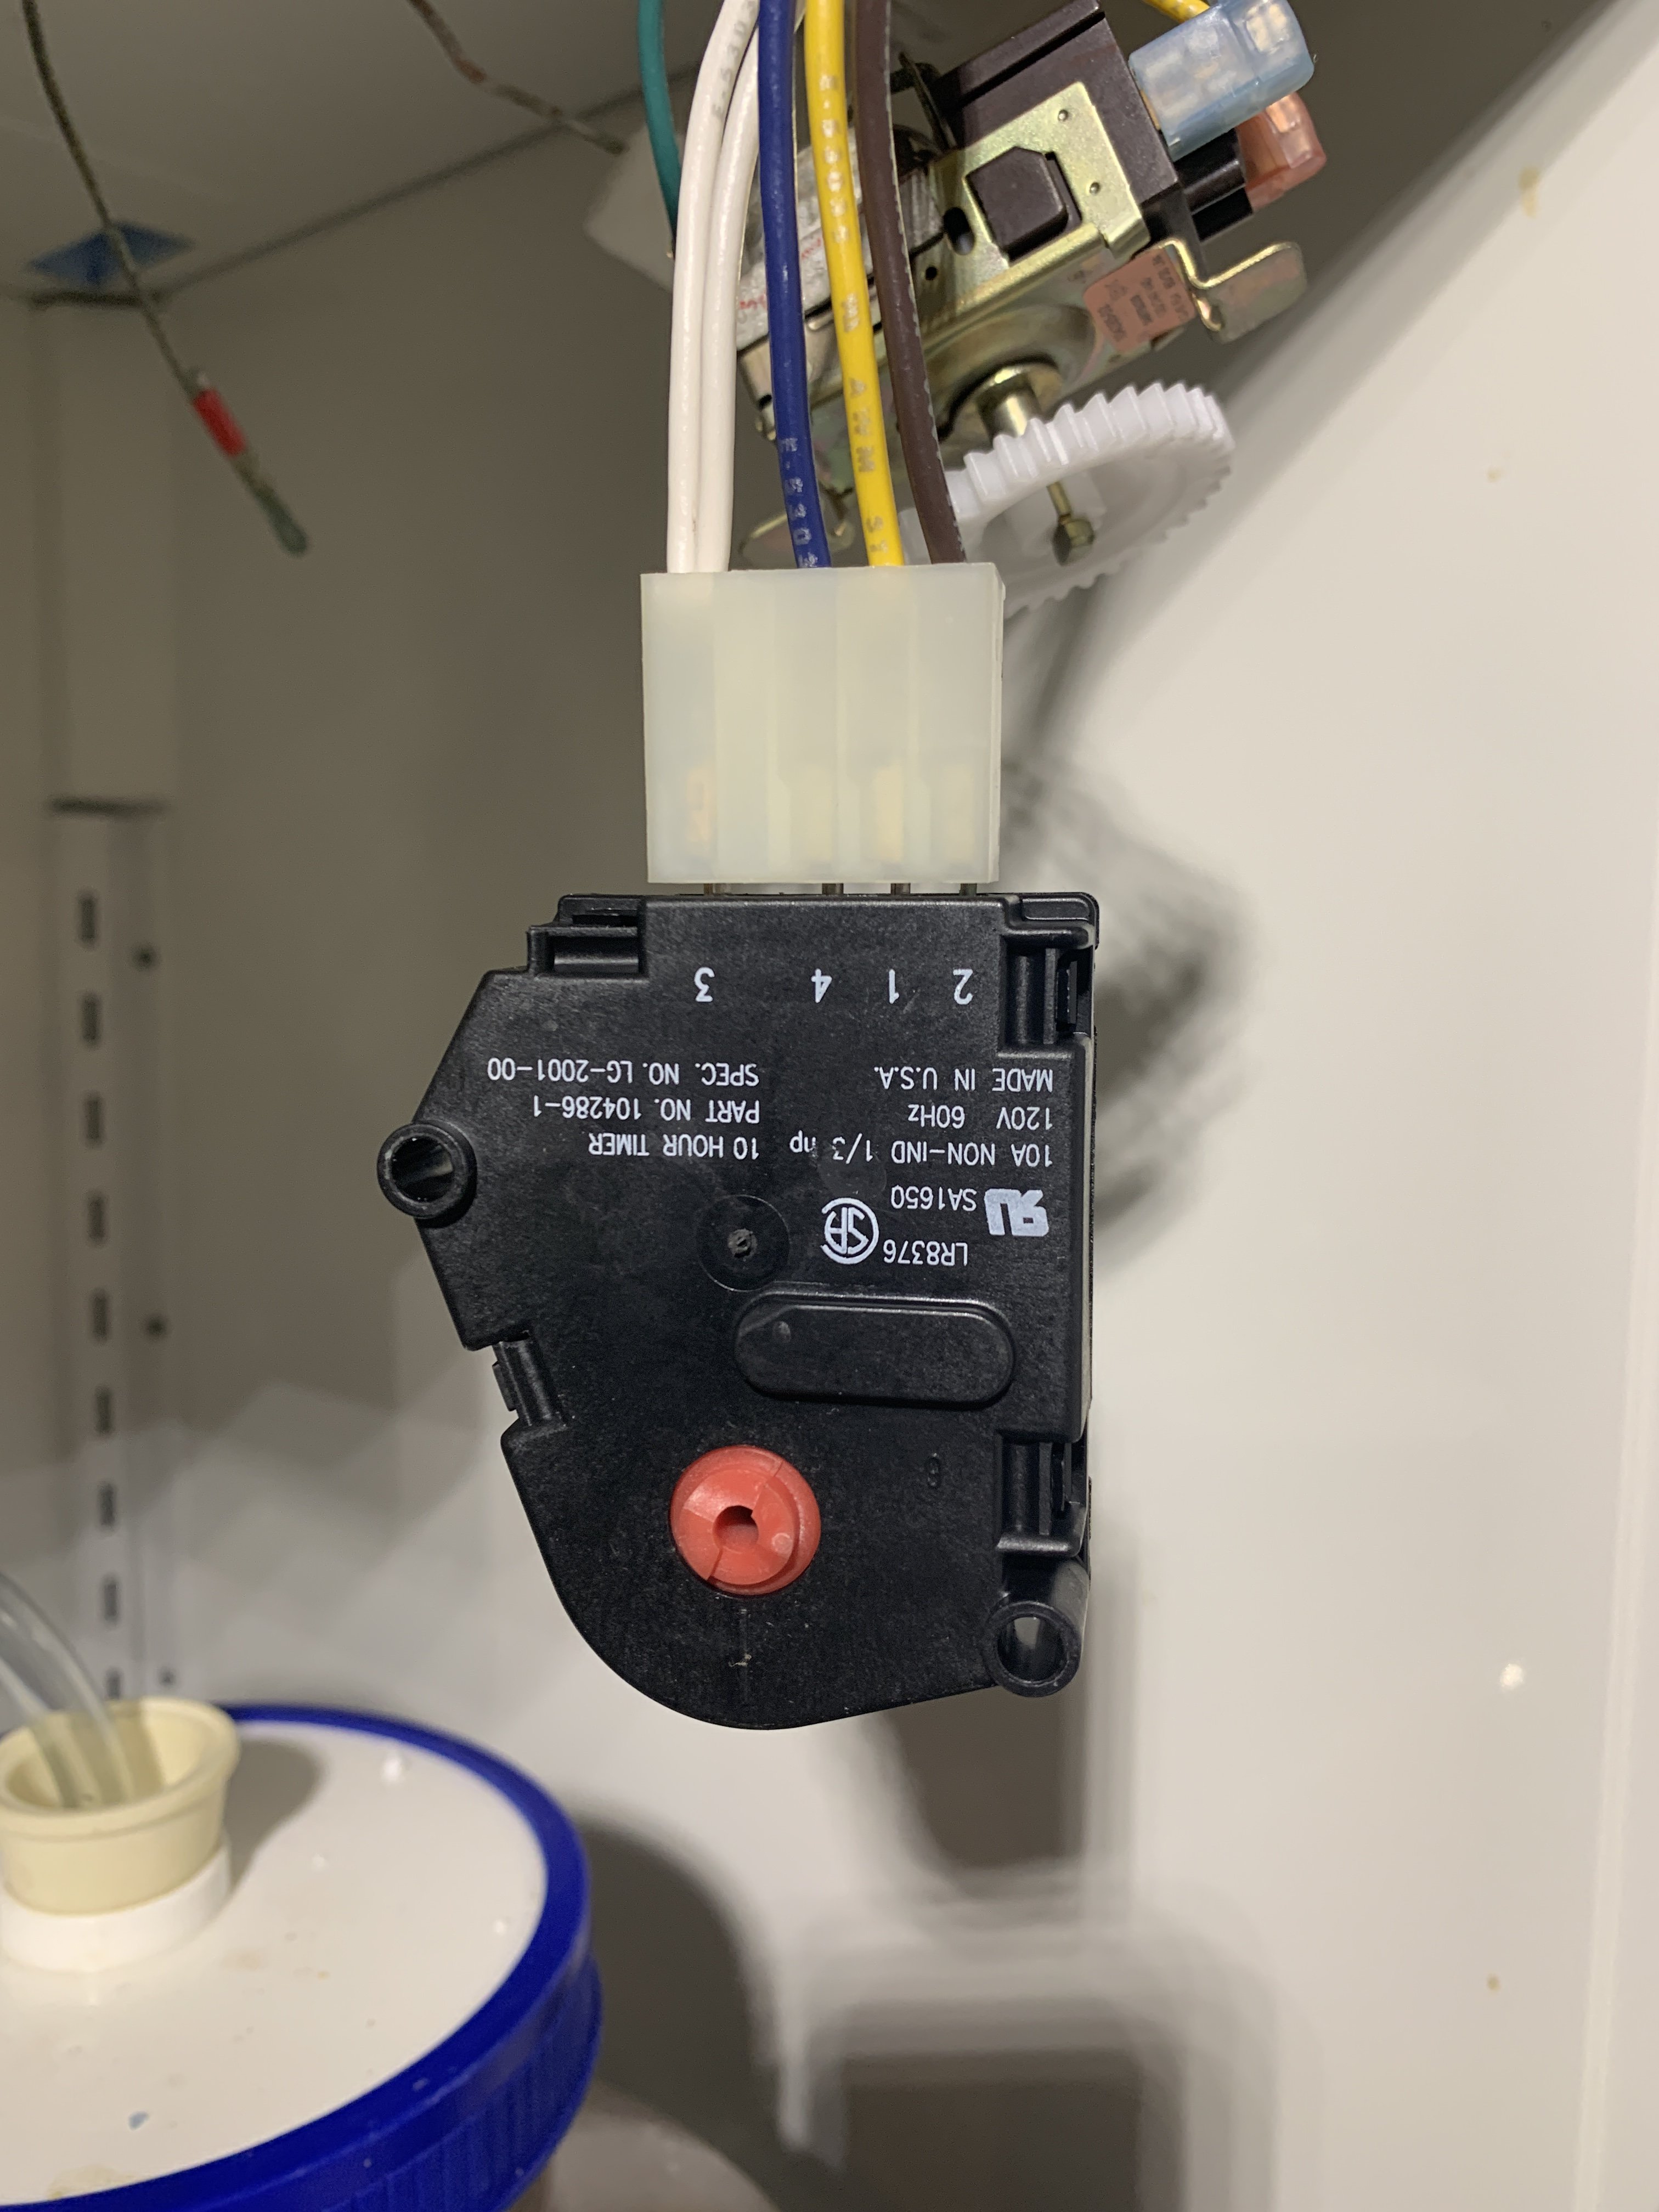
Anyone ever attempt it? Ive started tearing into it and there’s some wire, some temp sensors, and temp controls. Just wondering if anyone’s done it and if there’s some examples of what people did with these things.

I’ll consult a wiring diagram soon to see if I can interrupt these controls with my own. But I wanted to get some ideas flowing.
41DB26F6-8545-4488-AAA6-3180B3563808.jpeg

That’s basically all I found. That and a bunch of insulation. If I can delete these things even better!
 
Not exactly sure what I’m looking at here, and the end goal. Are you simply trying to turn a freezer into a fridge? If so, there multiple ways to go about it ranging from super simple to fairly complex.
 
So the whole thing is a stacked fridge freezer. Freezer on top. What your looking at there is unbolted from the top of the refrigerator compartment. There are slider controls to control the temp of each compartment. Those act on gears to turn what I assume are variable resistors connected to thermocouples in each compartment. The black box thing I think may be a relay? I’m not sure. Then there’s an on/off switch for “external cabinet moisture control” which I don’t know what that does.
The goal is to remove the divide between the fridge section and the freezer section and have it be one big fridge, essentially. Controlled ideally by the IT-308 or ST-1000 I already own.
 
I believe in a typical over\under configuration the freezer temp influences the fridge temp with a pass-thru. Reasonably if you turn the freezer all the way down then you shouldn't get a lot of that falling cold air, although only the fridge coils may not be enough to keep the whole thing cool in warmer temps.
 
I believe in a typical over\under configuration the freezer temp influences the fridge temp with a pass-thru. Reasonably if you turn the freezer all the way down then you shouldn't get a lot of that falling cold air, although only the fridge coils may not be enough to keep the whole thing cool in warmer temps.


As you mentioned, the fudge is typically cooled by a pass though device of some kind. The only evaporator coil is in the freezer section and serves to cool both halves anyway so capacity shouldn’t come into play.

So the whole thing is a stacked fridge freezer. Freezer on top. What your looking at there is unbolted from the top of the refrigerator compartment. There are slider controls to control the temp of each compartment. Those act on gears to turn what I assume are variable resistors connected to thermocouples in each compartment. The black box thing I think may be a relay? I’m not sure. Then there’s an on/off switch for “external cabinet moisture control” which I don’t know what that does.
The goal is to remove the divide between the fridge section and the freezer section and have it be one big fridge, essentially. Controlled ideally by the IT-308 or ST-1000 I already own.

The short answer is “yes, of course you can”! You will just need to find out what’s what, and how to best control the compressor. Unfortunately you have a lot going on in the rail your trying to delete, and you really need to identify every wire to determine if it will be used or deleted. The cabinet humidity control for example, indicates there are heaters somewhere around the outside of the freezer section to keep condensation down. Sometime this is, you guessed it, in the mullion between freezer and cooler.
 
Unfortunately you have a lot going on in the rail your trying to delete, and you really need to identify every wire to determine if it will be used or deleted. The cabinet humidity control for example, indicates there are heaters somewhere around the outside of the freezer section to keep condensation down. Sometime this is, you guessed it, in the mullion between freezer and cooler.

That makes perfect sense about the Humidity Control. Thanks for that! I honestly didn’t know what it was. The black box is the defrost timer I learned from a parts list, but I haven't found any detailed wire diagrams beyond that. I probably wouldn't need a defrost cycle anyway as the entire unit will not get below freezing? This defrost timer is probably the reason that sometimes the fridge would not kick on when my ITC-308 told it to, (I was thinking it was broken. haha.) Well, at least I'm learning a lot about refrigerators.

It looks like the fridge temp control only controls a damper to let cold air in from the freezer. Since I'll be eliminating the separation, thats as good as gone. The freezer controller I just need to wire so that it is always on. So that can go away. The defrost timer likely can go away, as the temp will regularly be above freezing. And the external Cabinet humidity control can likely go away too, as it would be freezer temps causing the condensation, and therefore, not needed at fridge temps. Now I just have to figure out how to wire it to delete all of these things.
 
Last edited:
Sounds like a plan! As for the defrost circuit, if you thought you may need to raise the temp at any point, you might try utilizing the existing heater for that purpose instead of for defrosting coil.
 
That's a good idea. The plan is after this thing gets gutted is to then build two separate chambers vertically, insulated from each other with foam. I’ll have to think of a way to work that element in. It’s there. It’s wired. May as well.

Well. Started cutting wires. I don’t like to do things until I’m 100% confident, but I’ll admit I was only about 80% when I started cutting. Haha.
2D9D8F21-E969-4FB5-B8F4-7612D879491A.jpeg image.jpg
I can find a space or even trim these wires down more. The one bare wire hanging completes the circuit for the defrost element. Tried her out and she started right up! Although I grimaced a bit when flipping the switch!
This was actually way easier than I thought it would be. Now I just have to wait for that beer to finish up and I can work on tearing out that freezer floor.
 

Attachments

  • 0E1F3092-0FA5-4962-AE92-C5C7454BD837.jpeg
    0E1F3092-0FA5-4962-AE92-C5C7454BD837.jpeg
    963 KB · Views: 96
I won’t destroy the face of it. I’ll leave the doors. I may take the face of the freezer floor out at a later time and build a custom door, but that’s beyond the scope of this project. I’m not even sure how much longer this fridge will last. Haha. It’s pretty old.
 
I’ll just keep updating in the hopes that someone will find the documentation of this process helpful.

I tore out most of the foam. Found a couple more wires but I was using a recip saw so it just skipped right over them. They were just wires for the refrigerator lights anyway.
One bonus I’ve found is that I can work from above for a significantly long time without bringing up the temperature of my fermentation chamber below just due to stratification. Acts like a chest freezer. This will be handy for doing additions. Best of both worlds. This top section is where the temp control ducting and fans will go in the later phases of this project, so it will be nice to be able to tinker from above.
70D68844-F02F-47AD-BD3C-3768E45E2DAB.jpeg 70C5D52C-EF9A-4CD7-B181-F2EA4F699E7D.jpeg 7AEE0D8F-23F5-4AFA-9DDB-15E793A2C777.jpeg
 
I’ll eventually have a Cornical on each side, but have just the one for now. With the freezer floor taken out, she chills like a champ! 10/10. But I did accidentally freeze my starsan in the blow off jar when bringing the beer temp from 75-50. Used an aluminum commercial baking pan for the bottom. Fit the existing drawer rails almost perfectly. Next step will be isolating two chambers and (hopefully) controlling their temps independently. For now, one big chamber is ok.
 

Attachments

  • DDF75471-2B6C-442E-B7B5-A9602F05BA9B.jpeg
    DDF75471-2B6C-442E-B7B5-A9602F05BA9B.jpeg
    1.2 MB · Views: 99
don't know if it's relevant to your project...But when i needed to get my oven to go low for malting, i added a switch and a 200ohm resistor in series on the temp probe..

i would imagine like the oven mods for pizza ovens you'd want a potentiometer that goes way high and add it in parallel...

edit: but you did say your already using a external controller....:oops:
 
don't know if it's relevant to your project...But when i needed to get my oven to go low for malting, i added a switch and a 200ohm resistor in series on the temp probe..

i would imagine like the oven mods for pizza ovens you'd want a potentiometer that goes way high and add it in parallel...

That’s interesting, I assume your introducing a temperature offset? For this scenario, another way (albeit not as neat), is to leave the temp probe exposed to the chamber for the first 12hrs or so. By that point, you can generally use a thermowell or attach it to the vessel to bring it the rest of the way down.


Awesome! What will those Binchmann guys come up with next?!
 
That’s interesting, I assume your introducing a temperature offset?

the way temp probes work is by changing resistance at different temps....So if you want to go hotter you want a high ohm resistor between both wires off the probe....(parallel), to lower resistance....but i wanted to go lower, so i put a low ohm resistor in series, or on one wire, to raise resistance.... and added a switch to turn the resistor on or off, for when i actually need to use the oven for something other then beer....

doesn't happen often, but it's nice to be prepared! :)

(now that you mention it, my oven can maintain like 85f in low mode....yogurt would be a good idea! thanks! :D)
 
Here’s a couple pics of mine that I’ve “split”. The only difference is mine started out as a singe chamber. In short all you need to do for the second zone is isolate area, insulate it, and add a fan on separate temp control blowing from main chamber into second zone. I’ve added a simple barometric damper (opens with the pressure of the fan coming on). It’s not a must, but will help isolate the sections when fan is off. Another “nice to have” is a small fan to help circulate the air. Depending on the size of your second zone, you may easily do without it.
Use your imagination a bit with these pics. I’m in the process of revamping all the controls, and there are old and new sensor, wires, etc all mixed in there. Also there is a wire self that sits where you see the fan imbedded in the foam to make that a usable space (that’s where a carb my kegs)

3FE20EB9-B962-41C7-9806-1E30C5BDF3C0.jpeg


Damper in closed position
B36B8DF8-9EE6-4E5B-A022-923A57CB17A1.jpeg


Damper with fan on
D75447D7-542C-4D58-9613-C9F2438FE283.jpeg


The right controller is for top section with refrigeration and left is for bottom half and simply controls a fan and a heater.
43CDC704-ECF8-45FF-B666-E514E92EEA57.jpeg
 
Back
Top