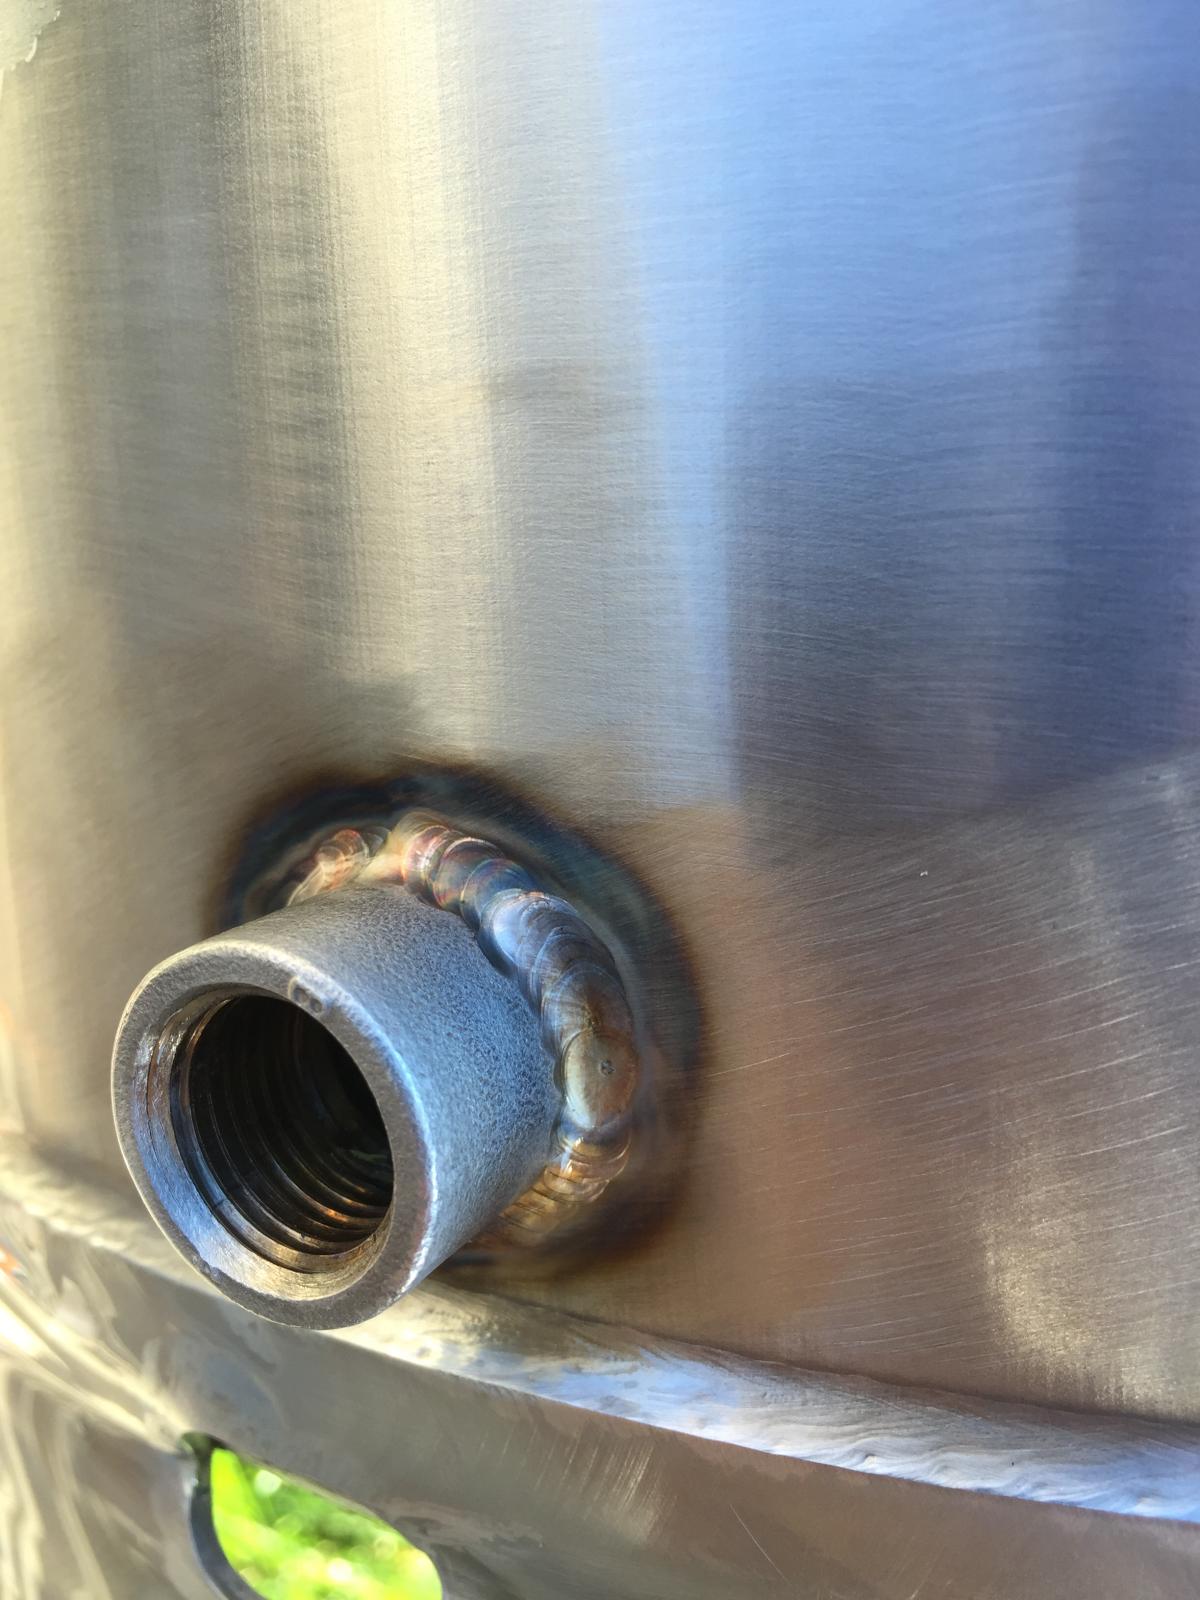
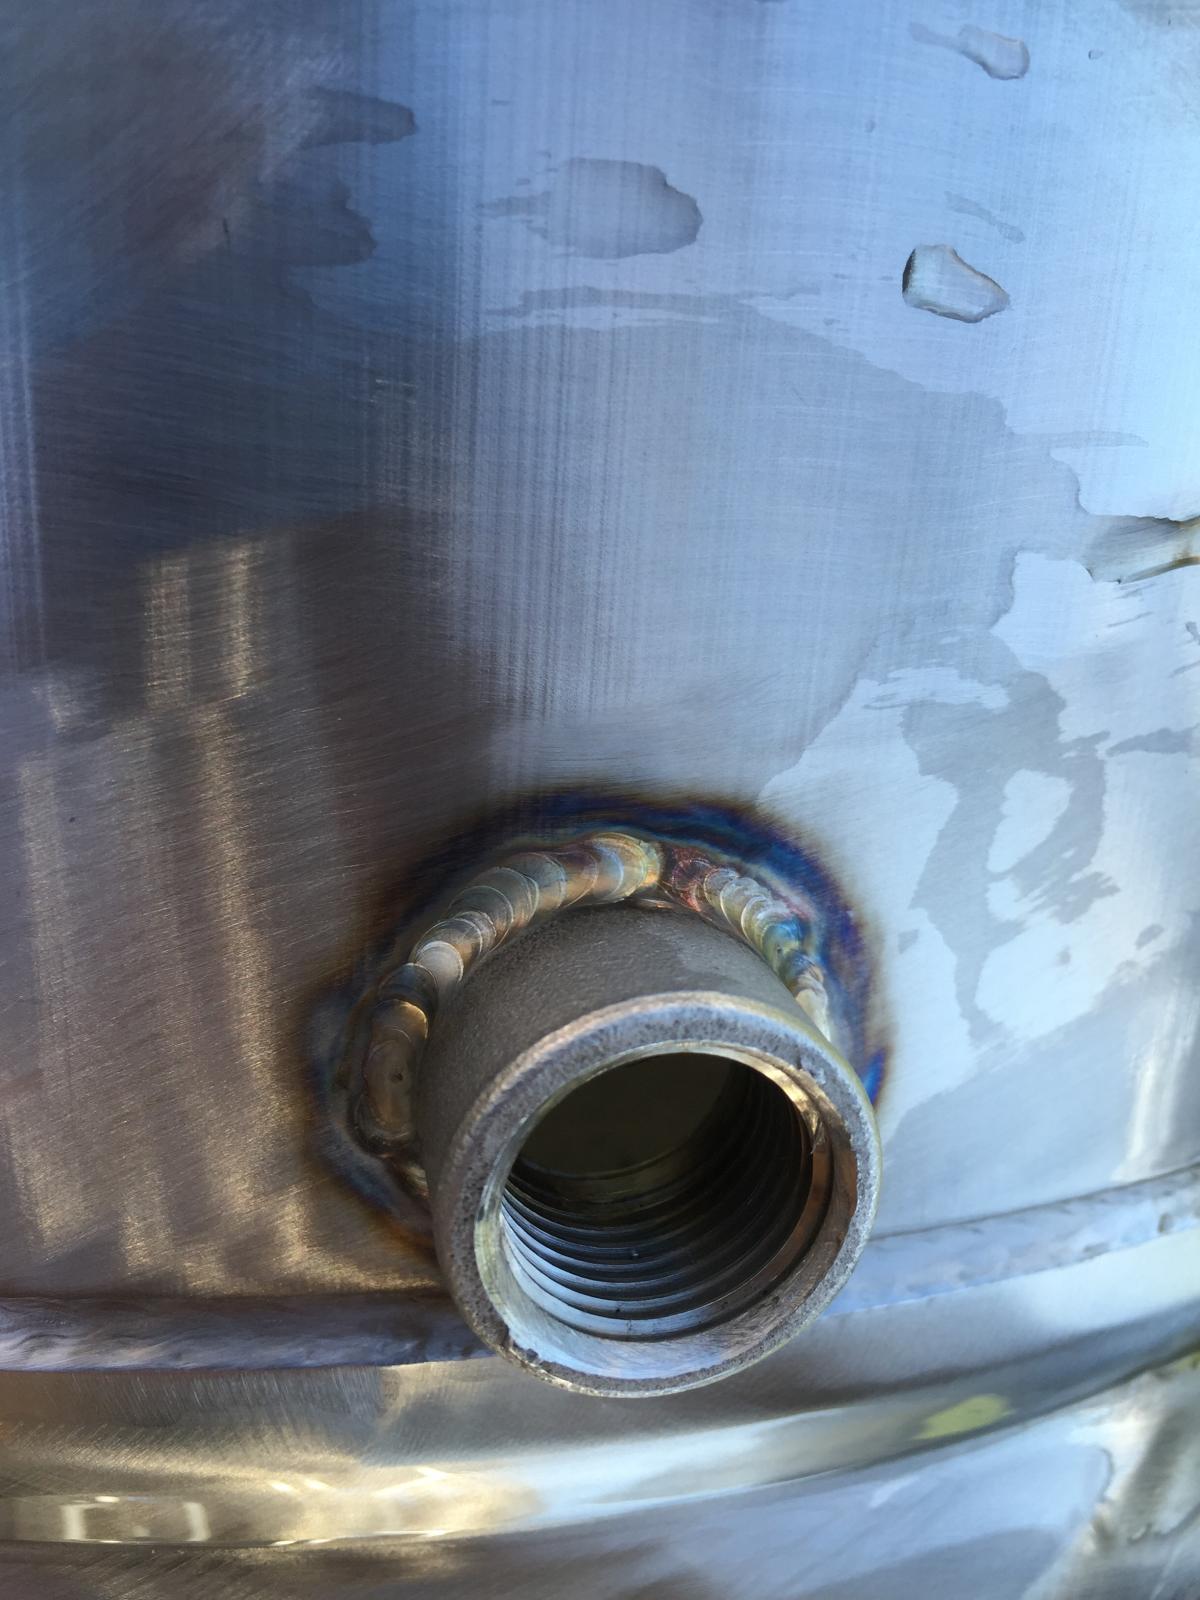
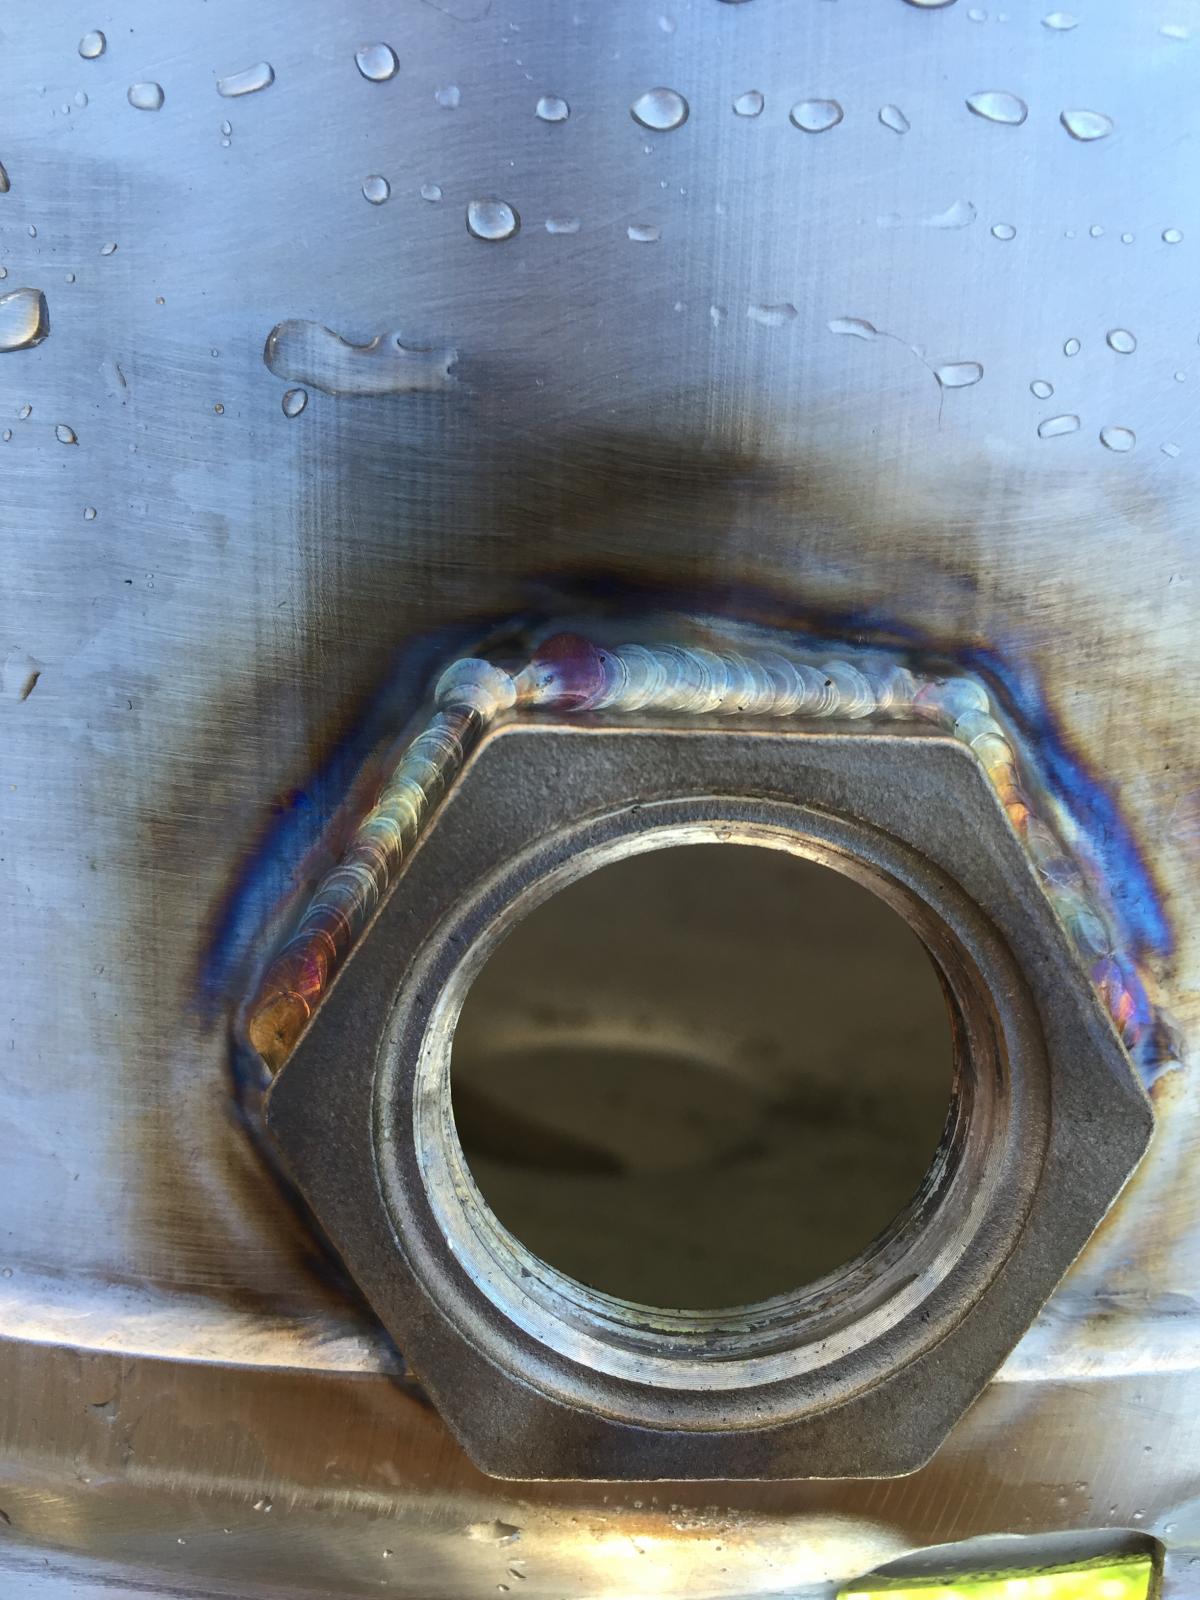
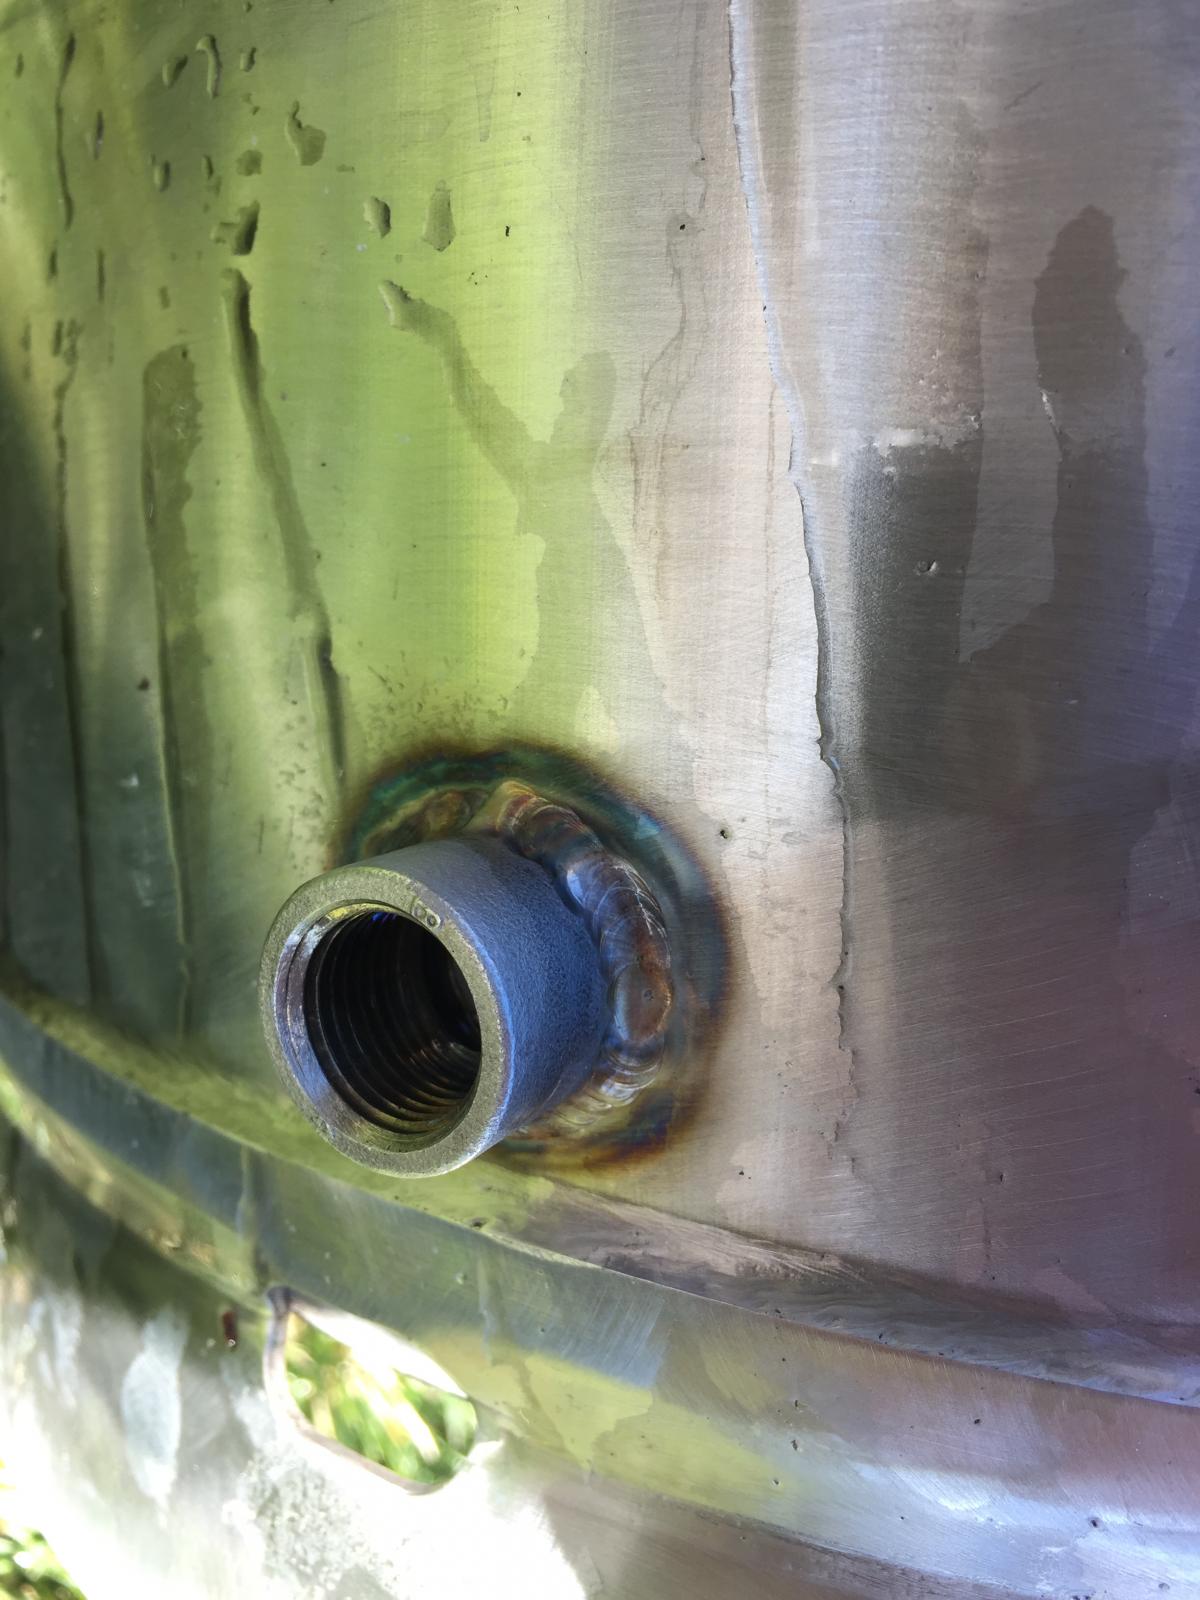
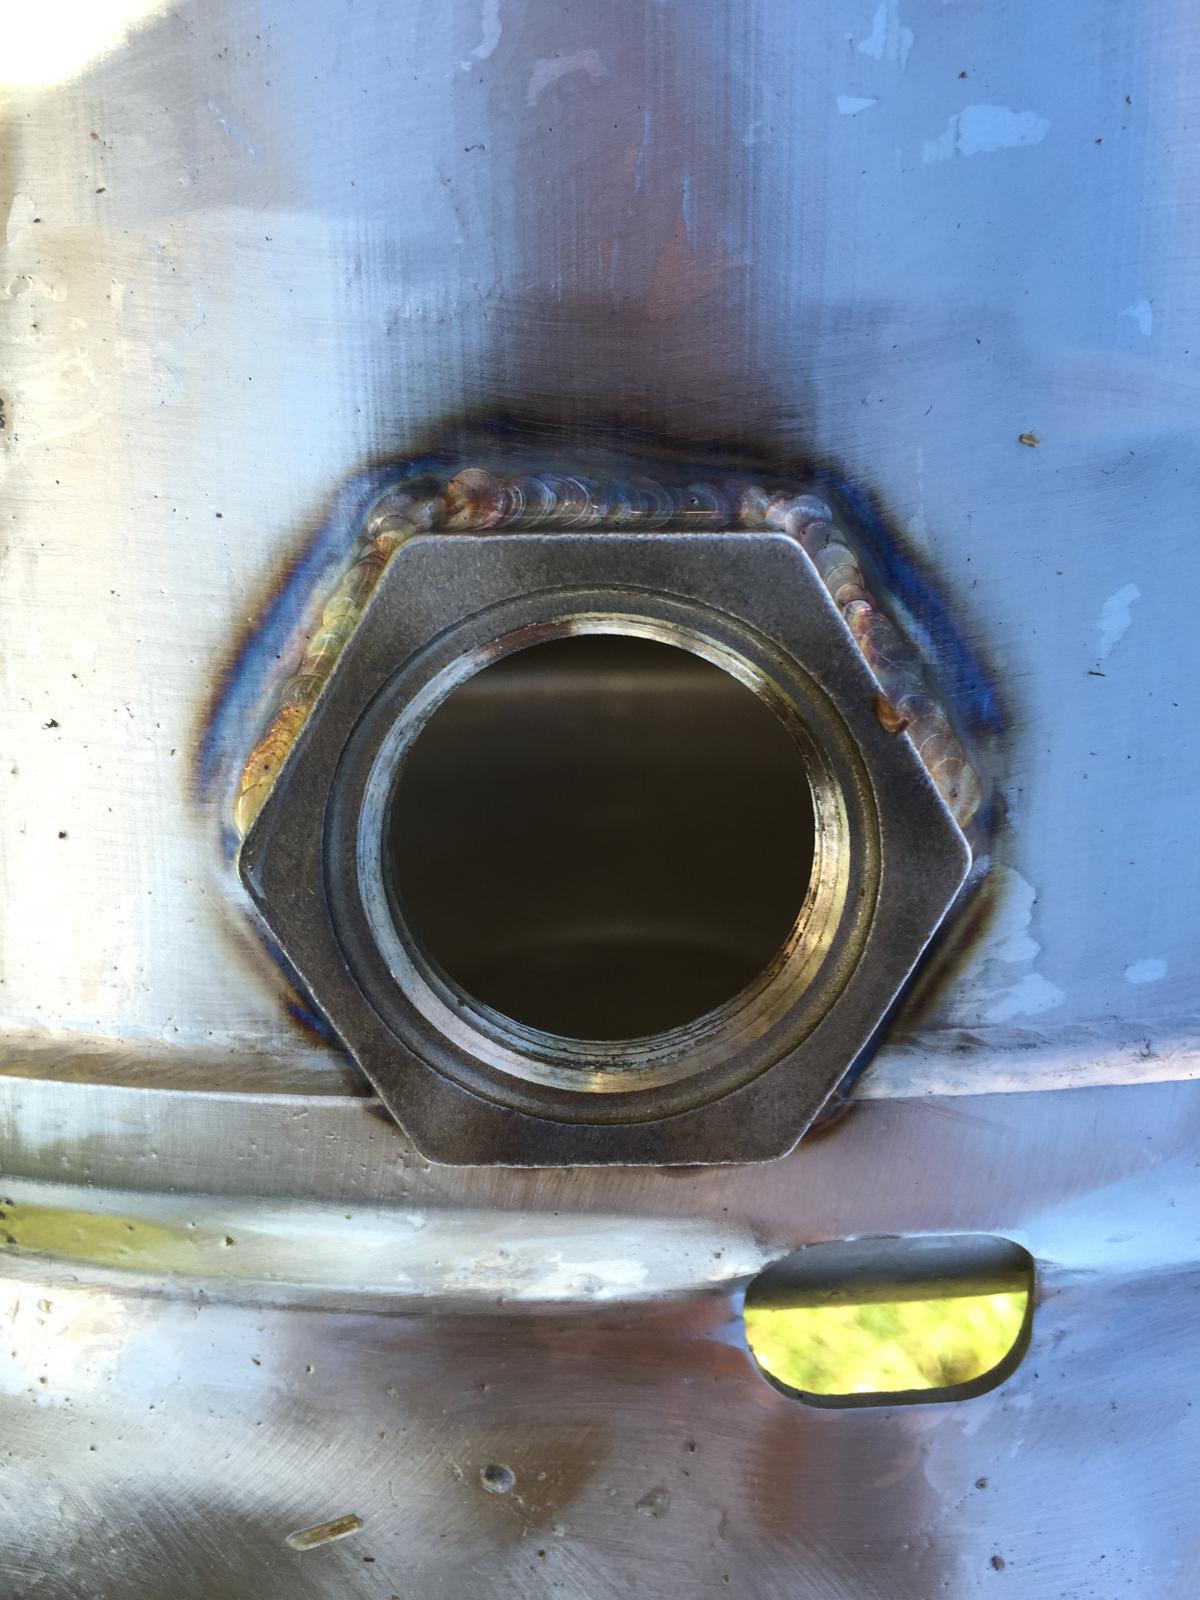
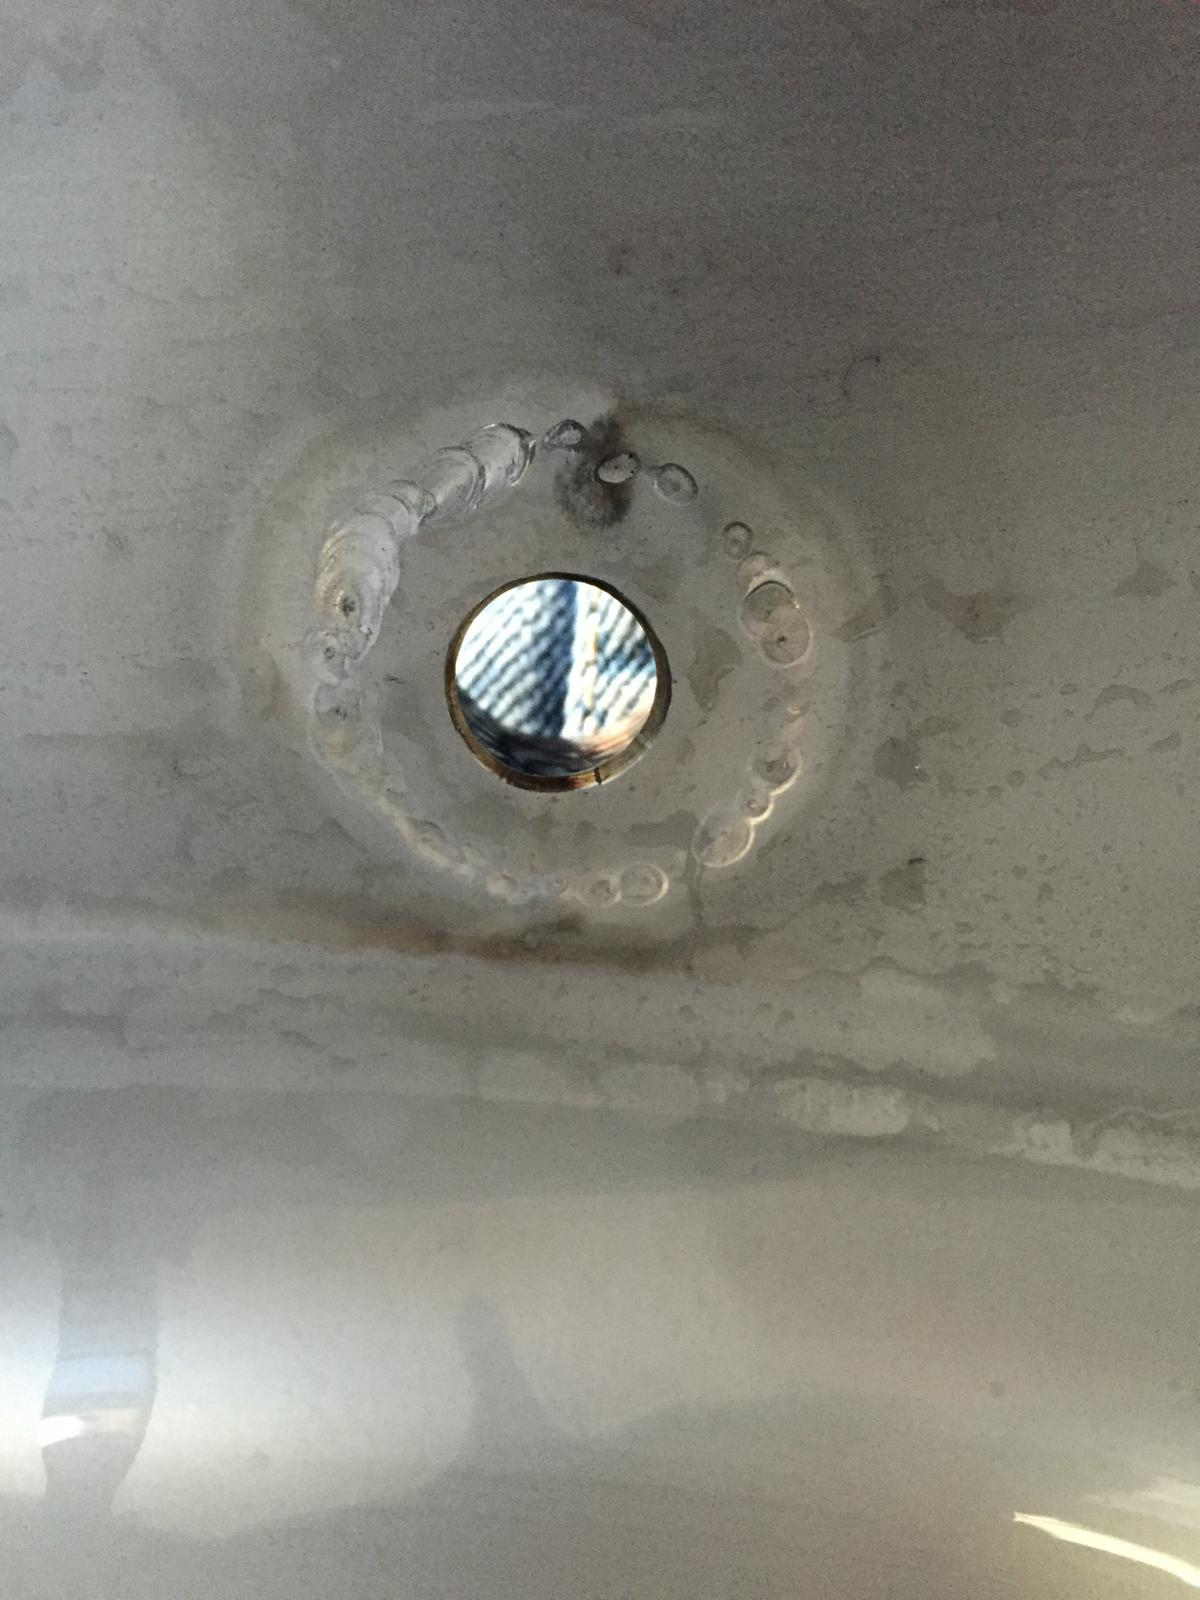
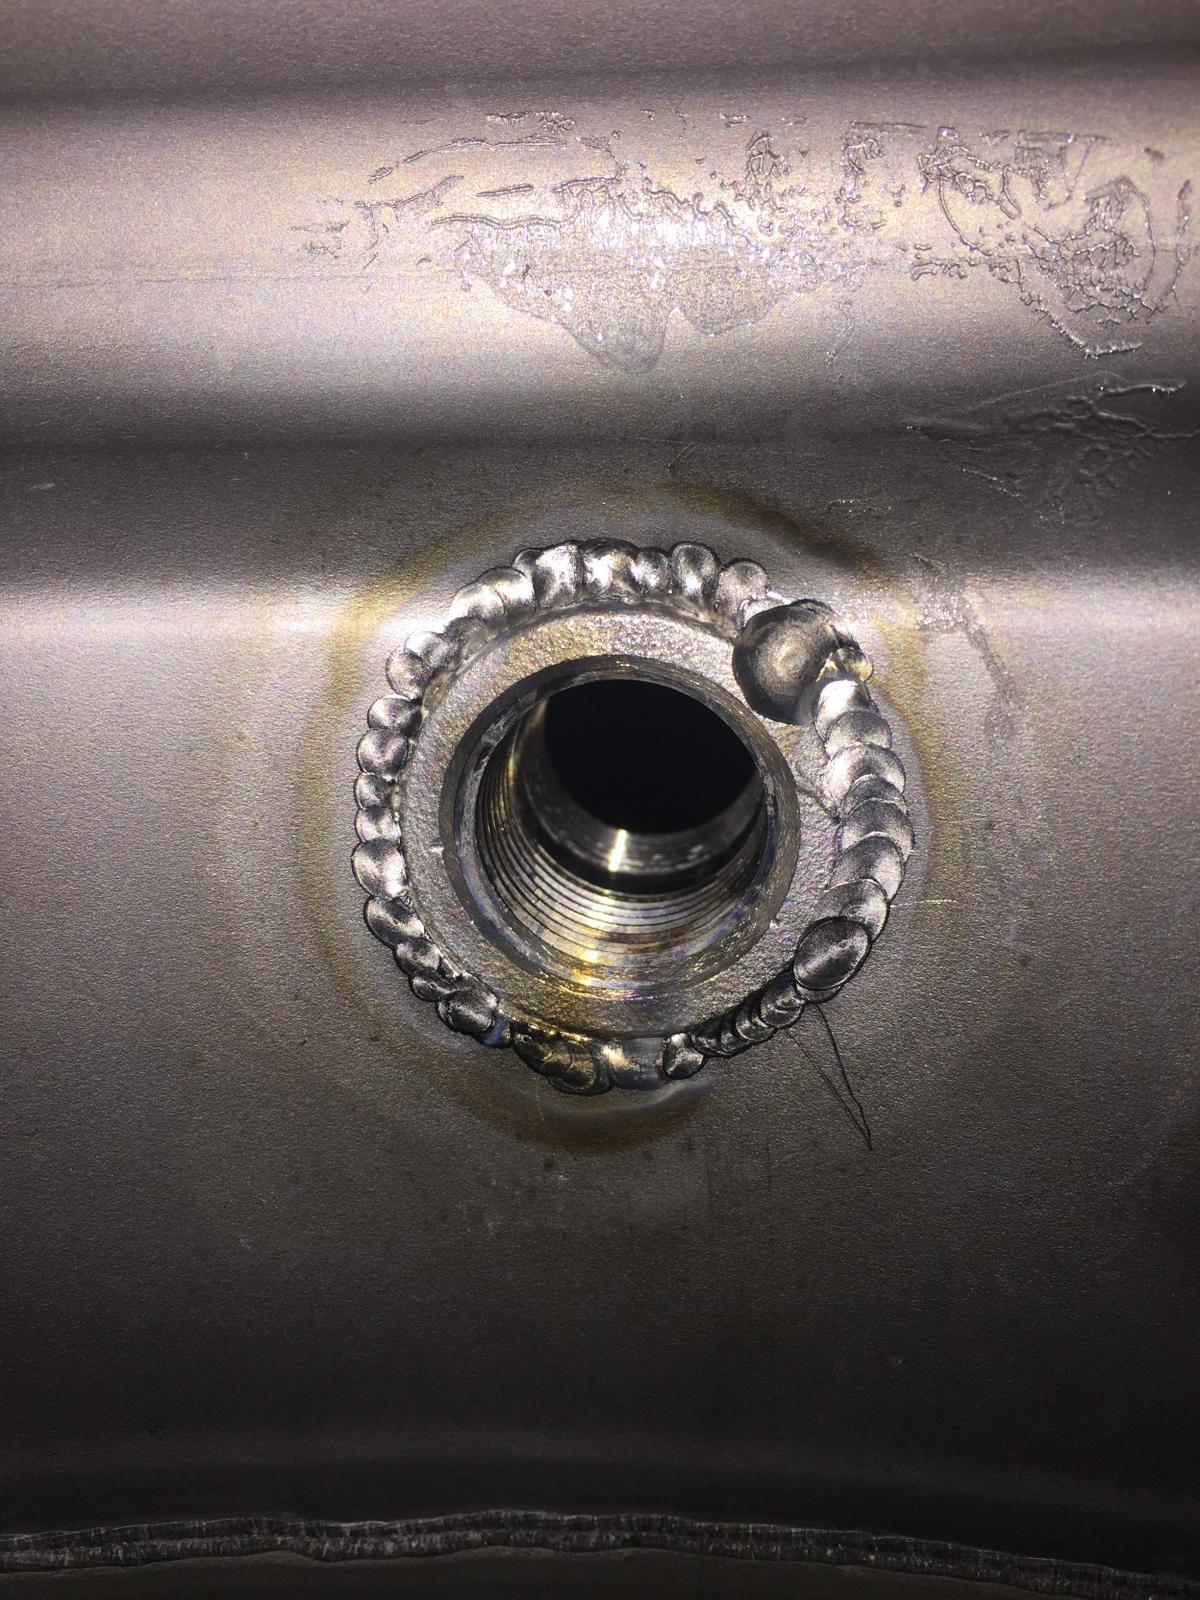
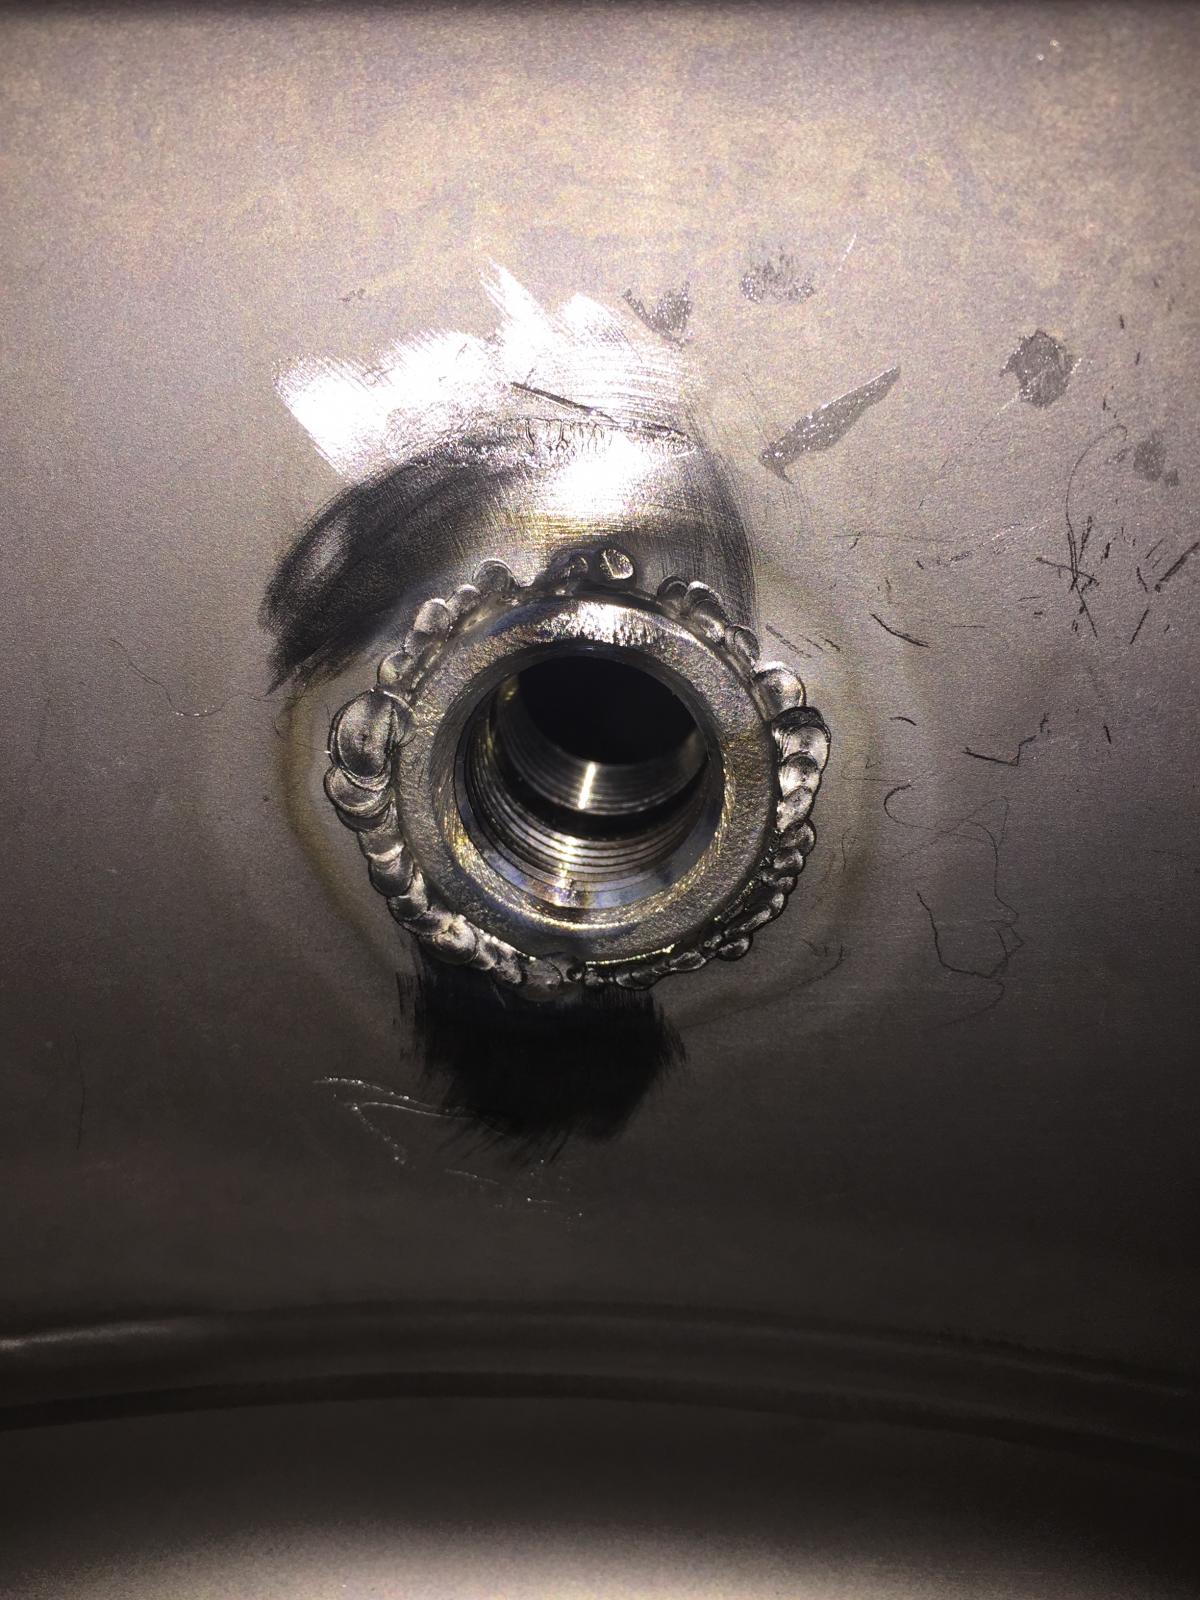
Check out these sanitary welds

Homebrew Talk - Beer, Wine, Mead, & Cider Brewing Discussion Forum

Help Support Homebrew Talk - Beer, Wine, Mead, & Cider Brewing Discussion Forum:

This site may earn a commission from merchant affiliate links, including eBay, Amazon, and others.

mattoak

Well-Known Member
Joined
Feb 4, 2013
Messages
55
Reaction score
5
After paying $100 for a crappy weld job from a "professional", I decided to have a buddy tackle the job instead. The "professional" did an OK job...he sort of back purged, and almost got the fittings on straight. There was a very minimal amount of sugaring. However, check out the work a good friend of mine did. His services are also for hire if anyone in the Denver area is looking for an awesome TIG welder.

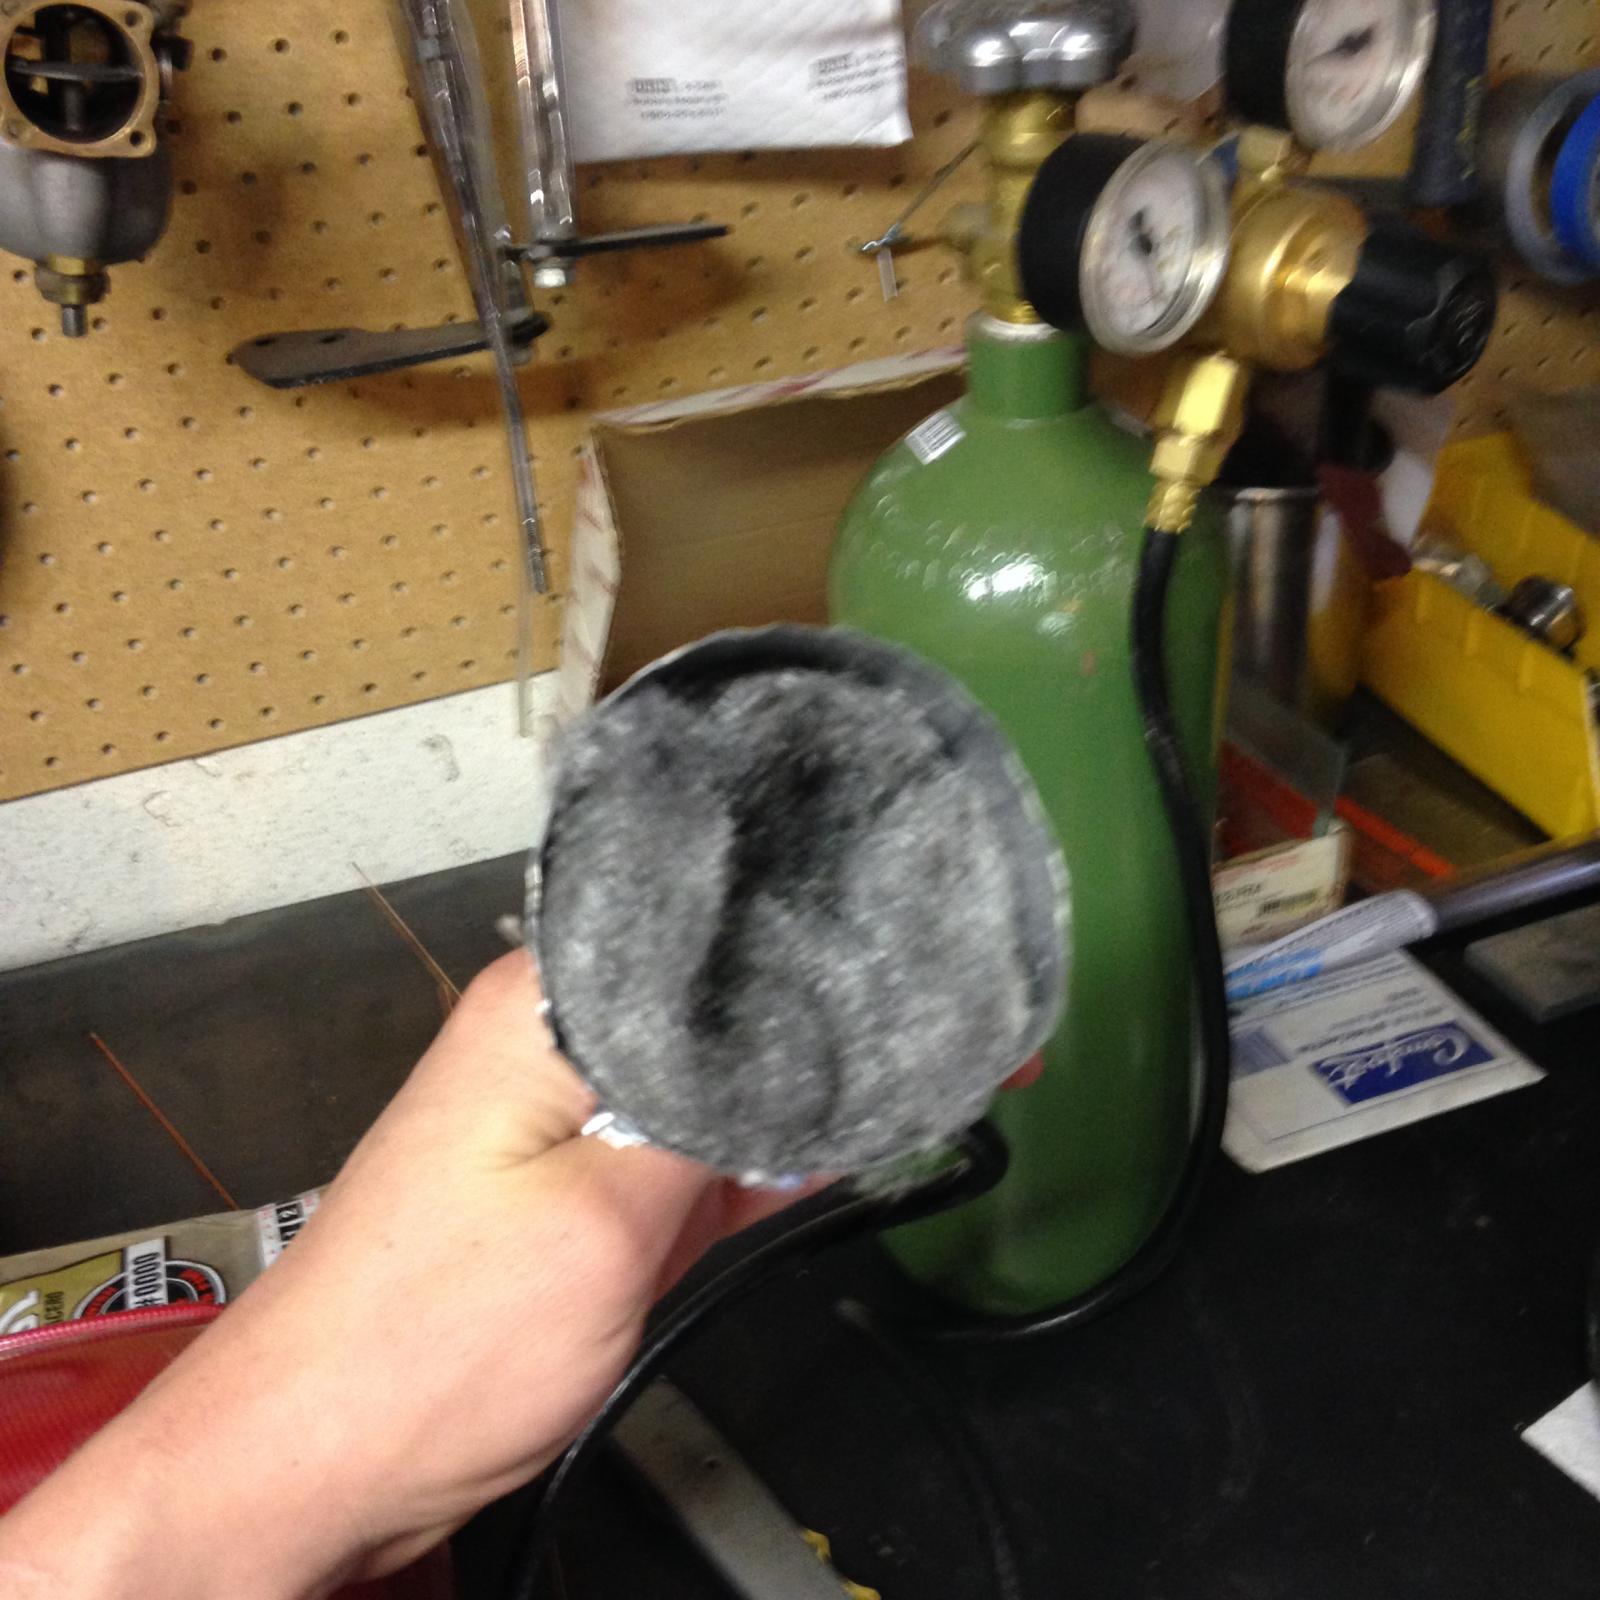
The first set of pics is the fittings as welded, before any cleaning. Also, the only reason the 1" nut weld has some corrosion and discoloring is because the purge setup fell due to the heat softening up the adhesive on the glue. We noticed after the welds were finished. The subsequent welds we made sure it stayed securely in place.
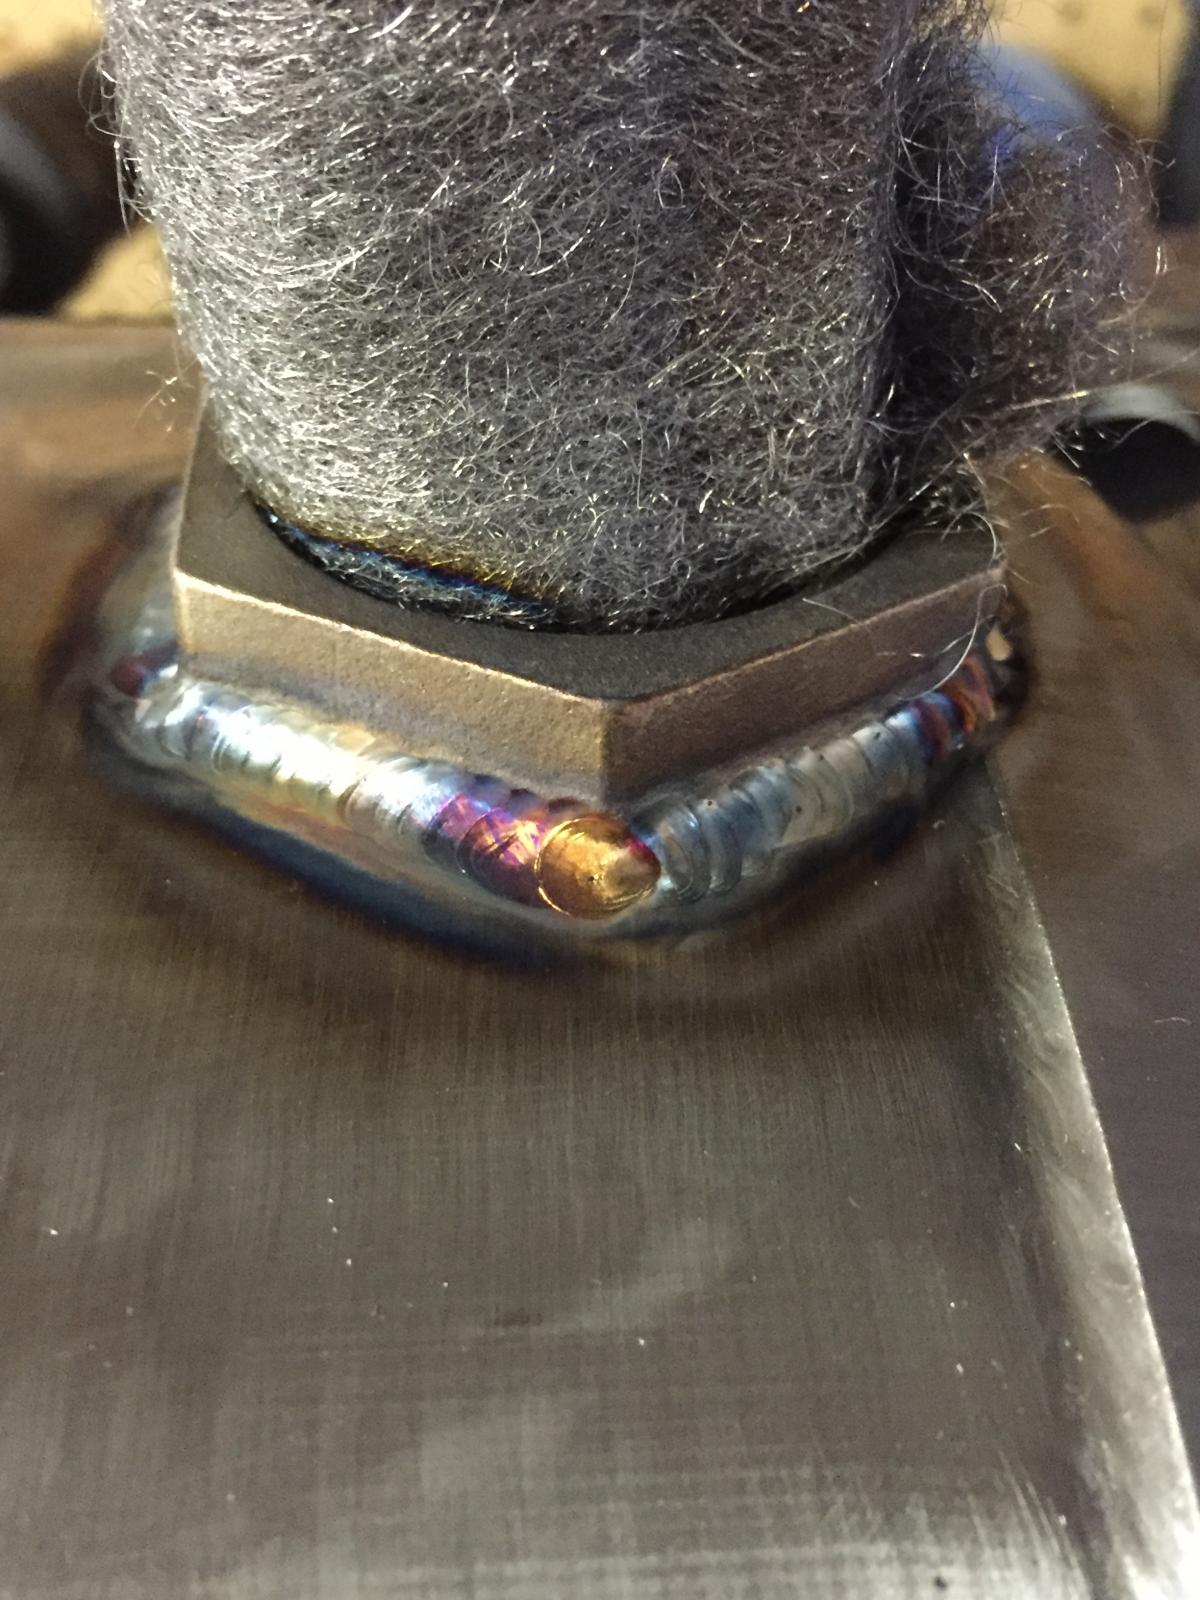
IMG_5820.jpg


IMG_5822.jpg


IMG_5826.jpg


IMG_5829.jpg


IMG_5830.jpg


IMG_5831.jpg


IMG_5836.jpg


IMG_5839.jpg
 
This is after some light cleaning with BKF. I am going to hit the rest of the discoloration with a scuffing/buffing wheel on my dremel which will take all the discoloration out. I'll post up those pics once I'm finished.

IMG_5841.jpg


IMG_5842.jpg


IMG_5844.jpg


IMG_5845.jpg


IMG_5846.jpg


IMG_5847.jpg
 
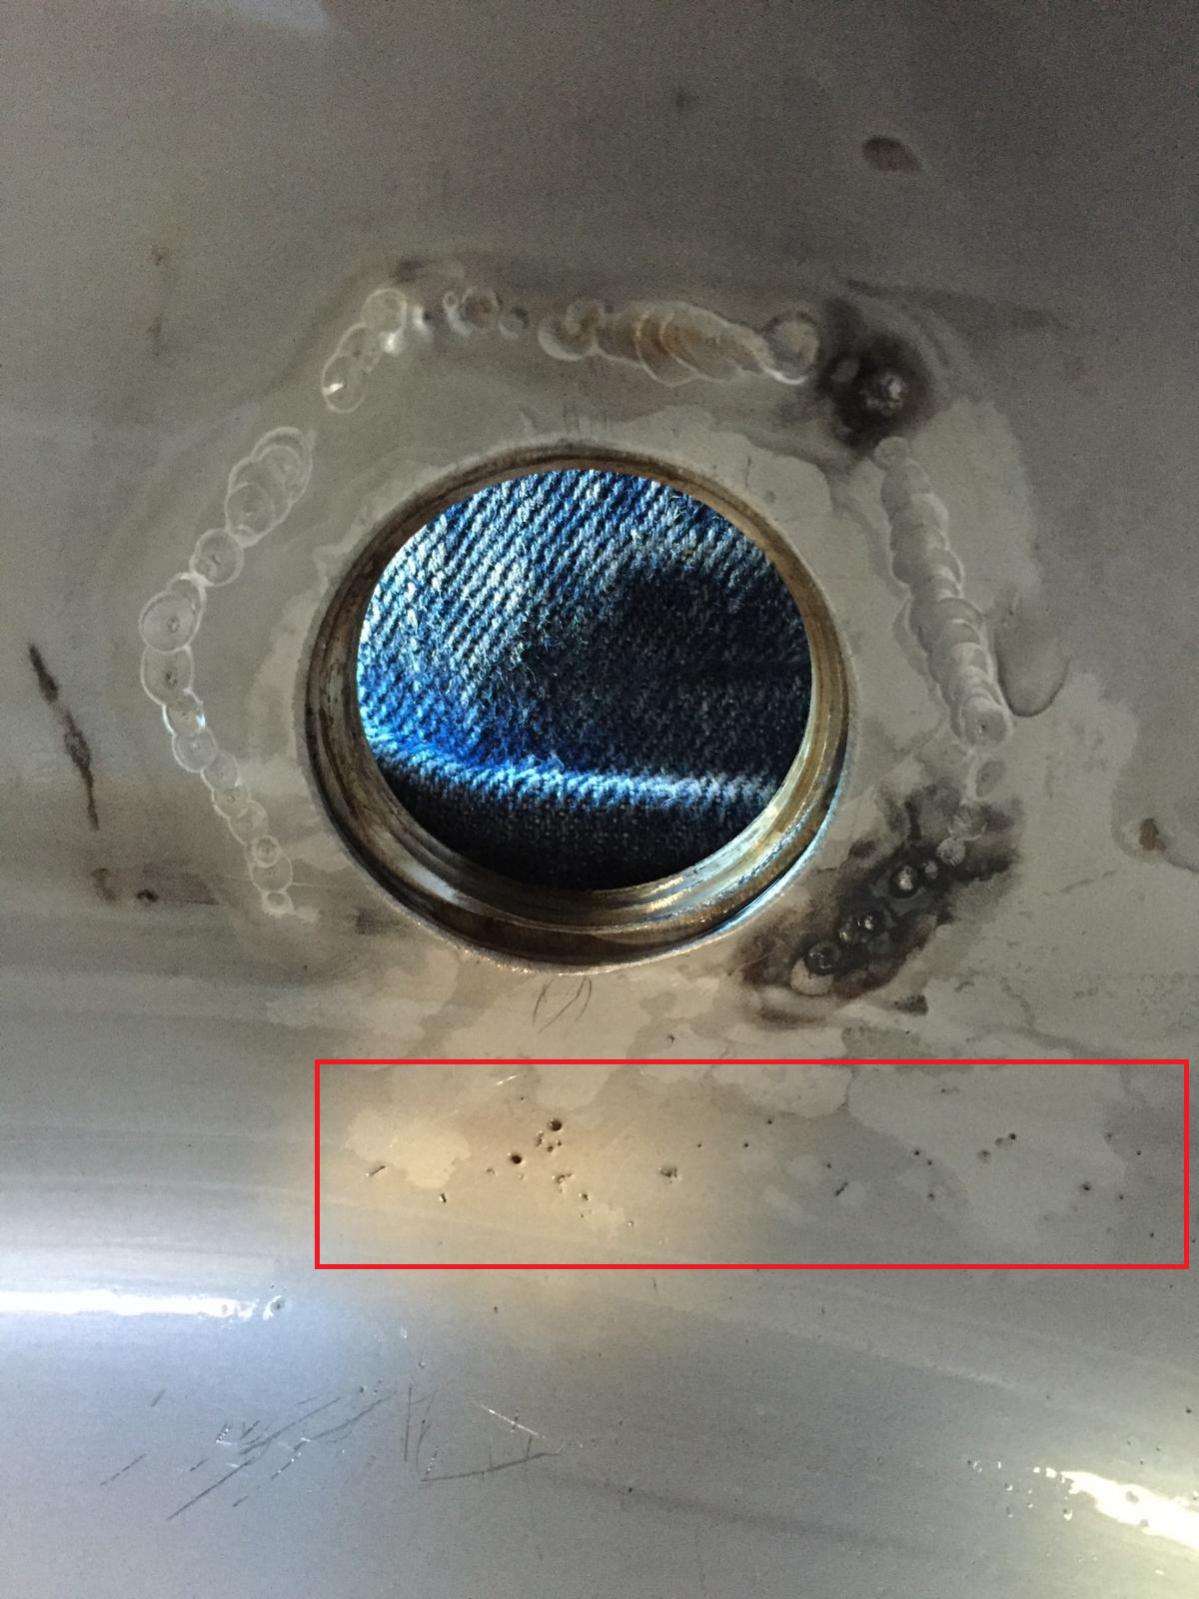
Nice welds, but the red box full of holes/pits looks a little scary.
Is the void between the side/fitting from hole to weld going to harbor nasties though?

welds.jpg
 
Nice welds, but the red box full of holes/pits looks a little scary.
Is the void between the side/fitting from hole to weld going to harbor nasties though?

That's just dirt that stuck to the bottom when I rinsed the sides, not actual slag or holes/pits.

And as for the nasties, this is the HLT, so it will only have water. Even if it was the boil kettle, it would be boiling. Nothing on the brewing side of a home brew setup can harbor any nasties since it all gets boiled in the kettle, or pasteurized in the HLT. I guess if you sour mash you could risk some unintended infection, but then it would probably be welcomed and be individual to your equipment. You don't sanitize your HLT, MLT, or boil kettle before a brew session do you?

Man, they sure looked like inies, not outies. They look identical to some of the voids I've seen in bargain welded kettles.

Yeah, I thought about the whole boil part after the fact.

I was under the impression that weld fittings were welded at the edge of the hole, leaving no possibility of a void. Maybe not so with DIY welding. I silver solder fittings, and since that will flow into a 'reasonable' void, it's not an issue.
 
Im not a welder, but isnt it bad that he actually welded through the pot like that?

Every one of my holes is welded but you'd never know it from the inside its baby butt smooth like from the manufacturer. (Yes my pots a bit dirty, sue me!)
20160404_233701.jpg


I mean it will work fine probably, but i dont think its supposed to do that if done properly.
 
I don't know, I'm also not a welder. I guess for a structural weld you would want full penetration so you'd want to see it on the backside. For fittings, not so much I guess. I also looks like you ground the weld area on yours? Is that correct? I'm sure I could grind off the marks and you'd never know it either.
 
A little heavy on the amperage there, I would have rather seen him go back and fill those pits rather than see you grind all that base metal off.
 
A little heavy on the amperage there, I would have rather seen him go back and fill those pits rather than see you grind all that base metal off.

Well we still have 2 more fittings, so I'll have him turn down the amperage a little bit. Thanks!

But, from Sconnie12's post, the inside of that weld definitely has even more penetration (unless it was also welded on the inside)?

So do you want the puddle to fully penetrate to the inside surface, or do you want the inside to not look different at all? The last 2 posts seem contradicting, unless of course that weld was also welded on the inside.
 
That pic from the spike kettle is exactly what it should look like.

That starts with proper fitment. The hole should b just larger than the OD of the fitting. Then welded with full penatration of the weld from the outside with a good back purge. I would want a structure weld because will end up being used as a handle.

Your buddy did a nice job but I believe he was only thinking of sanitary as back gas to prevent oxidation in the weld but neglected the fitment part. Also more gas and longer post flow and a bigger cup all to keep the weld shielded until cooler and it won't discolor
 
His welding isn't too bad, but he was obviously struggling a little. He really did drop the ball on the fit-up, but in reality, even the spikes kettle in the pic isn't sanitary. I would consider having him weld the inside of that nut, just to seal it off. There should be enough room since no filler or purging would be necessary.

It also looks like he is struggling with pinholes on his stops. If he is running a pedal, tell him to ramp the current down when he reaches the end of the weld, and keep welding a few more walks. If it is scratch start, pull out at the end and let it cool a little, then strike it up and and get a little puddle going again and add a little filler.
 
Thanks guys. So my buddy is very experienced in TIG, but never back purged, or welded sanitary welds. So I was the brains behind how we did the purge setup. I was also there with him when he did the welding.

The fitment was 100% me. I drilled all the holes before the welding session, and lined up the fittings before he tacked them. I'm not exactly sure how I could have done it any better...

The drain hole (1/2" coupling) which was a half coupling had the hole drilled just larger than the ID of the threads and smaller than the OD of the coupling, so the fitting was resting on the keg, not inserted into it. I guess I should have drilled it enough to insert the fitting? I'm not sure here, since it won't have anything screwed in from the inside.

The nut hole was also just drilled slightly larger than the threads. Obviously you can't drill a hexagon into the keg, so I figured that was good. How could this one have been any better unless I cut a hexagon shape out of the keg?

The temp probe hole (3/8" coupling) was not drilled to the size of the threads, because this is the HLT, and I didn't think it was necessary to have a large hole if I'm just sticking a 1/4" probe through it.

Tomorrow we are going to weld the HERMS coil fittings. So those will be full couplers that will be inserted halfway through the keg wall. I appreciate the advice, but I'm not sure how he/I dropped the ball on fitment of the existing fittings? Or by fit up do you mean they don't look square? Thanks!
 
If he is running a pedal, tell him to ramp the current down when he reaches the end of the weld, and keep welding a few more walks. If it is scratch start, pull out at the end and let it cool a little, then strike it up and and get a little puddle going again and add a little filler.

Yes its a pedal TIG. Will do, thanks.

That starts with proper fitment. The hole should b just larger than the OD of the fitting. Then welded with full penatration of the weld from the outside with a good back purge. I would want a structure weld because will end up being used as a handle.

As in we should be doing a root weld? Actually have a tiny tiny gap that we are filling between the keg and the coupling with the weld bead?

Your buddy did a nice job but I believe he was only thinking of sanitary as back gas to prevent oxidation in the weld but neglected the fitment part. Also more gas and longer post flow and a bigger cup all to keep the weld shielded until cooler and it won't discolor

Spot on. All I was thinking was back gassing. But I'm still confused about how fitment wasn't good.

So if you guys could elaborate on what you mean by the fitment was bad, that would be great so we can improve for the HERMS coil welds. Obviously those holes will be larger than the couplings since the couplings will be half in and half out. Thanks

Edit: I just reread and though about it, and it seems like you guys are saying that the weld should always be right at the edge of the hole on the keg? So no matter if its a half coupler or not, always drill the hole just barely larger than the fitting? That way the weld bead will fully penetrate both sides? Am I correct? If so, should you actually be inserting the fitting into the keg very slightly too? I'm still not sure how the nut weld fitment could have been different, unless the hole should have been as close to the width of the nut as possible.

2nd edit: In hindsight, I guess it's not actually sanitary if there's a void where microbes could hide huh? In that case, these are definitely not sanitary by those standards
 
The drain hole (1/2" coupling) which was a half coupling had the hole drilled just larger than the ID of the threads and smaller than the OD of the coupling, so the fitting was resting on the keg, not inserted into it. I guess I should have drilled it enough to insert the fitting? I'm not sure here, since it won't have anything screwed in from the inside.

I think its just a matter of preference, either way will work fine. I think some people prefer to do it through hole mounted because its harder for slag to **** up your threads on the inside(i think?) if its not welded properly.

I have 10 1/2" holes on my 3 pots and they are all flush mounted on the outside like yours are...none of them have any issues screwing in on the inside.

Why are your herms coils half in half out? Who said thats necessary? All of my full couplers are flush welded like yours are. I never understood welding couplers through pots, it just makes difficult places you cant actually see under the coupling to clean properly. I just cant think of a valid reason to do half in half out for any fitting.

I dont remember exactly, but i think we used 5/8" holes for my 1/2" couplers.

Depending on the herms coil size you end up going with having your couplers half in half out could screw you. For example after compression fitting->50' 14" SS coil i can barely fit it in my 18" pot with maybe an inch to spare after its screwed into the fitting. It was a giant PITA to get in. If i had half in half out i dont think i could have gotten it in there.
2015-08-19%2017.44.24.jpg
 
Sorry it took a while to reply but I have been traveling for work. I'm glad u understand what I have been referring to as fitment bc the hole is the ID of the fitting and the weld is on the OD so there is space for bugs to hide. (Think if I was only one cell, where would I hide)

On the other hand we can take fire to it all on the hot side and should b ok.

For the herms u can go all in or all out or anywhere in between, that FITMENT is OD fitting through hole.

And lastly to clarify on the pre heat to weld, the thin wall on the kettle will heat faster than the thick heavy wall fitting. If you put some heat in the fitting first it will weld more even.
 
Here is a good example of fit, but a poor example of welding. The fitting should slip inside the kettle so it is flush with the inside. I will also admit that this was my first attempt at welding on a keg.

20160405_175536-1.jpg
 
Anyone nit picking the weld quality hasn't been around long enough to see just how low the bar has been set. They are pretty good. Who are we kidding though, as soon as you weld a threaded coupling in, the threads are 100 times less sanitary than the weld.
 
Finished the last two welds. Here are pictures of the inside surface for each one. I decided to go flush mount instead of half in half out, so the coil would sit more centered in the keg.

Not perfect, but definitely not bad. Had an oops moment of blowing a small hole, which is why there is a spot with that large bump since we had to fill that hole. Overall I think they look pretty damn good, especially for the cost of argon and filler rod, plus a few beers for a friend.

IMG_5861.jpg


IMG_5864.jpg
 
Glad to see that this thread helped you out. Those look much better, and they won't trap liquid like the others.
 
Glad to see that this thread helped you out. Those look much better, and they won't trap liquid like the others.

Yeah thanks! Too bad the MLT and boil kettle were already done (by the welder I refused to pay again). The part on the right side of the top picture (just under the big blob) looks like exactly what you'd want all the way around. My buddy is interested in doing more of this type of stuff too, so now I just have to find some more people in the area that need welding done. Thanks again though!
 
I have only welded triclover fittings in kegs. I cannot imagine how difficult it would be to weld a heavy coupler to an 18 gauge keg. It would just be putting heat into the collar, and whipping it down to the keg. A very dirty dance with the devil really. I wish I could get my hands on some keg tops that were cut out to practice on.
 
I have only welded triclover fittings in kegs. I cannot imagine how difficult it would be to weld a heavy coupler to an 18 gauge keg. It would just be putting heat into the collar, and whipping it down to the keg. A very dirty dance with the devil really. I wish I could get my hands on some keg tops that were cut out to practice on.

Yupper, big copper heat sink and lots of cool-blue heat sink paste. ®Cheat The Devil!
 
Back
Top