Brewie

Homebrew Talk - Beer, Wine, Mead, & Cider Brewing Discussion Forum

Help Support Homebrew Talk - Beer, Wine, Mead, & Cider Brewing Discussion Forum:

This site may earn a commission from merchant affiliate links, including eBay, Amazon, and others.
Brewie Support, Friday 11. January 2019. 12:02
Hello xxxx,

The difference between the 110V and 240V machines are only the fuses and the heaters, the rest is the same.

You can convert your 110V unit to a 240V one. By the way, as I can see, you had a perfect brew on the 8th of January. Just let me know, I send whatever you want, but as of now, if the machine works, I would not bother it.

The Amazon shop is ran by another company, the codes are not valid to that. However, you were right, the BEC500 was not working properly on our site. Thanks for drawing our attention tho this, it is fixed now.

Let me know how you wish to proceed.

Cheers;
Máté

Fresh email from Brewie tech support.... I had asked about converting to 220 because this lowers the amperage going though the connections that were defective by half that and I already had 220 installed in my brew area because I was expecting to have the Z2 up and running in my brew area 4-5 months ago. I do have a new code if anyone wants it you can pm me. It does not work on the Amazon website. So if you use it be sure to check that you are getting the best deal. $1599 from their site and it changes all the time on Amazon and I'm not sure who else has them.
 
Last edited:
Lol, nope, I would not built a beer making machine since I bough it to brew for me. I joint the forum for this element issue. If this pic can't convince you, nothing I can do.

I'm a technical person, working for 18 years in a buisness who built sofisticated equipment for the heavy steel industry, I do the engeniering of fully automated heavy equipment (electrical, automation, sensors etc) way more complex than a beer brewing machine. I have also a small buisness at home doing electronic and automation, I have a CNC router and a PCB making machine along with any need equipement required to do PCB assembling. We are unlucky to have been those first people trying a new design but this kind of things happen to me also sometime on my machine design and I can understand my customer when this happen, exept that when it happen to me on my systems it cost way more pesos to send me to china or anywhere to fix the problem cause a whole productionline is stoped. I can easily imagine those guys at brewie, who worked hard to develop this nice machine, who work wel and look nice, trying to satisfy many people with some issue. they will solve those issue, i'm certain, or else all their work will be history, and I'm more of a half full glass personne.

Slice of life, To go foward in life and creating something new, we have to take risk, we should not let fear run our lifes. When I spent 500+houres designing a new industrial system with 300000+$ of Allen Bradley or Siemens PLC and electrical components and I push the ORDER MATERIAL bouton... I always have doubt about what could happen when everything will be assembled, will it work, is the motor and drive well sized for the job, did I forgot something essential, etc... risk, in life we take risk, and when we are unlucky, we get up and fix the thing, that's my way of living.

Have a good WE guys, friday, I will take some beer!! ;-)
Fair enough!! Thanks for sharing your expertise with us!!!
 
Brewie Support, Friday 11. January 2019. 12:02
Hello xxxx,

The difference between the 110V and 240V machines are only the fuses and the heaters, the rest is the same.

You can convert your 110V unit to a 240V one. By the way, as I can see, you had a perfect brew on the 8th of January. Just let me know, I send whatever you want, but as of now, if the machine works, I would not bother it.

The Amazon shop is ran by another company, the codes are not valid to that. However, you were right, the BEC500 was not working properly on our site. Thanks for drawing our attention tho this, it is fixed now.

Let me know how you wish to proceed.

Cheers;
Máté

Fresh email from Brewie tech support.... I had asked about converting to 220 because this lowers the amperage going though the connections that were defective by half that and I already had 220 installed in my brew area because I was expecting to have the Z2 up and running in my brew area 4-5 months ago. I do have a new code if anyone wants it you can pm me. It does not work on the Amazon website. So if you use it be sure to check that you are getting the best deal. $1599 from their site and it changes all the time on Amazon and I'm not sure who else has them.

It will surely help a little to have less curent running thru the elements connections, that was my guess on one of my first post on this forum, but after further investigation and some monitoring, I realised that the resistive heating of the terminals wasn't the real problem (it is probably part of the problem after the therminals exceed the manufacturer max temp). The real problem is the heat radiating from the element that can't go anywere since the entire area is covered with an insulating blanket. At the end, with 120 or 240V, teh result will be the same power running thru the element and the same heat lost in the therminal area. Ventilation seams to be the best solution for now.
 
Below is the message I received after asking if the overheating connection/wire issues have been resolved on units currently shipping. It sounds like this alone may not fully resolve the issue without ventilation?

Maybe I missed it, but are there pictures of the fan and connections that should be made when adding in then fan solution?


Yes, the machines that we ship are from the second batch, where new, upgraded wires are built-in with more strict quality checks.

Let me know if you have further questions.

Cheers;
Brewie Support
 
I w
Maybe I missed it, but are there pictures of the fan and connections that should be made when adding in then fan solution?

I will post pictures of my fan setup /repair when I have mine apart again. I do need to take min apart again just to check the work I did and make sure that the heat is being removed well enough I don't have the equipment to test temperature without causing a shock/short hazard. My temperature probe is stainless steel.

The fan connection I made on mine goes to the 12 volt power supply which is 3 amp. I'm sure I should probably change it and put in a separate supply. The 2 fans I used are under a half an amp combined. My other option was to search out more efficient fans and replace the 2 that came installed on the machine that way I can hook them into the automatic switching circuit. Finding anything locally is a real pain.... home depot, Menards, best buy, 1 automotive store and Ace hardware just to find the spade connectors. And the only fans I found were the larger case cooling fans at best buy. None of them had smaller chip cooling size fans.
 
I w


I will post pictures of my fan setup /repair when I have mine apart again. I do need to take min apart again just to check the work I did and make sure that the heat is being removed well enough I don't have the equipment to test temperature without causing a shock/short hazard. My temperature probe is stainless steel.

The fan connection I made on mine goes to the 12 volt power supply which is 3 amp. I'm sure I should probably change it and put in a separate supply. The 2 fans I used are under a half an amp combined. My other option was to search out more efficient fans and replace the 2 that came installed on the machine that way I can hook them into the automatic switching circuit. Finding anything locally is a real pain.... home depot, Menards, best buy, 1 automotive store and Ace hardware just to find the spade connectors. And the only fans I found were the larger case cooling fans at best buy. None of them had smaller chip cooling size fans.


Thanks. And thanks for your help identifying a solution. I'm curious if Brewie's "fix" included upgraded fans...Do you happen to know what the size of fan in mm you were looking for as replacements of the factory installed fans? Perhaps something on Amazon or NewEgg or the like would have them?
 
Here is the fan that I used for the supplemental cooling (same one as Iron). It only draws .11A. I drilled one small hole into the metal plate and secured the fan with a small screw and locking washer nut that I found at my local hardware store.

I couldn't find this fan local either so I ordered one from ebay and one from Digi-key. Digi-key came in about two days, ebay took a week or so.

http://rover.ebay.com/rover/1/711-5...0001&campid=5338413729&icep_item=264115185726

https://www.digikey.com/products/en?keywords=NMB-MAT 1606KL-04W-B50-L00 Axial Fan
 
When doing the thermal test with the fan and the thermocouple, my goal was to cool the area and not trowing too much heat in the Brewie. the raison of the insulating blanket it probably to help boilling and also to protect from the heat the electronic in the middle of the 2 tank. there is enought venting in the area with the bottom fan and as tested with Harkin, Half the surface area of a small 40mm fan is enought (using the hole on the bottom of the mounting plate).
 
Thanks. And thanks for your help identifying a solution. I'm curious if Brewie's "fix" included upgraded fans...Do you happen to know what the size of fan in mm you were looking for as replacements of the factory installed fans? Perhaps something on Amazon or NewEgg or the like would have them?

I'm not the original for the fan solution I think it was iron ... but with the knowledge I have of electronics and electrical system as limited as it is, I concluded that it was good path to go. Although I did cut the mounting plate a little bit so that the fan blades are not covered by the mounting plate at all. I ended up not buying any fans , I salvaged the one I used on the mash side from a dead computer processor and the other I had salvaged from something else years ago and it is slightly larger. Again I will get pictures when I can.
 
New email from Brewie. I told Máté to that I post on Home Brew Talk and that if ther was anything that he wanted me to pass along to let me know. So here is the latest......

Based on Customers' feedback, the upgraded wires do their job, plus it is reasonable to keep the 110V parts in the US. If you send me your shipping address, I can send you a set of 2nd generation wires (and whatever else you need for the machine).

Unofficially, I don't have any stock info from our distributors, they may have a few machines, but the batch you are referring to has ran out from our warehouse, we are not selling those anymore, and the next generation has new wires, which are more reliable.

Regarding your next mail:
- the countdown function with more precise process descriptions are on the way
- App notifications under development
- Whirlpool hopping: the so called Developer Mode will address this issue with full manual control over the machine (0 minute hops are not added, this has been solved in the 3.1)

Cheers;
Máté

As you can see they are working hard getting issues solved and still working on the software. I had asked him about a more precise countdown function because adding adjuncts like honey just doesn't work if you have no idea how much time is left. And honey is one of those things that is sensitive to boiling. I also asked about an alarm when specific time remaining in the boil is met and about a pause in action until you tell it to continue.... Again for adding adjuncts.
The third thing I brought up was adding the option for whirlpool hopping.
The fourth thing I brought up was the glitch in my first brew that froze the machine when I wanted to add hops at flame out (0 minutes) . My machine continued to boil but the clock stopped counting down and percentages stopped moving. And touching the screen didn't do anything. Fortunately they thought ahead on this machine and you can unplug it and then plug it in and reboot. It will then ask you if you want to continue where you left off. Minor inconvenience but he!! Of a lot better than losing a brew. In my opinion an ingenious solution to computer errors. Something that all of us older people are all too familiar with but seems like it doesn't happen nearly as often now days and back in the day would cause a loss of data about every time.
A couple of things I asked about but were not addressed in this email were adding honey to the ingredients list and adding a notes section. If my son is using my machine having notes to look at would be very beneficial to him with his lack of brewing experience etc...

Finally I still have a functioning code for a $500 discount that works on the Brewie site. They said I could pass it along so if you would like it just send me a pm and I will pass it along.
 
Last edited:
Thanks Still Brewn & Iron for posting all the info. Pulled the trigger and ordered the B+ and canceled my Z1 order. I have my Zymatic still and a 240v High Gravity eBIAB setup so I'll likely be selling my Zymatic once I get the B+ up and running.

Couple simple questions. How is your beer coming out on the B+ and I am partial to hop bombs, anyone supplementing late addition hops with a mesh basket for late addition/whirlpool hops (I saw the manual say 1.4oz limit on the hop cages) Do you most folks use a 3rd party recipe crafter like Beersmith for building recipes?
 
I have only done 3 brews and do not care for ipa's so I can't answer anything towards those. I can tell you the hop cages will float if you have that lid open and the flow is on to a cage. My brews have all been experimental to test times, timings and ease of use. So really haven't tested for consistantancy yet but I have a feeling it will be dead on.
I did an American Amber numbers came out above what the machine said they would be. But I was experimenting with protine rests and how that would affect the length of brewing time. Beer came out nice that is a picture to the left. Not one of my best but not a bad beer and it was all but gone from one small family get together.
The Whiskey Barrel Stout This was a leftover extract conglomeration of miscellaneous stuff pretty much an extract kit I got as a gift some time back (more than a year). Since I'm unable to brew without help and the last of my kids moved out this year it just sat around. It came out better than expected I exchanged some of the old grains for new /different and it is pretty much all gone also from a party over this weekend.
And lastly I have a Honey Brown in the fermenter that came out where my math said it should be but since Honey is not on the menu yet the machine did not have accurate numbers for me.

All 3 are fairly light beers and I have gotten very good efficiencies from my mash because of my light grain bill. 85% for the Honey Brown and lowest was the American Amber at 75% but it was also the heaviest grain bill. And I'm sure my sparging time and the addition of rice hulls is helping.
 
Got an update from Máté today... nothing new. Just sending new wires to me and partially answered a question I had about a possible issue I may be having with the mash tun lid. I had asked him about adjustment procedures and if there were any special instructions or alignment tools needed. With the tension on the hinge pins that is able to hold the weight of the lid I didn't want to break/screw the hinges up. Not saying that I couldn't figure it out on my own I just want to be prepared before I start.

On another note..... what is the best (easiest) way to post a picture here. Other that this site I have no facepage or anything like that and when I clicked on the little picture it asked for a url. Does that mean I have to get a friendbook or something like that?
 

Attachments

  • 15476857536701245653296.jpg
    15476857536701245653296.jpg
    1.2 MB · Views: 151
Got an update from Máté today... nothing new. Just sending new wires to me and partially answered a question I had about a possible issue I may be having with the mash tun lid. I had asked him about adjustment procedures and if there were any special instructions or alignment tools needed. With the tension on the hinge pins that is able to hold the weight of the lid I didn't want to break/screw the hinges up. Not saying that I couldn't figure it out on my own I just want to be prepared before I start.

On another note..... what is the best (easiest) way to post a picture here. Other that this site I have no facepage or anything like that and when I clicked on the little picture it asked for a url. Does that mean I have to get a friendbook or something like that?

Just pull that lid from the side and it will close properly. I have the same fitment tolerance.
 
Just pull that lid from the side and it will close properly. I have the same fitment tolerance.

Máté said the same thing but after doing that i was only able to get it to close again but it still hits the plastic surround of the screen. Bending a hinge is never a good solution for fixing things I would rather adjust it properly. Before my last brew it fit and had an even gap on the entire left side along the other lid.
 
If anyone has ingredients they would like added to the Brewie menus let me know and I will pass it along.
Here is the list I have so far.....
Fermentables-
Triticale Malt 2L (Epiphany Craft Malt)
Epiphany Chocolate Triticale Malt, 500L (Epiphany Craft Malt)
Honey
Belgian Candi - all varieties
Sugar - beet, cane, corn, brown multiple varieties, whole or unrefined sugar
Molasses
Agave
Maple syrup


Hops-
Lemondrop

I'm sure there are a ton of other things missing but I'm sure that if we work together we can get thing moving a little faster so they aren't reading a hundred emails with the same things instead of working on the software.
 
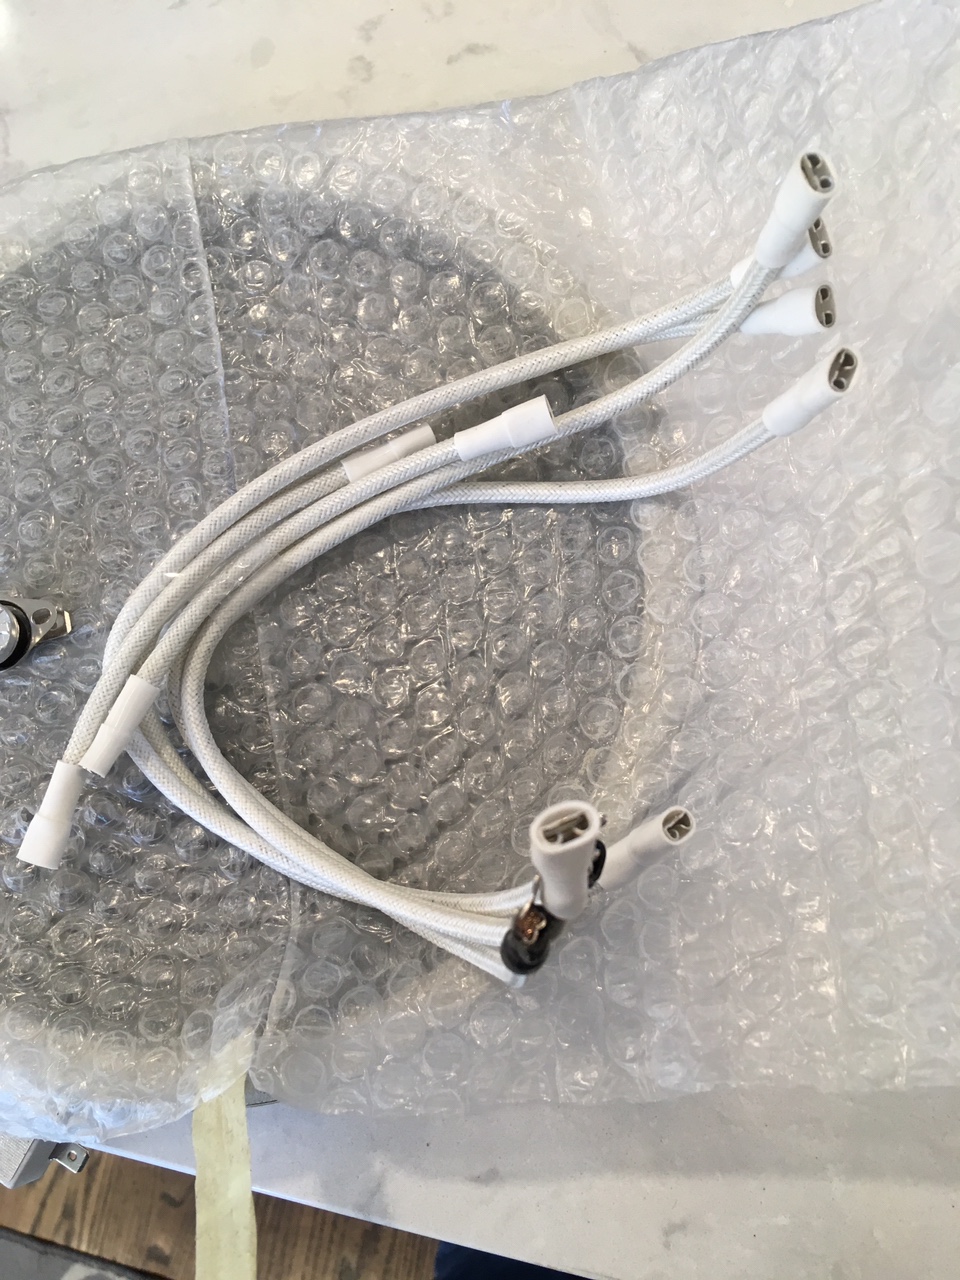
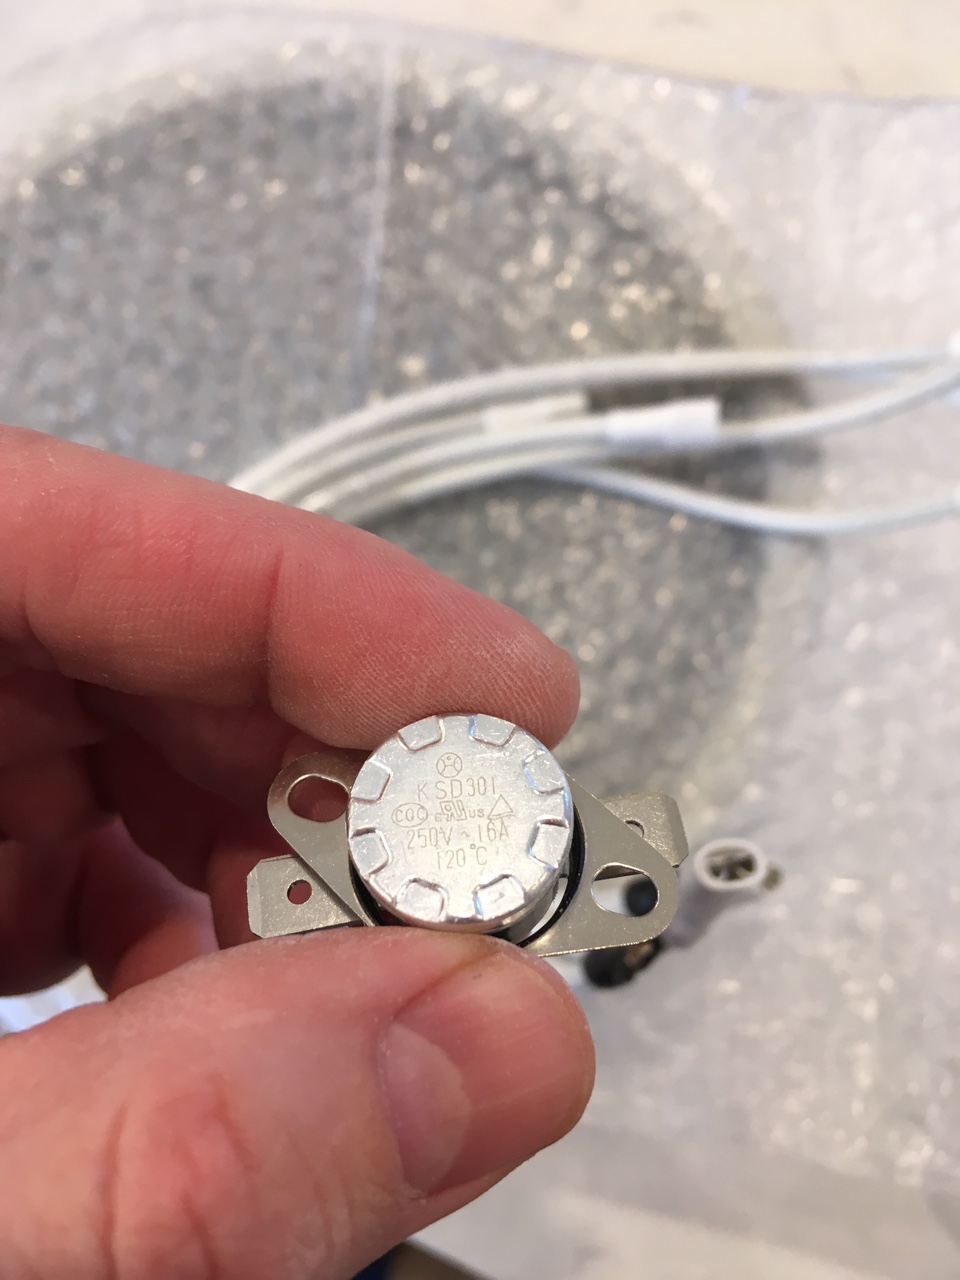
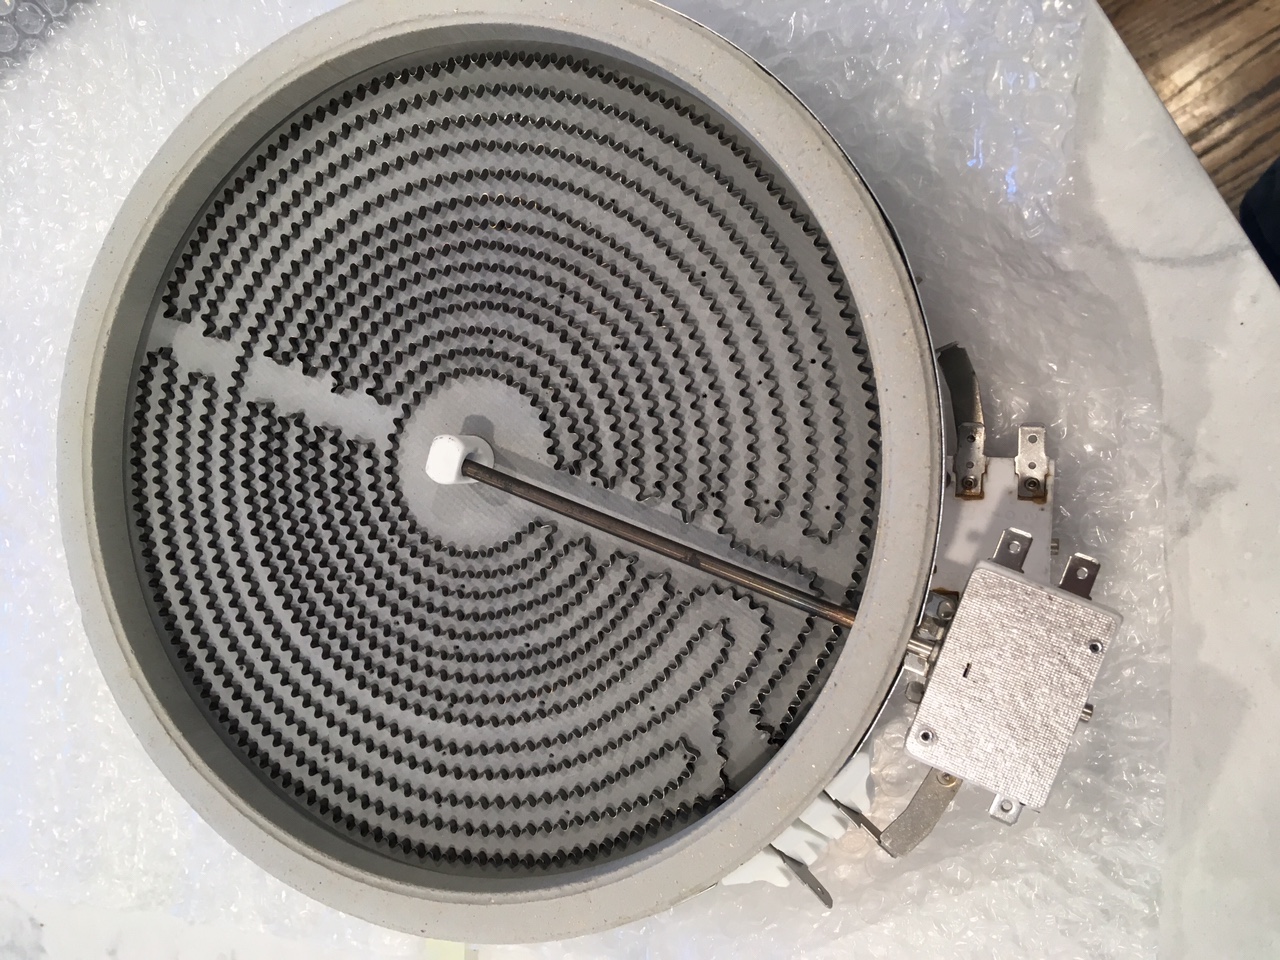
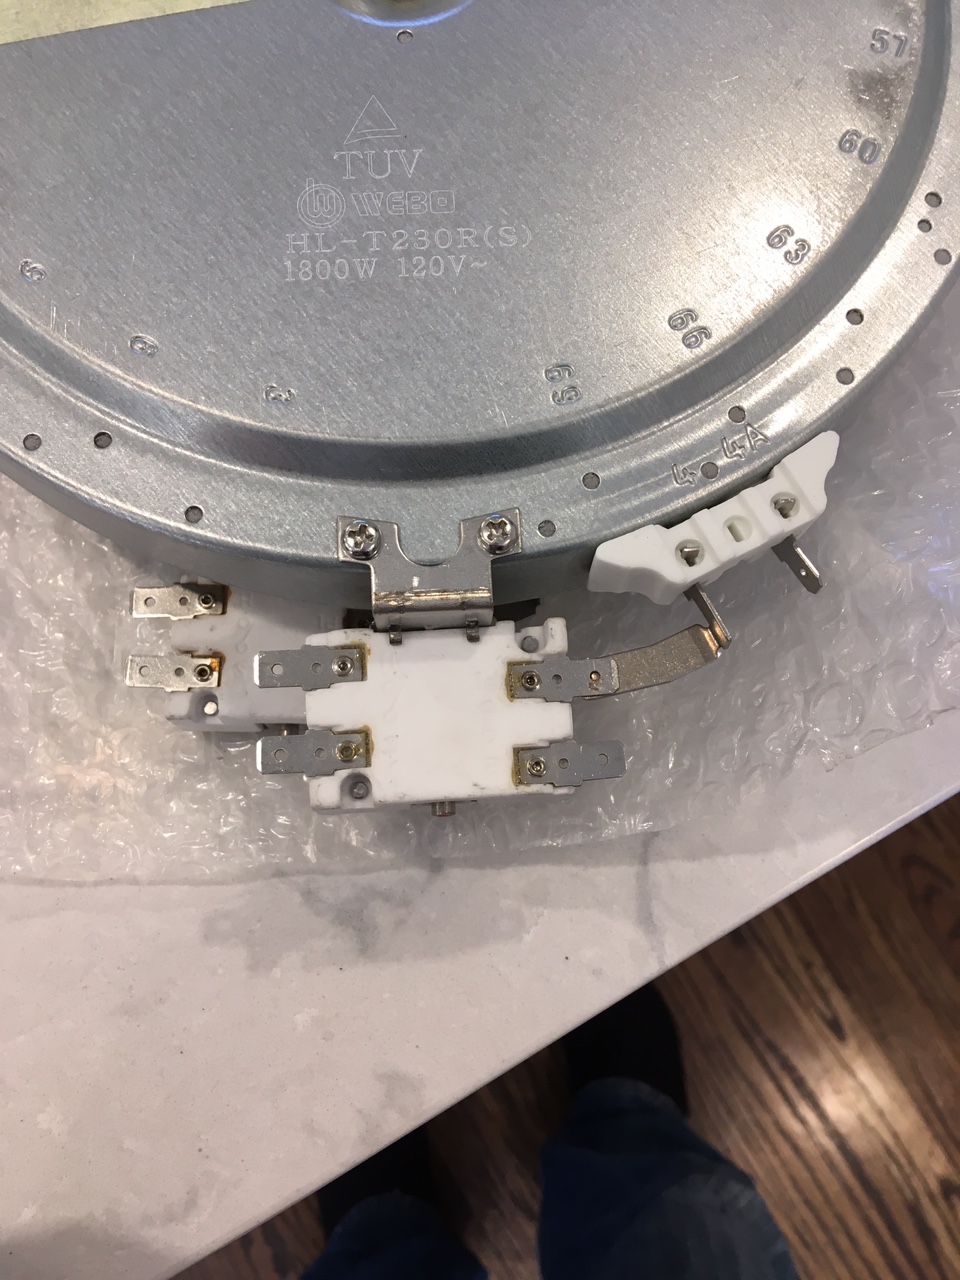
Got a little care package from Hungary. Two new elements, wires and two thermal cutoff switches. The wire connections are covered in silicone tape, much like I have wrapped mine already. The thermal switches are 120C. Nice to see these parts if we ever have to source them independently.

IMG_0572.JPG
IMG_0573.JPG
IMG_0574.JPG
IMG_0576.JPG
 
Very nice. Máté sent me an email on Saturday saying my wires are on the way. I don't need any of the other stuff it all still works. Still waiting for a response to my suggested fix for our lid issue.
 
Crazy that they are "letting" you do your own repairs. Plus people here determining work-arounds and fixes. They should be owning the engineering flaws and taking responsibility for them without cost, pain, or aggravation to the end users. I just cannot fathom, how for several years now, they have mistreated their customers continuously. The leadership there clearly has a warped culture when it comes to taking care of their customers.
 
Crazy that they are "letting" you do your own repairs. Plus people here determining work-arounds and fixes. They should be owning the engineering flaws and taking responsibility for them without cost, pain, or aggravation to the end users. I just cannot fathom, how for several years now, they have mistreated their customers continuously. The leadership there clearly has a warped culture when it comes to taking care of their customers.

I don't feel in any way mistreated and every response from them has been helpful. They are taking full responsibility for the wiring issue even though it was a defect caused by the company assembling the Brewie using inferior parts. They are working on software issues which are minor and are still in the testing phase of the Brewie phone ap. I have the knowledge to do my own repairs and feel perfectly comfortable doing them. If you bought one and are not able to do your own repairs you are able to send it in for repairs at no cost as it would still be under warranty. There are repair places here in the states so your machine won't be gone for too long. I happen to catch my wiring issue after/during my second brew because I paid attention to what it was doing and it didn't have time to do damage to any other parts other than the spade connectors.
Additionally, you mention "warped culture".... If you have been paying attention to the news coming out of Hungary you should be giving anyone living there a break. You are damn lucky to be living here or anywhere in North America for that matter. The "slave law" that just passed should make you thank your lucky stars that you don't have to live there. A quick rundown of the slave law..... employers can make you work up to 400 hours of overtime a year, can pay you at regular hourly rate, can take 3 years to pay you for the overtime. They also have one of the lowest minimum wages in th EU even though they have raised it quite a bit recently. Roughly half what they make in France, germany and about a third of the average wage in the US. Only about 5000 more than the average wage in mexico.
 
I decided to order a Brewie+ on a great Boxing Week sale at $2000 CDN... and then I discovered this thread (read it all!), and have gone from depression to somewhat optimistic about the purchase. I want to thank everyone on this thread for the education and contributions.

I still haven't seen my Brewie+ as it is a post-tour present to myself after I finish up in Afghanistan in July. This said, I am assuming that I will have the wiring issue that has been described and will fix this before turning on the machine for the first time. I have a few questions as I want to ensure that I start off on the right foot and optimise my brewing experience from day one with the B+.

Are there also issues with the heating element or just the wires that I should be concerned about?

Is Iron's fan upgrade still required with the wires upgrade?

Thank you for the wonderful design and testing the mash basket at Arbor Fab. I'm going to order the 600micron basket unless someone talks me into the 400.

Best regards to all. Keep brewin' (I miss my eBIAB set-up).
 
I decided to order a Brewie+ on a great Boxing Week sale at $2000 CDN...

Are there also issues with the heating element or just the wires that I should be concerned about?

Is Iron's fan upgrade still required with the wires upgrade?

Thank you for the wonderful design and testing the mash basket at Arbor Fab. I'm going to order the 600micron basket unless someone talks me into the 400.

Did you order from Brewie? If yes the wiring is already taken care of, per Máté. I posted an email I got from him on that issue.
The fan upgrade that iron did I did also even though i repaired my wires, I would rather head off any future problems now than have to take the machine apart repeatedly.
When you get your machine be sure to do the water rinse thing. It will also need to be turned on and off several times. The Brewie will only perform 1 firmware / software upgrade each time it is turned on. Right now the version of firmware is 7 and software is Maibock 3.0.16 . To get this info use the menu button in the upper right corner and drag the menu up to find "About" and select it. There are a number of things that don't work as expected until all of the upgrades have been installed. Like the drain pause button won't do anything.
After your machine has been fully upgraded (you may be required to do a couple of things during this process... 1 is the new machine water purge and 2 is calibration) you can start playing with it. If I had to do it over again I would run a the test brew just so I could see how the machine reacts while brewing. You can cancel the test brew at any time just like any other brew.
A couple of other hints.... The calibration process is not near as sensitive to disturbance as it was but will not work properly until the machine is fully updated. (Thanks for telling me Brewie). After trying 4 times and wasting a bunch of water and several hours trying to find something to help me get it done right I shut off the machine and gave up. It wasn't until the next day when I turned on the machine and it upgraded again that I realised that it wasn't finished with the software / firmware updates. I had levels out and everything thinking I was doing something wrong. You will want a scale for the calibration and a couple of large containers to make the process faster.... clean milk jugs?.... be sure to tare your scale before you fill the jugs.

The short wash sucks and needs to be reworked to clean the hop cages better. To better clean this area after you have used the short clean go to the main menu and select "Extras" then select "Full Drain" unselect the boil kettle and mash tun. Next fill the hop cage areas with water it will take about 3 quarts of water to get them full. I use hot water. After they are full use your soft scrub brush with a handle to scrub the inside of each one. Refill each with water and press drain. I find doing this twice gets them clean.
Input of recipes .... deleting them can be a pain sometimes it works, sometimes not. I usually have to do it twice on the phone app and once on the machine. Make sure you do it on both before you do anything else or it may reappear on one or the other.
 

Attachments

  • 20190125_094526.jpg
    20190125_094526.jpg
    1.3 MB · Views: 93
  • 20190125_100331.jpg
    20190125_100331.jpg
    1.3 MB · Views: 77
  • 20190125_100350.jpg
    20190125_100350.jpg
    1.3 MB · Views: 84
  • 20190125_100401.jpg
    20190125_100401.jpg
    1.2 MB · Views: 79
  • 20190125_100412.jpg
    20190125_100412.jpg
    1.3 MB · Views: 85
Thanks for posting the added tips! My Brewie and brew basket arrives today. Looking forward to messing around with it.
 
Sure thing, I know there are more things but I had to get to the brew store and I have to take a nap before I brew tonight, I don't want to fall asleep while brewing.... again. I know there are pictures I need to post of my fan setup I am just waiting for my new wiring to show up before I open it up again.
 
Did you order from Brewie? If yes the wiring is already taken care of, per Máté. I posted an email I got from him on that issue.
The fan upgrade that iron did I did also even though i repaired my wires, I would rather head off any....

@Still Brewn Thanks ever so much for your generous advice! I'll follow it completely.

With regard to my B+, I purchased it from a vendor from Winnipeg, Canada, early January. I guess I'll have to get the serial number and check with Máté to see if it is an early or late production run model (I can't inspect the unit myself at the moment).

Thanks again!
 
@Still Brewn
With regard to my B+, I purchased it from a vendor from Winnipeg, Canada, early January.
Most likely the older wiring. If you want to get a jump on it, email customer support and explain the situation, be sure to give date of order and when it was delivered and maybe you can have a new wiring set waiting for you when you get back home. Or if you have someone taking care of your things while you are away have them unpack it (follow instructions to avoid damage) and plug it in and get the serial number...... nevermind I just went and looked, the serial number is on a sticker on one end of the box. You should be able to email customer support with a picture of that and get a new wiring set on the way. That is if you have someone that can get you a picture. Should look something like this one.
 

Attachments

  • 20190126_101812.jpg
    20190126_101812.jpg
    1.4 MB · Views: 125
Another note that has never come up and I'm surprised that it hasn't, 20 amp plugs/wiring. To keep from burning your house down or constantly blowing your fuses/tripping circuit breakers this has to be used on a 20 amp circuit. We have a 105 year old house so I had to install a circuit for mine. Good thing I did because during the process I ran across the wiring that goes out to the garage. 30 amp circuit on 14 gage wire with a connection that had been overheated enough that it only took a flick of the finger to break the wire. Even worse this was in an attic space that had 2 feet of wood fiber insulation over it. It would have burned forever before we knew there was an issue. Anyway back to the potential issue some may have. You will want a 20 amp circuit with 12-2 wiring and an outlet that can handle 20 amps. If you have an older home like mine assume that it is wrong in some way and have it checked. If you are in a newer home you can go to the breaker box and find the breaker for the outlet you are planning on using. Should say 20A on the end. If it says 15A you need to have it rewired from the breaker box to the outlet to get rid of the 14-2 wiring. This includes the breaker, wiring and outlet or you have to find a different circuit to use. On houses that had 15A (15 amp) circuits installed usually had 20 amp circuits installed in the laundry area and sometimes kitchen. Could be worse though..... back in the day I rented an apartment that had one 10 amp circuit for the entire apartment. Now that was a pain in the a$$.
 
Also, if you need to change breakers/wiring, add a GFCI outlet or breaker.

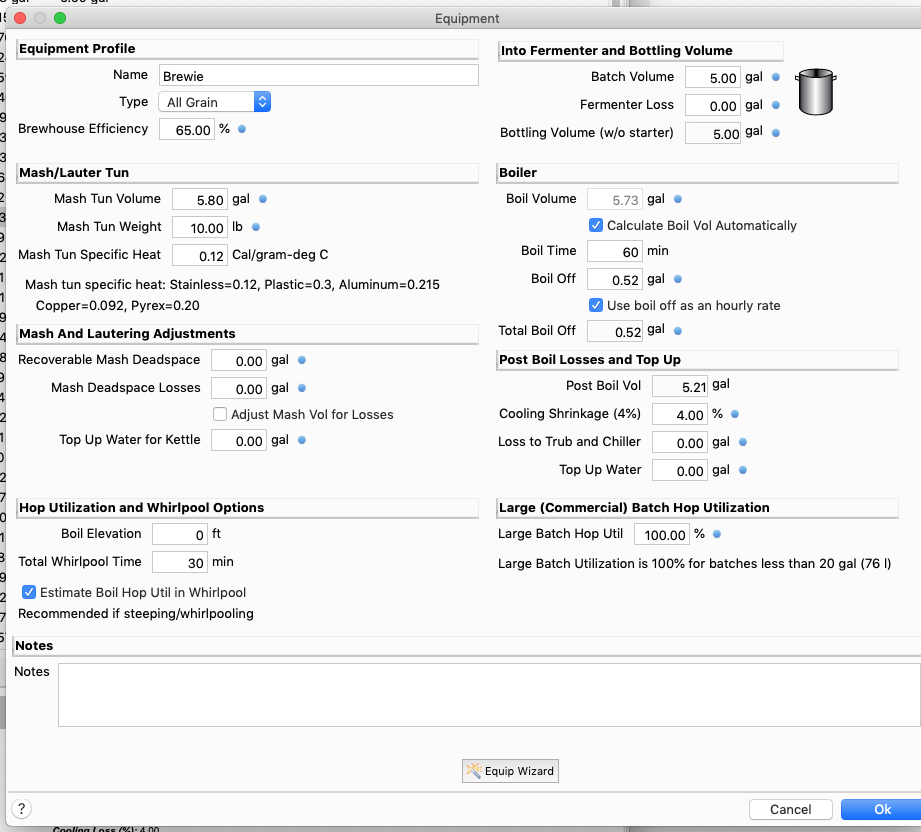
My first experience with the recipe crafter left a lot to be desired. I like to see everything on one page. I have a Zymatic which has its own recipe crafter issues but better than building it from the units screen. I also use Beersmith for my eBIAB. I saw they had a guide on Brewie's site for the Beersmith profile but wanted to confirm I had it right if anyone uses Beersmith. I wasn't sure if I needed to add anything for Mash / Lautering losses? Below is what I have entered so far...

On a side note...I took the advice to run a test brew w/o ingredients....just a reminder if you do that, please adjust the total water down a gallon or so as you need to account for not loosing any water to absorption and there is potential for overflow once you get to the boiling step....I was about a 1/2" from the rim when I aborted to drain.


upload_2019-1-26_22-41-58.png
 
Also, if you need to change breakers/wiring, add a GFCI outlet or breaker.


On a side note...I took the advice to run a test brew w/o ingredients....just a reminder if you do that, please adjust the total water down a gallon or so as you need to account for not loosing any water to absorption and there is potential for overflow once you get to the boiling step....I was about a 1/2" from the rim when I aborted to drain.
View attachment 609379
Good idea in the GFI outlet or you can use GFI breaker...
Sounds like there is another issue with your machine if you used the test brew that was inluded with the recipies installed when you got your machine. I had no issues and didn't even come close to filling the Brewie. I will look and see what the numbers are for mine and post in a bit. Right now I have to go transfer a beer to secondary.


*************** NOTE....... NOTE ...... VERY BIG NOTE *************

When you do a clean or anything else but especially a clean cycle, double check that the hoses are not kinked near the back of the machine. During the clean it is not measuring the water and if the outlet hoses are kinked it will not expell enough water to keep up with the amount of water coming into the machine. It WILL overflow if you are not paying attention. And it will continue to overflow until the clean cycle is finished if allowed to. Fortunately they thought ahead and you can press the cancel button at any time and then go to the drain menu.
 
Yeah, didn’t see the test brew.... I just ran one of the included recipes w/o the ingredients
 
Mmmm... that shouldn't make a difference. Water is measured only on the boil tank side and is measured by a pressure sensor. I would run the calibration on the machine again. The machine has popup warnings if you enter a recipe and the water settings are not right.but this is not the case for you. Either your calibration of the machine is off or maybe the pressure sensor is bad..... just my opinion I'm not saying this is fact. Here is what I would do....
1. Recalibrate machine
2. Run the same brew cycle again
3. If it comes to overflow levels email tech support

1. Recalibrate machine
2. Read the recipe and measure the appropriate amount of water that it says for mash in and pour in boil tank
20190127_003126.jpg
20190127_003246.jpg
20190127_003155.jpg
20190127_003126.jpg

3. Mark tank so it will still be there after draining
4. Go to drain menu and unselect the hop tanks and mash tank then press drain all
5. Run the same brew recipe
6. When it is finished filling with strike water check to see that is right about where you placed your mark
7. If it is way off your mark email tech support

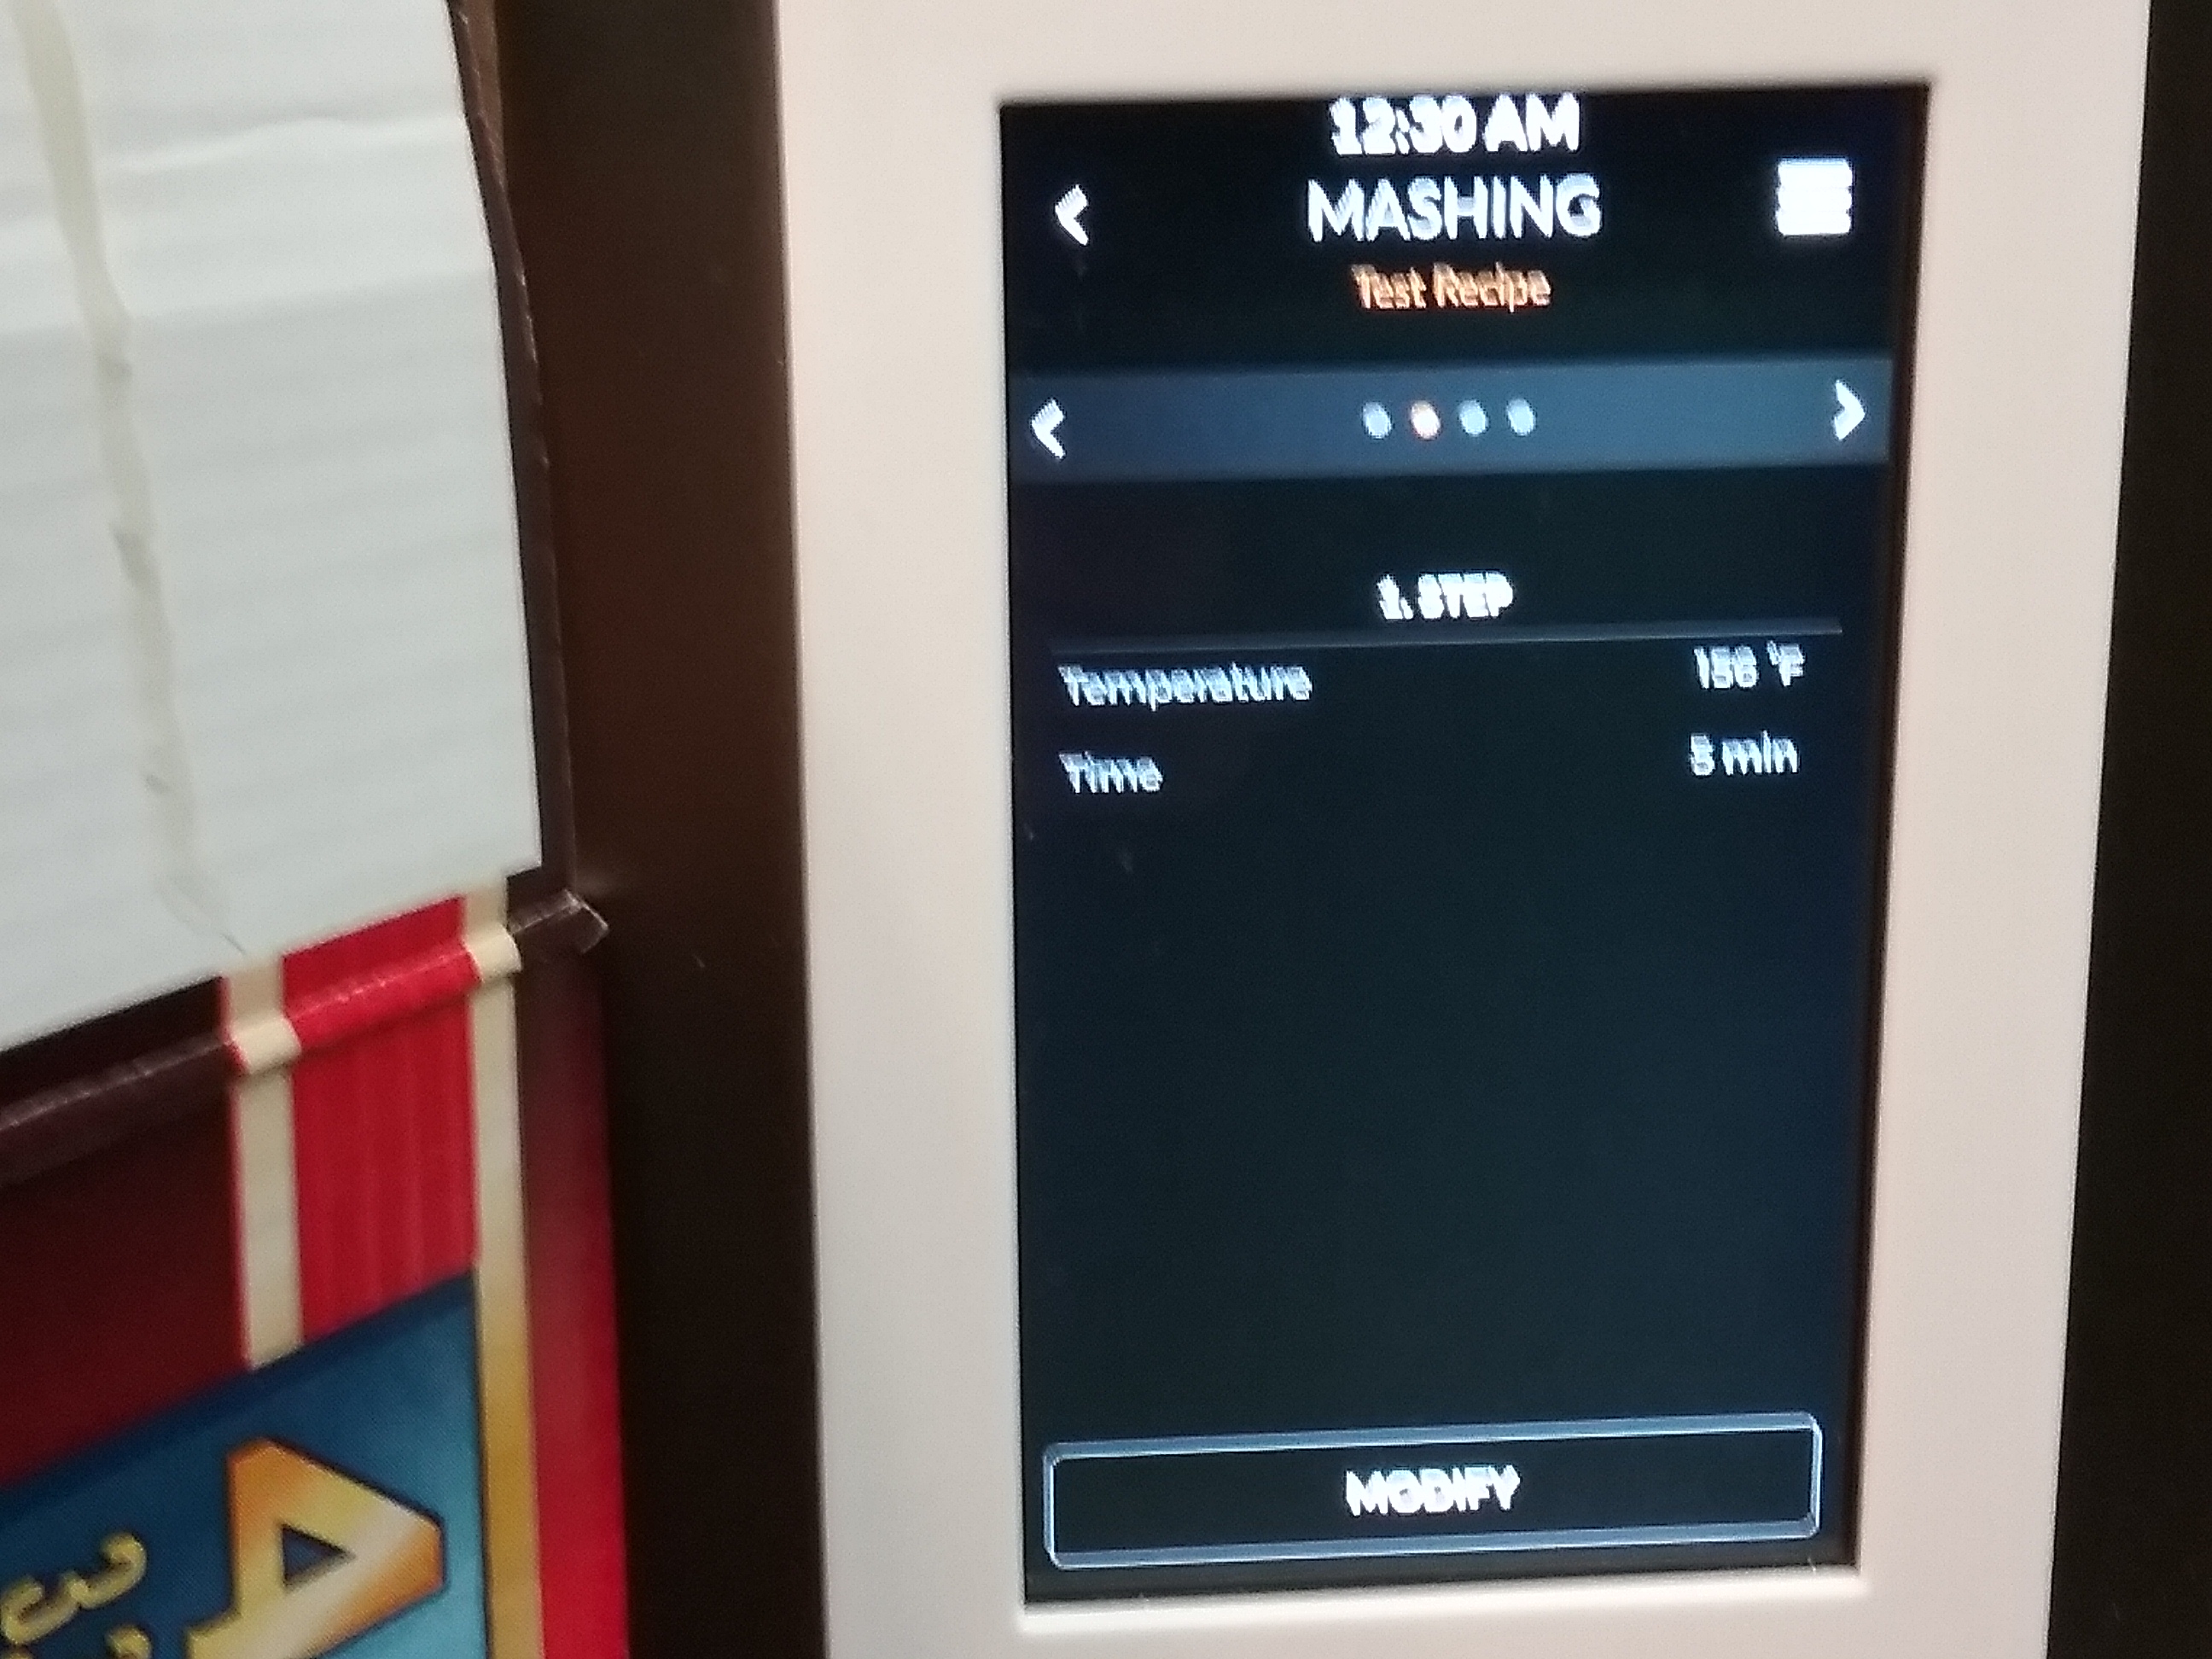
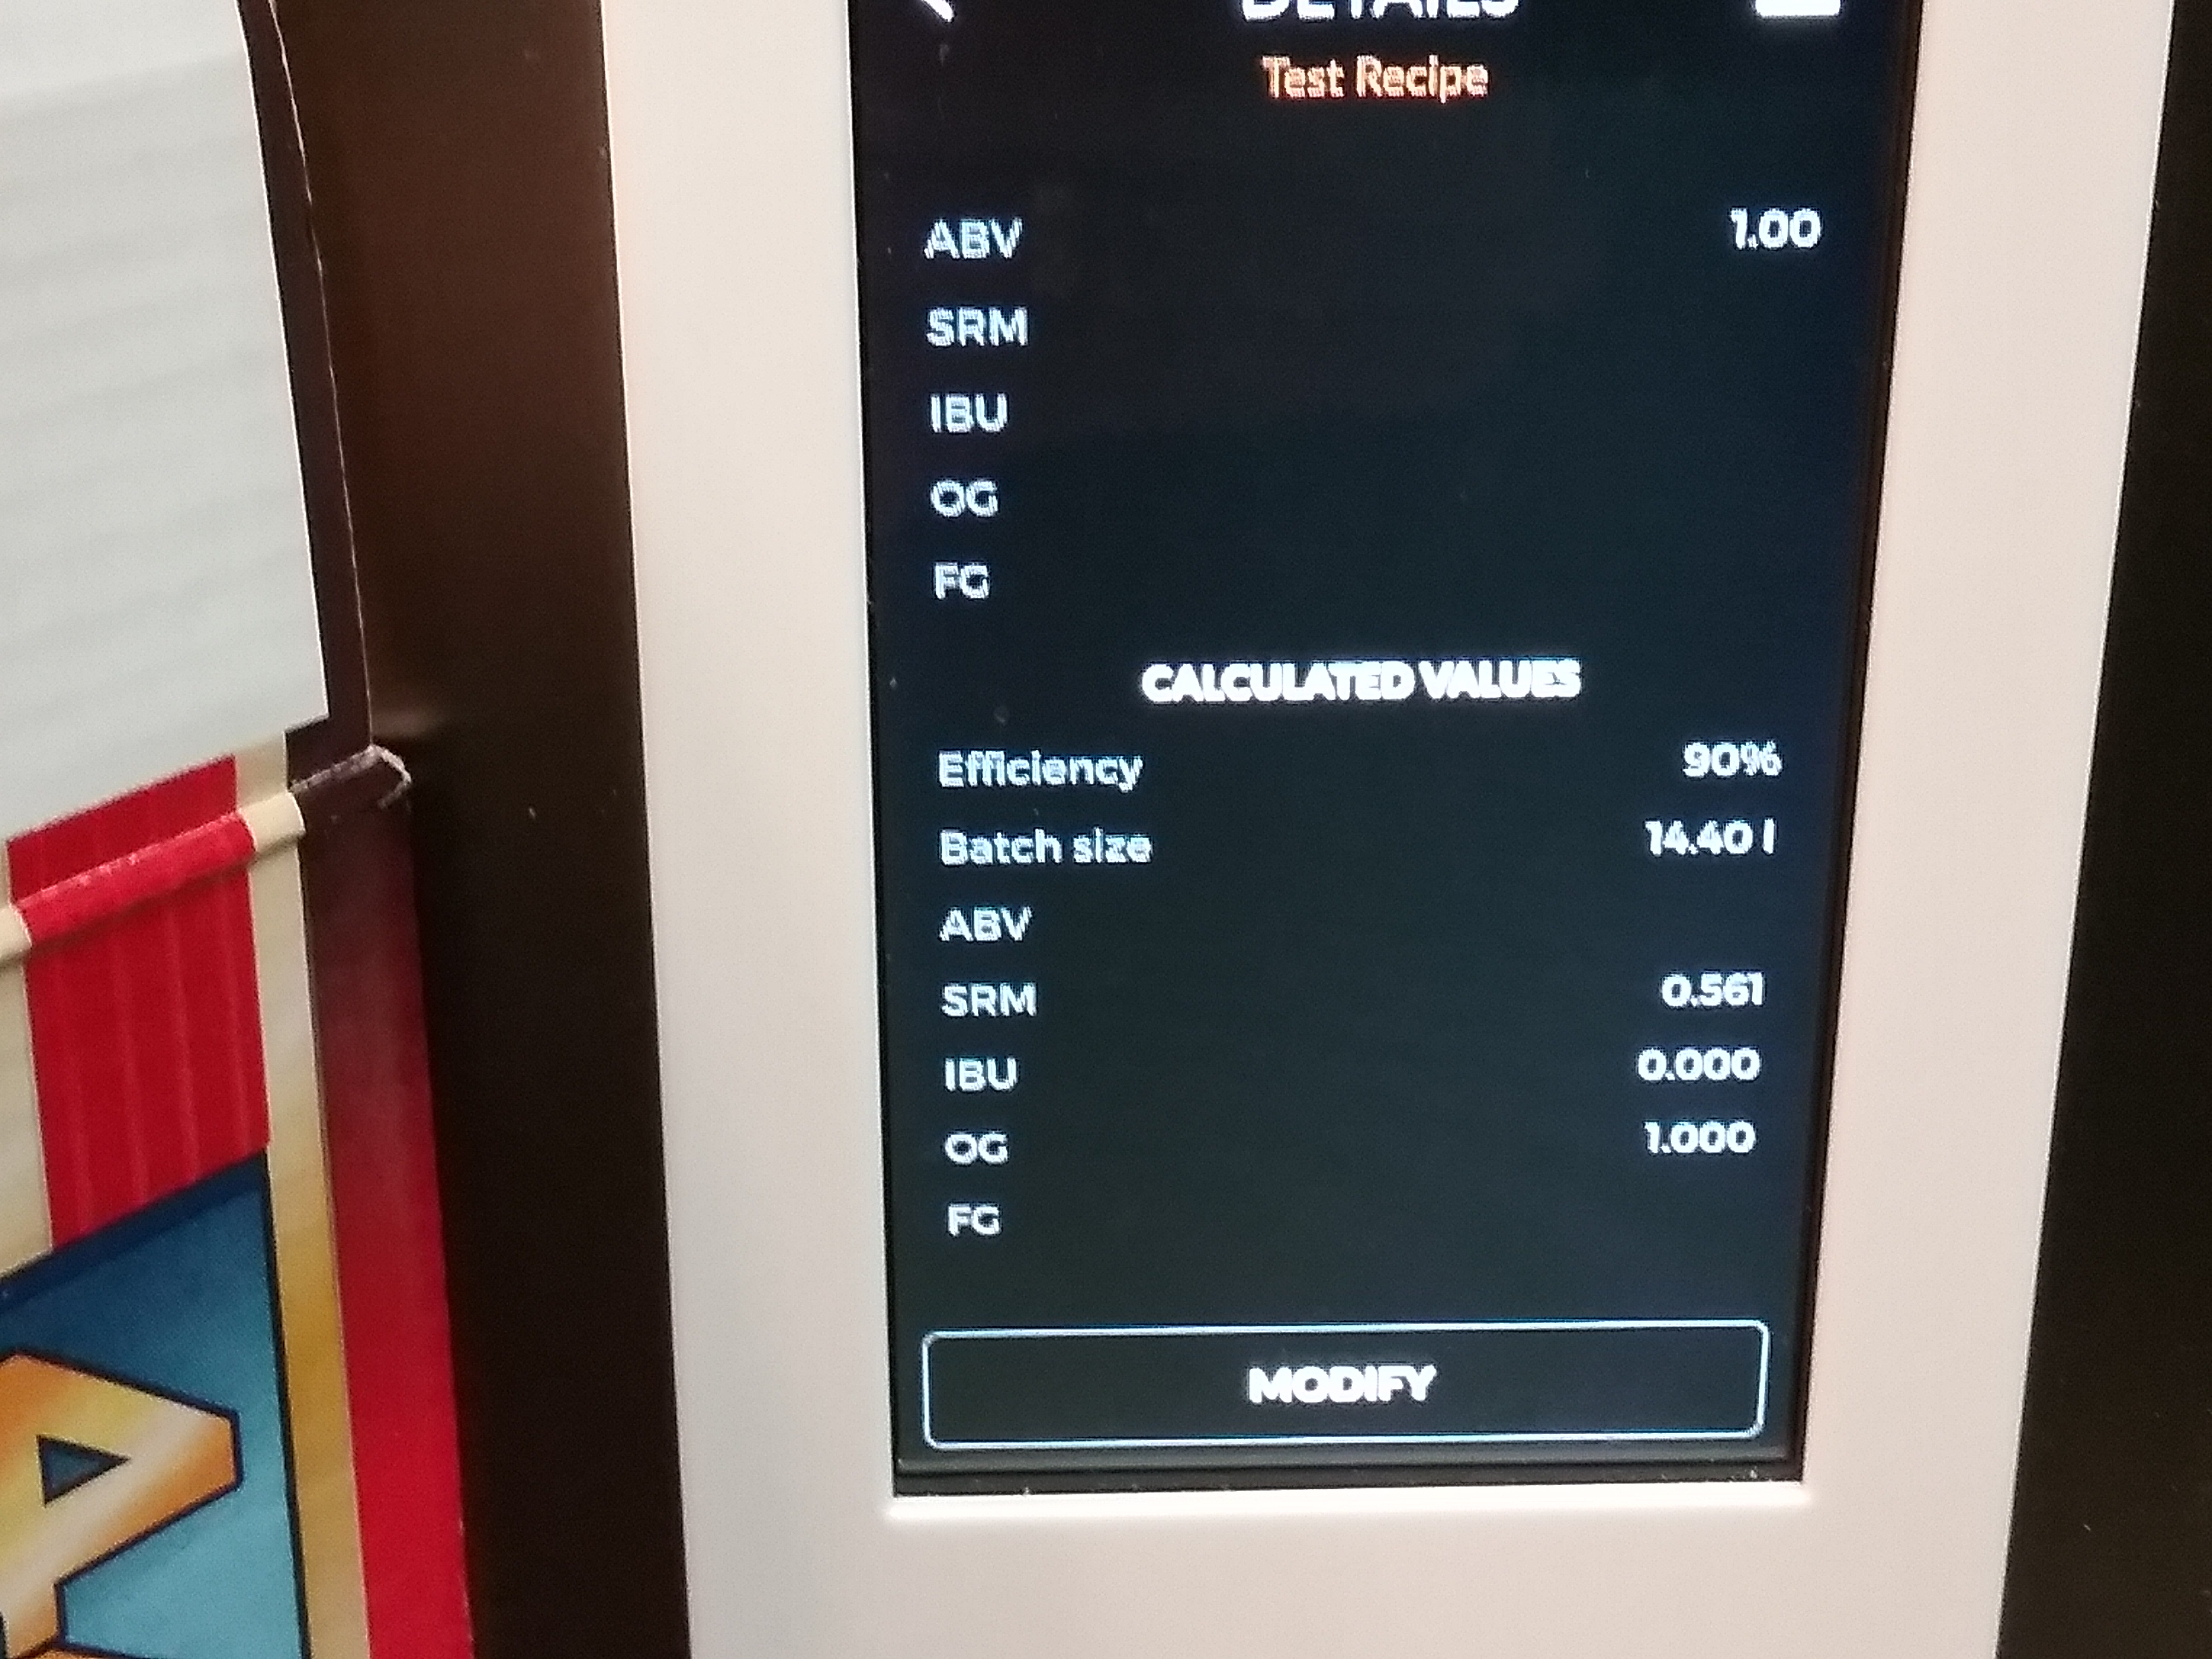
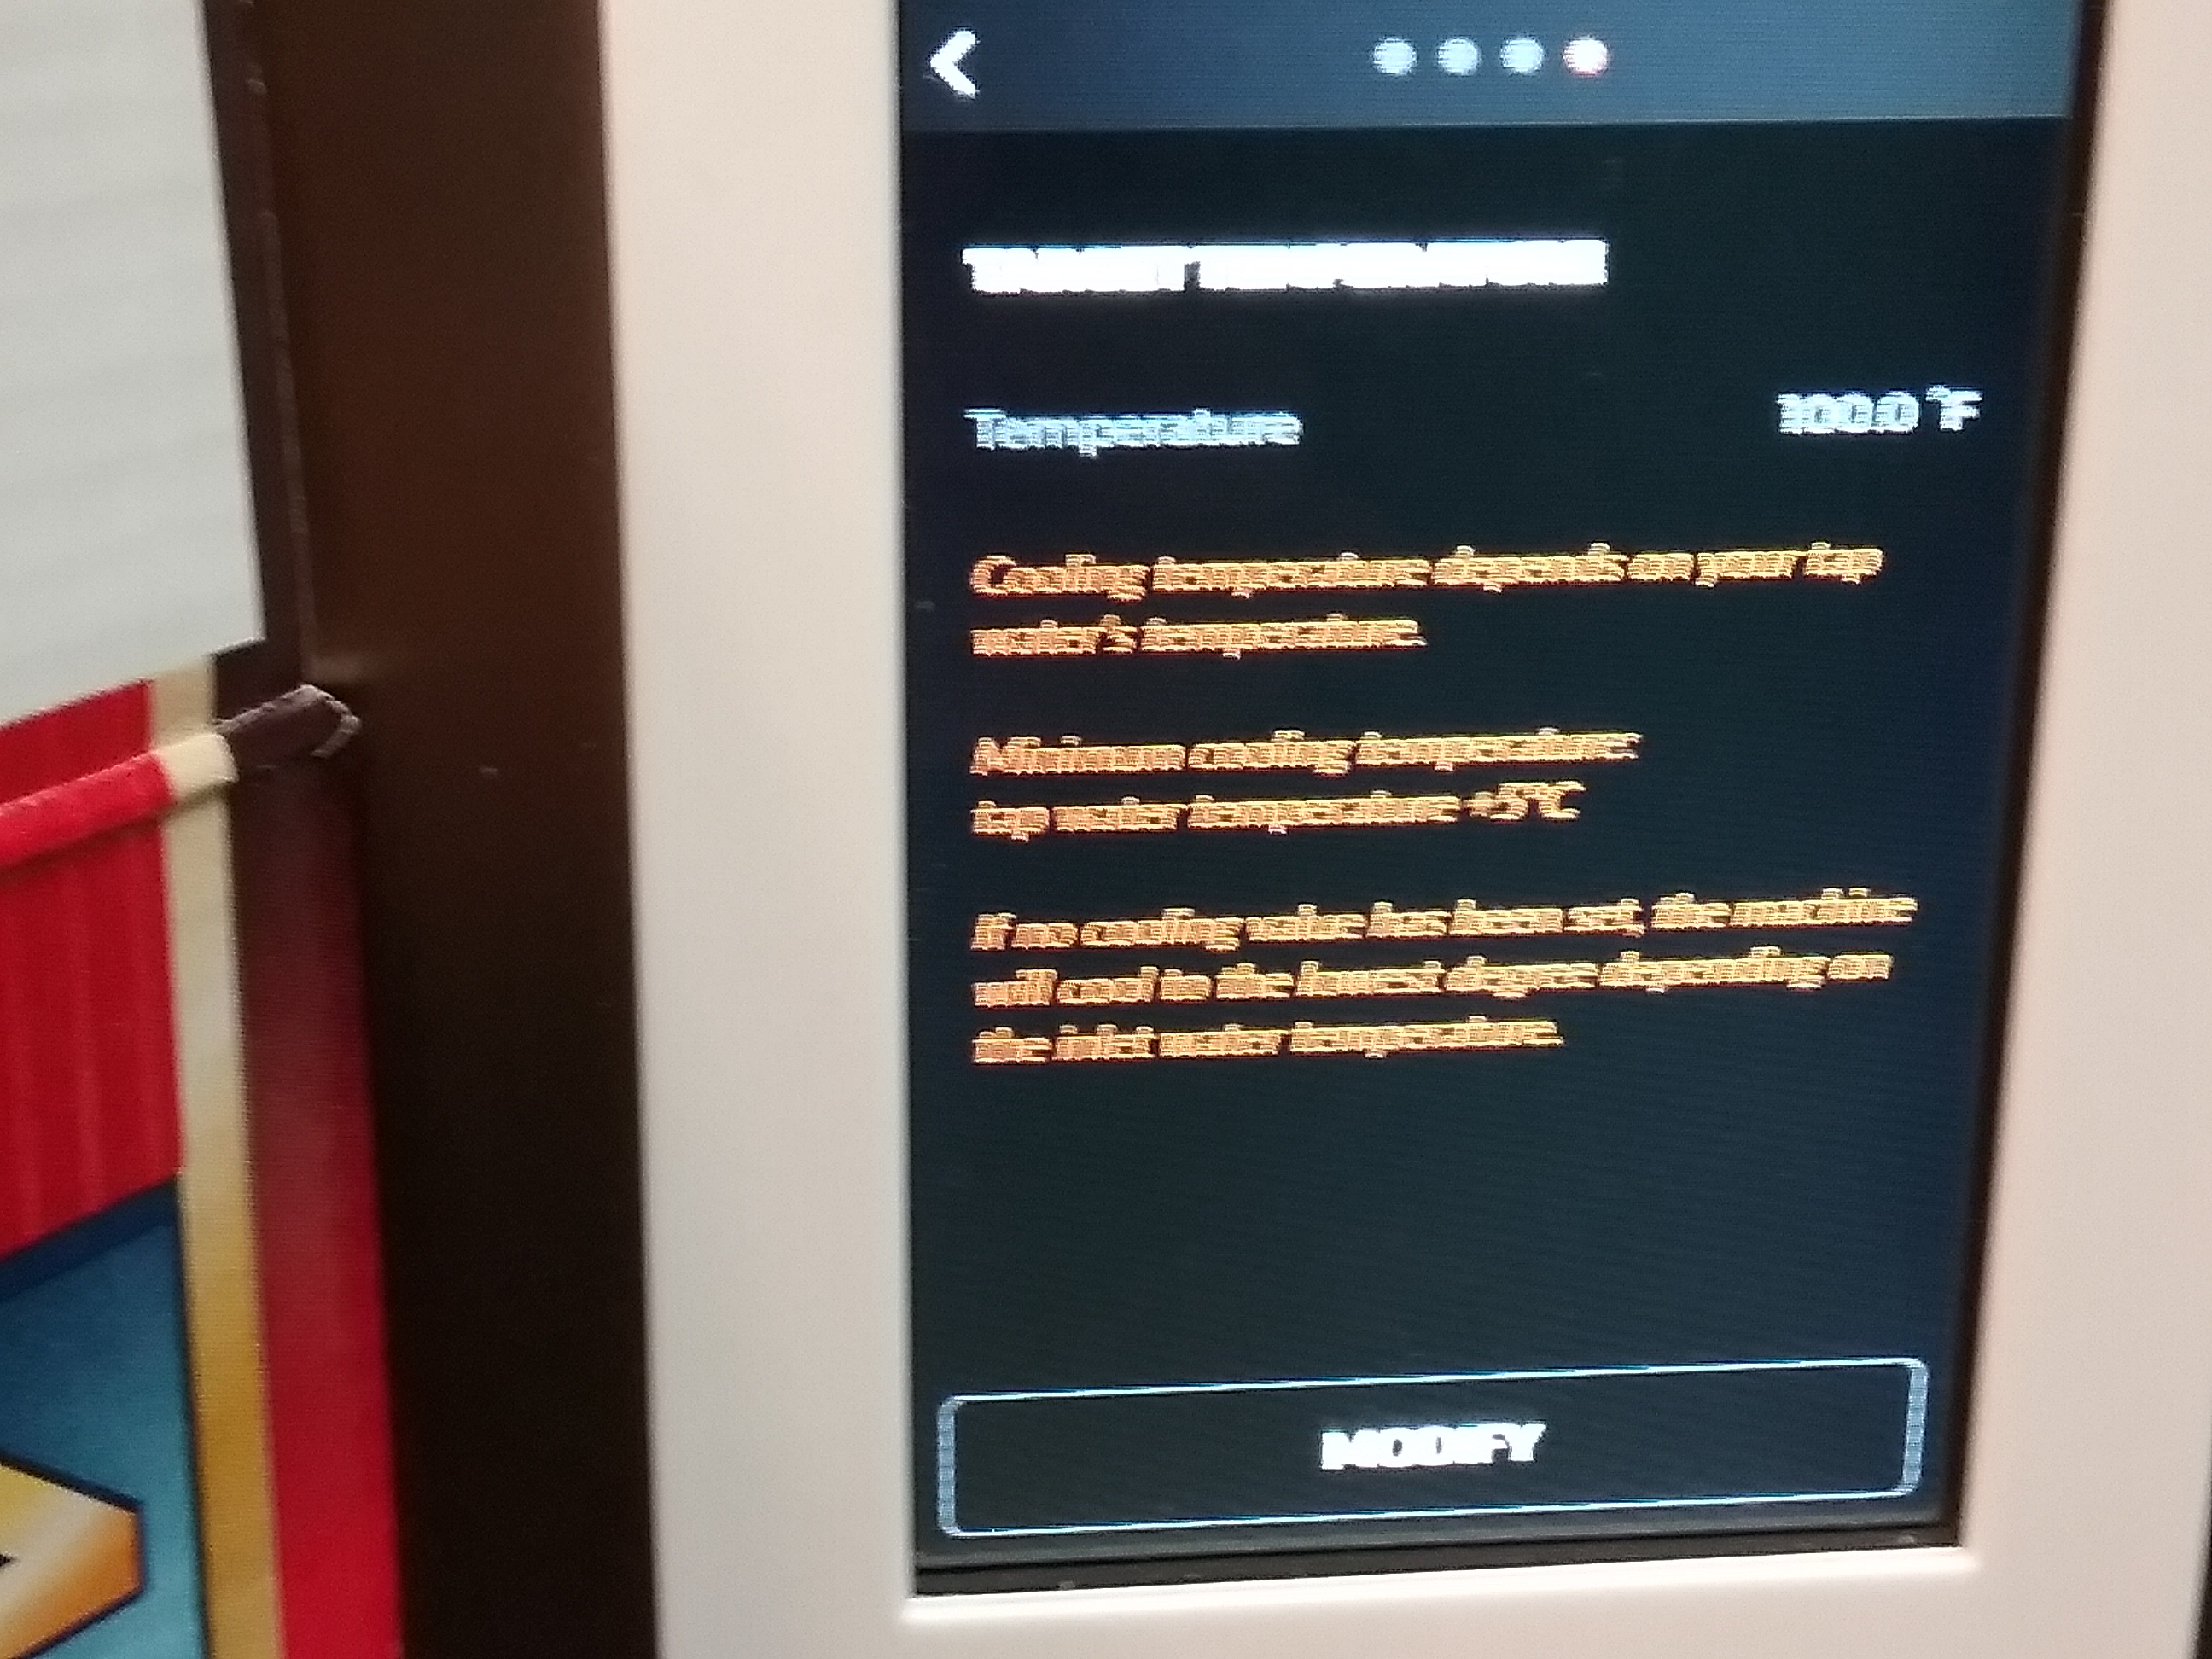
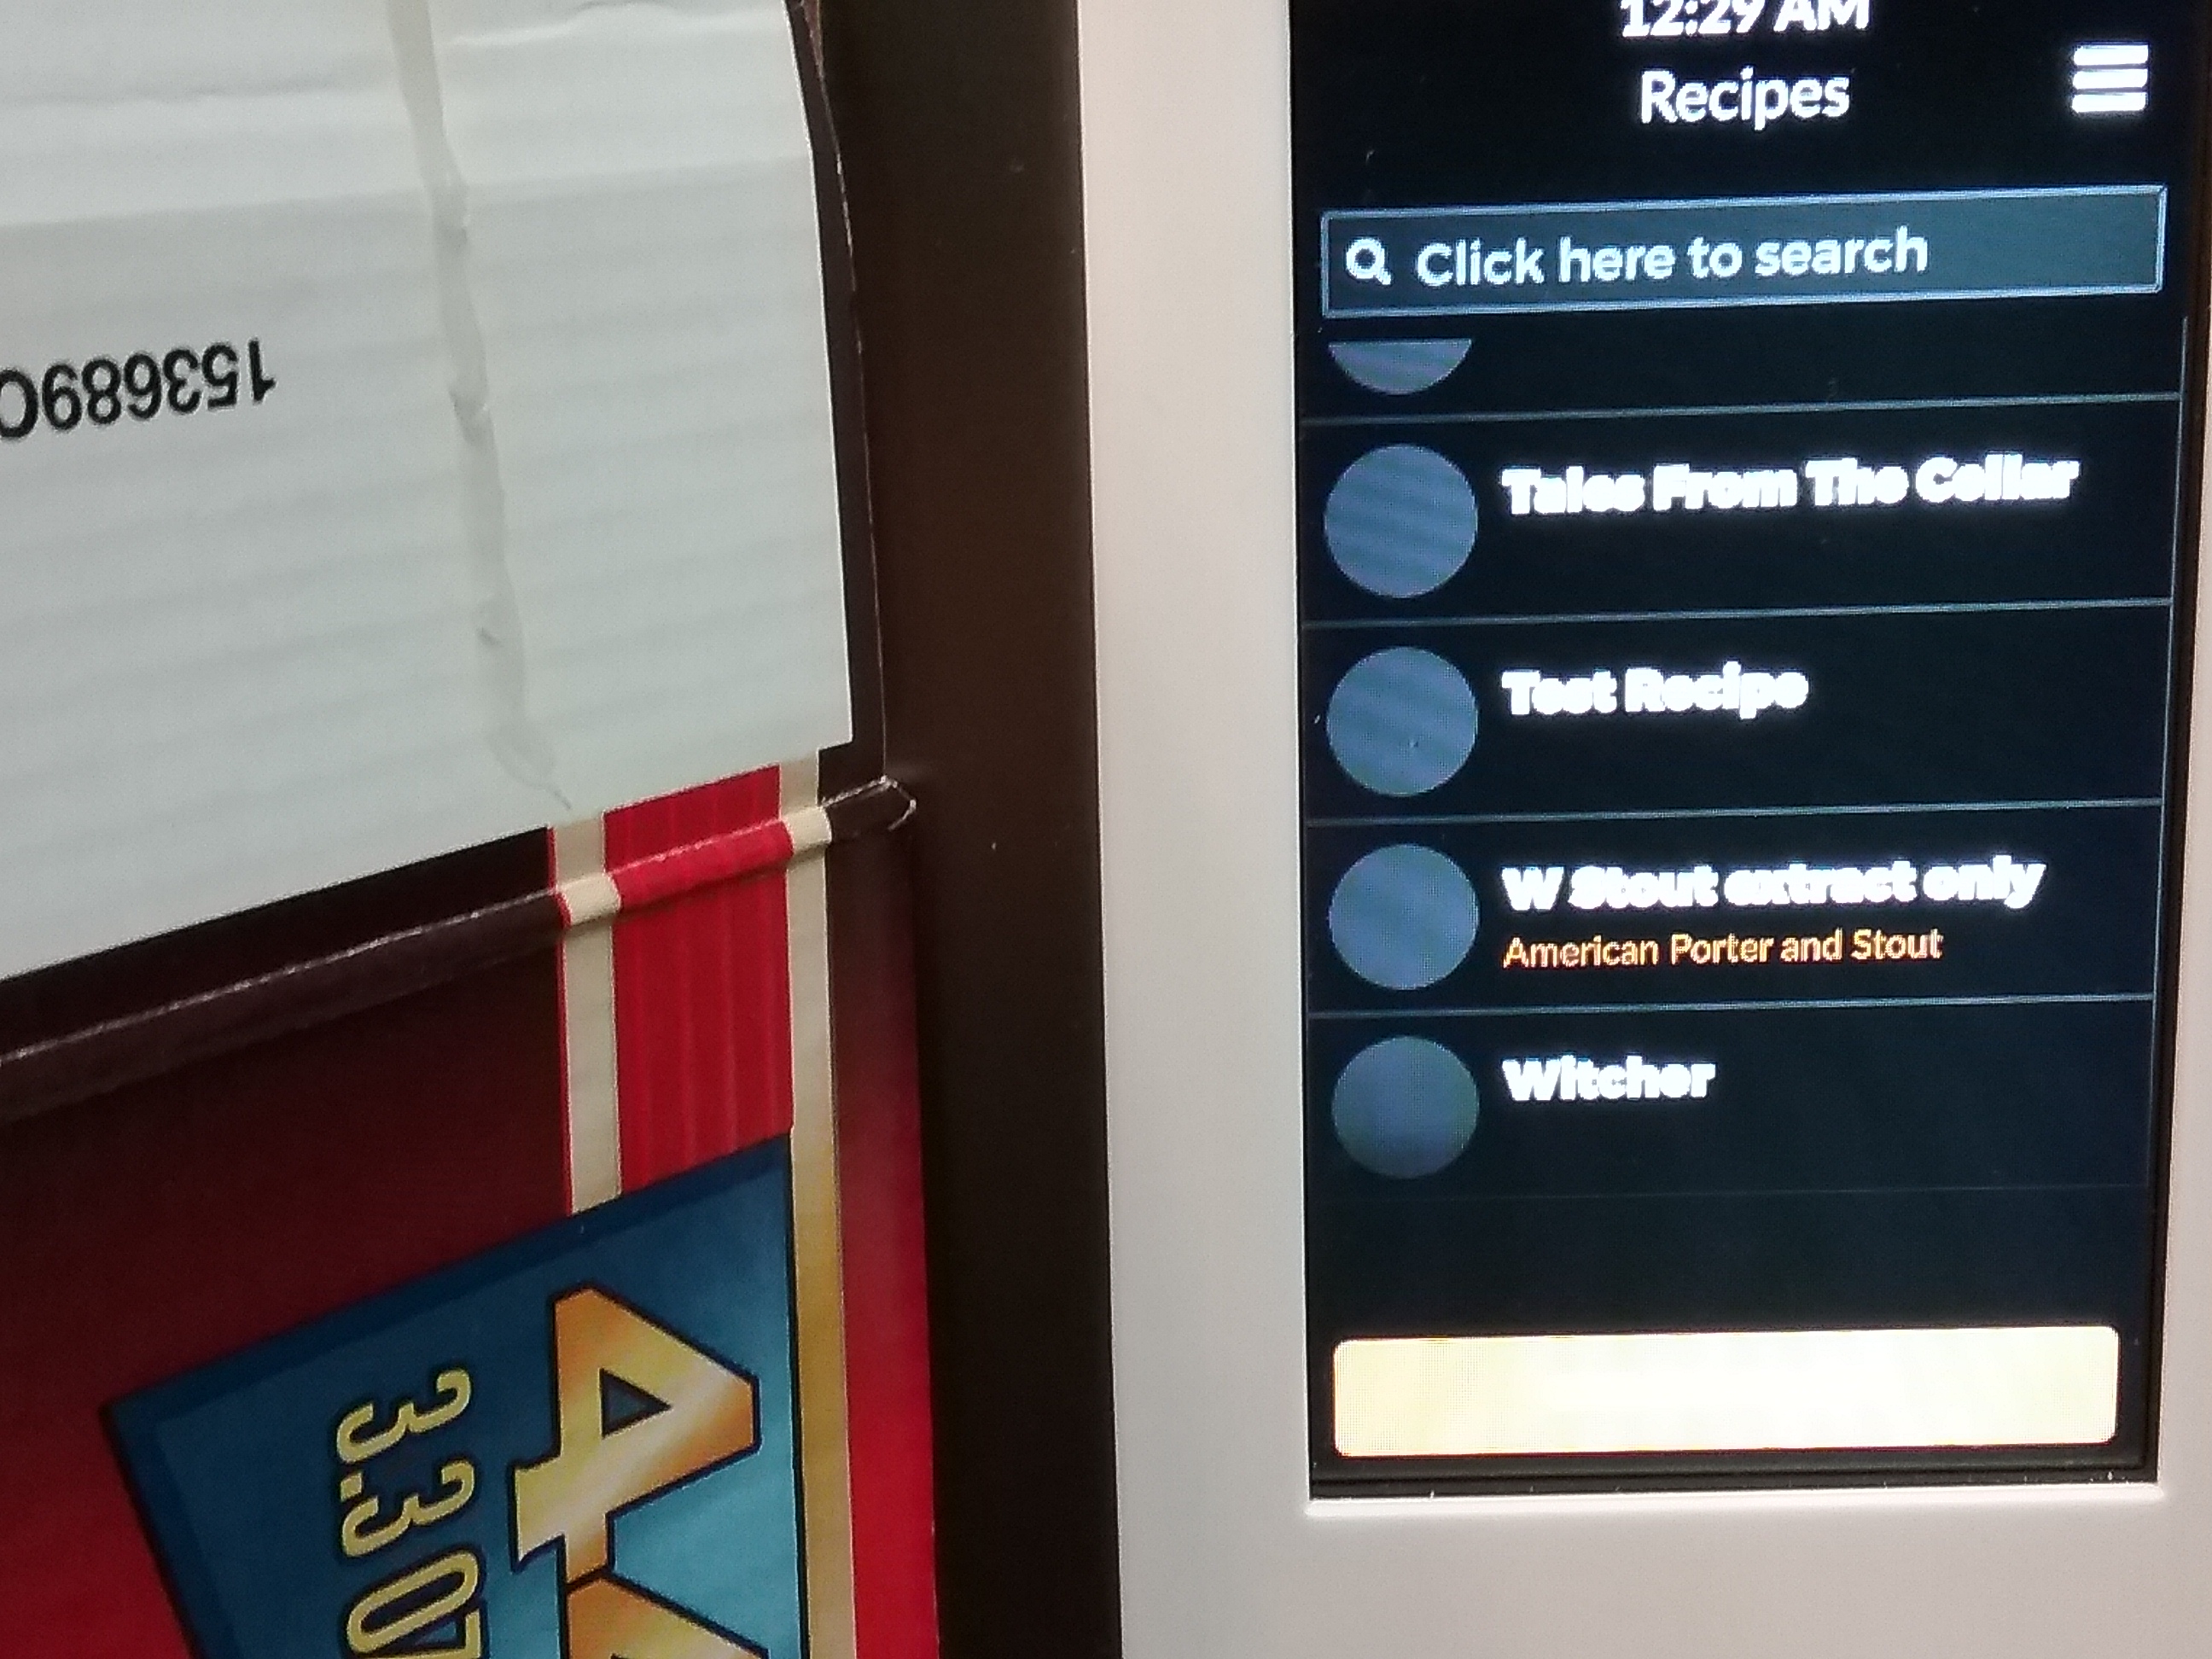
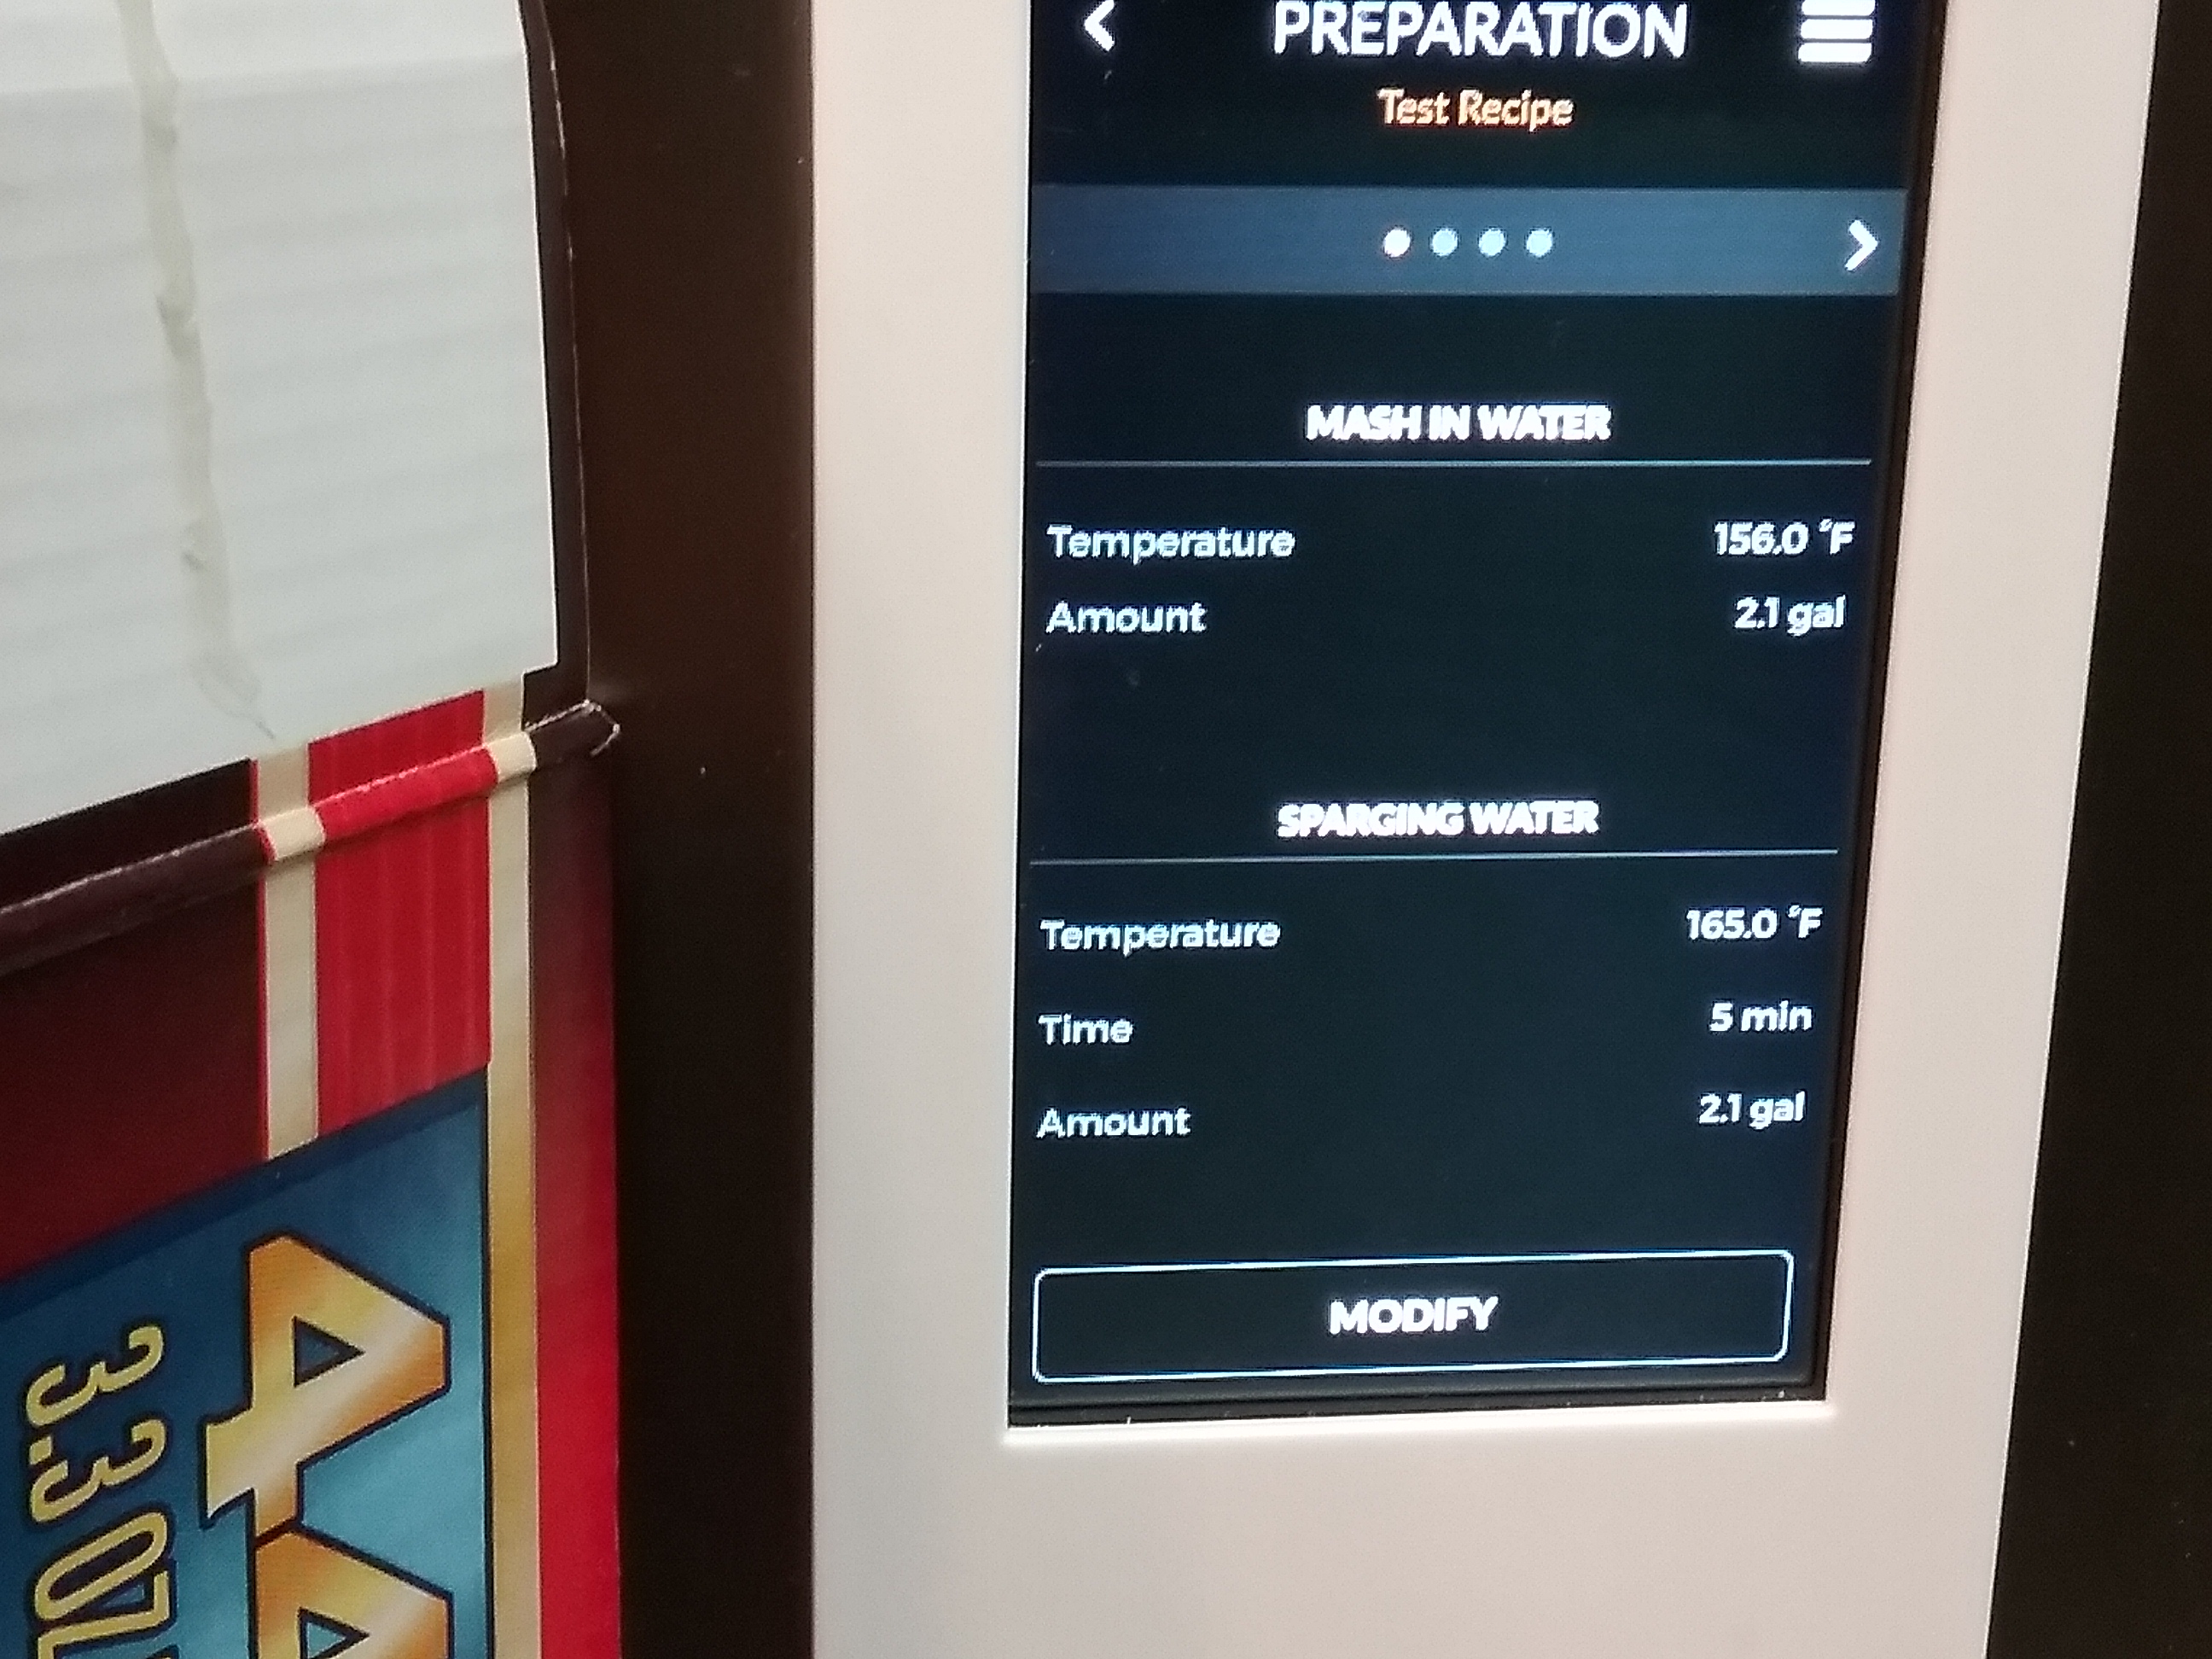
Here are pics of test recipe, pardon the popcorn box I put it there for contrast because the camera wouldn't focus..... really old tablet.
20190127_003044.jpg
20190127_003108.jpg
 
Sorry that was all out of order..... all the pictures go after everything, they have to do with the test recipe not the hints for getting your machine to measure water properly.
 
Couple simple questions. How is your beer coming out on the B+ and I am partial to hop bombs, anyone supplementing late addition hops with a mesh basket for late addition/whirlpool hops (I saw the manual say 1.4oz limit on the hop cages) Do you most folks use a 3rd party recipe crafter like Beersmith for building recipes?

I have completed 4 brews.... 3 were dead on, one however was way low for st. That being said it was the first time I have ever brewed with corn, i entered the recipe as if I was brewing with wheat...... basically I f'd it up it was probably not the machine at all. You can enter your recipes and it will show you what you can expect from your inputs including fg sg abv srm and ibu. If you don't like what you are seeing you can still change your recipe, boil, sparge, hops..... and as long as you are entering the correct info it will show you what to expect from your brew.

They are working on whirlpool hops solution.... You can always get an old fashioned mesh tea ball that will work if you put it in the boil tank. You can pause the cool down at any time and restart it when you are finished.

I use the menu installed on the machine, app on the phone and just some plain old paper and pencil along with a calculator. Swmbo asked if I am doing my homework almost every time. Because I usually have one or two books open and a tablet along with my phone and a calculator and of course my notebook that the recipe gets written down in before it goes anywhere else.
 
Back
Top