Brew lines and suggestions?

Homebrew Talk - Beer, Wine, Mead, & Cider Brewing Discussion Forum

Help Support Homebrew Talk - Beer, Wine, Mead, & Cider Brewing Discussion Forum:

This site may earn a commission from merchant affiliate links, including eBay, Amazon, and others.

mmeadows24

Well-Known Member
Joined
Jan 25, 2013
Messages
81
Reaction score
0
Location
Fresno
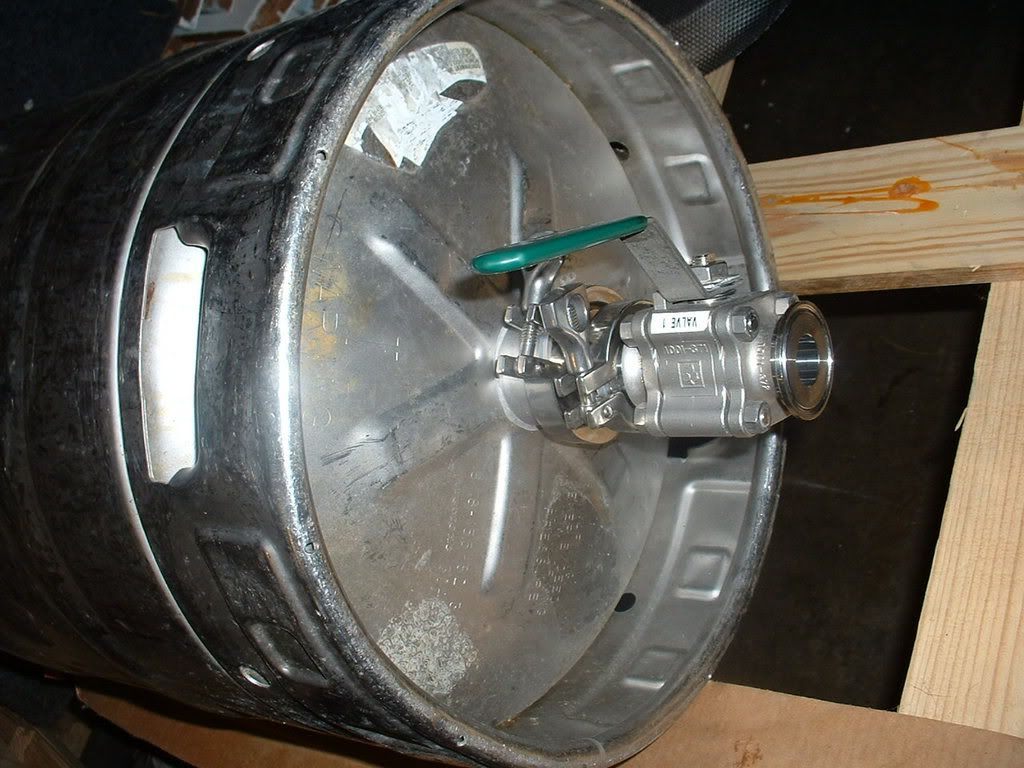
So I have a bottom drain 3 keggle eHERMS system that has welded tri-clover (1.5") ferrules. I am in the middle of polishing them and I am ready to start finally putting it together to have the inaugural brew day/test day/most likely a bunch of things to adjust day. I have avoided buying the fittings (only to the hose types-I have all the clamps already) so that I could check out my options and get some opinions. I purposely went with tri-clover to avoid threaded fittings so there will be no threaded fittings in the system (initially there might be some at the pumps if my welder can't get my Chugger pump heads welded before I get the rest of the fittings). The question is what ID line should I go with (I'm would like the discussion to start with 1/2" minimum because I am not looking to go smaller). I have read a ton of threads on I.D. discussion (mostly relevant to true ID vs bore ID) and it pretty much stops after 1/2" and 3/4" but what about 1". My thought process is I can use a 2" reducer to 1" and then have a 1" (or a 2" above the reducer) butterfly valve that then connects to a 1" tri-clover/barbed end hose setup. I will have two types of restrictions with this setup. 1 on each pump end (I am using 2 pumps with a three way valve inlet and outlet of each pump end-plus a three way on the mash tun outlet at the reducer) and one at my HERMS coil (I was silly and ordered 50' stainless coil with welded 1.5" ferrules and had my keggle welded with a 1.5" ferrule with standard ID instead of the reduced size type i.e. 3/4" OD on a 1.5" ferrule). What's everyone's thoughts? I get 1" ID hose is more expensive but other than that the pricing on fittings is negligible if I went up to 1" and by doing that I create less restrictions. Otherwise I'd have restrictions at the pumps, the keggle sanke, hoses, etc. I'm not set on this setup. I would love to hear opinions of practical real life use expected or possible hiccups. I'd also love to hear from the crowd using mostly or full tri-clover setups.
 
What is your goal in reducing restrictions?

1/2" is plenty even for a half-barrel sized system. 1" triclamp fittings are already way too big for a 10 gallon system as it is. Their popularity on homebrew systems has probably mostly been driven by cost, as 1/2" and 3/4" triclamp parts and fittings are usually more expensive.
 
Having already gone and setup the system with tri-clamp the only expense more is the hose cost difference. To me that is a non-issue as the long term cost of using it brings it to be only a minor luxury purchase. I guess the way I look at it is it will be better suited for CIP with having such a set-up. Waste wise I was looking at rigging up a flush system using my nitrogen setup I have for pushing my wine/cider/beer between secondaries when racking. The hose/clamps/3 ways are all rated for varying psi and I was only looking to use 5 psi or so that shouldn't be a problem either. These are all extra expenses but as it is if I ever scaled up my fittings and will all be better suited for it too as I plan on getting a 1BBL system for pilot brewing down the line. Any other thoughts out there.
 
I have the tri clovers on my setup but I went with 1/2 inch tubing. I have 1/2 inch restrictions from the Sabco syphon/diptube in the vessels that you do not have. I have all 1 inch tri clover valves, elbows, tees, ect. and I have excellent flow with these even though I am using 1/2 inch tubing. I have no flow control issues or problems once I went with the center inlet pump heads. As long as you have a way to purge the air out of the lines and prime your pumps (I use a bleeder valve on each pump on top of a tee) I think you will be ok going with the larger tri clover fittings, if that is what you want to do. Here is a pic of my setup.

DSC_6139.jpg
 
Oh forgot to tell you I use 1 inch flange to 3/4 inch hose barbs and stretch the 1/2 inch hose over the 3/4 inch barbs, to get full flow into the 1/2 inch tubing. Works great! Hope this helps a little.....

John
 
JCAV,

That's a nice setup. Your choice of plumbing seems pretty standard. Mind getting a close-up on your bleeder system?
 
JCAV,

That's a nice setup. Your choice of plumbing seems pretty standard. Mind getting a close-up on your bleeder system?

Sure, here you go!
DSC_5730.jpg
Here I am purging the air from the pump, once the water starts flowing the all the air is forced out and then you just close the valve. Works great!
DSC_5761.jpg
Just stick a short piece of tubing on the end if you want to take a sample for a gravity reading or whatever you need, without it splashing all over.
DSC_5762.jpg
Here are the valves I used:http://www.brewershardware.com/1-1.5-Tri-Clover-X-1-2-Sample-Valve.html

Hope this helps!

John
 
JCAV (JOHN),

Did you go with 1" butterfly valves too? I like your plumbing setup so I think I'm going to use some of it. Especially the use of the sampling valves as bleeders and samplers. Where did you source you 1.5" TC 3/4" hose barb fittings? Those go for $10-$11 each and I'll need a bunch.
Sure, here you go!
View attachment 353742
Here I am purging the air from the pump, once the water starts flowing the all the air is forced out and then you just close the valve. Works great!
View attachment 353743
Just stick a short piece of tubing on the end if you want to take a sample for a gravity reading or whatever you need, without it splashing all over.
View attachment 353744
Here are the valves I used:http://www.brewershardware.com/1-1.5-Tri-Clover-X-1-2-Sample-Valve.html

Hope this helps!

John
 
Yes I went with 1" butterfly valves on the exits of my vessels and 1" ball valves everywhere else. I got the 1.5" TC 3/4 " hose barbs at the same place I got the sampling valves (Brewers Hardware). They are not cheap but nothing tri clover is!! Here is the link to the barbs I used. http://www.brewershardware.com/1.5-Tri-Clover-X-3-4-Hose-Barb.html

If you have any other questions let me know.

John
 
Last one John but might seem different. Is the sample valve constructed in such a way that you could use a nitrogen source with say 3 lbs of pressure to purge the lines of material when the pump runs dry?

There is a stem inside that has two o-rings on it to make a good seal. As you unscrew the top knob this lets the air/liquid come up from the bottom opening in the tri clover flange, and out the short barb fitting. The 3 lbs of pressure is fine. You would probably have to introduce the nitrogen via a different fitting, and then let the liquid purge out the sample valve. Without seeing a pic it's hard to answer you more sufficiently, but I'm following you correctly I don't think you can introduce nitrogen with this sampling valve and use the same valve to purge the liquid. Unless you just push out the liquid and let it exit down stream elsewhere.

John
 
Thanks for all the great advice and answers. Anyone have thoughts on the best place to put a valve on a reducer. I can't decide if I want to put a 2" butterfly at the sanke end (Before the 2" to 1" reducer) or a 1" butterfly at the end of a 2" to 1" reducer. Again, pricing is not the issue for me as the cost difference is negligible of the lifetime of the system.
 
There is a stem inside that has two o-rings on it to make a good seal. As you unscrew the top knob this lets the air/liquid come up from the bottom opening in the tri clover flange, and out the short barb fitting. The 3 lbs of pressure is fine. You would probably have to introduce the nitrogen via a different fitting, and then let the liquid purge out the sample valve. Without seeing a pic it's hard to answer you more sufficiently, but I'm following you correctly I don't think you can introduce nitrogen with this sampling valve and use the same valve to purge the liquid. Unless you just push out the liquid and let it exit down stream elsewhere.

John

Thanks for all the great advice and answers. Anyone have thoughts on the best place to put a valve on a reducer. I can't decide if I want to put a 2" butterfly at the sanke end (Before the 2" to 1" reducer) or a 1" butterfly at the end of a 2" to 1" reducer. Again, pricing is not the issue for me as the cost difference is negligible of the lifetime of the system.
 
Thanks for all the great advice and answers. Anyone have thoughts on the best place to put a valve on a reducer. I can't decide if I want to put a 2" butterfly at the sanke end (Before the 2" to 1" reducer) or a 1" butterfly at the end of a 2" to 1" reducer. Again, pricing is not the issue for me as the cost difference is negligible of the lifetime of the system.

Without seeing a diagram or a pic, to better understand what you want to do, I would tend to lean toward a 1 inch butterfly valve at the end of the 2" to 1" reducer, and control the flow after the restriction from 2" to 1". I would love to see a diagram to better answer you though.

John
 
DSCF2736.jpg
Valve first (no reducer in this pic)
Without seeing a diagram or a pic, to better understand what you want to do, I would tend to lean toward a 1 inch butterfly valve at the end of the 2" to 1" reducer, and control the flow after the restriction from 2" to 1". I would love to see a diagram to better answer you though.

John
 
attachment.php
Valve after reducer
Without seeing a diagram or a pic, to better understand what you want to do, I would tend to lean toward a 1 inch butterfly valve at the end of the 2" to 1" reducer, and control the flow after the restriction from 2" to 1". I would love to see a diagram to better answer you though.

John
 
Without seeing a diagram or a pic, to better understand what you want to do, I would tend to lean toward a 1 inch butterfly valve at the end of the 2" to 1" reducer, and control the flow after the restriction from 2" to 1". I would love to see a diagram to better answer you though.

John

None of these pics are my setup or quite the same fittings involved (one of the reason I have no idea which way to go) but they are the visual you requested. I'm not sure it would matter where the valve goes but I wonder about how a 2" butterfly valve would do directly connected to a sanke fitting.
 
Me personally, I would go butterfly valve after the reducer, kinda like you have with the ball valve in the second pic.

John
 
Yea that would work great, just put on an elbow and attach the butterfly valve after the elbow. This way you have a large opening in the bottom of the keg for draining, and especially for cleaning. Just rinse out the grains if used as a mash tun or whatever and it will be much easier to clean with the larger 2 inch bottom opening. You can also not use an elbow and go straight down, depending on how the keggles sit on your stand. I like the elbow idea though. Just my two cents......

John

Thanks John! This is the final piece for my setup and I have languished over it for far too long. It's stopping me from finishing. I really appreciate your suggestions and help. BTW you buddy Jay's welded rig is sick! How did he wrap the aluminum the way he did. I would buy a rig from him in a heartbeat if the price was right. My only downside is I live in California.
 
Me personally, I would go butterfly valve after the reducer, kinda like you have with the ball valve in the second pic.

John

John, What's your stance on cam and groove fittings that have TC connections?
 
John, What's your stance on cam and groove fittings that have TC connections?

I agree Jay is definitely a craftsman and mad fabricator! I think the cam and groove fittings to TC connections will serve you well. They are a little pricey but since that is not a concern for you, they will work well where you need them. I went all tri clover except where the garden hose enters my chiller. I used quick disconnects there and it's the only place that I have a leak. I was thinking of using a garden hose to cam and grove fitting there to fix that problem. The cam and grove are easier to make hose connections and changes, but my tri clover ends on my hoses don't take that long to change. You do need two hands though....

John
 
I think the cam and groove fittings to TC connections will serve you well.
:)

So true on the fittings! When I started this I really didn't think the fittings would be the spot that would tie me up. I think I'm going to go with all TC like you. How do you like those 90 degree bend hose clamp fittings? I was thinking going all straight. Does it put less "stress" on the hoses with the 90 or just a preference. Also what temp sensors did you use on the tees? Brewer's Hardware's standard stock 4" temp sensor seems like it would be too long (I do see they have a 3" though- did you go with that?). Sorry for all the questions but I appreciate the hep a ton.
 
I really like my tri clover fittings and I am happy I went all TC. I have two 90 degree hose barbs that I use on my HLT valves only. The hoses ends that attach to the HLT vessel valves have the 90 degree hose barbs, as it is a long stretch and there is no sagging of the tubing with the 90 degree barbs. The other ends of the tubing that attach to the pumps are regular straight hose barbs. I used all 3/4 inch diameter barbs for my 1/2 inch tubing and stretched the tubing over the barbs, for better flow. The other tubing connections have regular straight 3/4 inch diameter barbs.

I used "The Electric Brewery" temp sensors. I used the 60mm or 2.36 inch size probes, and they fit perfectly into the tri clover tees. Here is a link to the ones I bought.
http://www.theelectricbrewery.com/custom-temperature-probes
Scroll down to the tri clover fittings. You can get them already made or as a kit to assemble yourself. Great products. I basically built a Kal clone so I follow this (Kal's) website's way of brewing. Check out the "Step By Step Brew Day" on the left side menu and you will see how I brew. Great info there. If you have any other questions let me know, I don't mind at all. Good luck with the rest of the build! :mug:

John

Thanks yet again. I'm guessing by you pics and what I've seen you change the hoses during your brew session. You definitely sourced everything from the big guys. I was gonna build my own but theirs do look interesting. You know how you buddy formed his brew rig? I don't think its practical to have him build one for me (I would though if he were semi-local) as I live in California. I'm interested in his process for the way he made the lipped aluminum siding (I am guessing aluminum because it is diamond sheet metal) and made the circular platform. I can weld decently just don't have my own welder at the moment.
 
Yes I change my hose connections after mashing when I sparge, and then once more to sanitize the chiller and to recirculate/whirlpool, and lastly from chilling into the fermenter. I don't know how Jay formed his stand that he calls the "Brew Gun". They are very nice though! I might be able to pm you his phone number and you can talk to him. Who knows, he may be able to make you one and ship it to you for a reasonable price.

John
 

Latest posts

Back
Top