rebl68
Member
I agree with Hopp, Hopmans is the way to go.

akthor said:Is the three the max corny's this will hold? with the collar can you get a 4th in there?
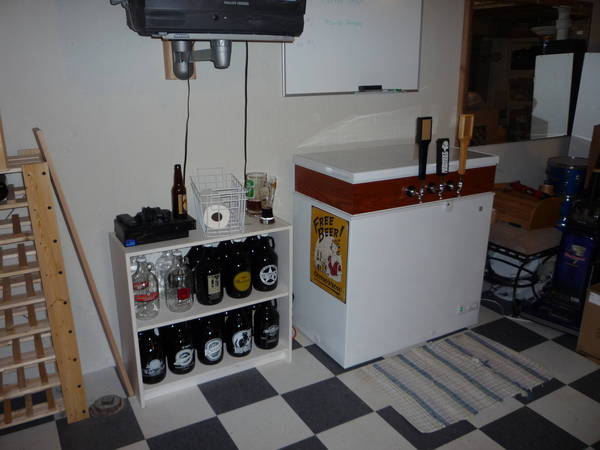
OK! Finished the Keezer over the weekend! Here's the step-by-step of what it took:
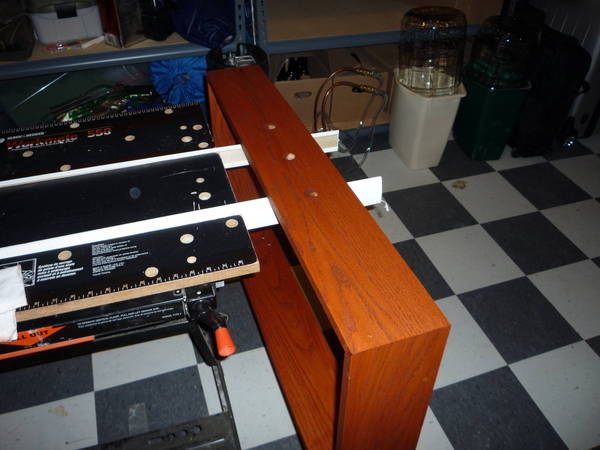
1) Make a collar out of 1x6 premium red oak.
- I mitred the two front corners and did straight cuts on the rear.
- All corners are glued, and bracing brackets were added as additional structure
2) Drill your shank holes in the front piece
- I laid my 3 holes out in a 10-inch span; one dead-center, and the other two 5" away from the center hole in either direction.

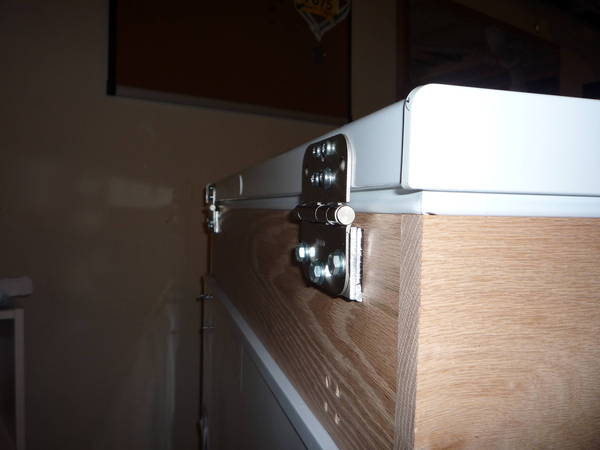
3) Using basic door hinges, mark the freezer lid hole pattern on the hinge and drill 4 through-holes.
4) Mount the hinges to the freezer lid using the existing freezer bracket bolts
5) Cut and drill shims for the freezer lid brackets and the collar brackets.
- When assembled, the collar will be offset from the freezer and the freezer lid by about 1/4". I bought a piece of 1/8" thick aluminum strip at Home Depot and cut my shims to bracket-size. Each bracket location needs 2 shims to get the needed 1/4", which means a total of 8 shims are needed; 4 long shims for the lid brackets and 4 short shims for the existing freezer lid brackets that will be used for the collar.
6) Line the shims up to the brackets, mark the through-hole locations, and drill through-holes
7) Temporarily lay your collar seal onto the freezer ledge and place the collar on top of it. Center the collar to the freezer, then place the lid on top of the collar. Mark your freezer bracket locations using the existing freezer brackets.
- You need to accommodate the standoff for whatever type of seal you will be using on the collar to the freezer itself. I used a double-channel door weatherstrip which I temporarily laid between the collar and the freezer when I marked my bracket locations. If you do not accommodate this gap, your collar will not sit flush on your freezer.
8) Flip the lid upside down and place it on the ground. Place the collar upside-down on top of the freezer lid and center it to the seal. Mark your lid bracket through-hole locations on the collar.
- Putting the weight of the collar on the lid will ensure that your freezer lid seal gets the proper compression to fully seal your keezer lid.
9) Drill your bracket through-holes in the collar itself using an oversized bit.
- I used 1/4" hardware on all my brackets, so I sized my through-holes to accomodate.
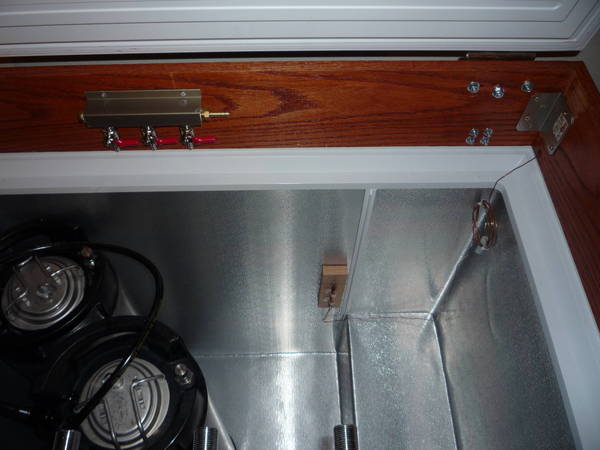
10) Pick locations for your temp control unit and your manifold. Mark the mounting screw locations and drill pre-holes for the mounting screws.
11) Drill a hole to run your temperature probe into your freezer.
12) Pick a location for mounting your temp probe.
- I mounted the probe to a piece of wood and used some all-weather double-backed foam tape to mount it to the wall about halfway up the side of the freezer wall.
- Some folks put the probe into a water bottle and fill it full of ice-pak gel, but I didn't get this complicated with my setup.
13) If you want, stain and seal your collar
- I picked a gunstock stain and one coat of gloss urethane.=, which looks really, really good on premium red oak!
14) After everything is dry, apply the weatherseal to the collar between the collar and the freezer itself.
- I reccommend sticking it to the collar itself. Sliding against plastic is a litte easier on the seal than sliding against wood.
15) Flip the freezer lid upside down, lay the collar on it, and bolt your brackets to it.
16) Lay the collar/lid assembly on the freezer and bolt the existing freezer brackets to the collar
- To get the proper compression of the seal, I laid a 2x4 across the collar and put a 15-lb weight on it, making sure the seal was properly compressed all the way around.
- I used longer #10 machine bolts, washers, and nuts from Home Depot to attach the existing brackets to the collars.
17) Mount your manifold and temp control module to the collar.
18) Route your temp probe through the collar and mount it inside the freezer in the location of your choosing
19) Install your faucet shanks and tail-pieces
20) Install your faucets and tap handles
21) Run your gas and service lines

22) Leak-test the system using StarSan solution sprayed at each joint location.
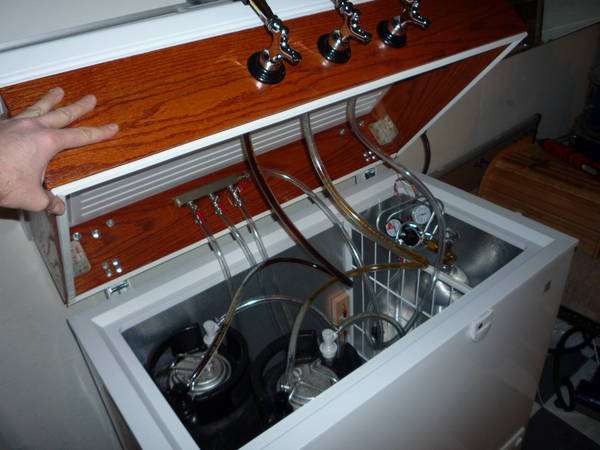
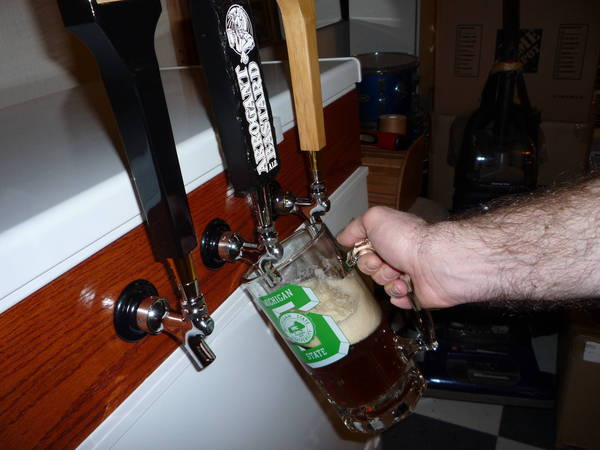
Here's some finished images of my handiwork. I'm quite proud of how this all turned out!
First pour! House Amber (MMmmm!) in a Michigan State University mug (BOOOooo!! It's my fiancee's mug, not mine!).
A few lessons I learned:
- Get self-closing faucets!!! When I hooked up the beverage service, I wound up with a bunch of stout on my pants because the faucet was left open. Also, my cats like to jump up and rub on the taps, which spills lots of beer on the ground.
- Use proper-length (i.e. long!!) and proper ID (i.e. small!) service lines. I've currently got it set up with 3' of 1/4" ID tubing on each of my kegs, and it foams like crazy when I pour. There's a lot of info on this site about how to keep the foam down, so either use at least 10' of 3/16" ID tubing as your beverage service, or use one of the keg-side flow mixers as mentioned in a few threads on homebrewtalk.
So that's that! I'm going to install the new 10' 3/16" ID beverage service lines this coming weekend and will let you know the result.
")
It will fit 3 ball locks with no collar along with a 20 lb tank.
For me it just makes it more convenient when you want to take a peek in there to check on things. To lift the collar requires pulling the keezer out away from the wall.is there a reason you put a hing on the top door vs just sealing it to the wood? Awesome build and thanks for the info
Also easy of working on the shanks, controller mounted in the collar and adjusting pressures. I have a four regulator manifold mounted to the inside of the collar.For me it just makes it more convenient when you want to take a peek in there to check on things. To lift the collar requires pulling the keezer out away from the wall.

Wondering if you could elaborate on this just a bit? Do you just put the shanks and taps right thru the side of the freezer? Can anyone post a pic?
Thanks guys, really appreciate the help.
Ron


Enter your email address to join:
