
I've seen a few DIY glycol chillers made from window A/C units, so this isn't anything entirely new. Thought I'd share my build, and how I integrated it with my system with two new 14 gallon SS Brewtech conical fermentors. I finished this project last winter, and it has worked very well for me so far.
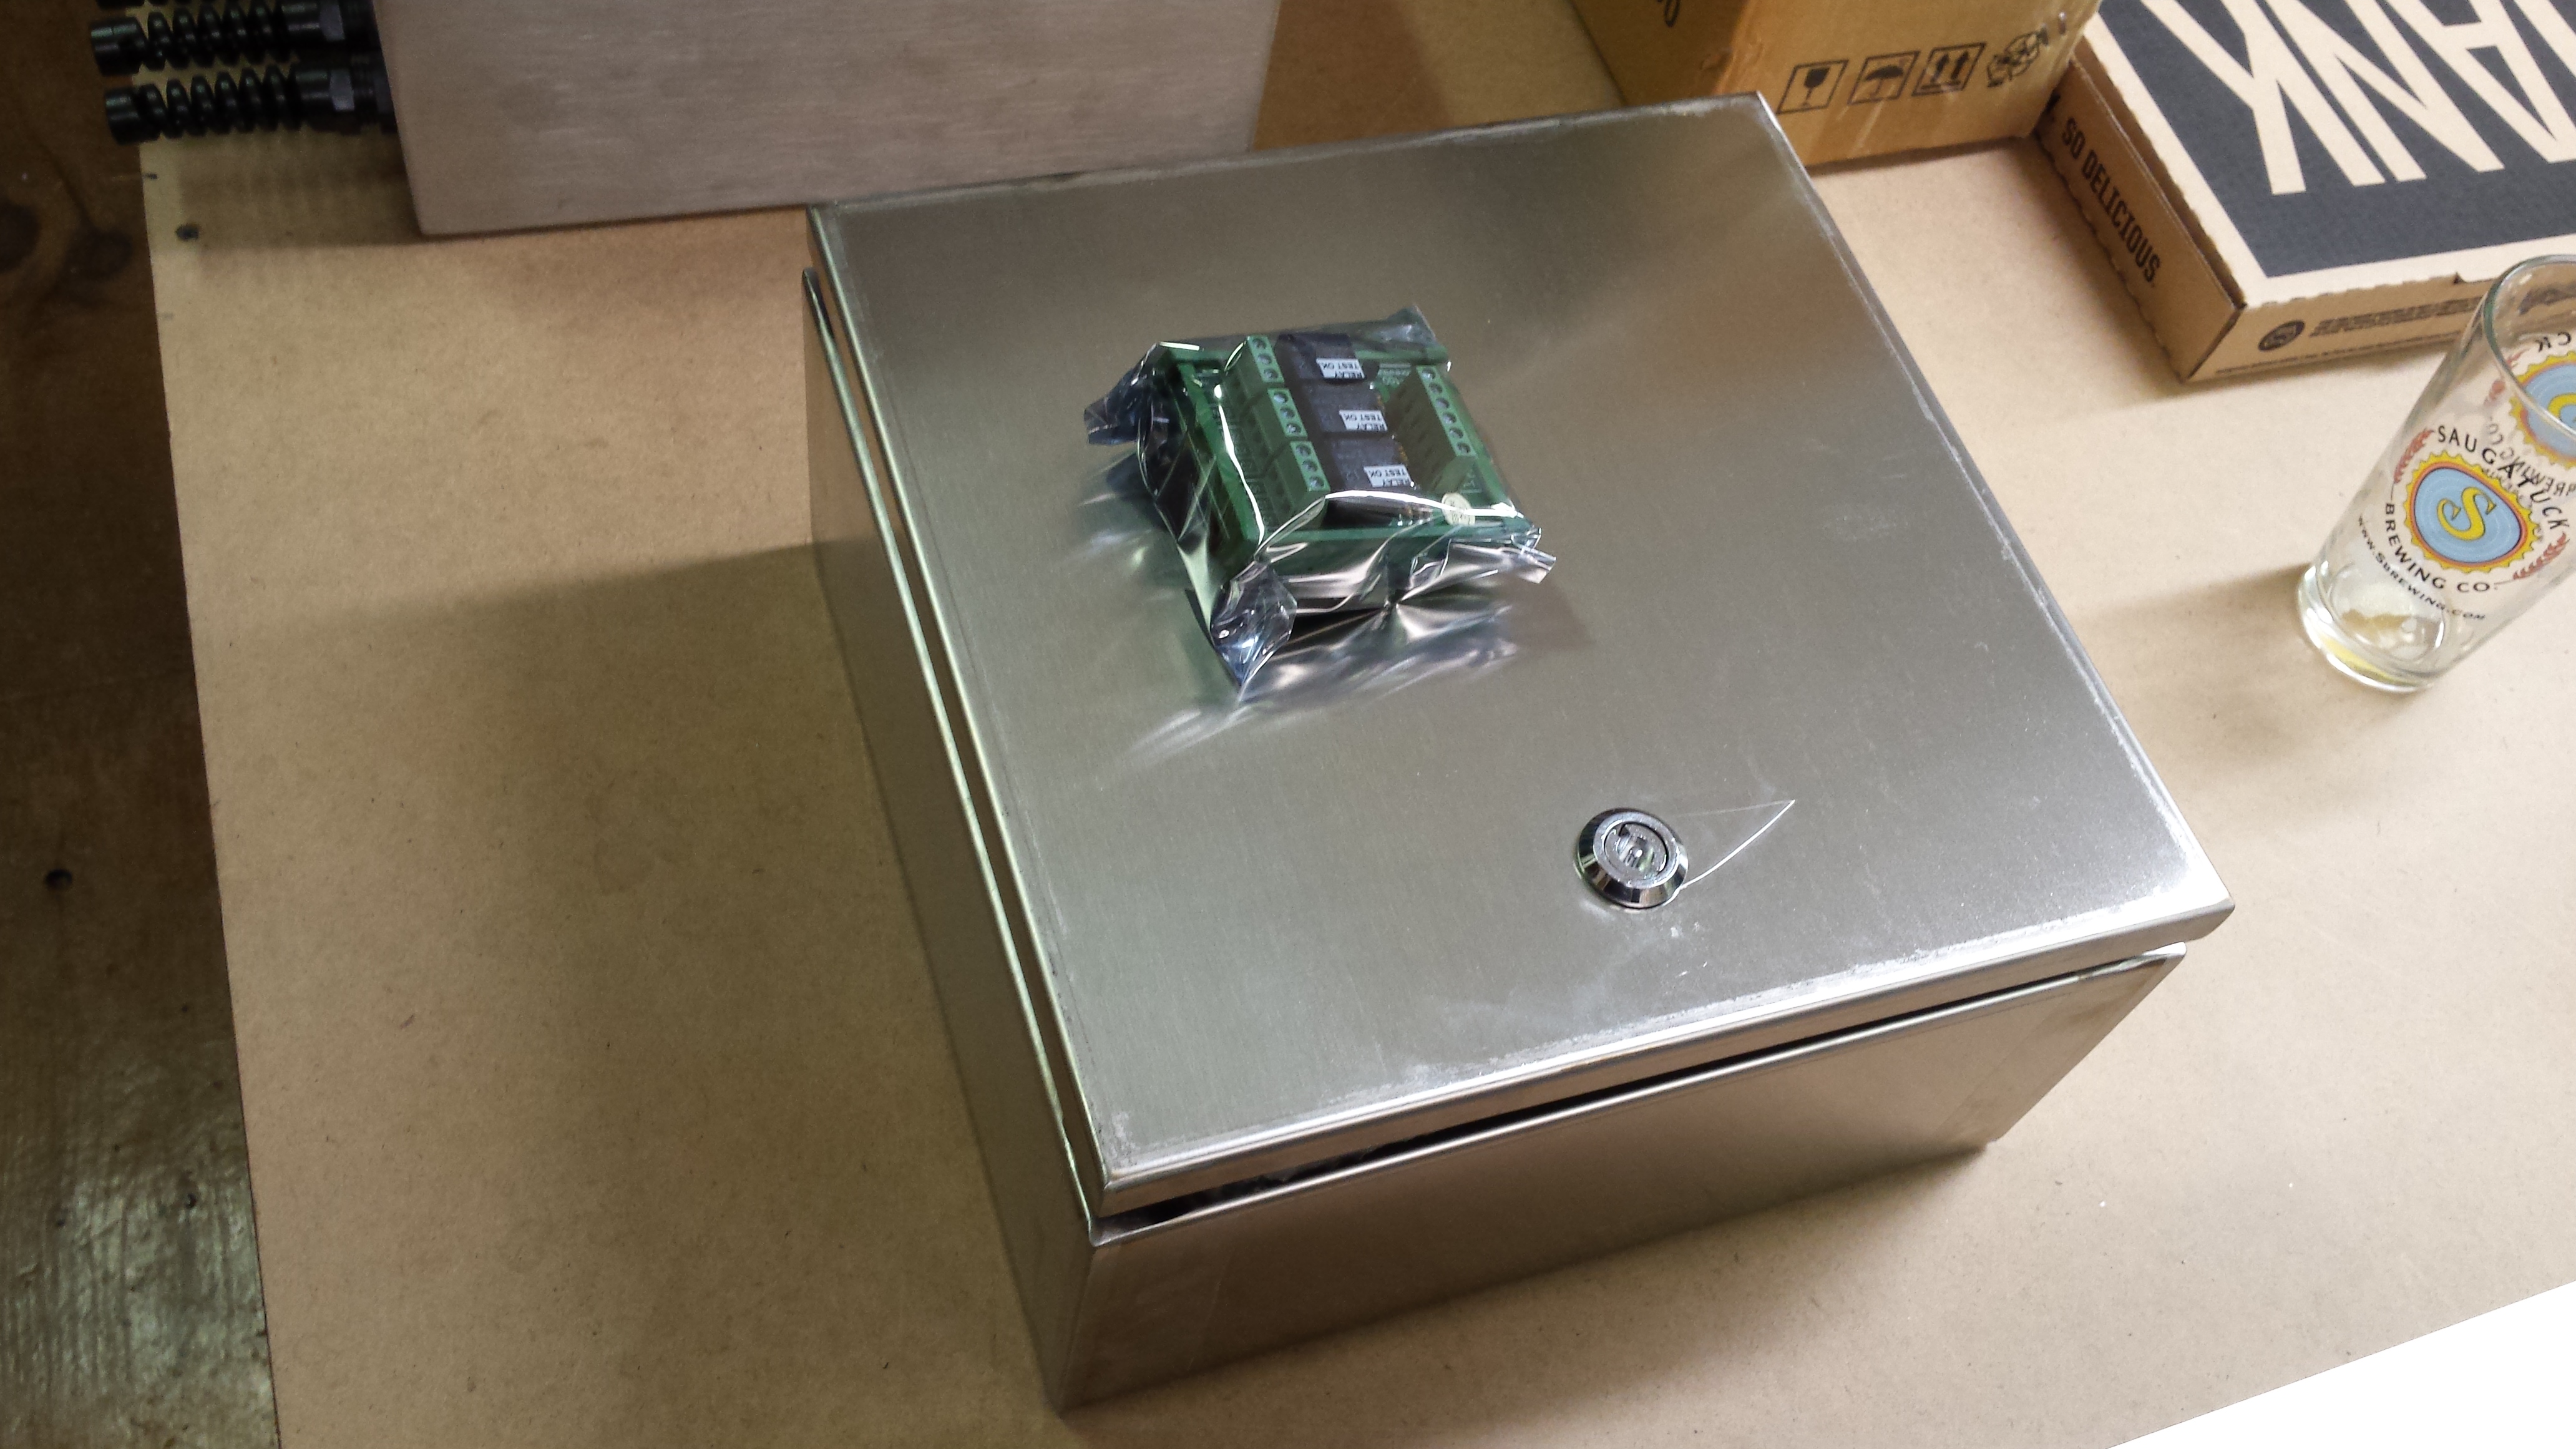
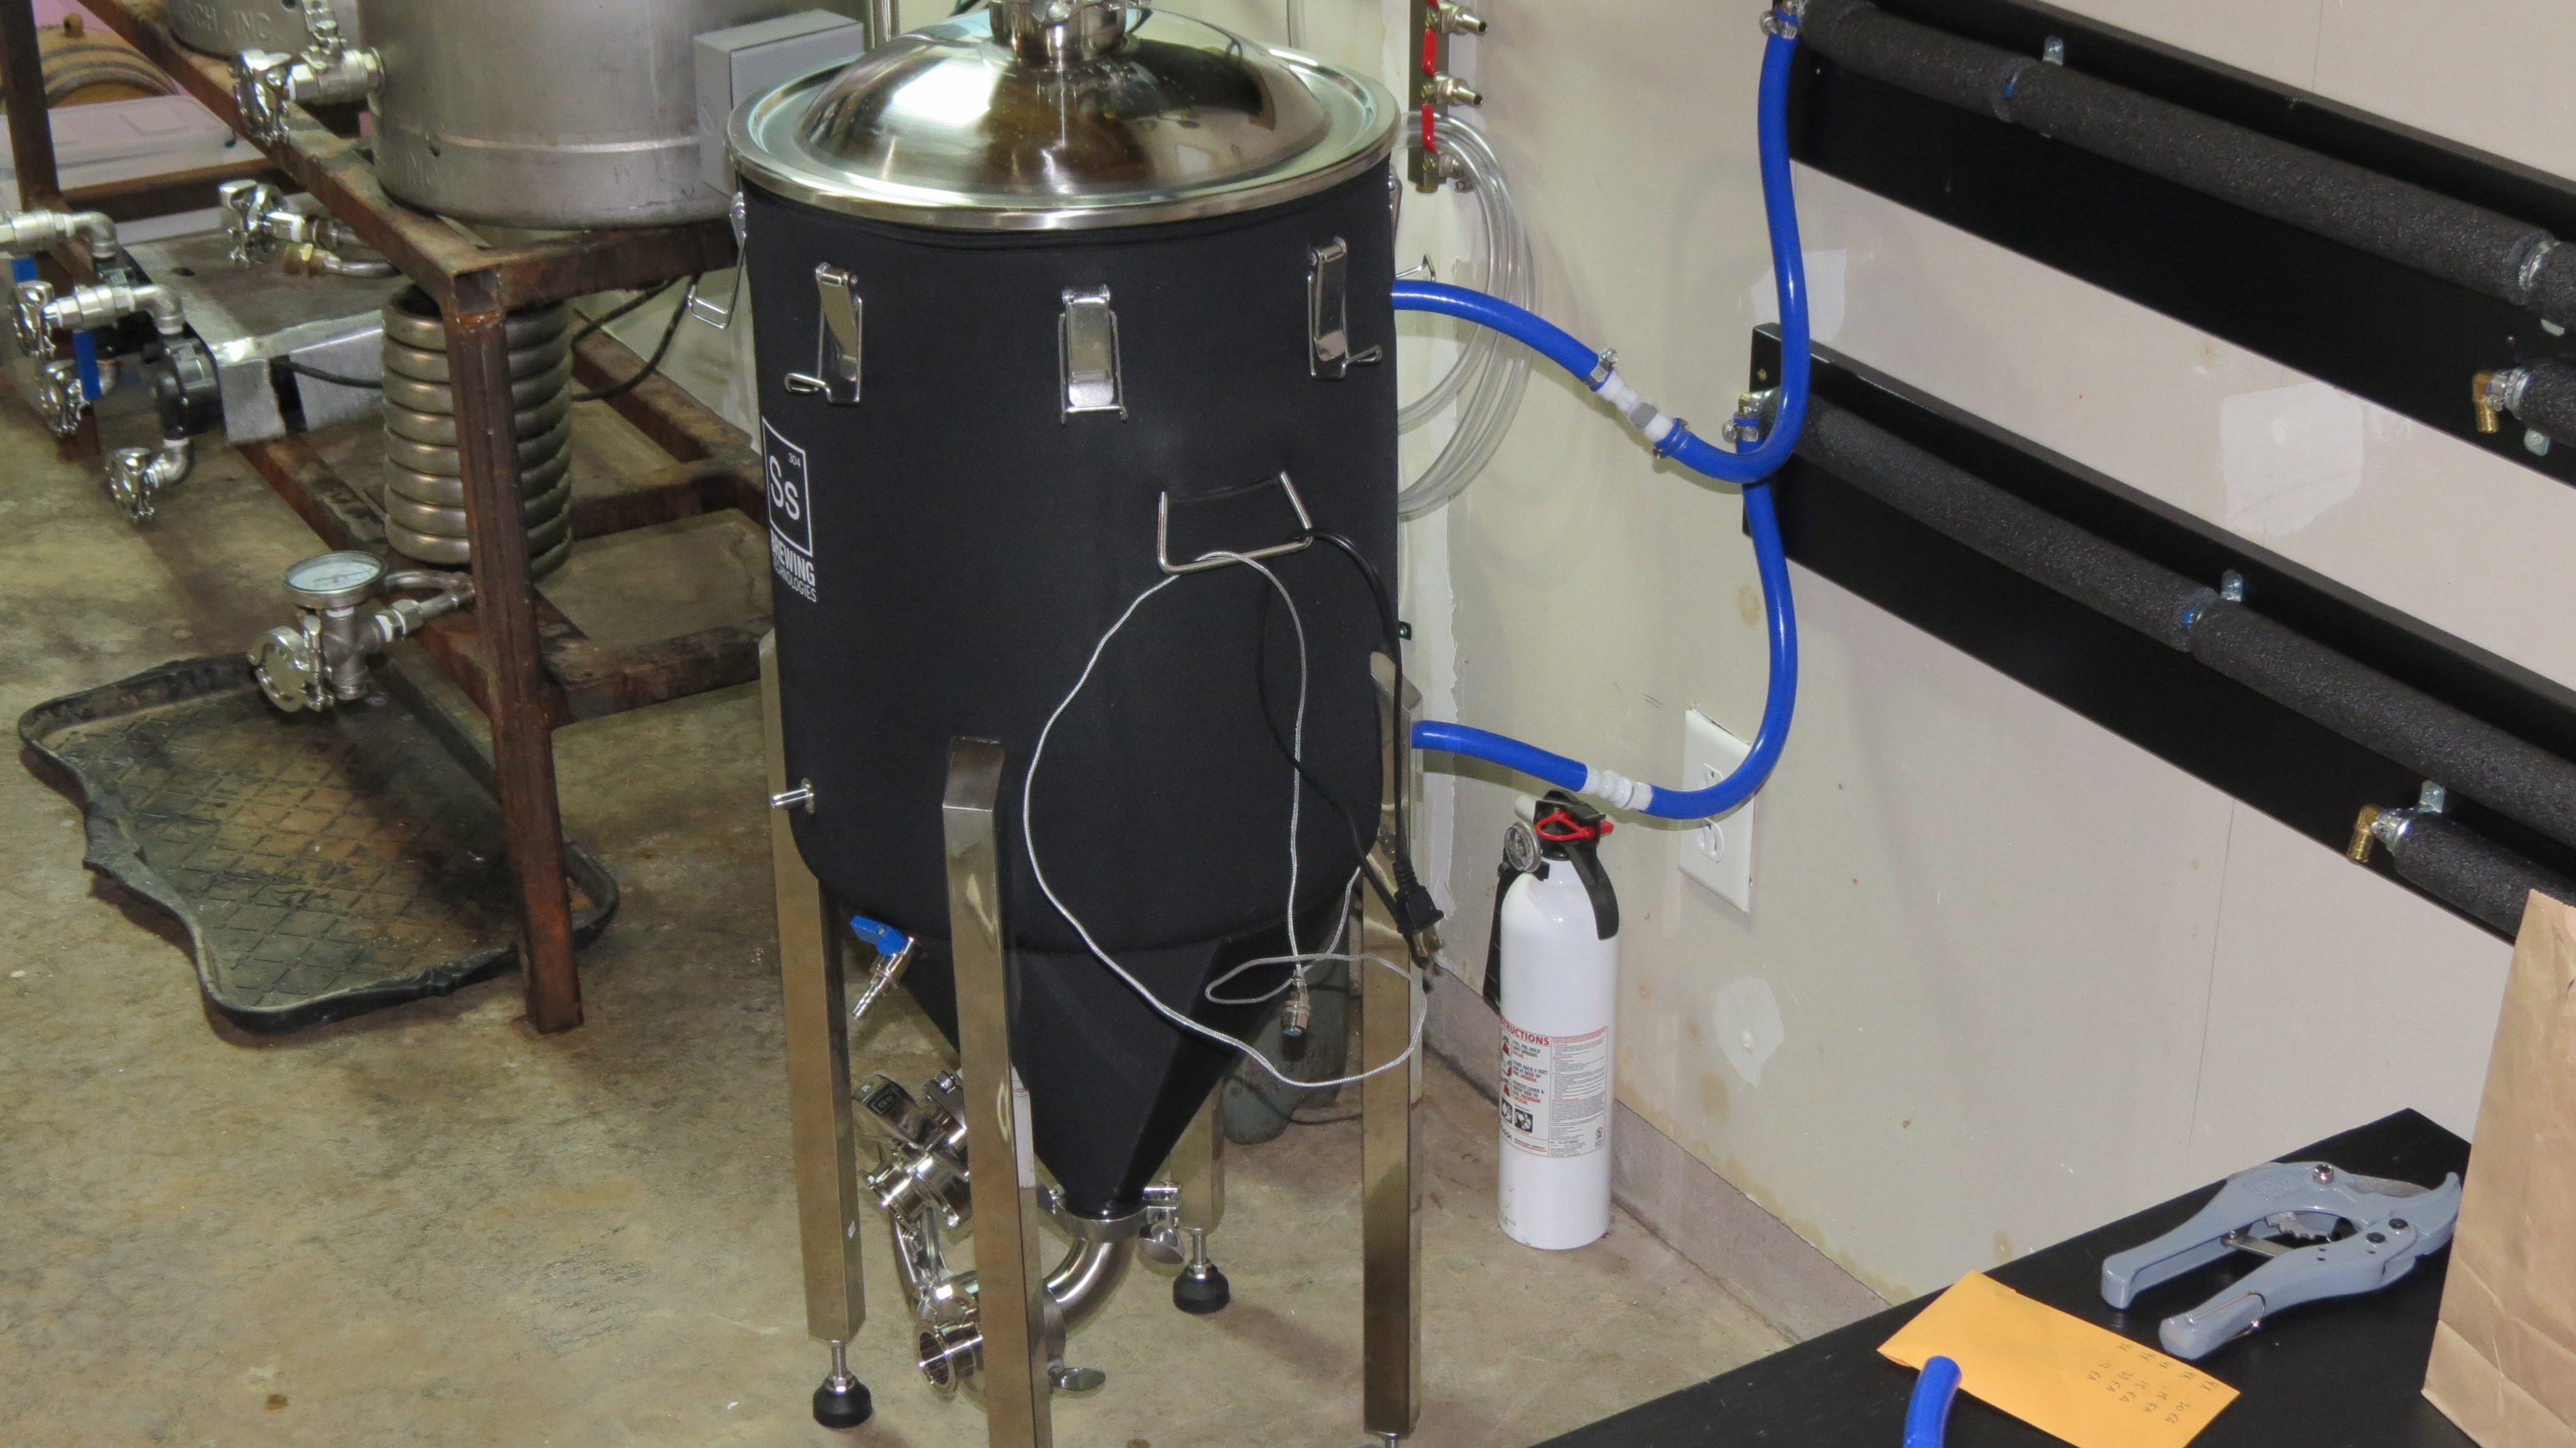
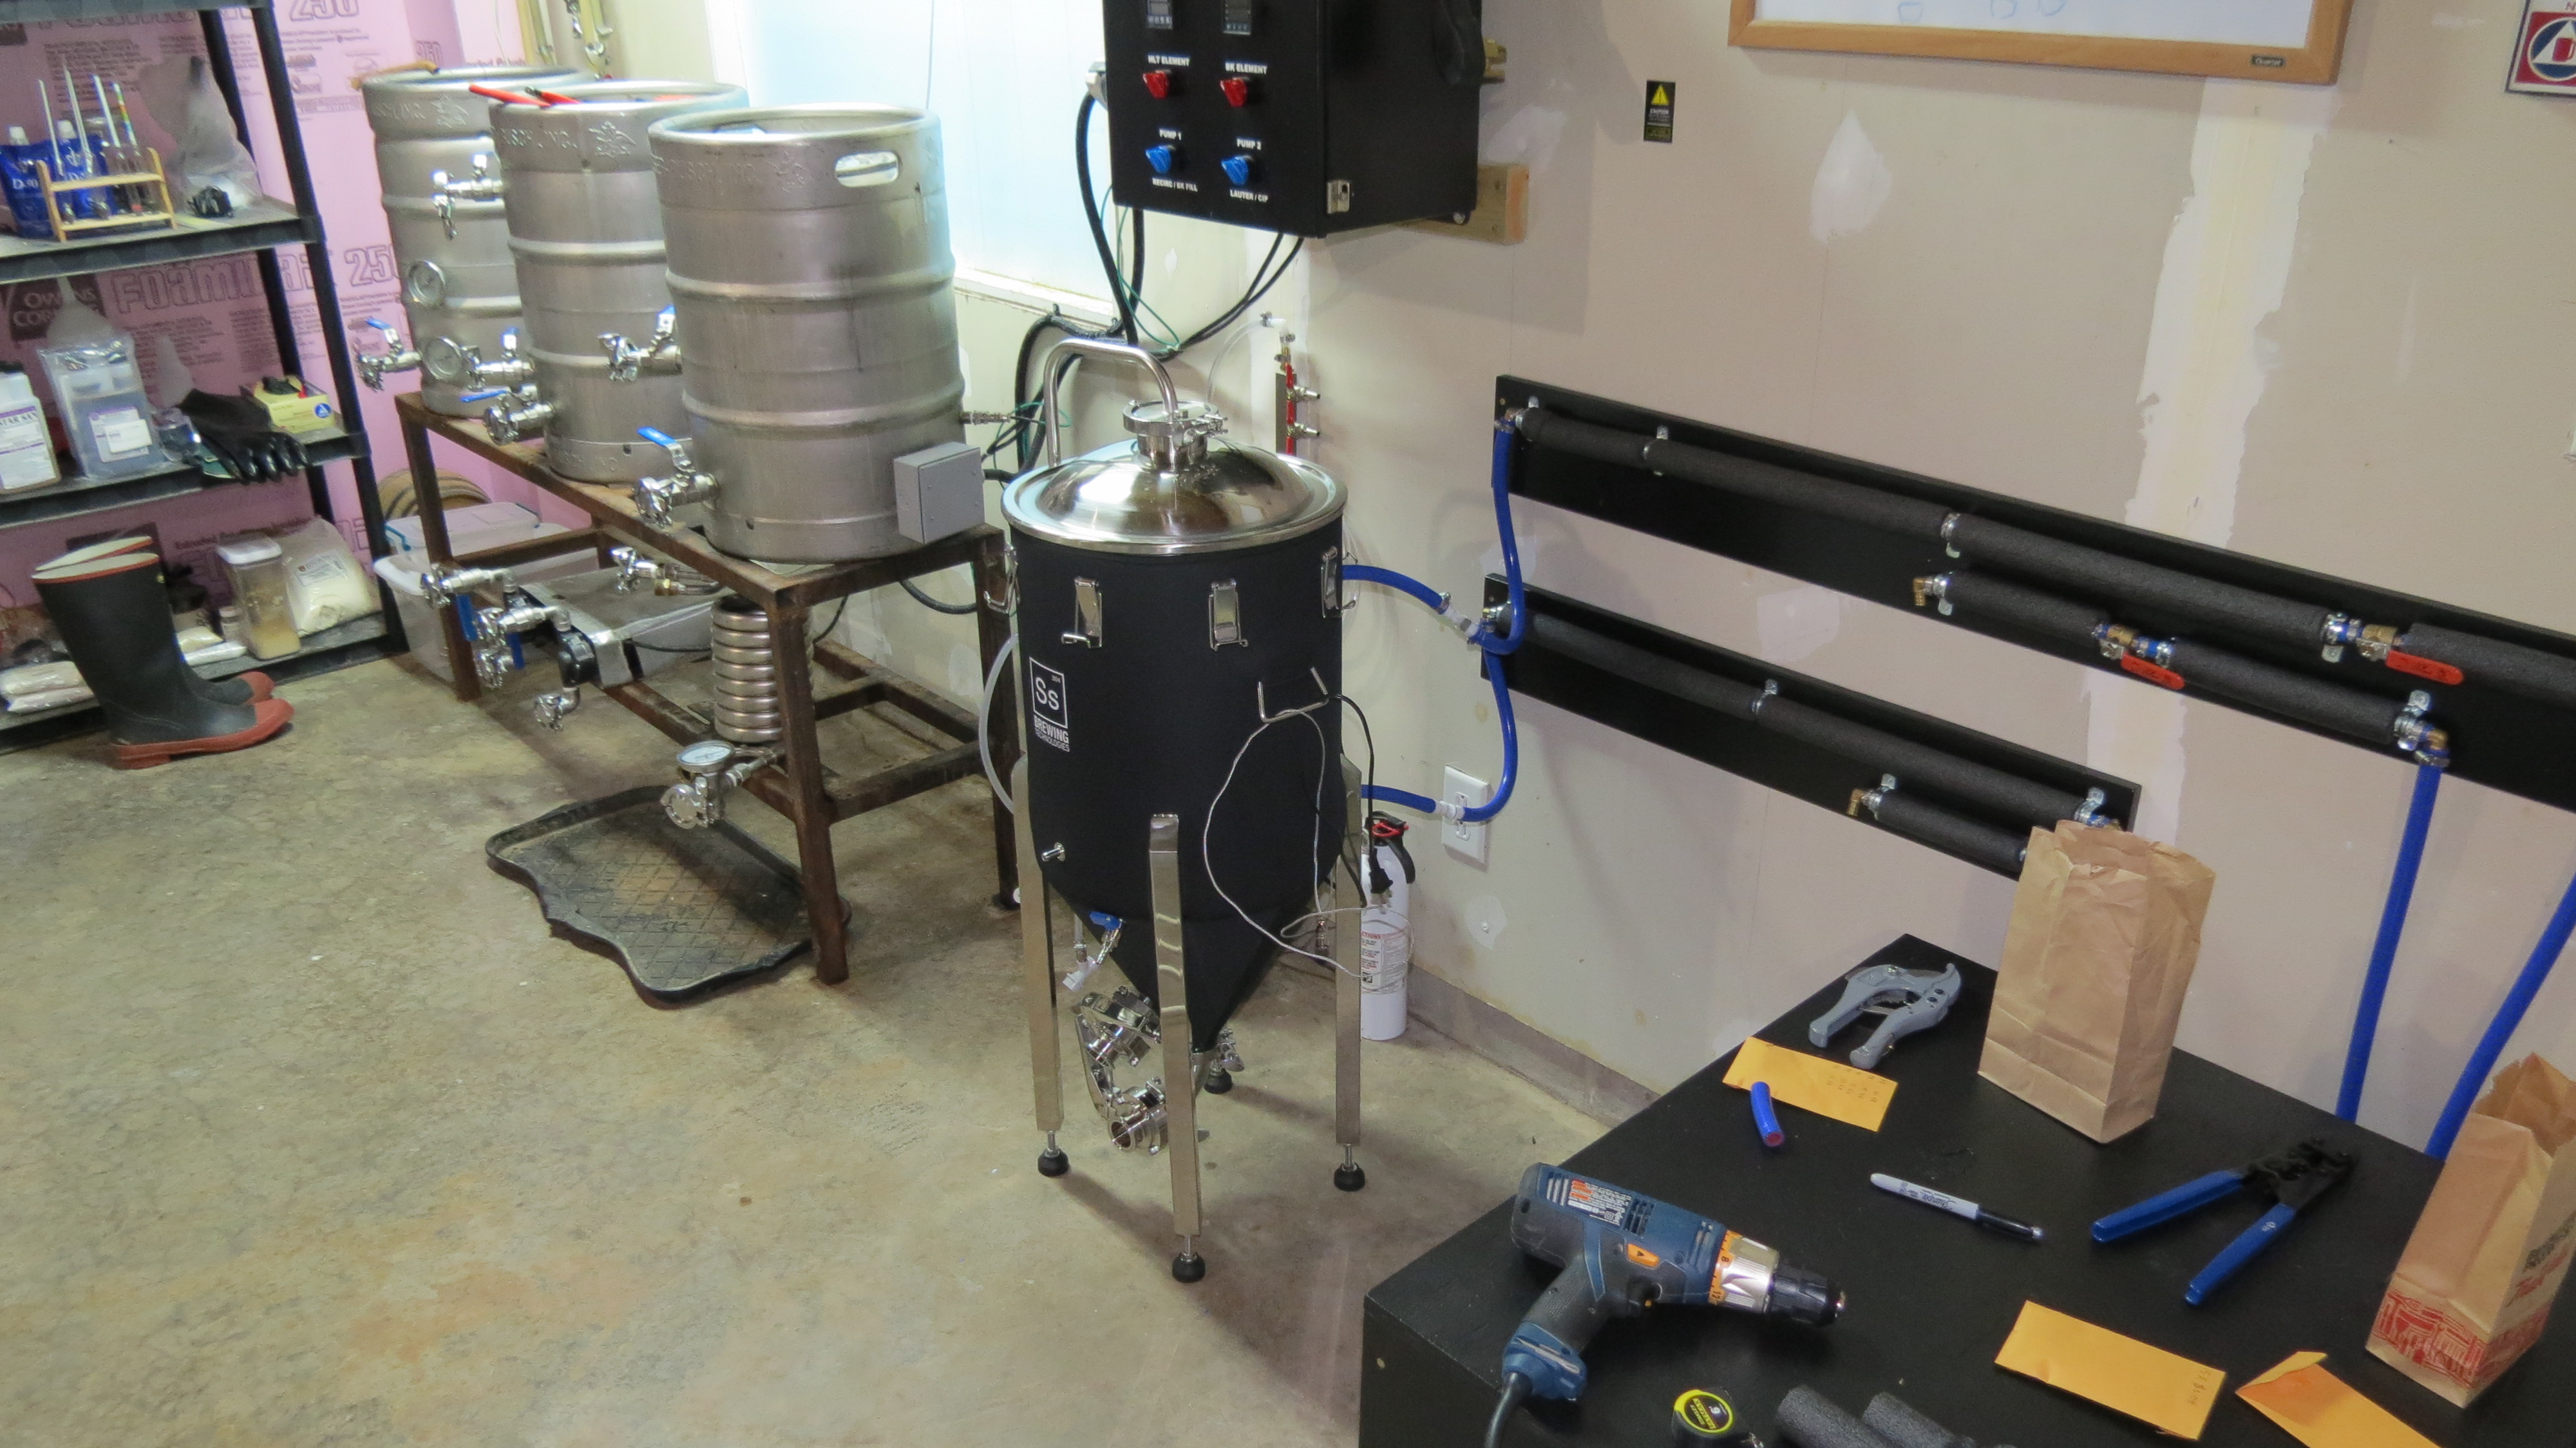
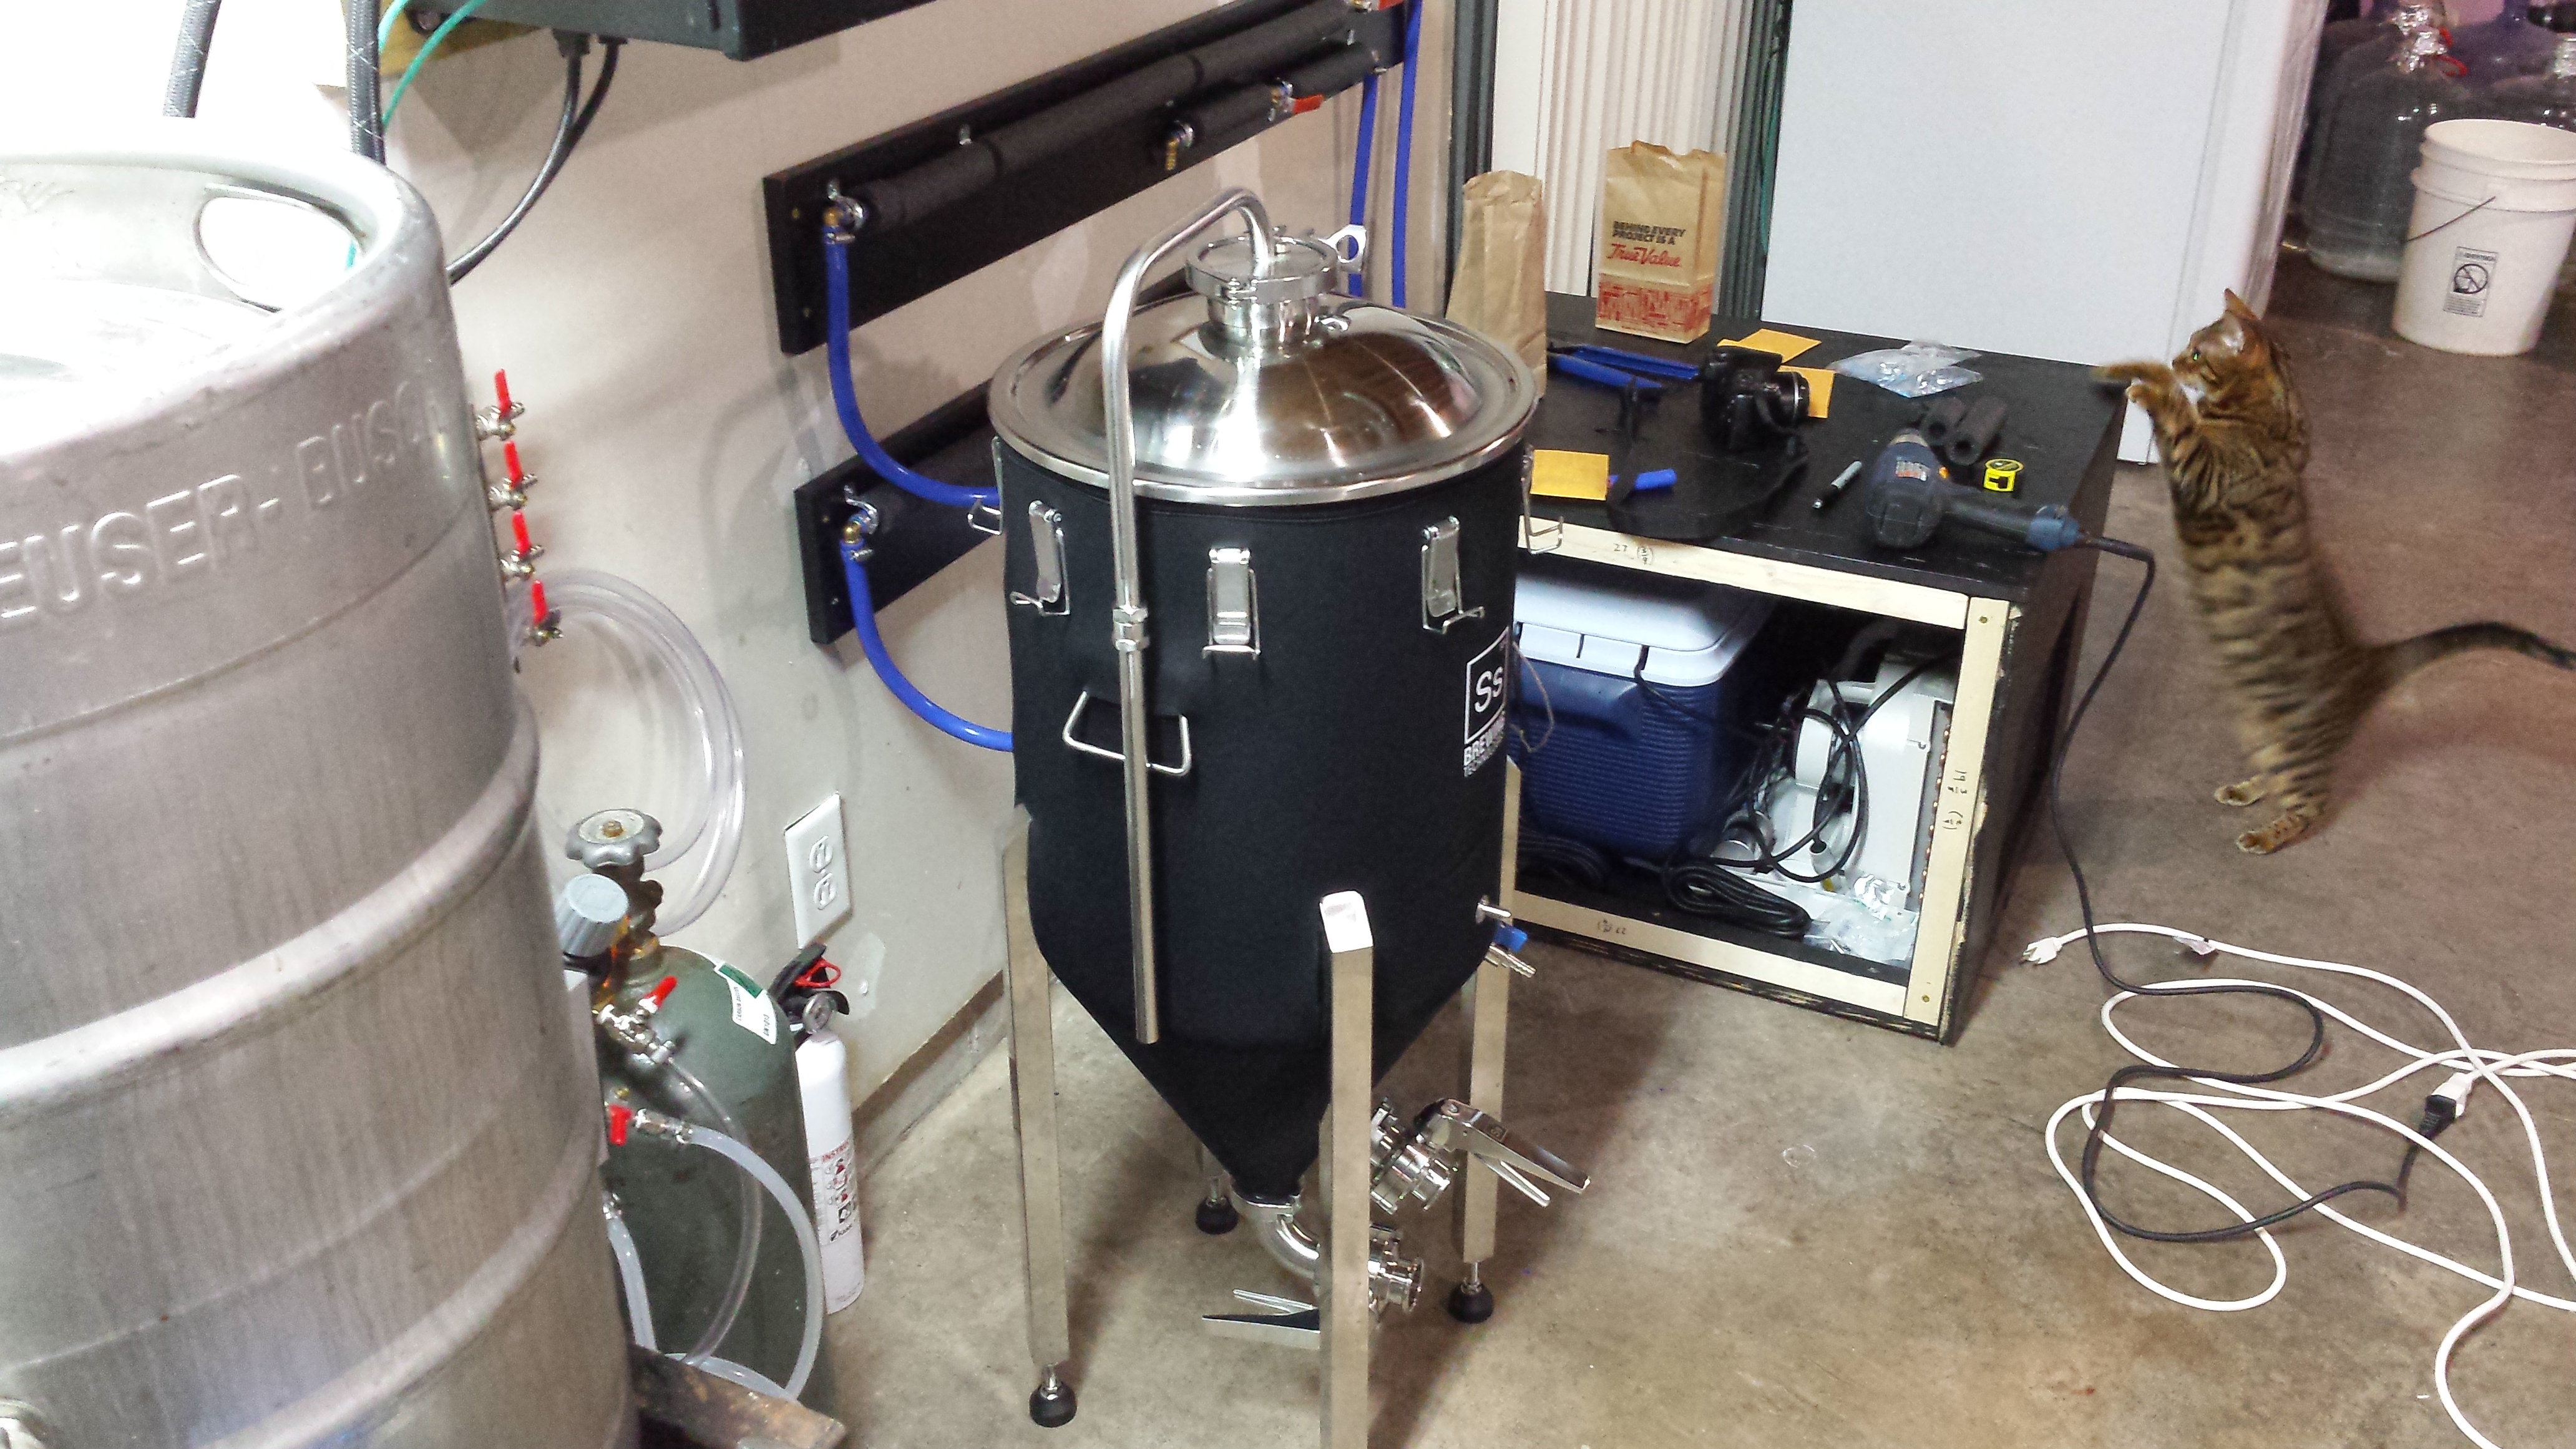
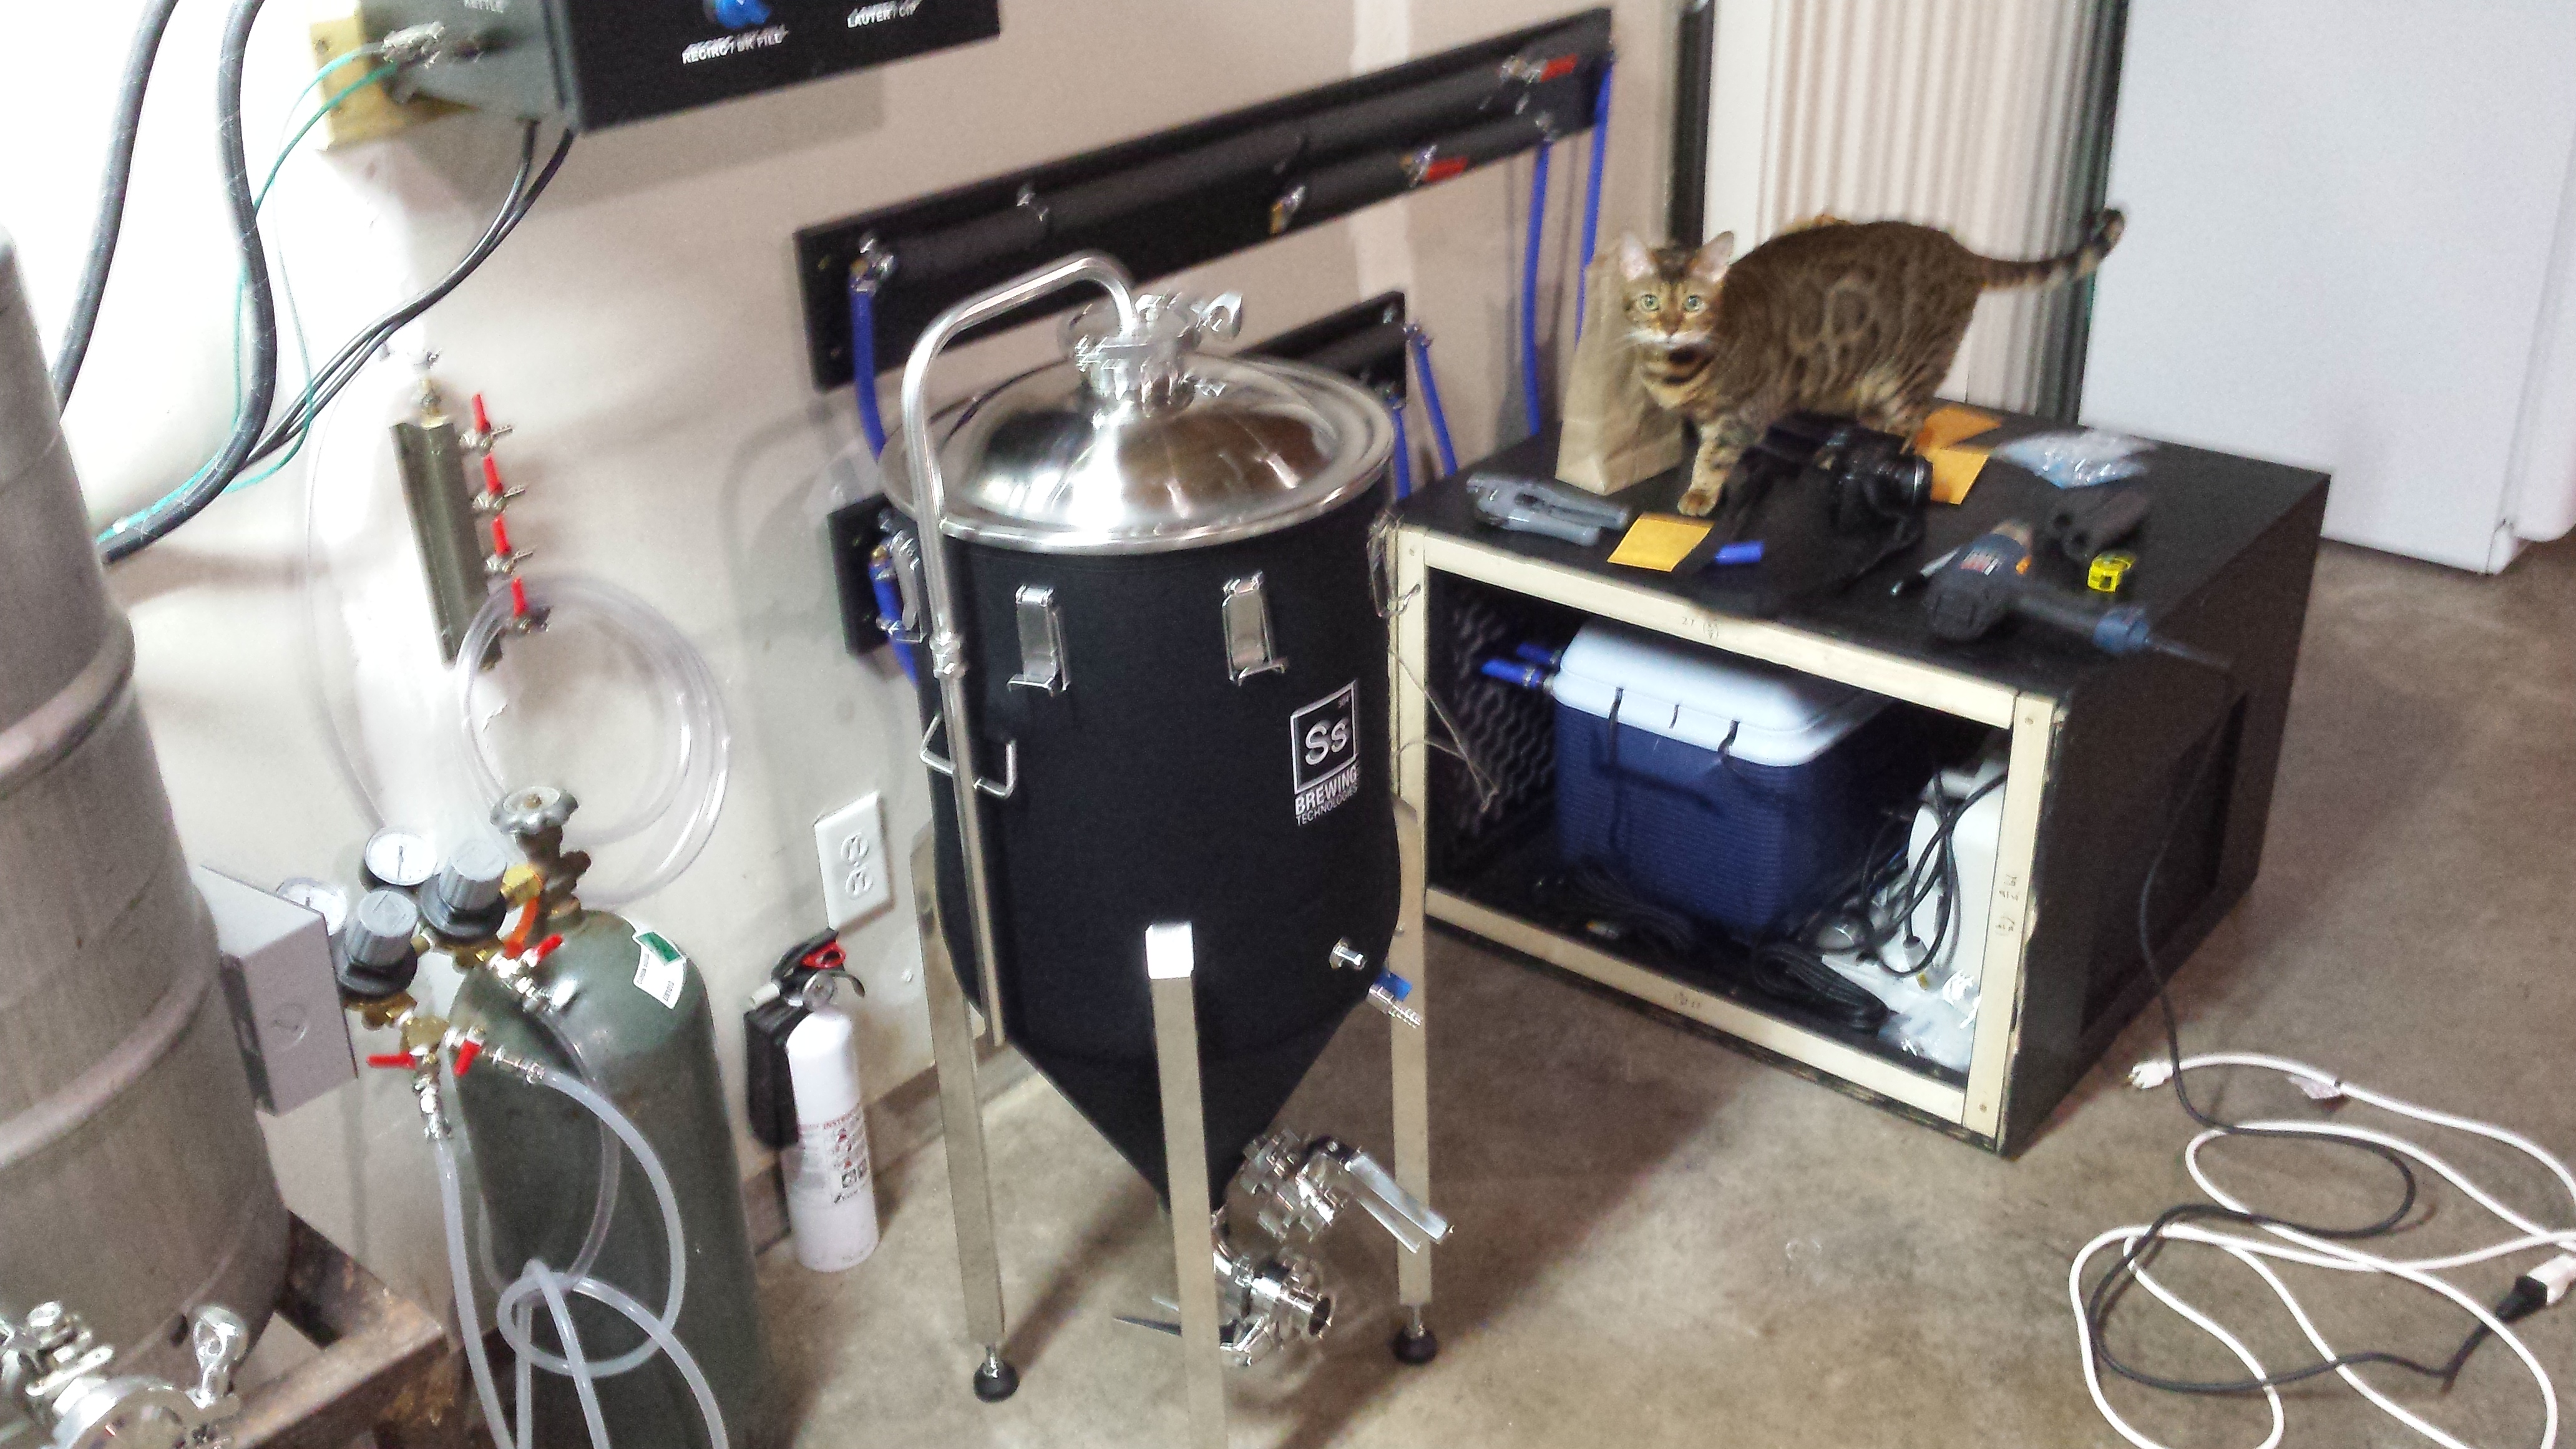
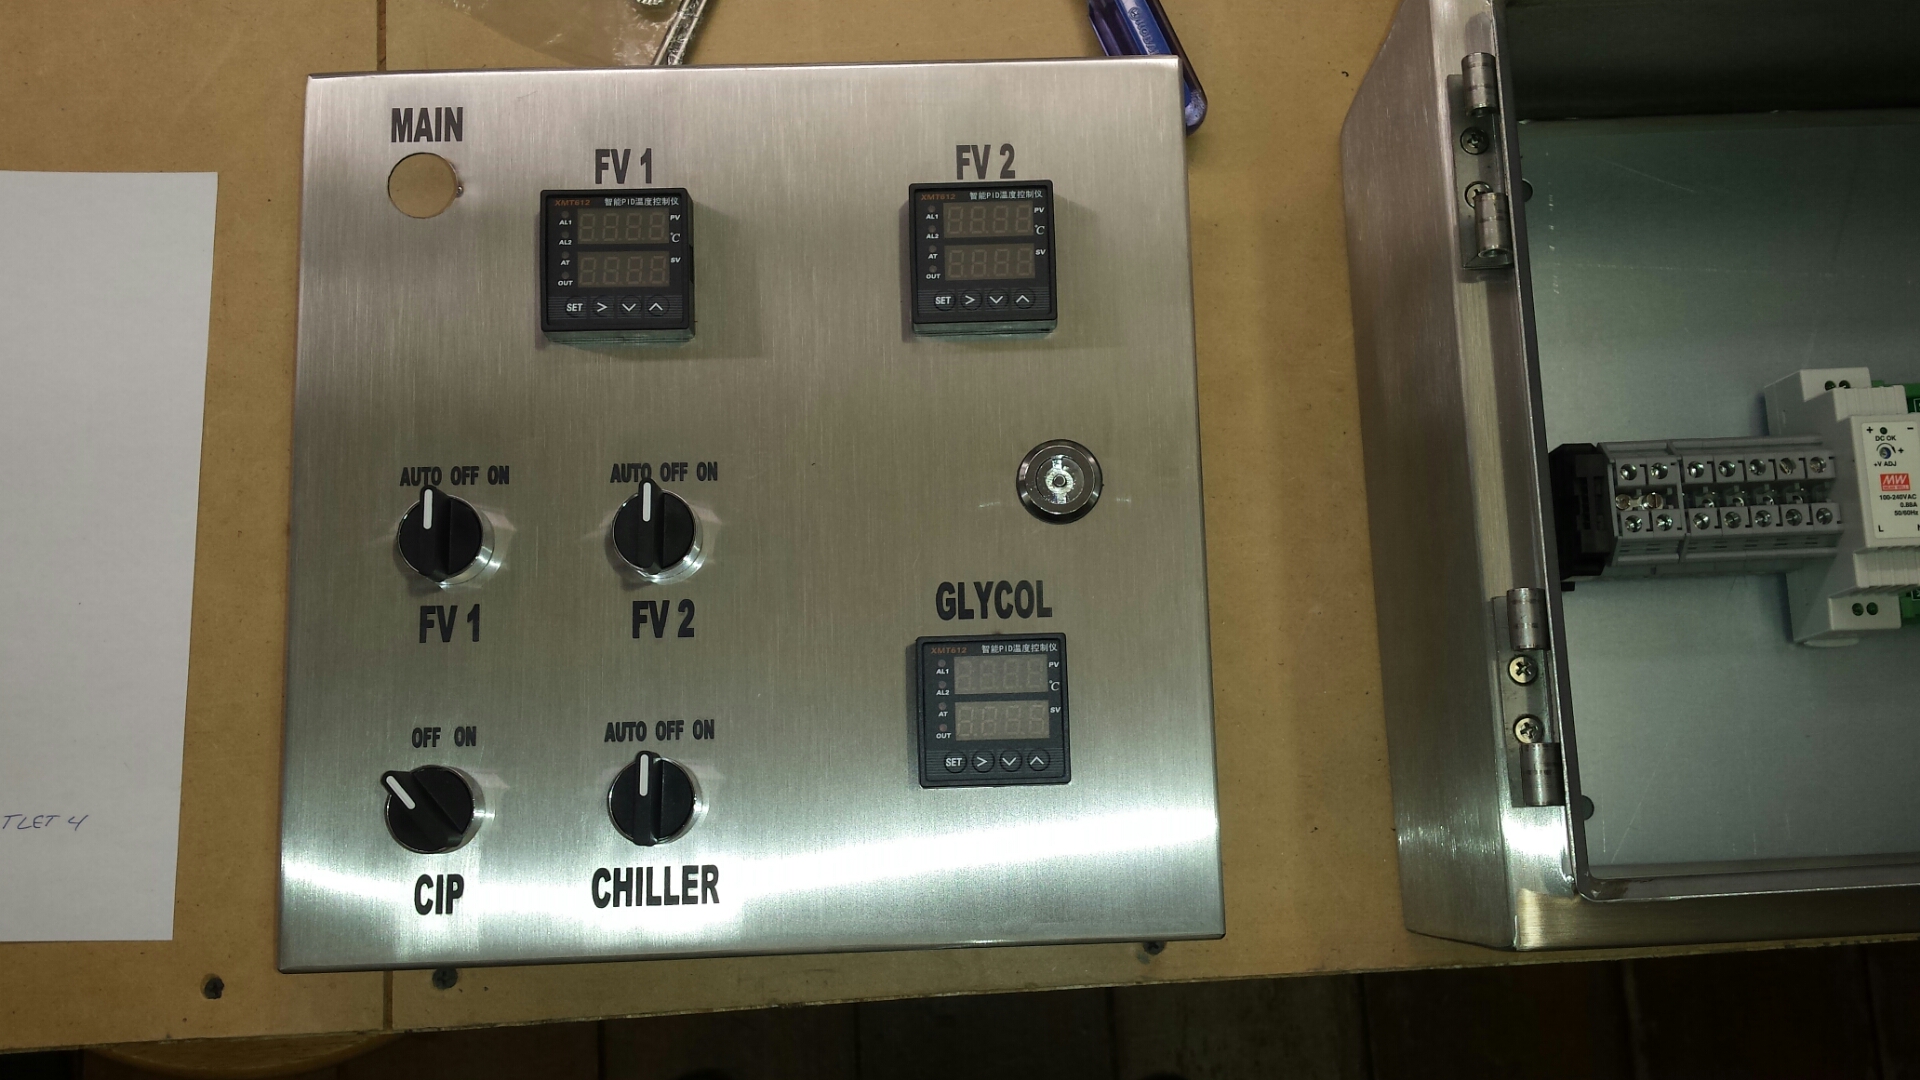
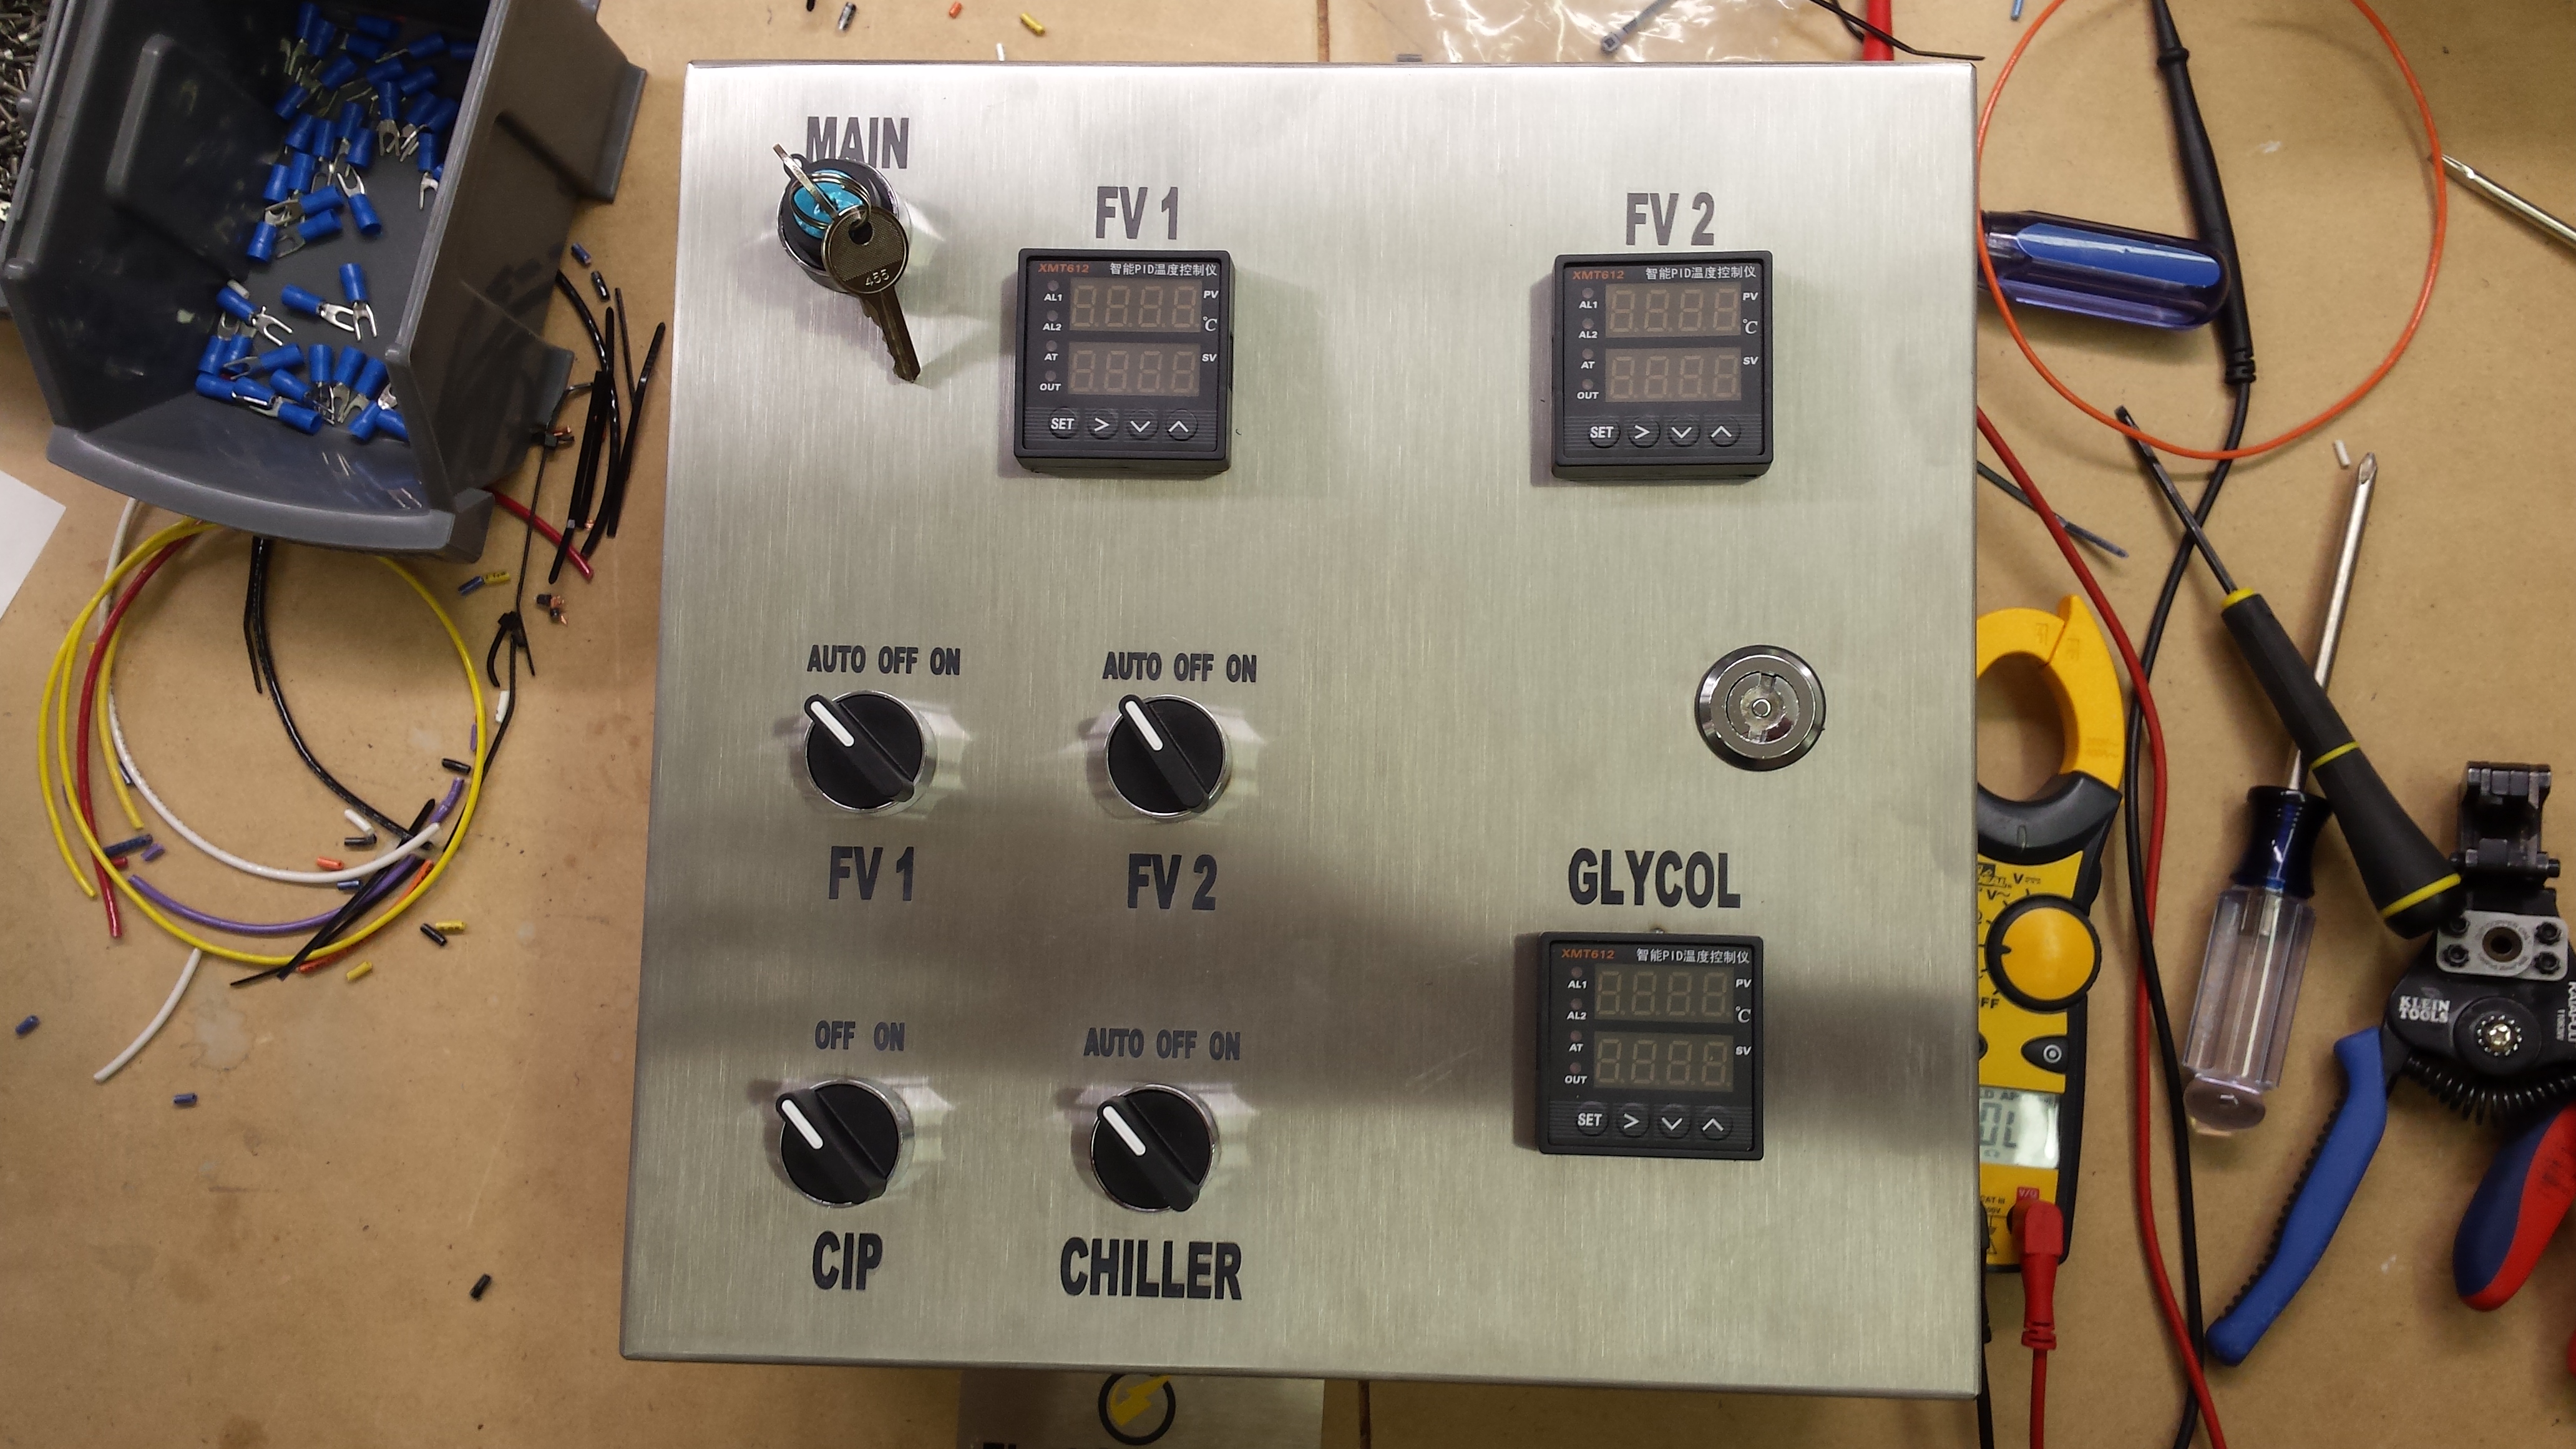
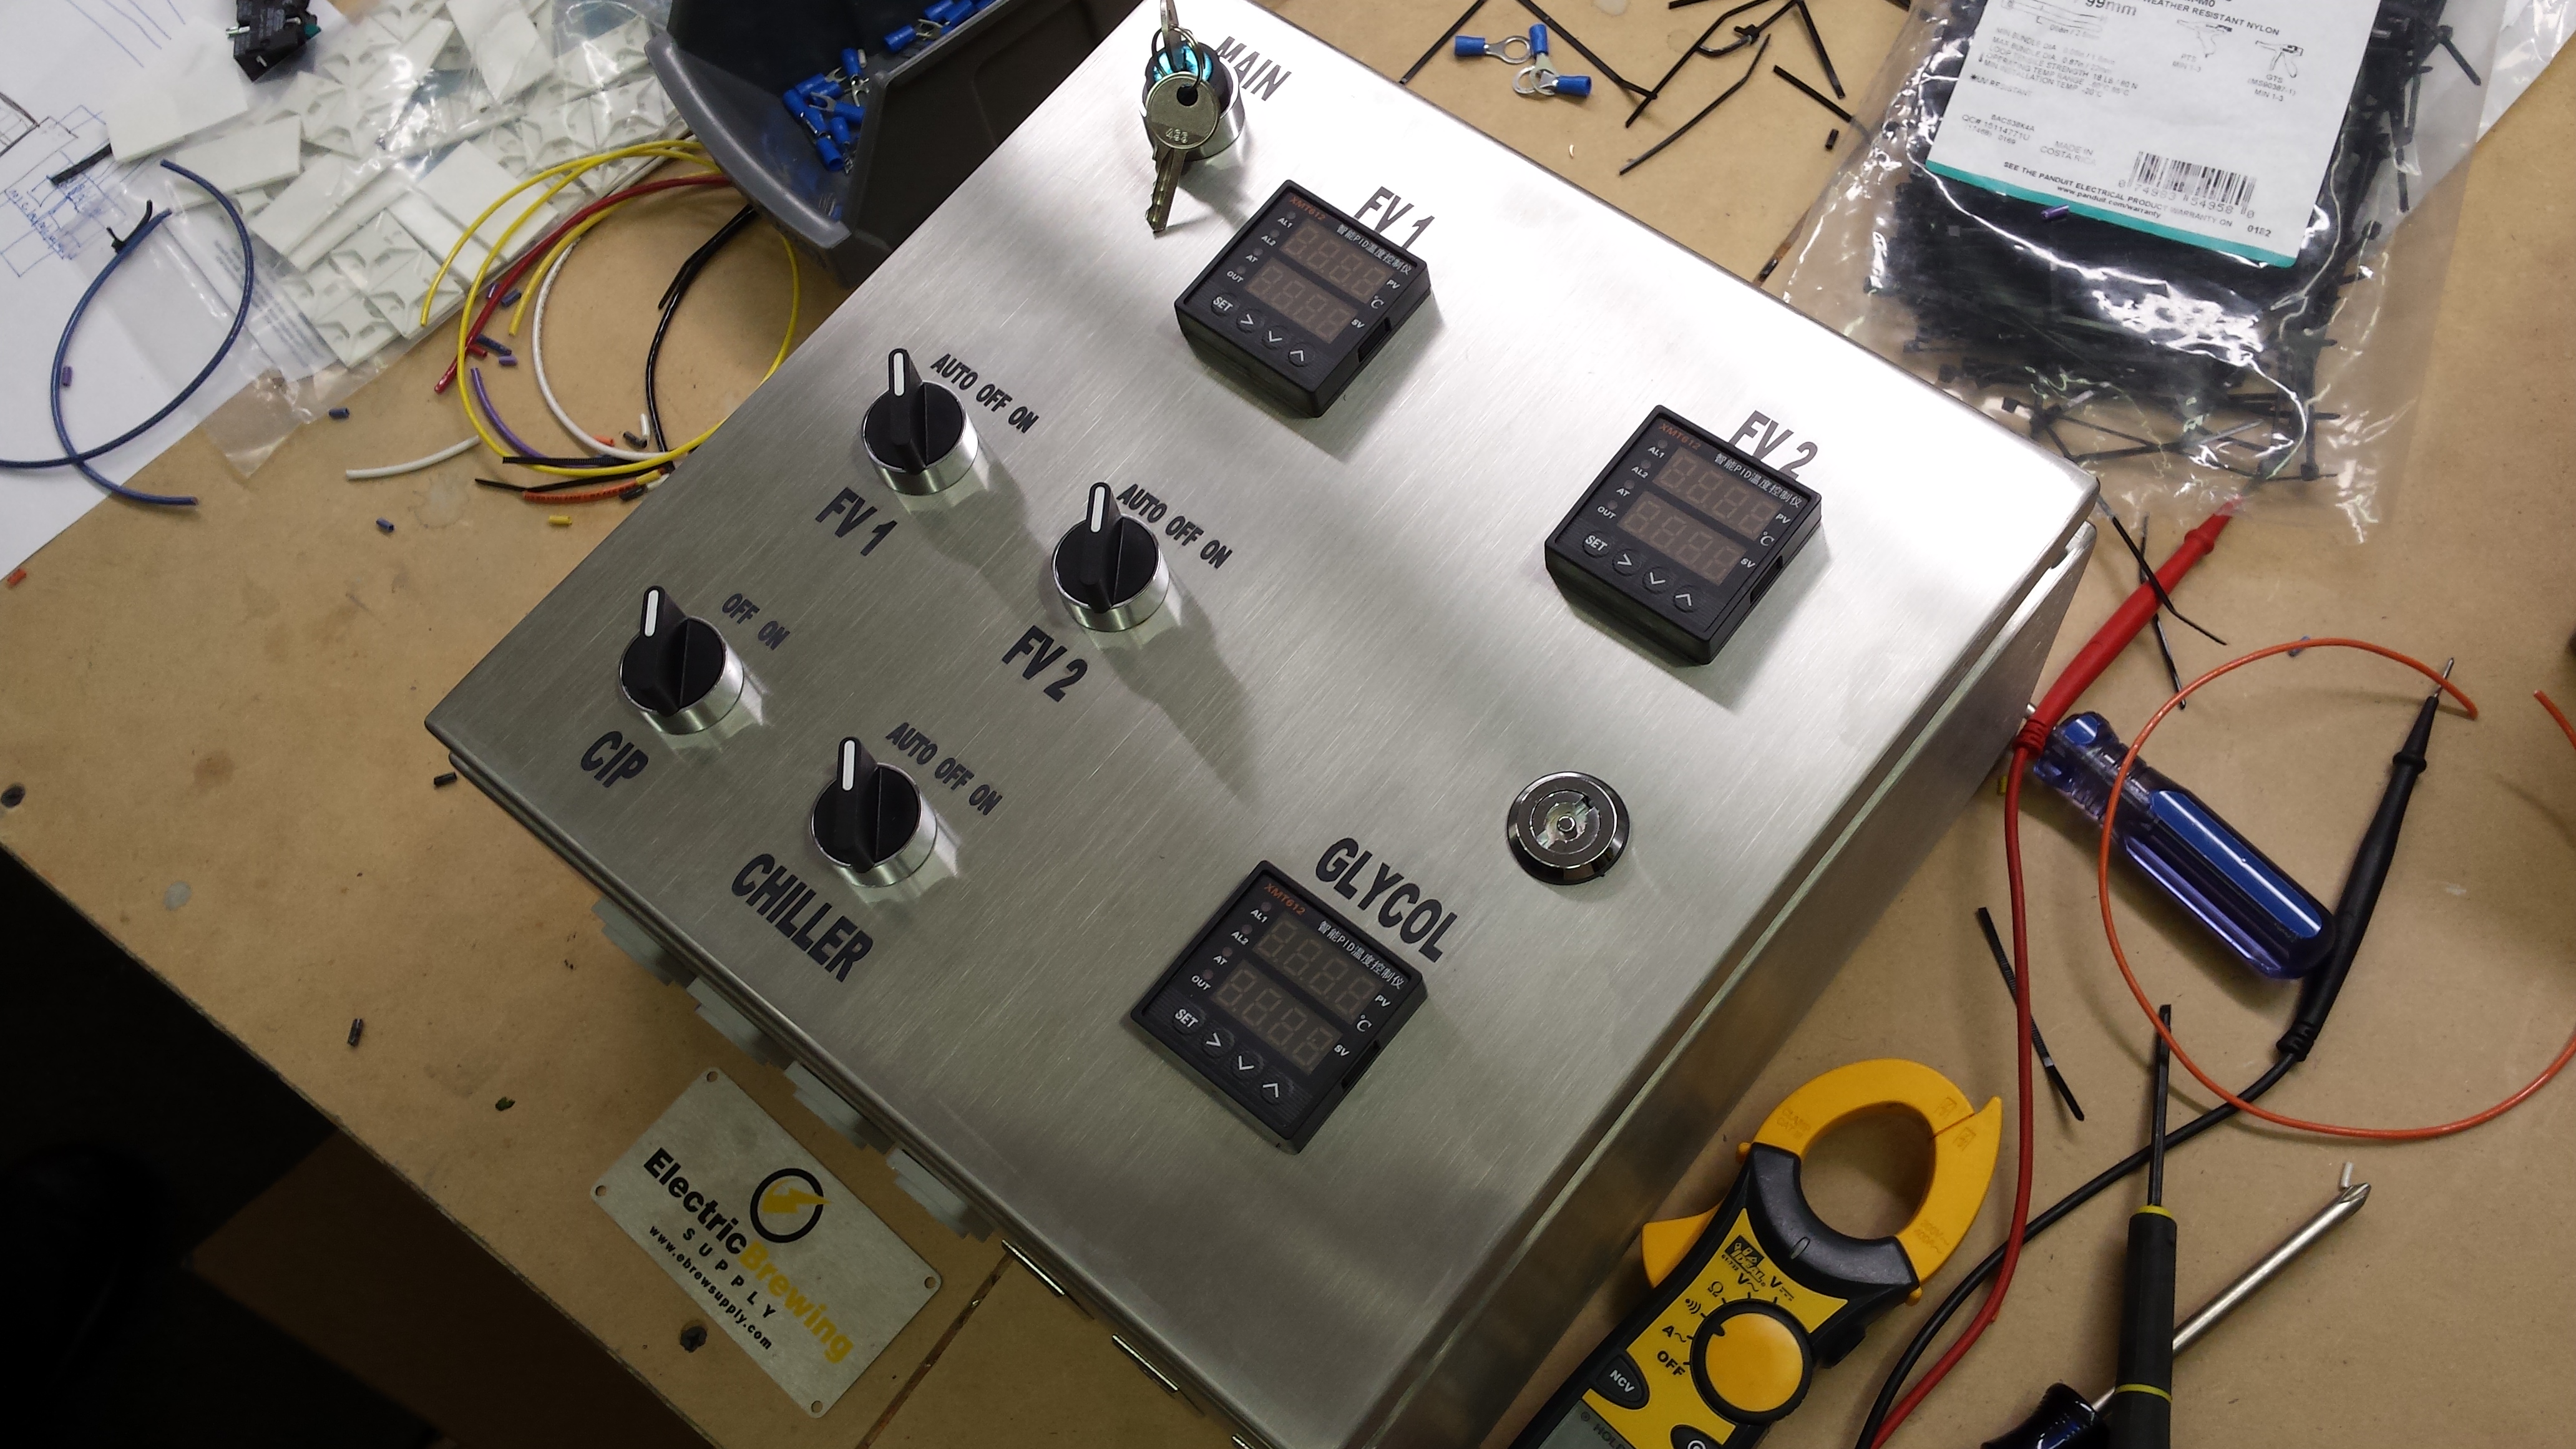
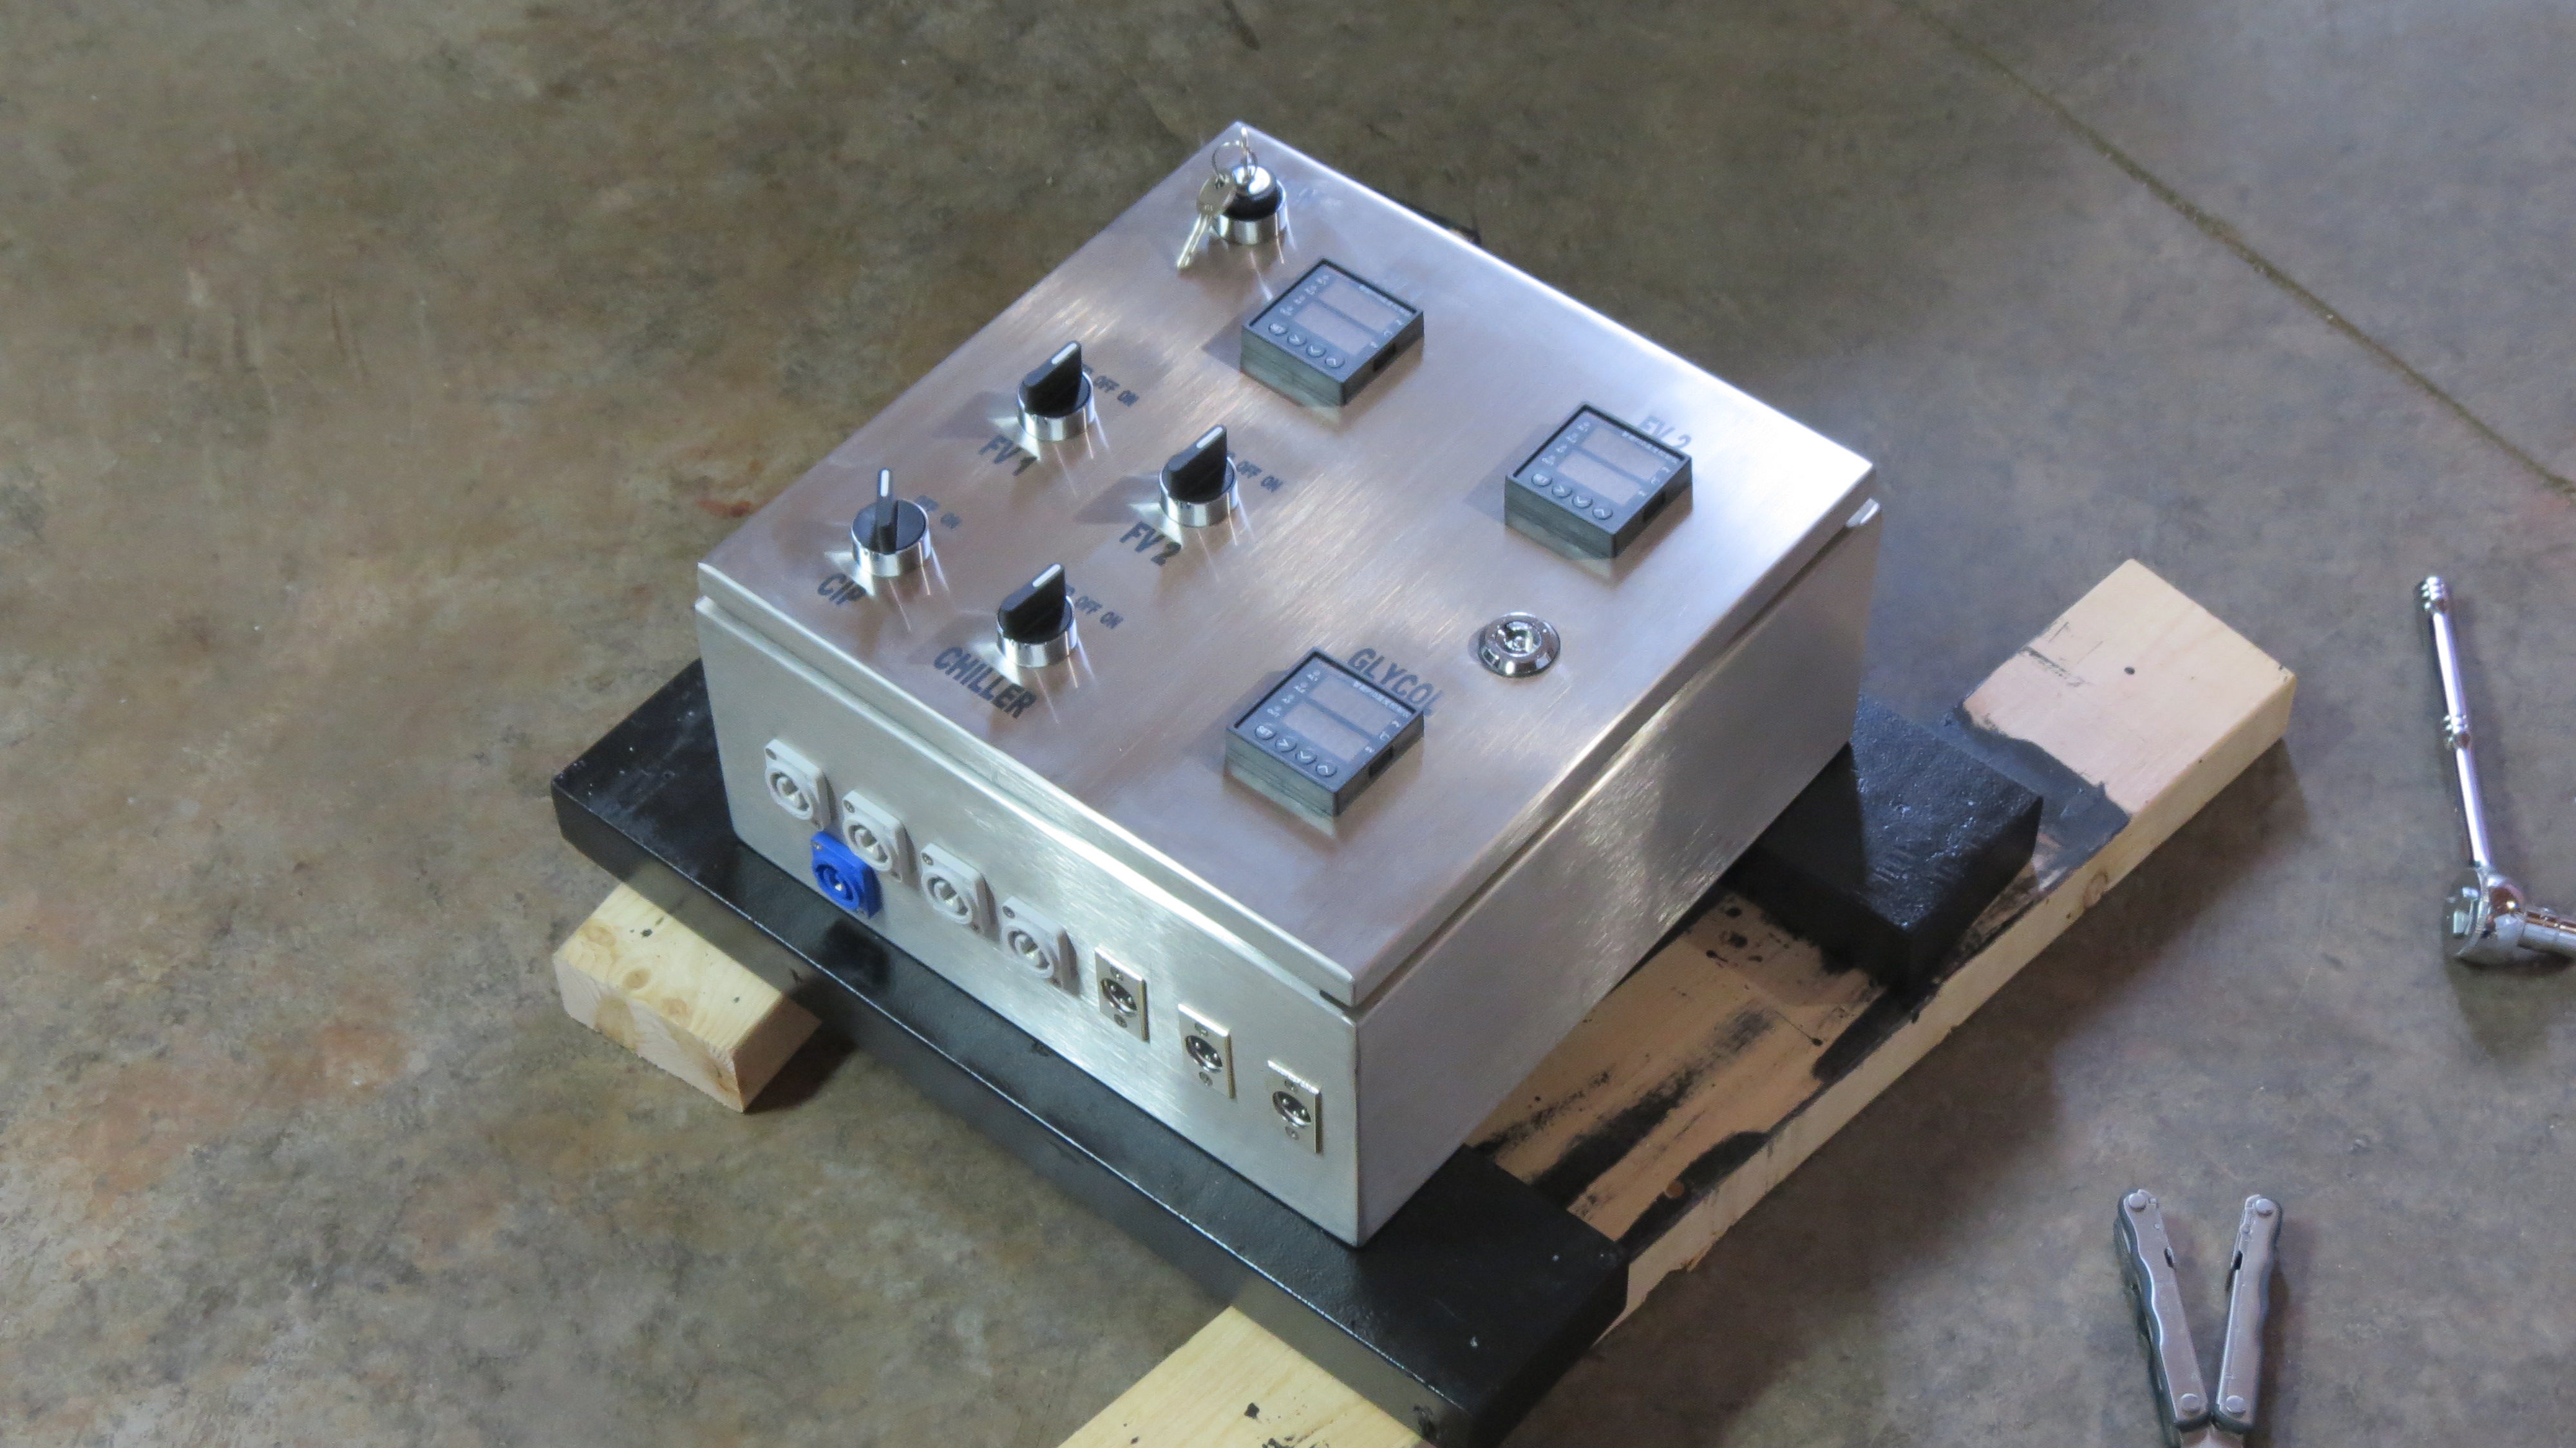
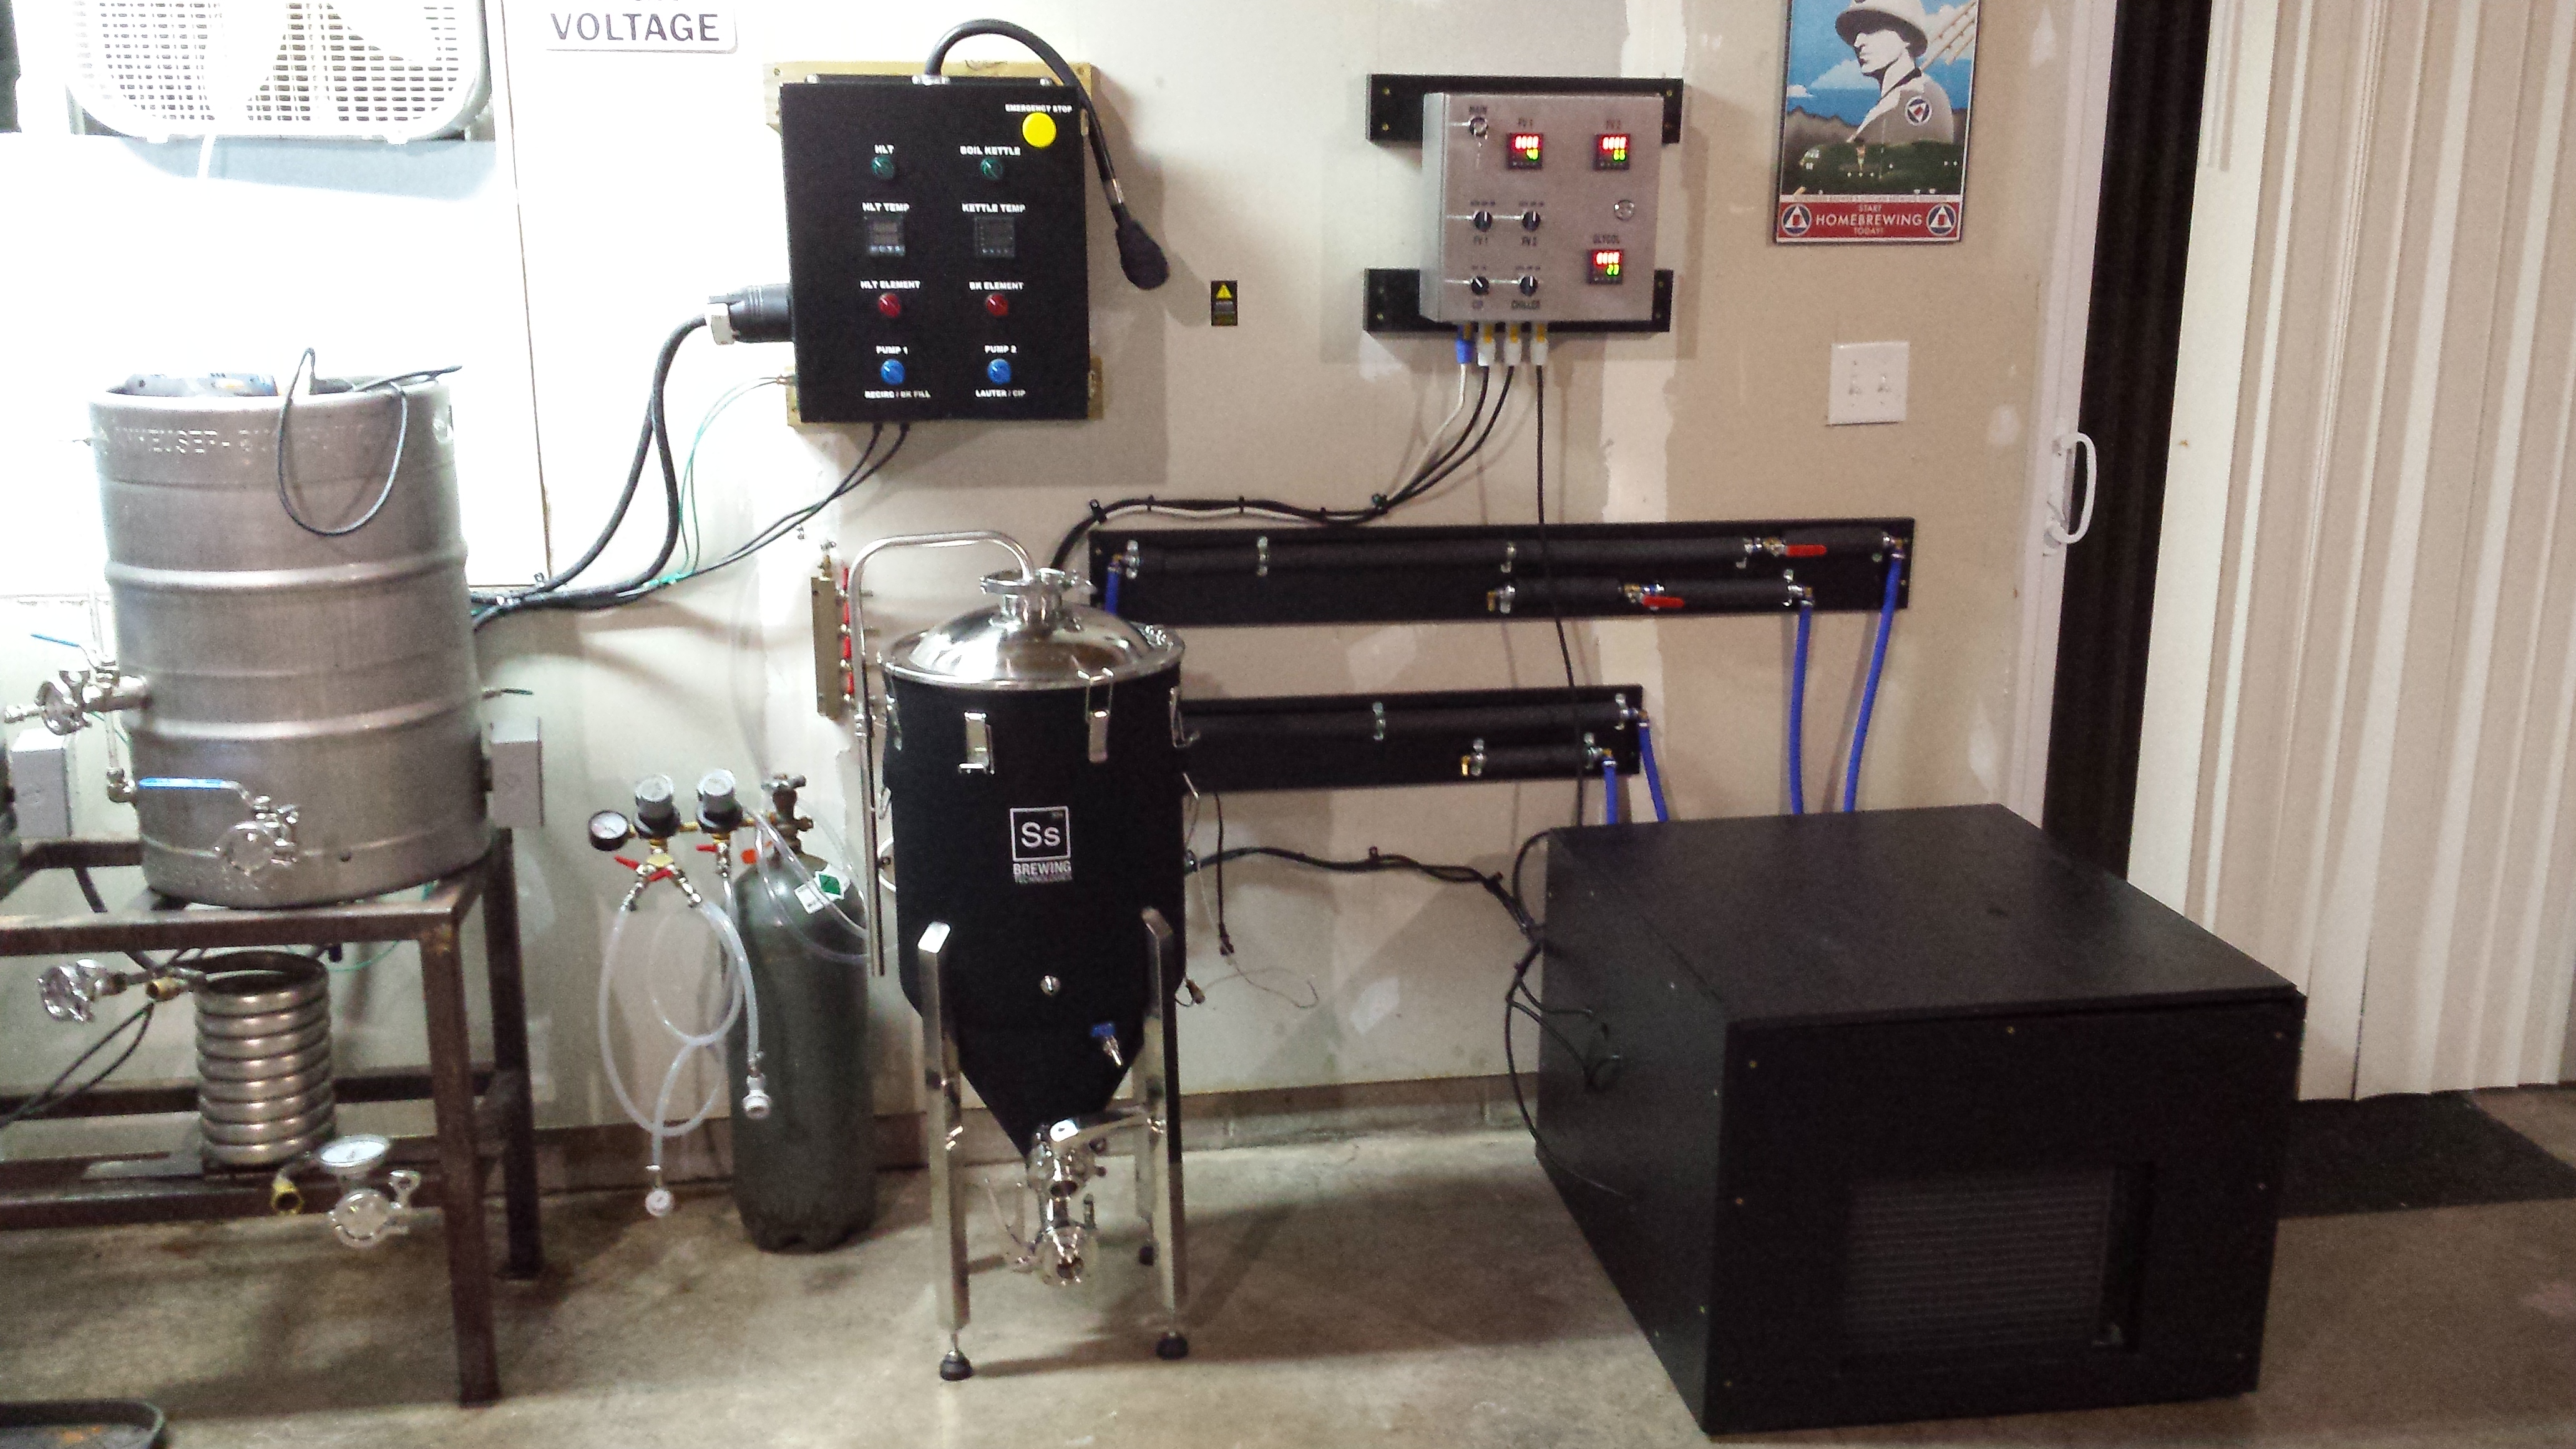
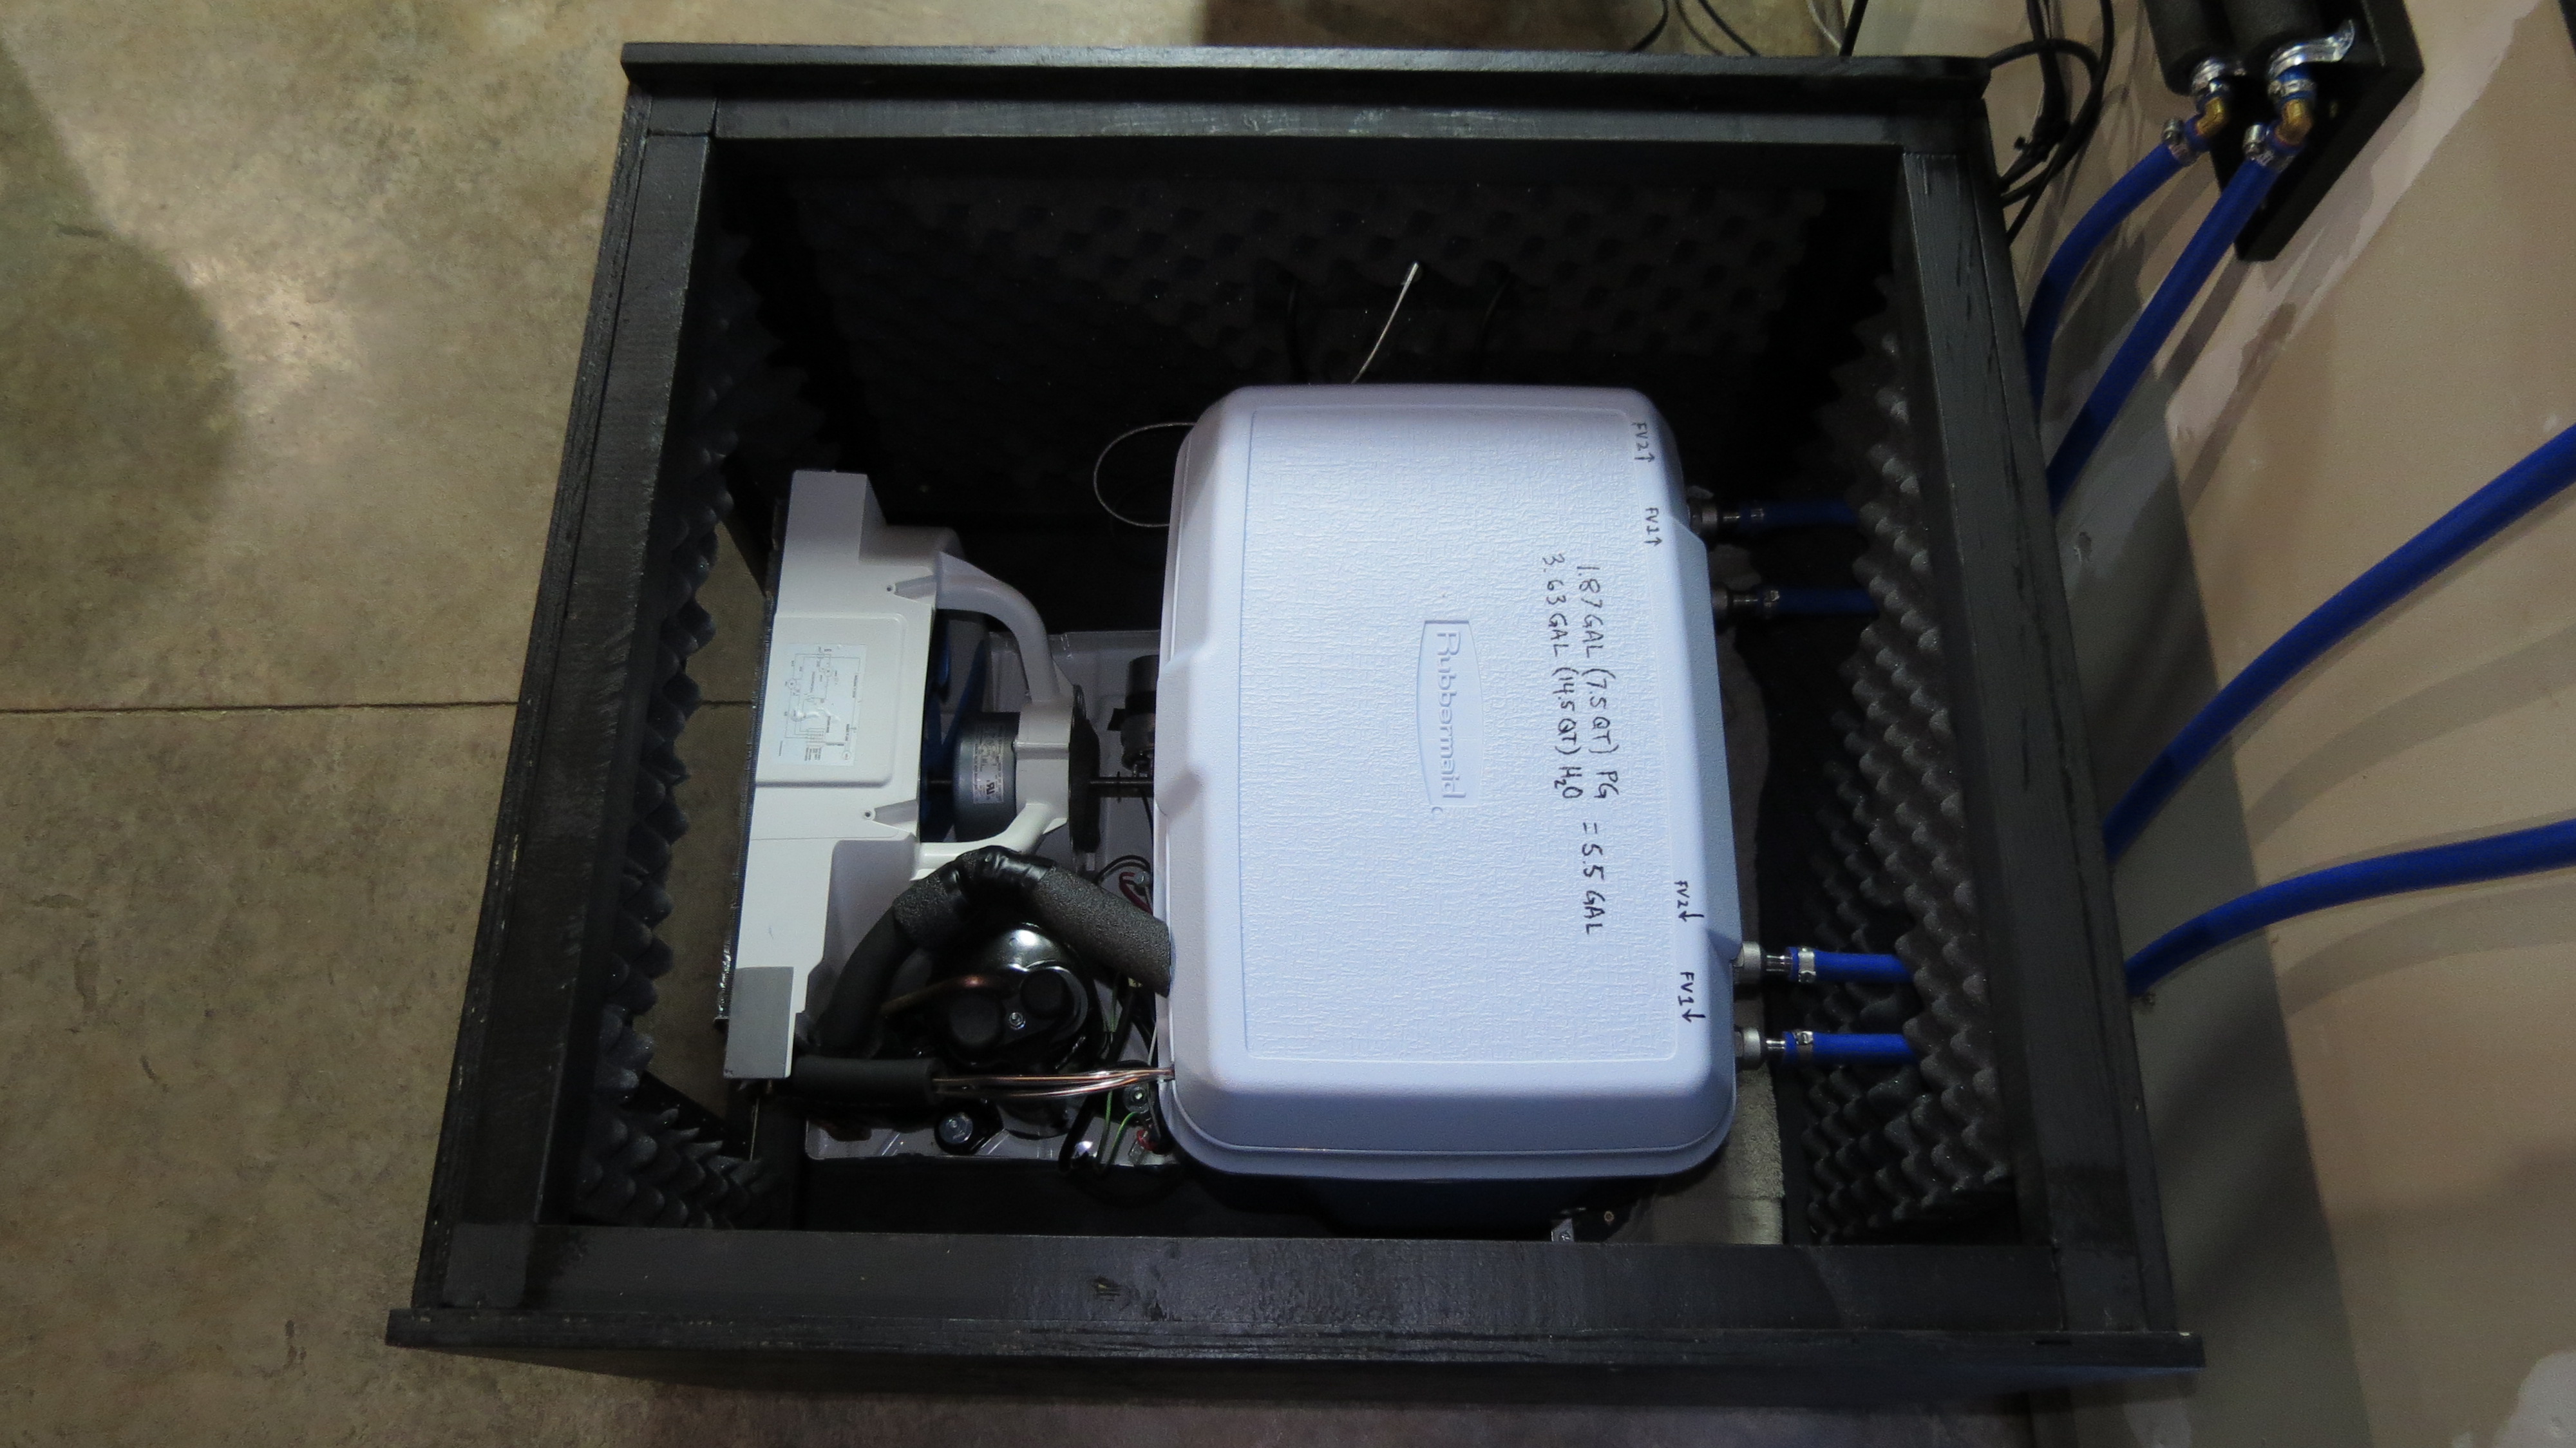
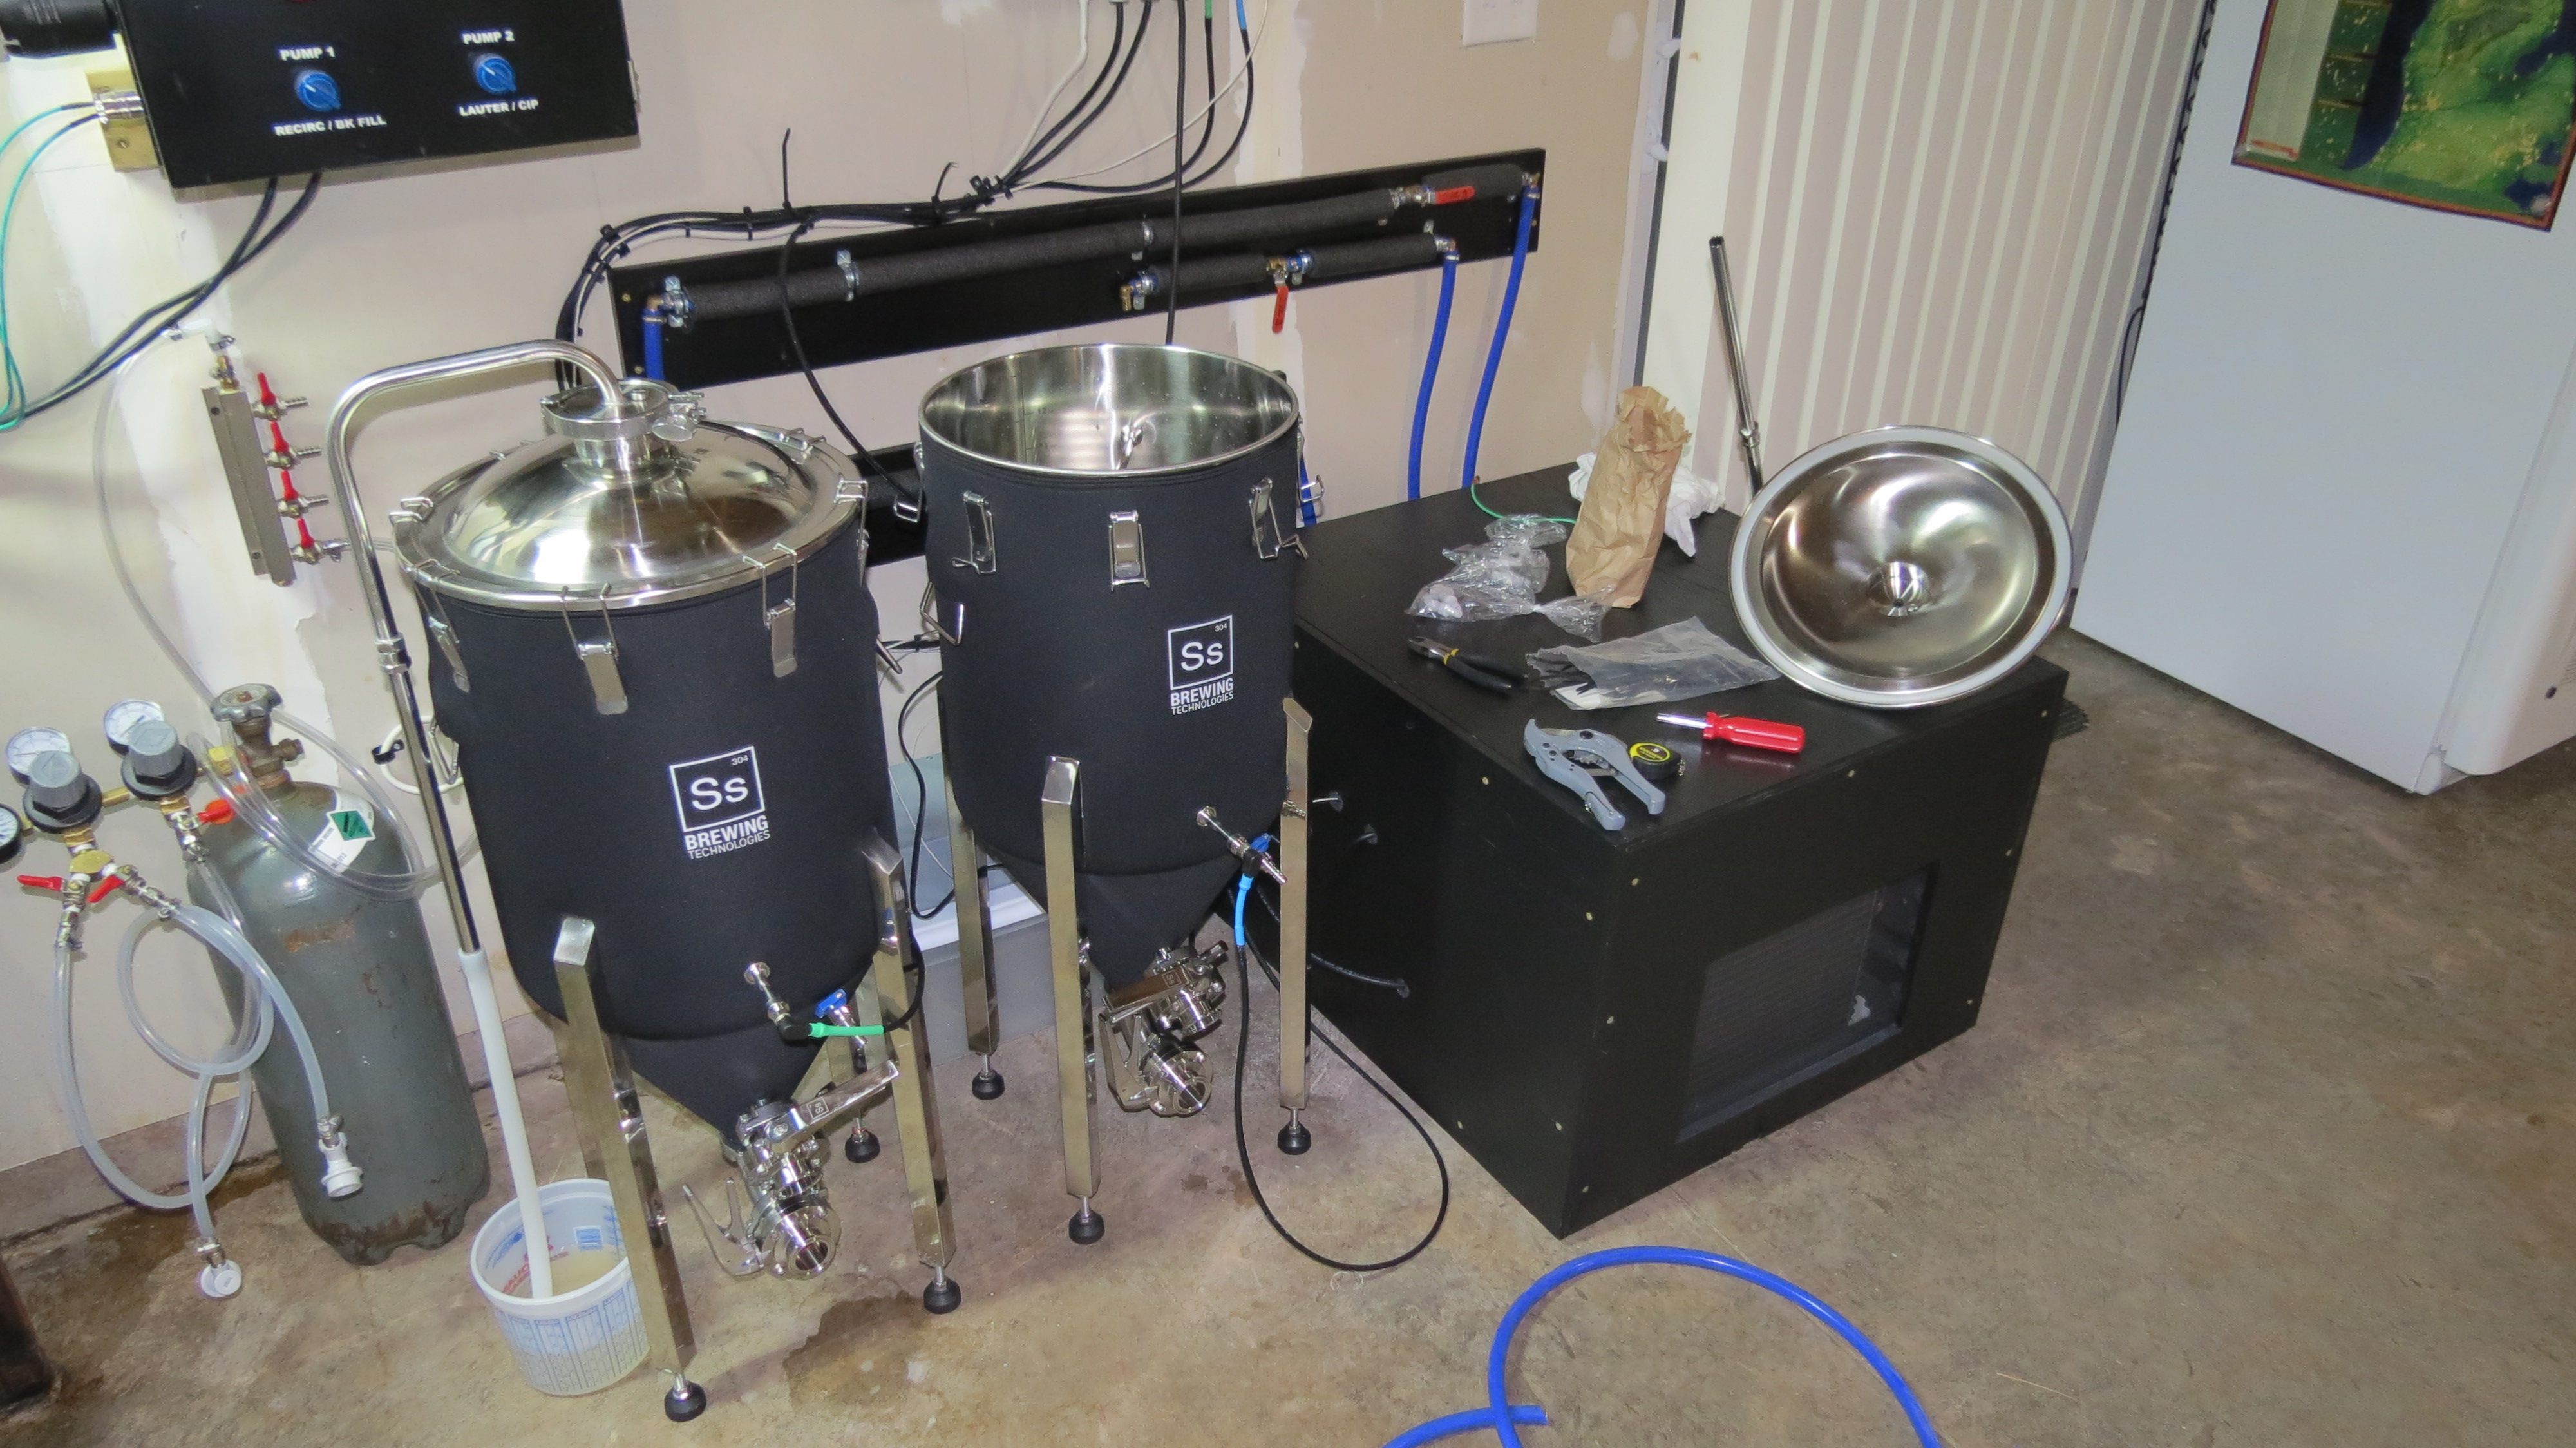
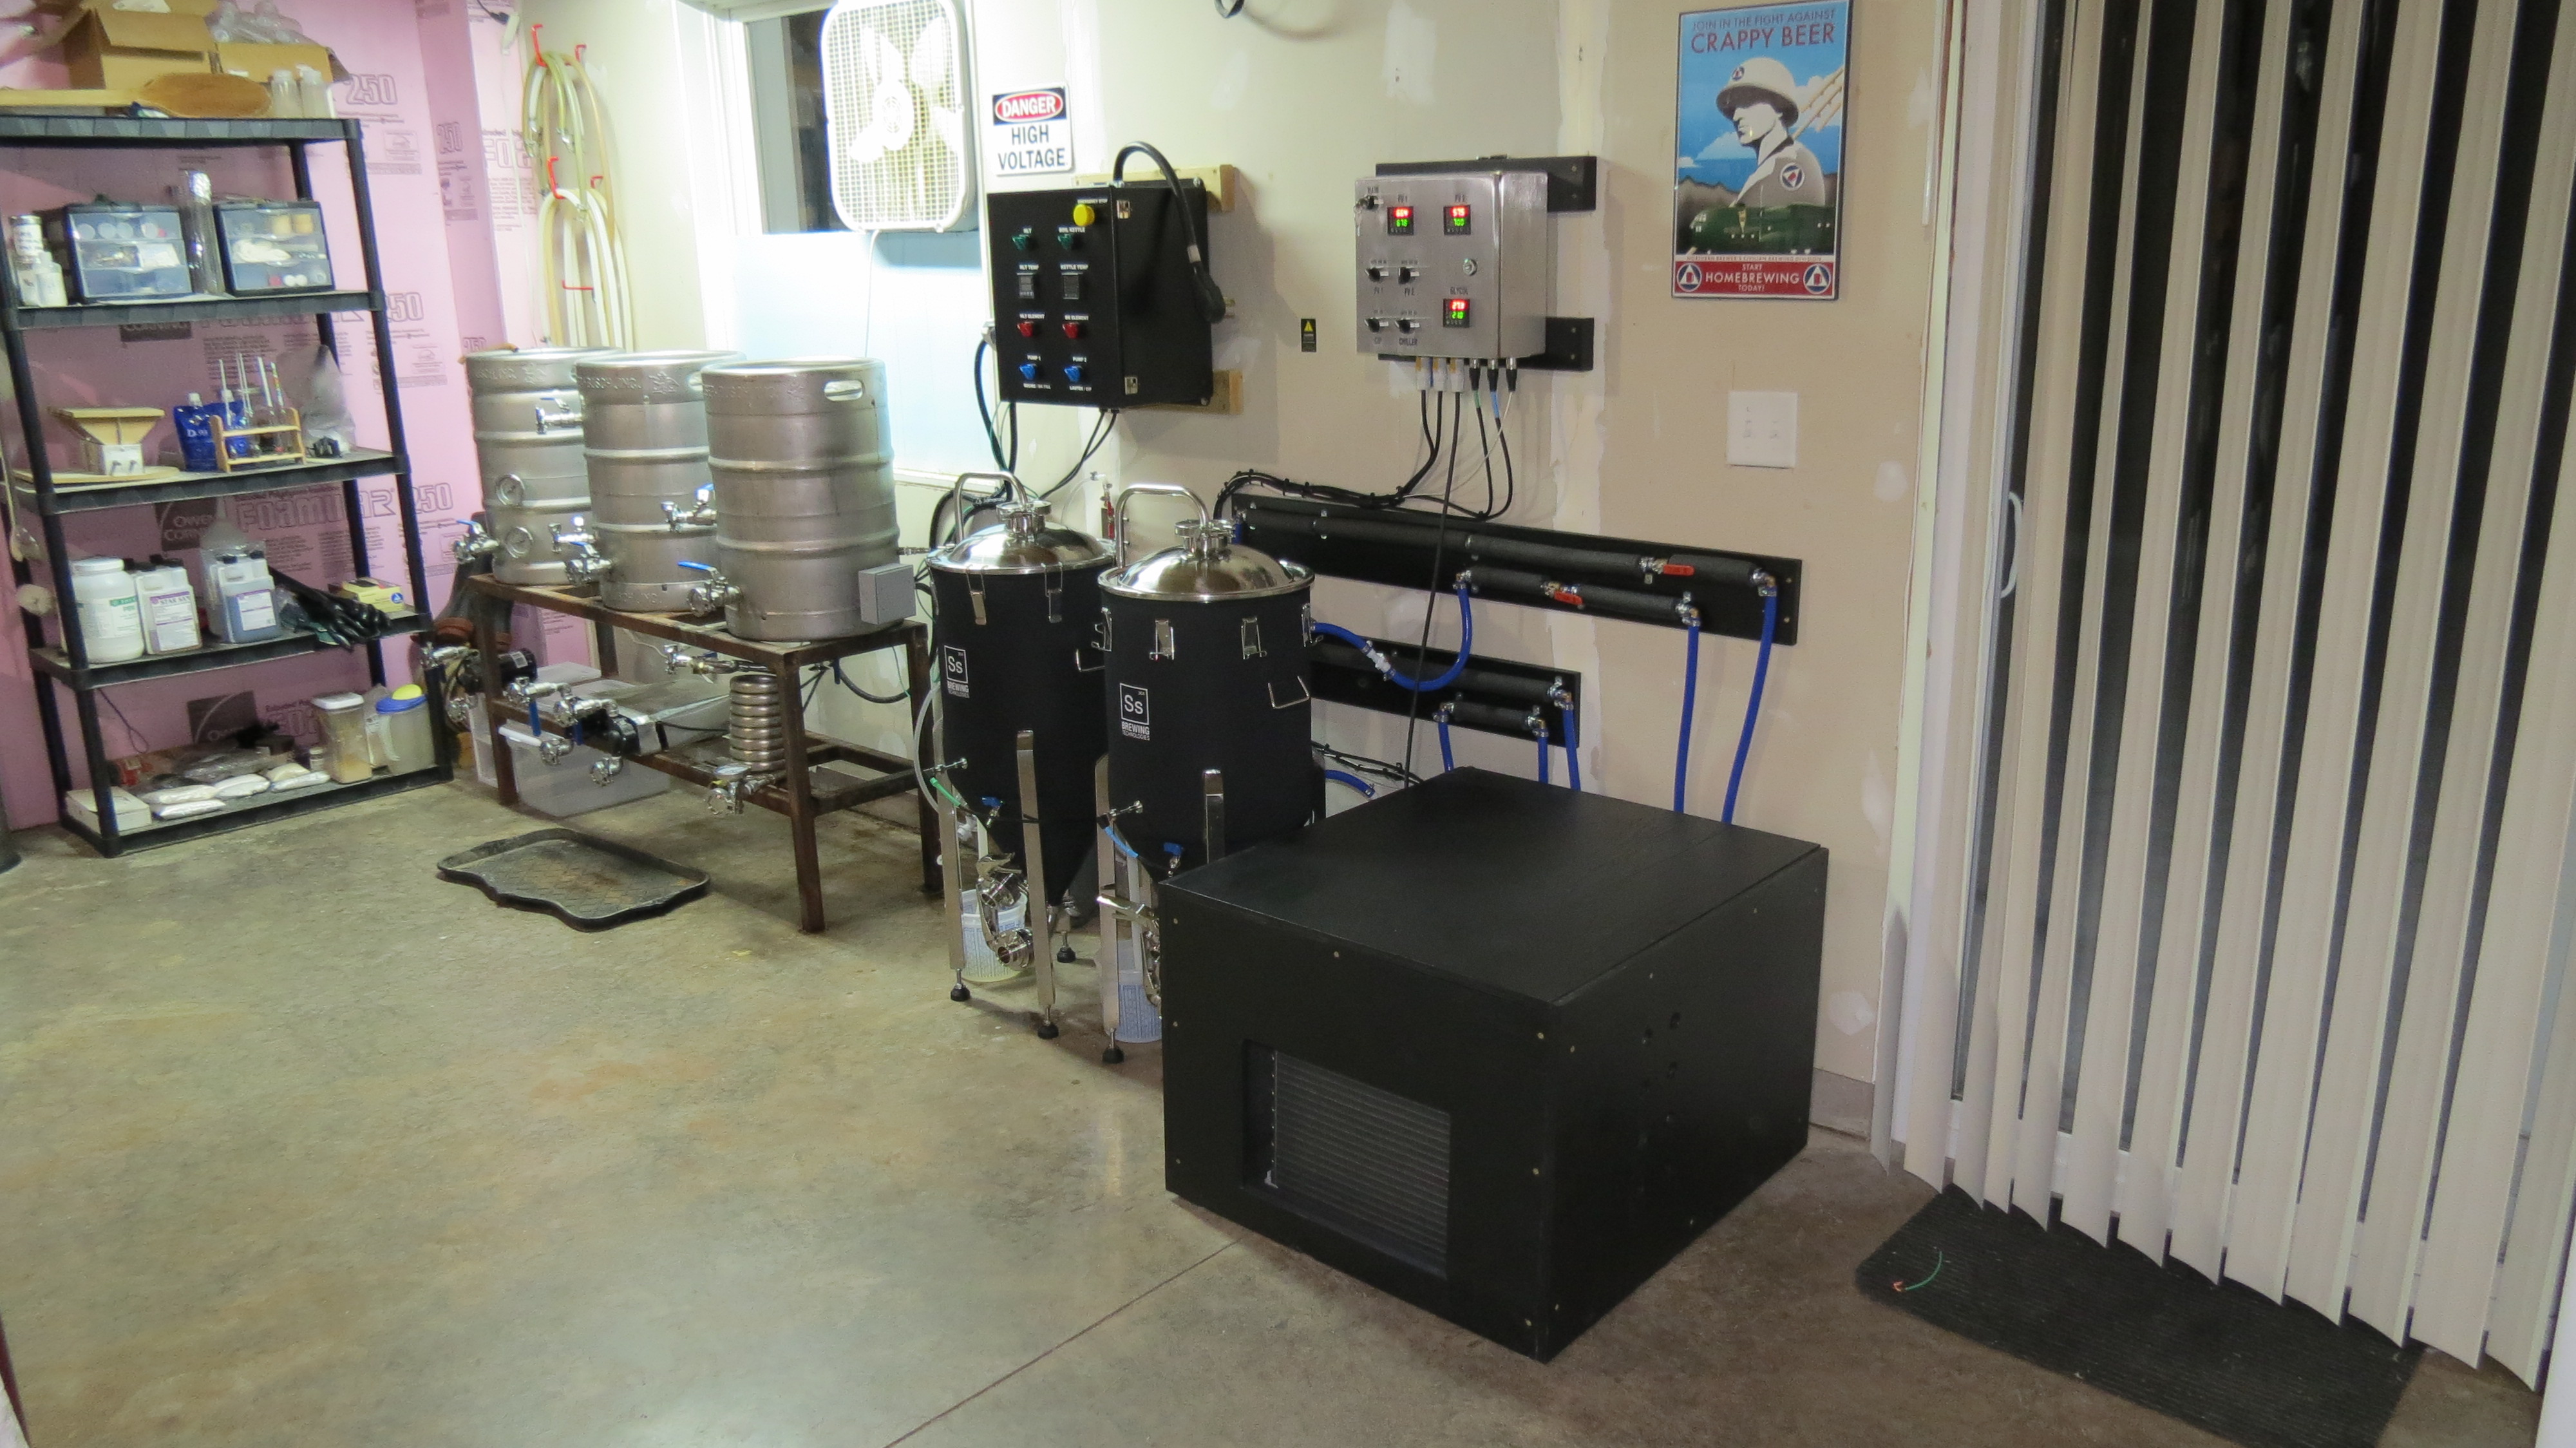
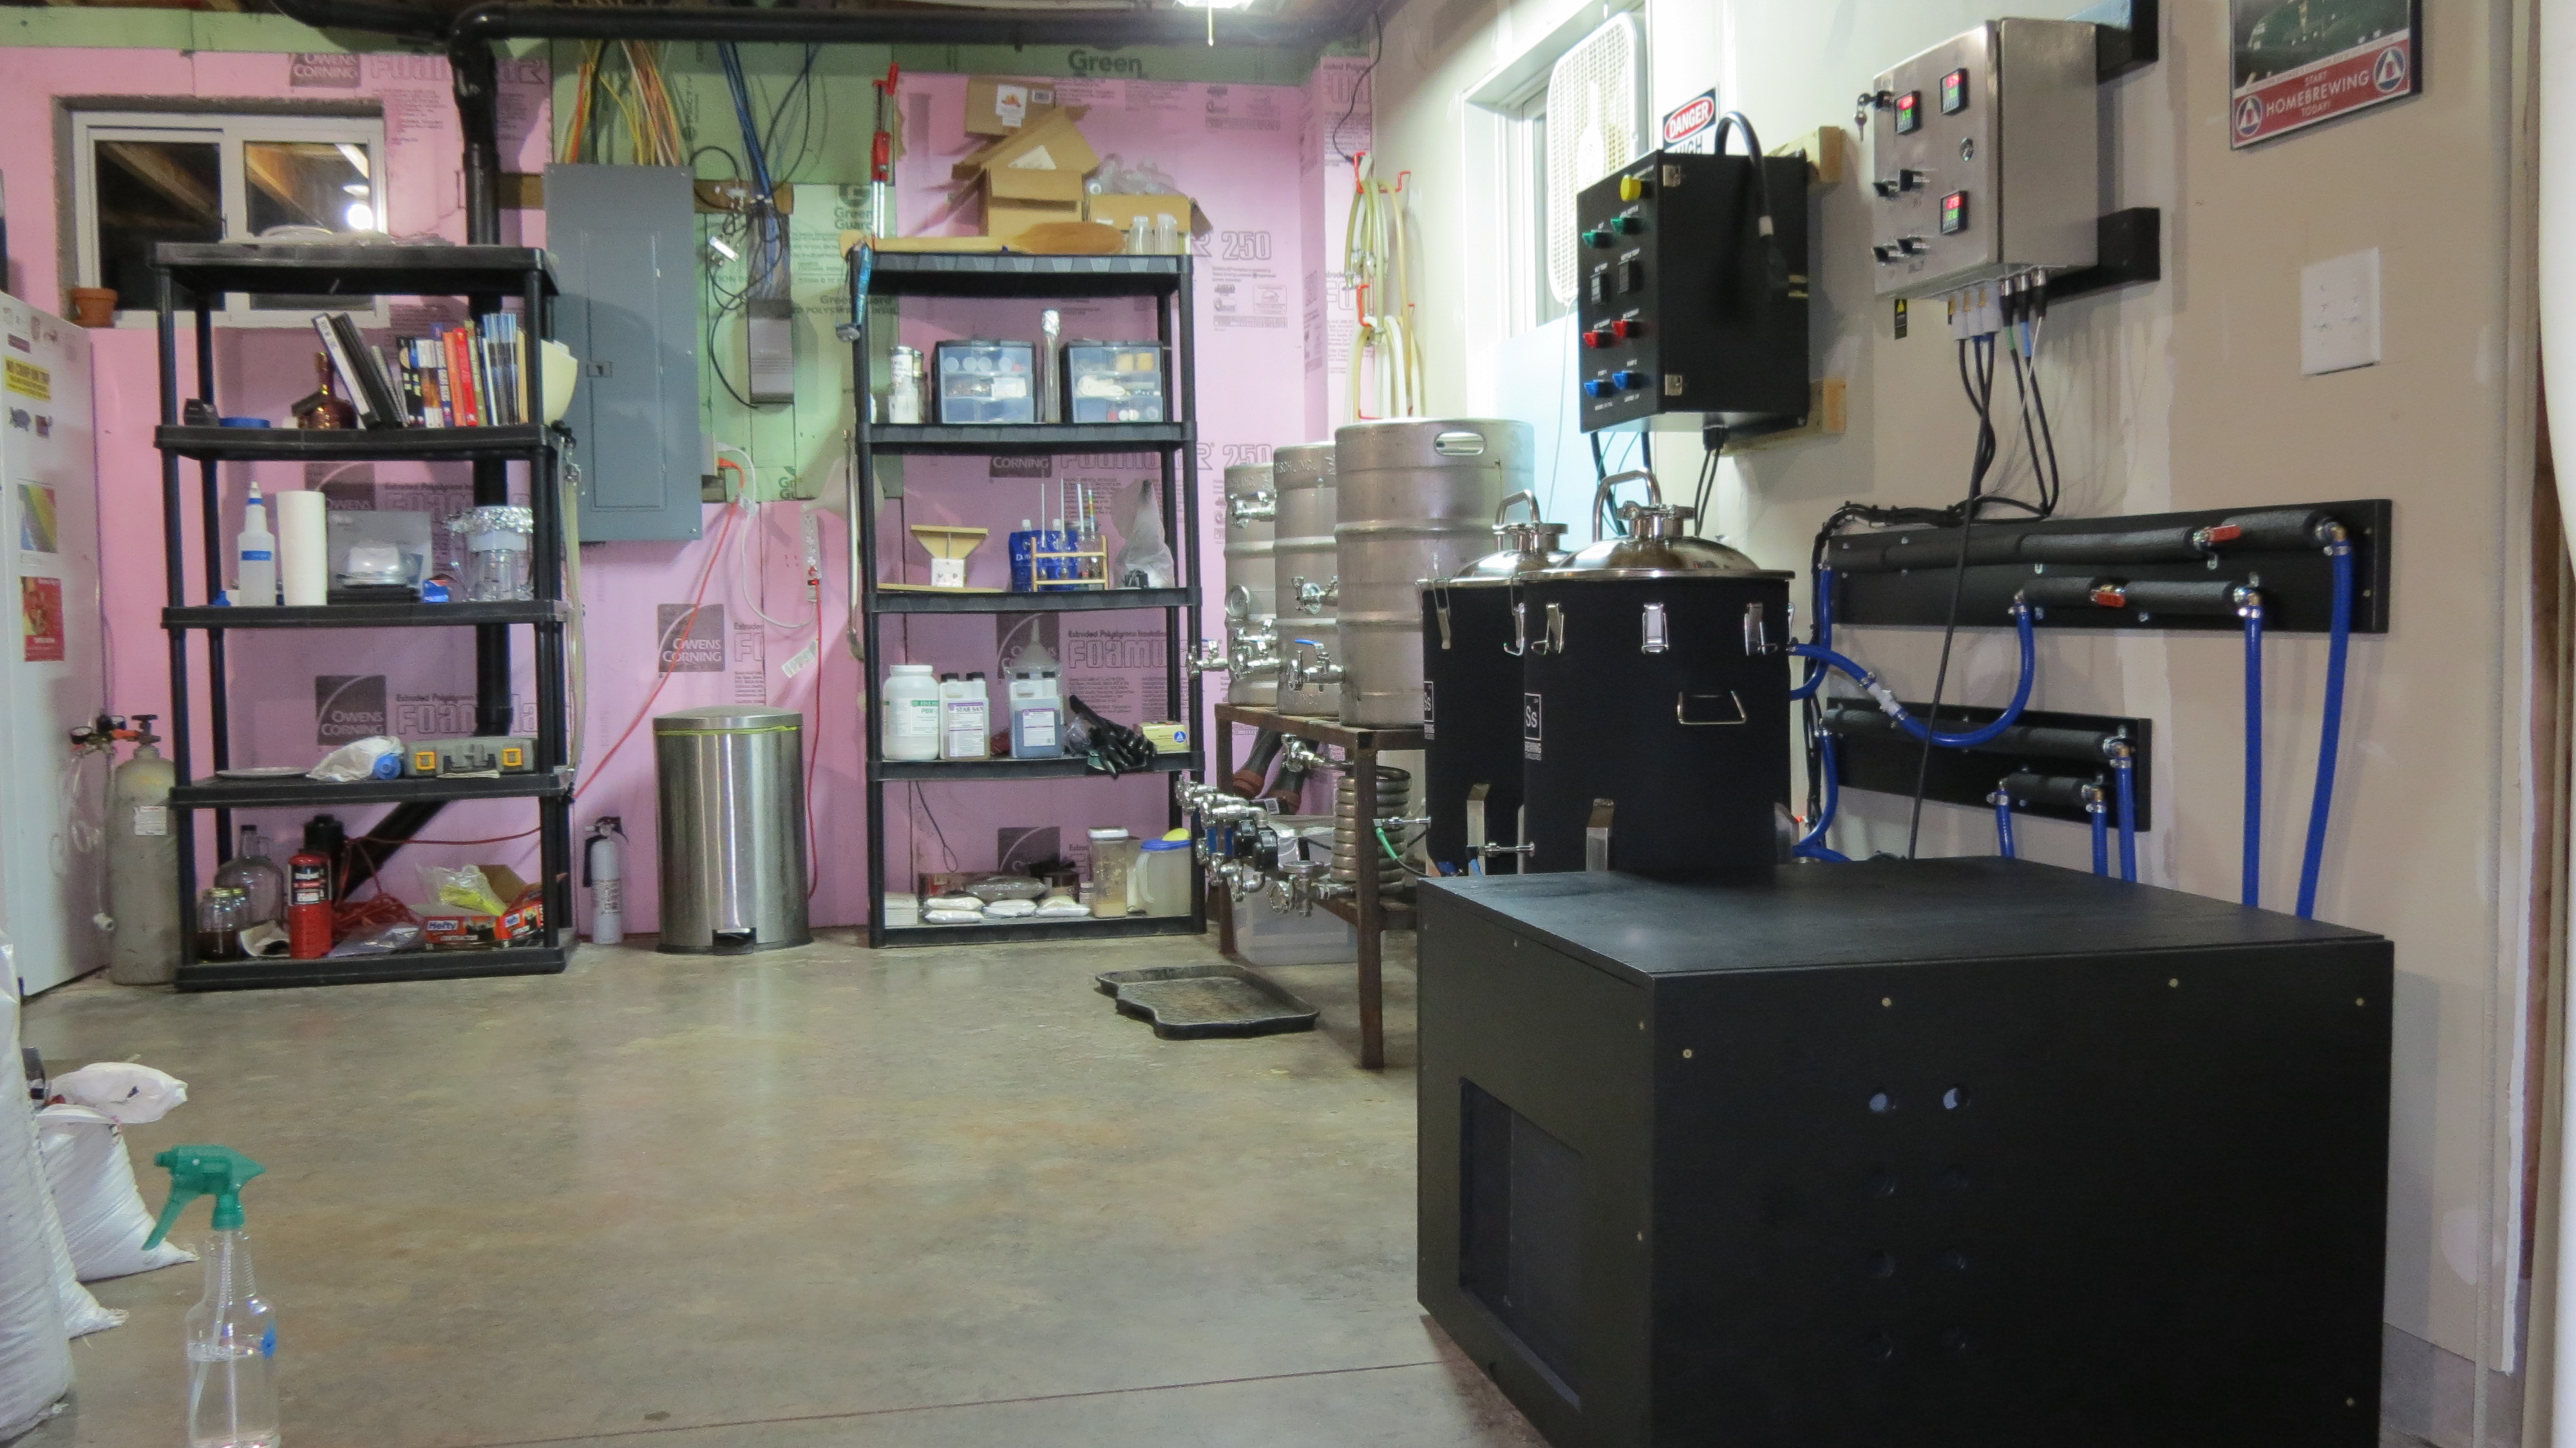
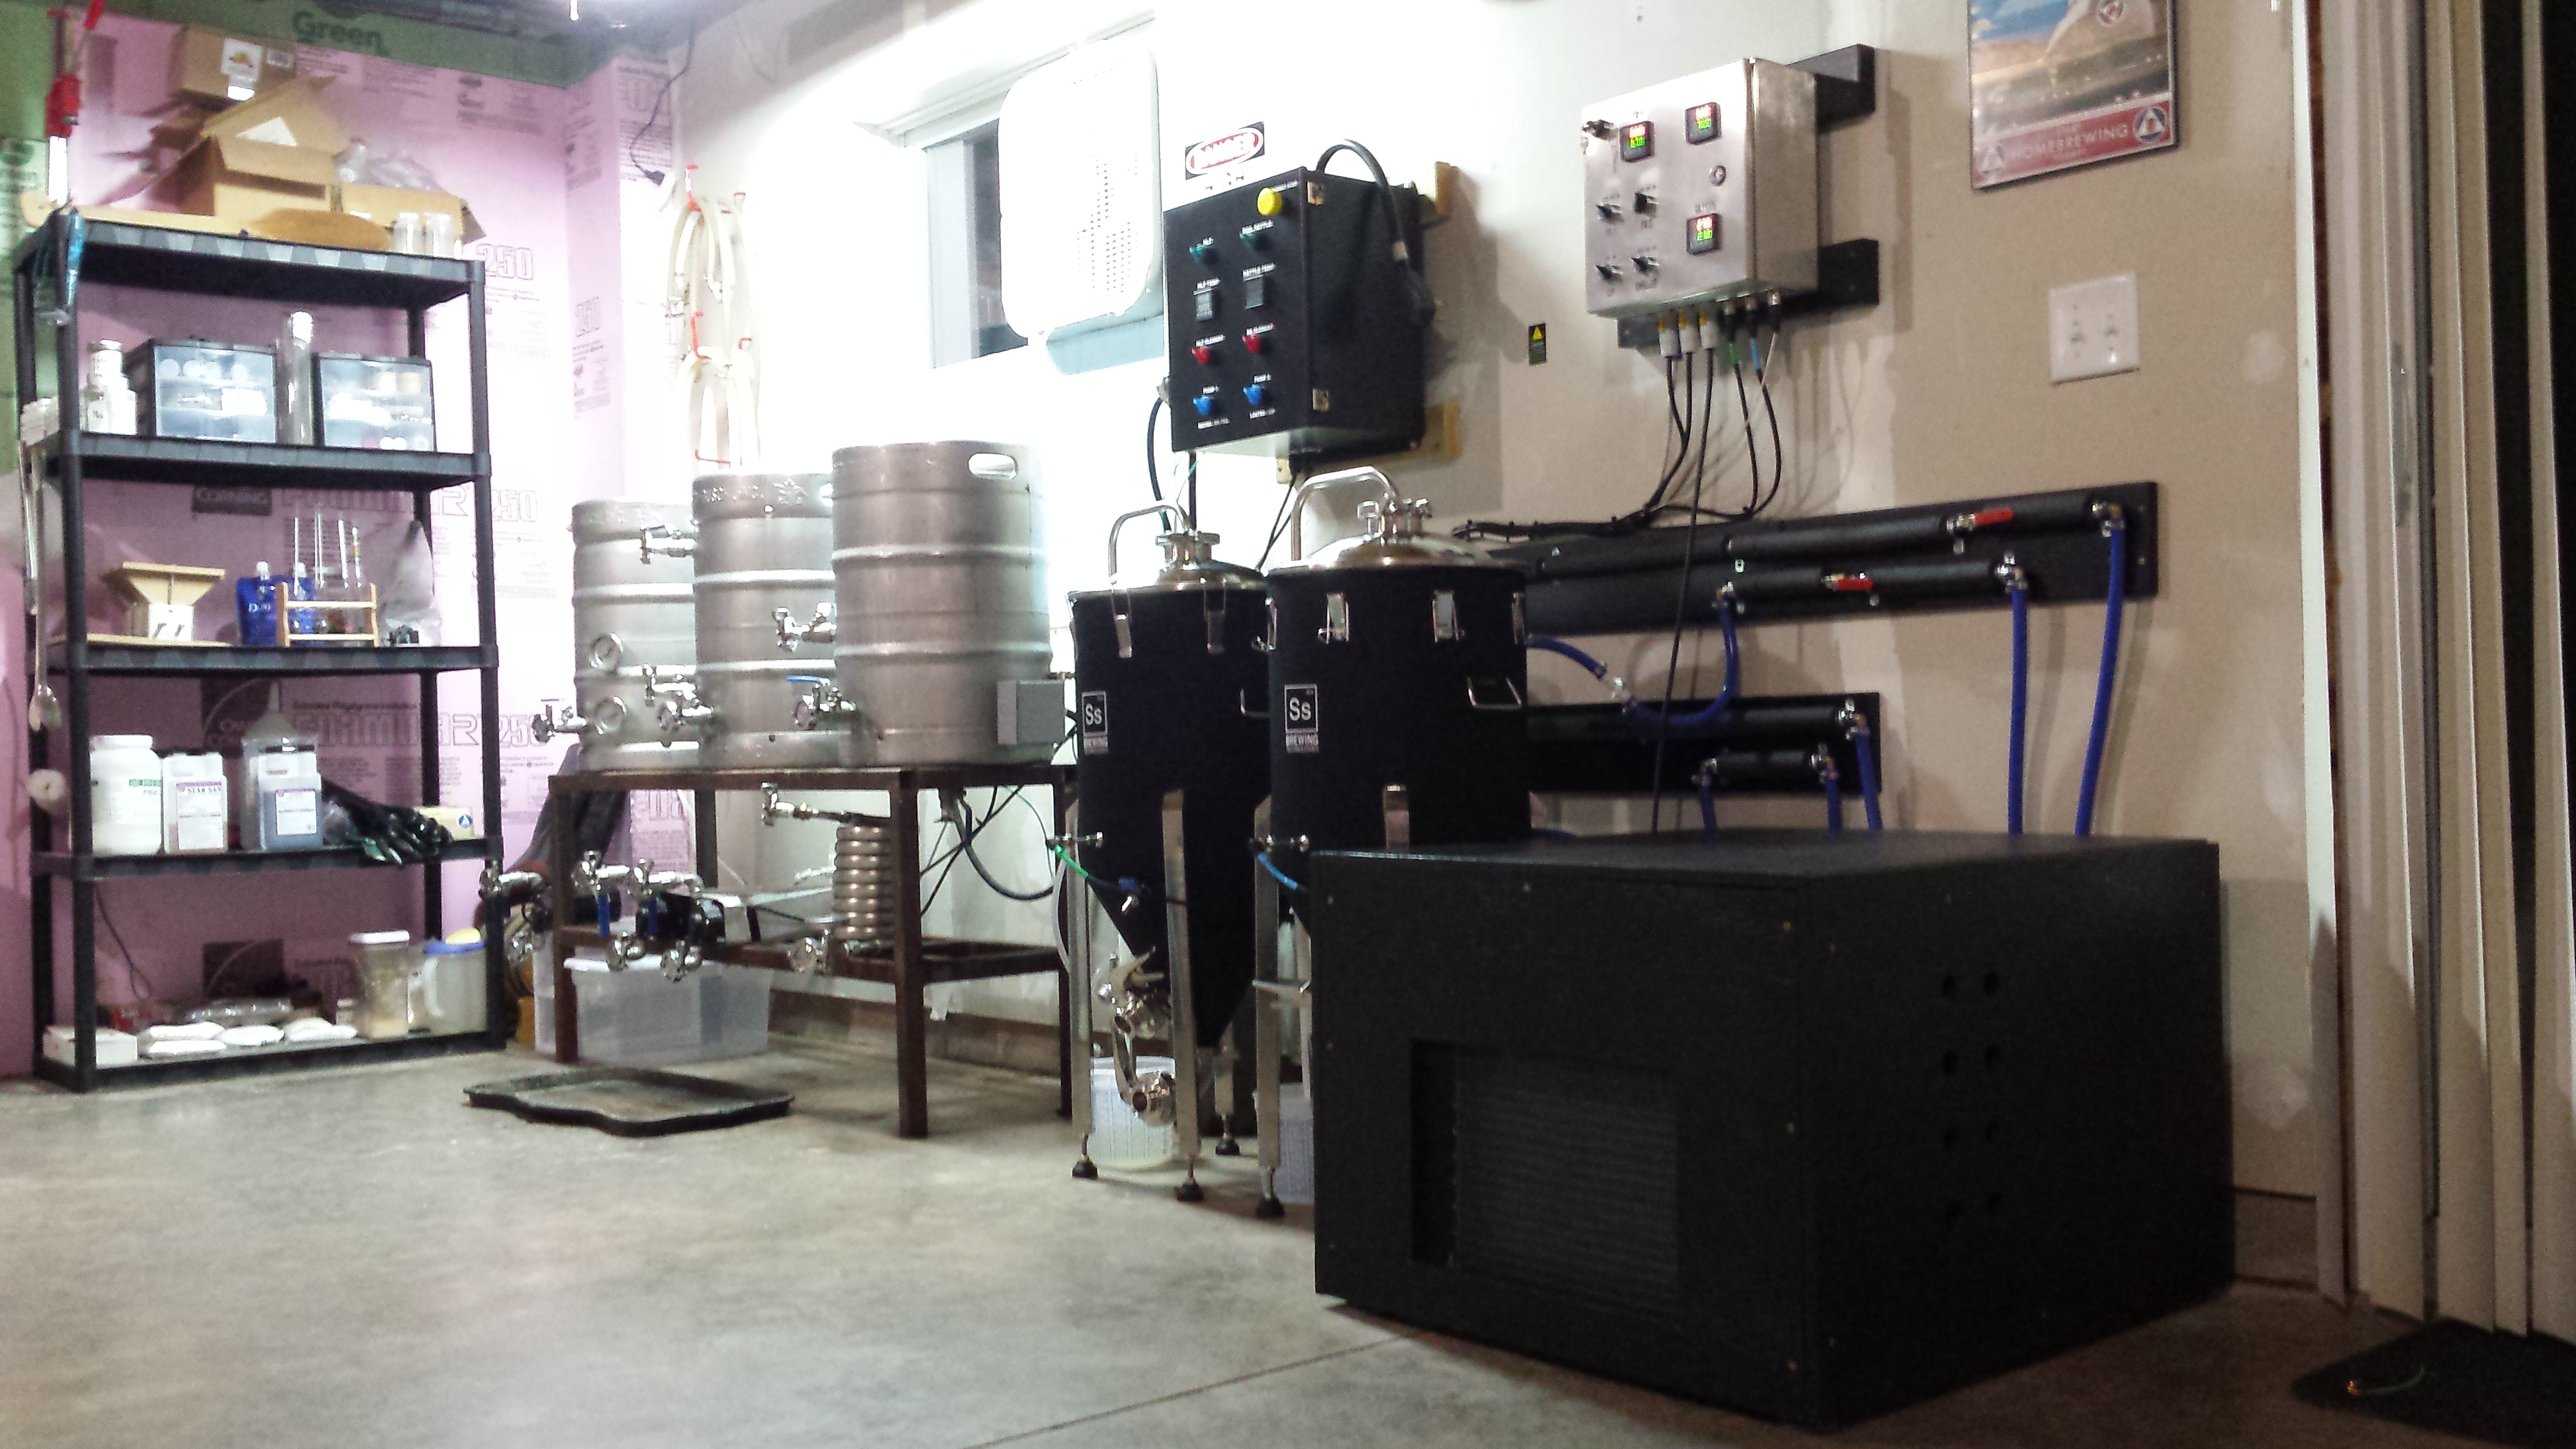
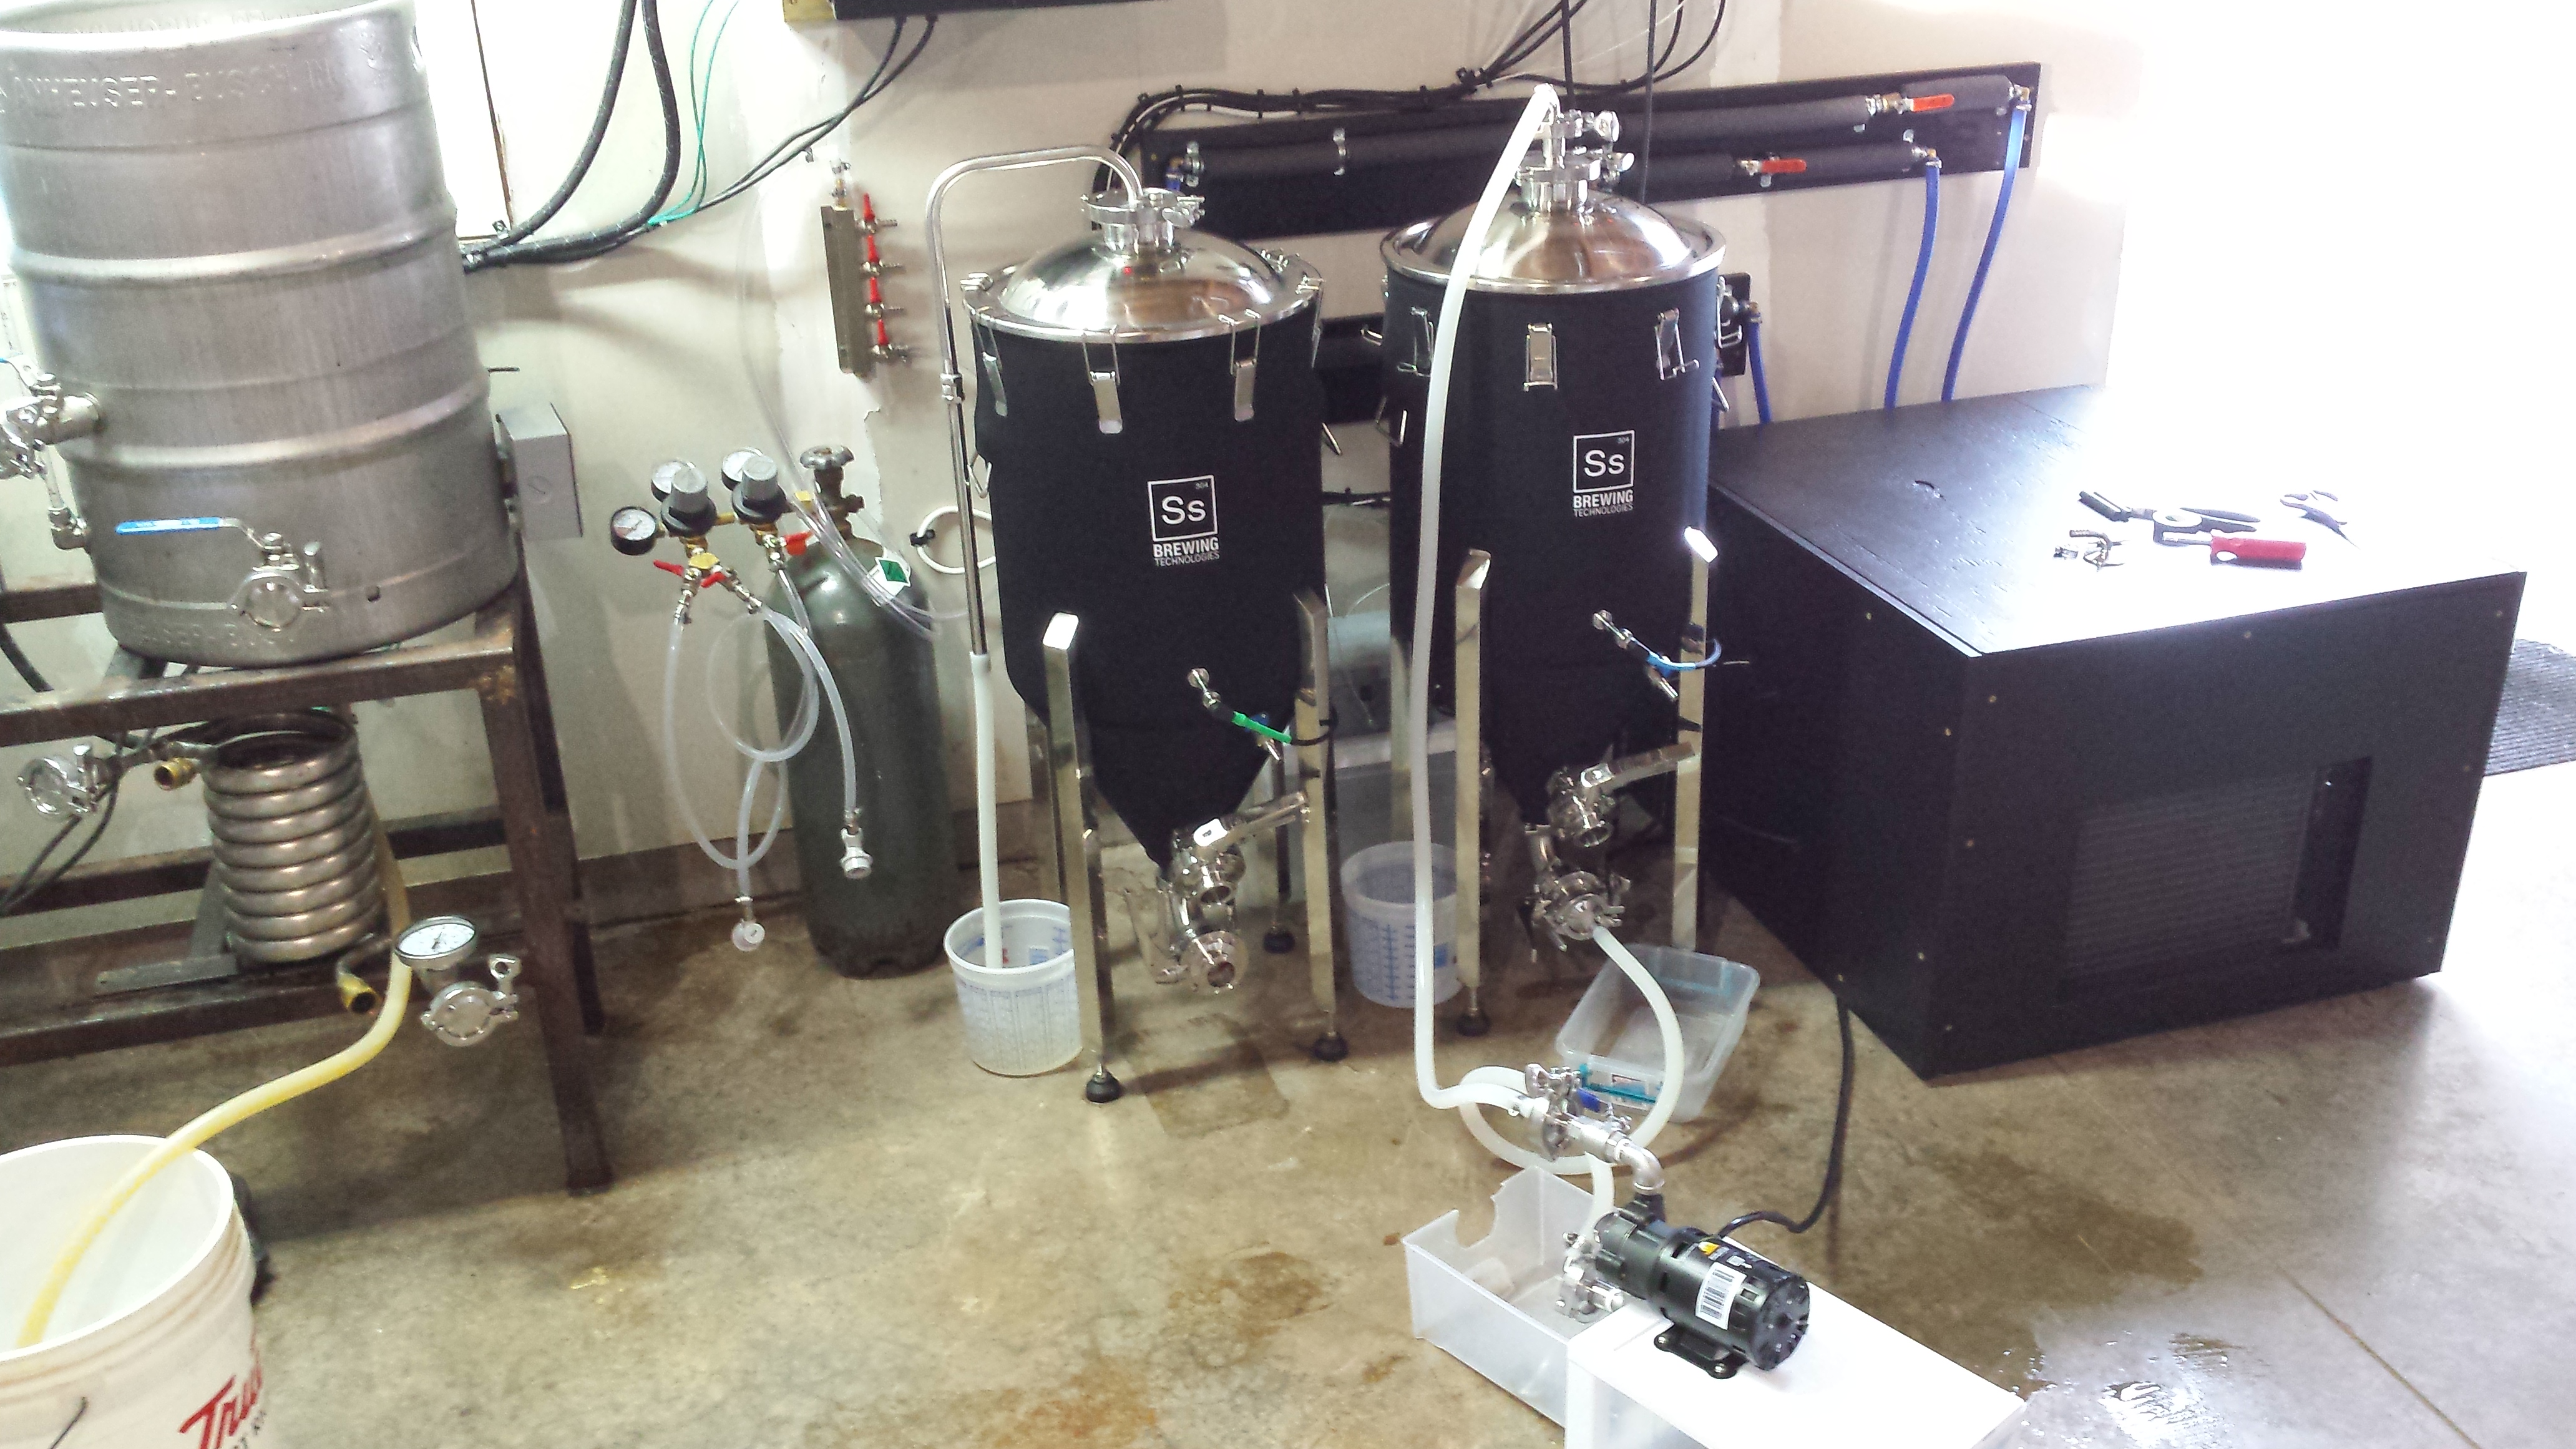
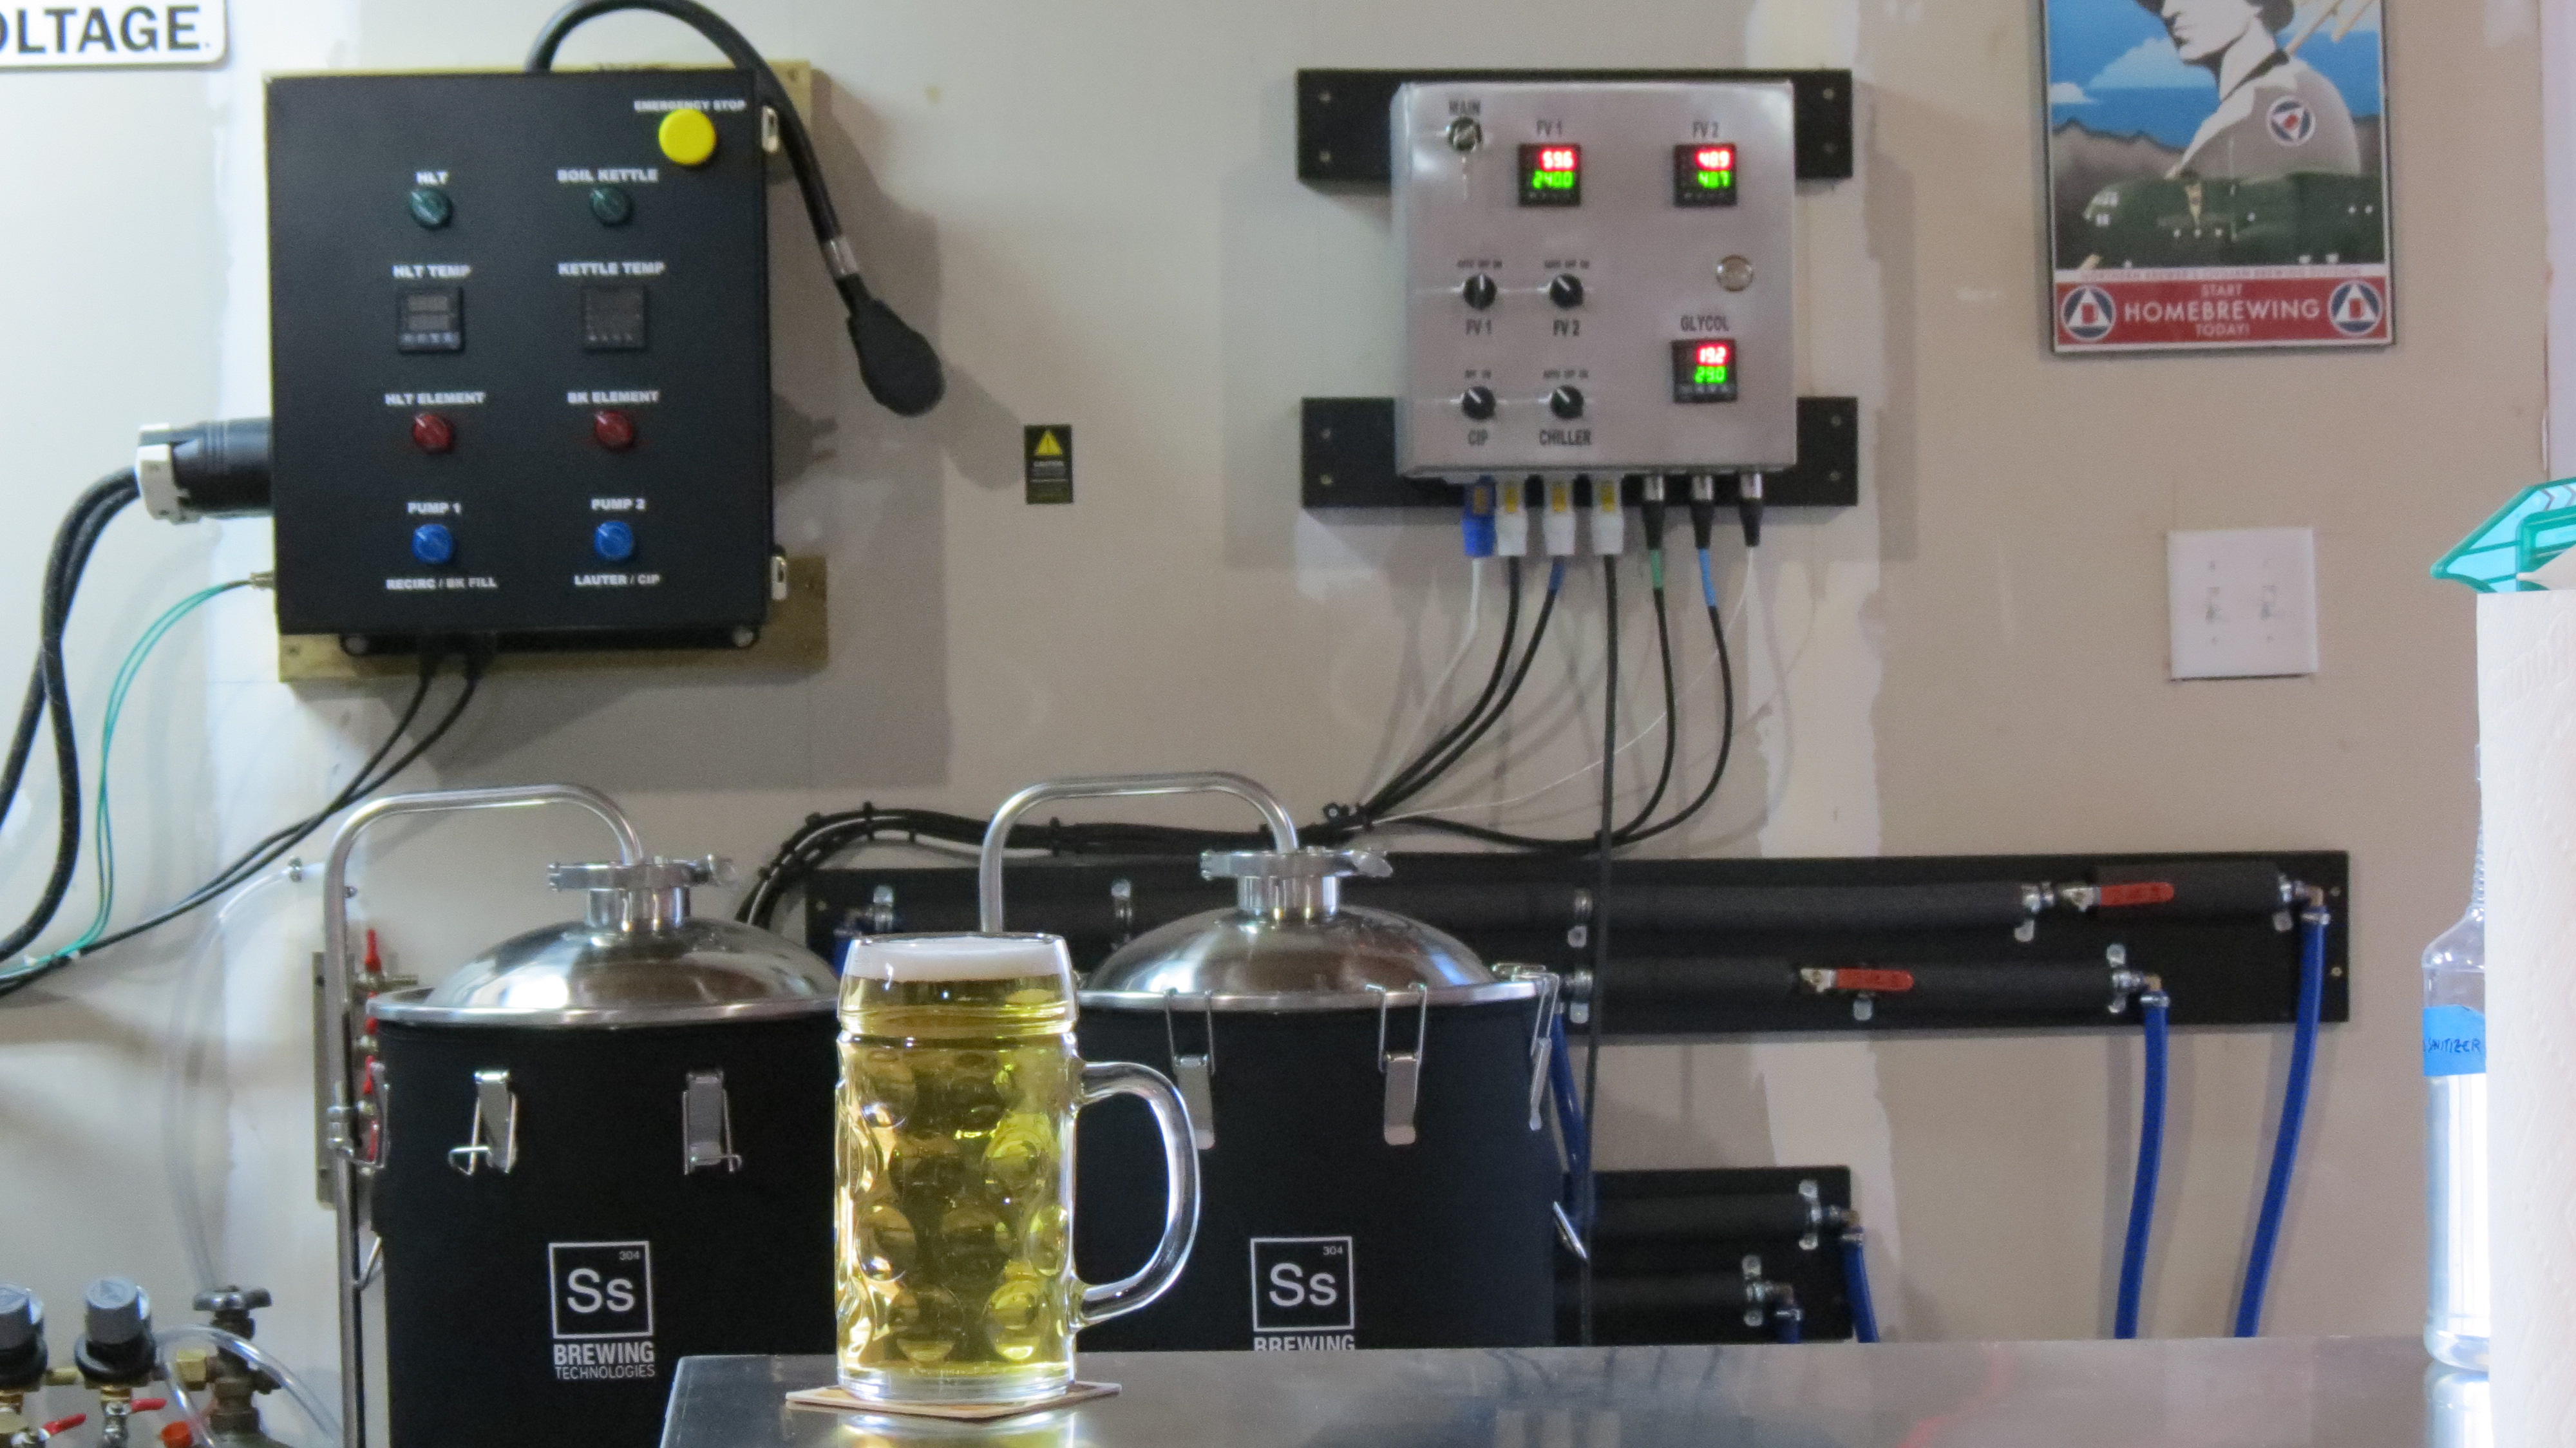
Finished project:
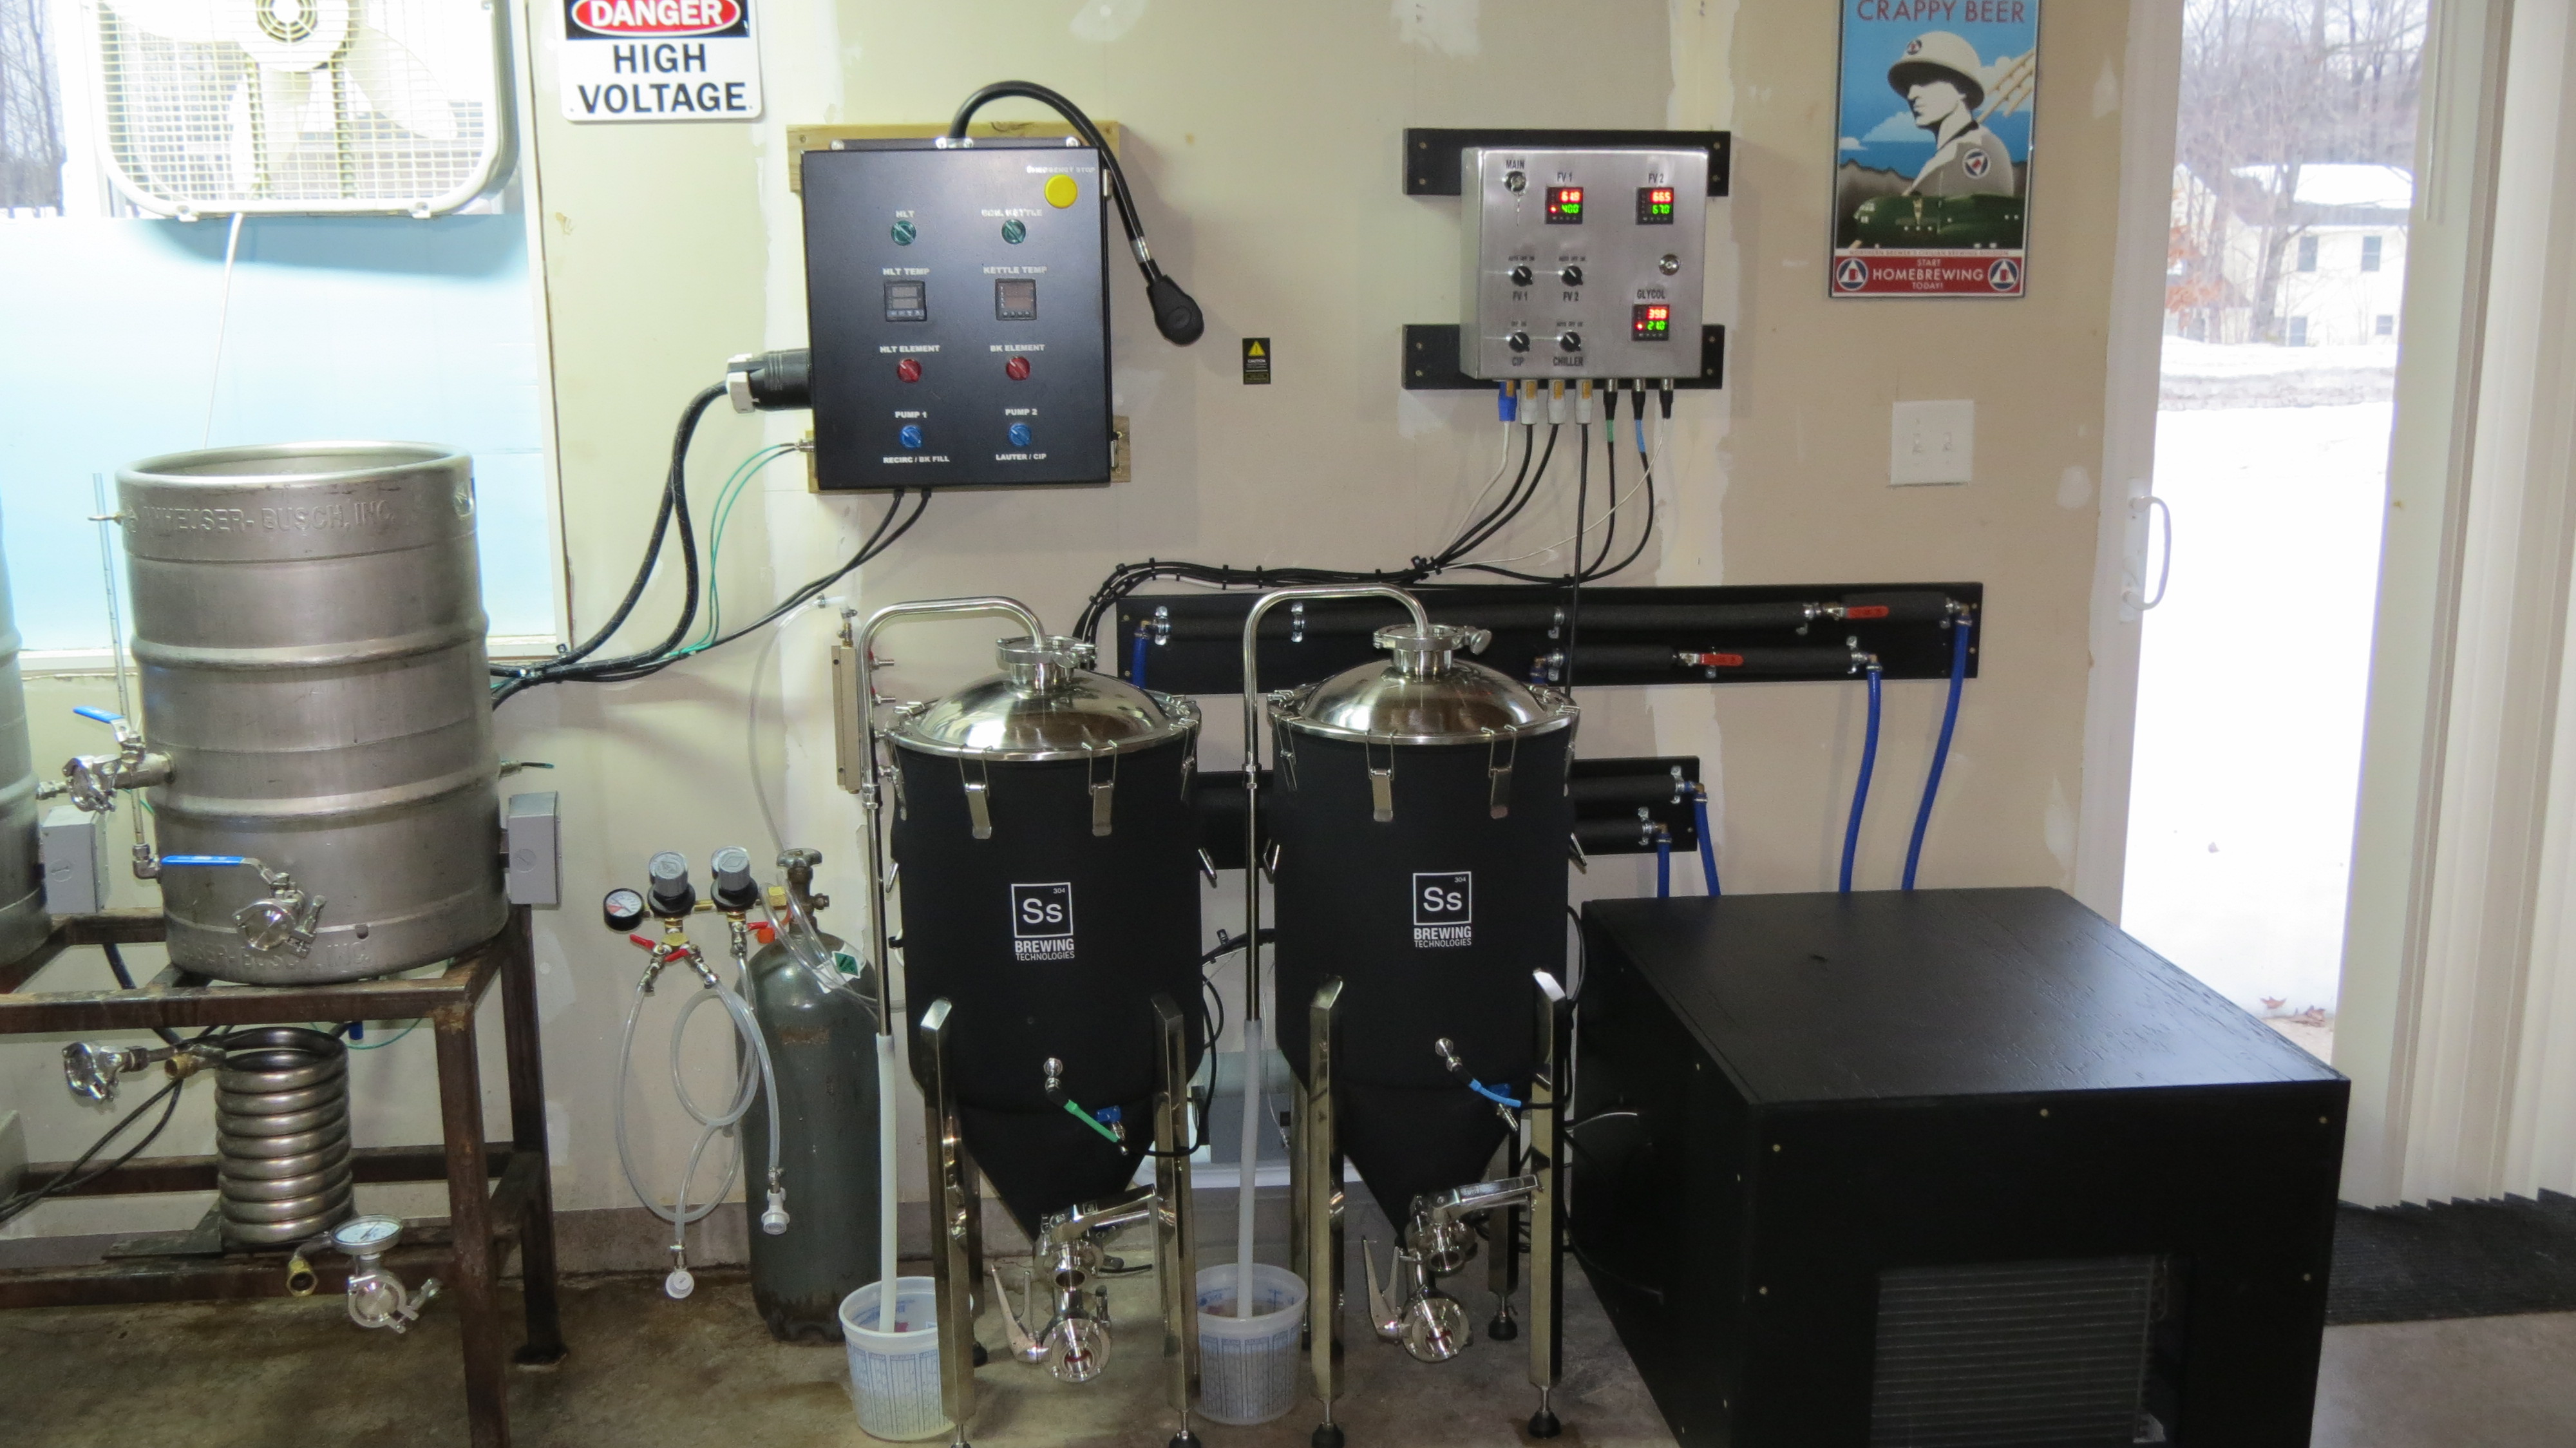
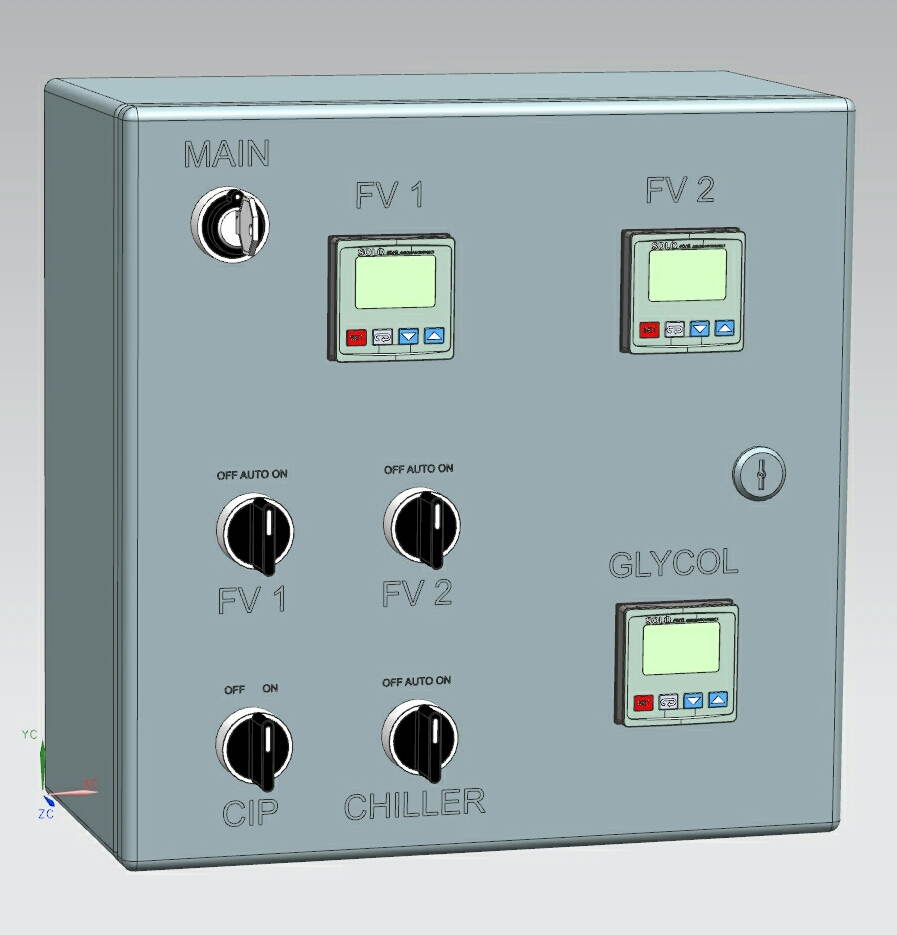
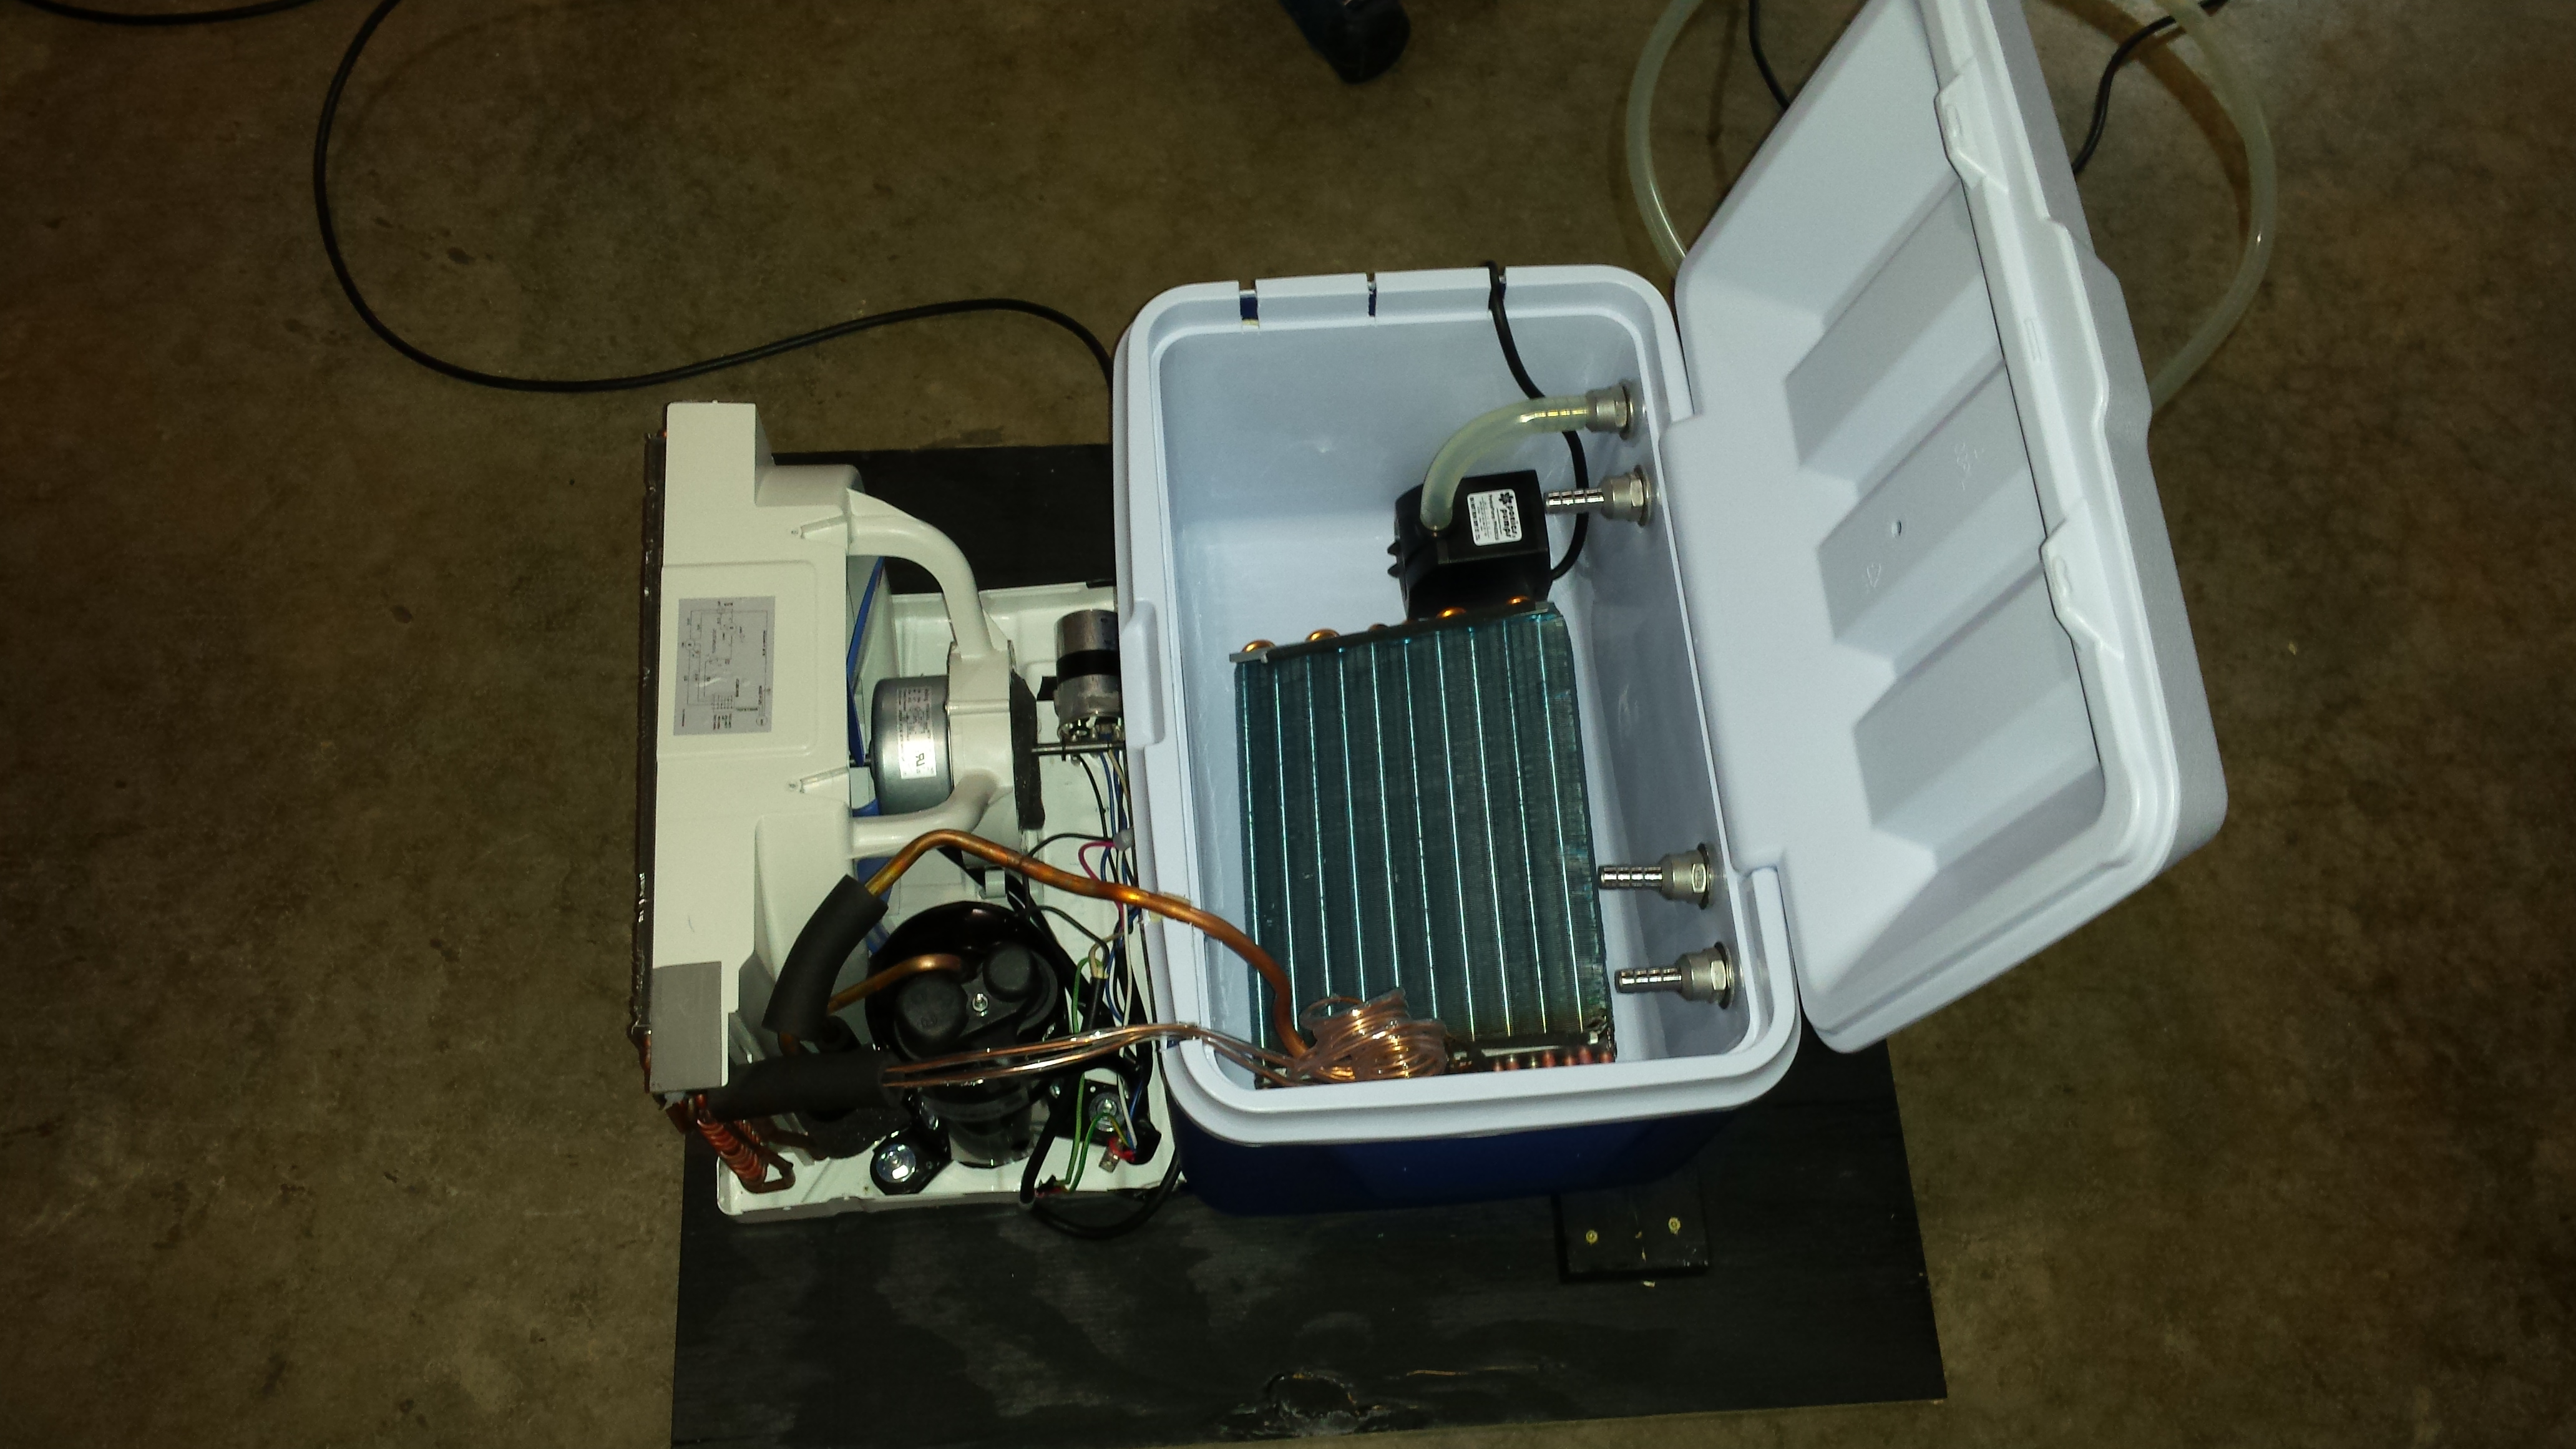
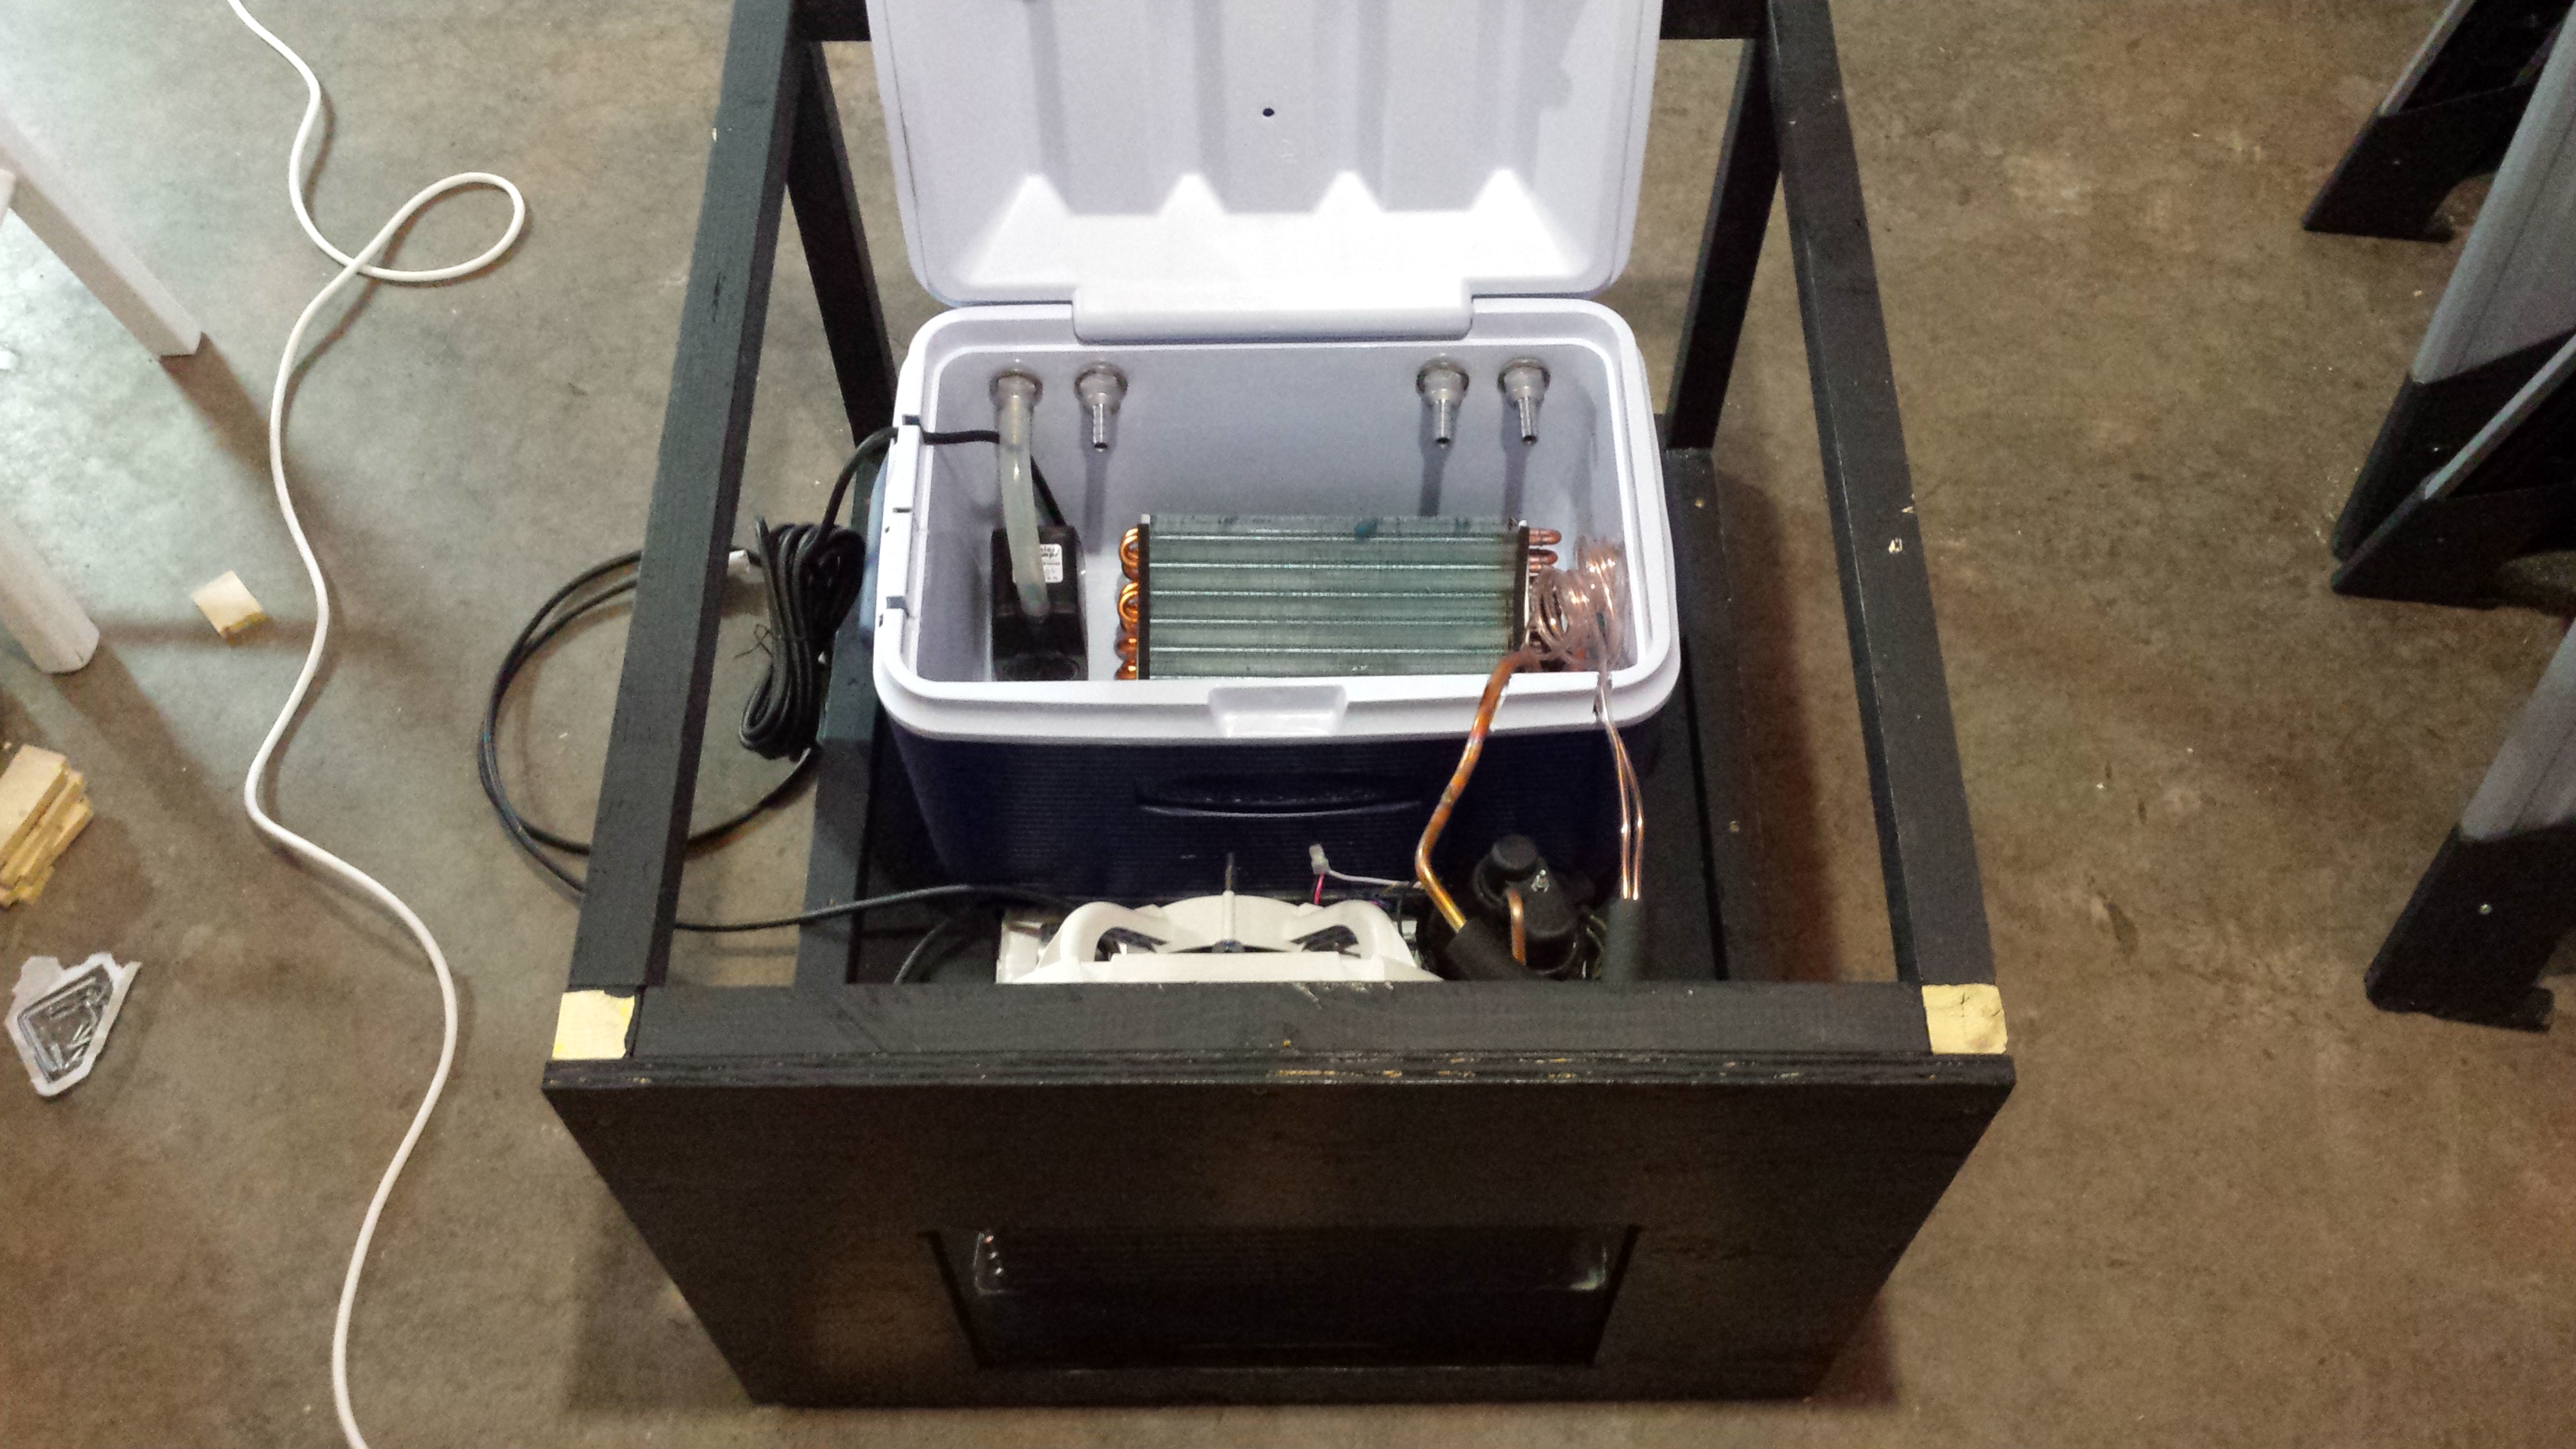
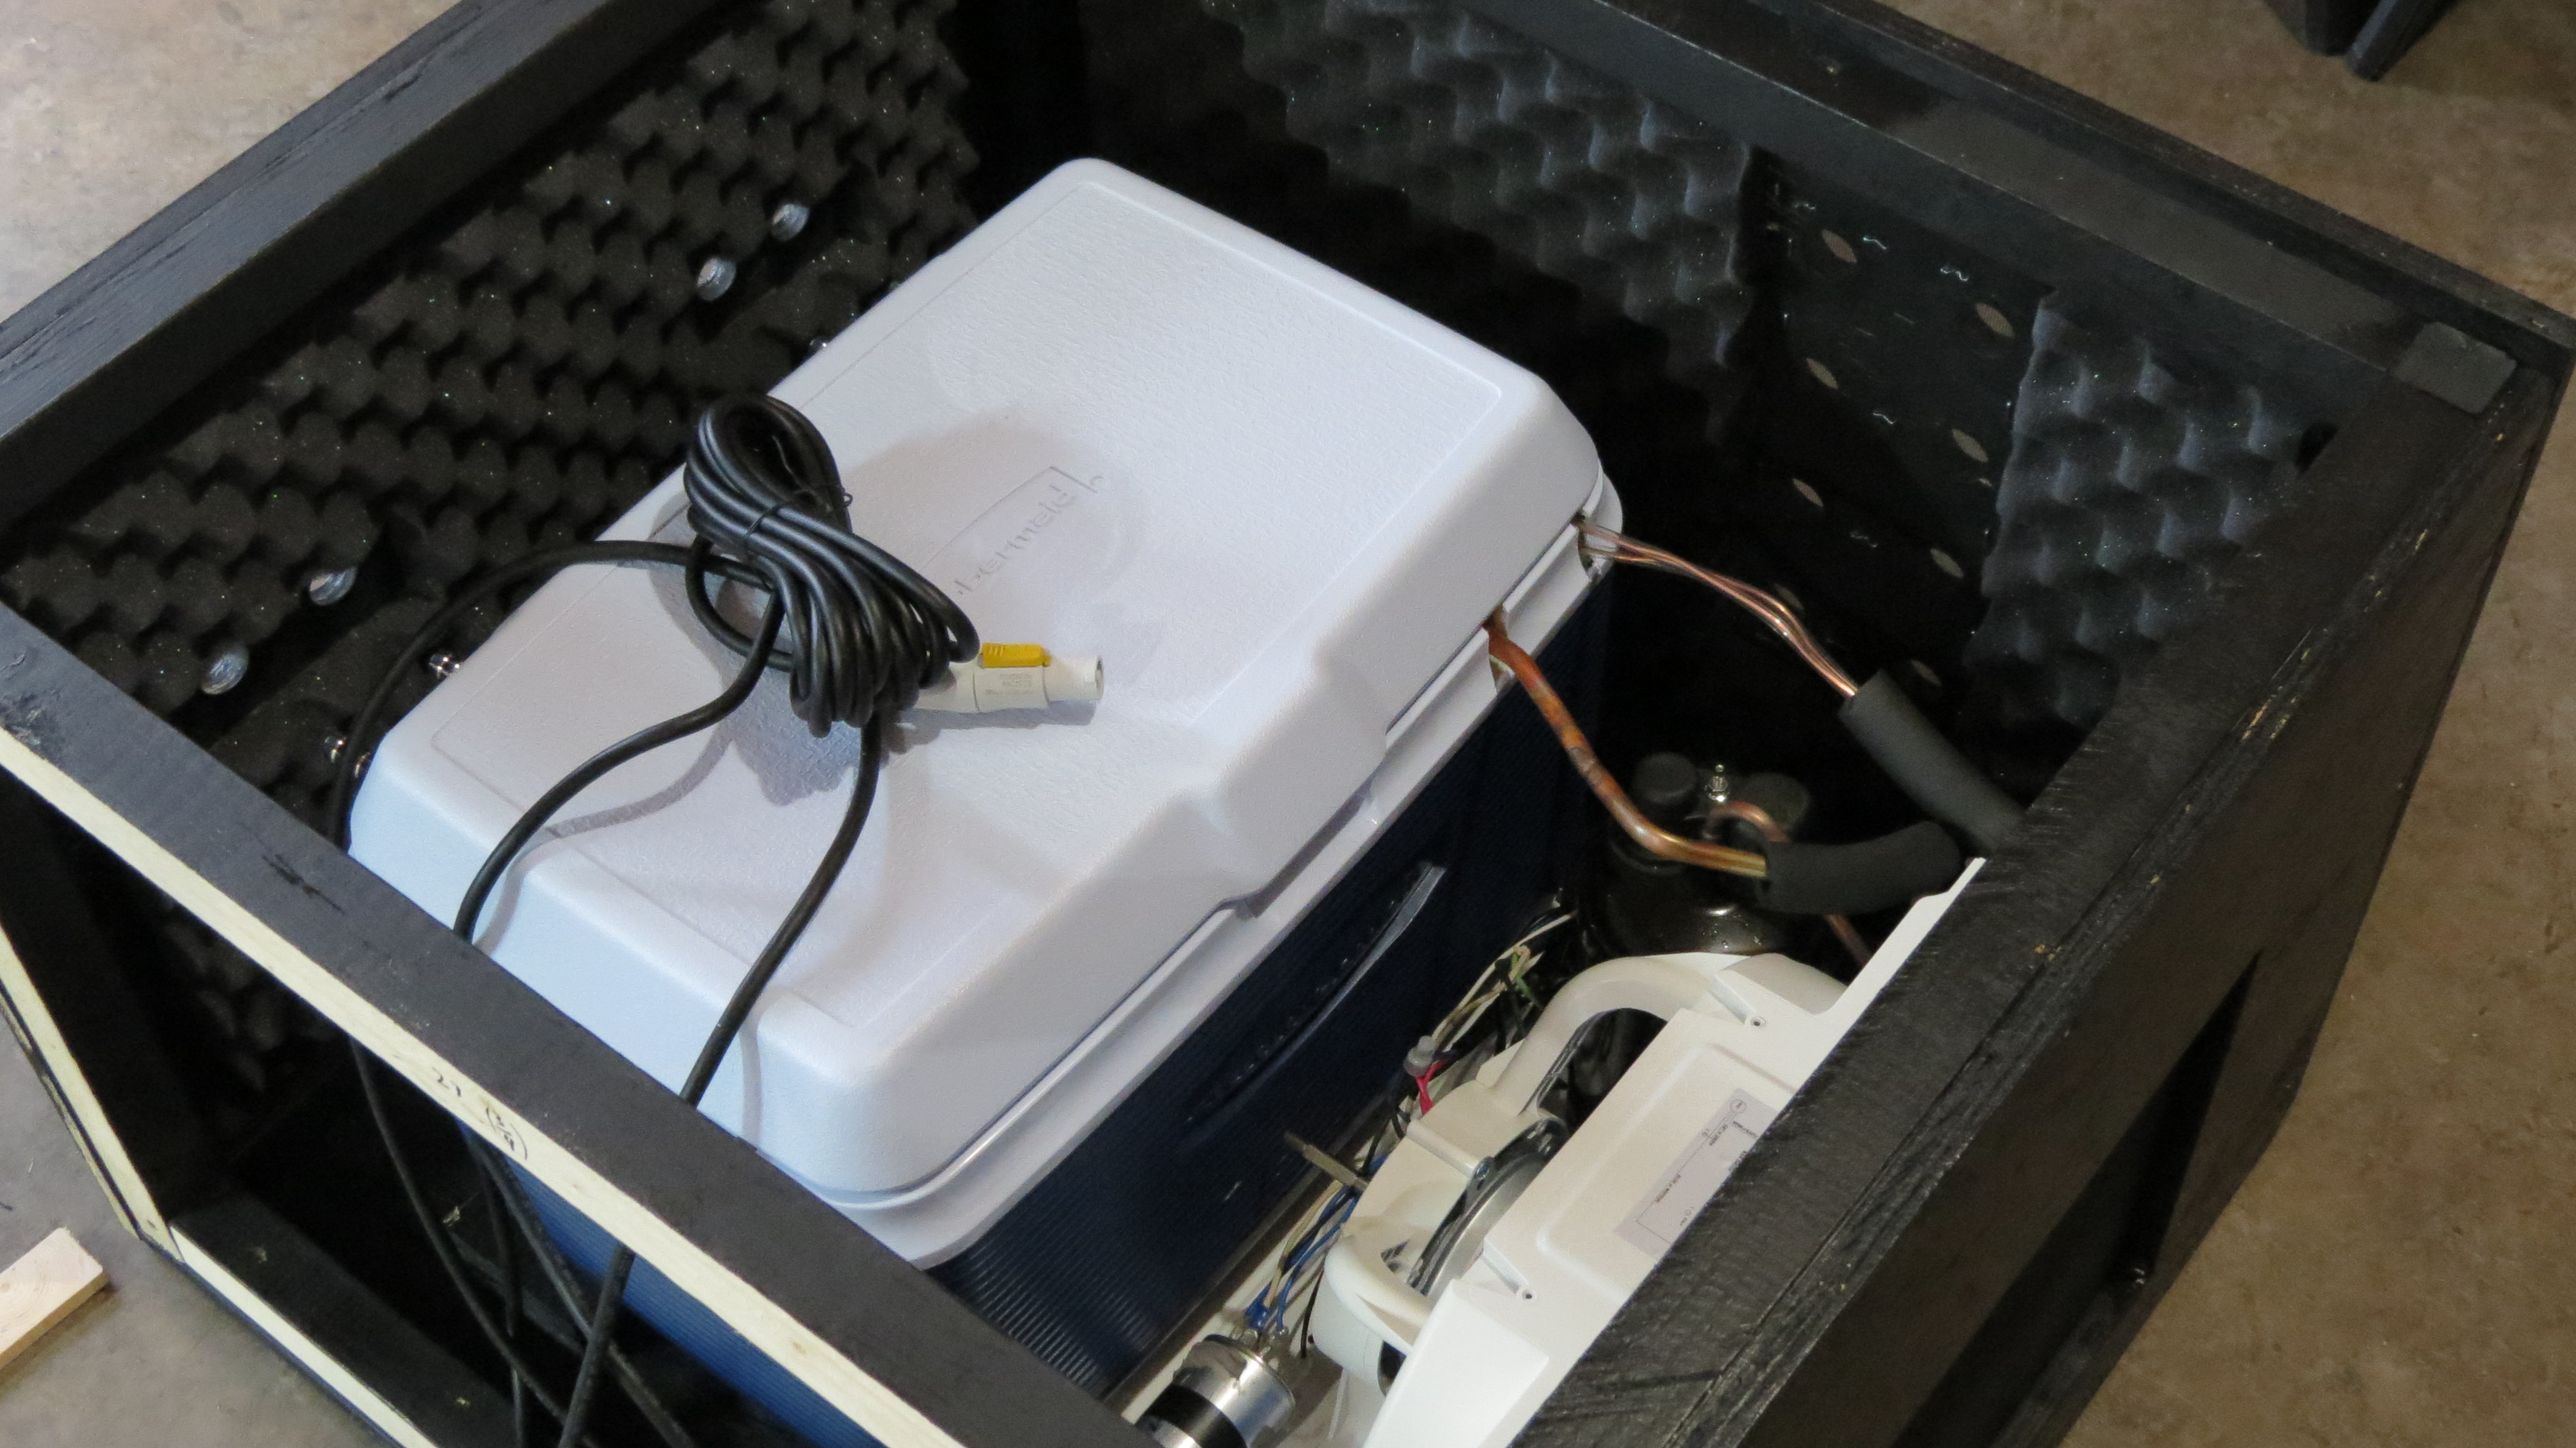
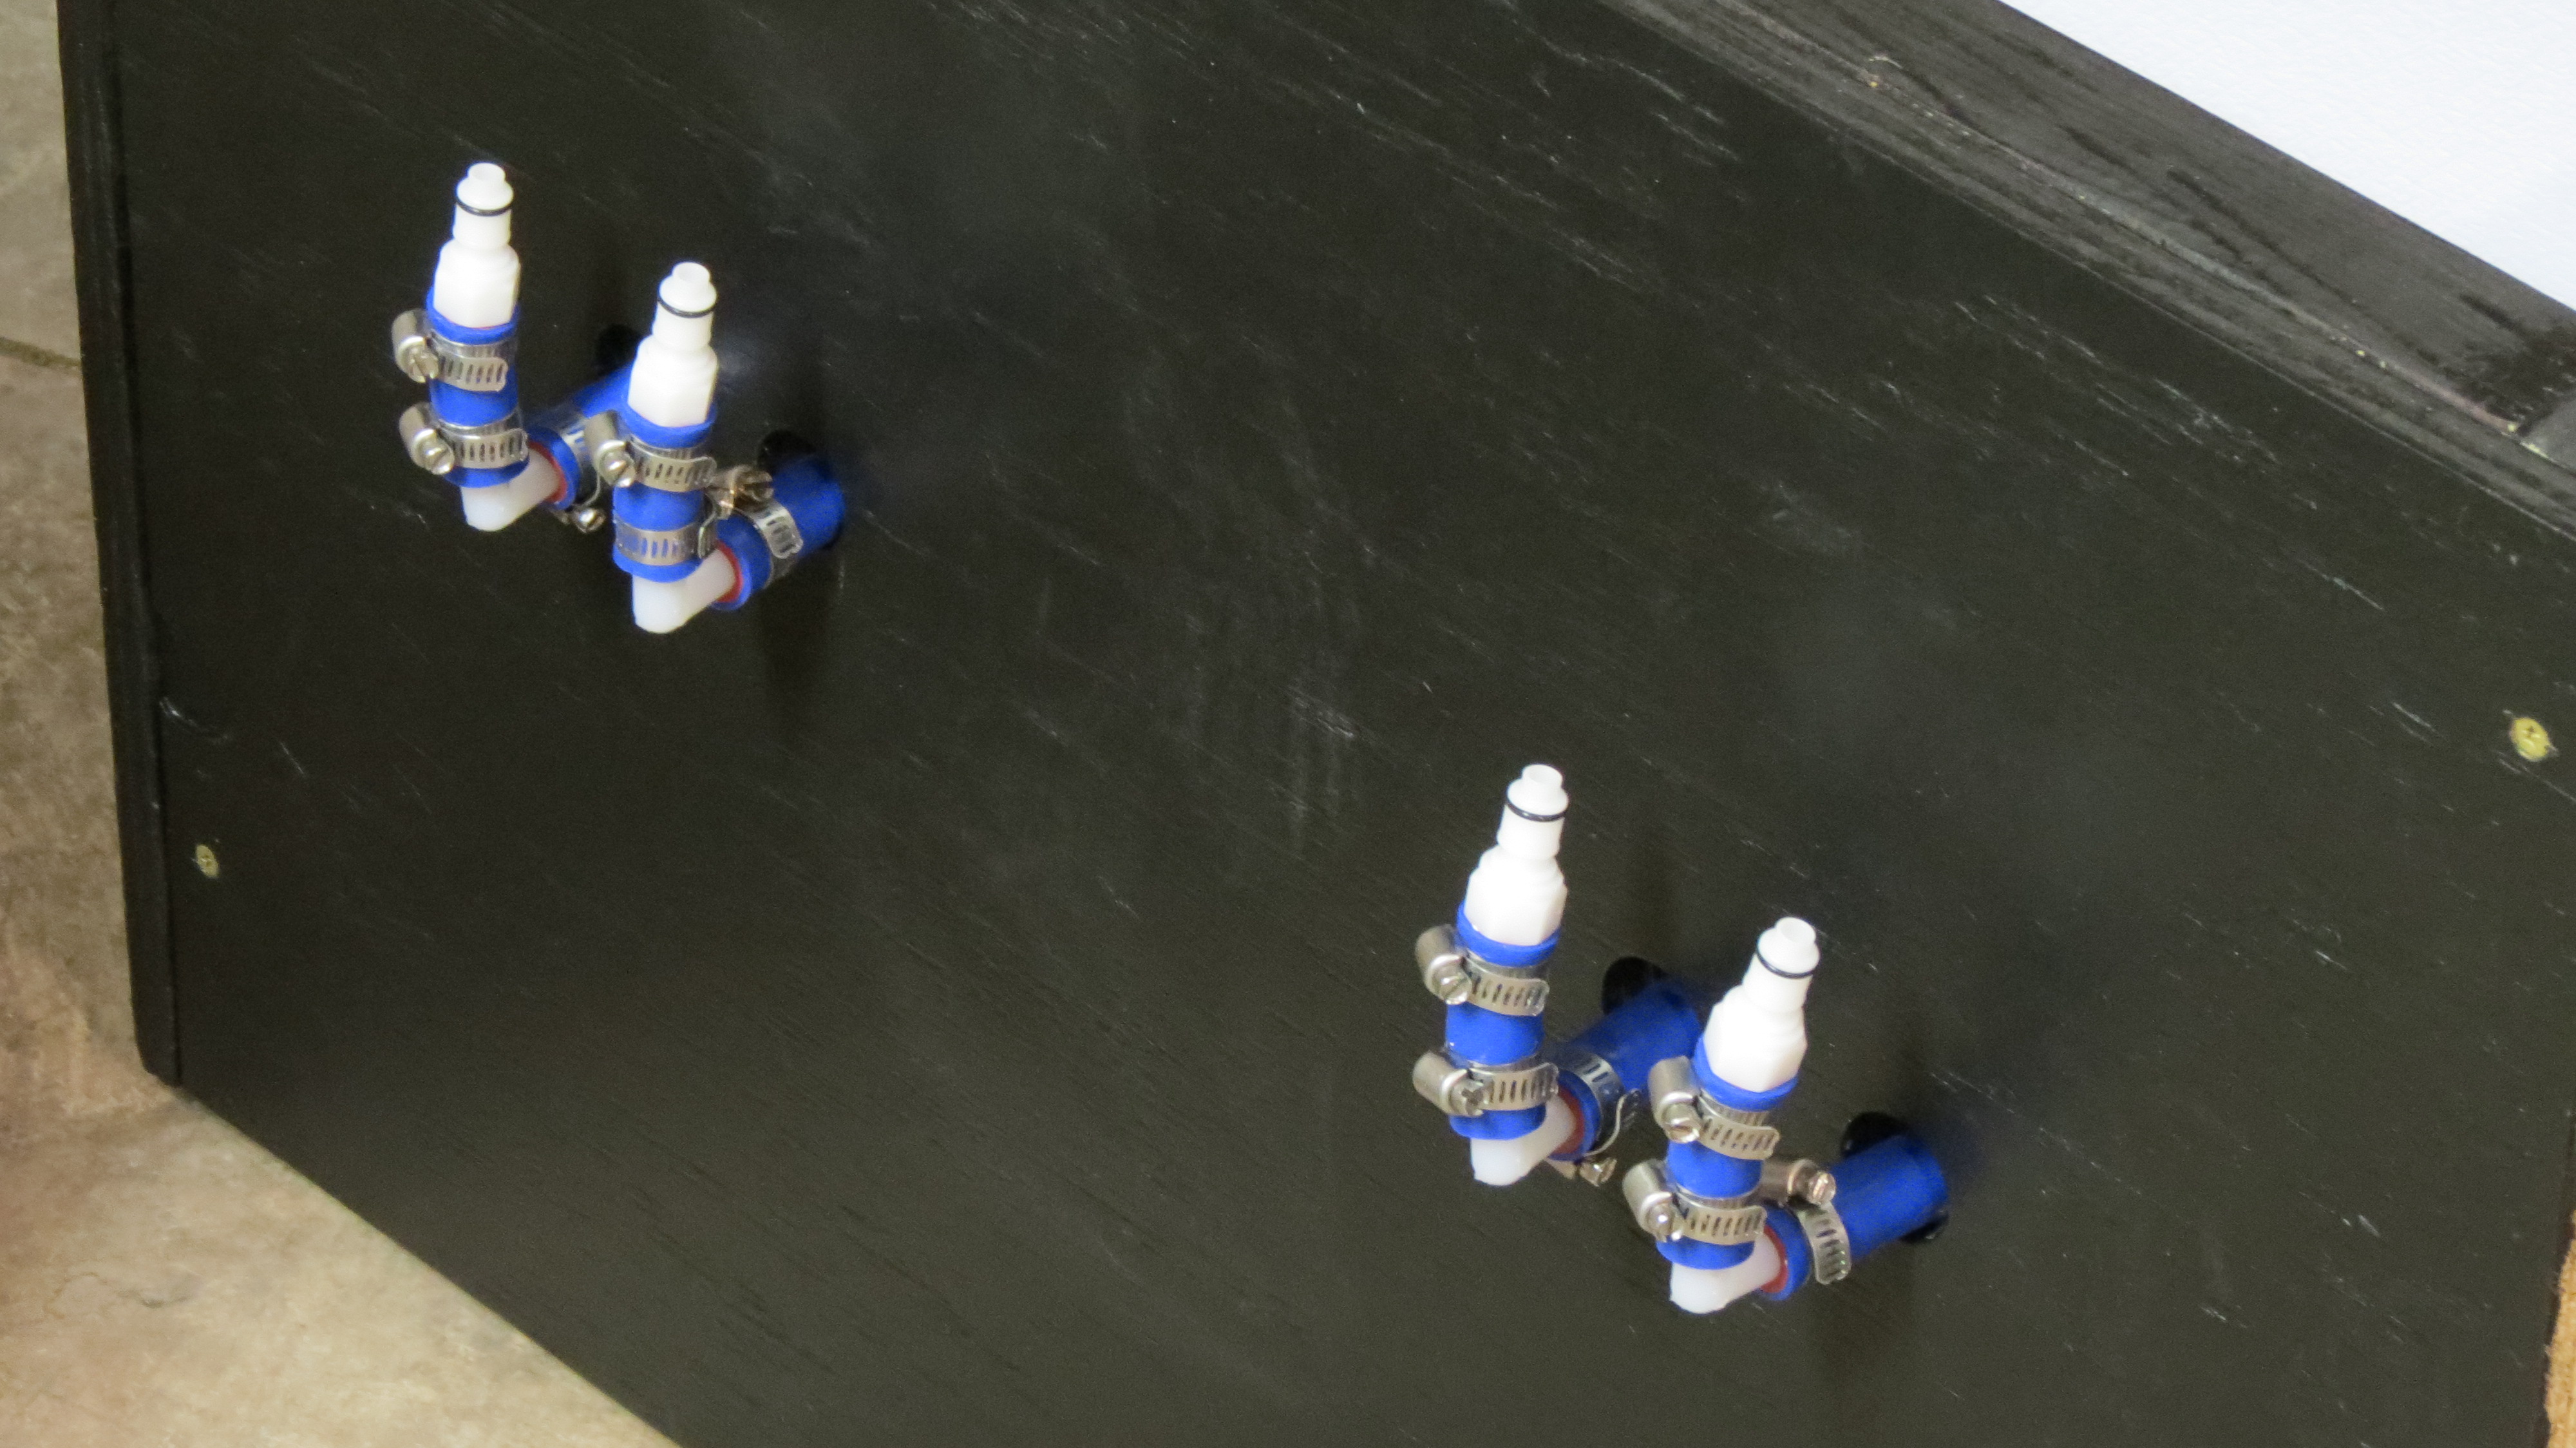
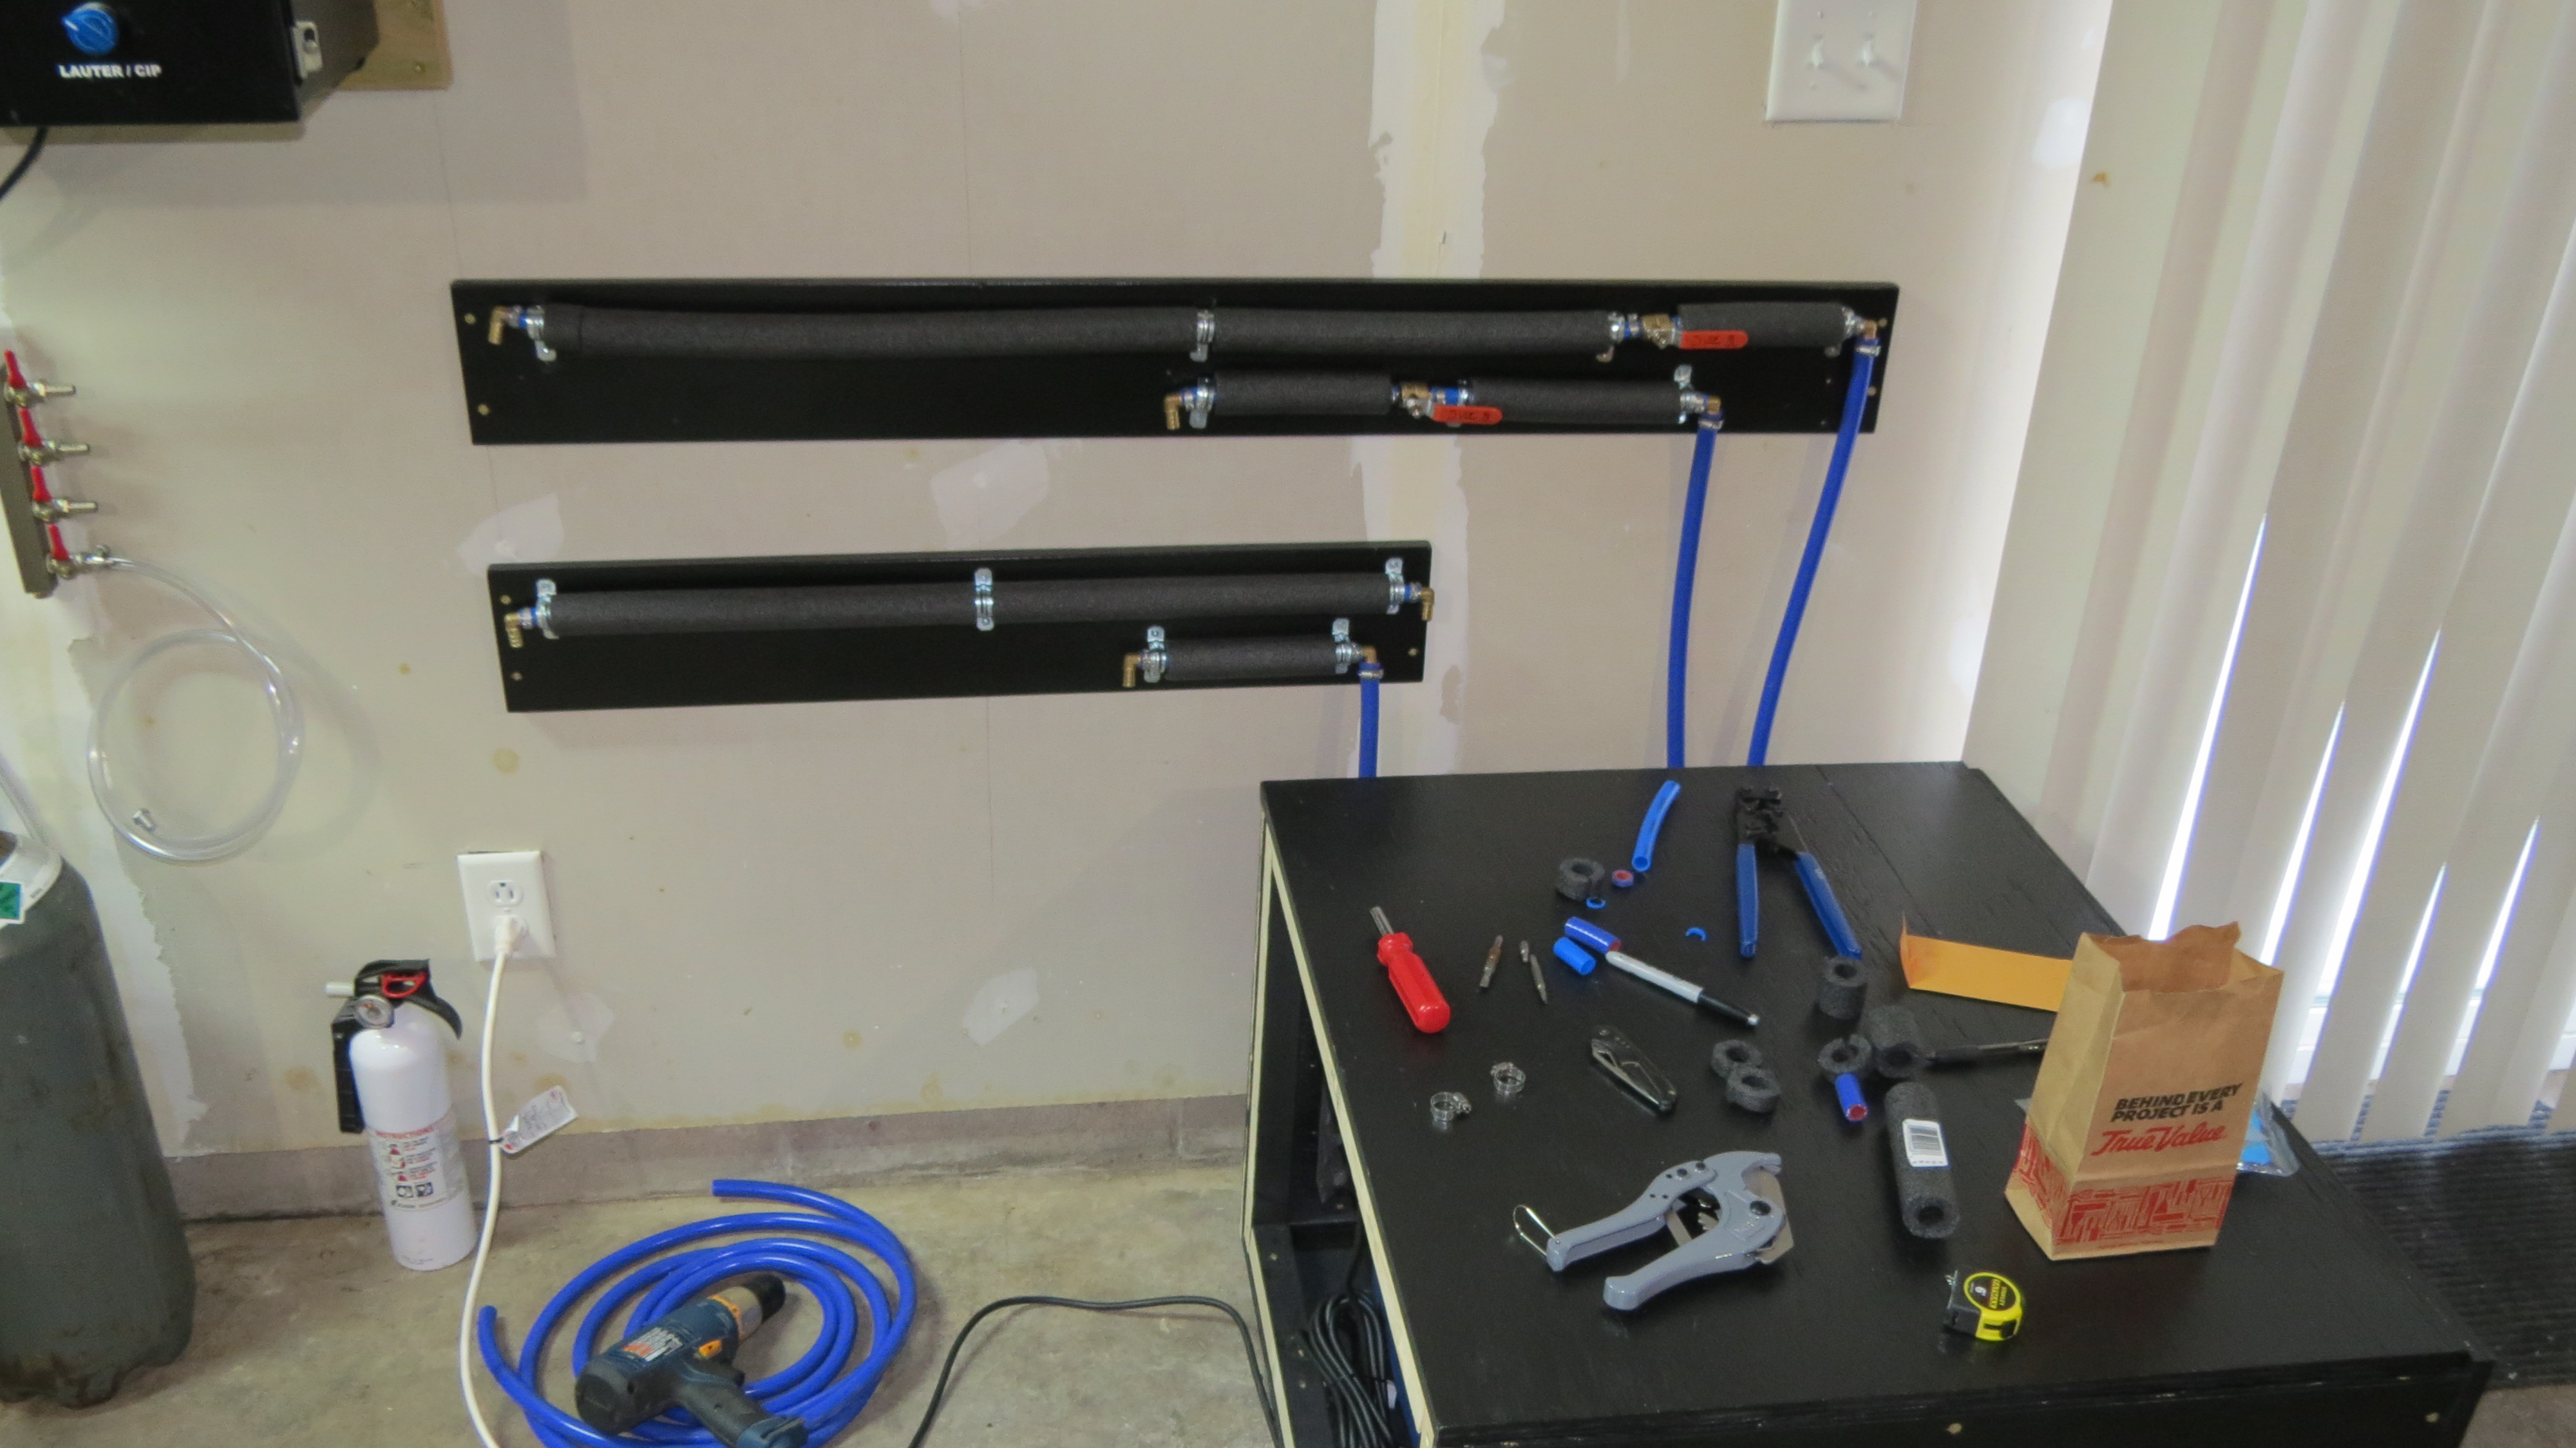
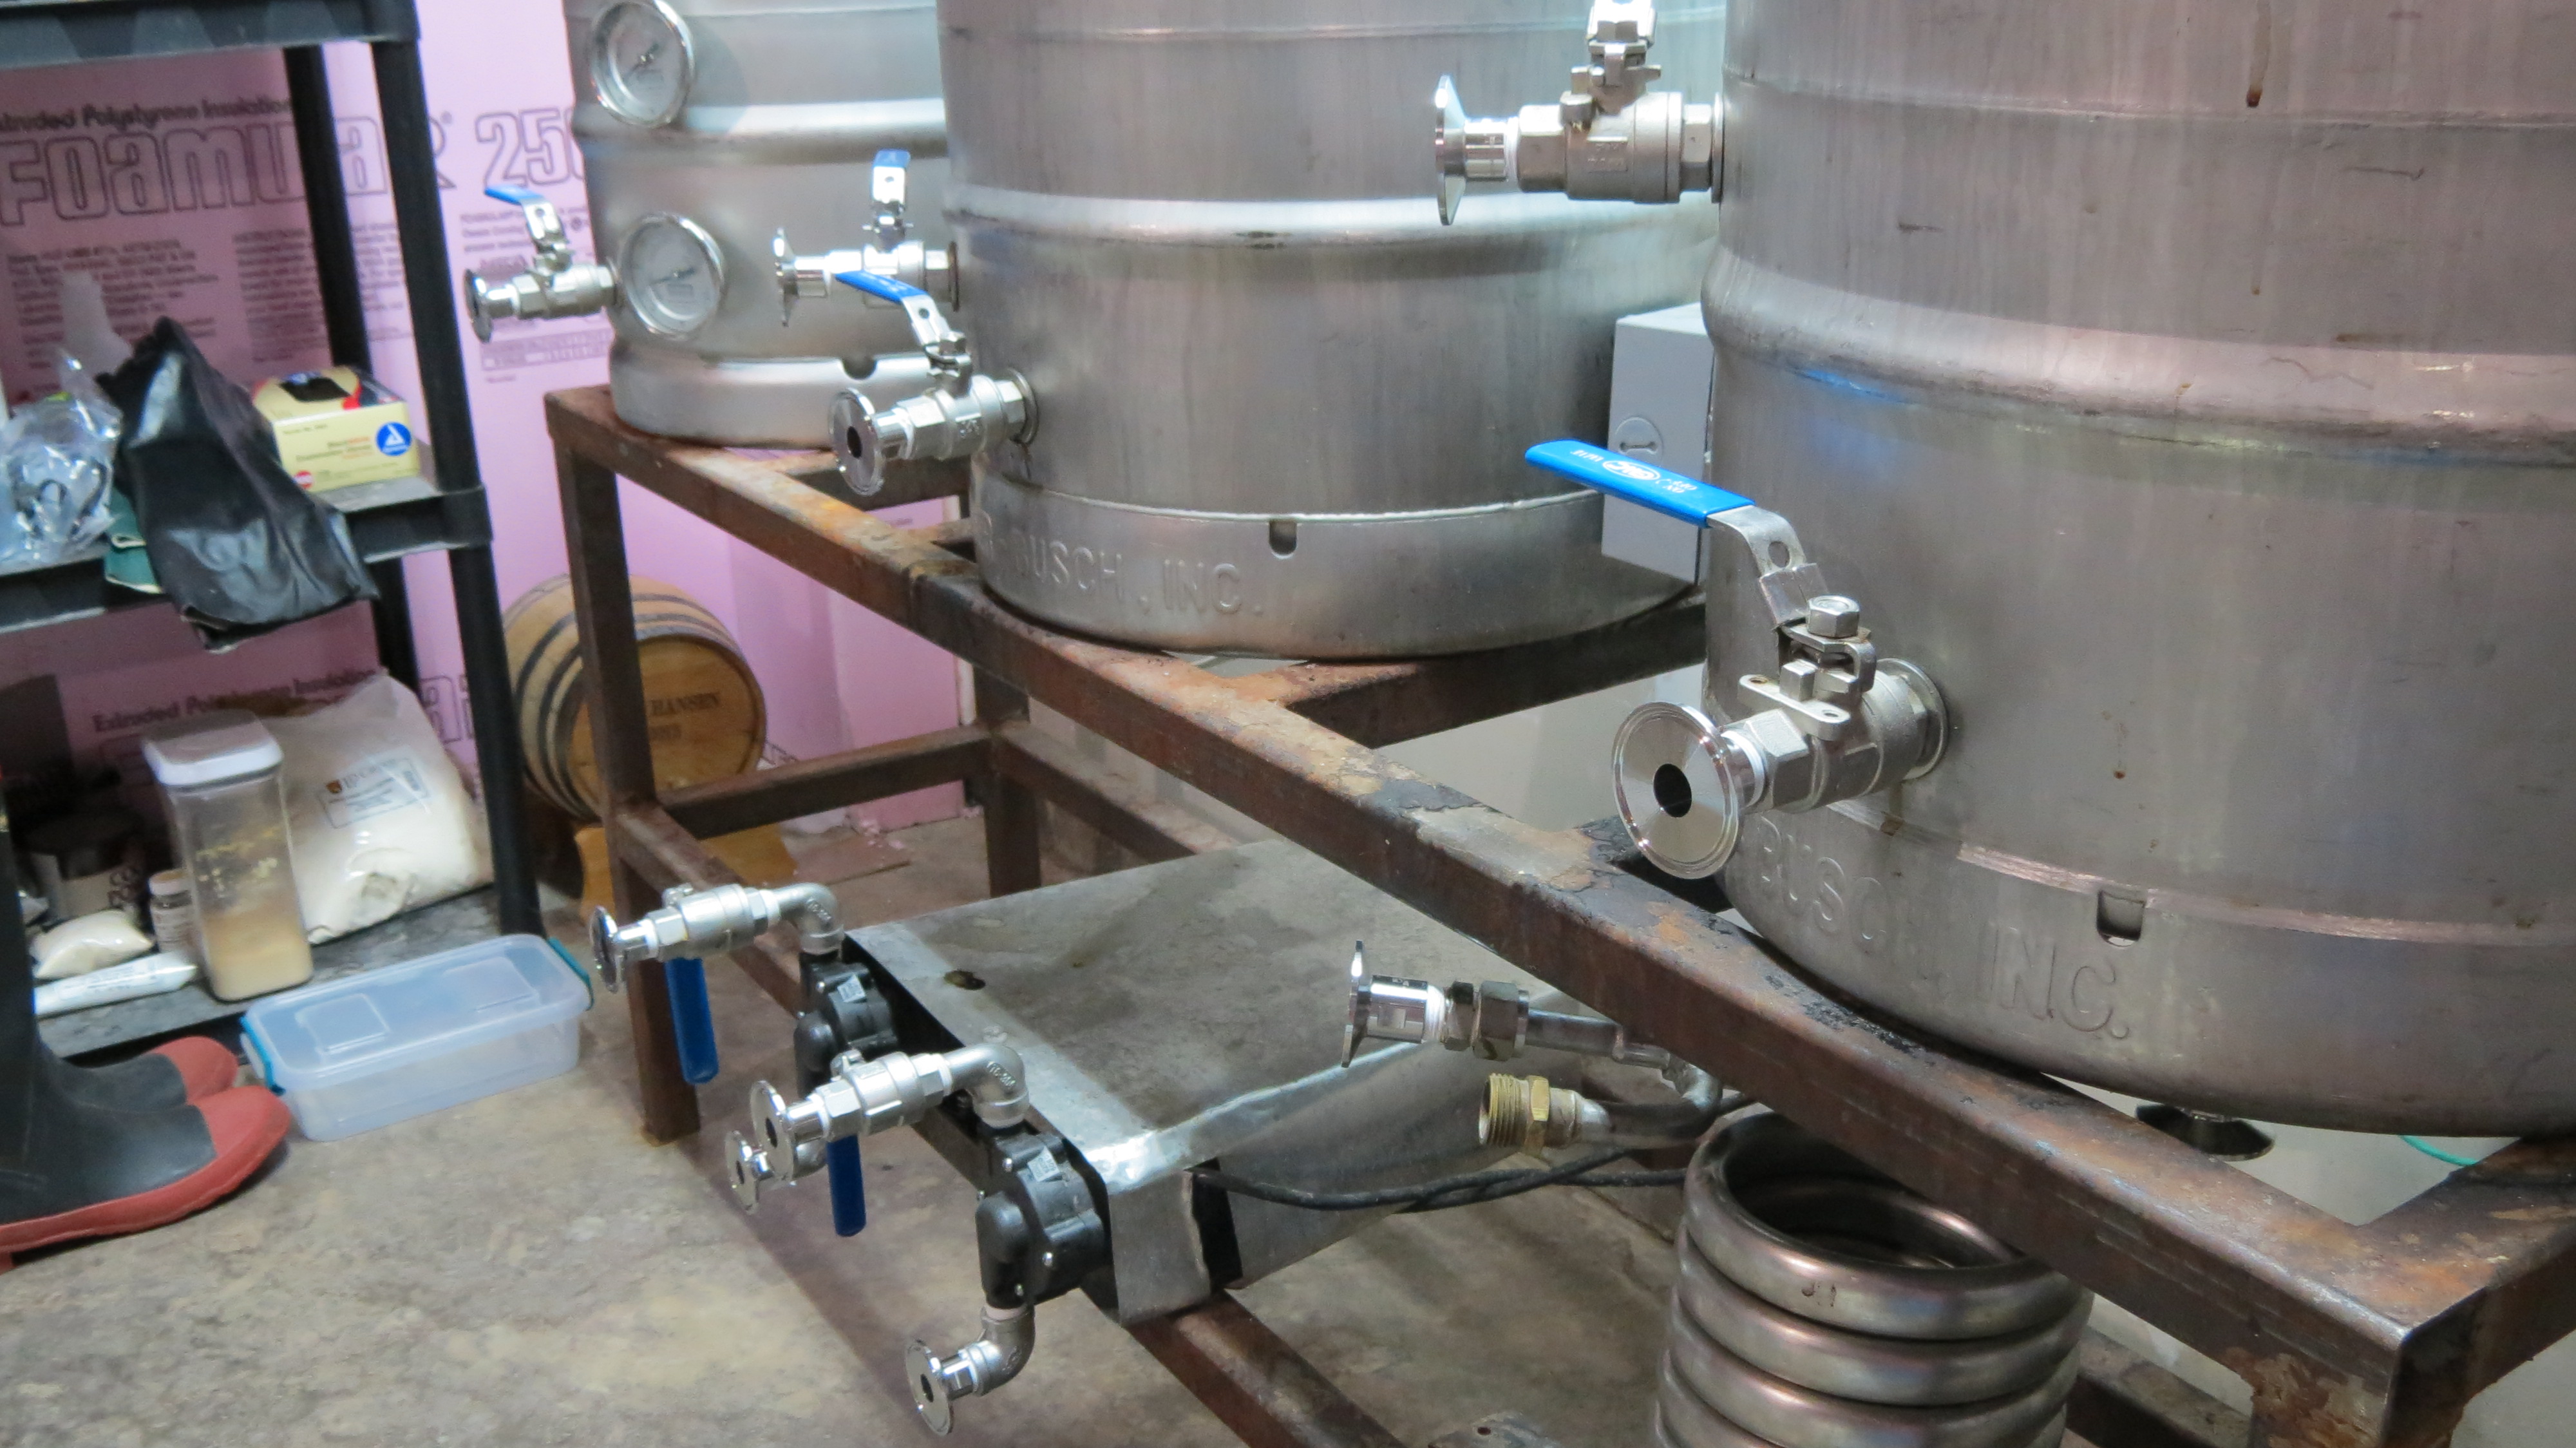
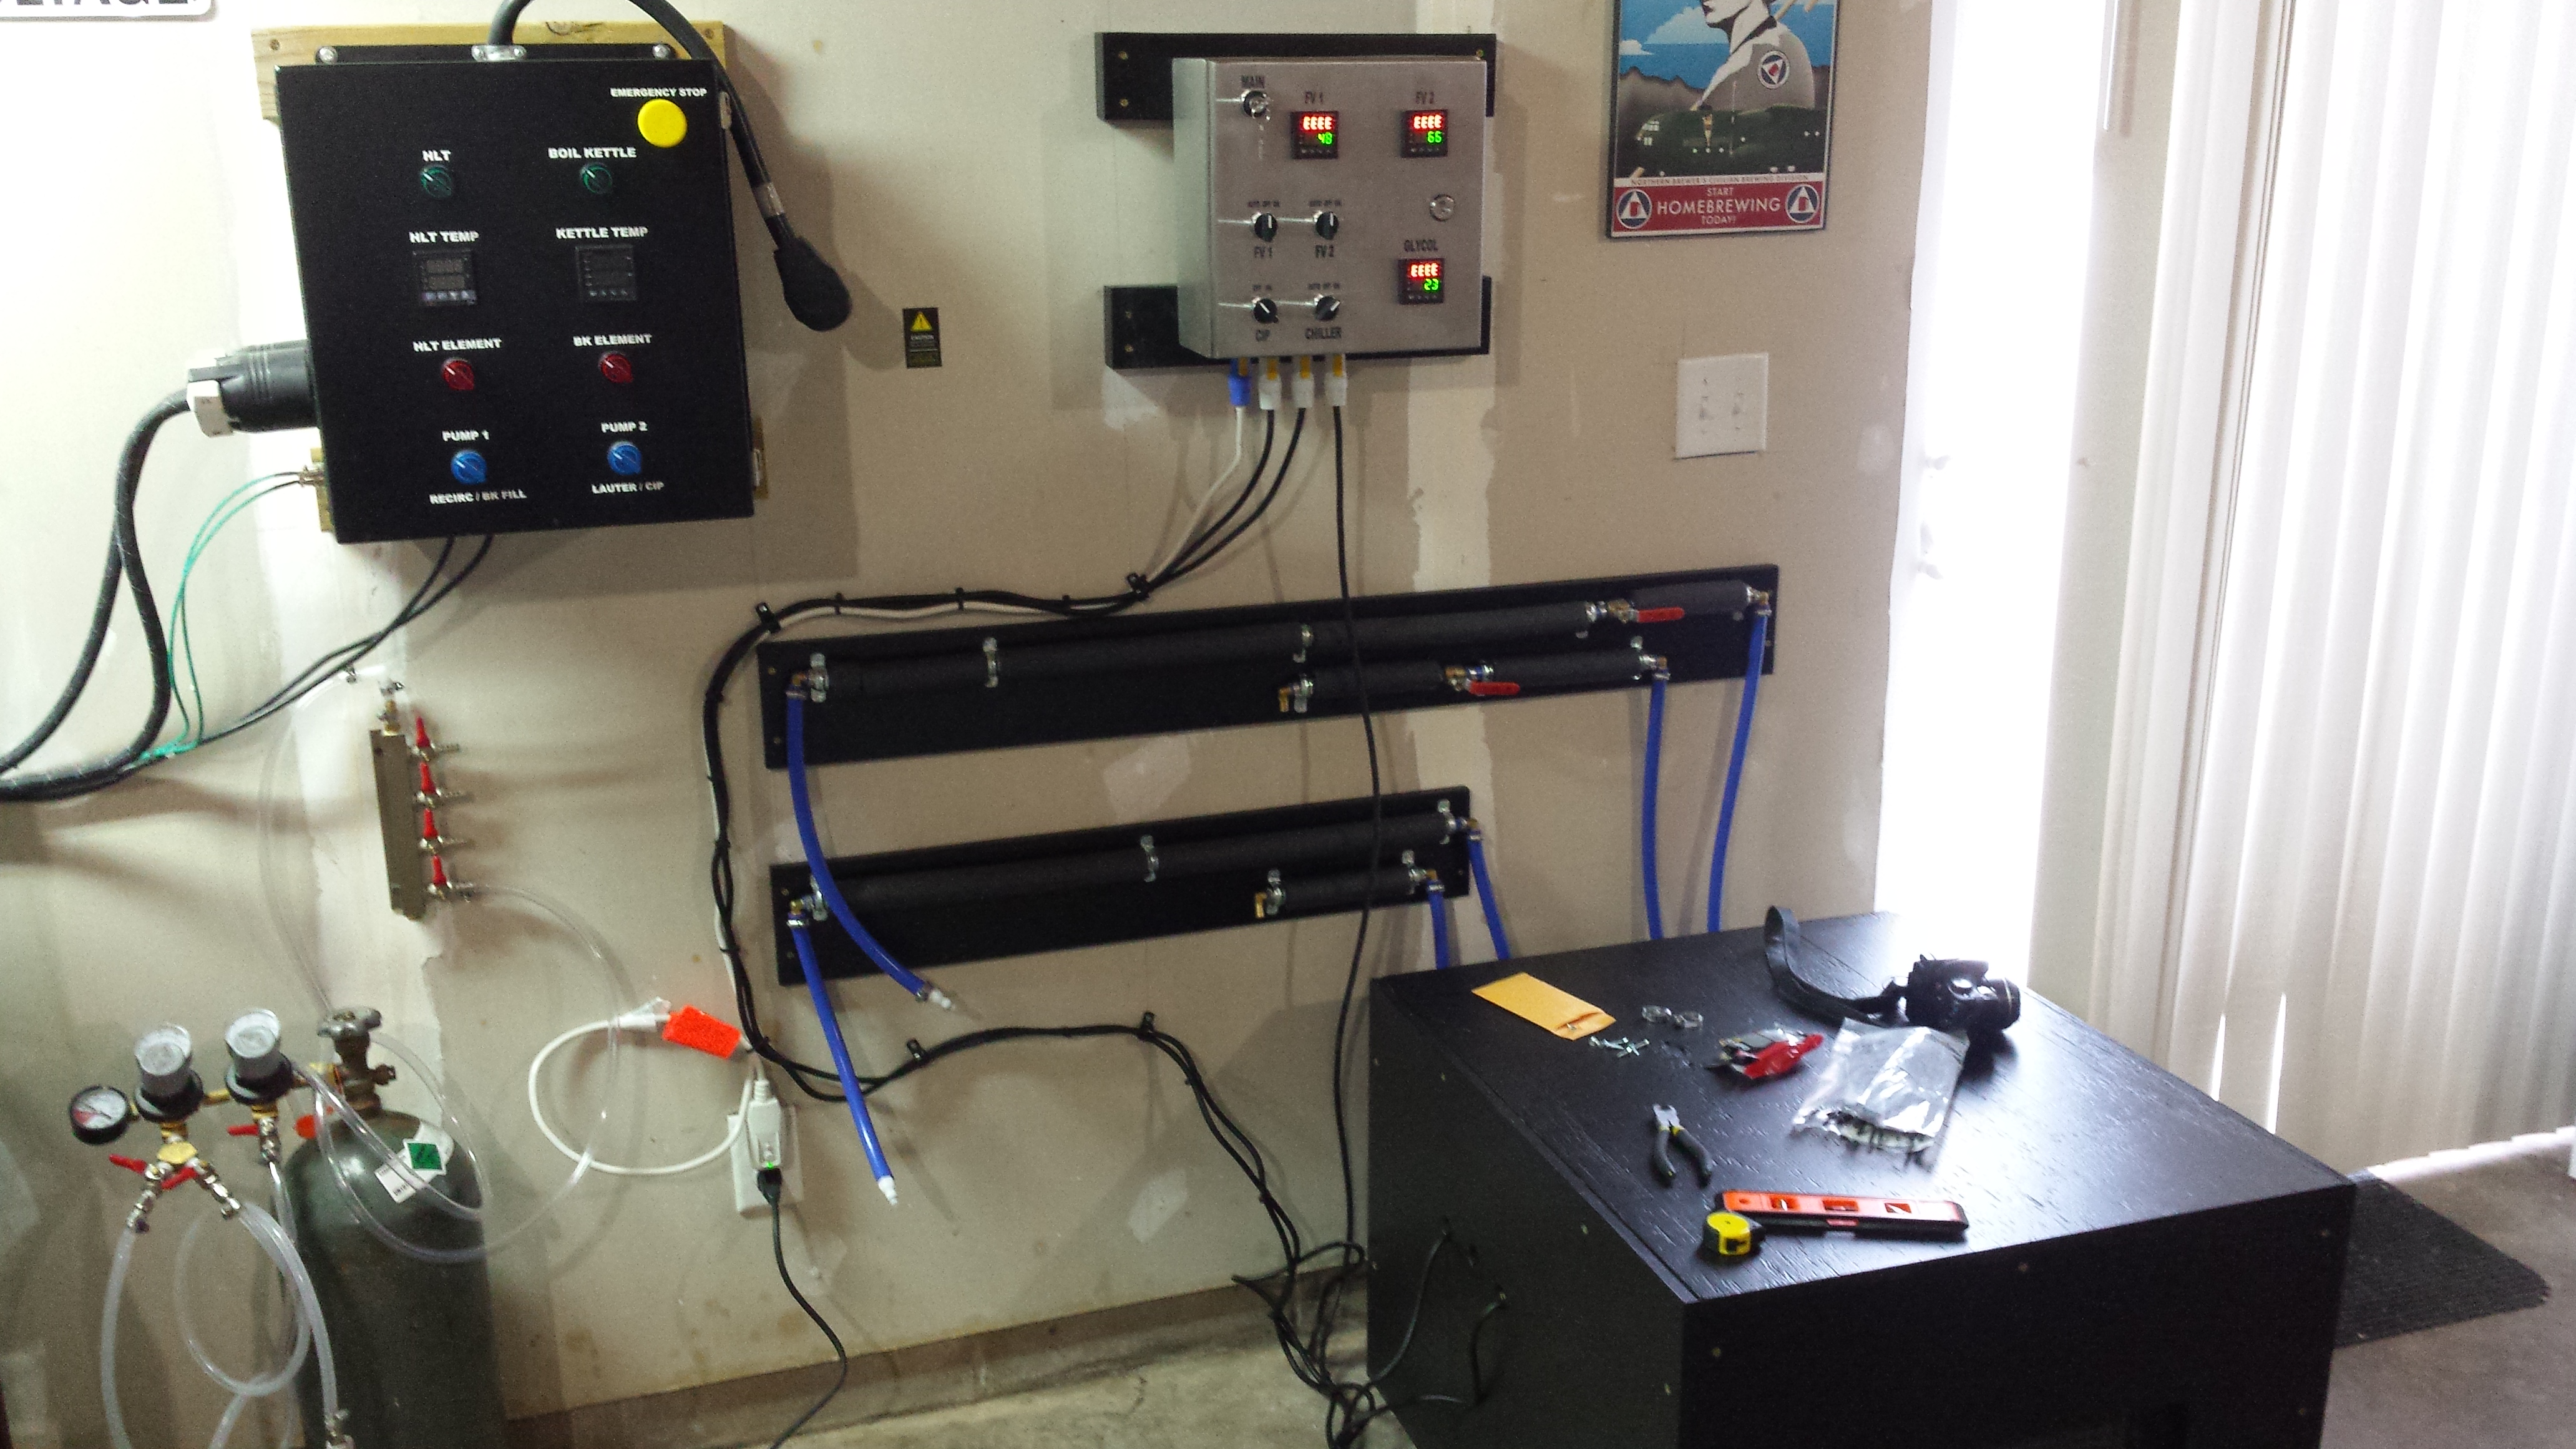
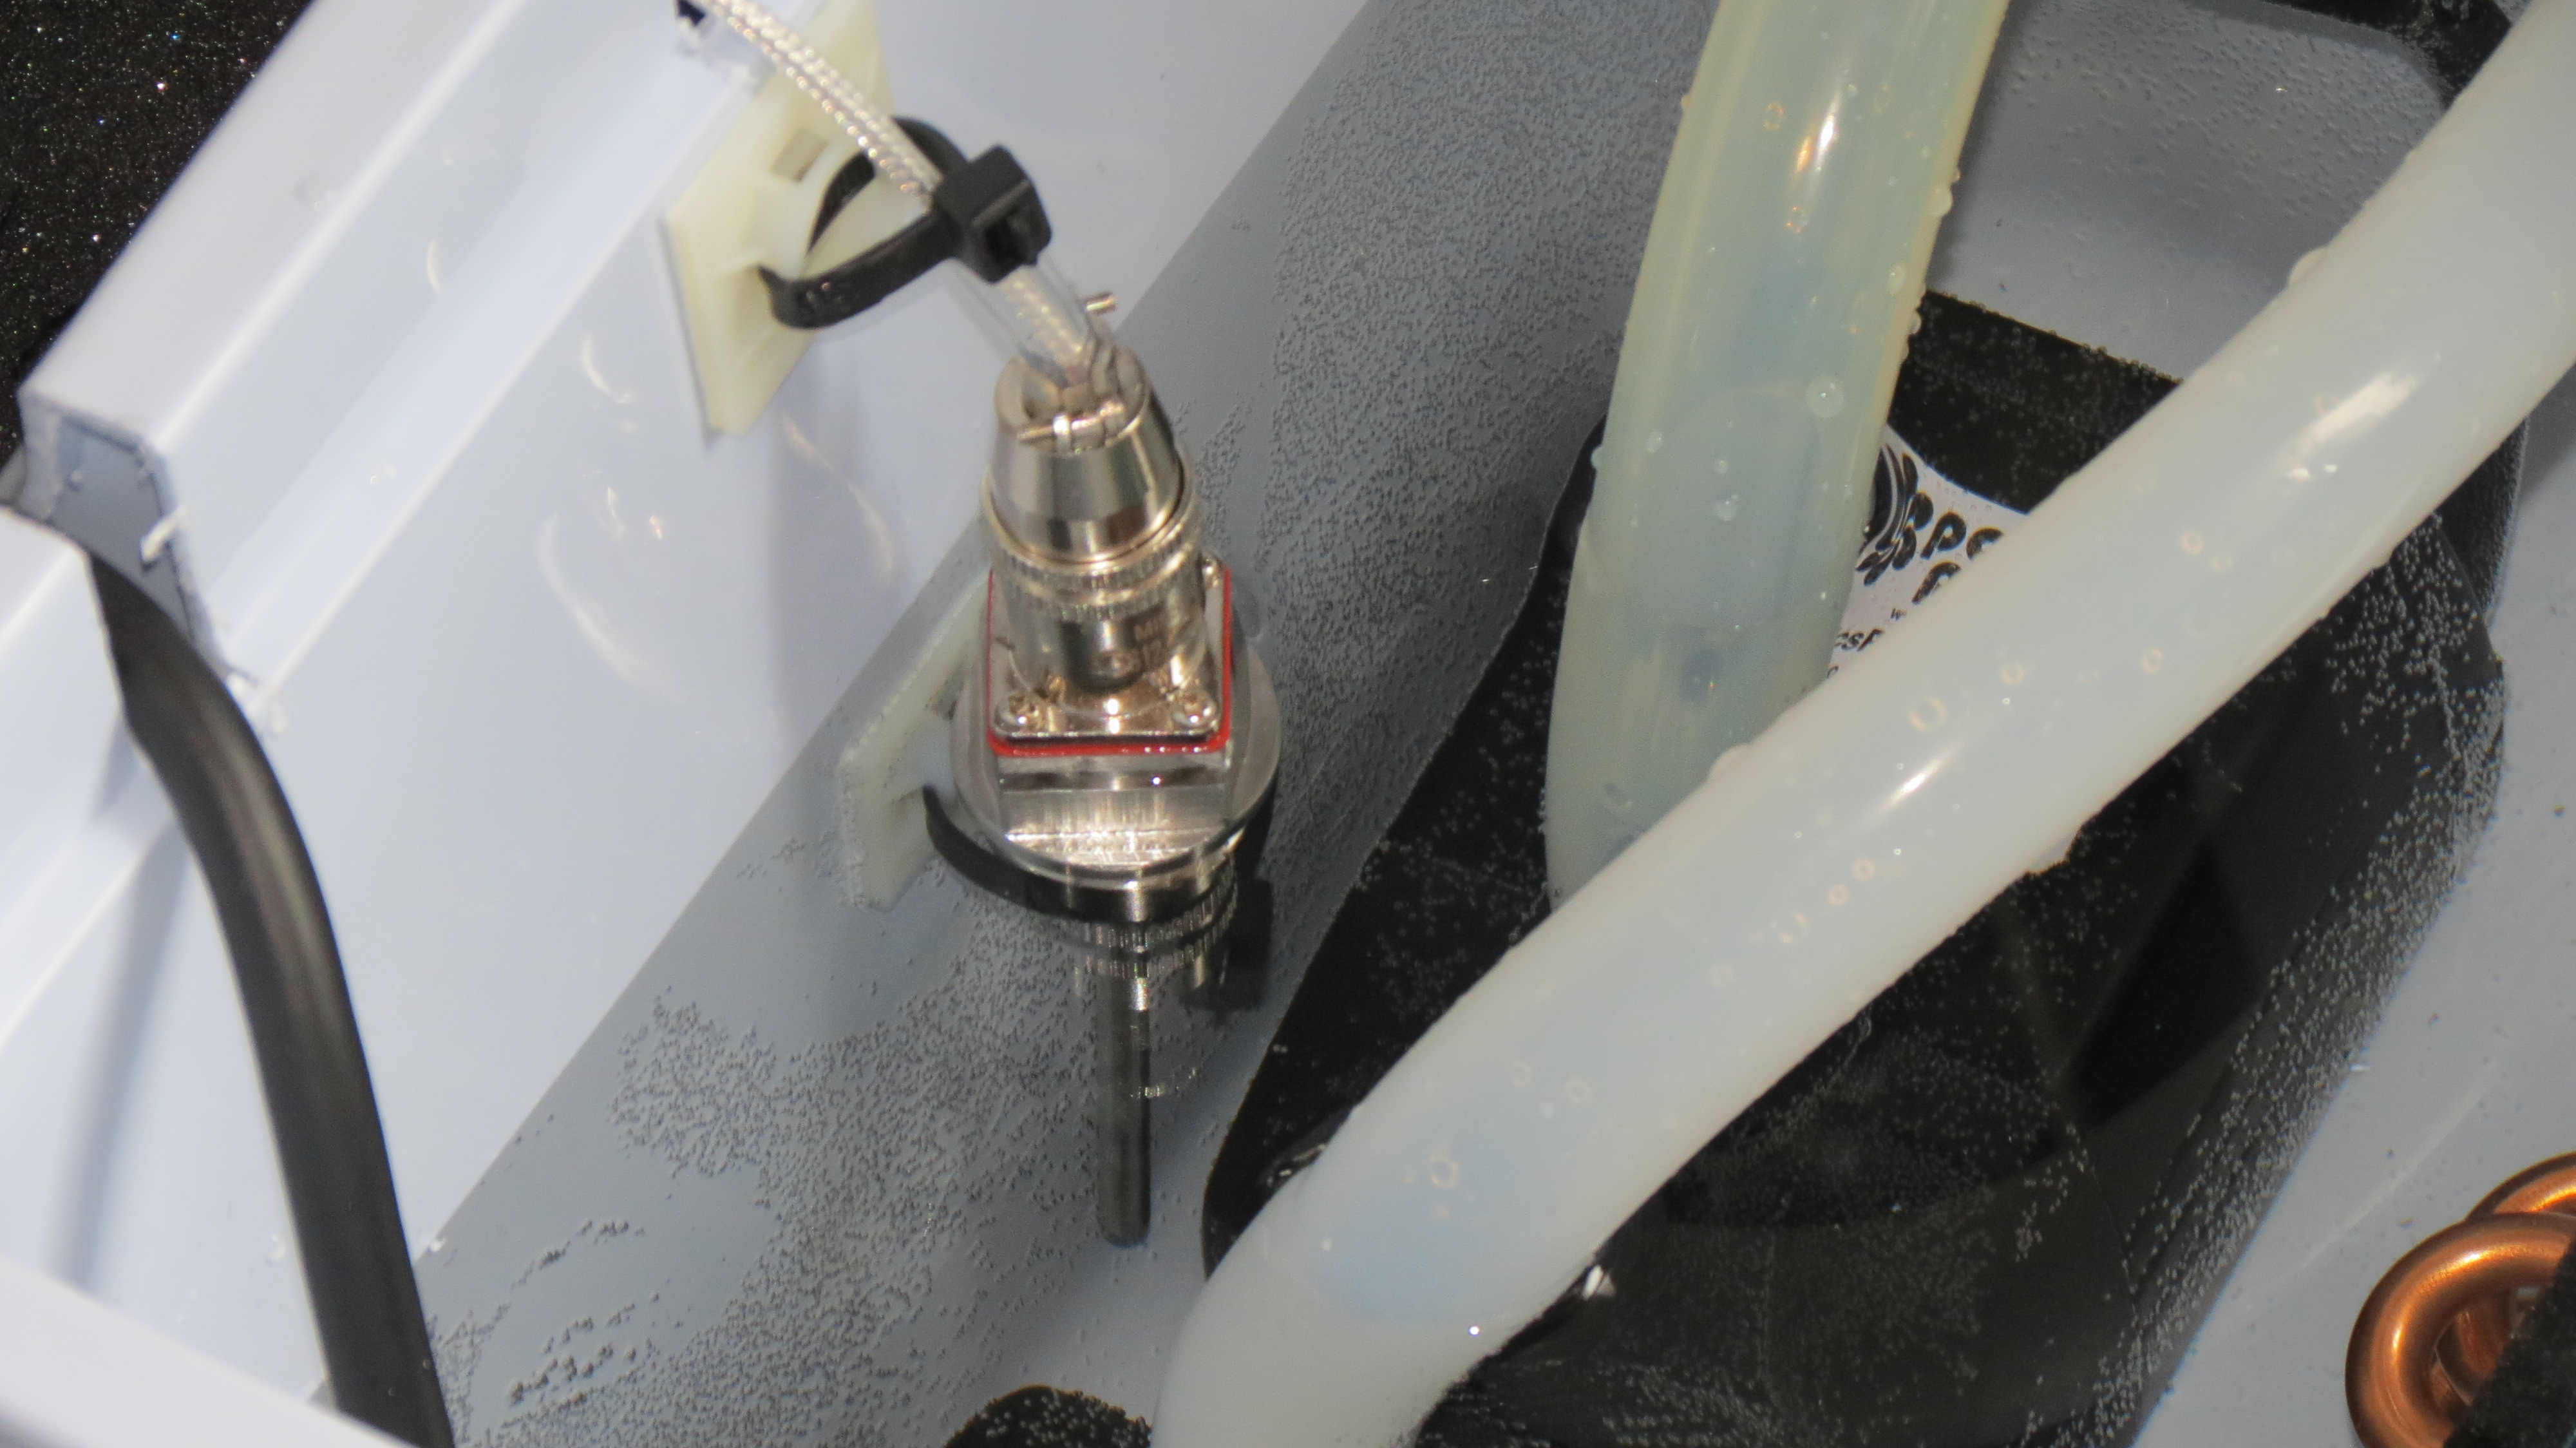
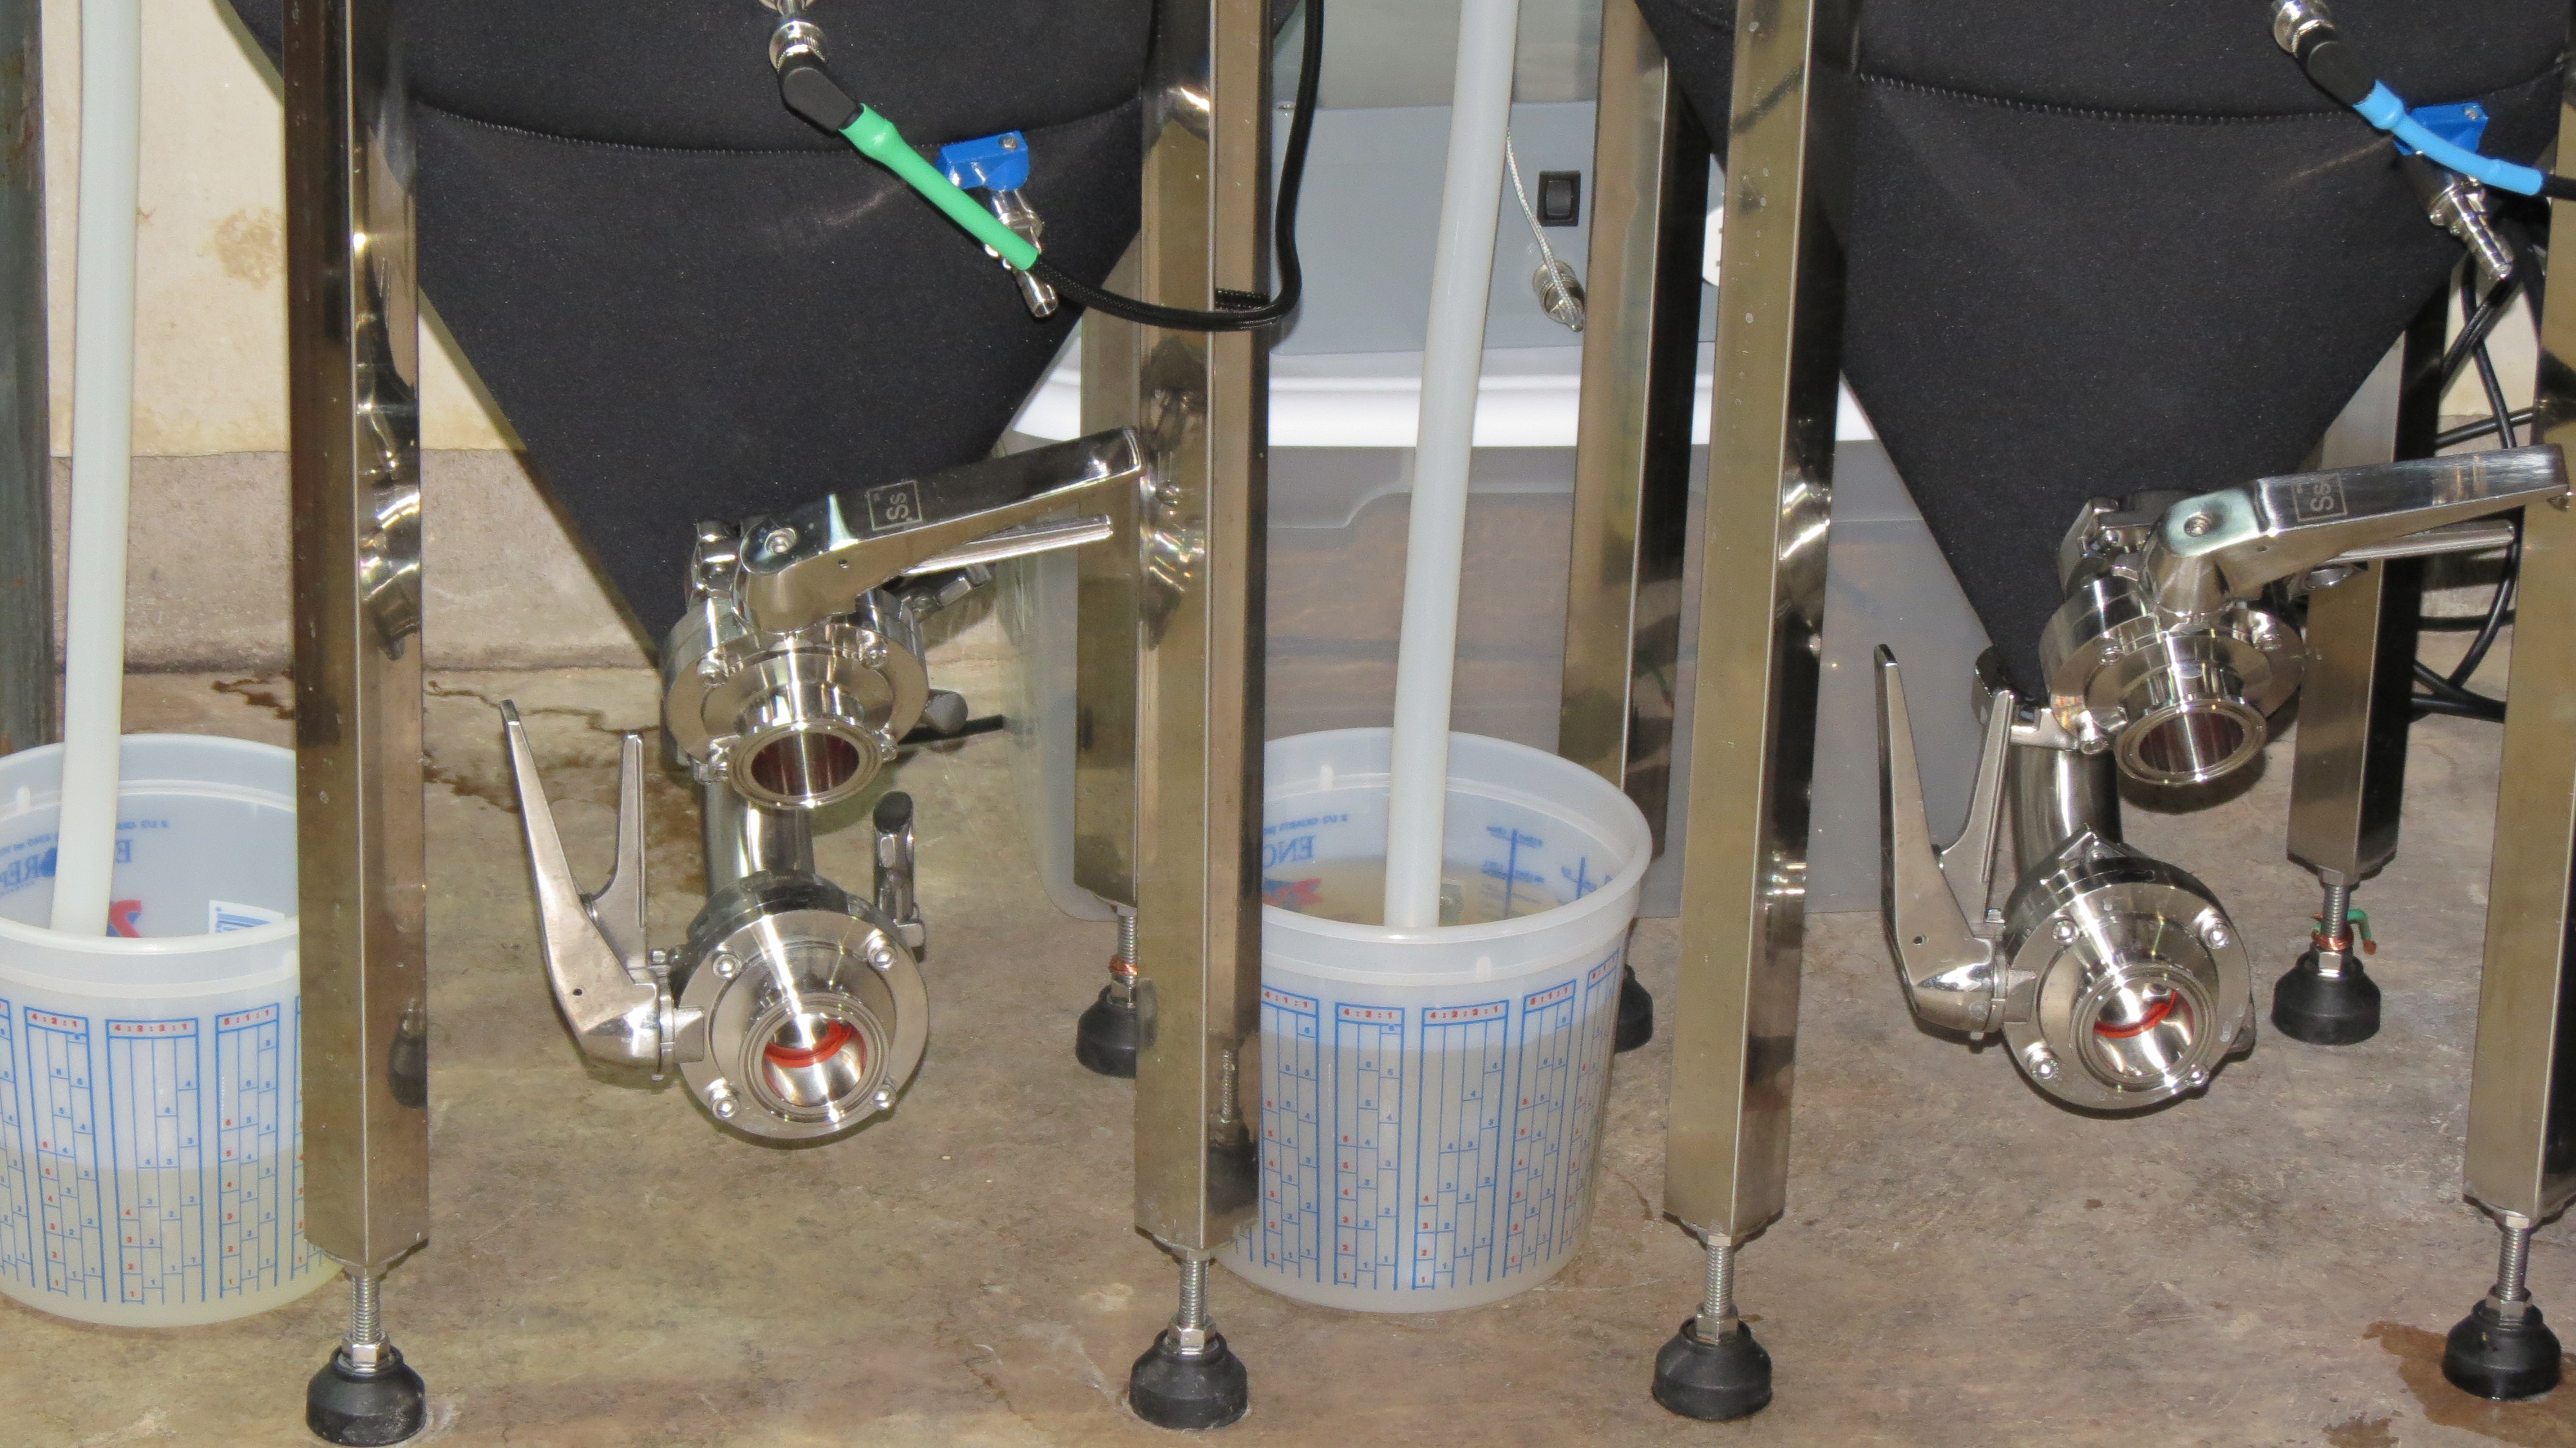
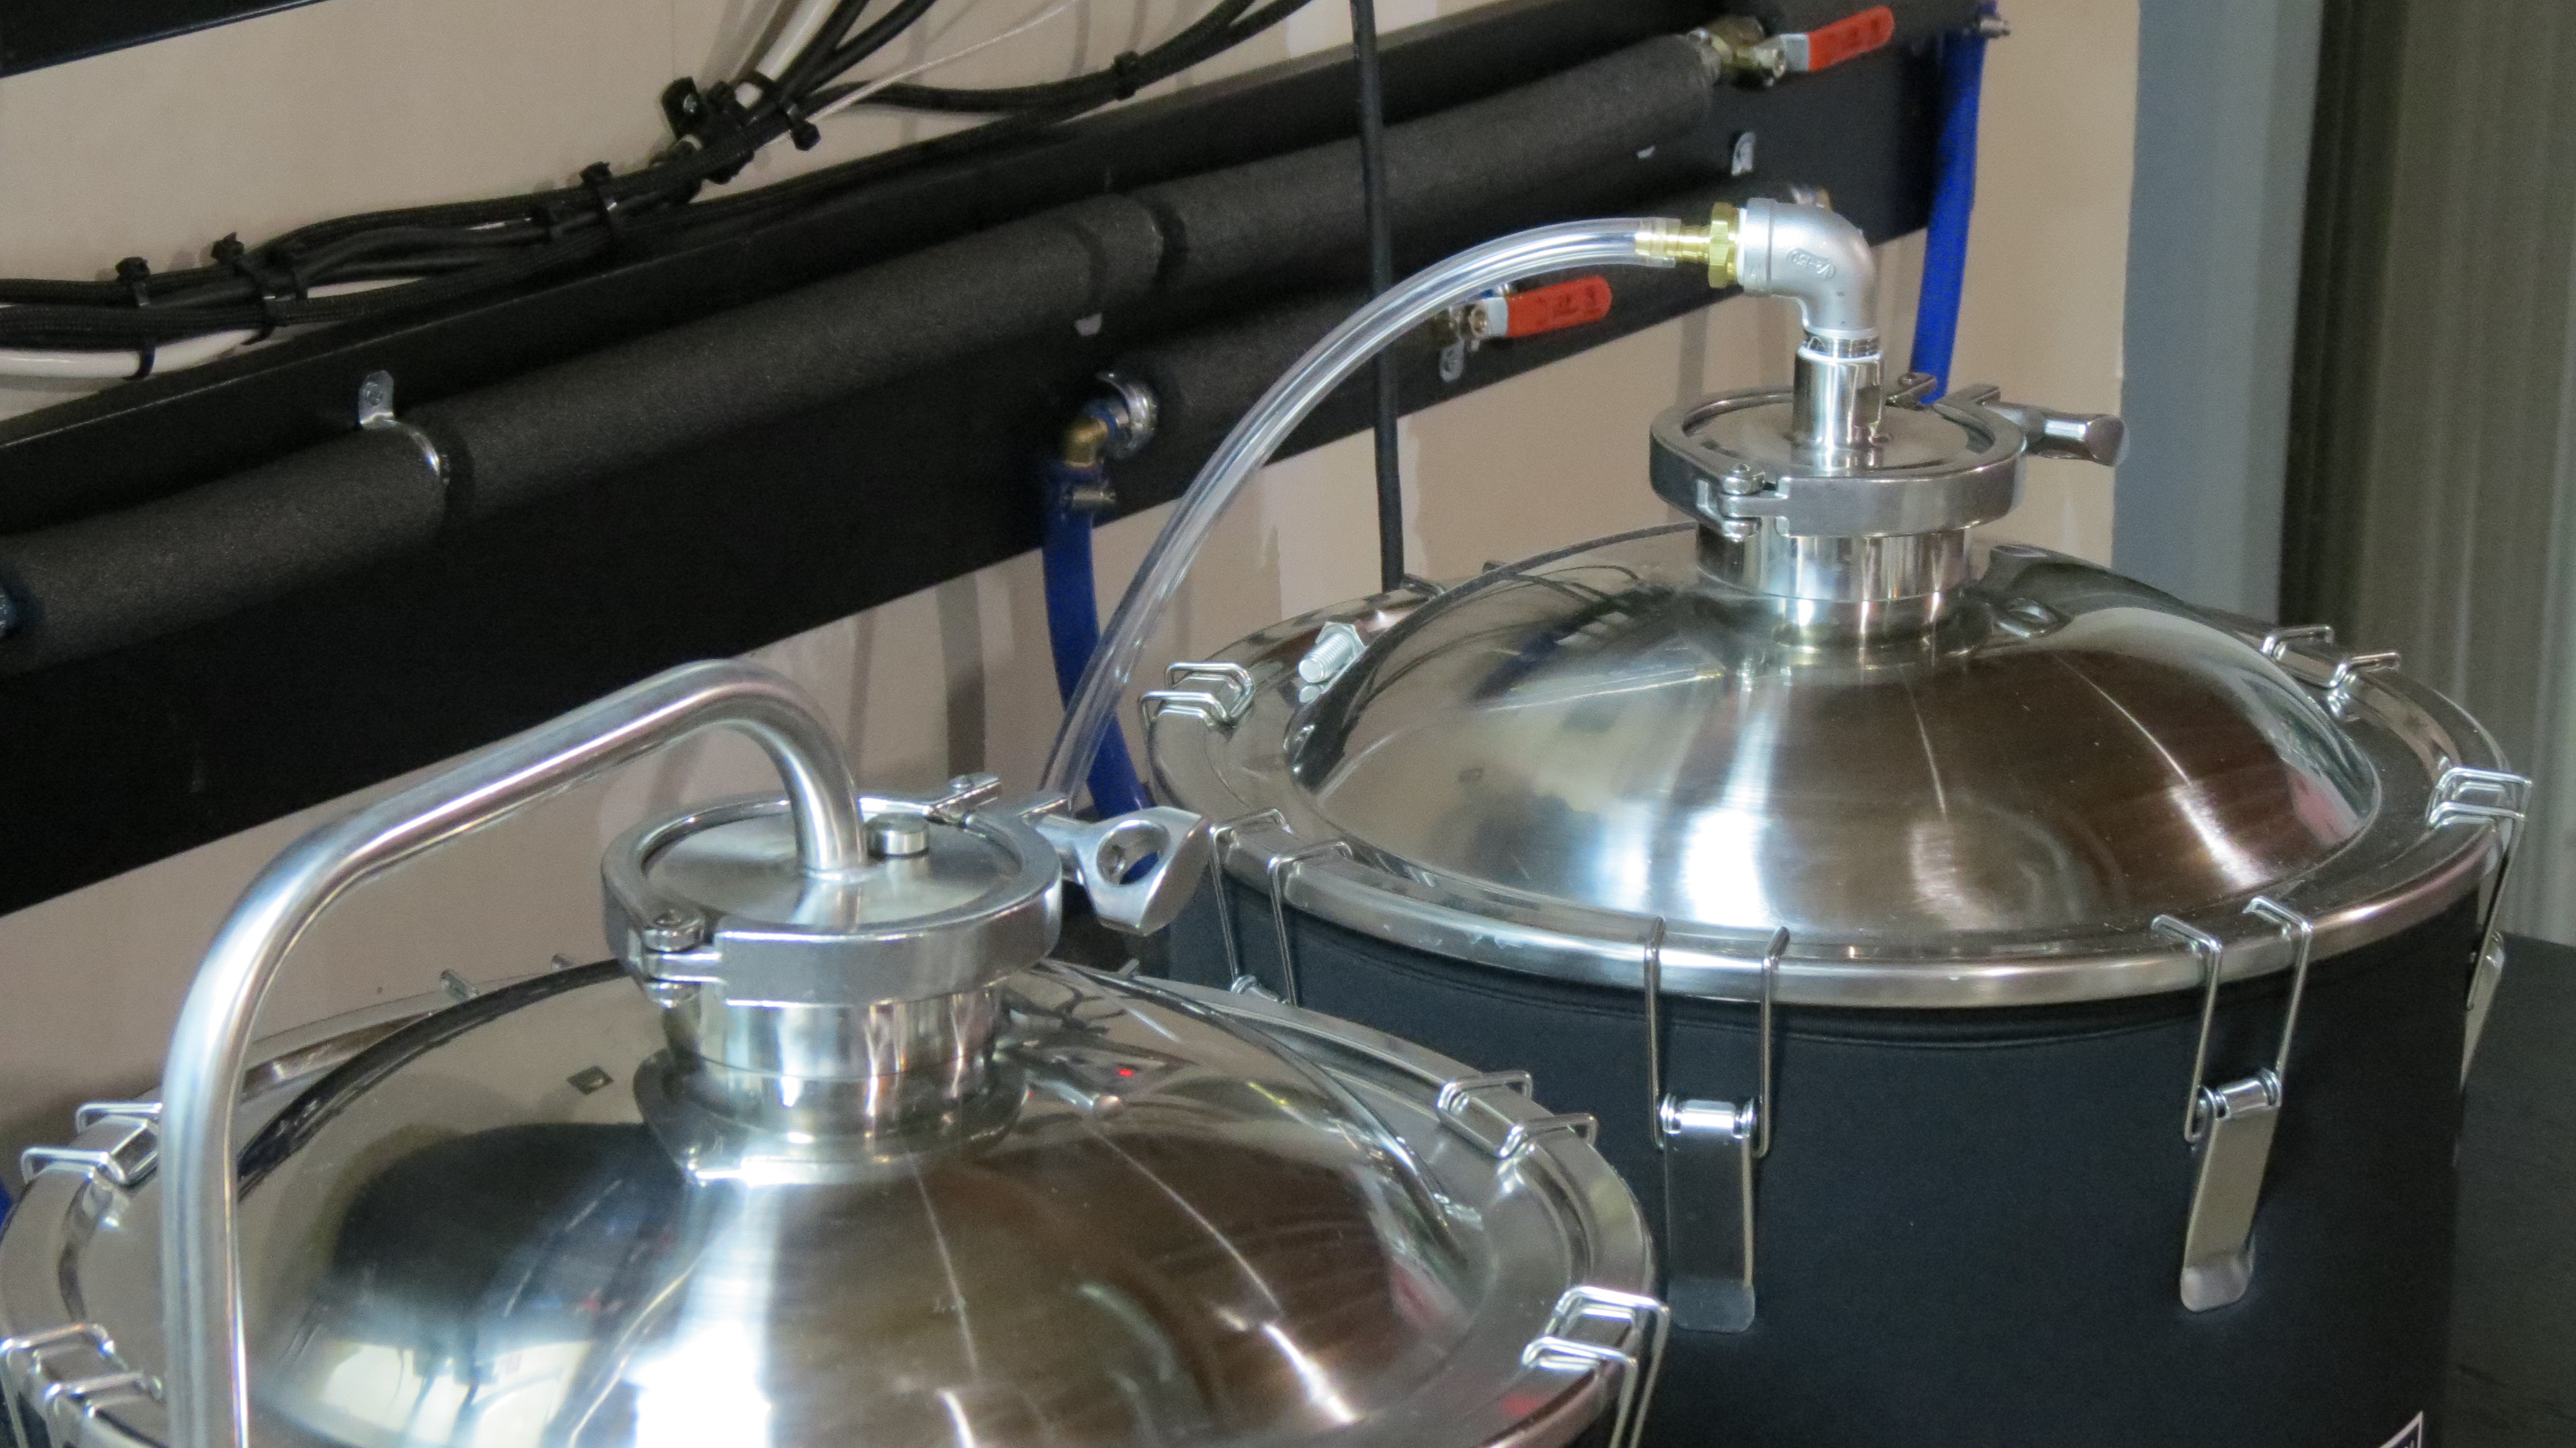
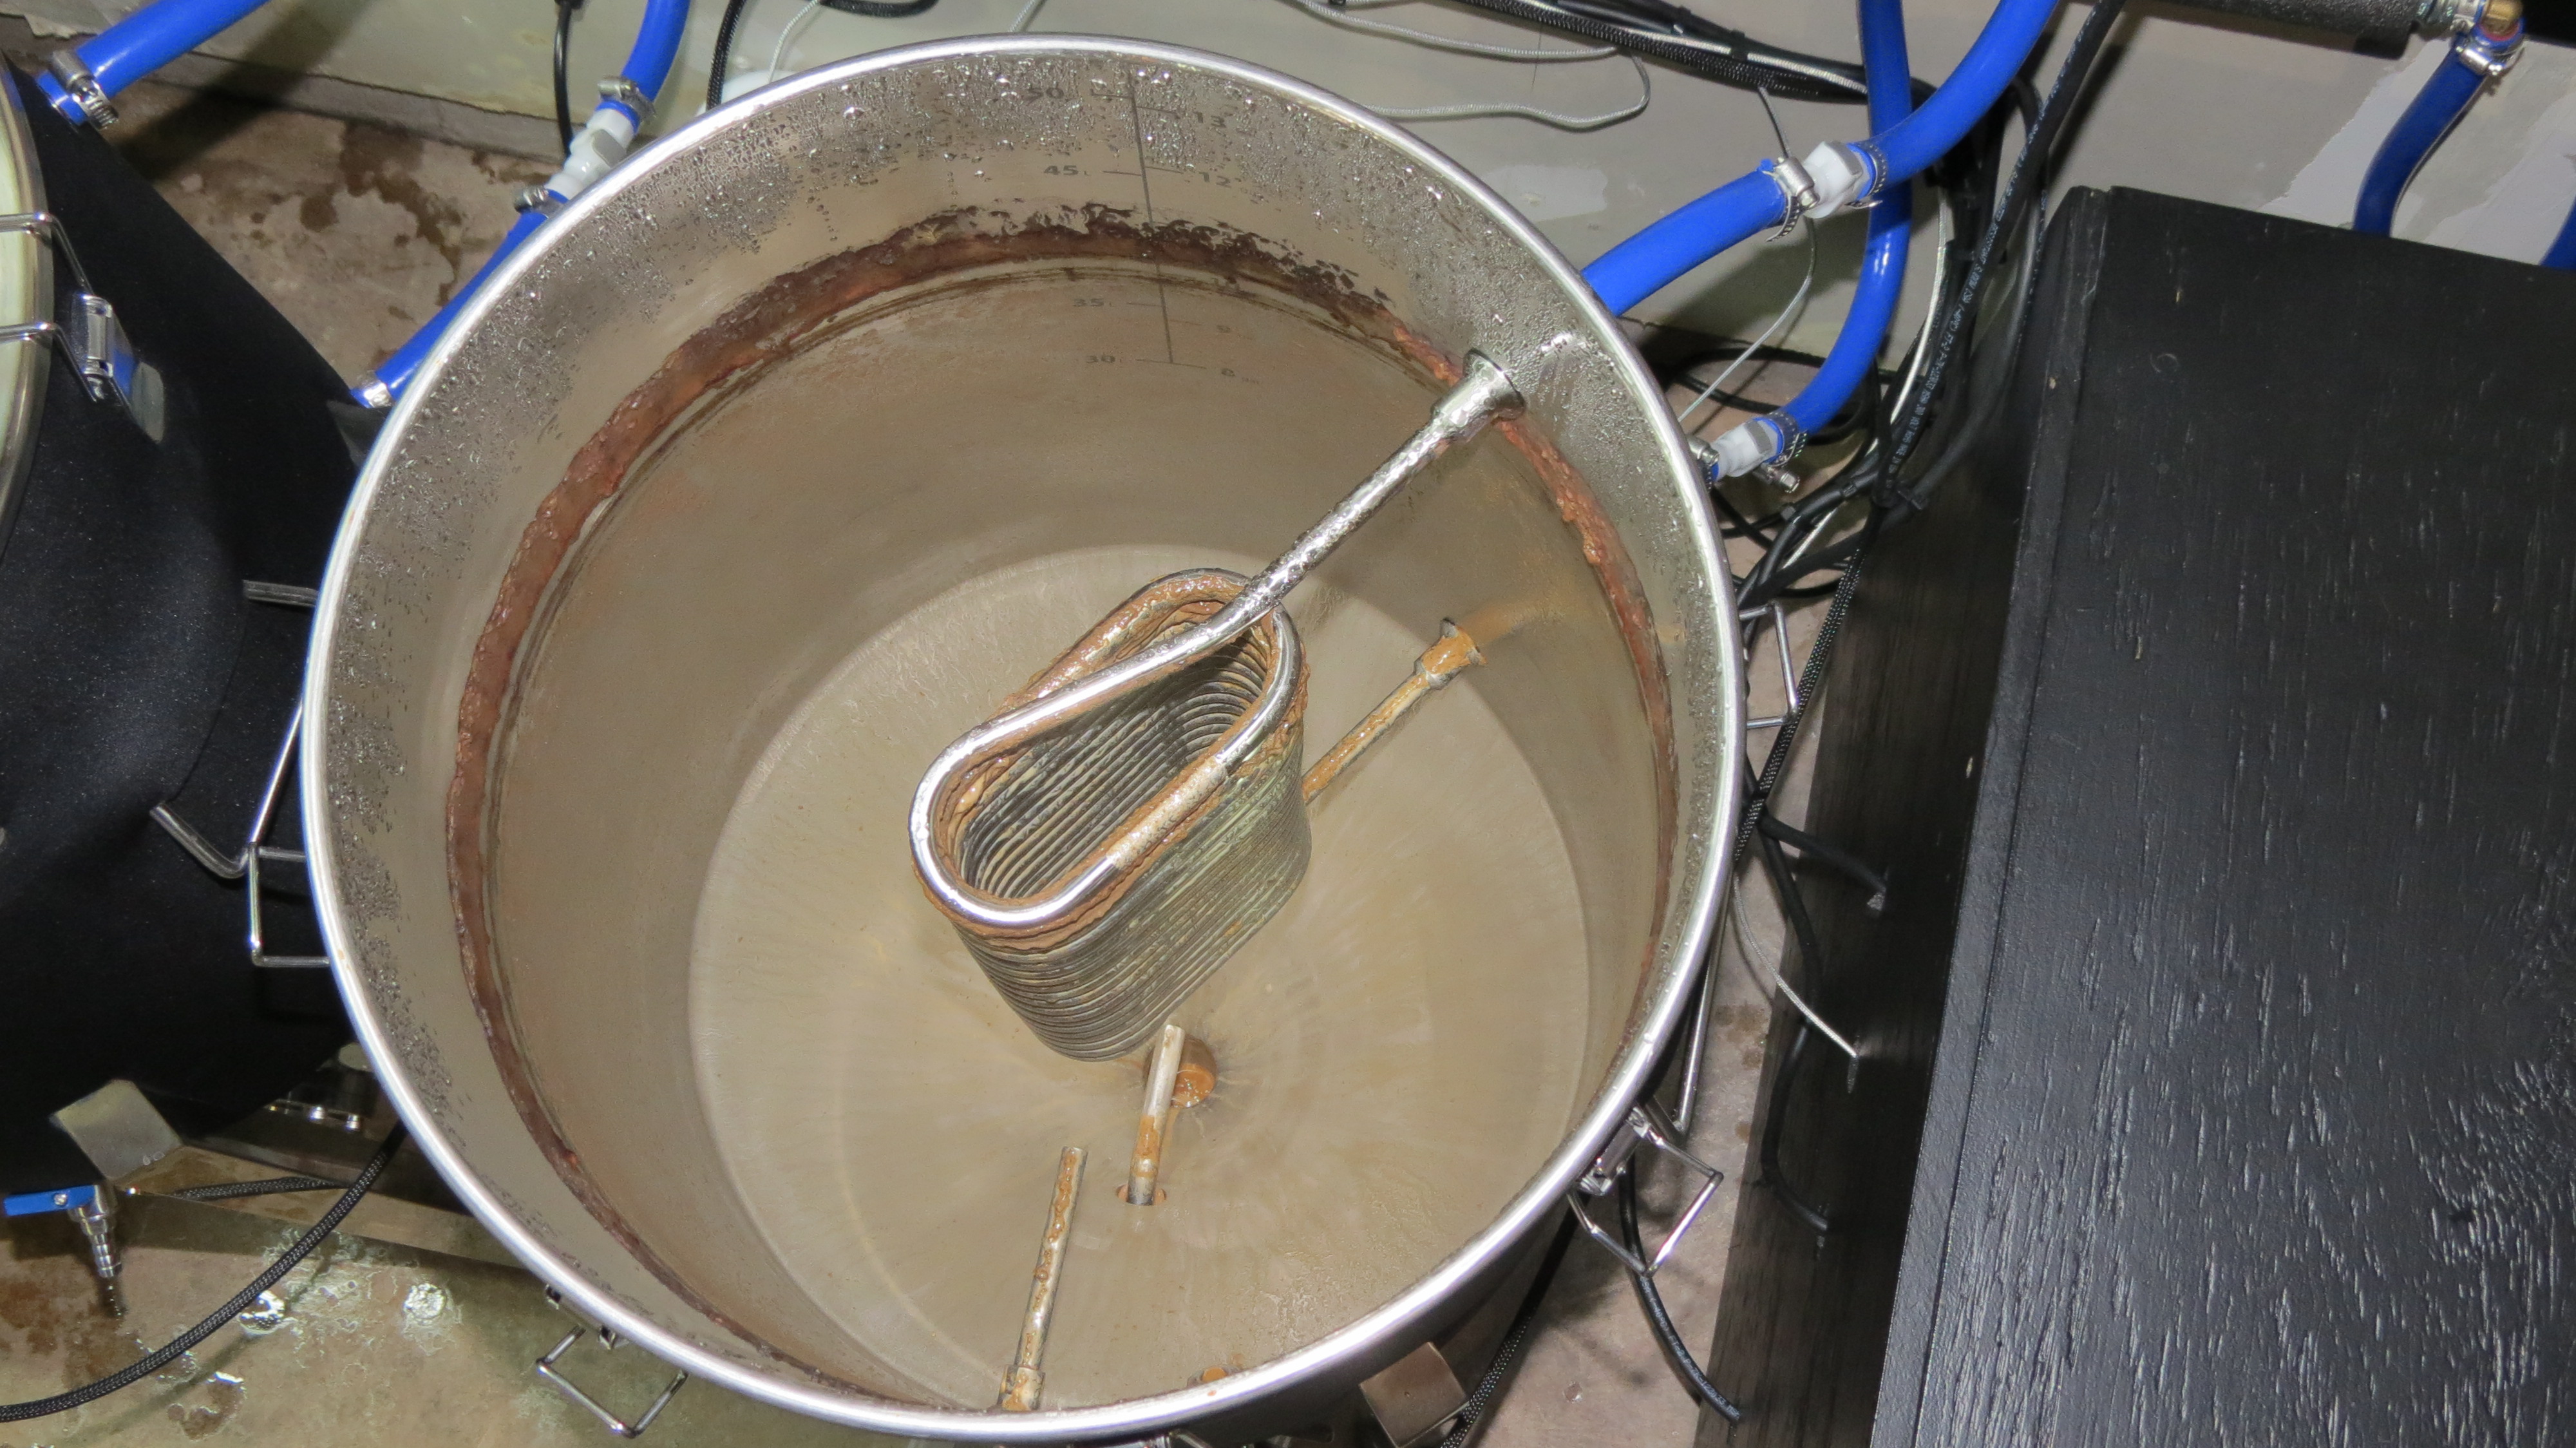
How it works: the evaporator from the A/C unit is submerged in a glycol solution inside a small cooler and is controlled by a PID unit in ON/OFF cooling mode. I chose one that has anti-short cycle delay to protect the compressor. The glycol PID gets temperature data from an RTD in the glycol solution. There are two submersible pond pumps - one for each fermentor - that are each controlled by a PID in ON/OFF mode. Temperature data is sent via RTDs in the thermowell on the conicals. When the beer reaches a certain temperature (SV+Hy), the PID turns on the pump, which pumps ~19F glycol solution through a coil in the fermentor, and back into the cooler. When the glycol temperature reaches upper control limit, the PID turns on the compressor/fan and cools the solution as needed.
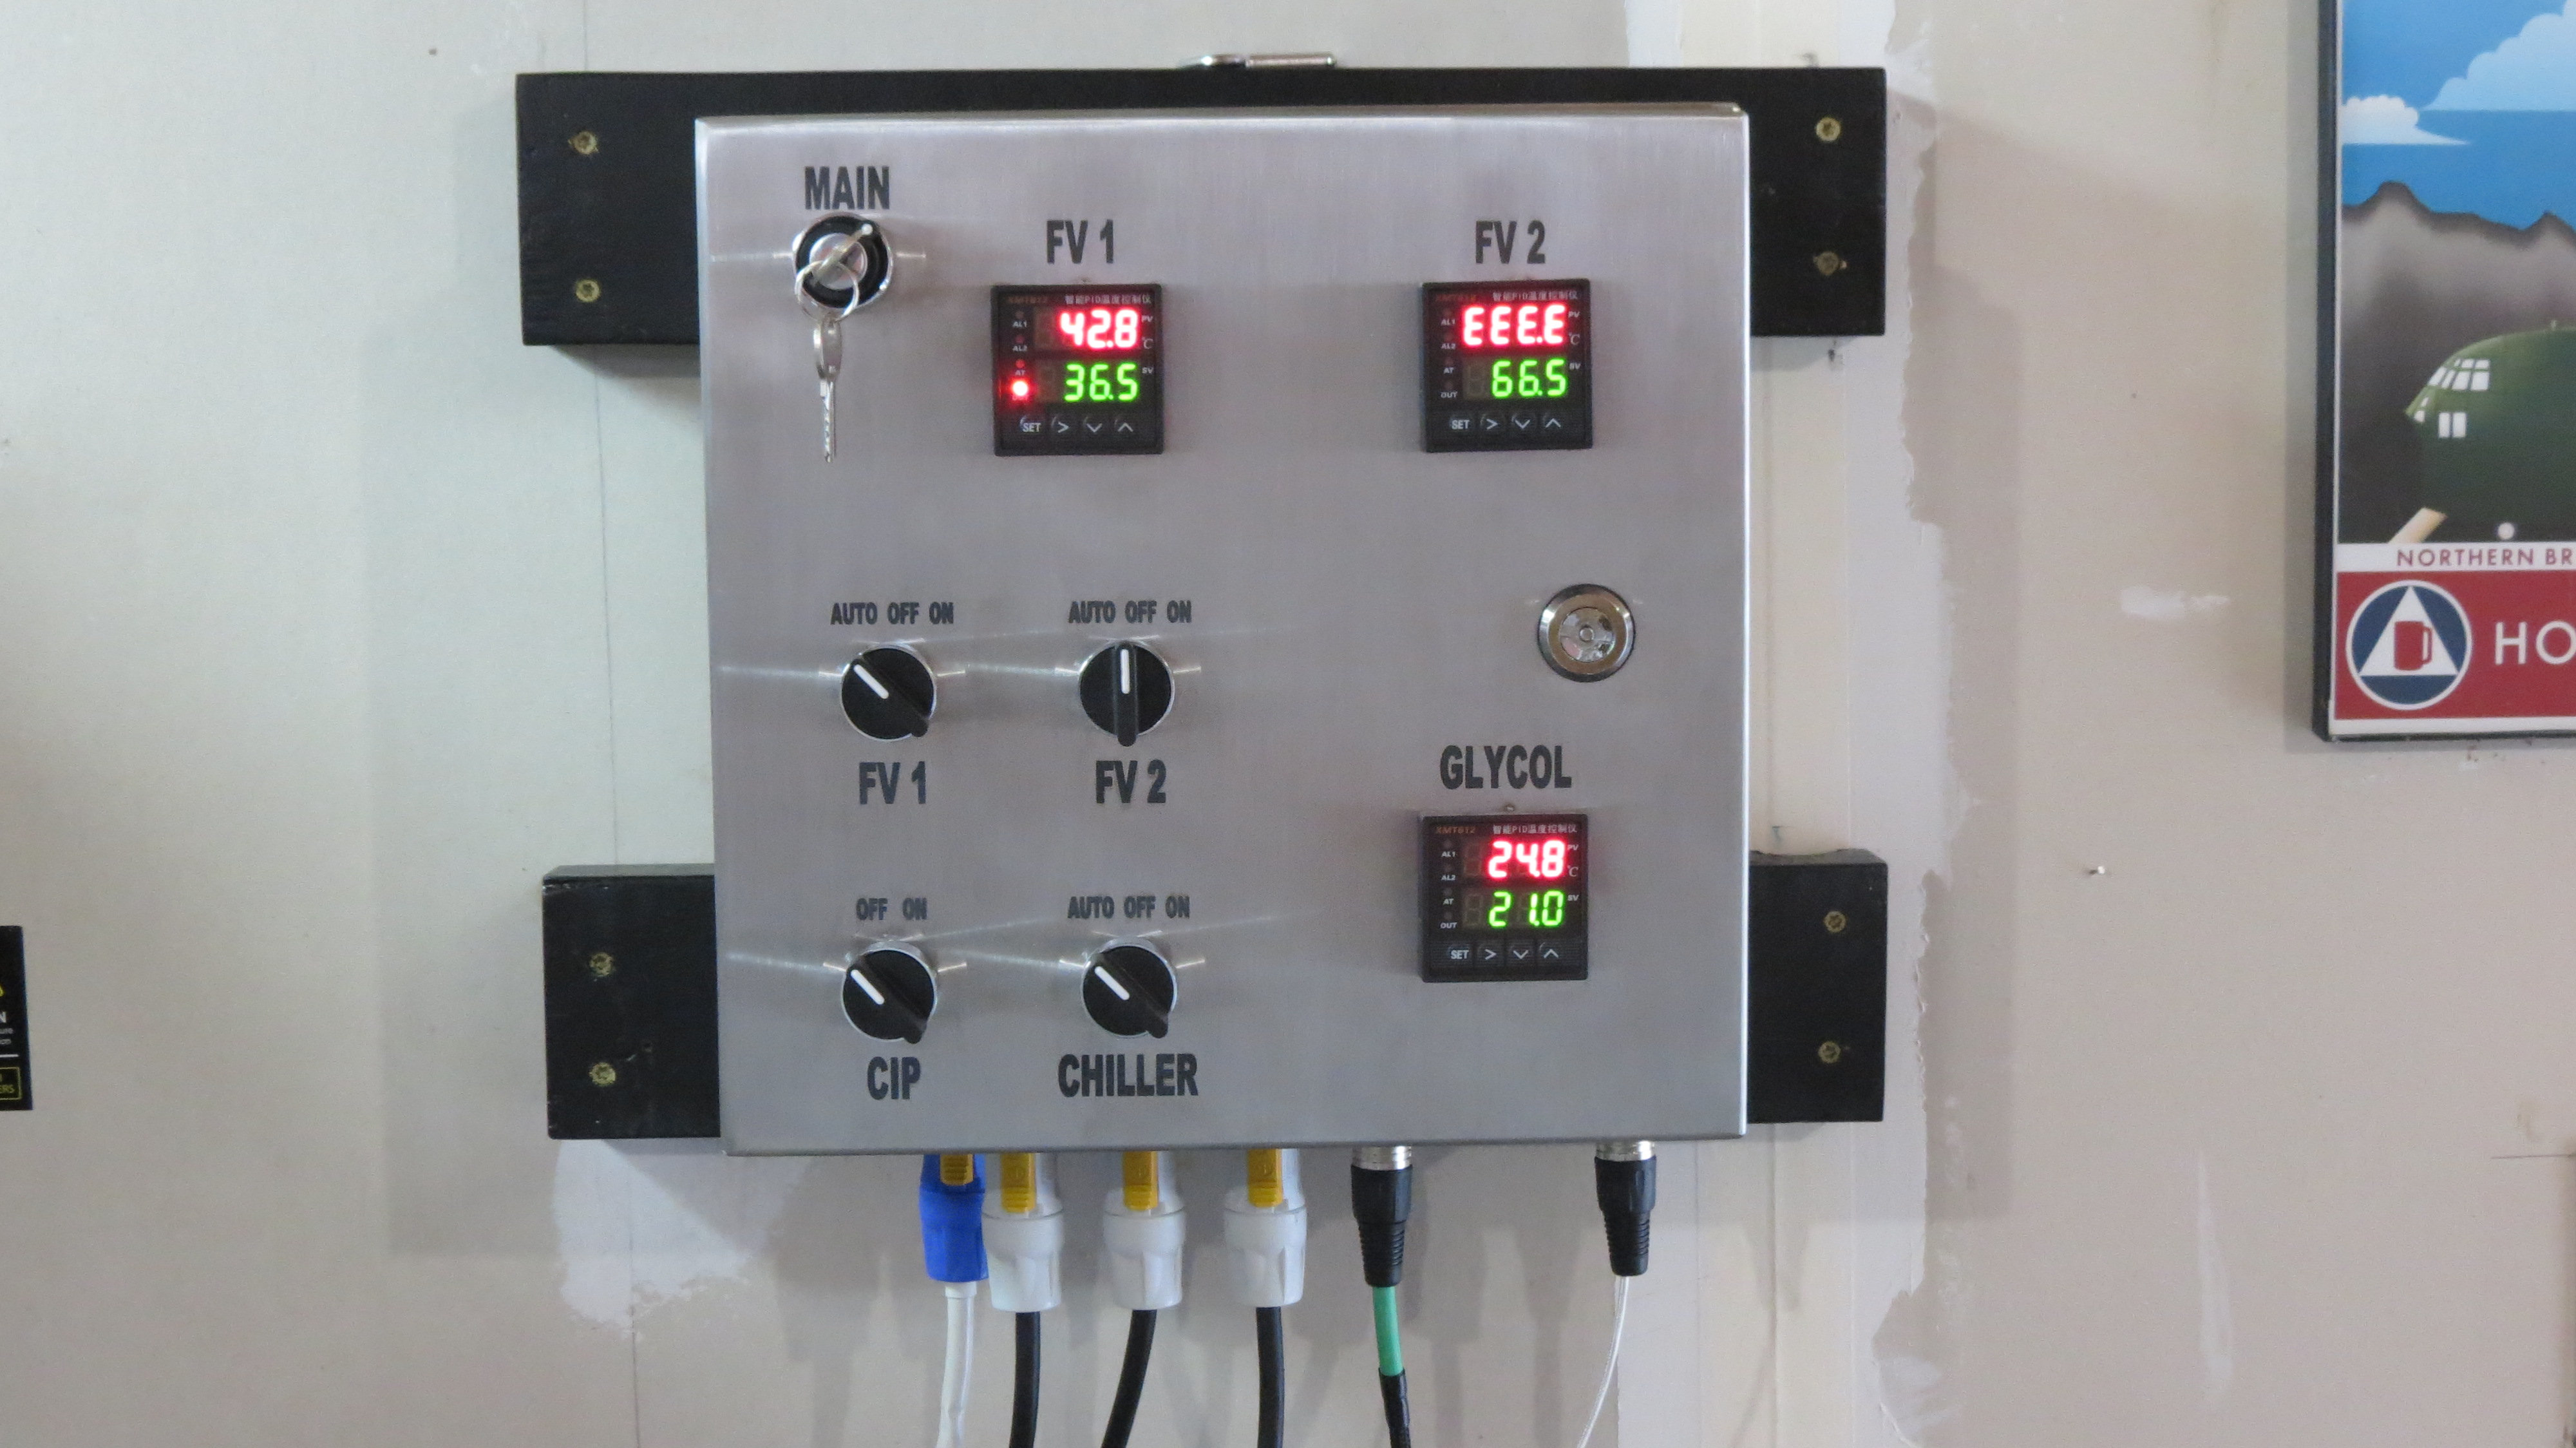
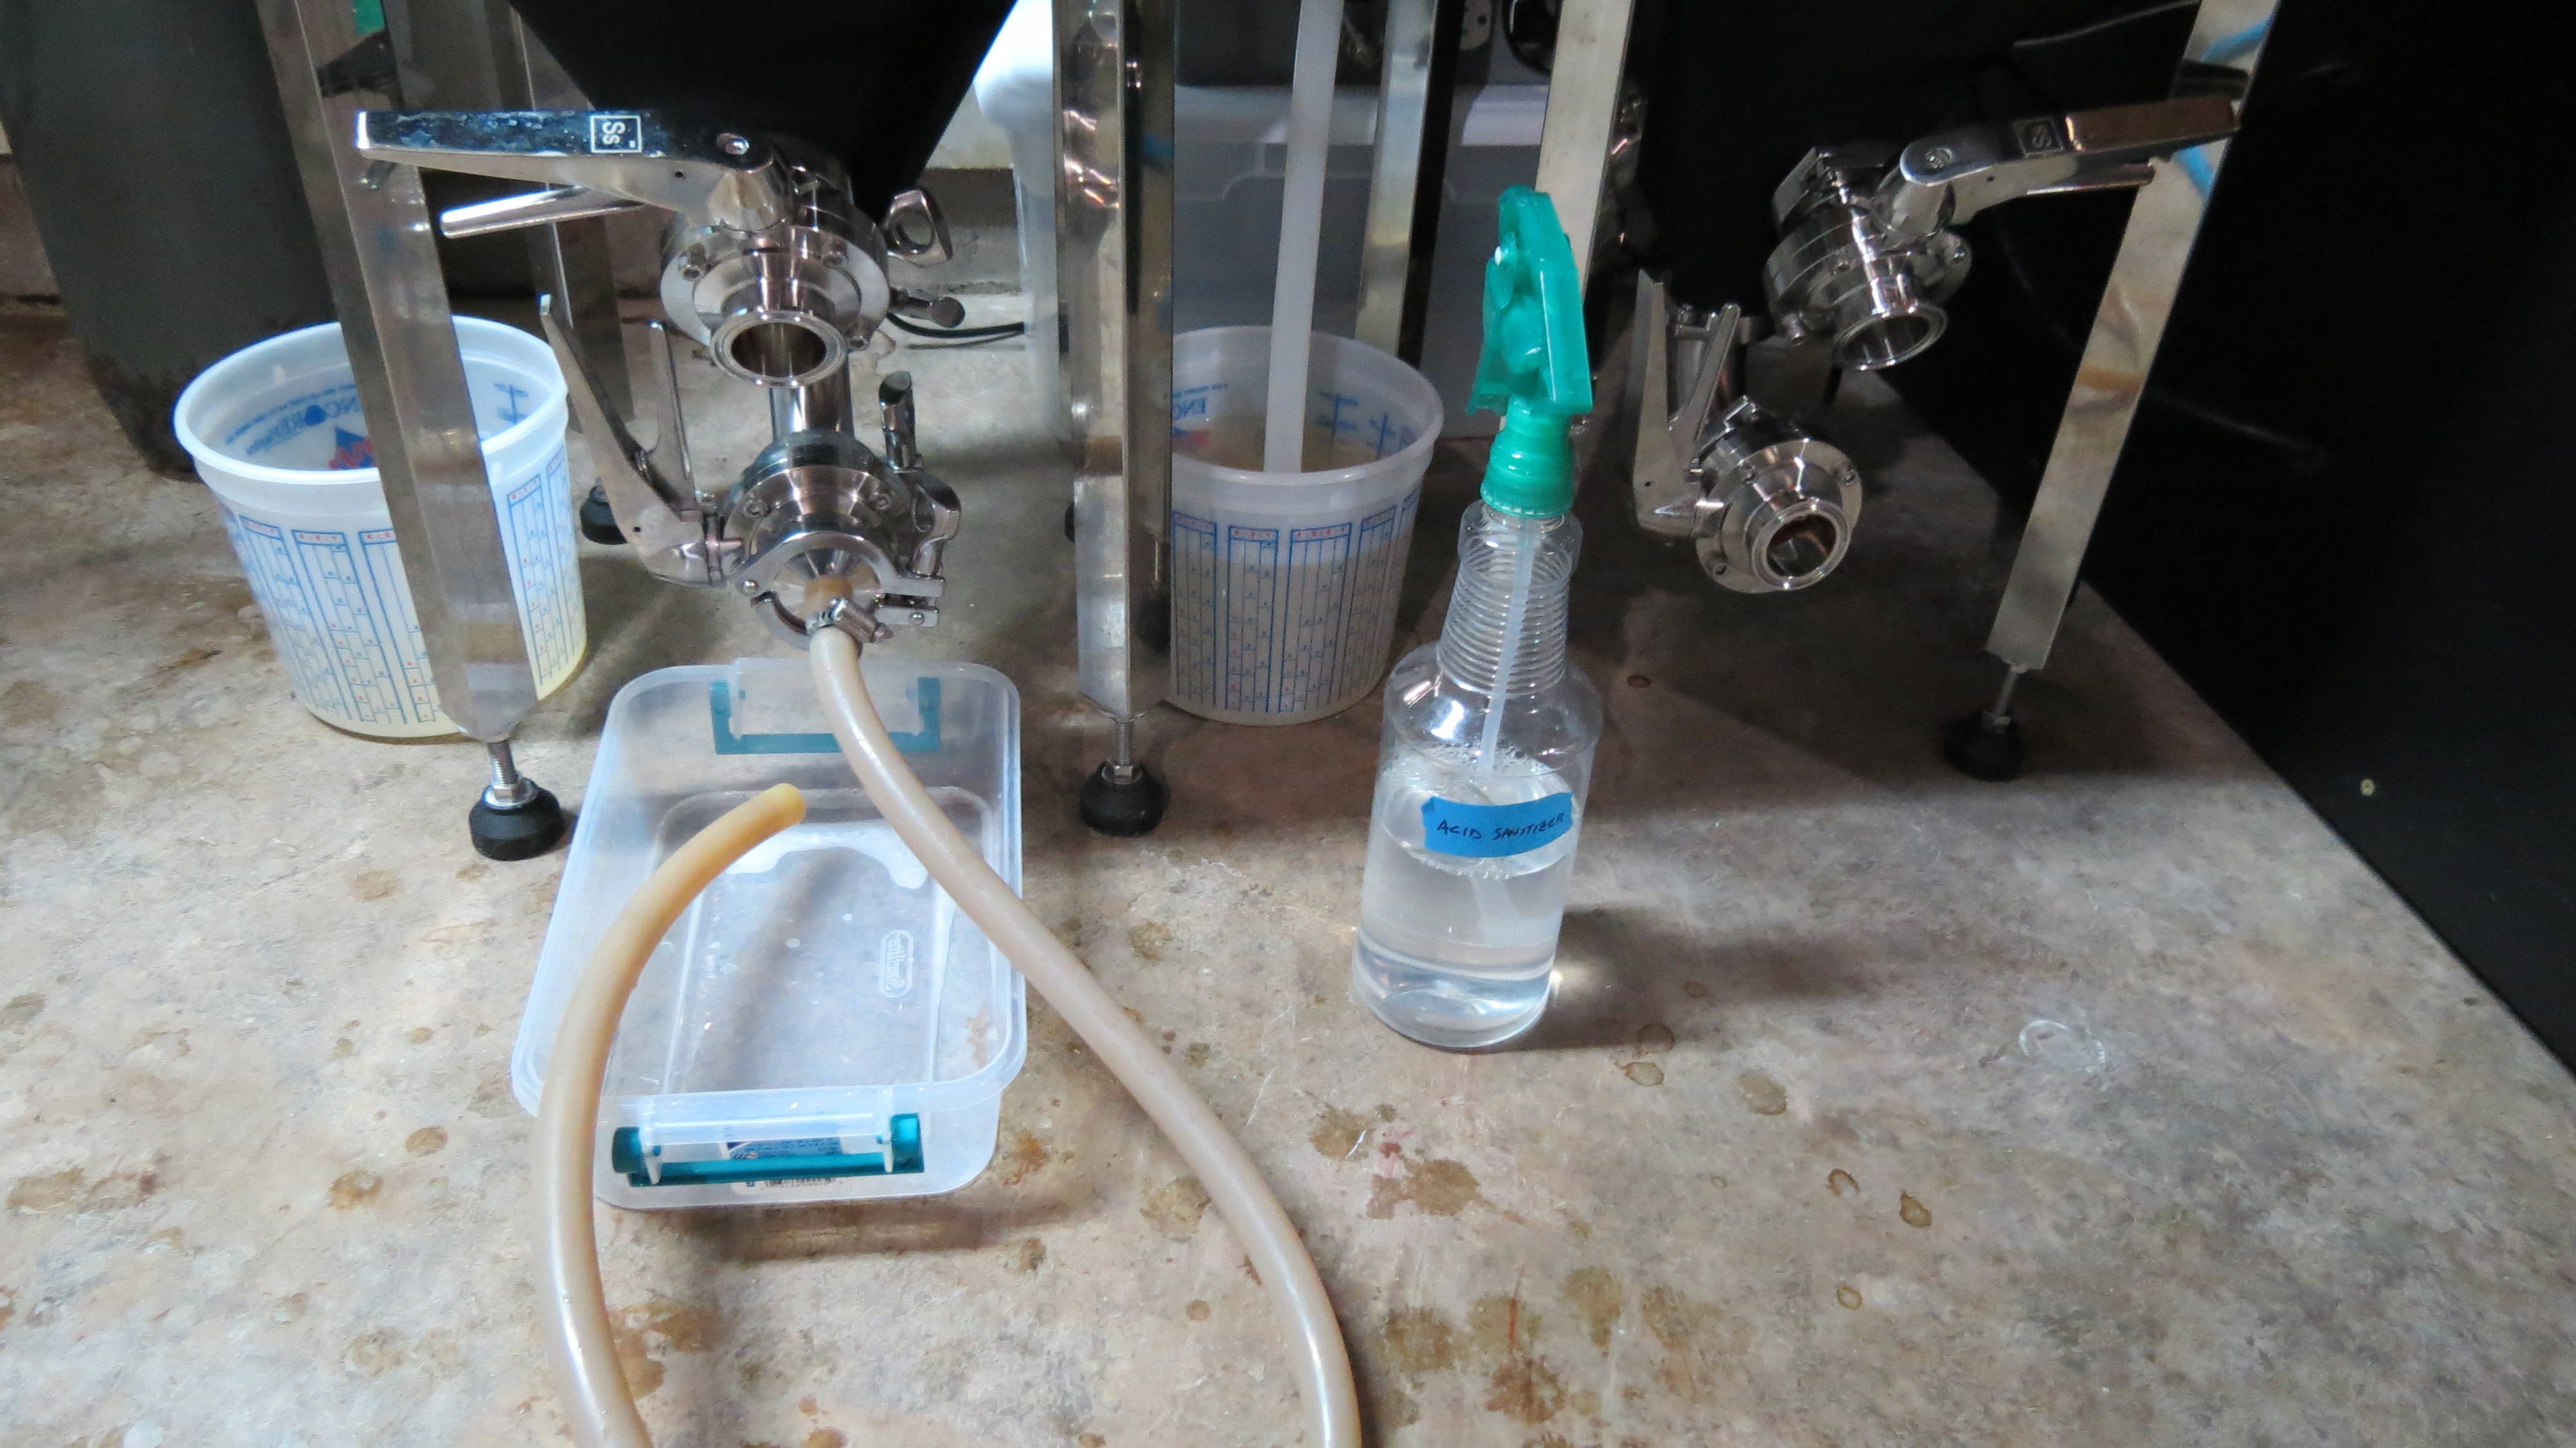
I also opted to include a 120VAC switched outlet on the panel for a CIP pump. With that, I can do all the CIP & SIP required for the conicals without having to use an extension cord or have a separate switch box - it's all in the fermentation control panel!
A big shout out to Ryan at eBrewSupply for his help. He was generous with sharing his knowledge, wiring the panel, and helping me acquire some equipment.
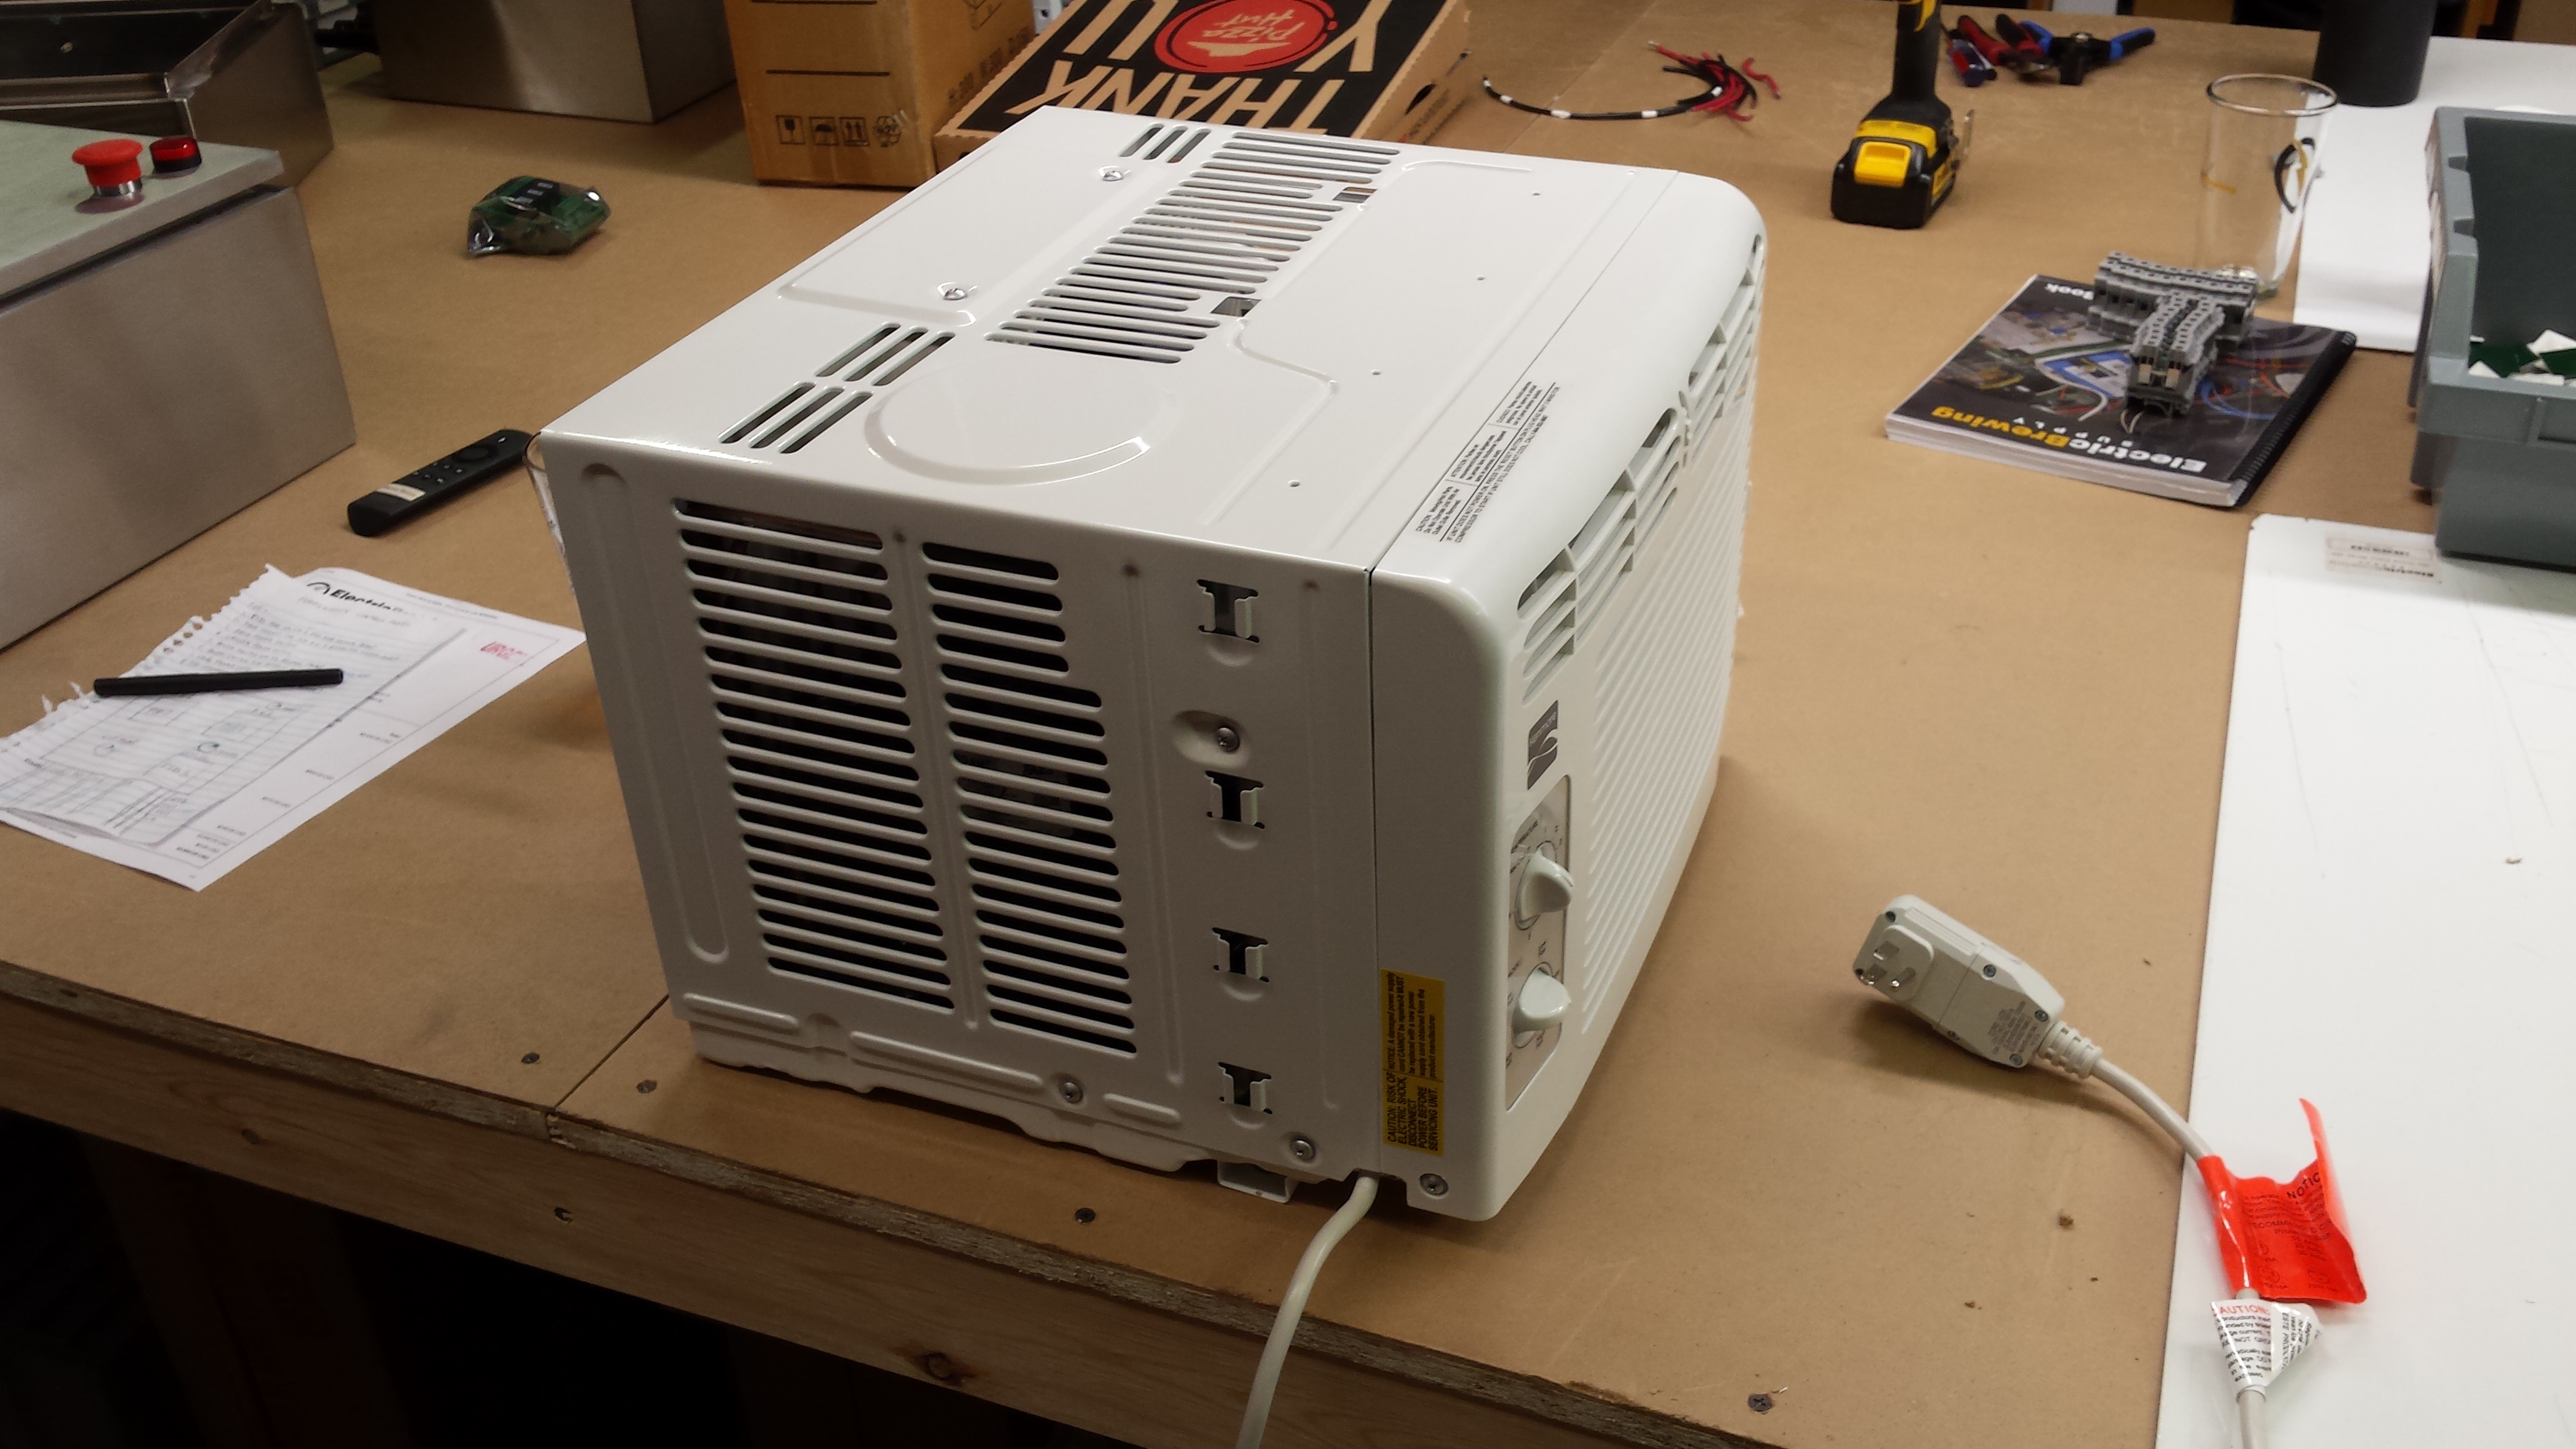
I started with a 5,000 BTU window A/C unit. Got it for about $130 at Sears.
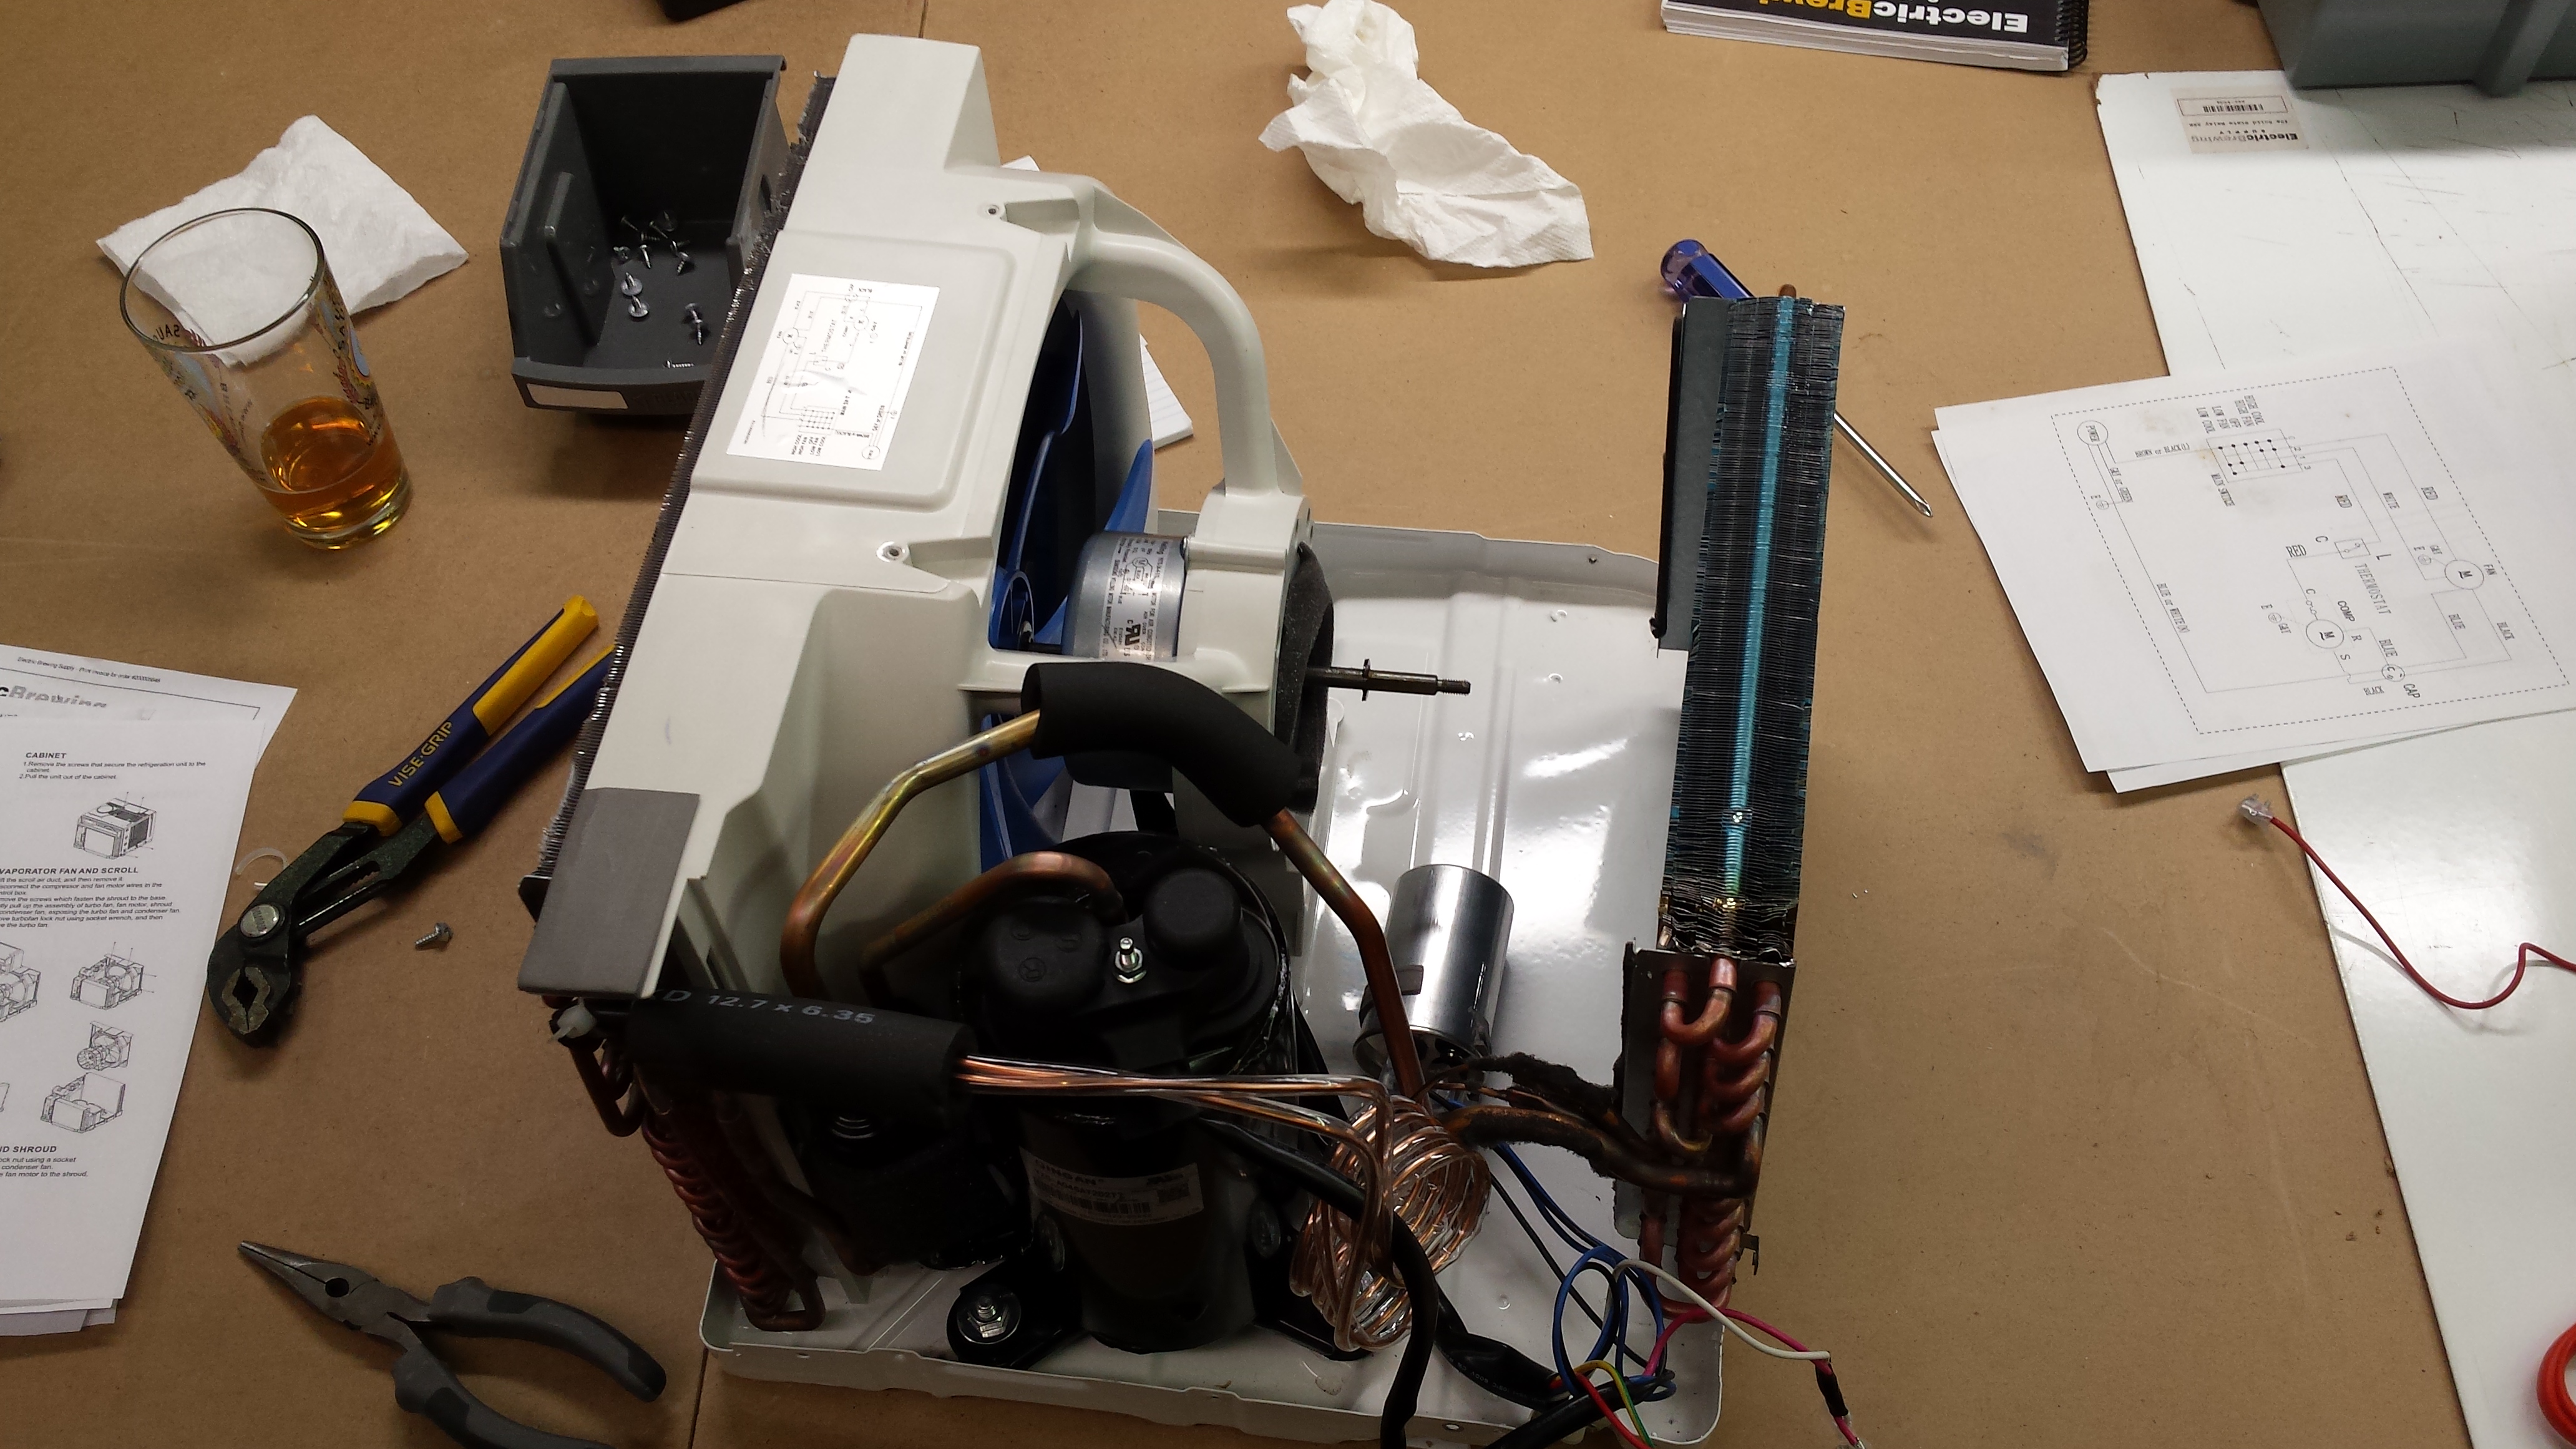
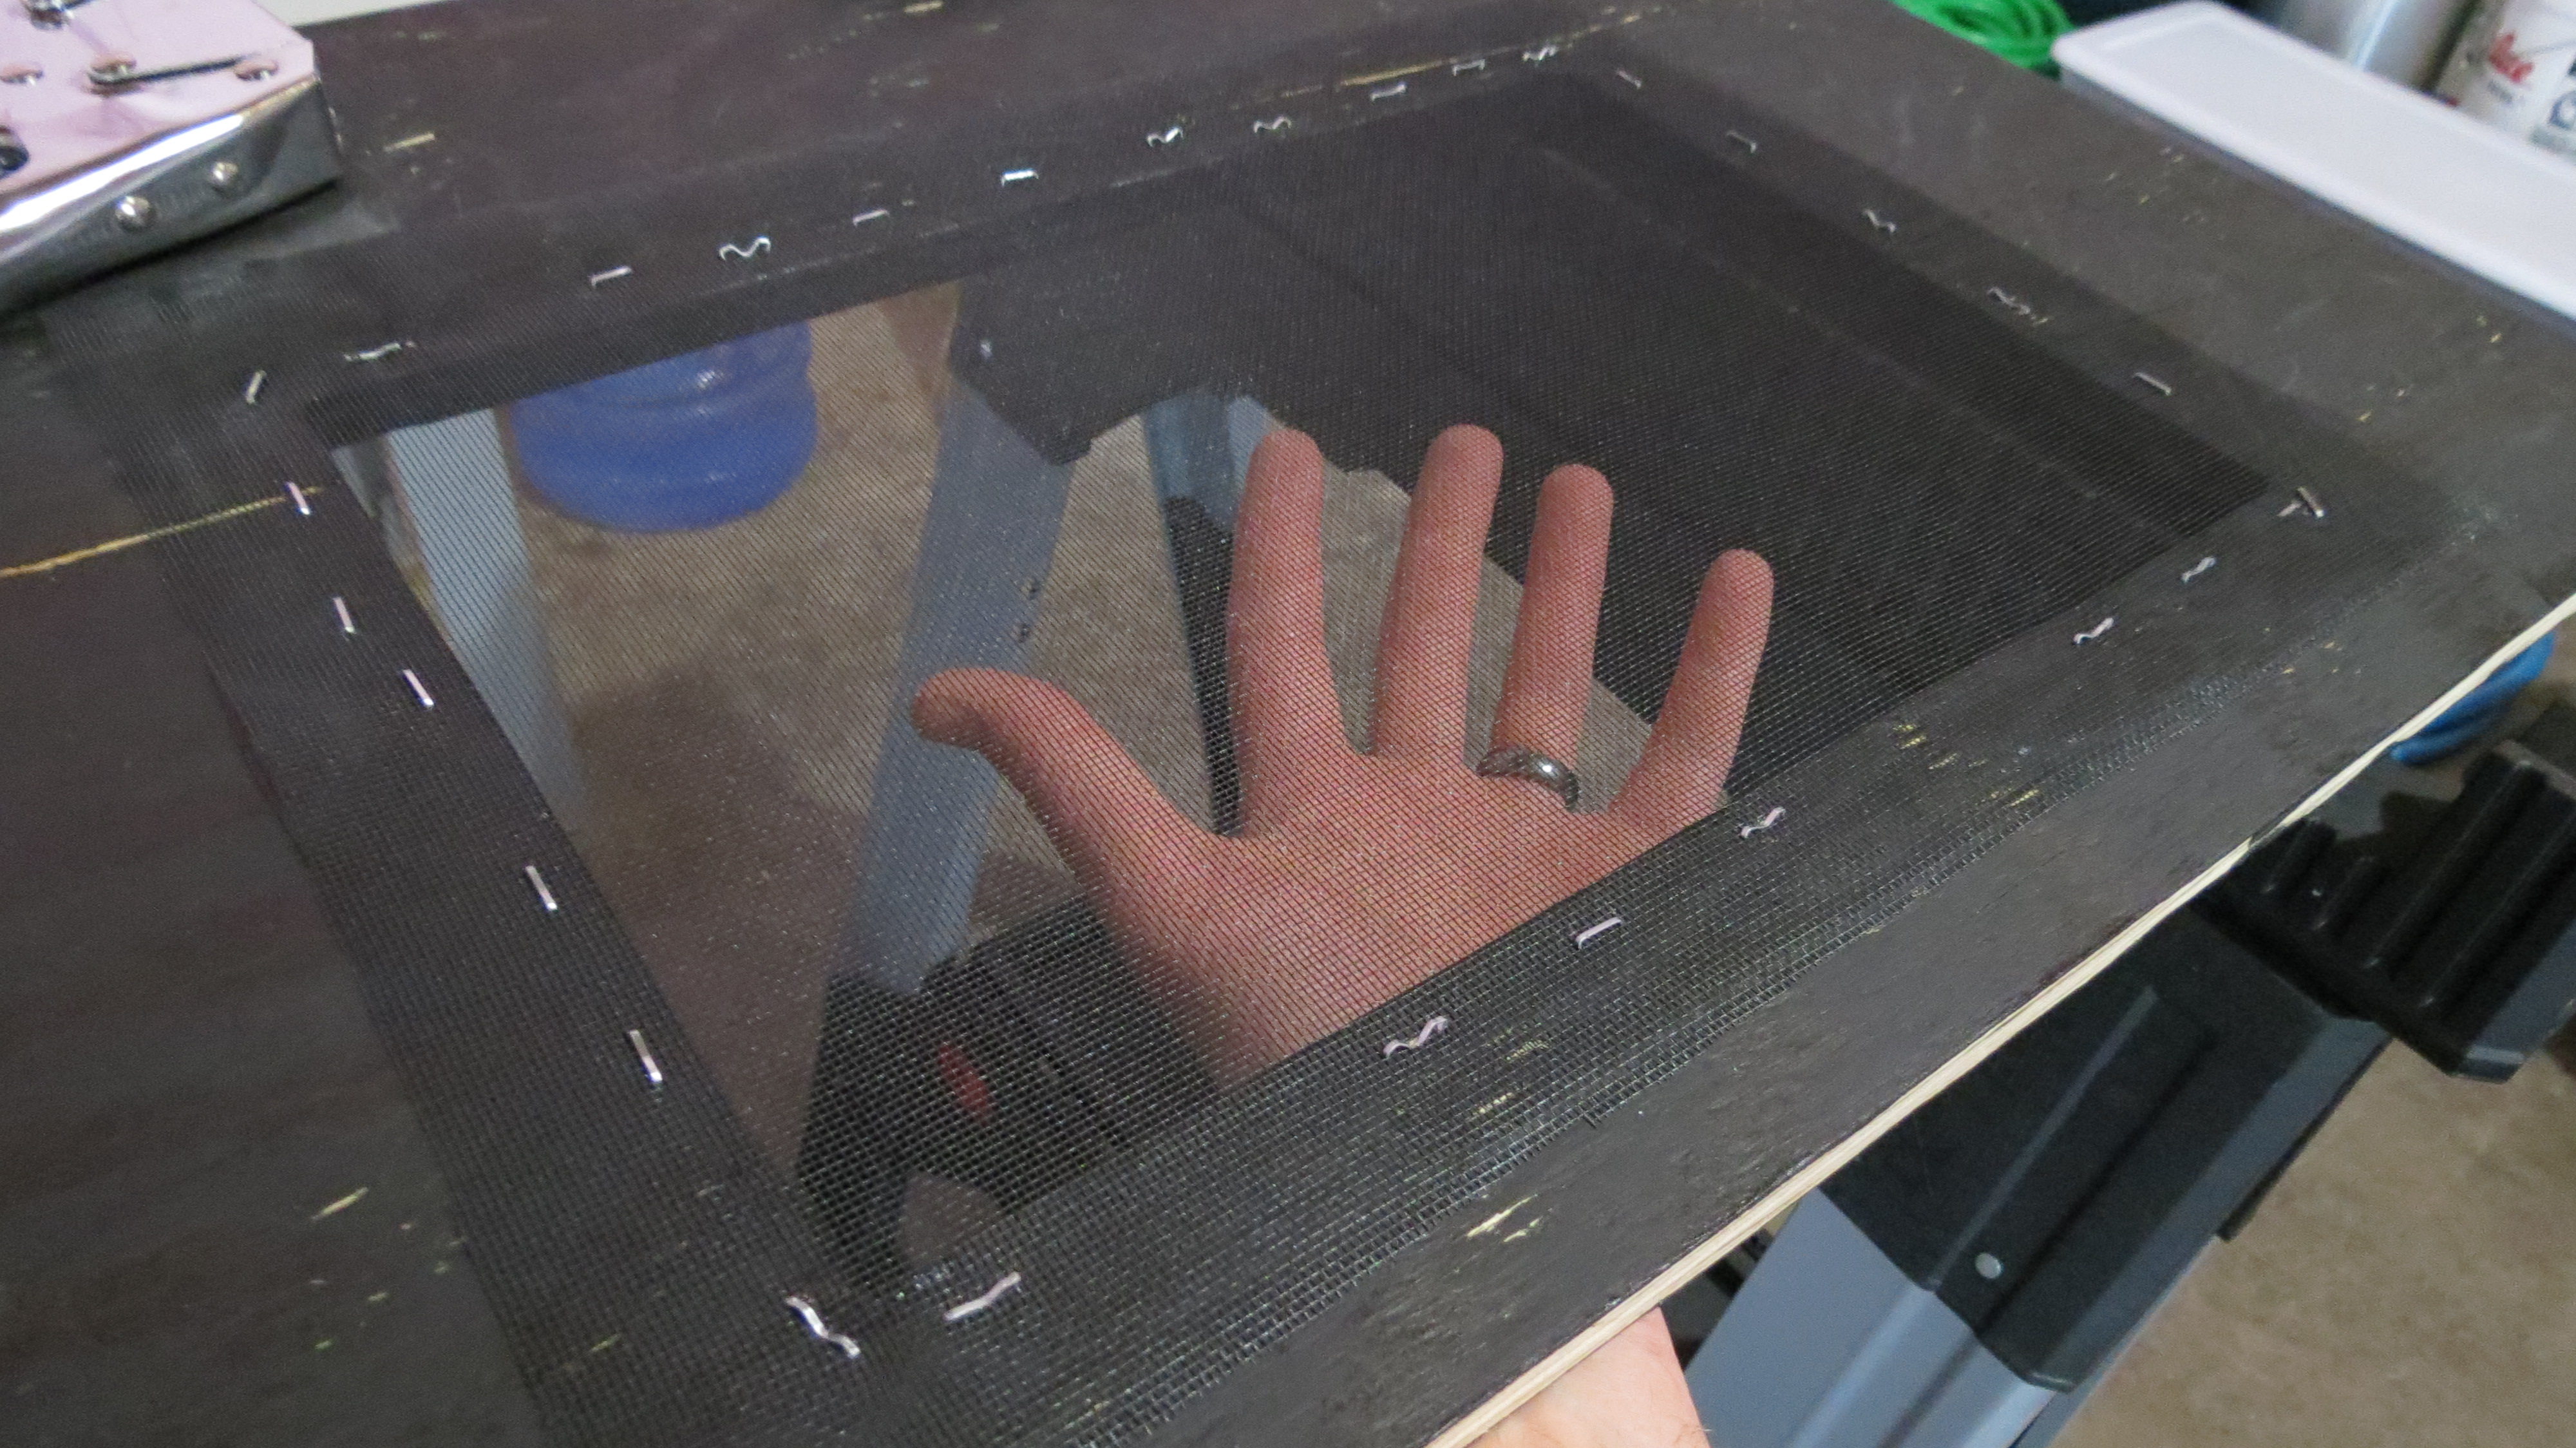
Then tear it down and discard any unused parts:
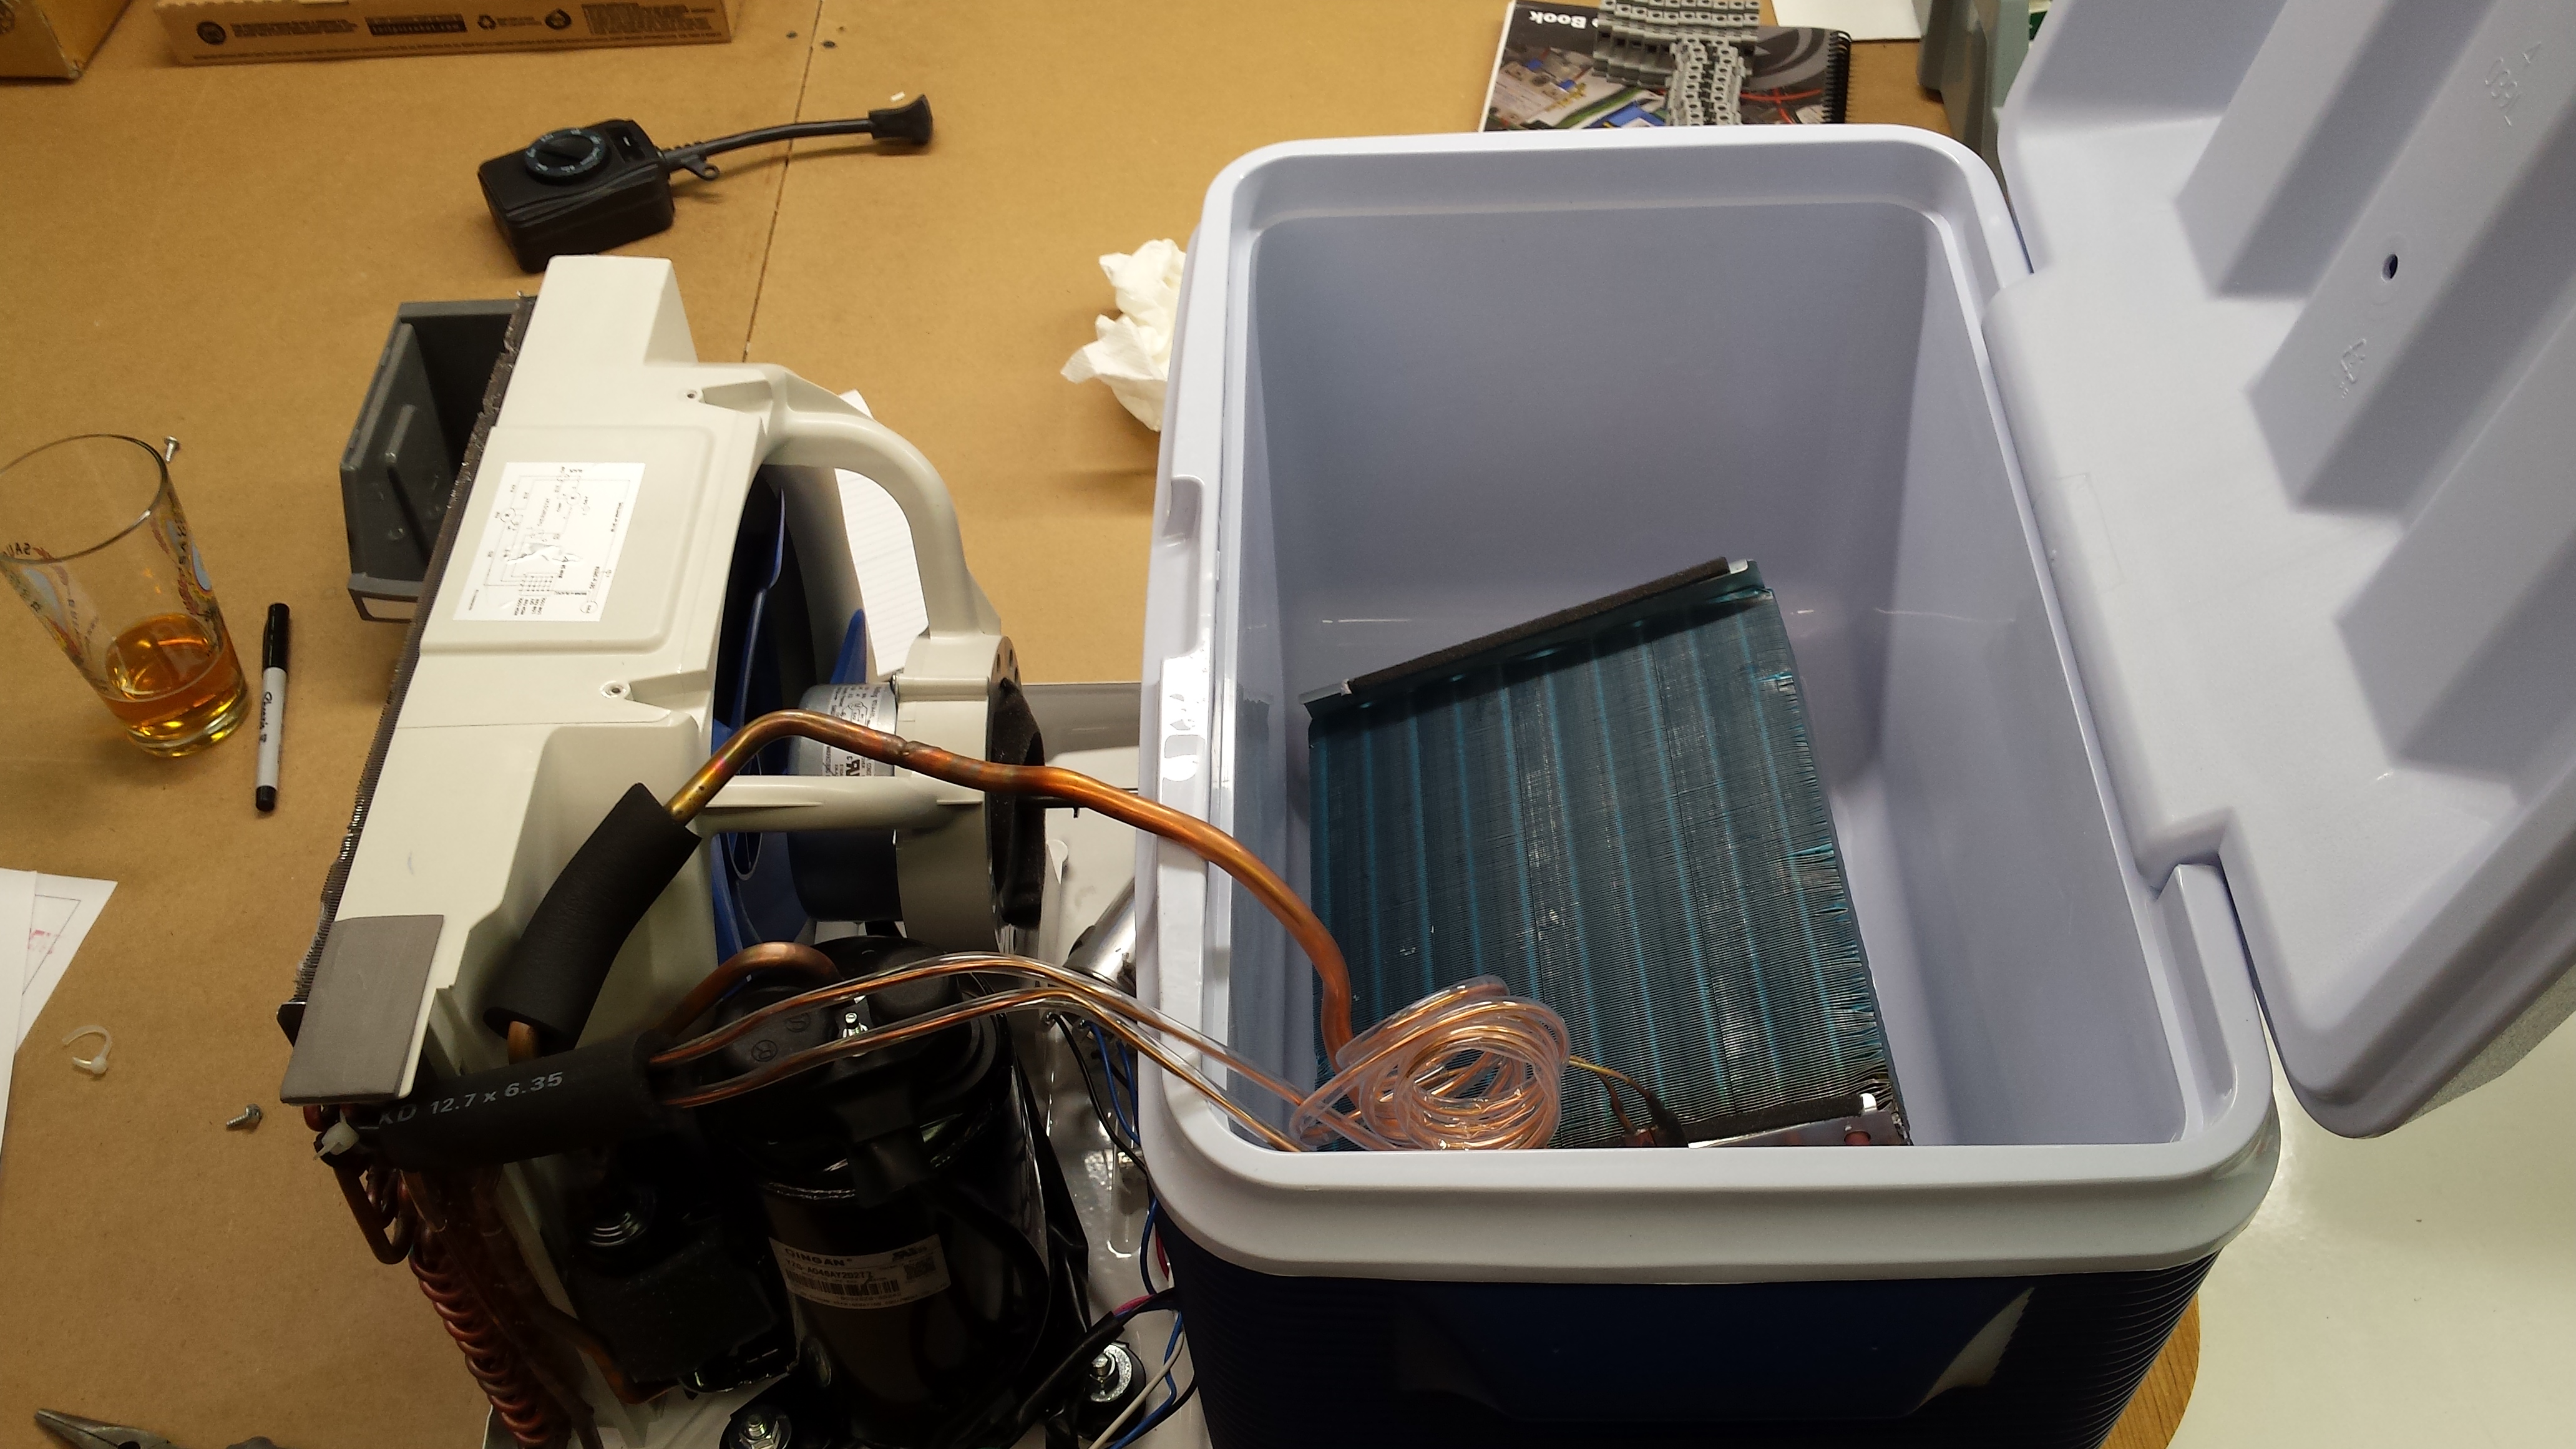
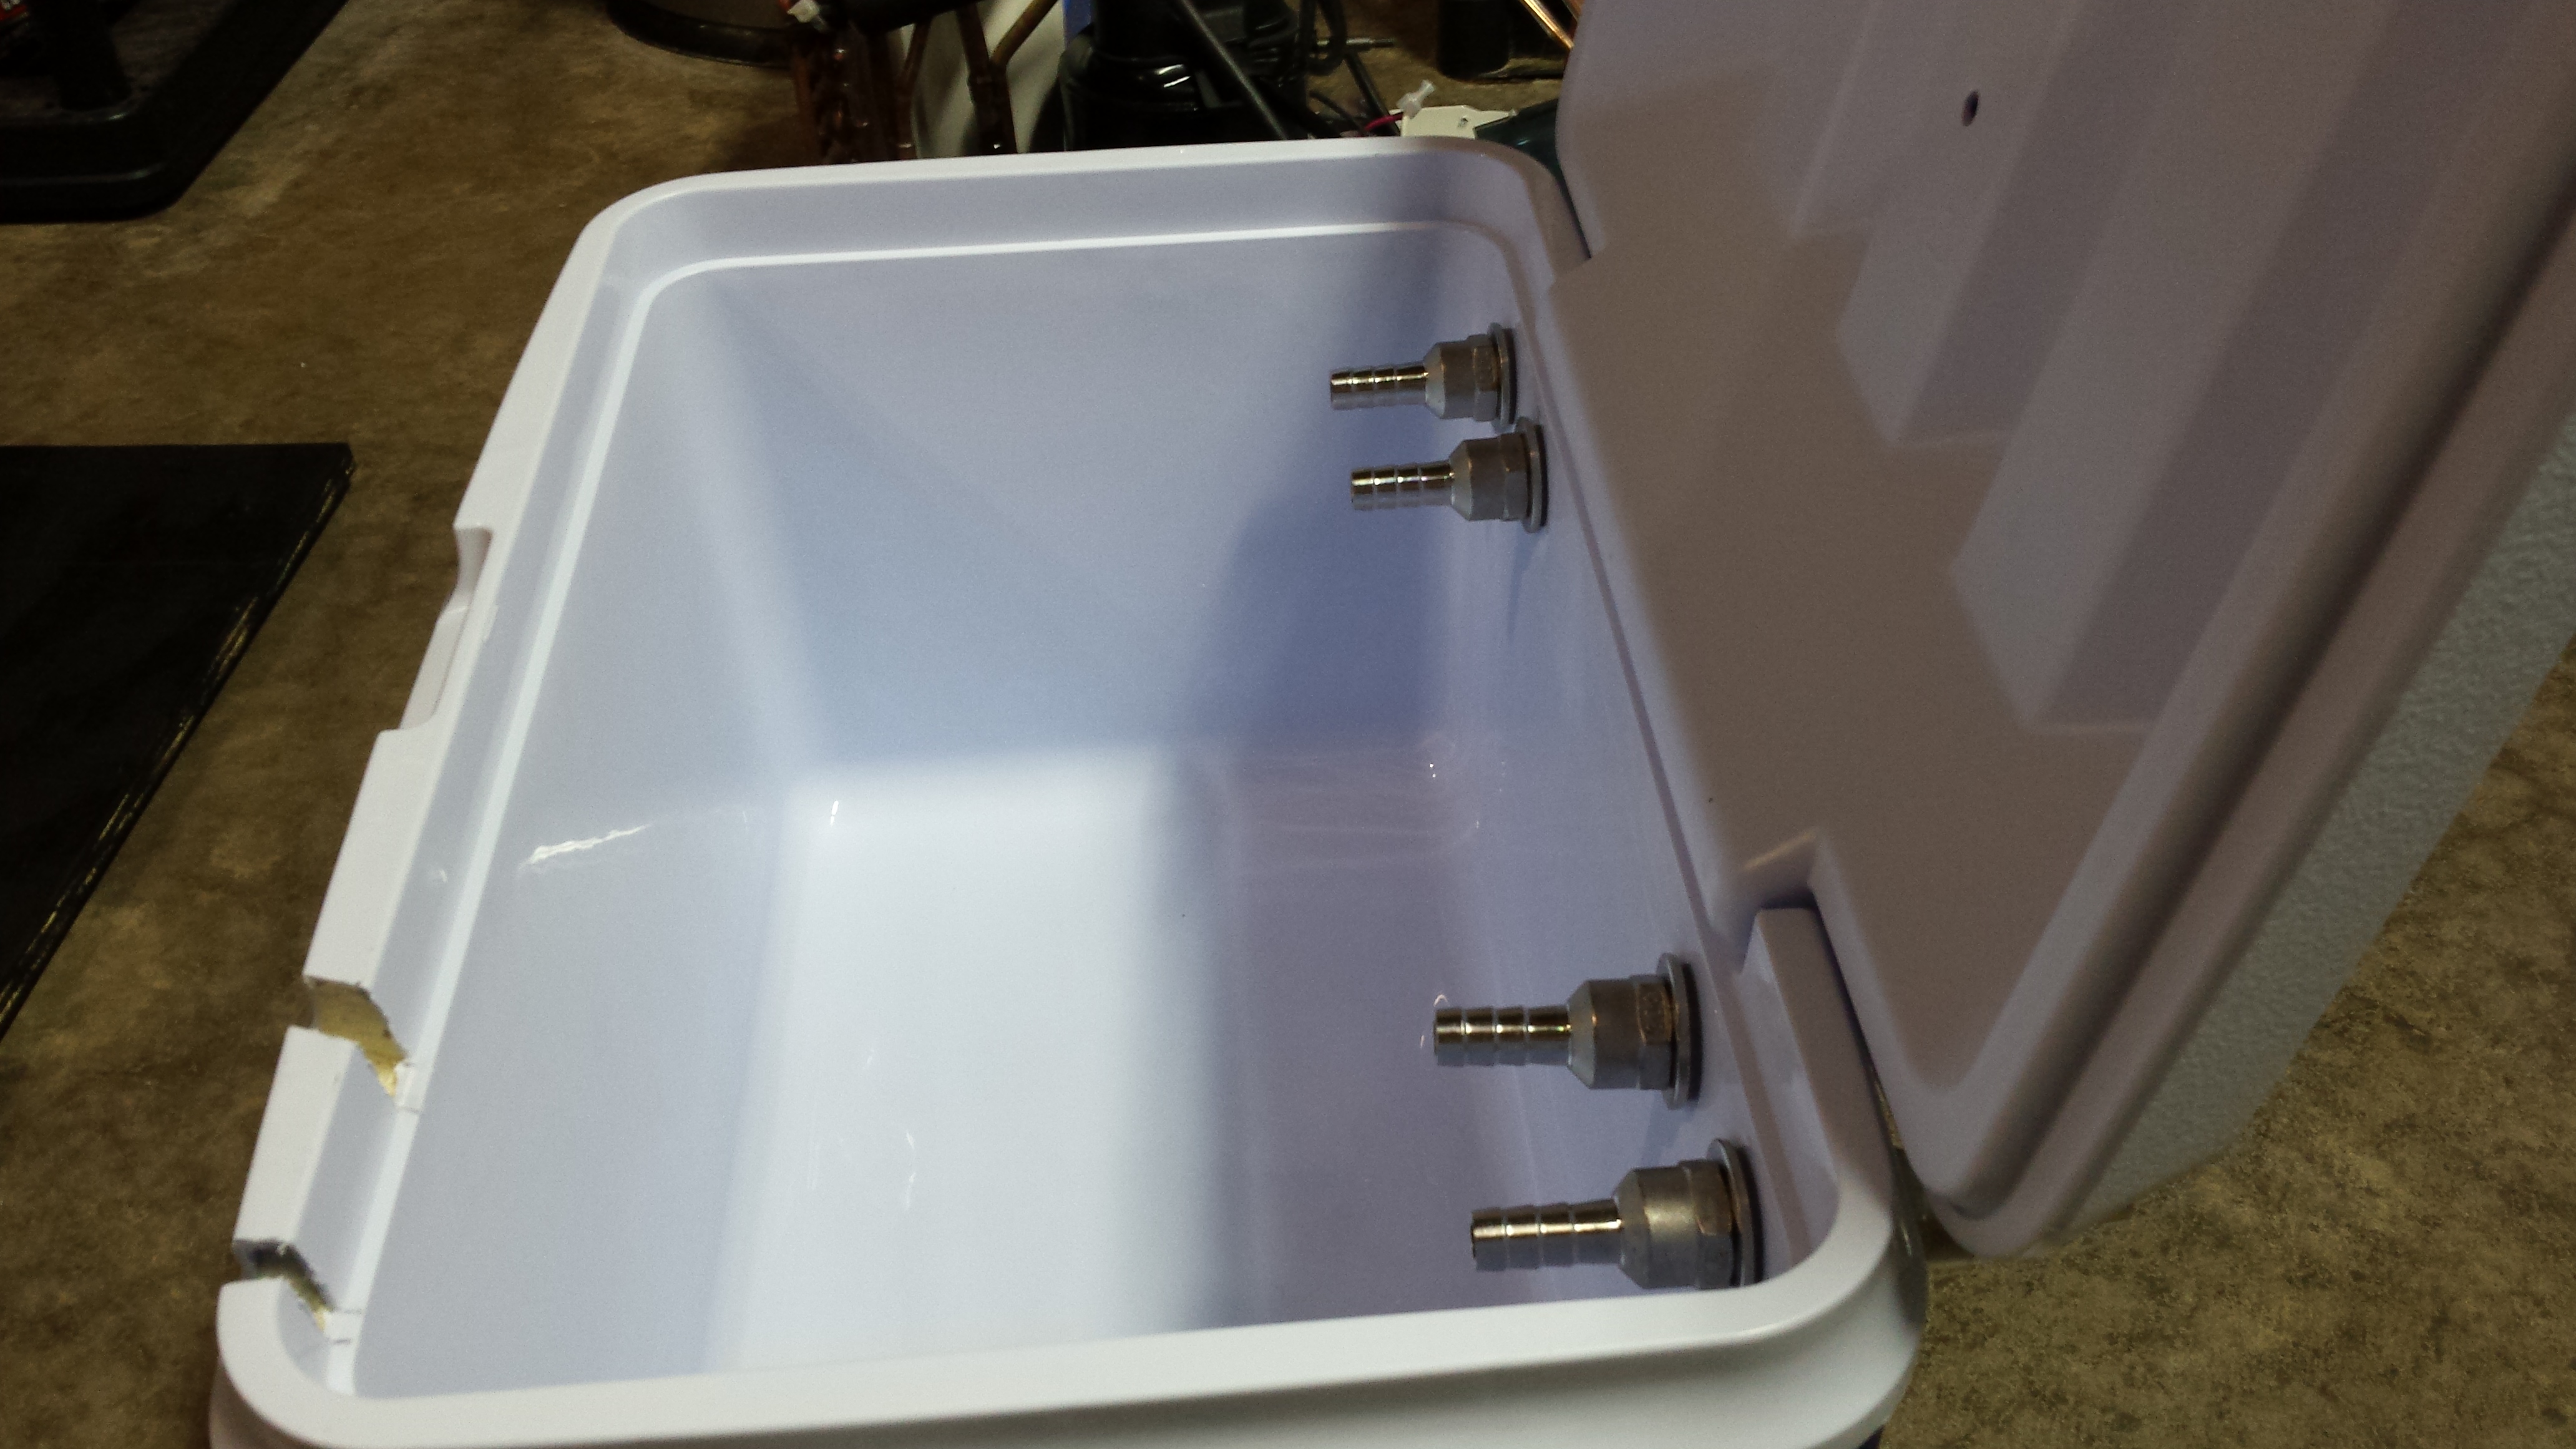
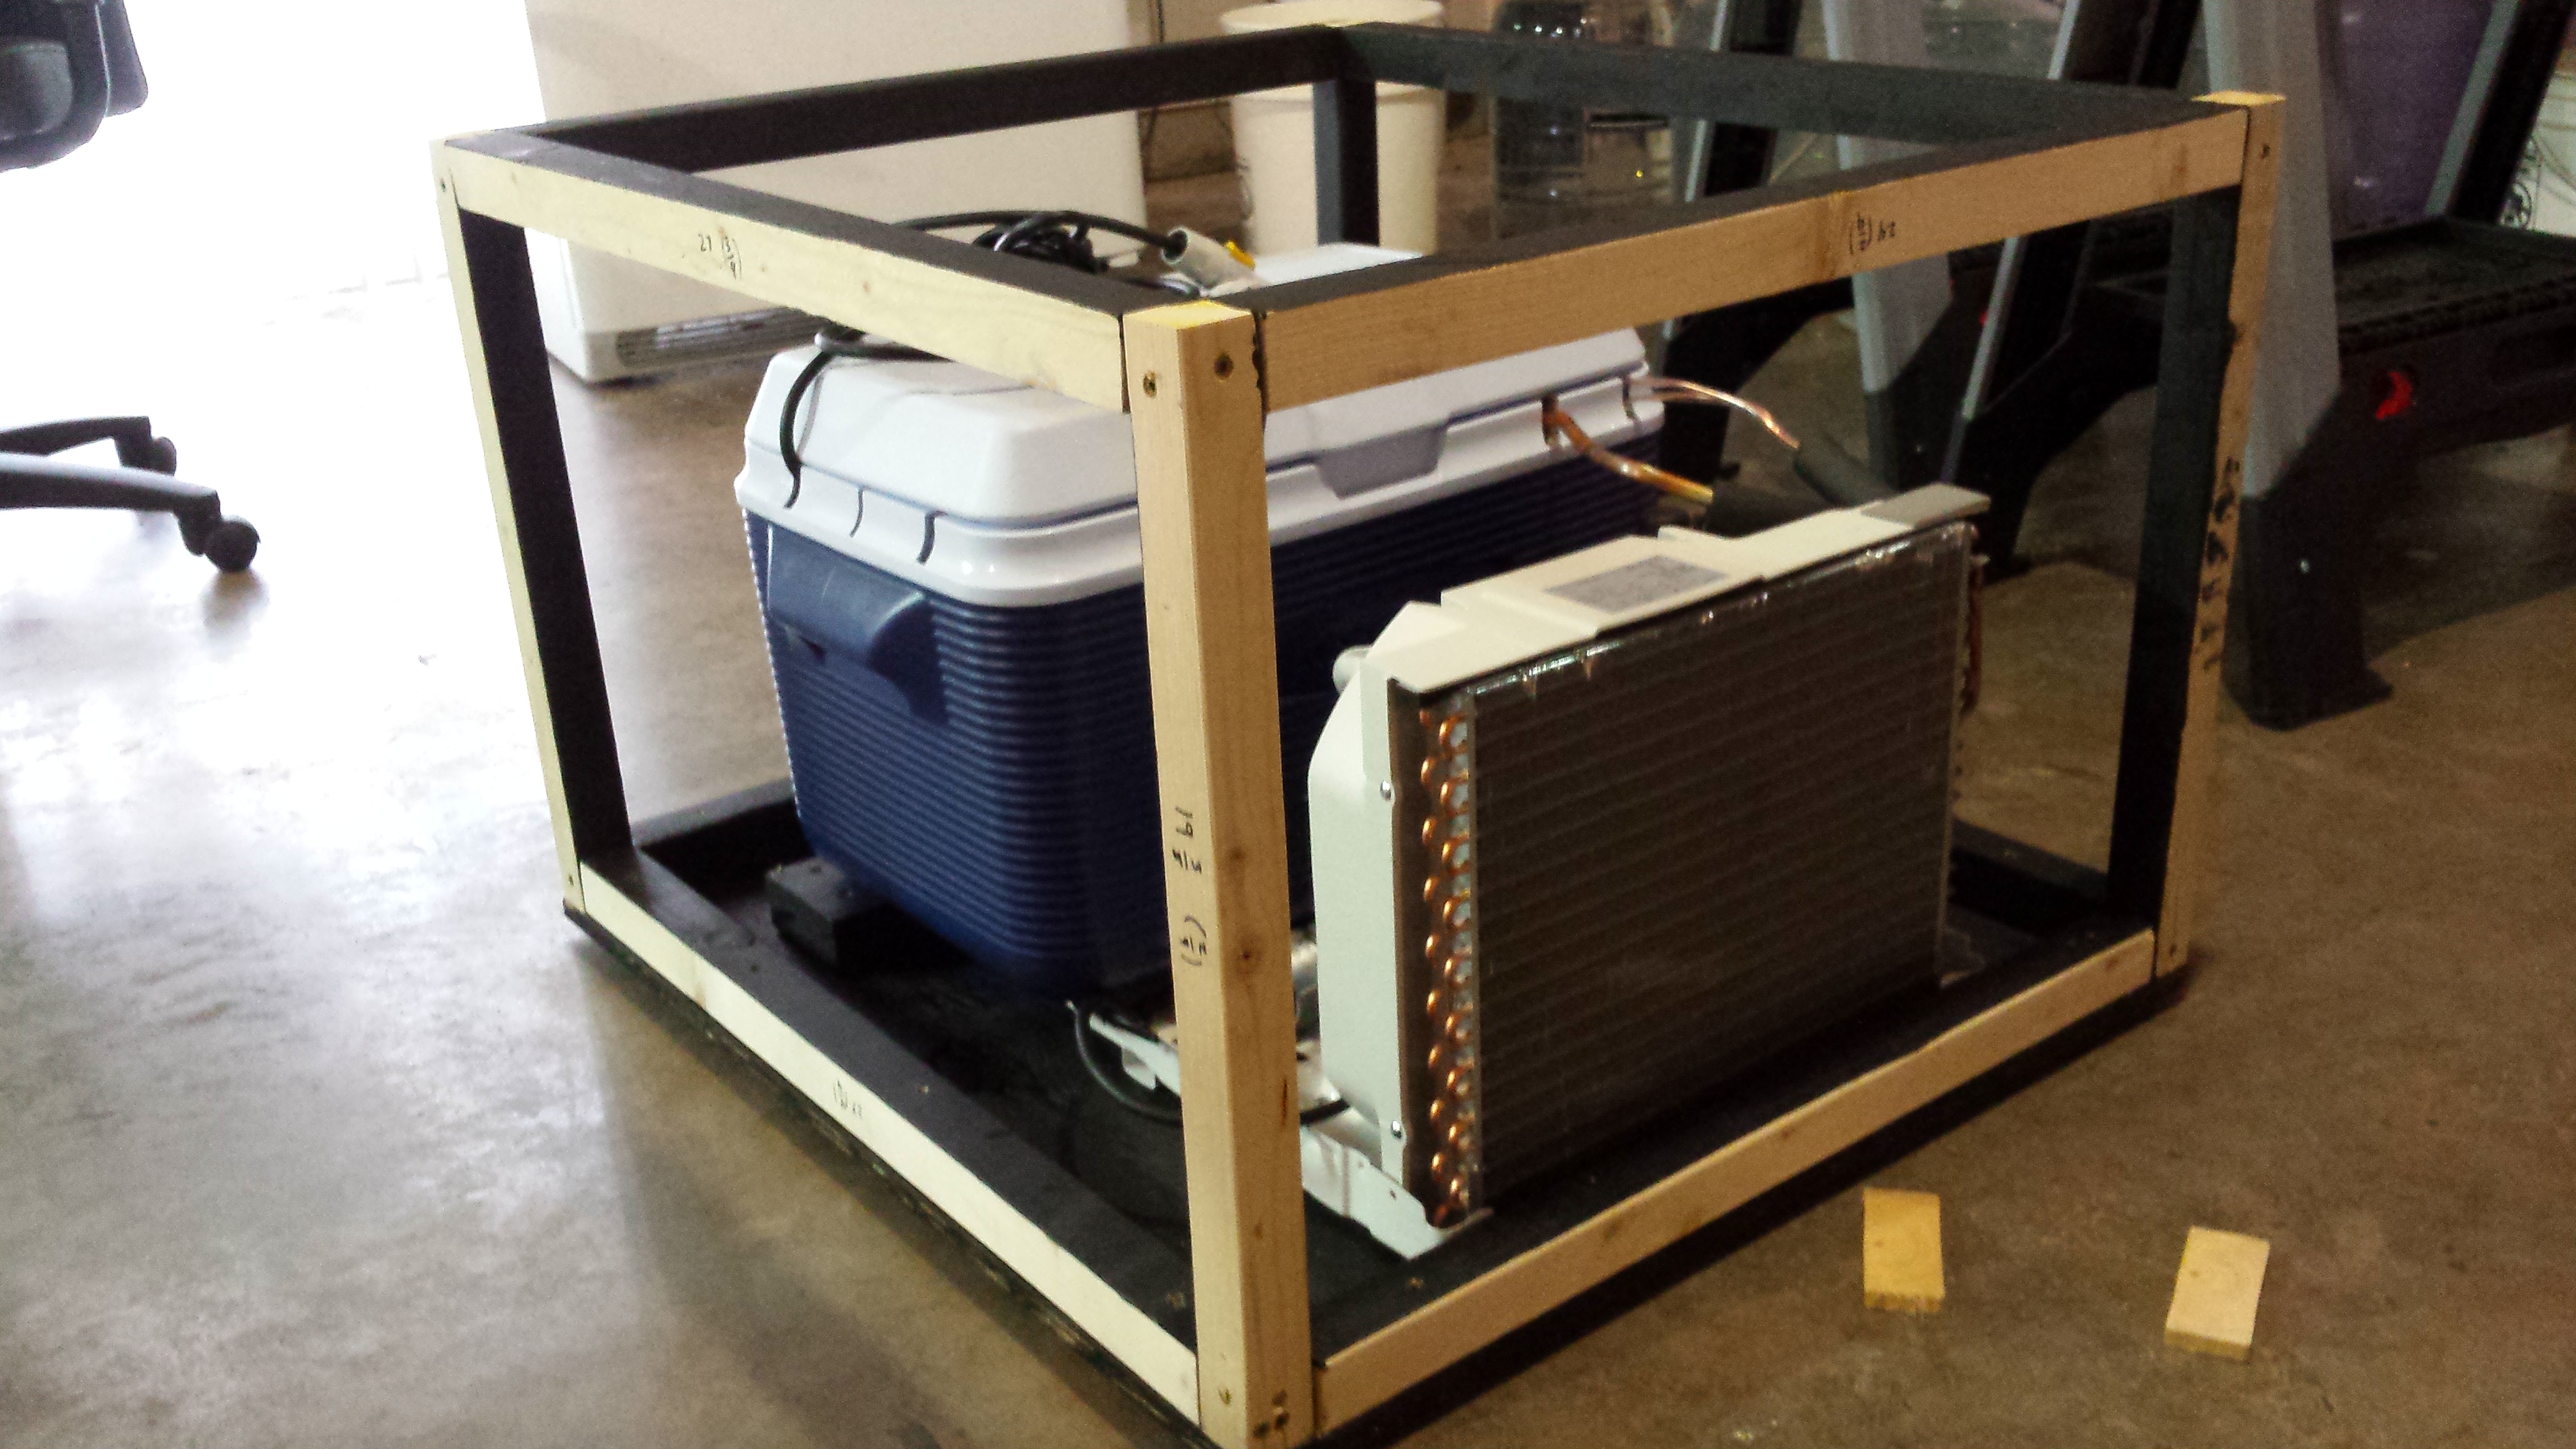
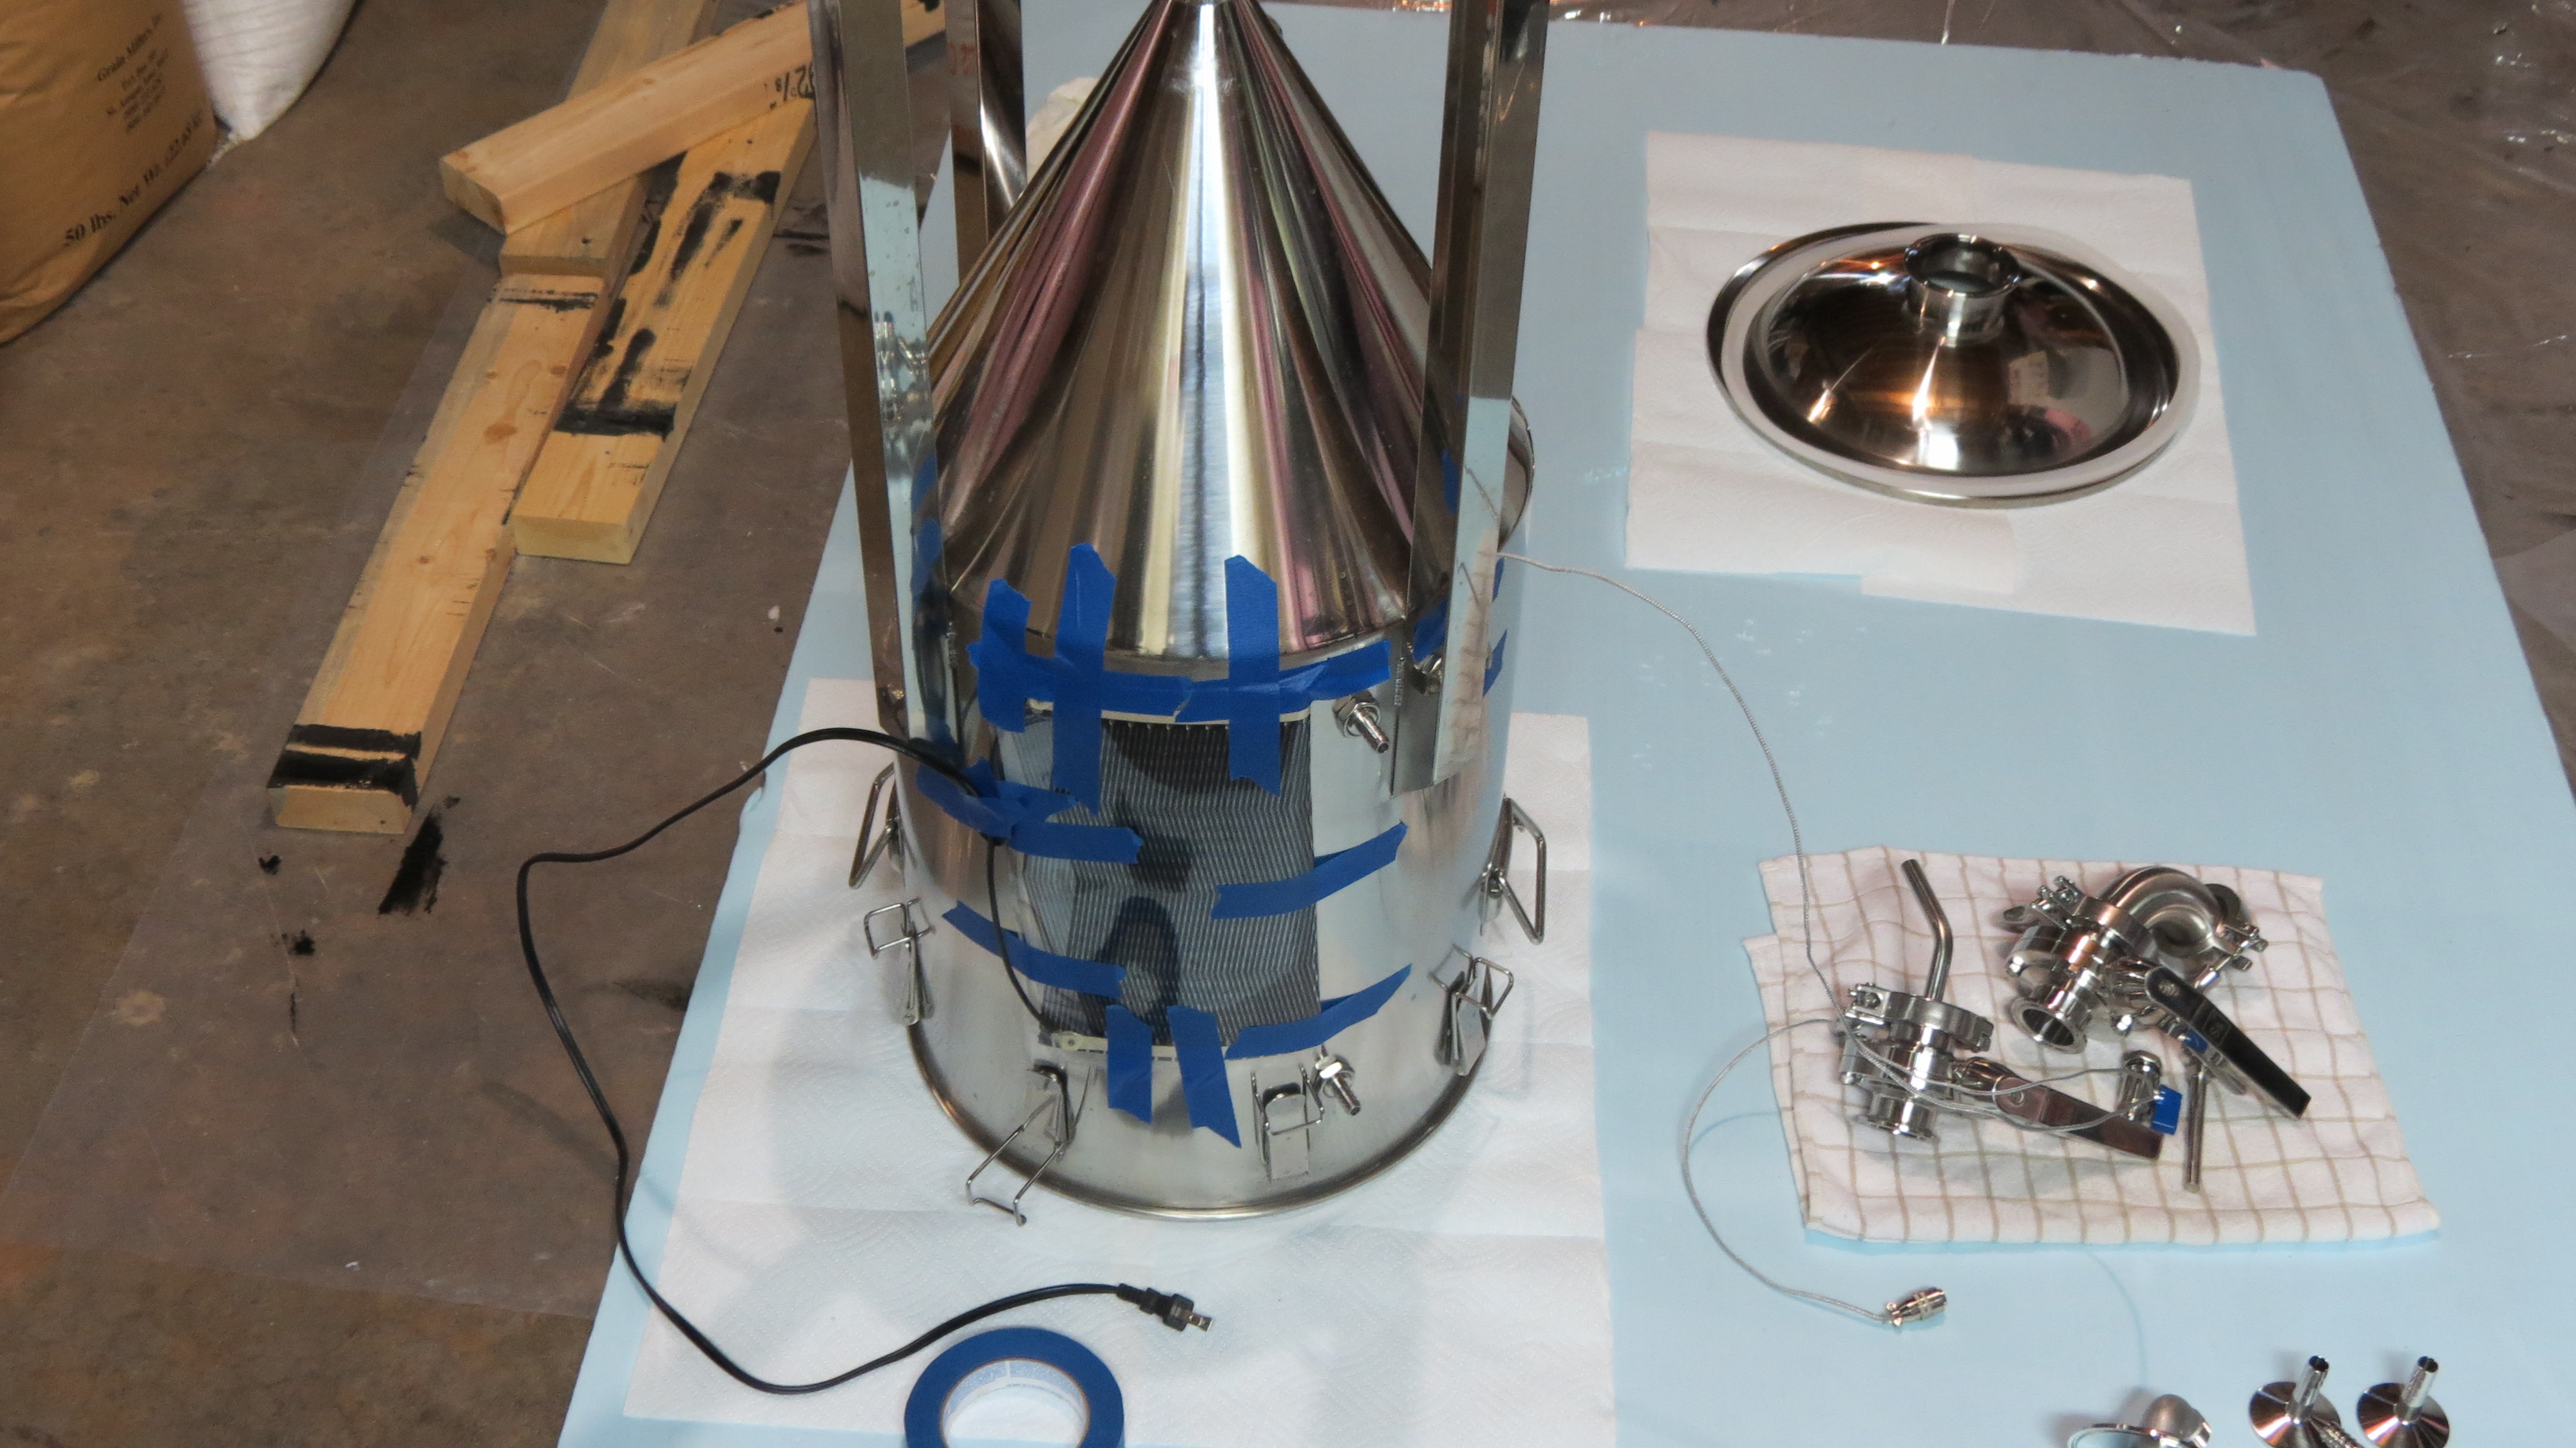
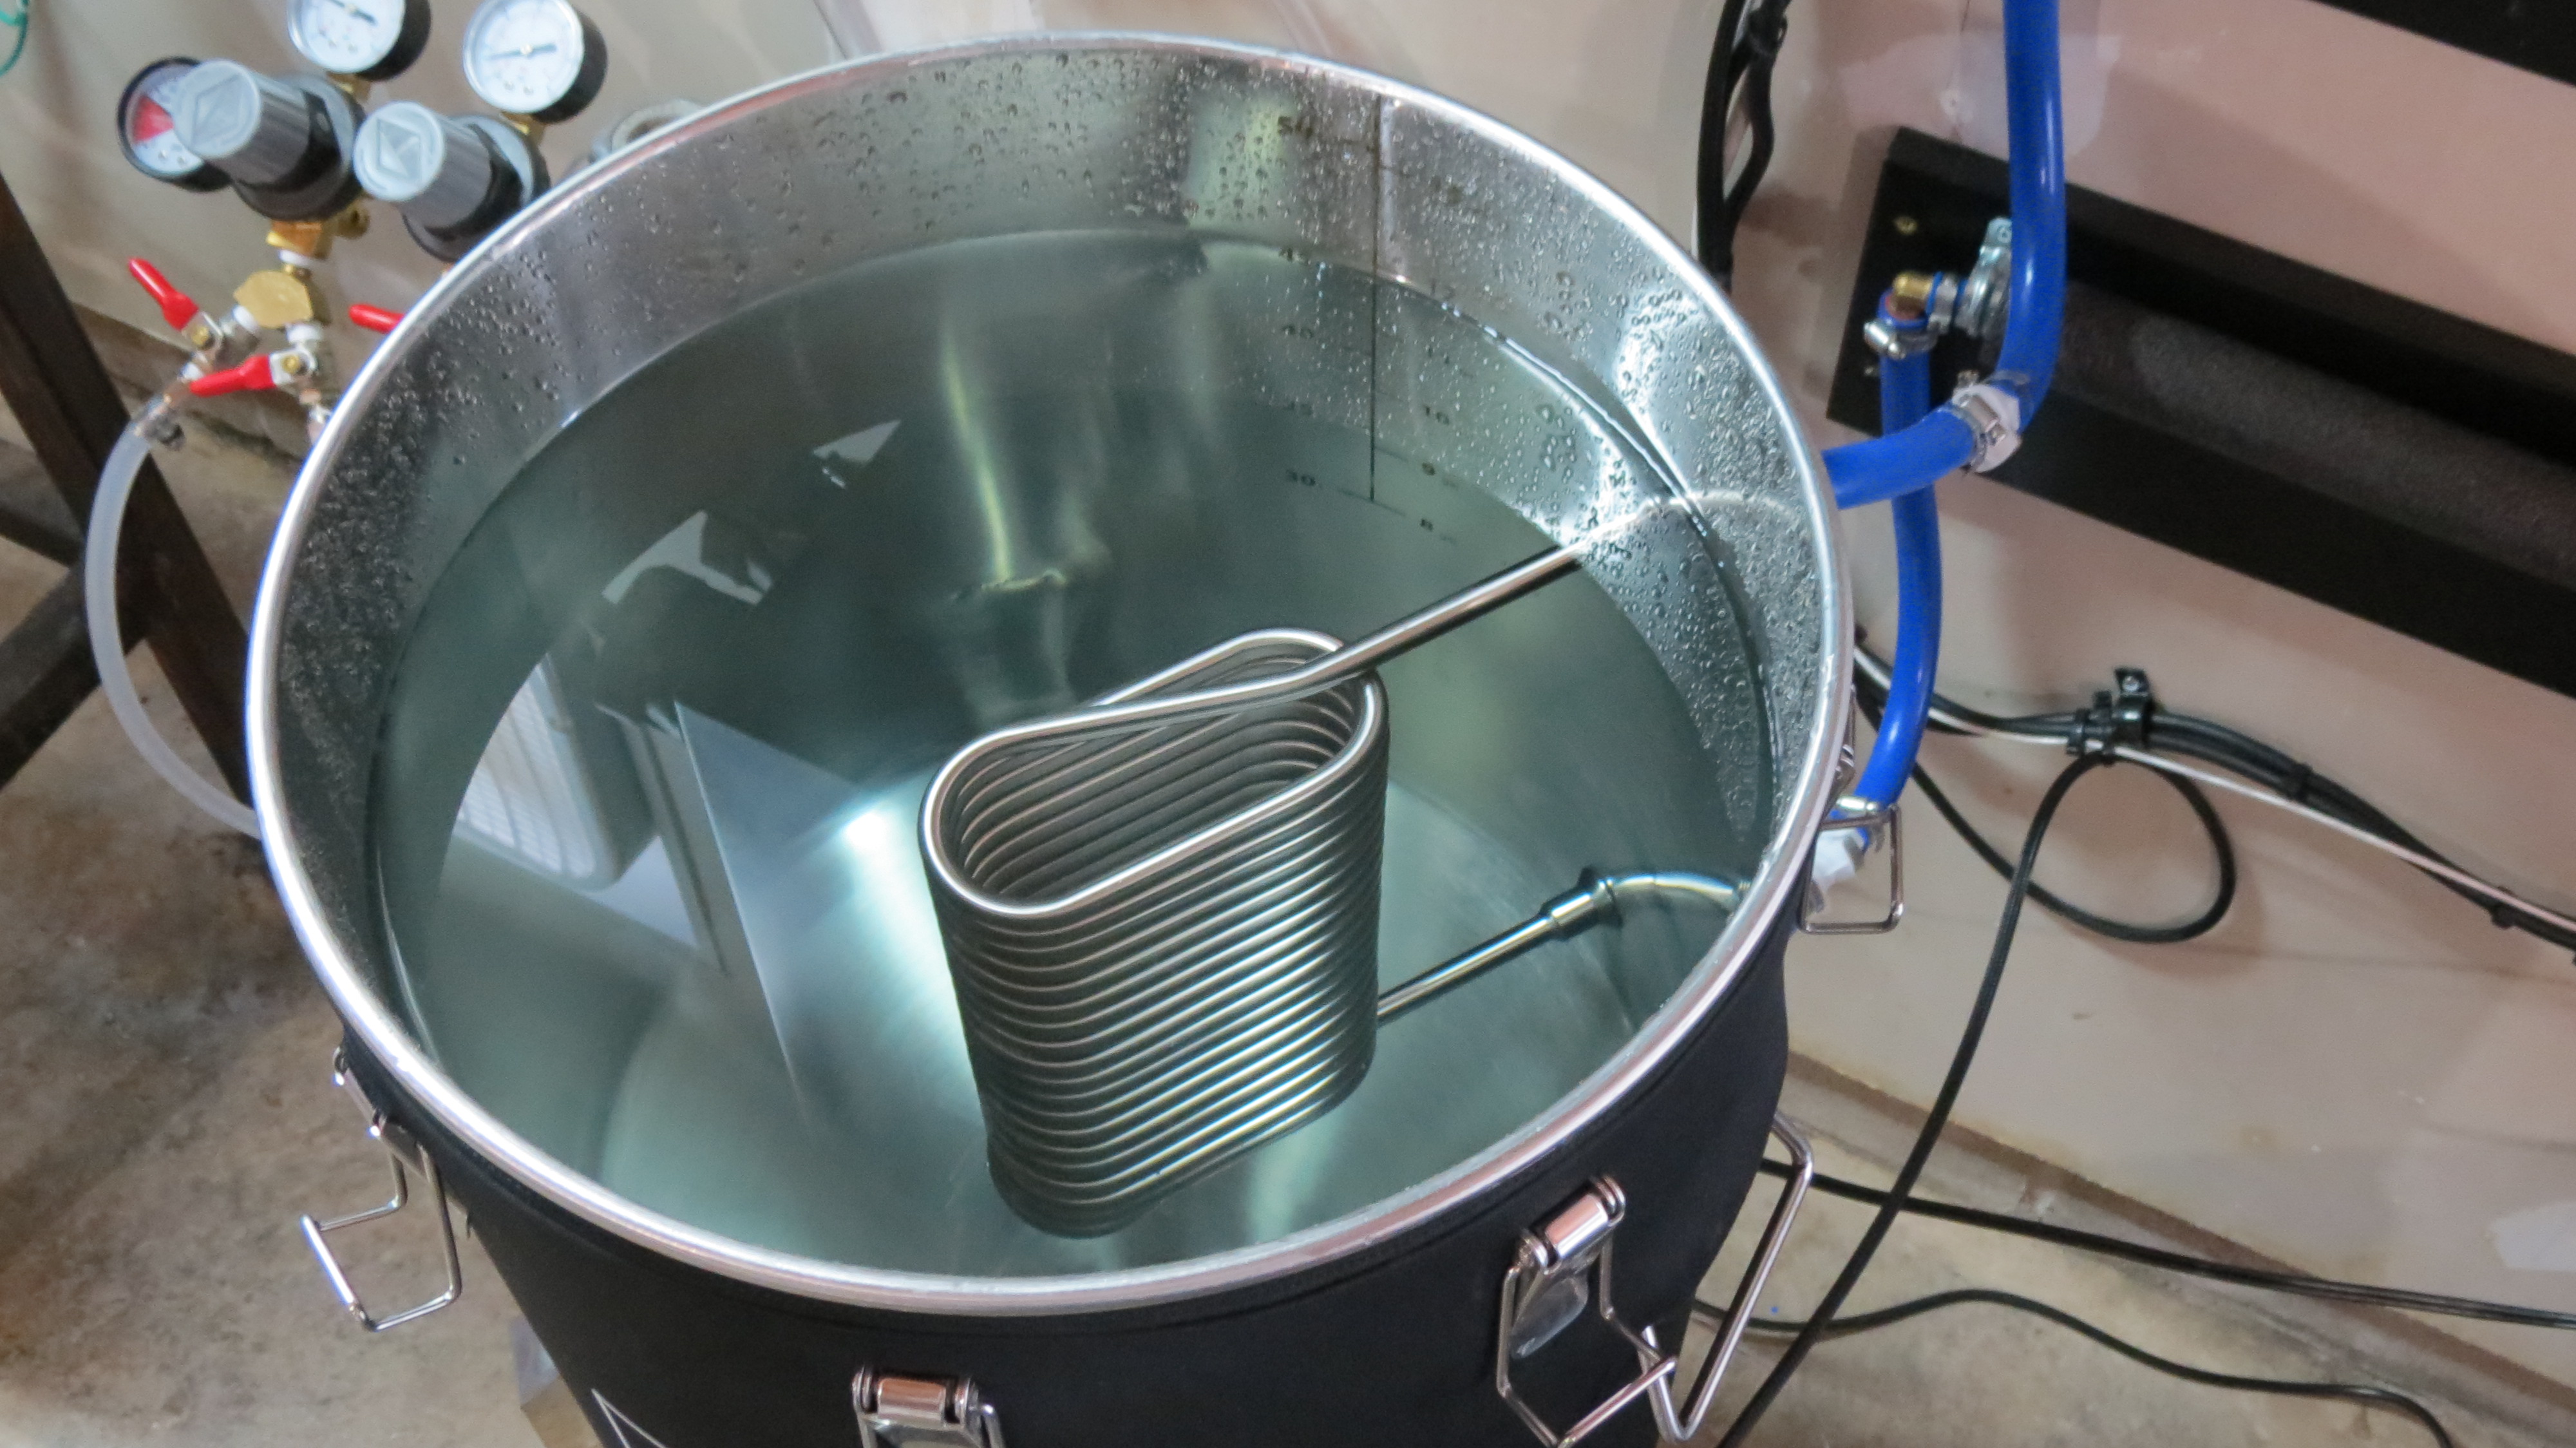
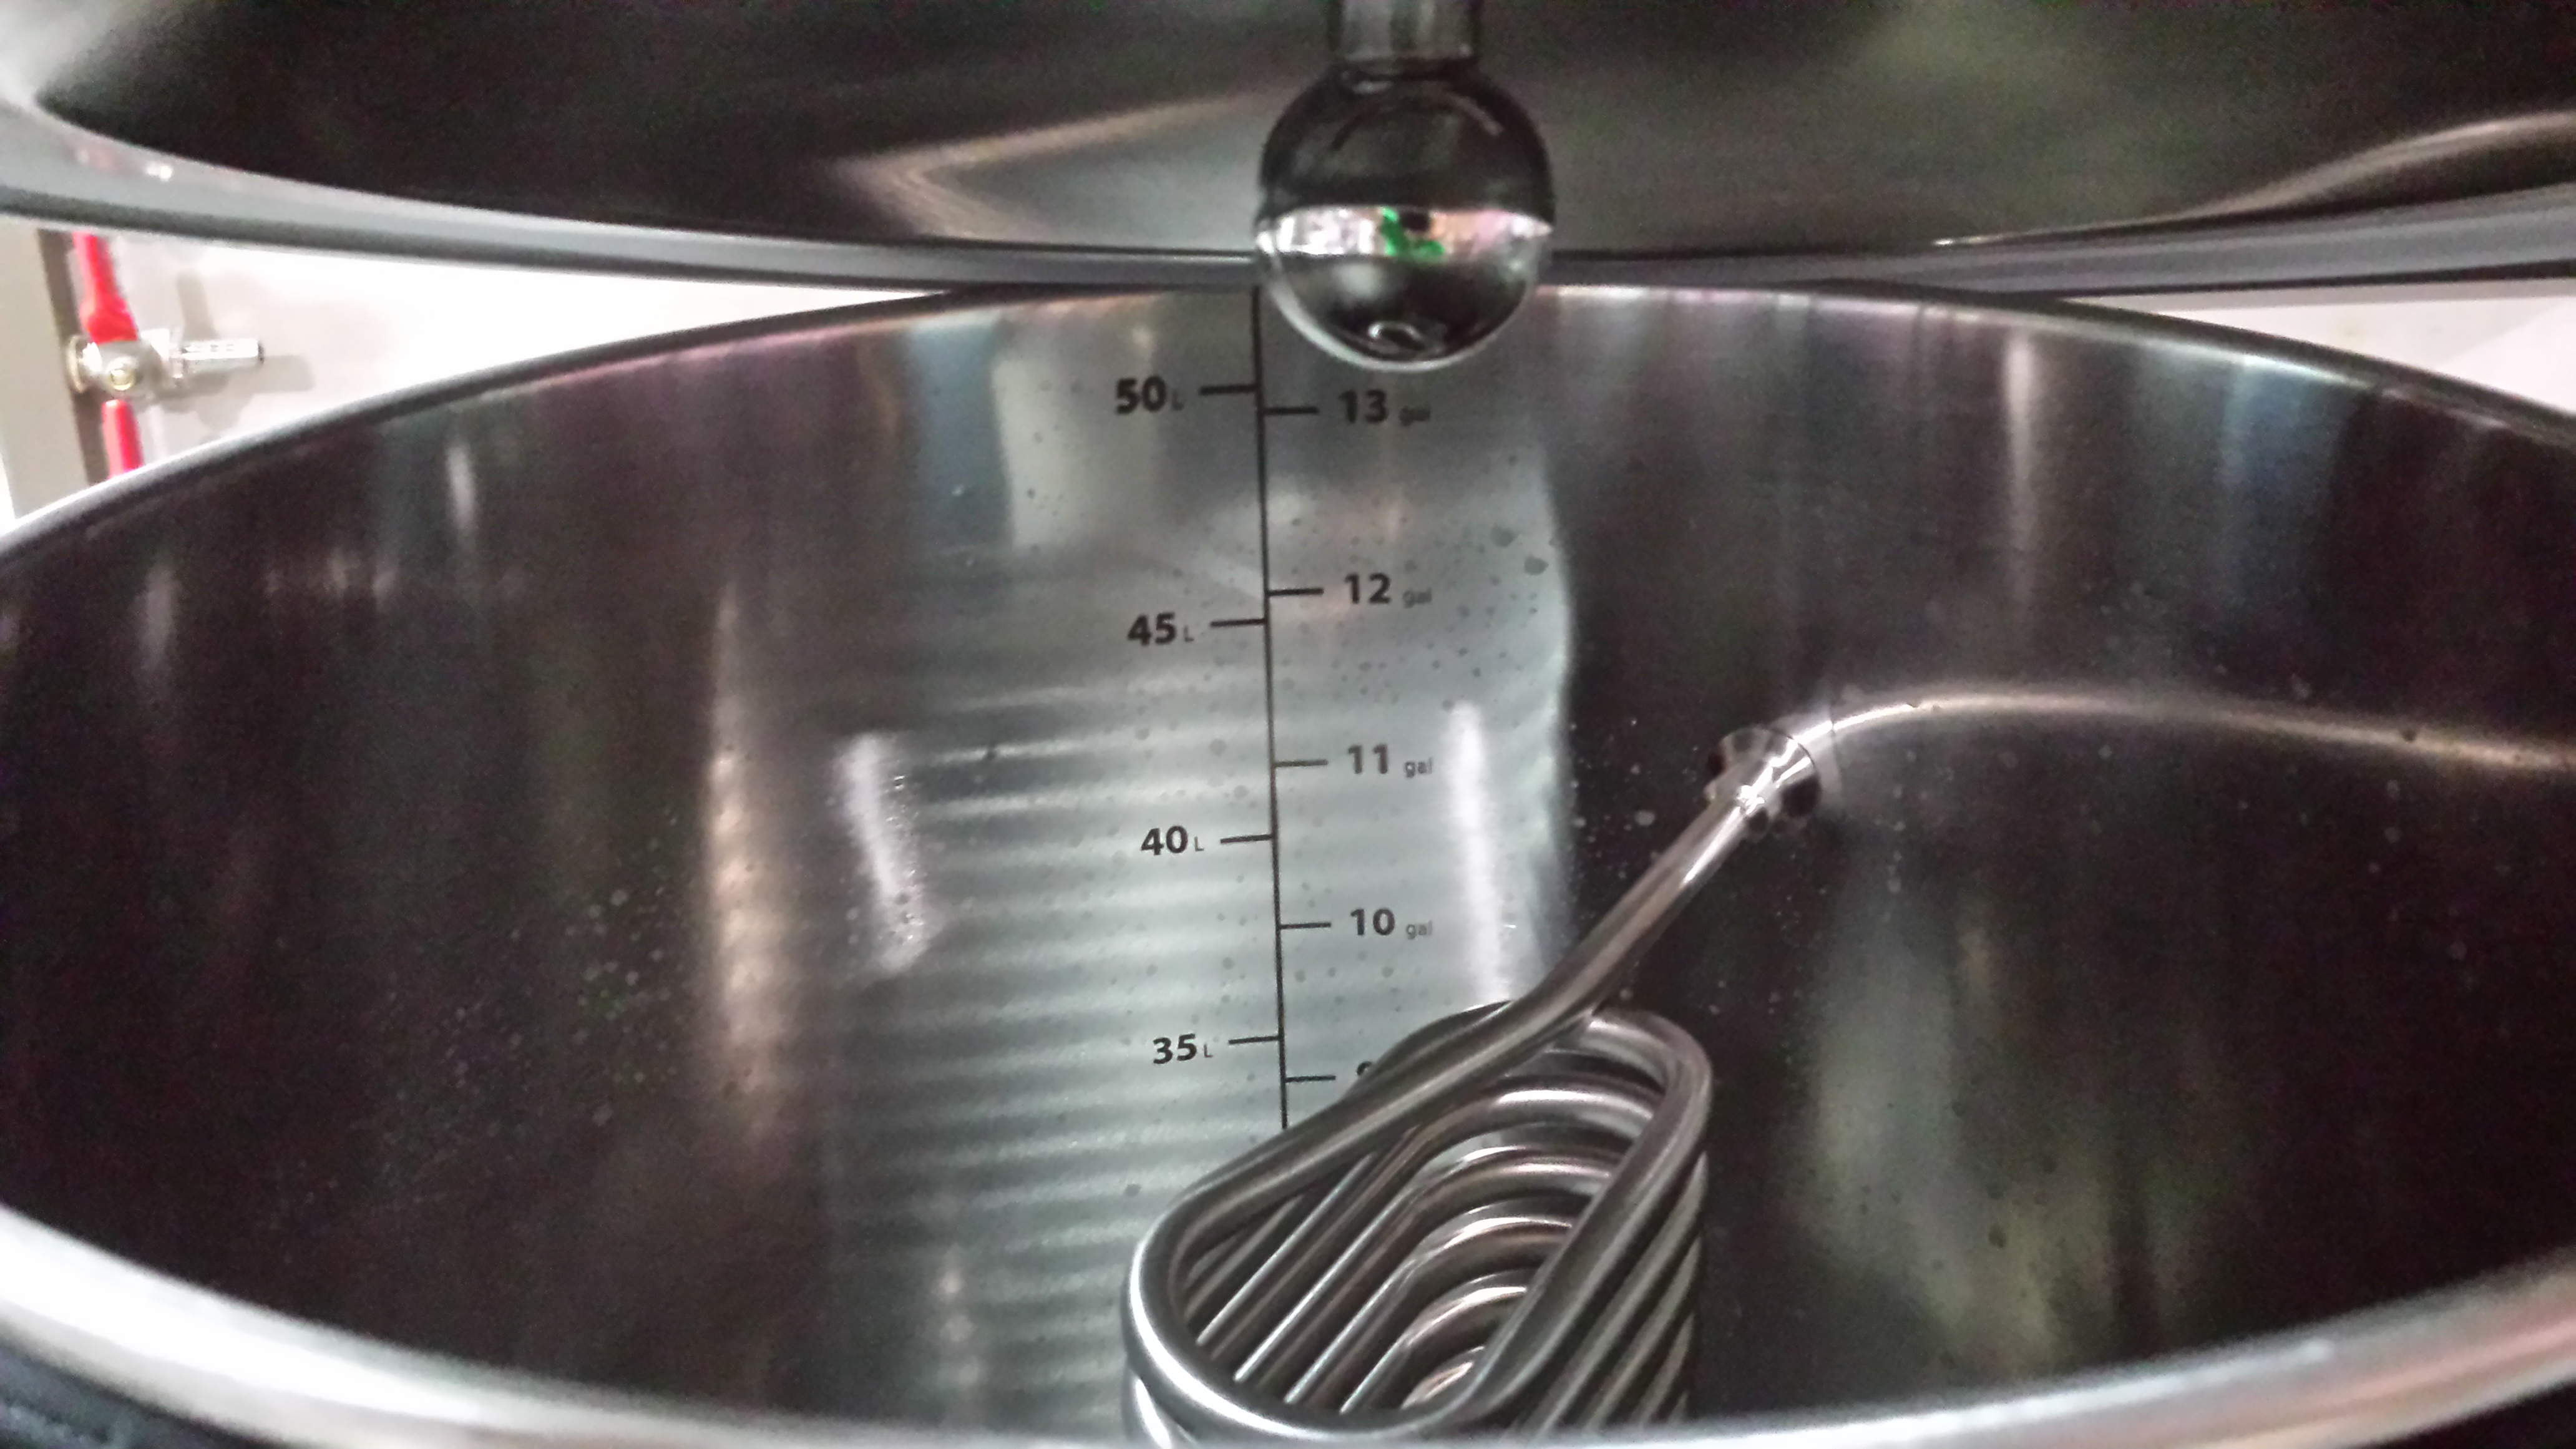
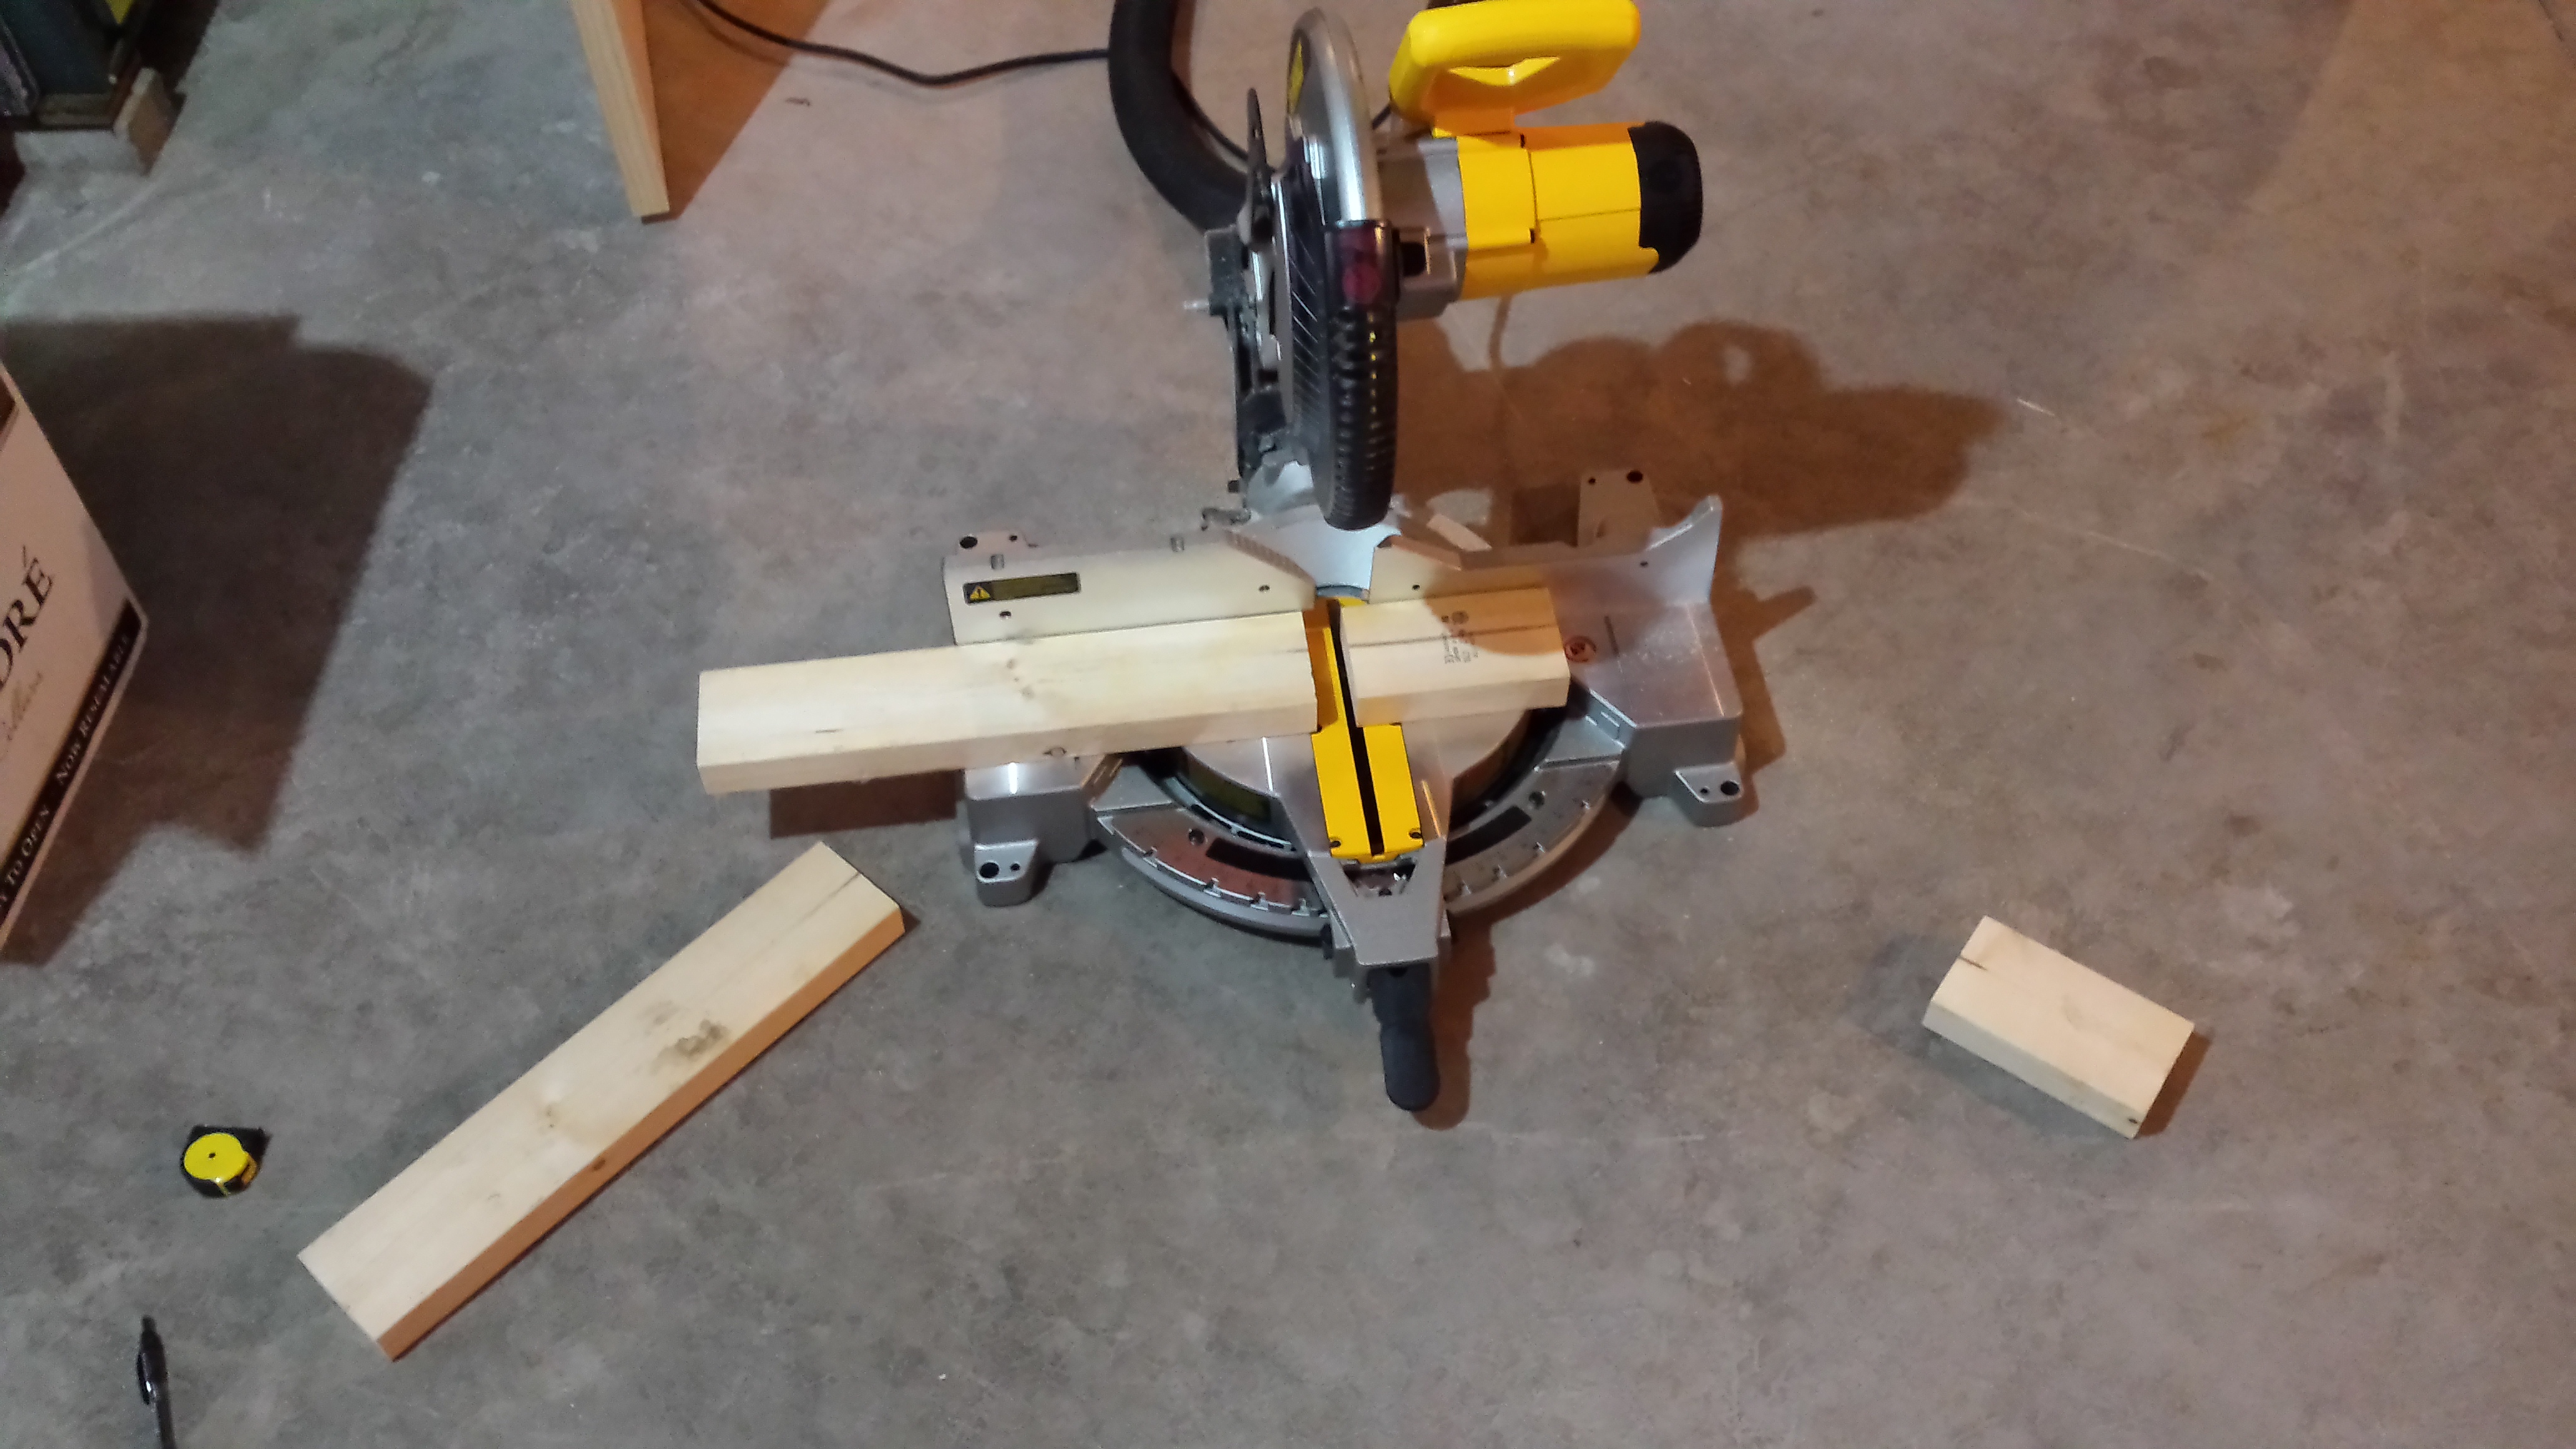
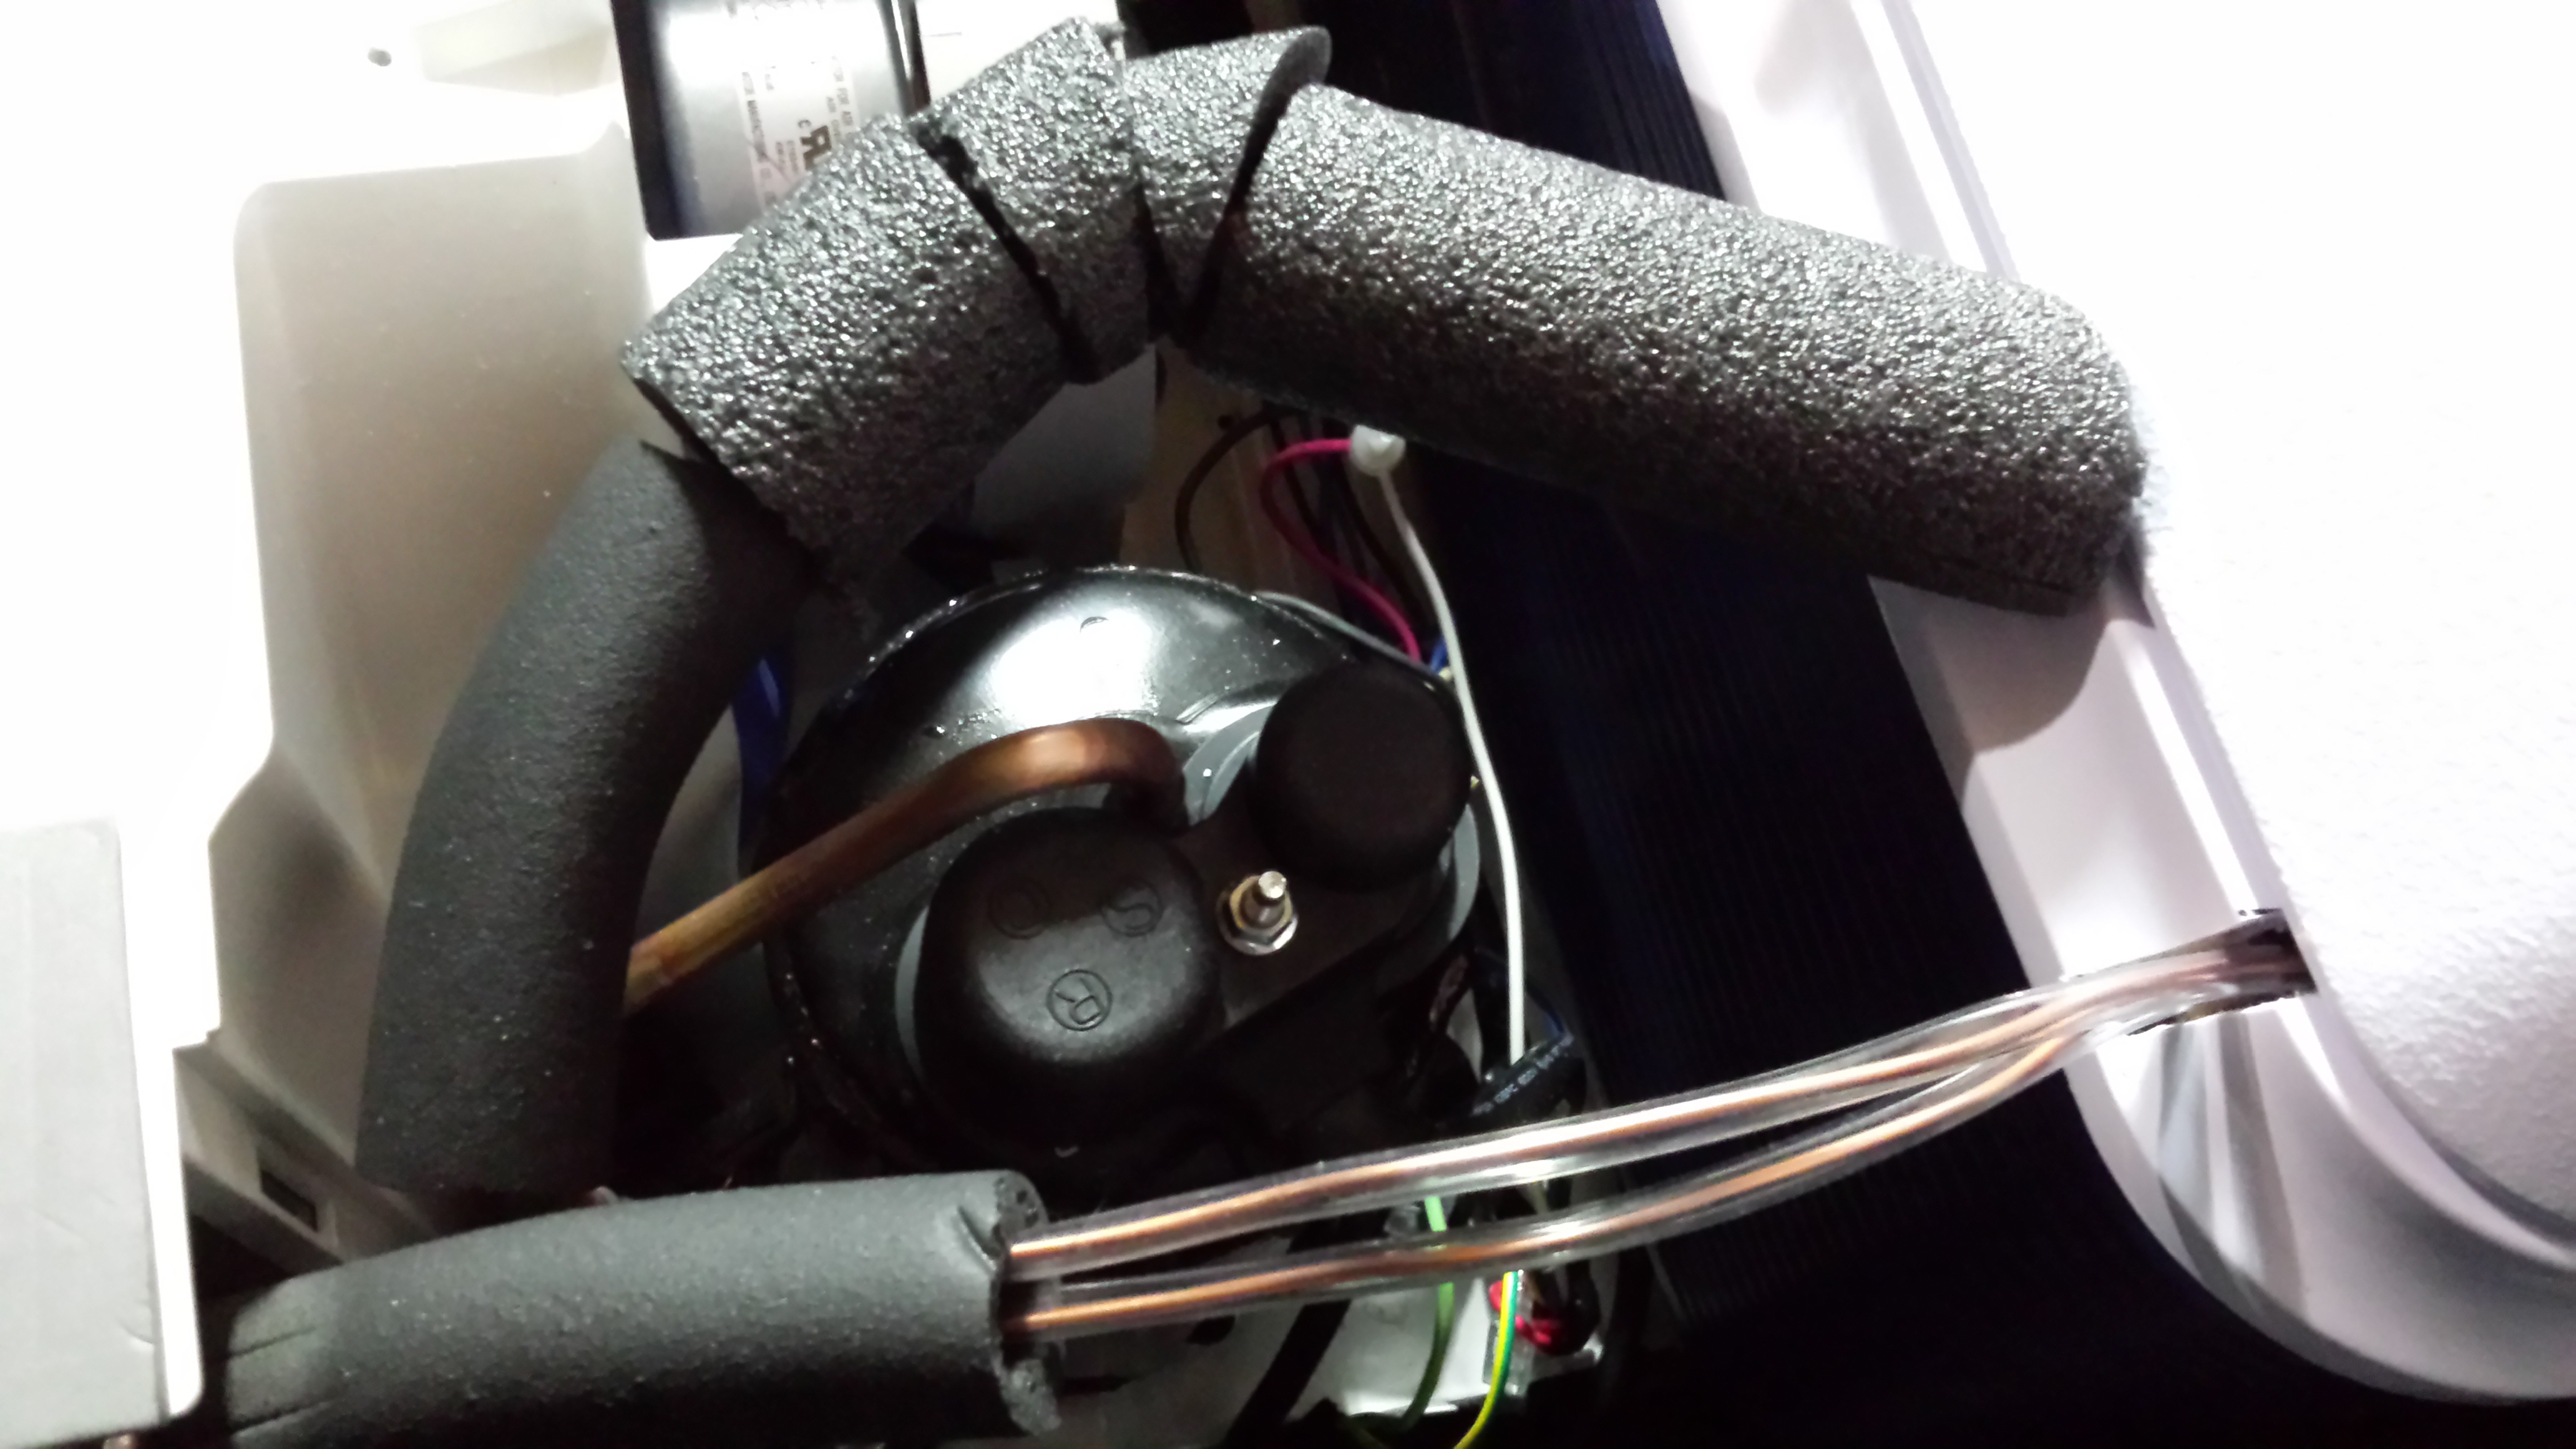
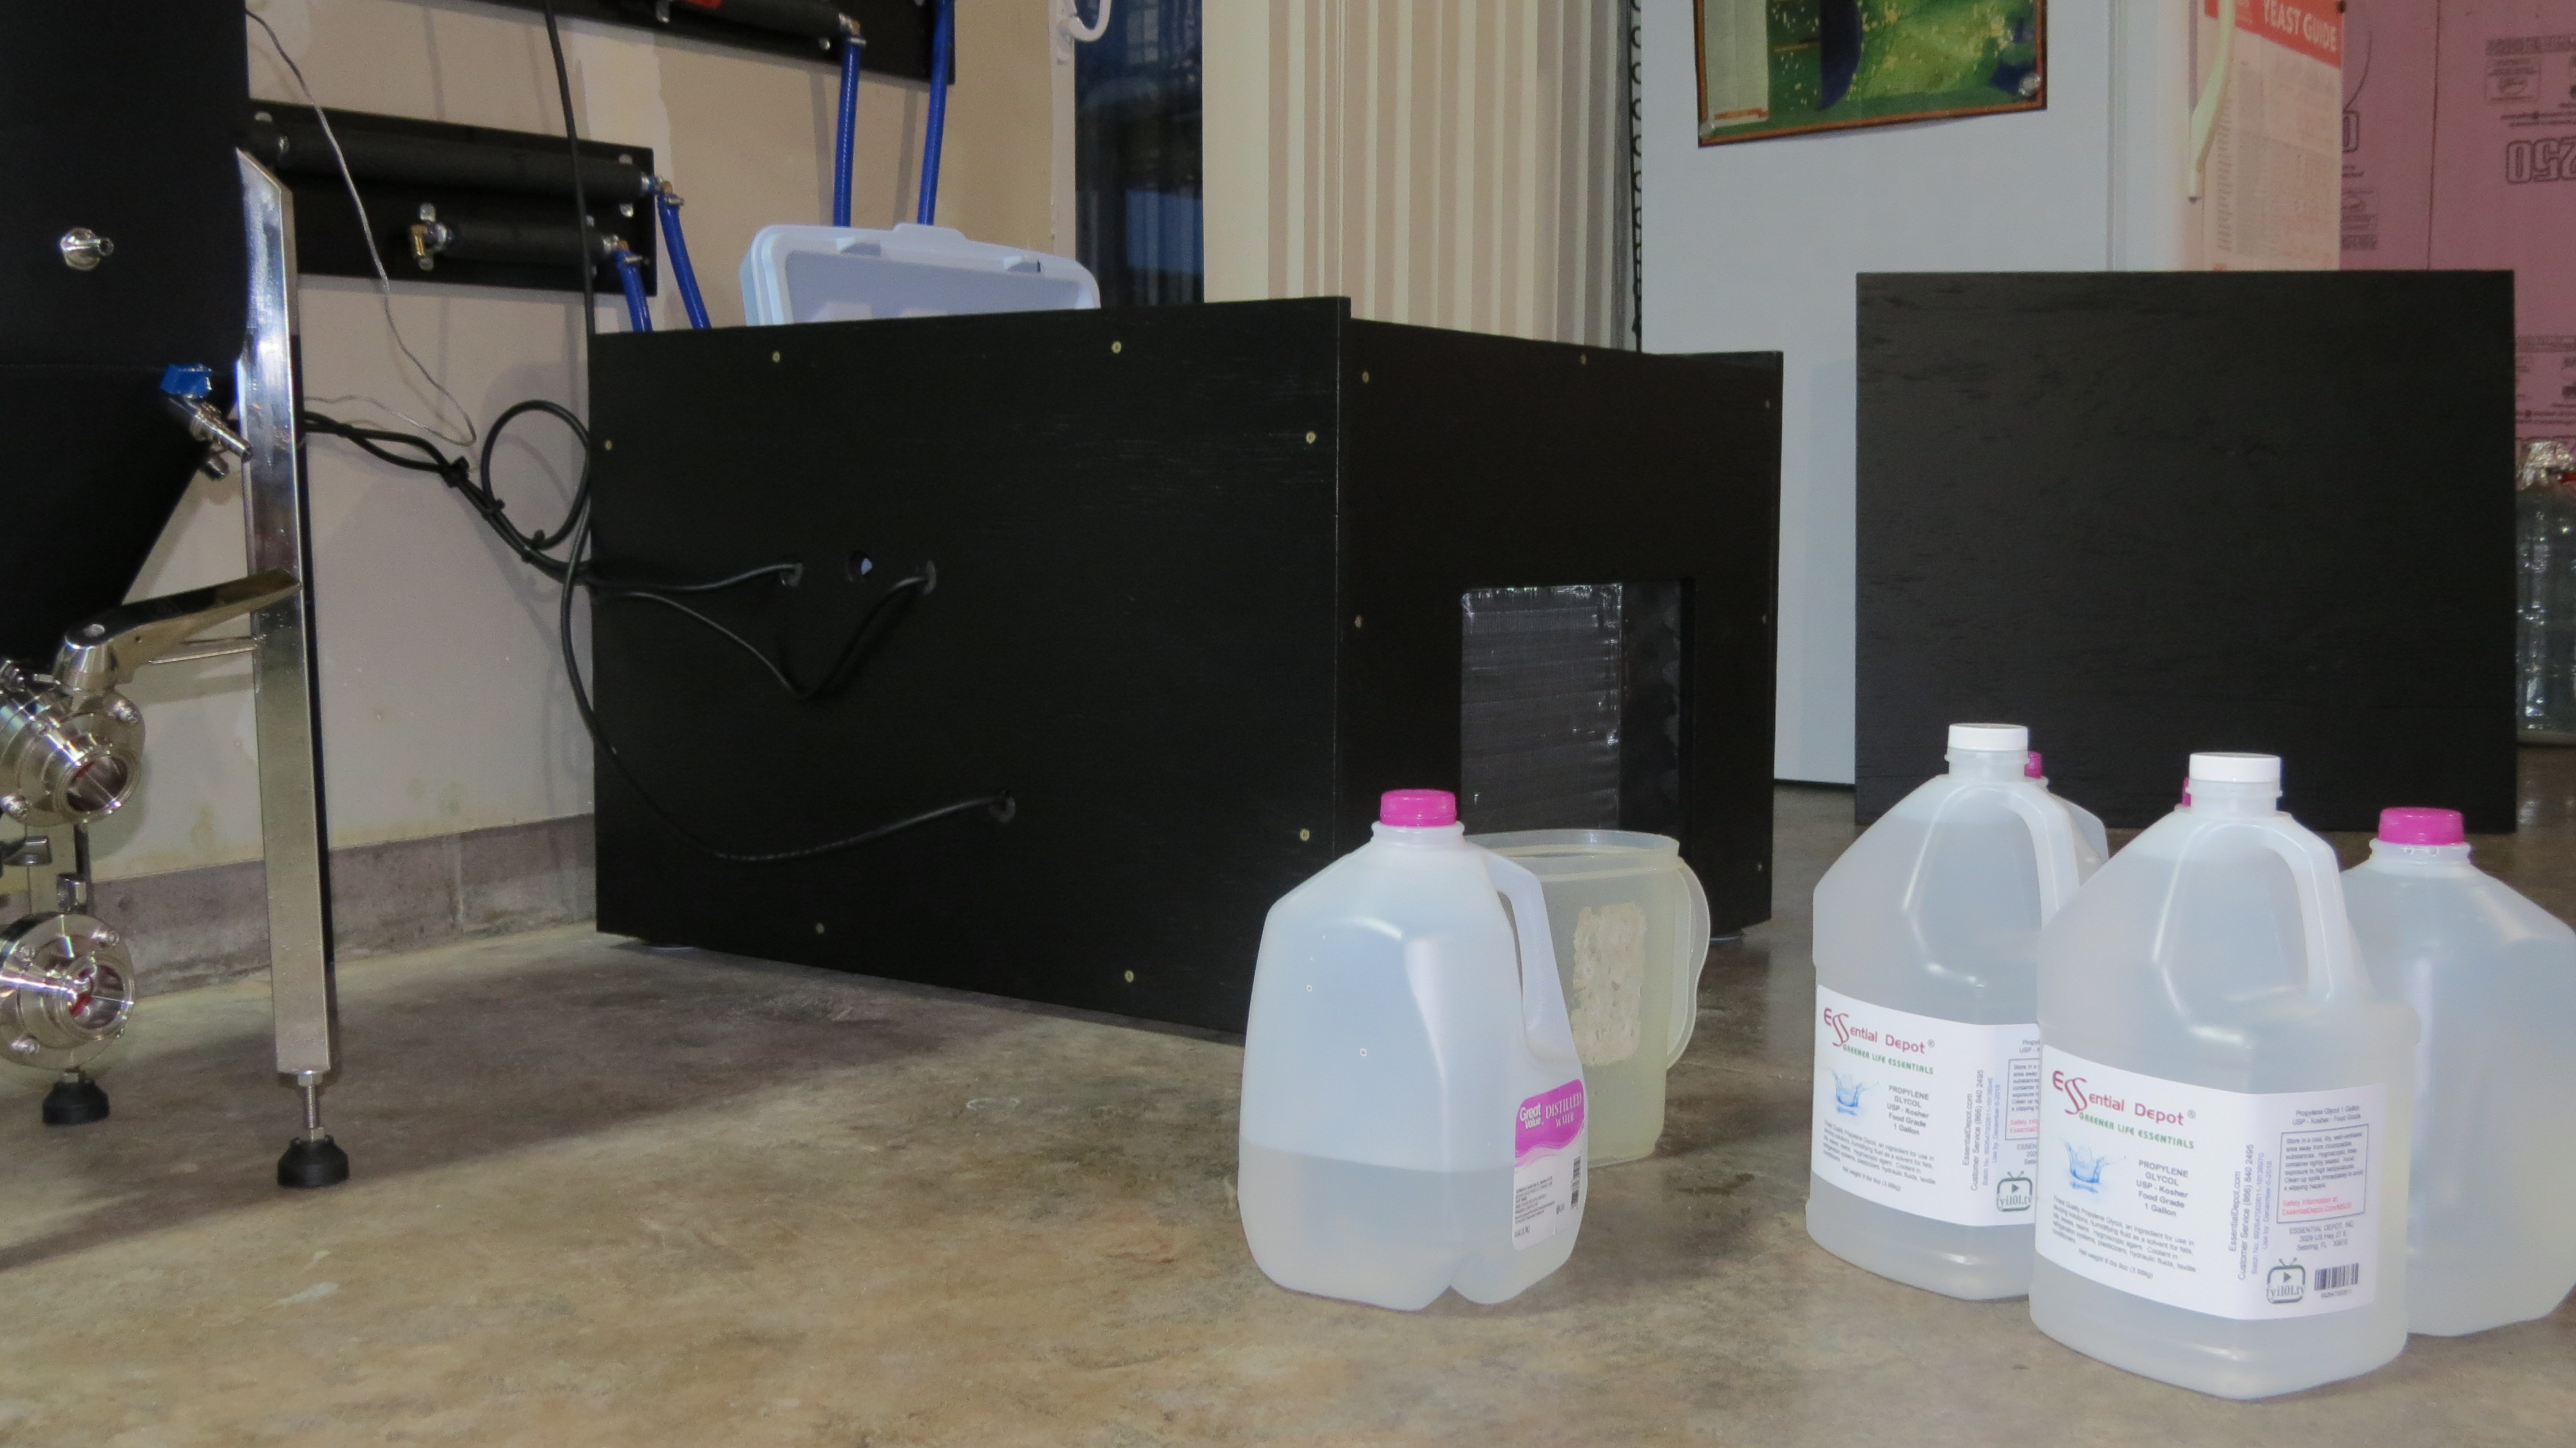
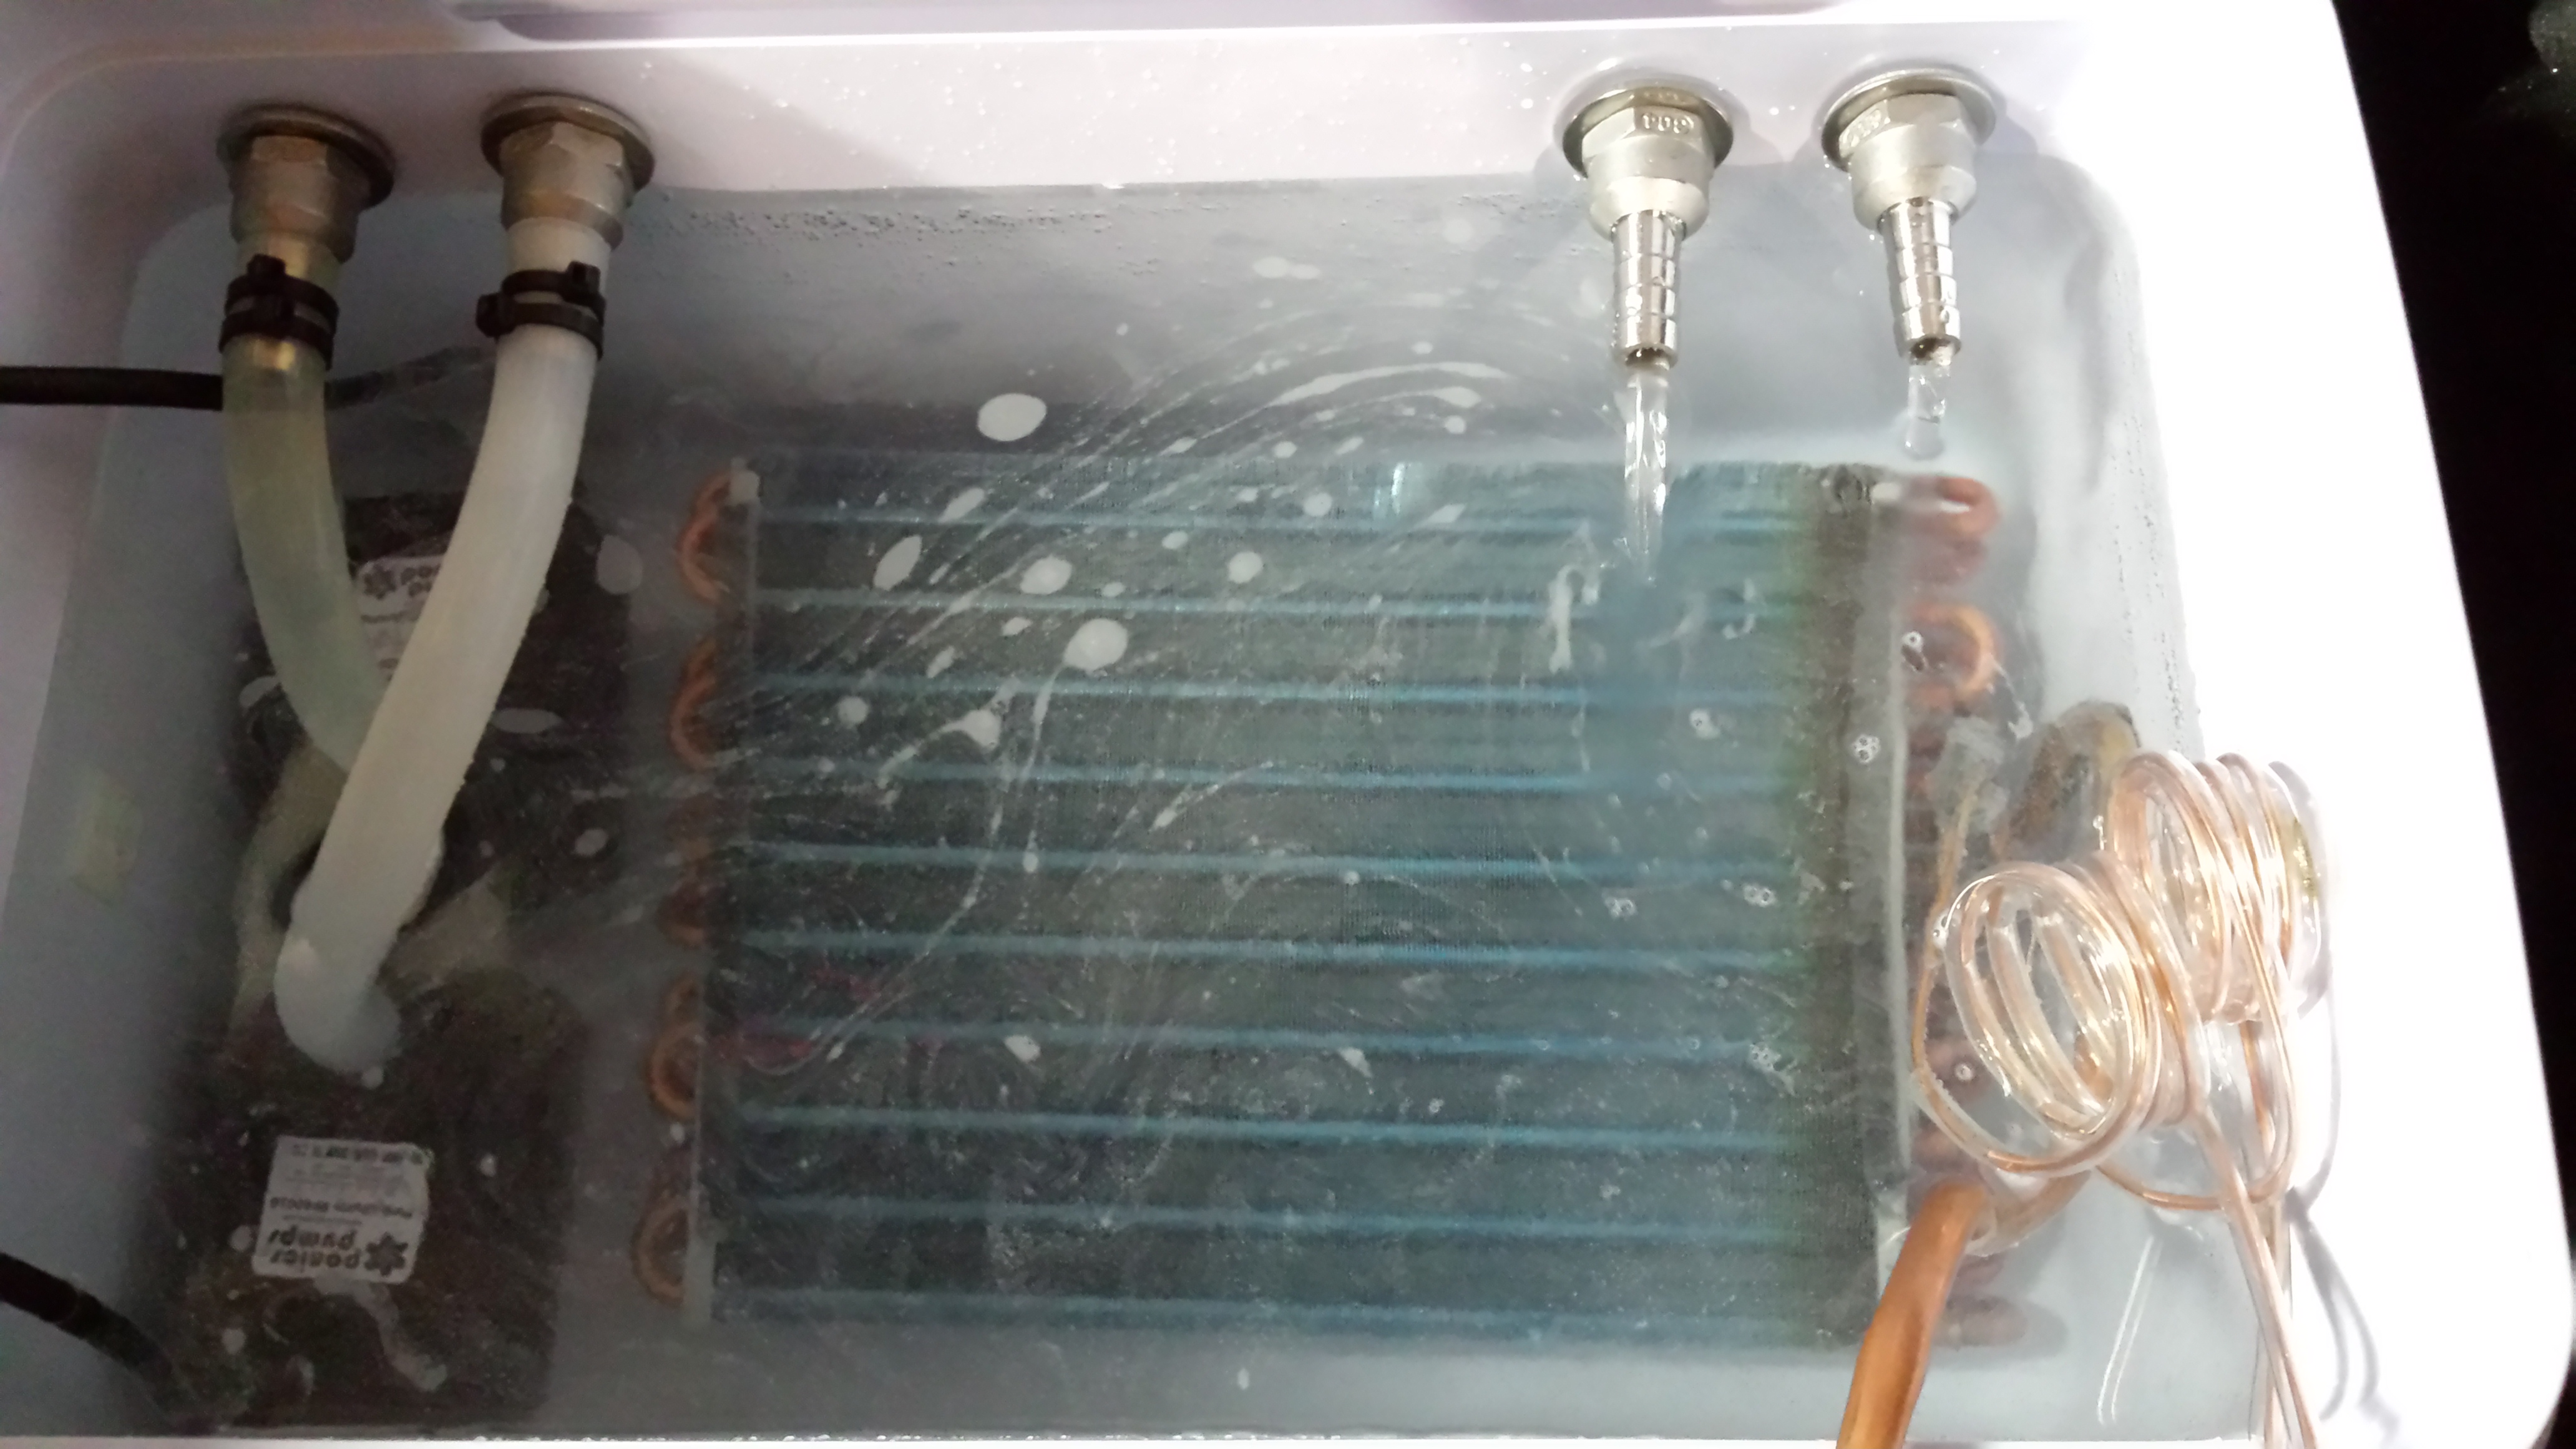
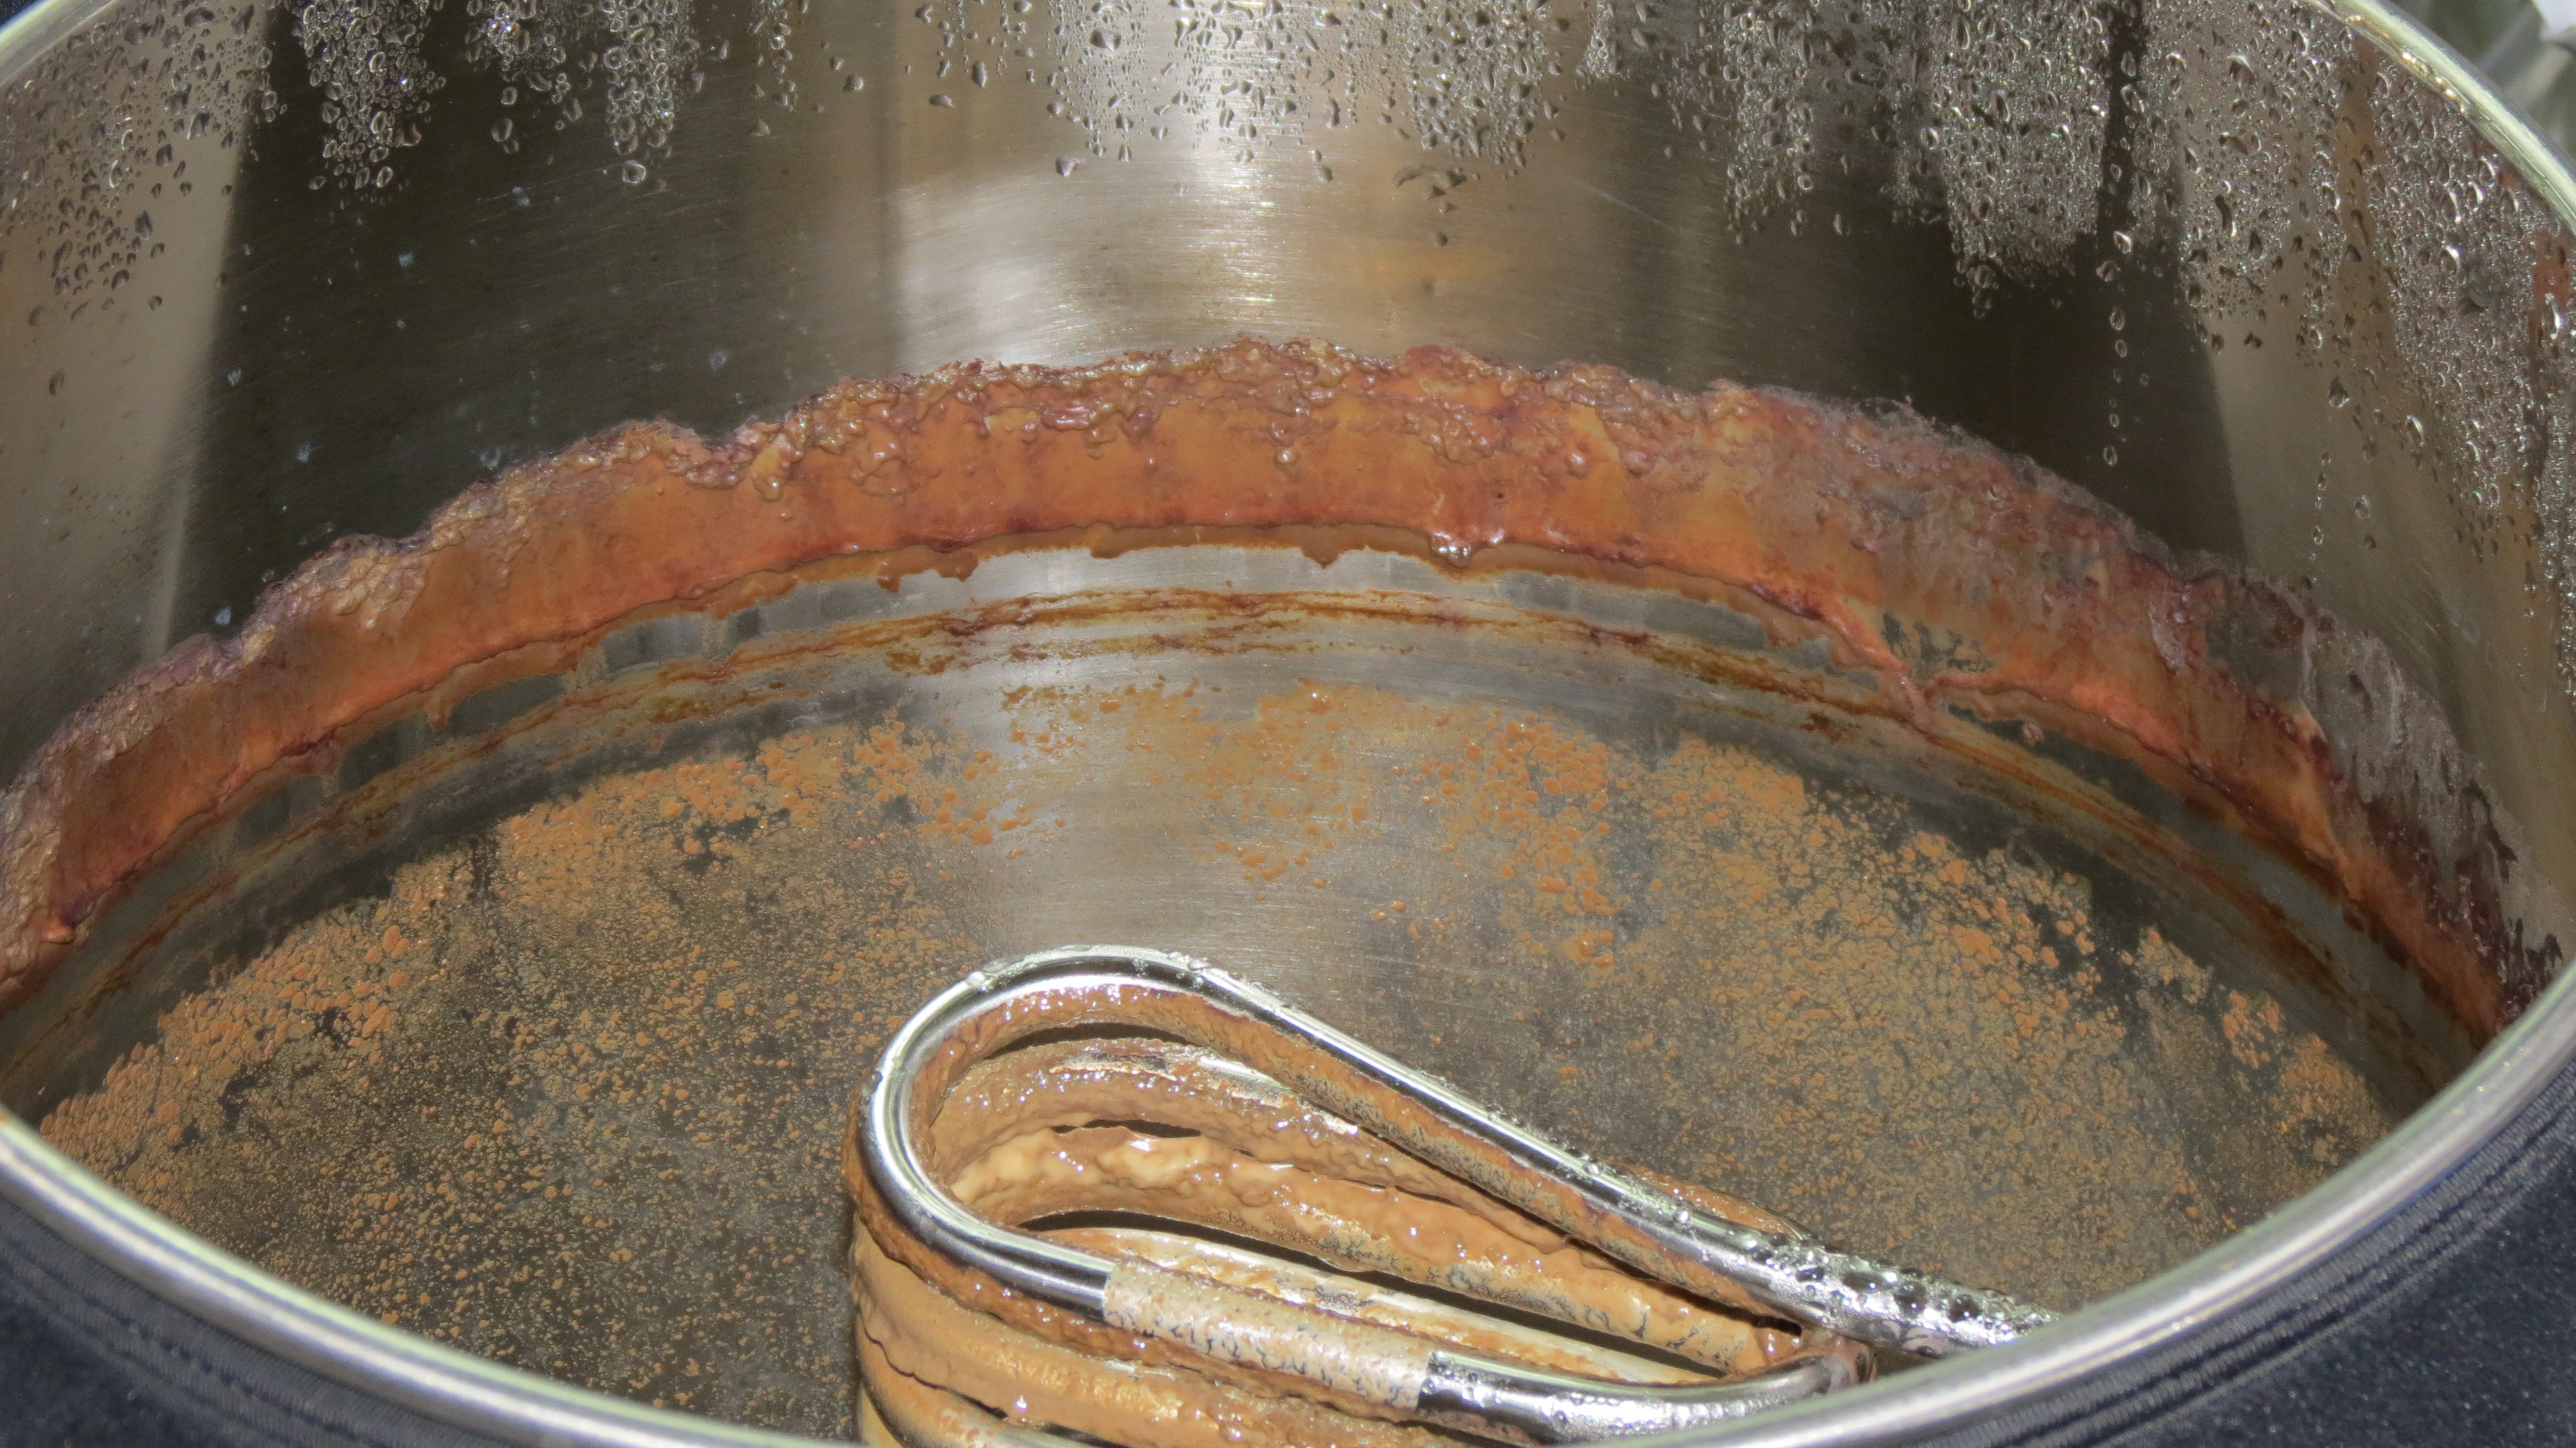
Carefully extend the evaporator into the cooler. You don't want to stress or kink the copper lines. I used a 34 quart cooler, which will be filled to about 5.5 gallons of glycol solution.
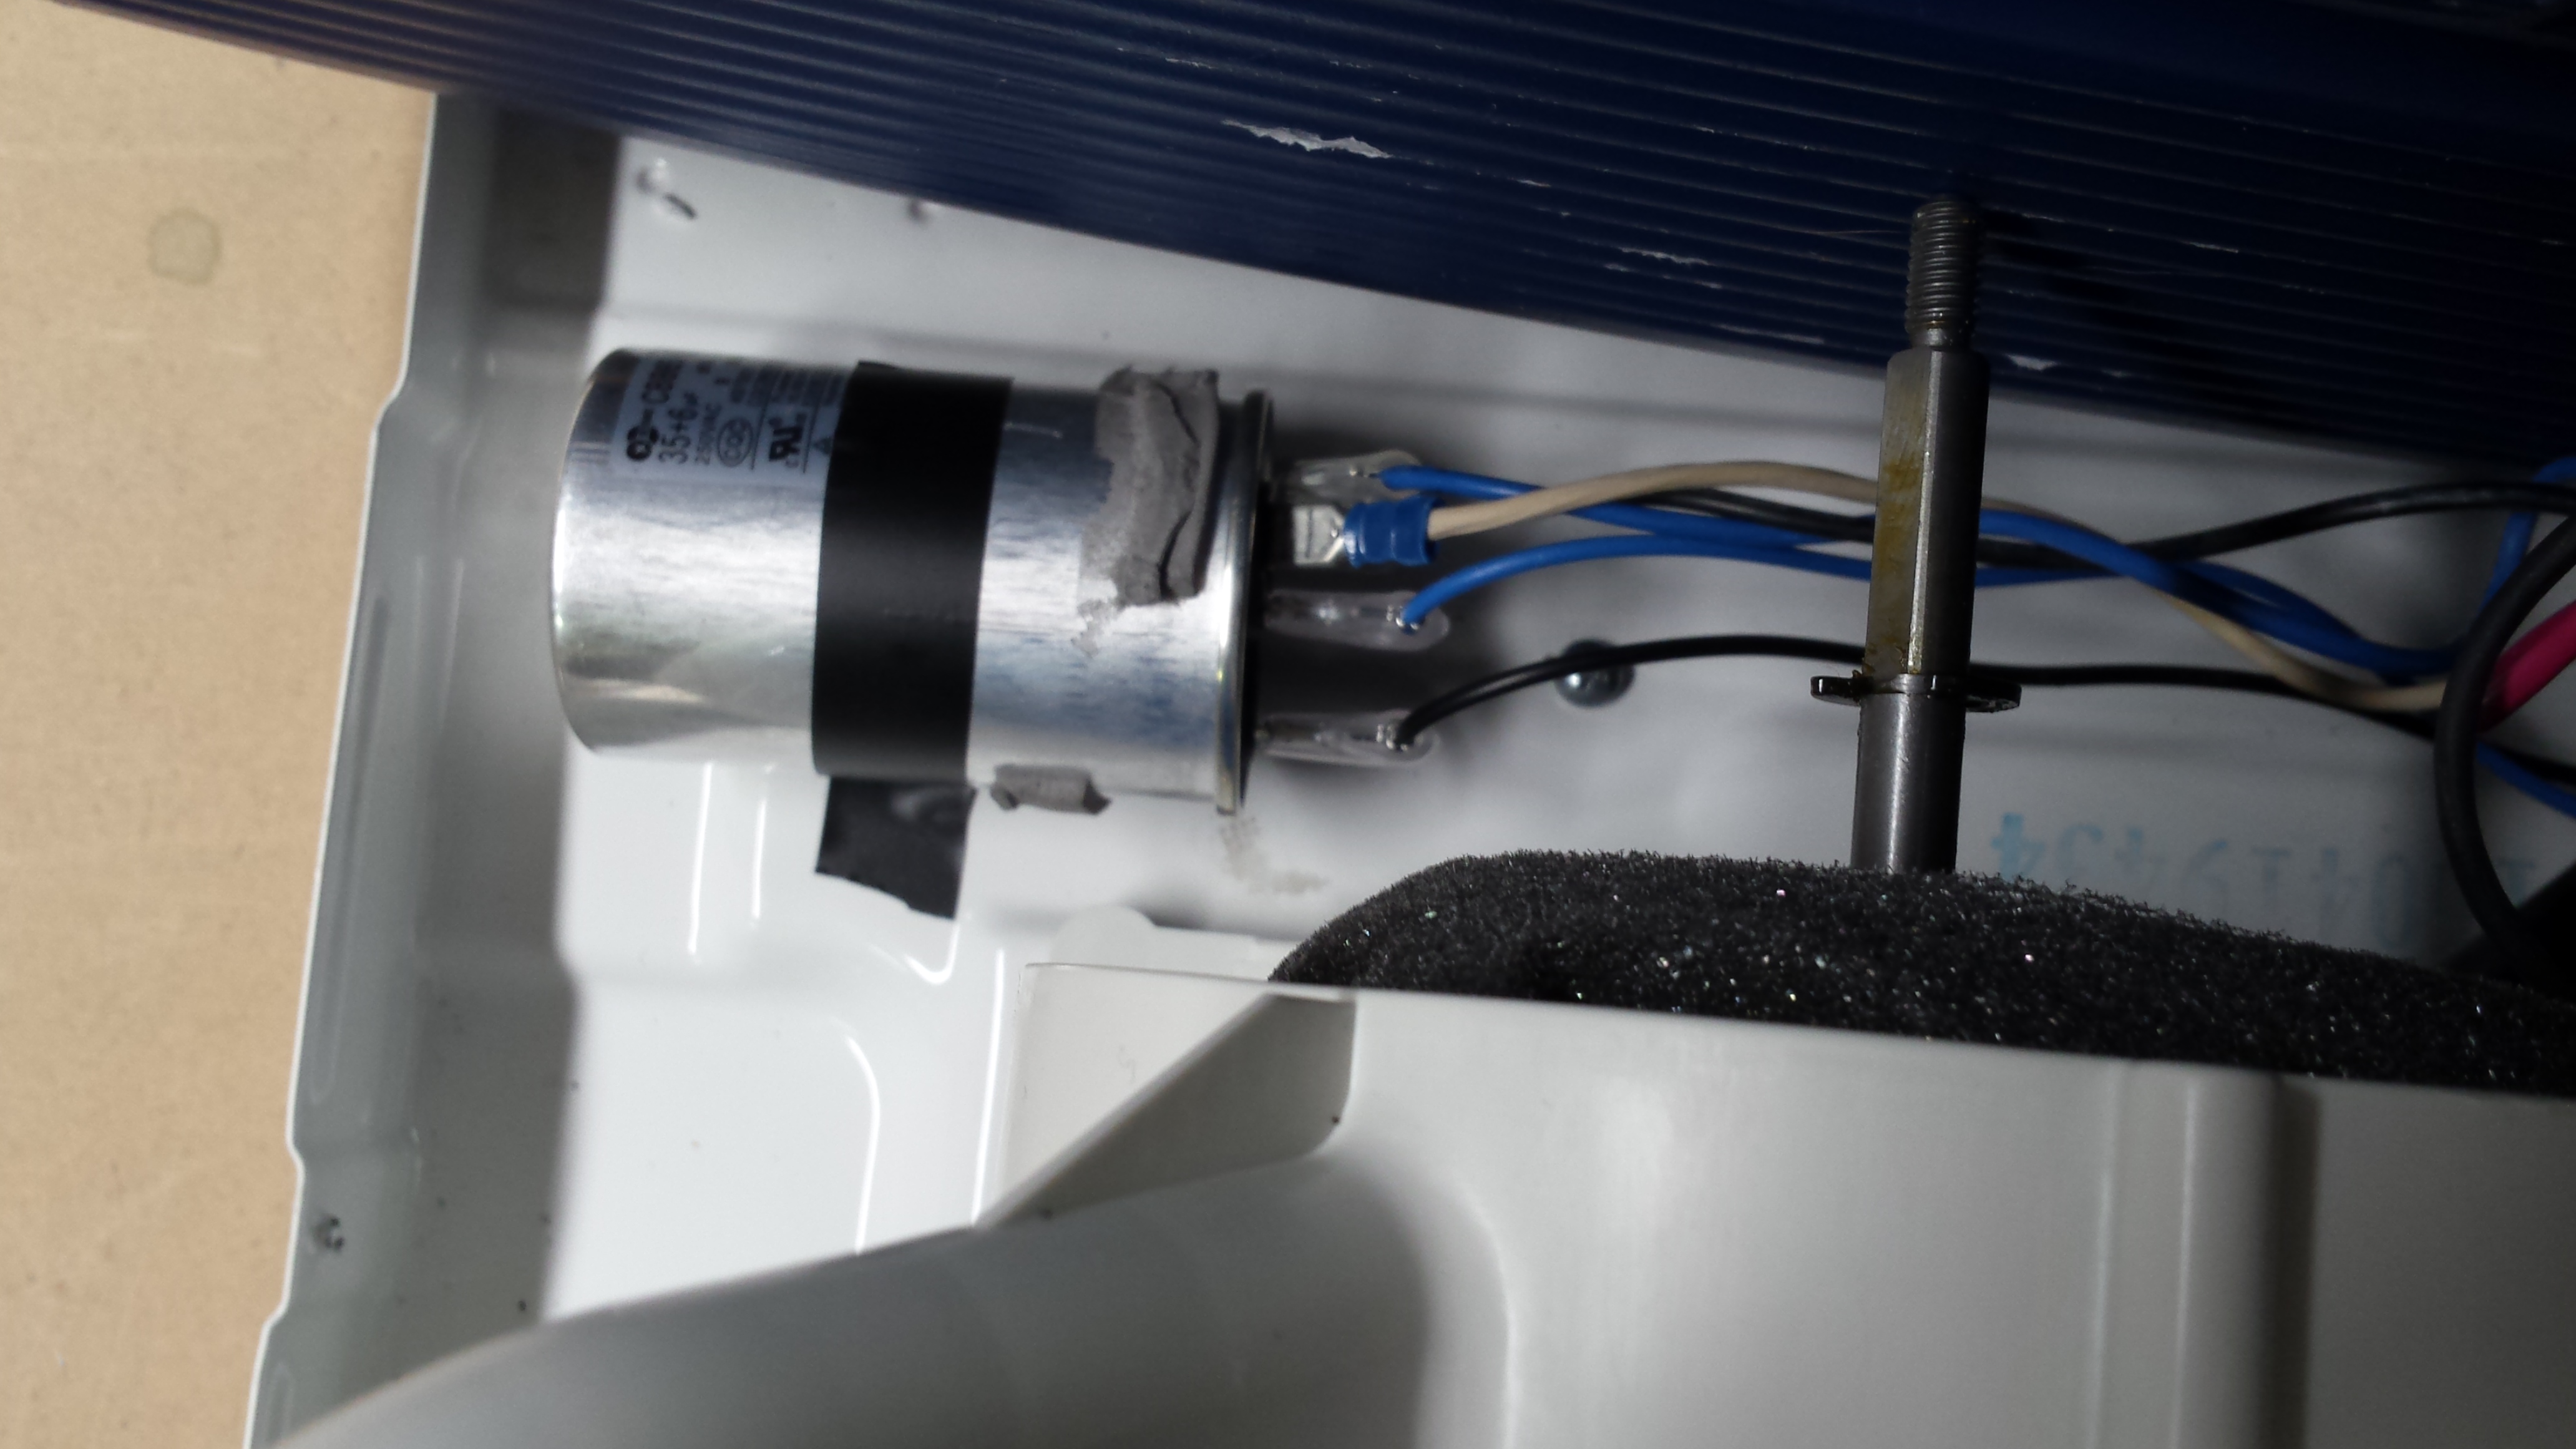
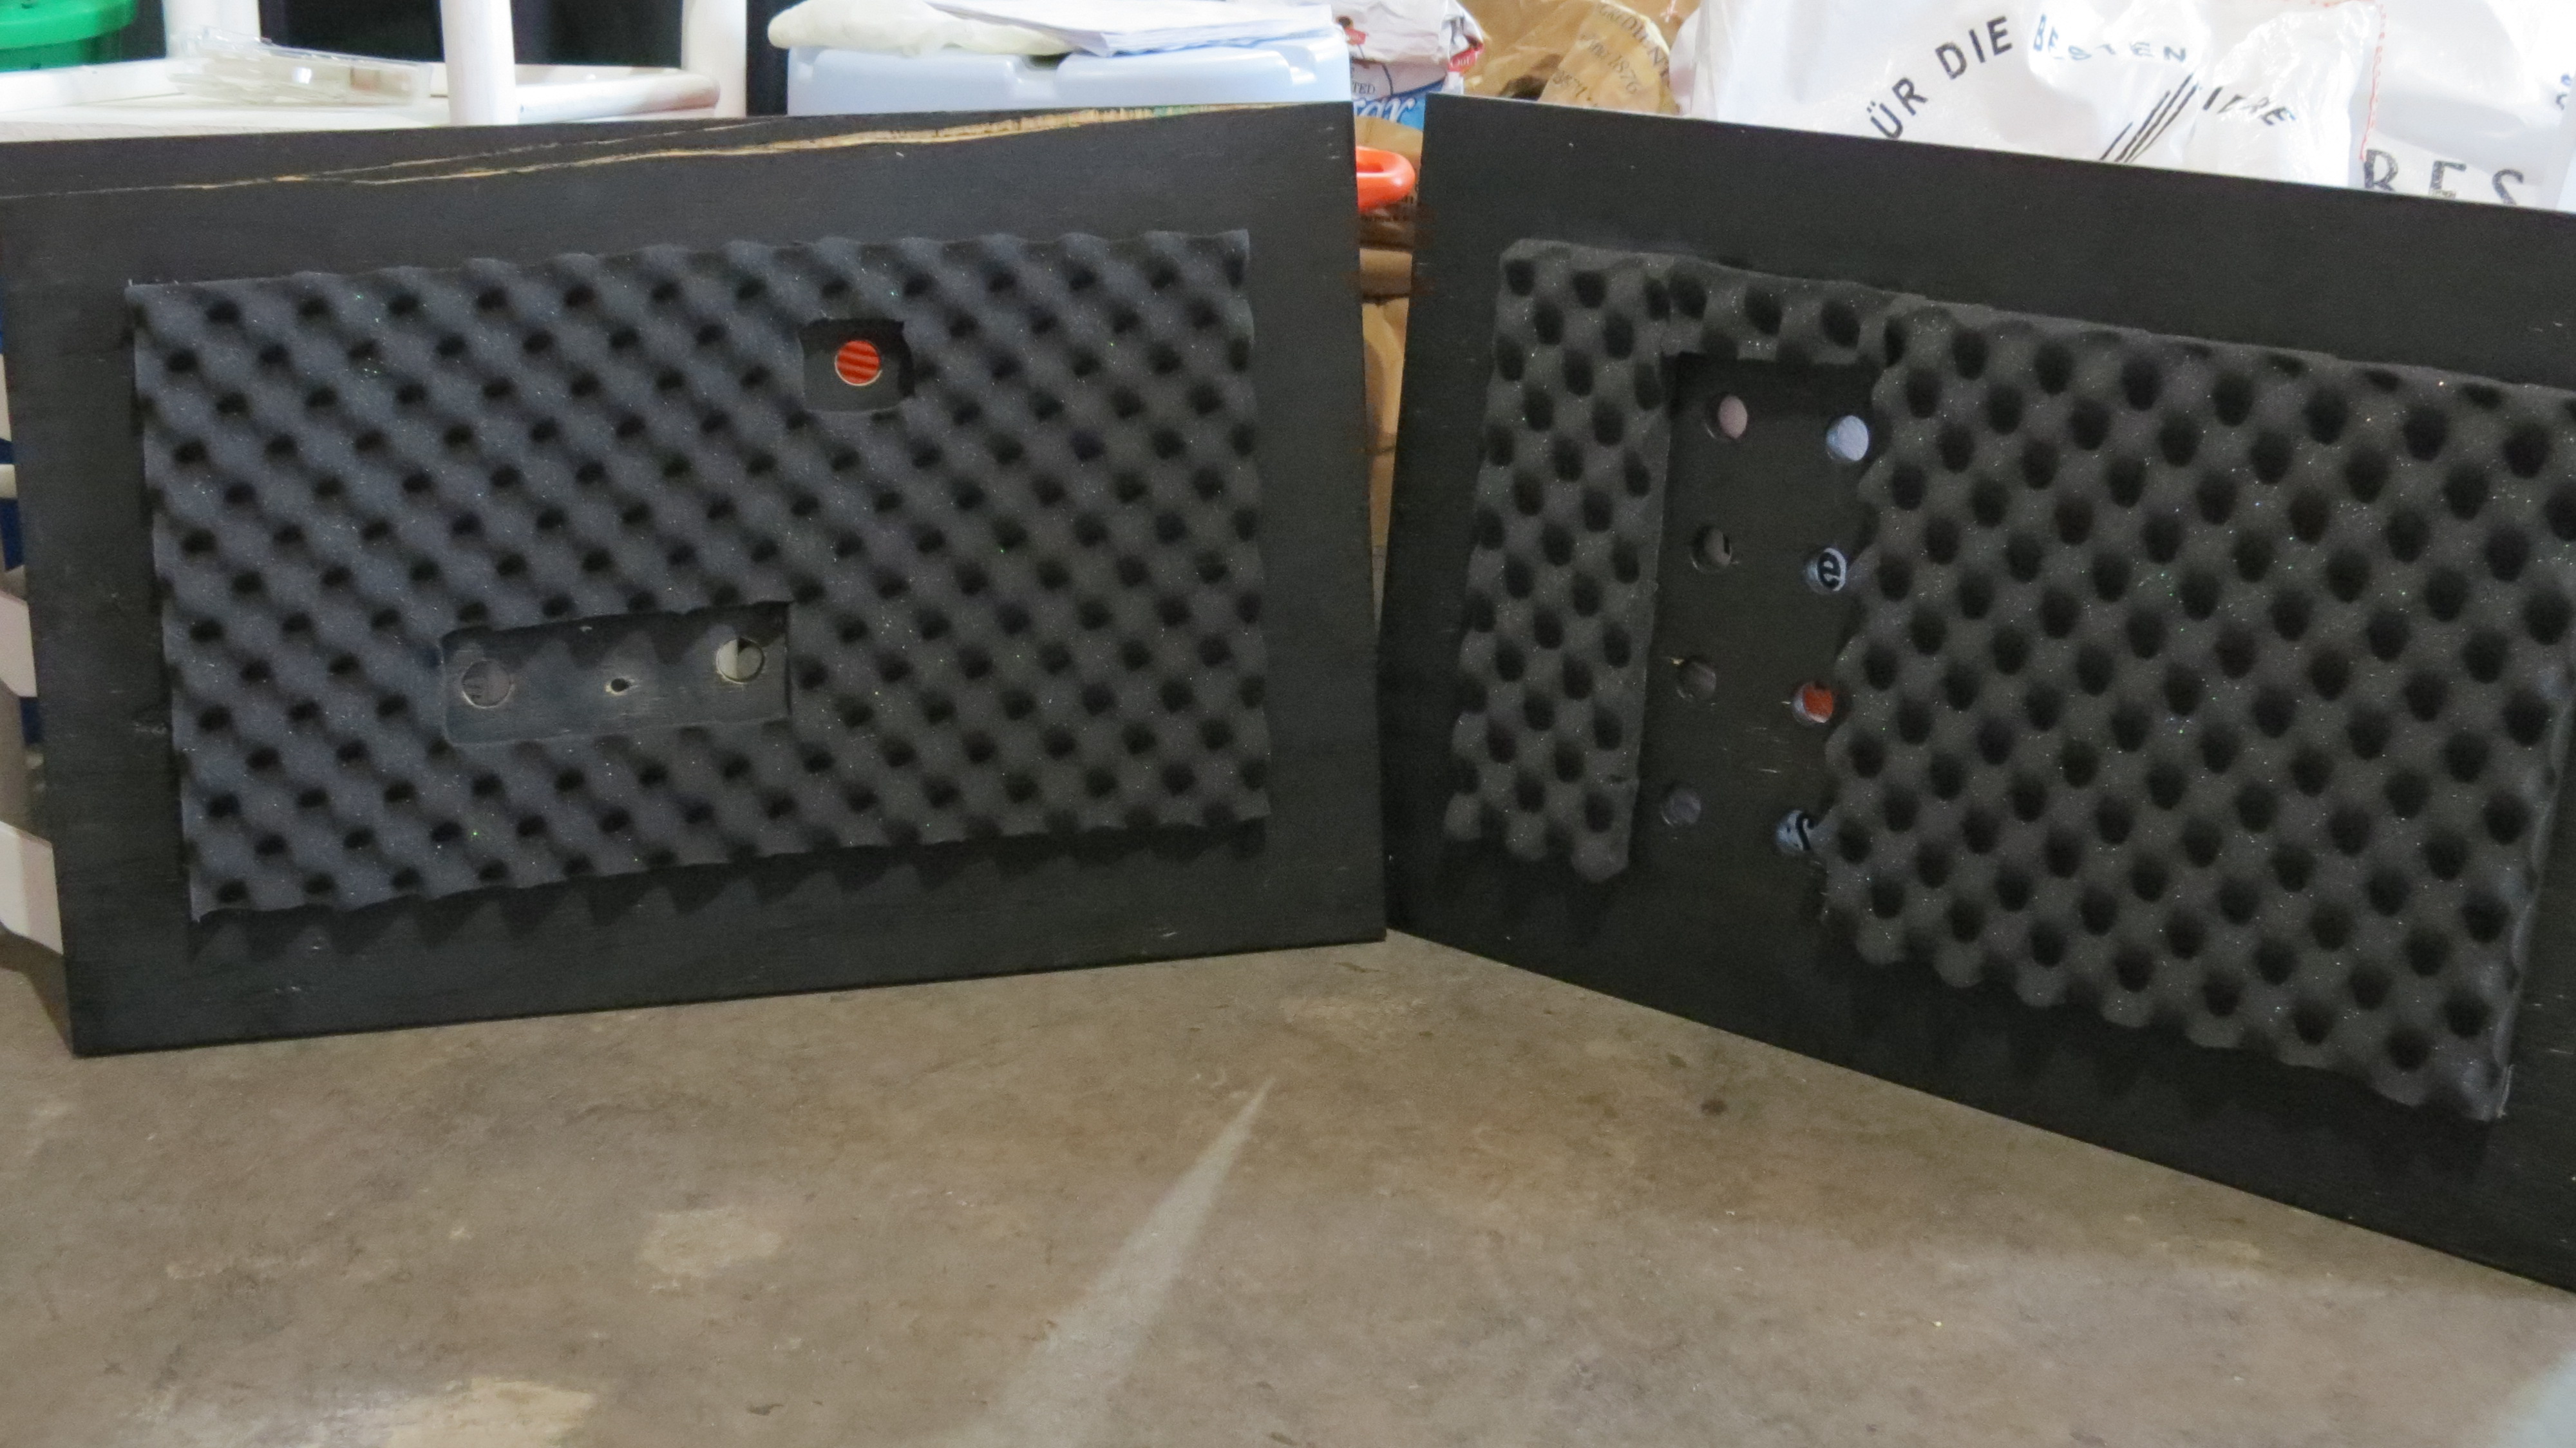
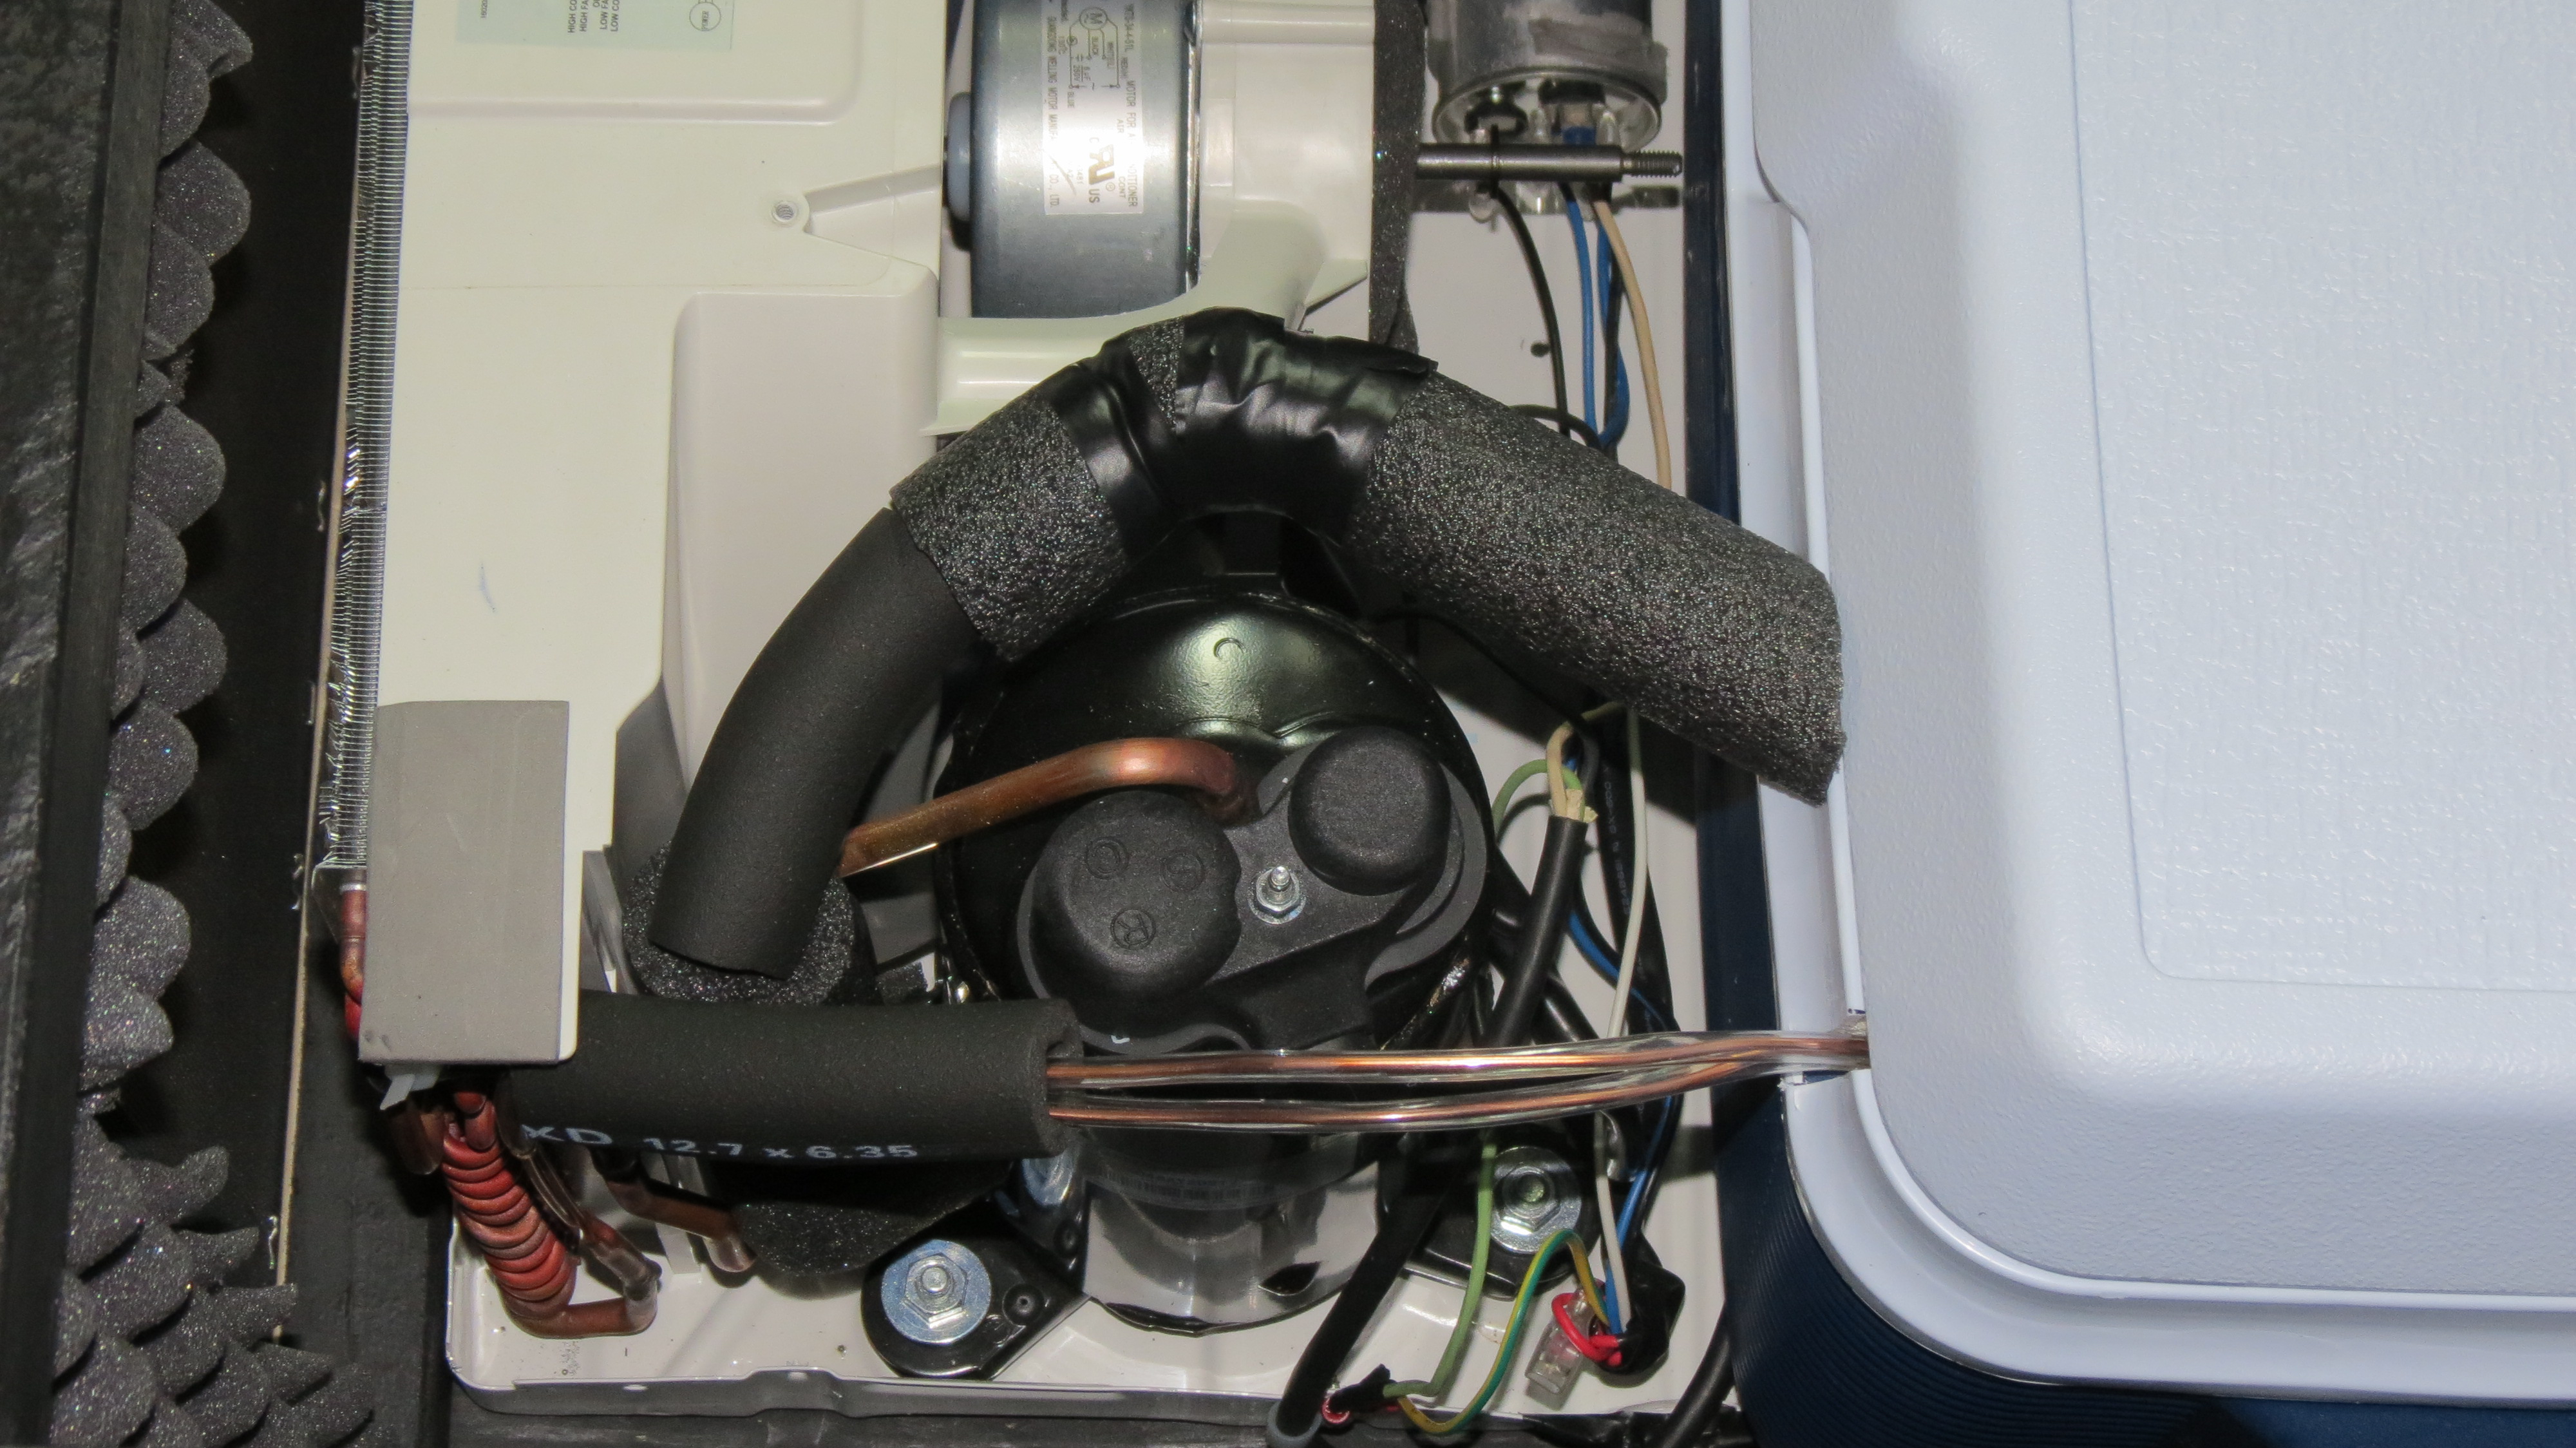
Next bypass the OEM thermostat and remove that. Make sure loose components are secured:
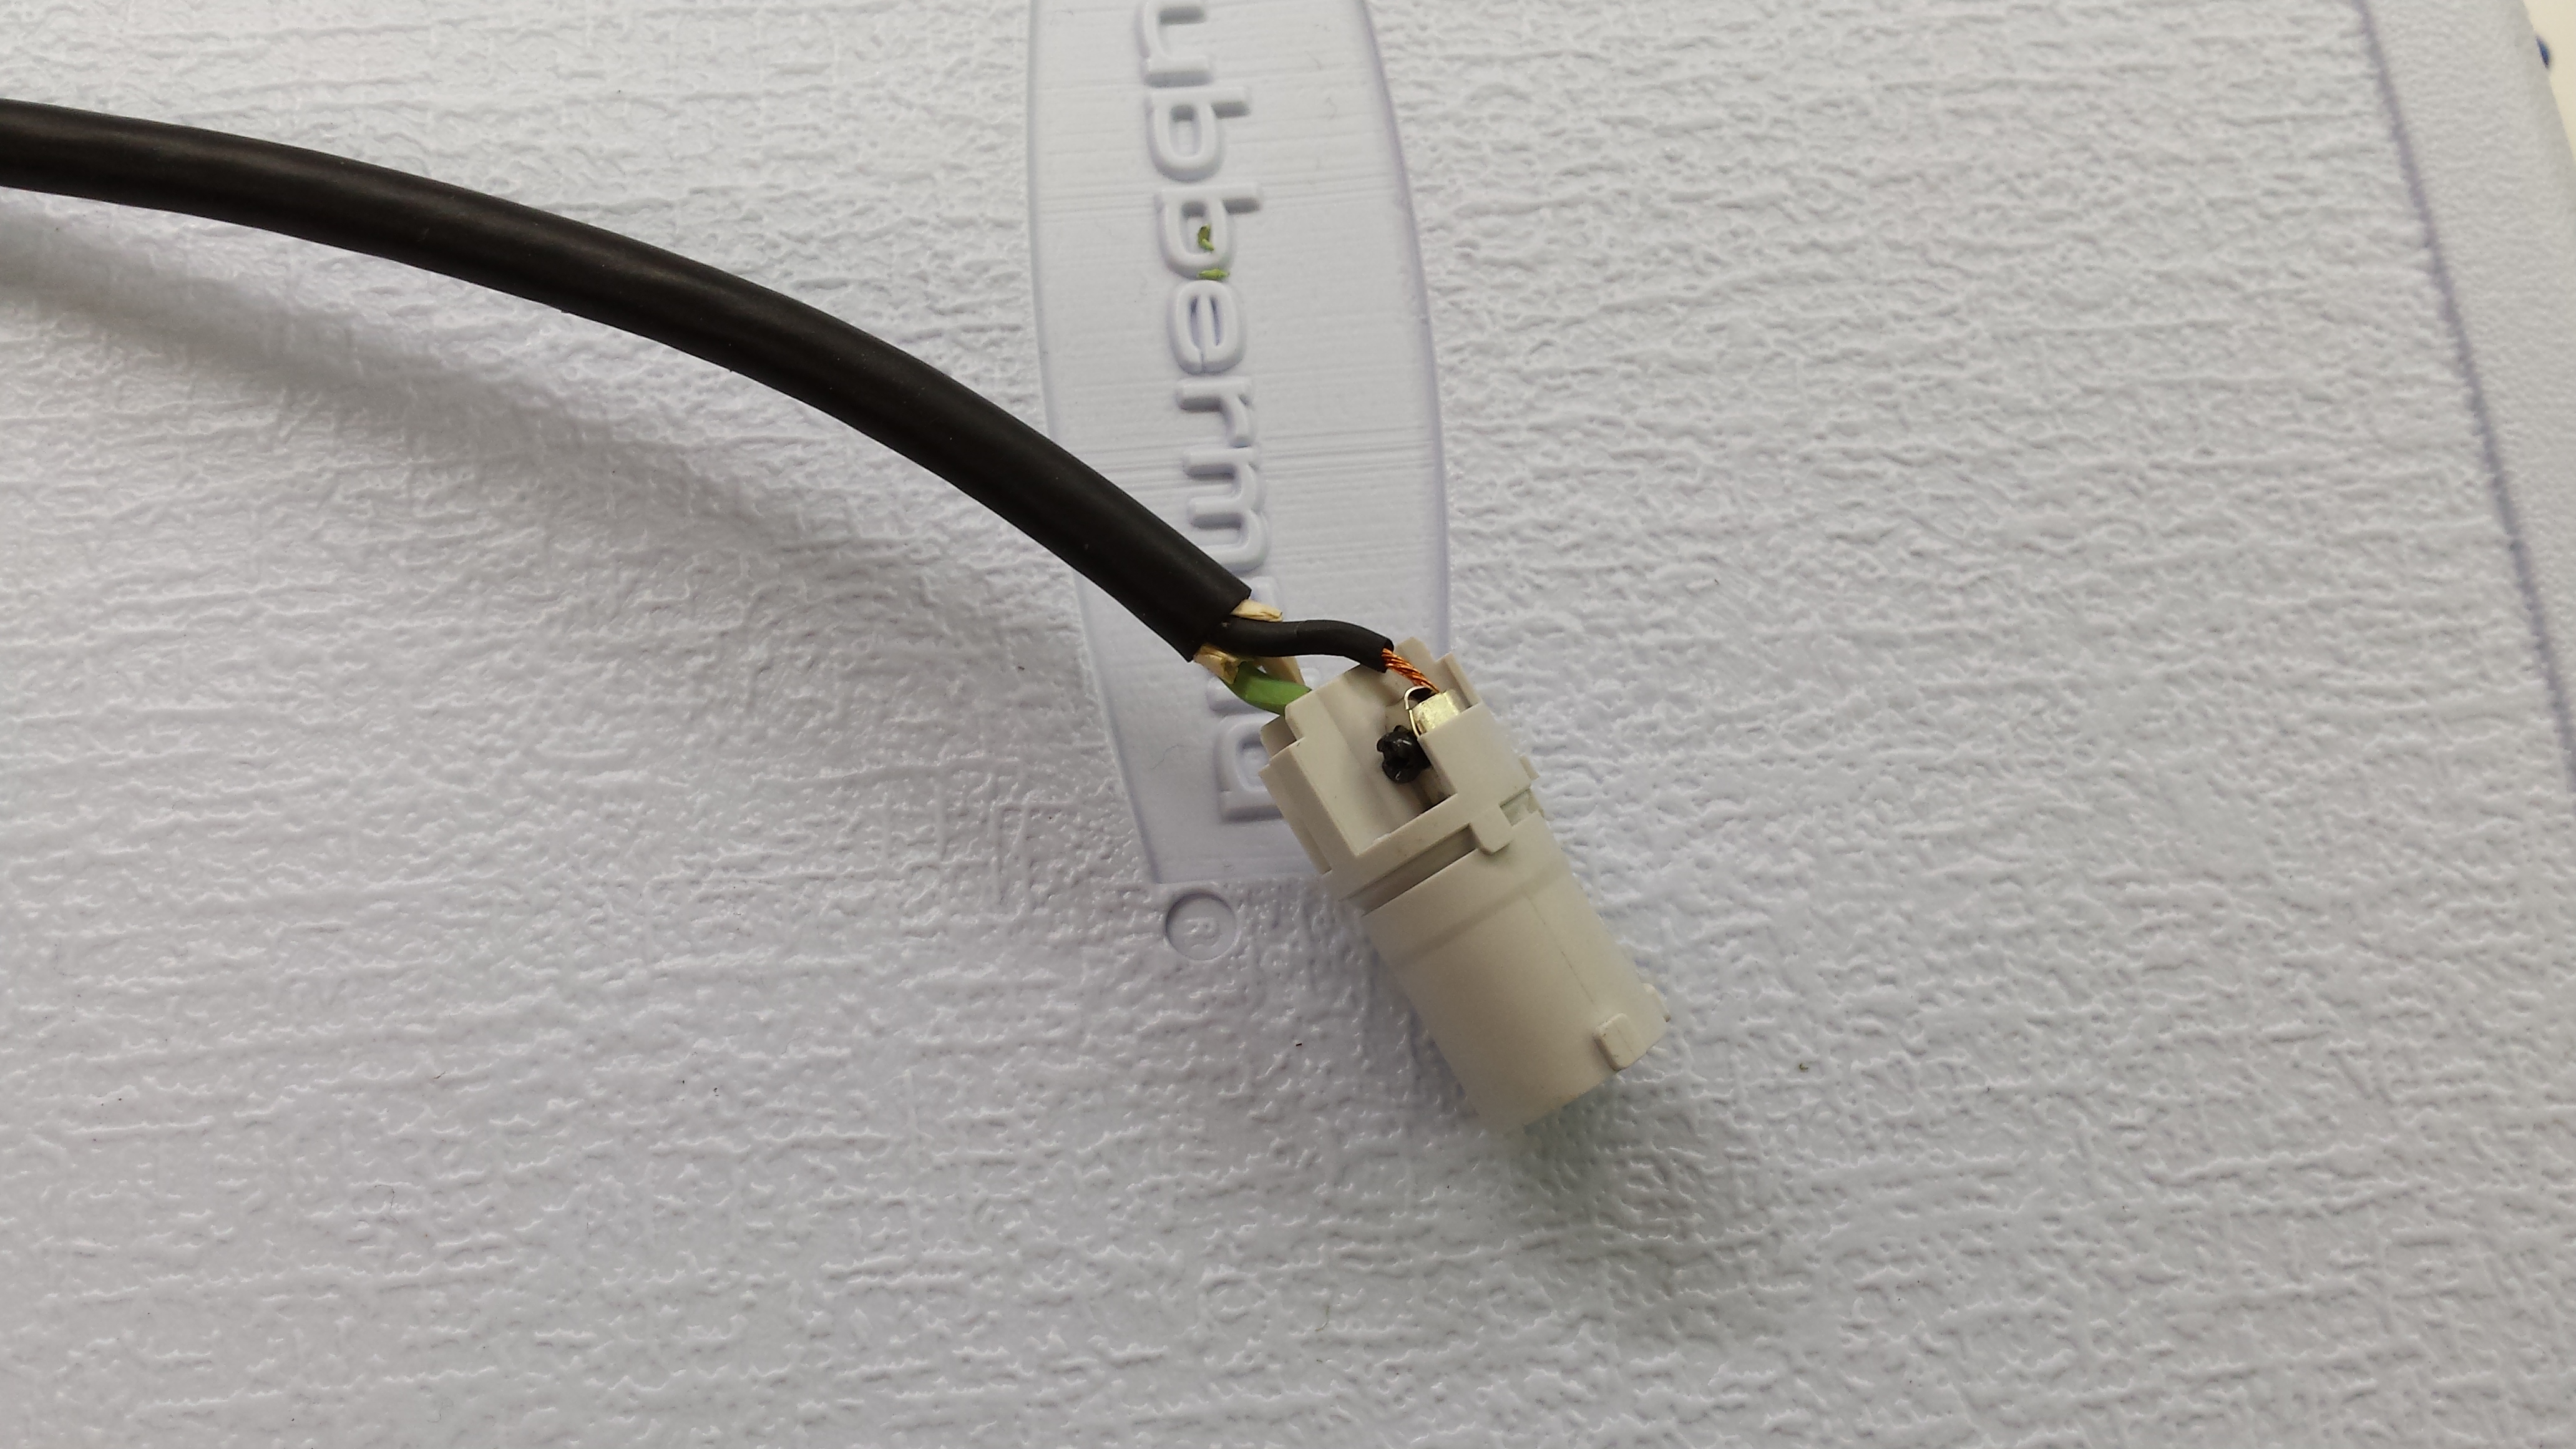
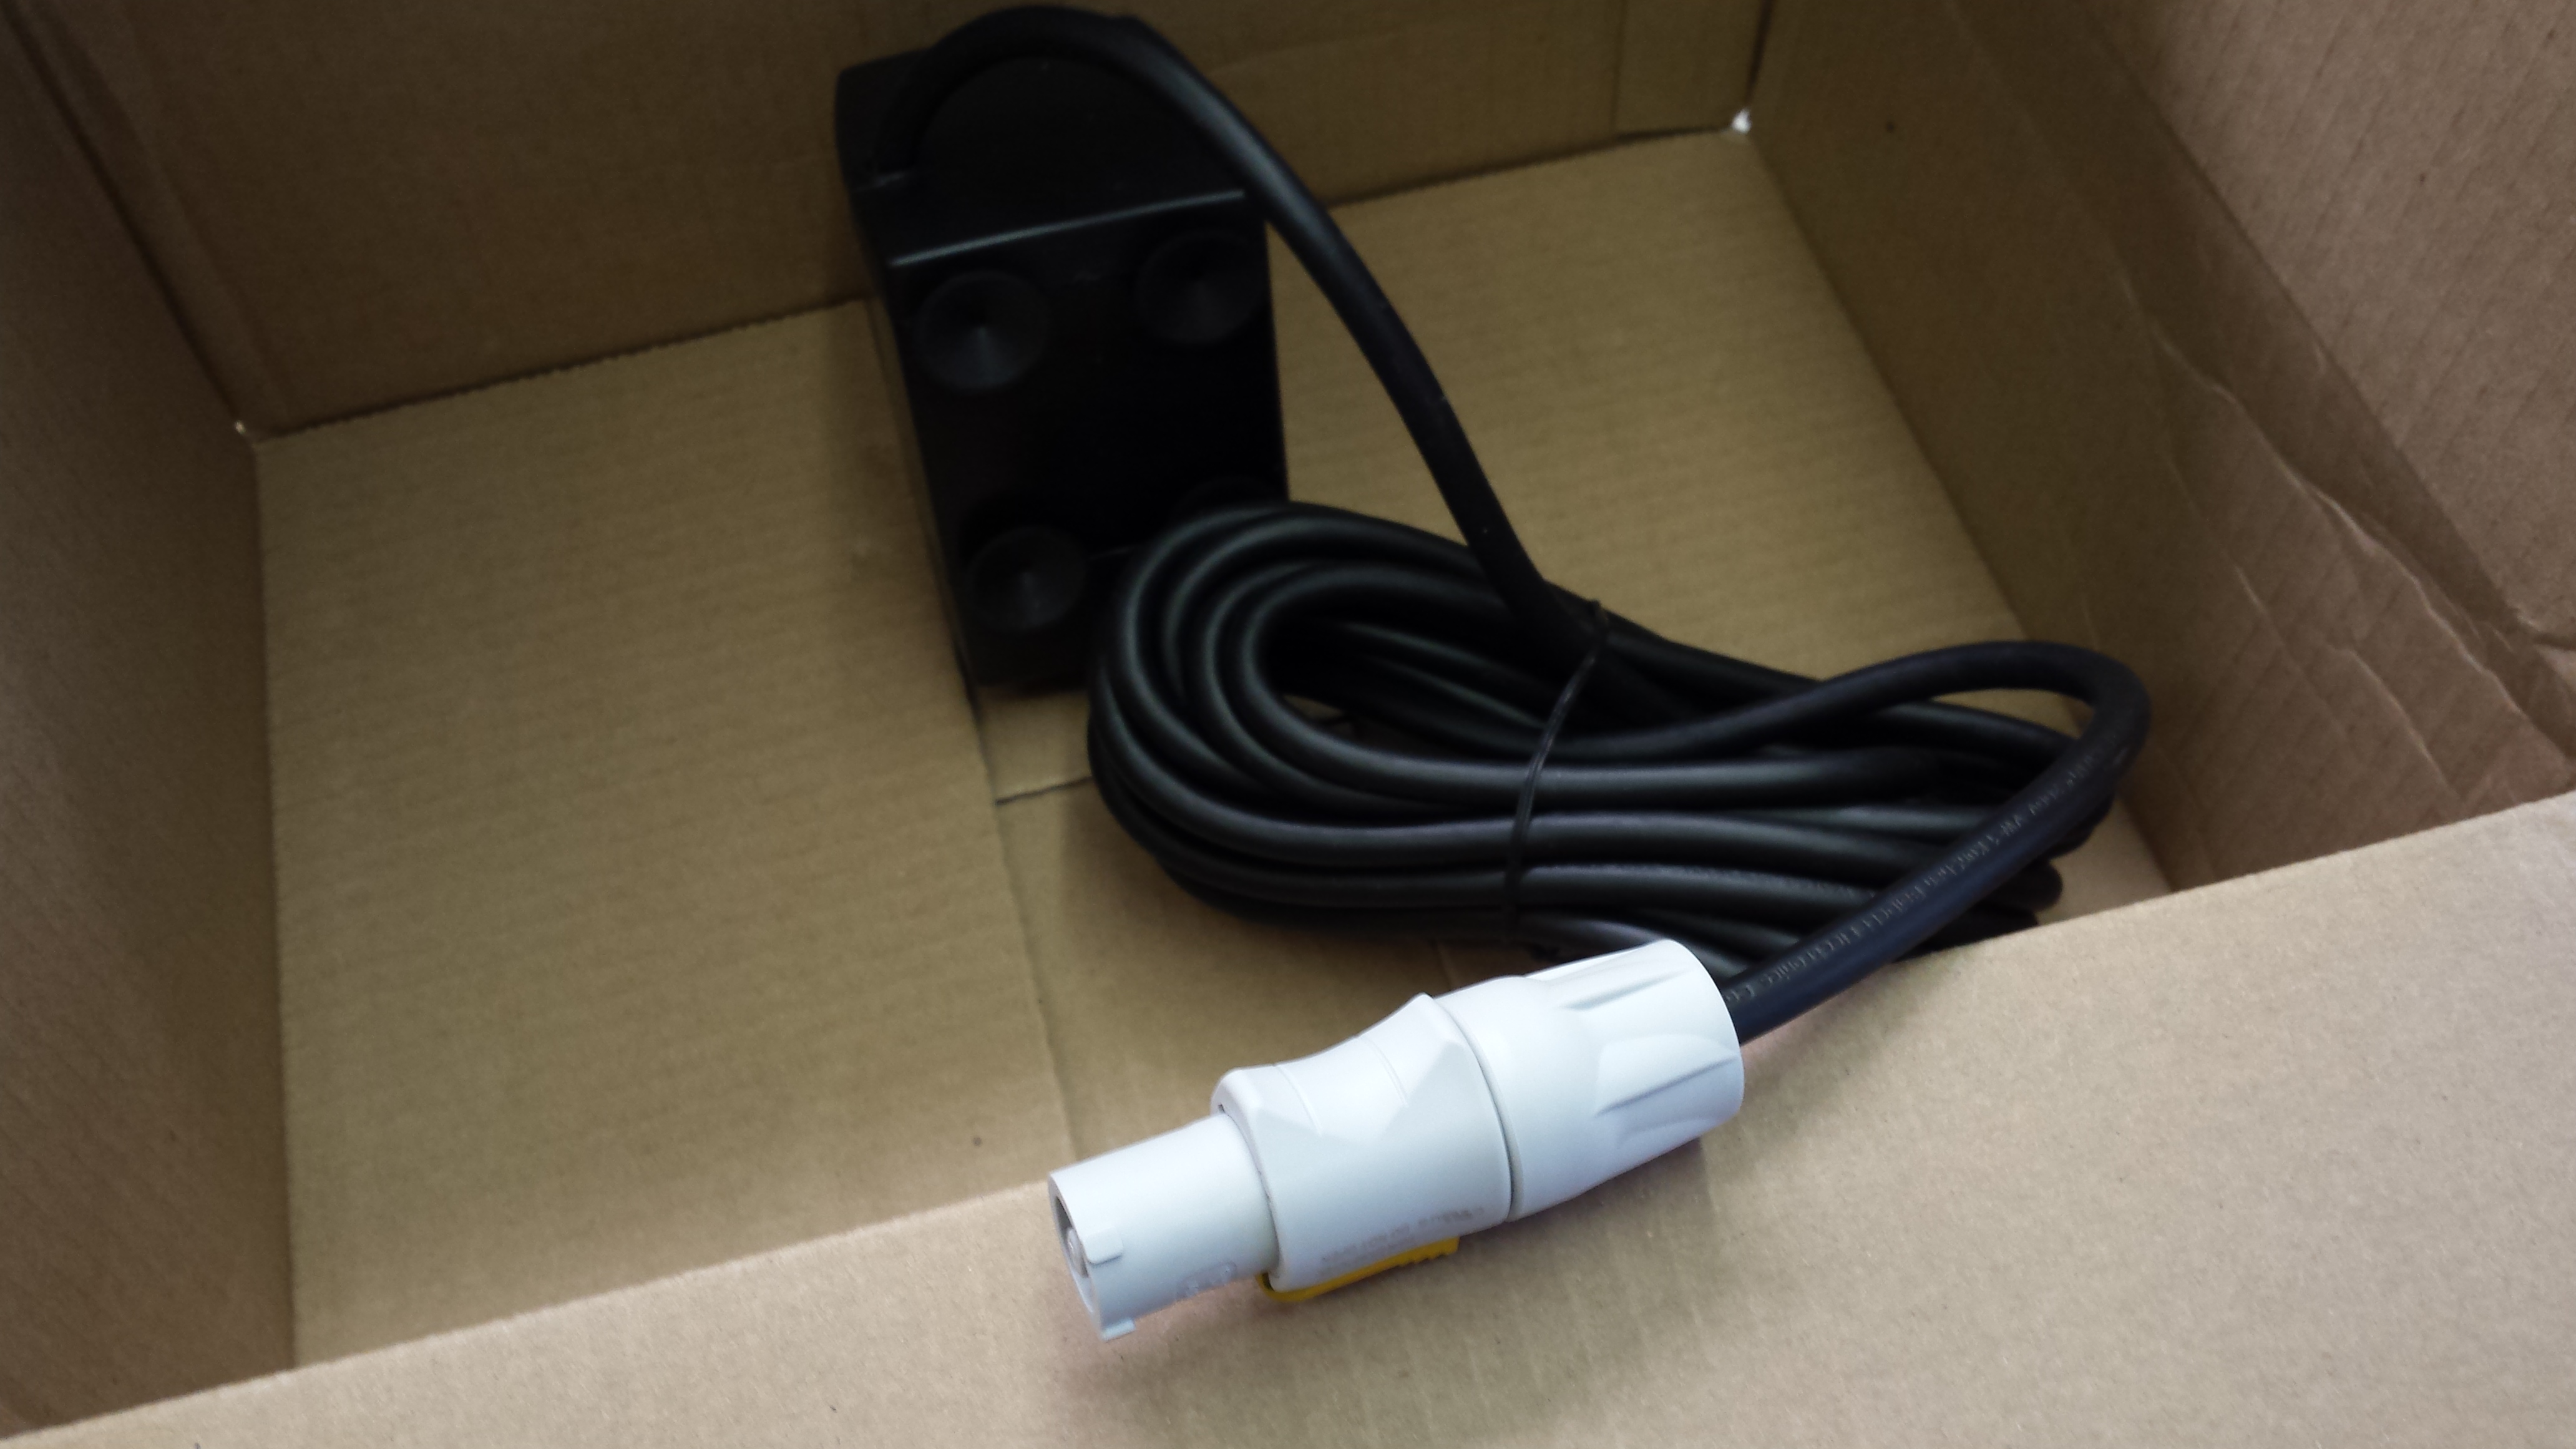
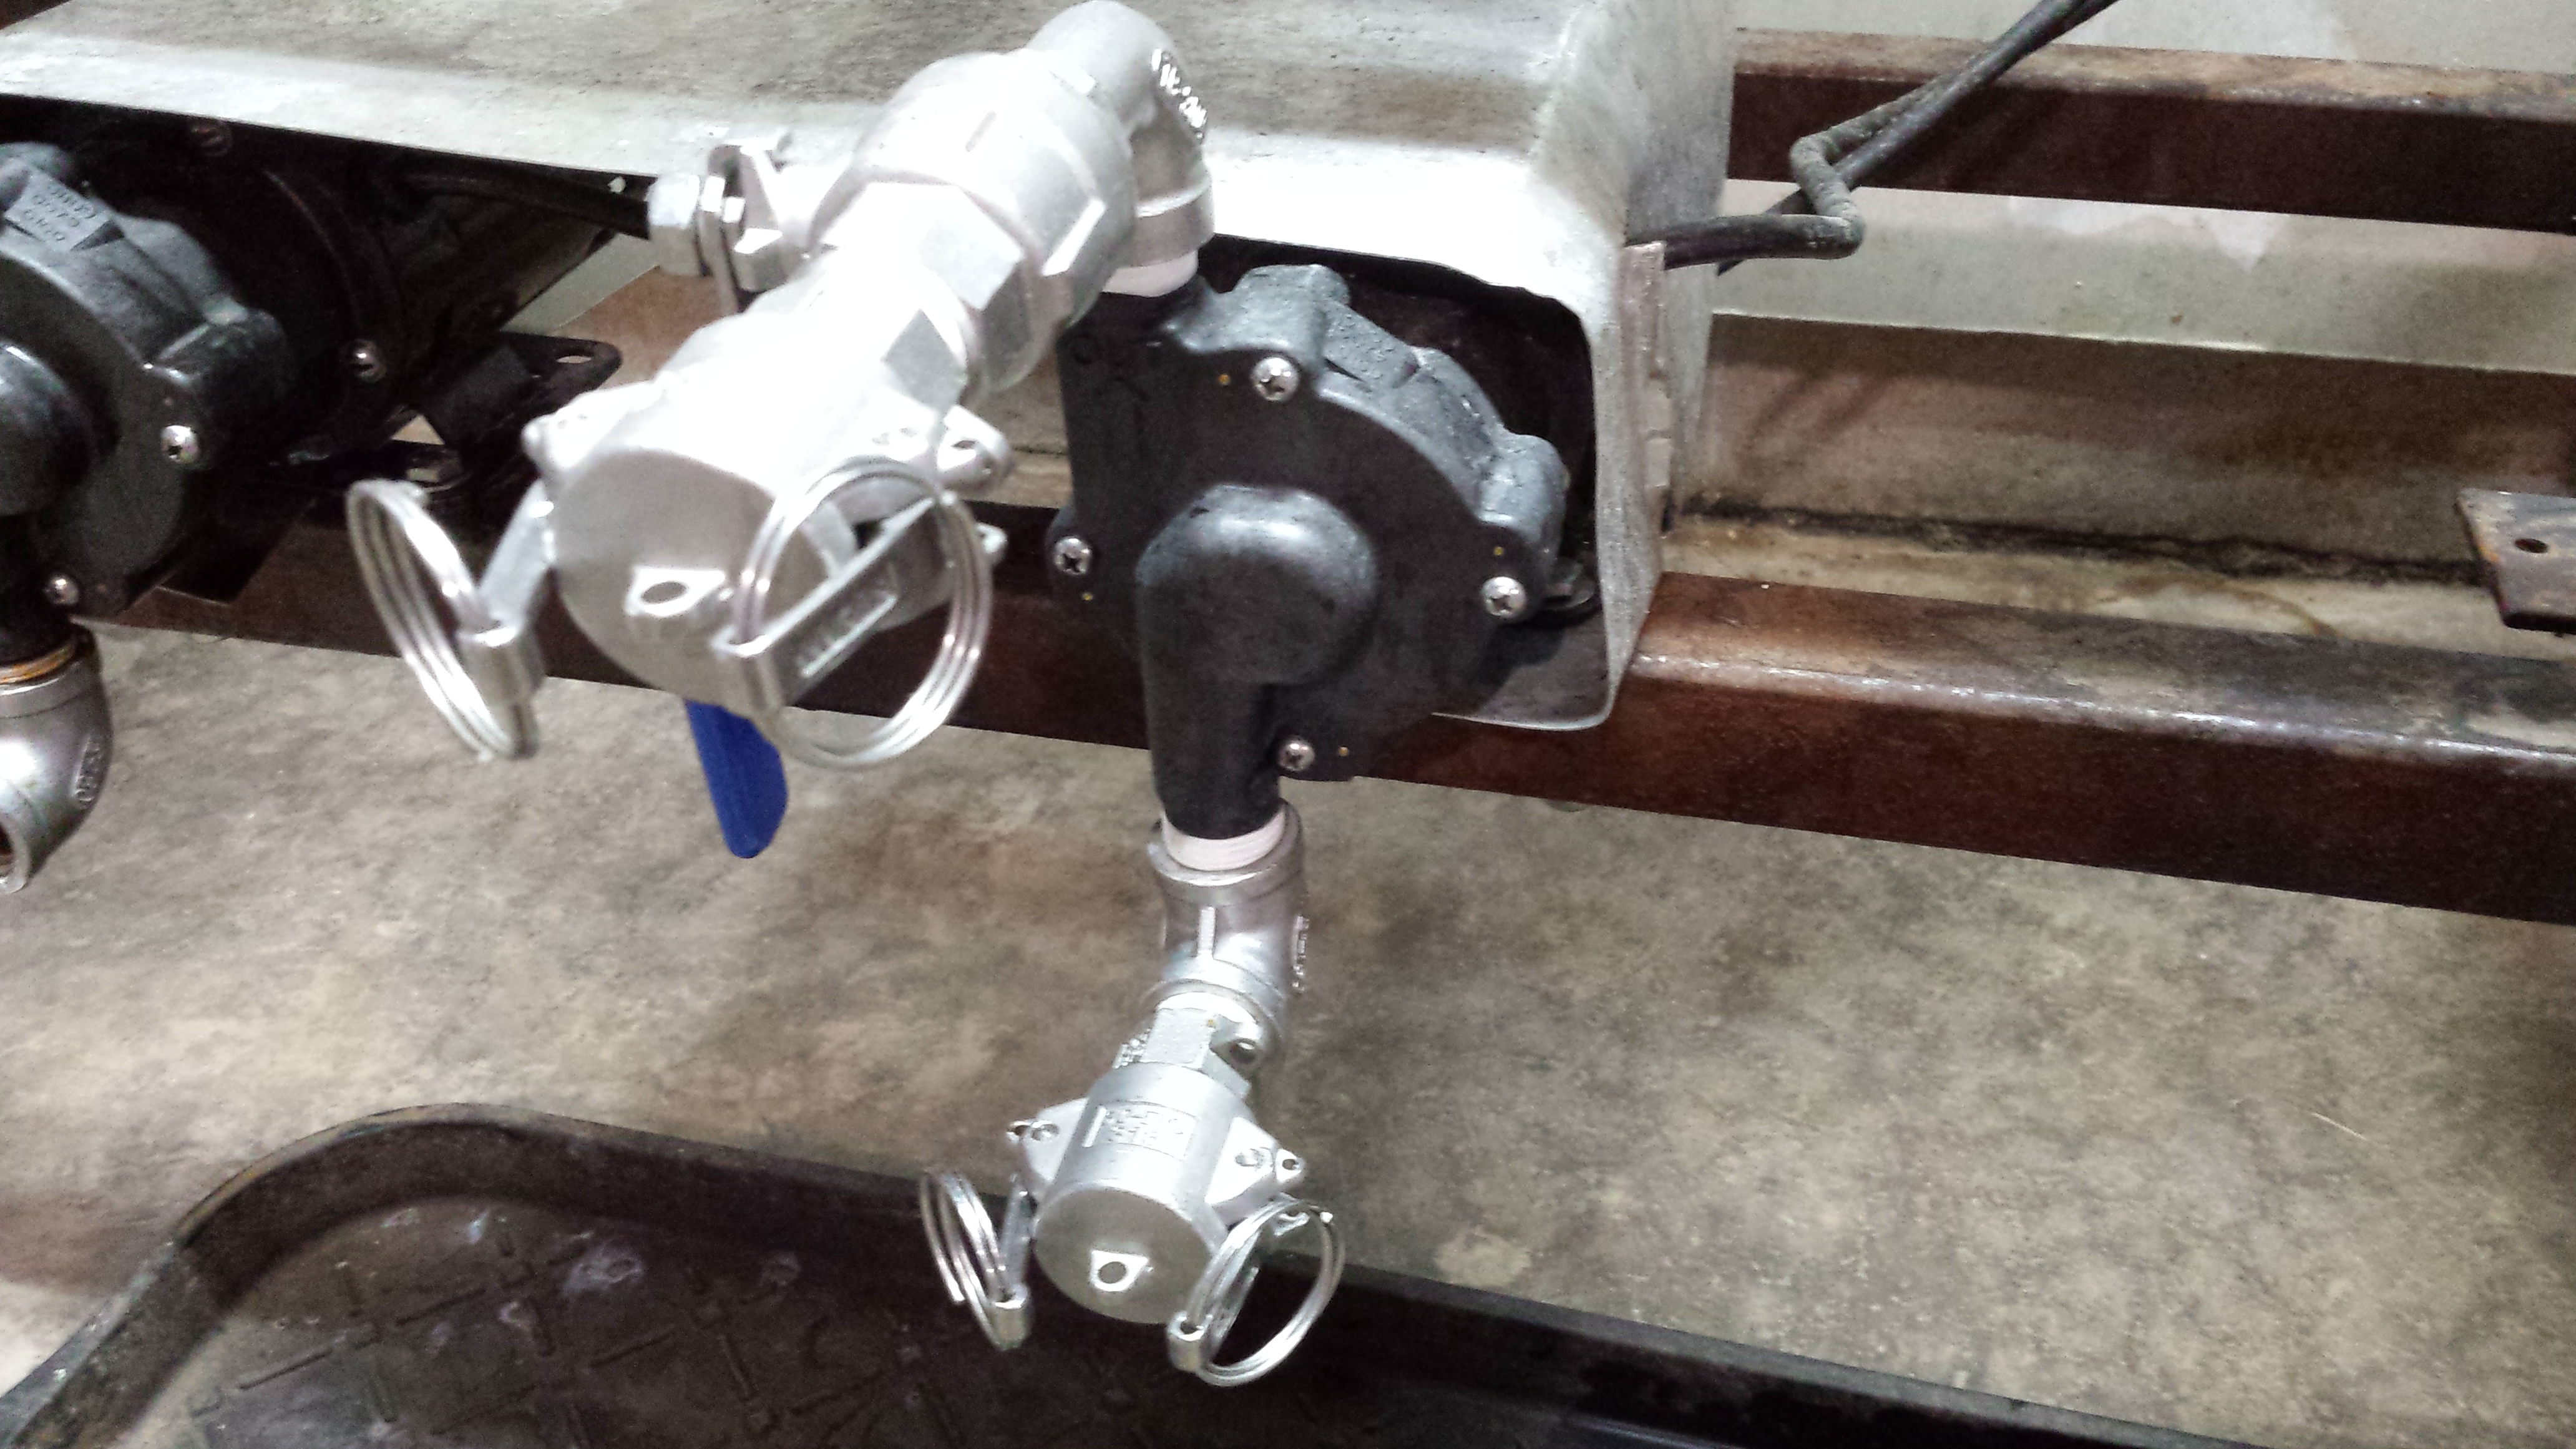
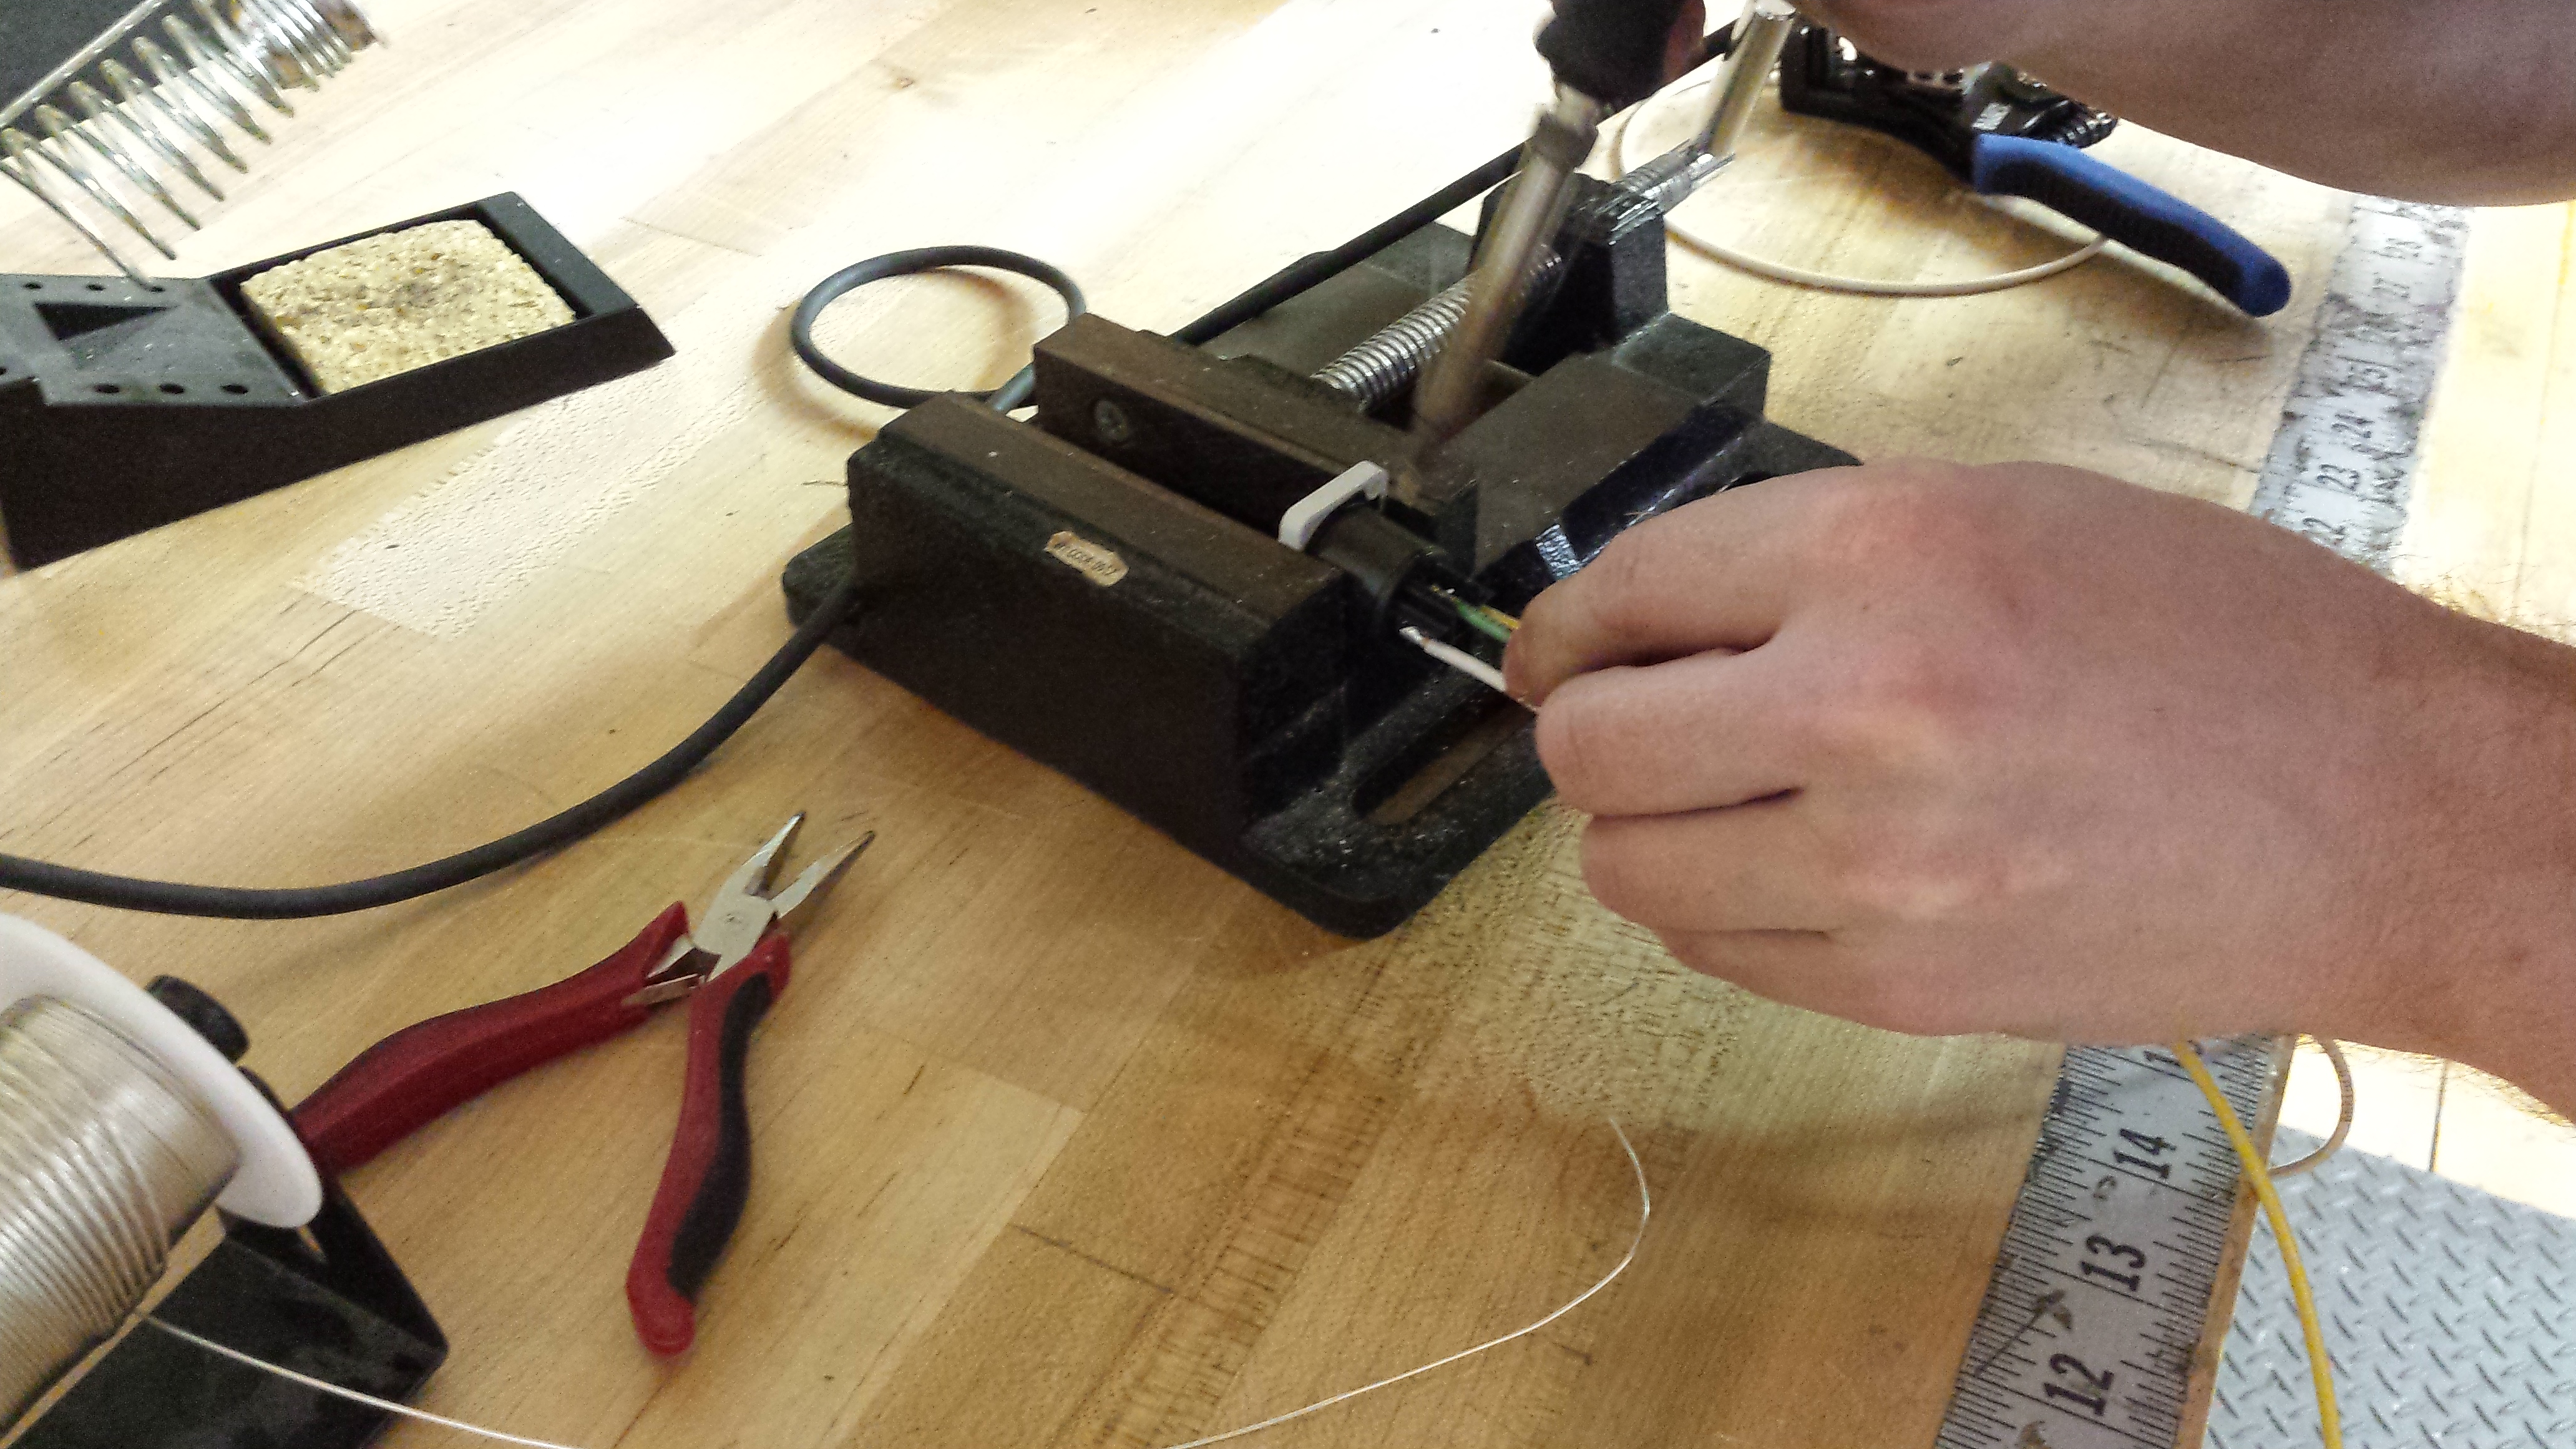
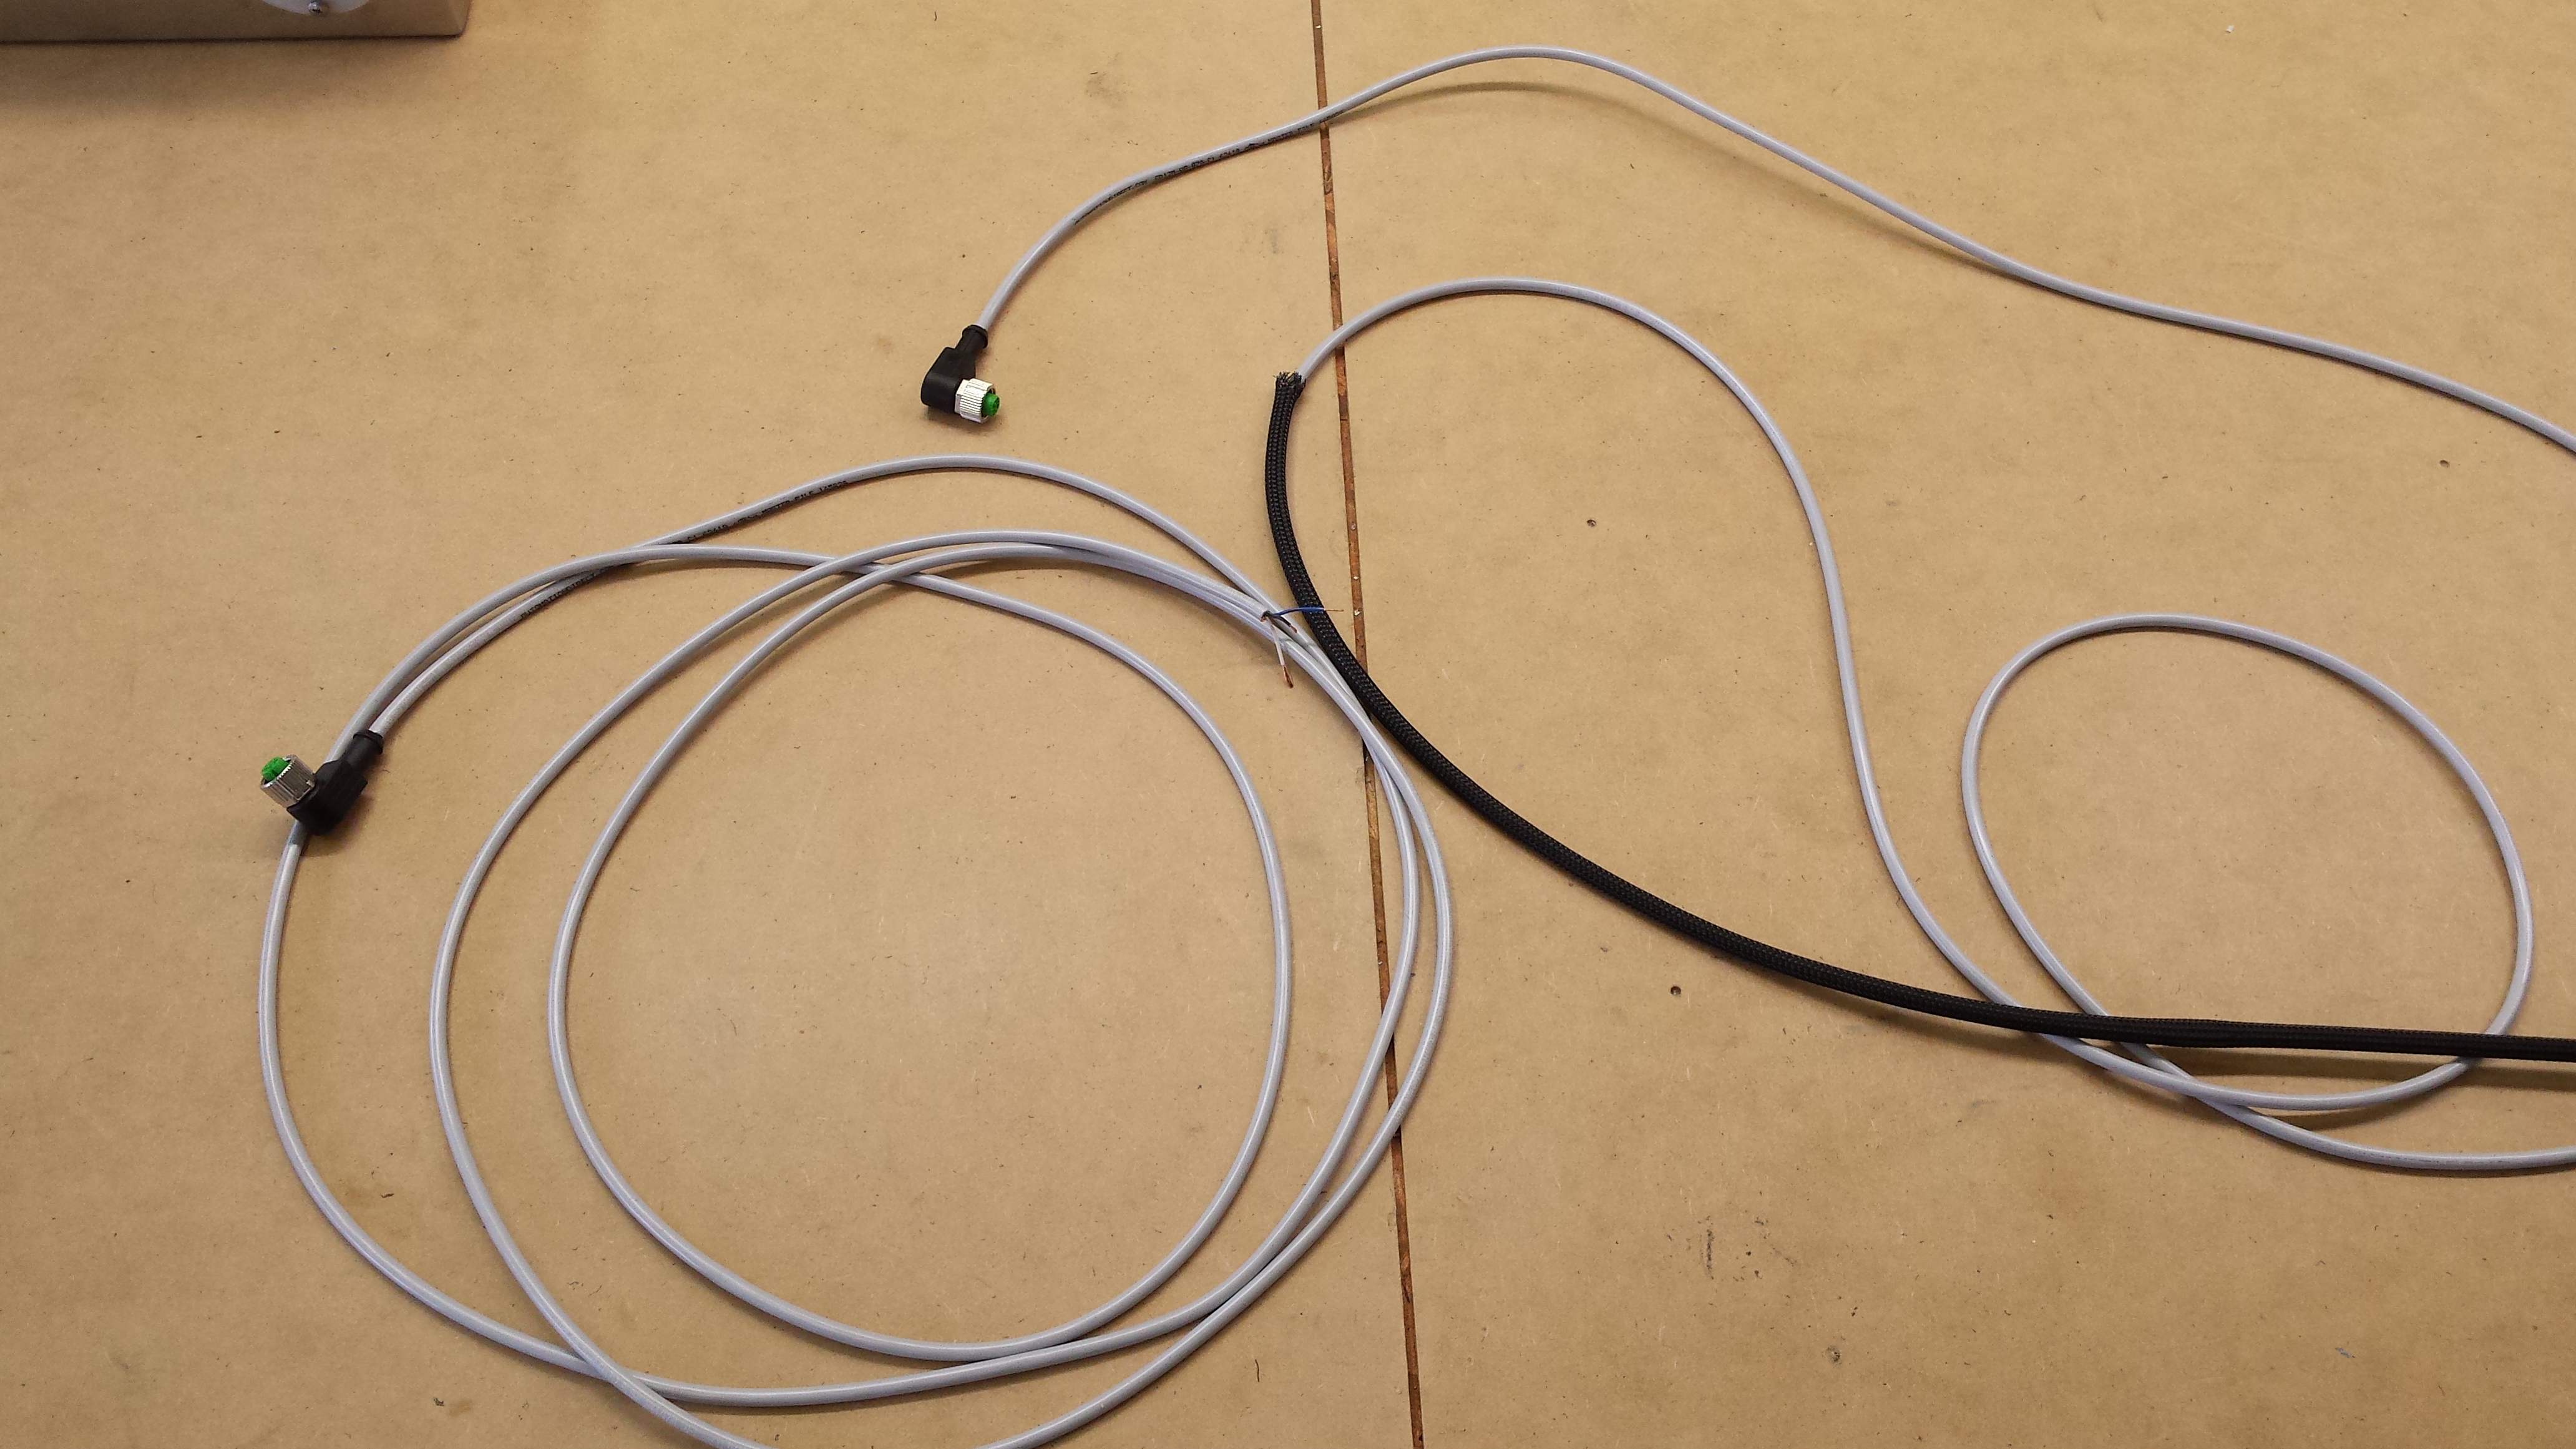
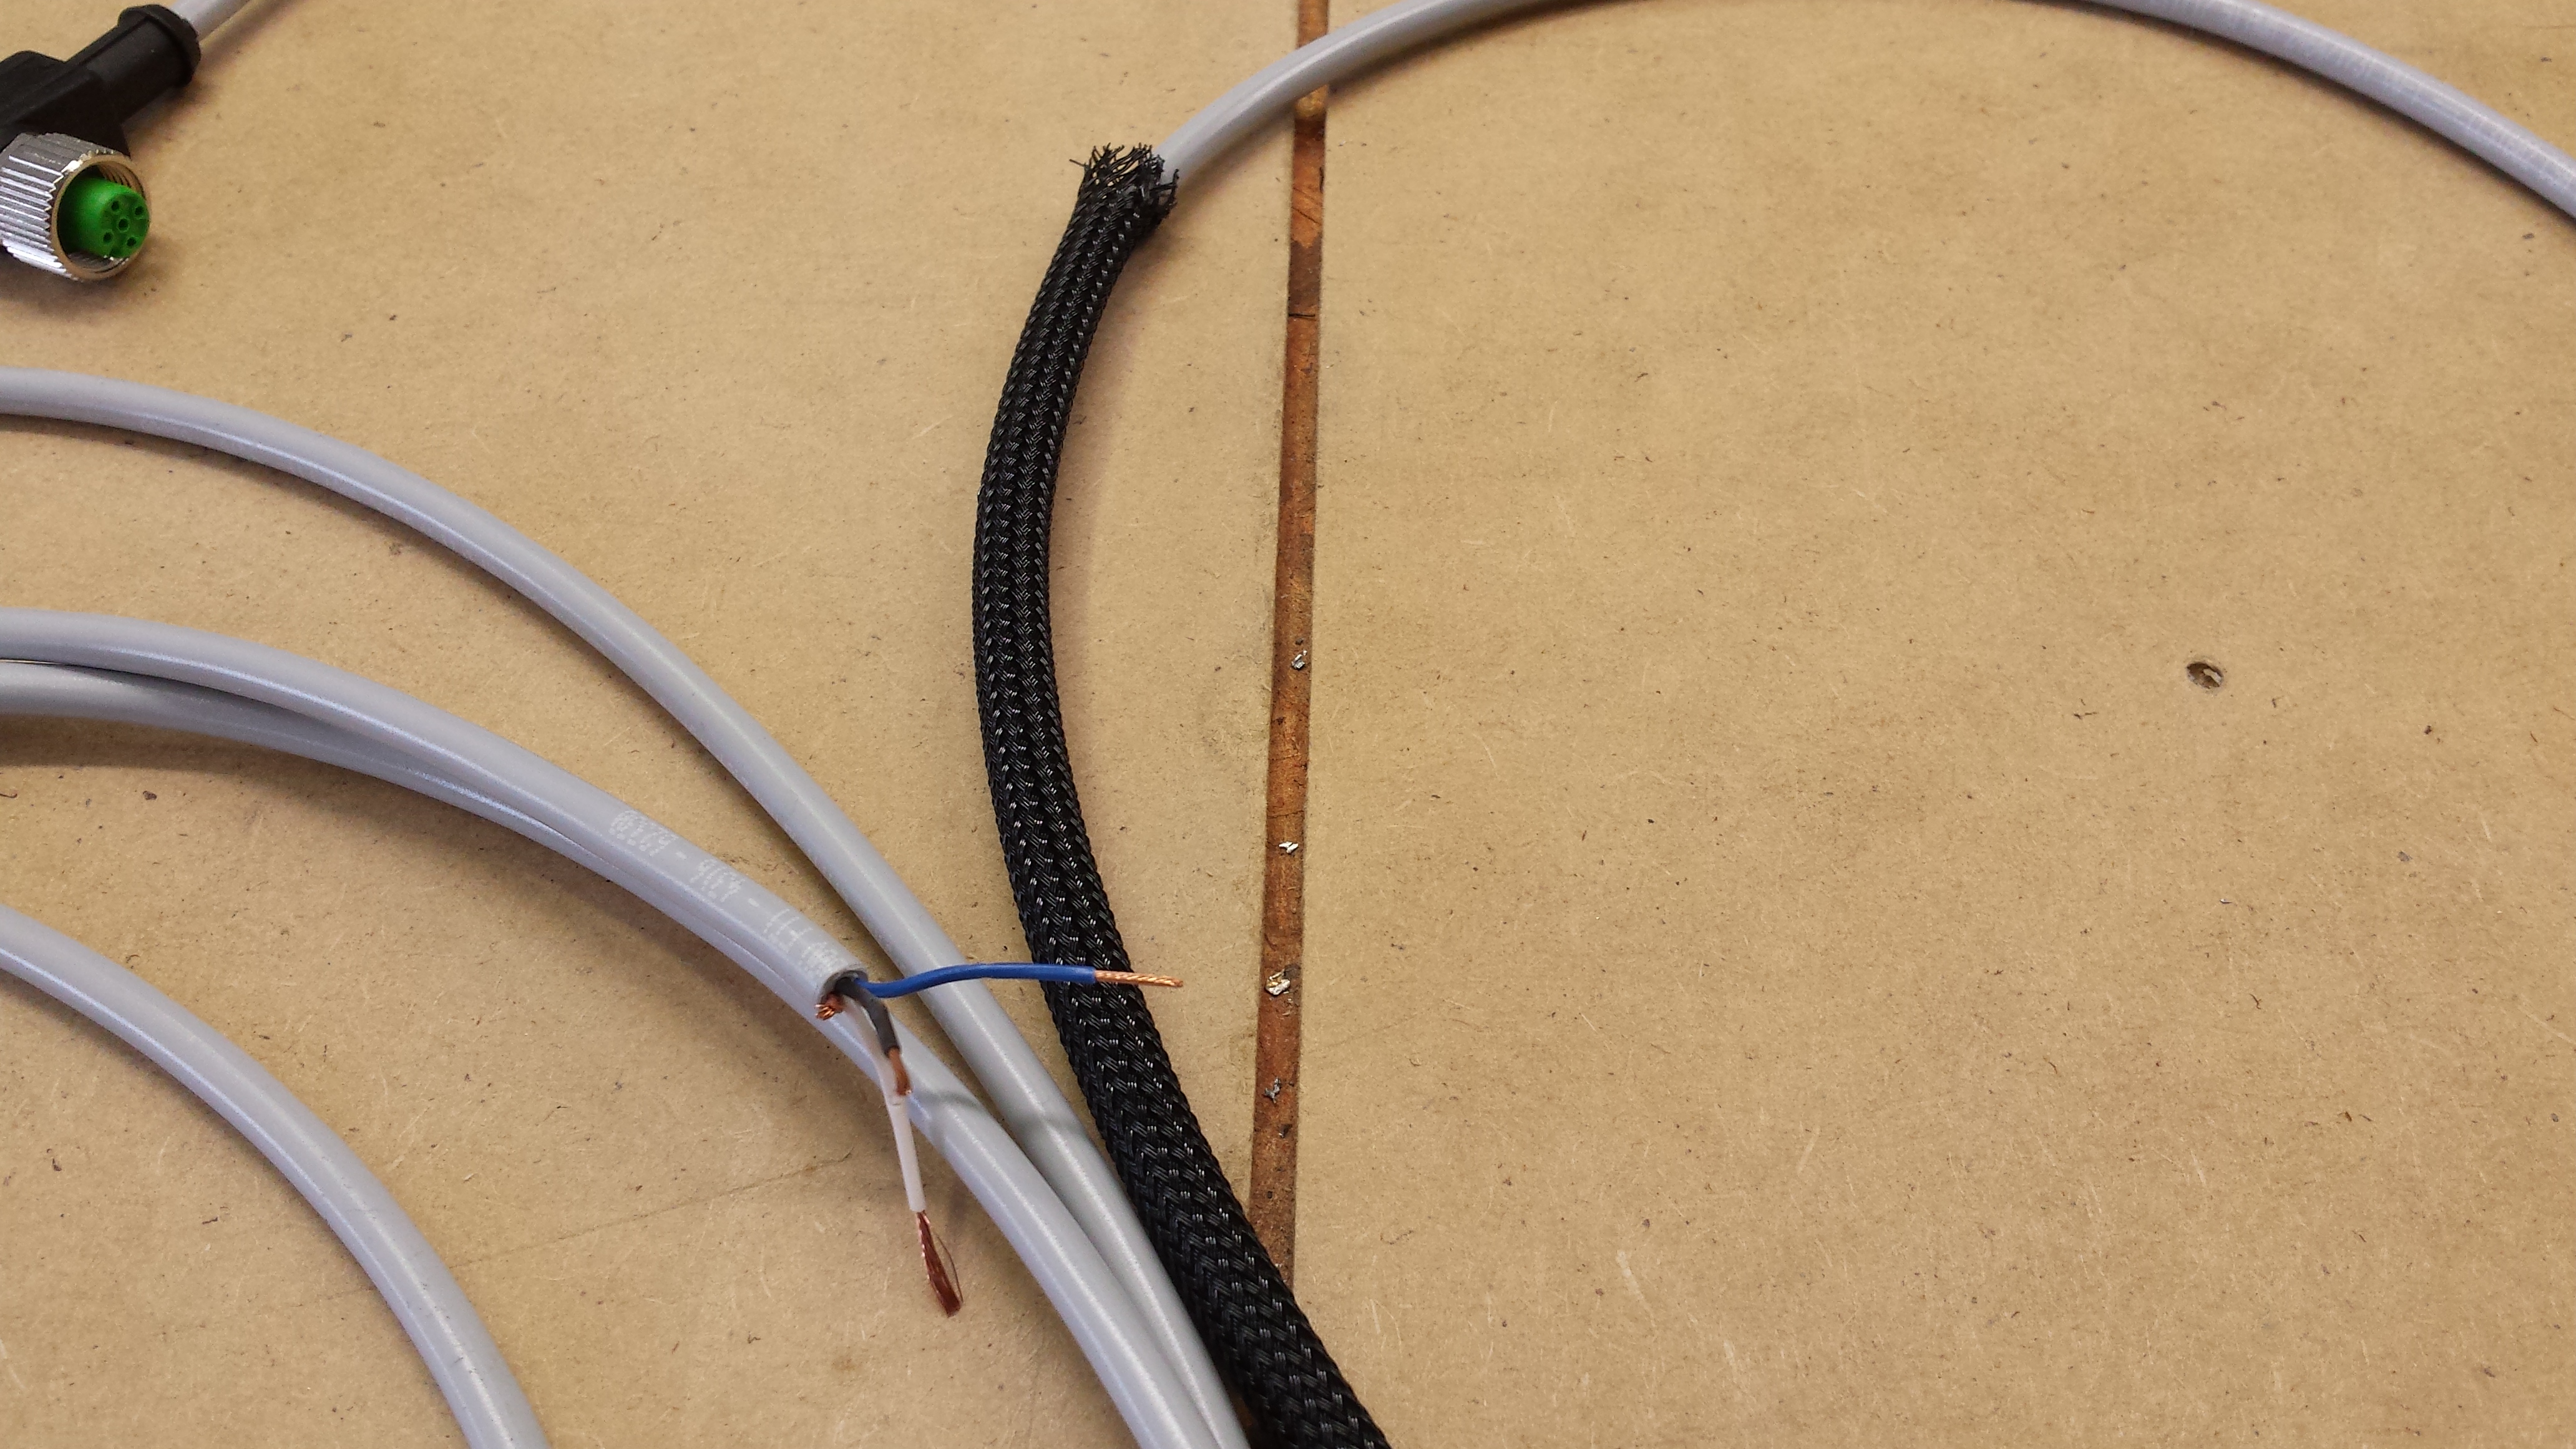
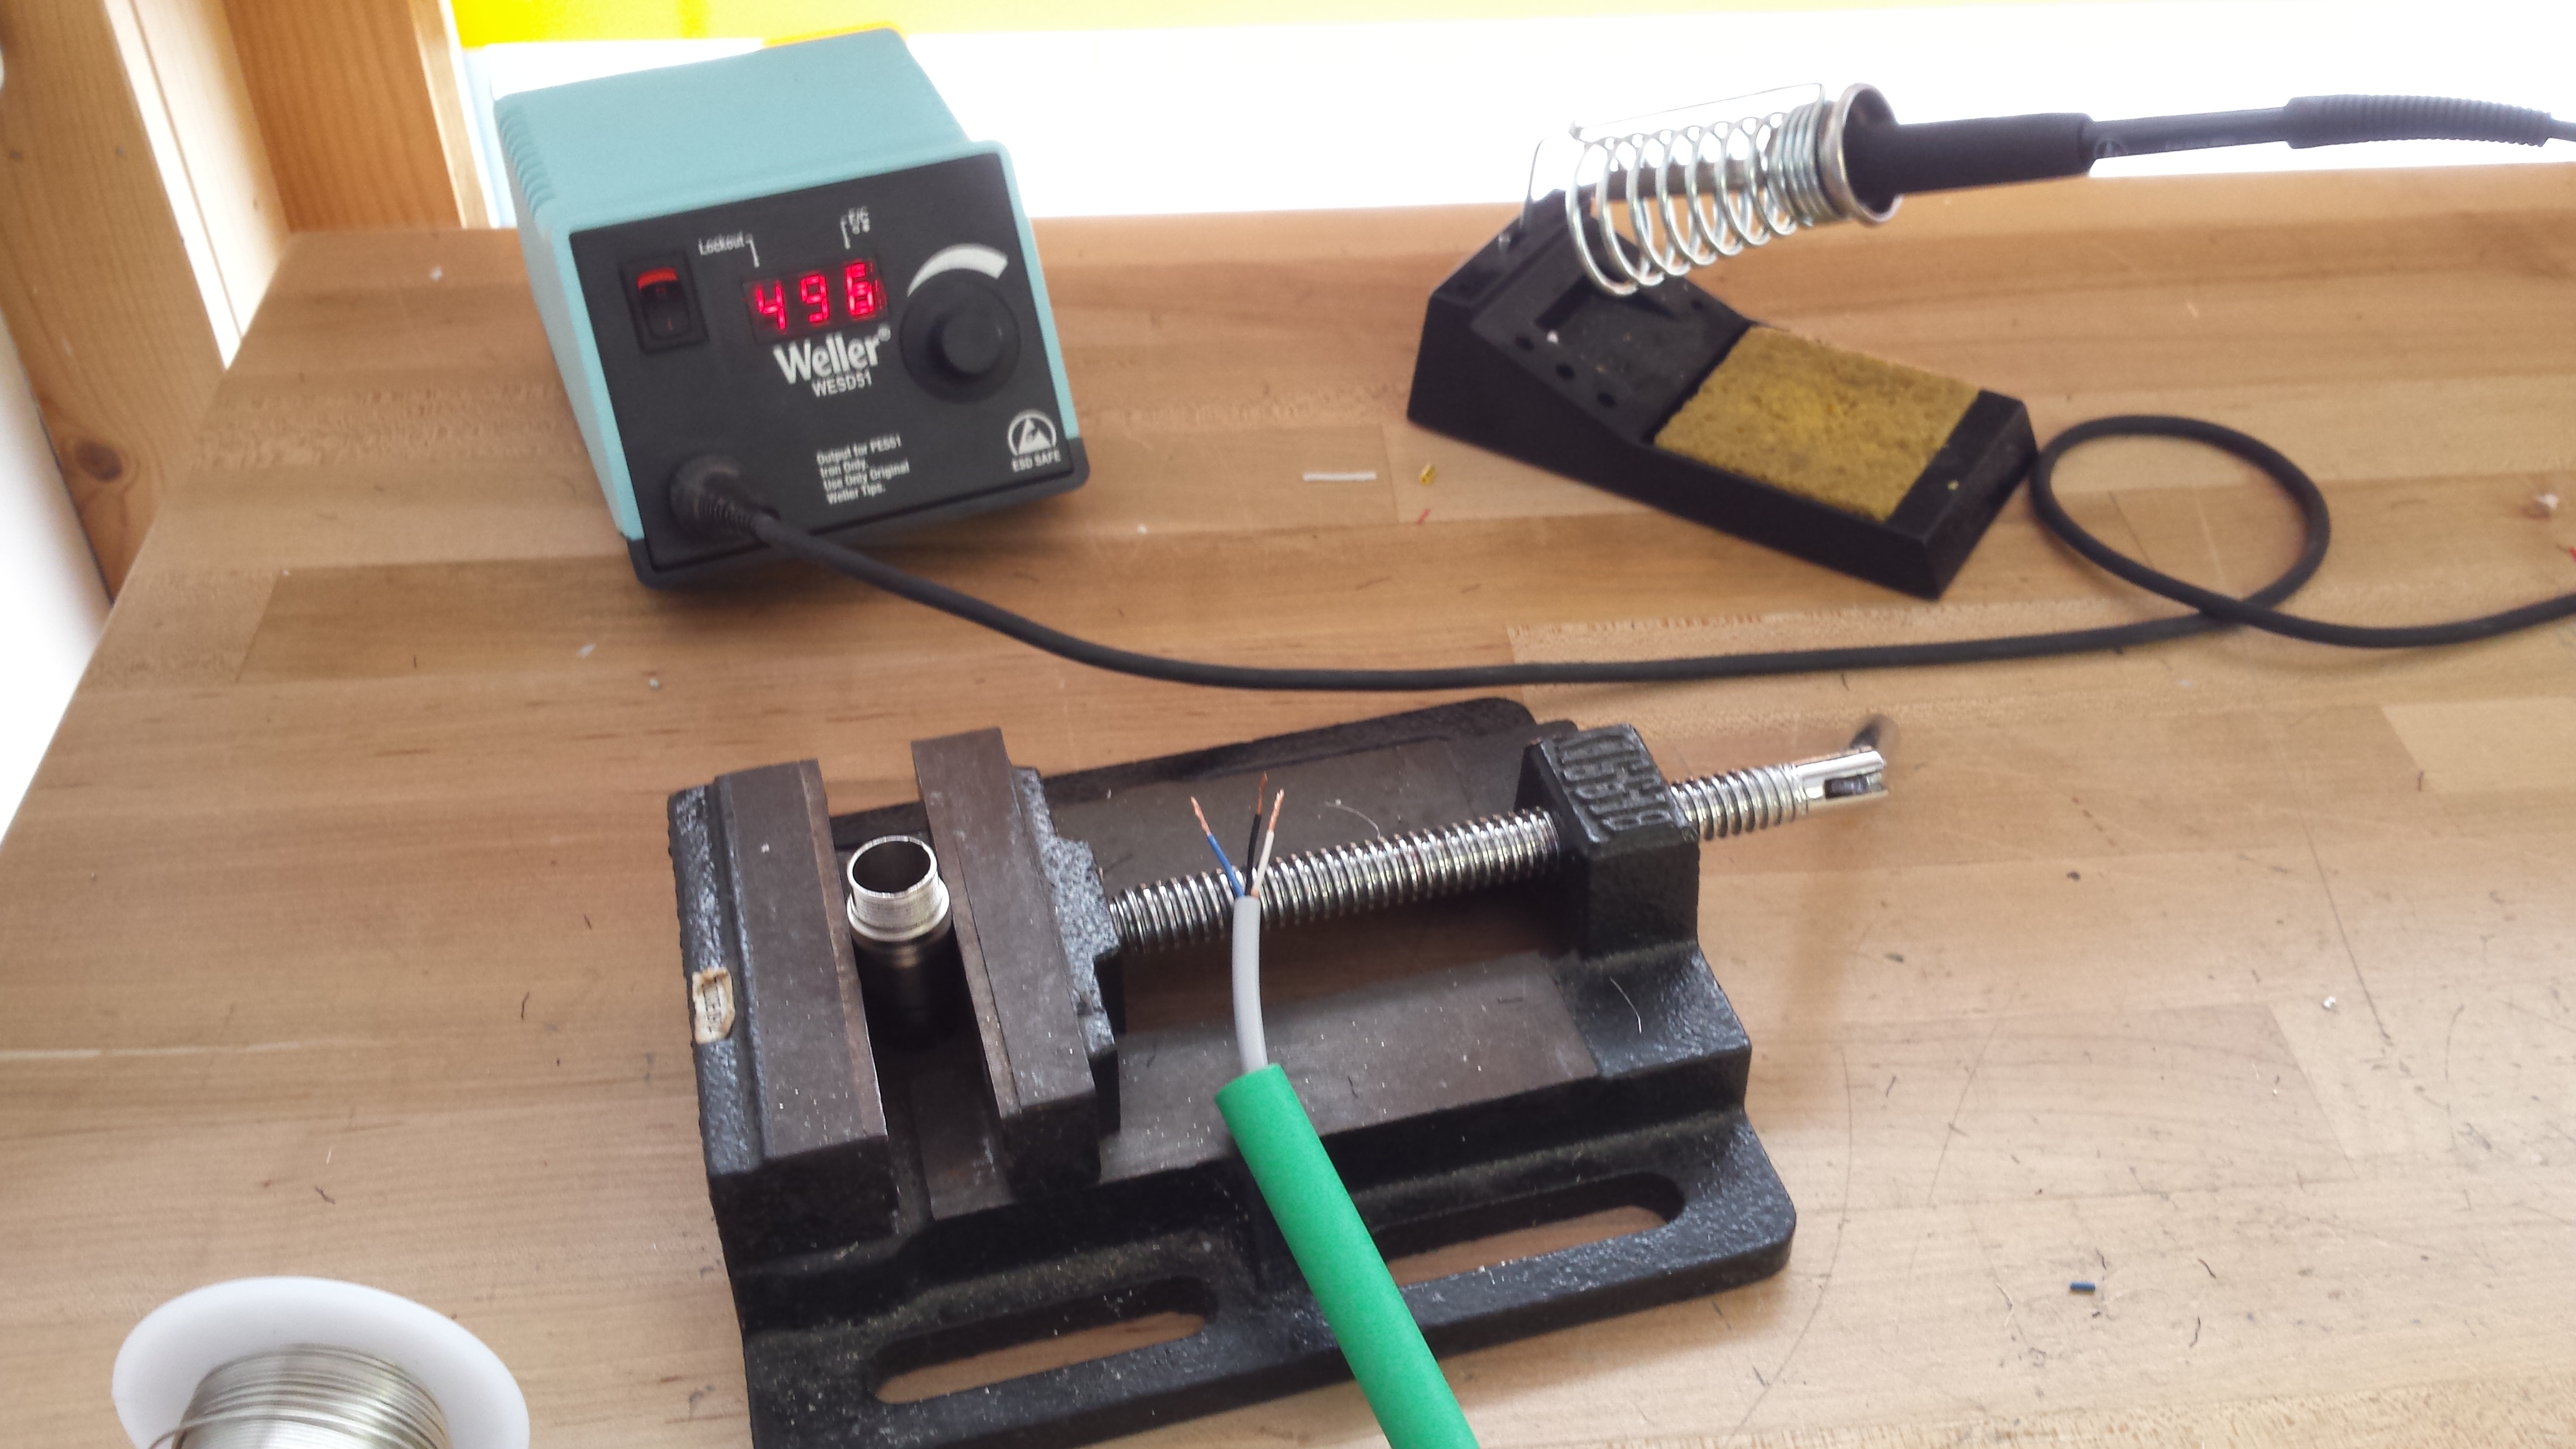
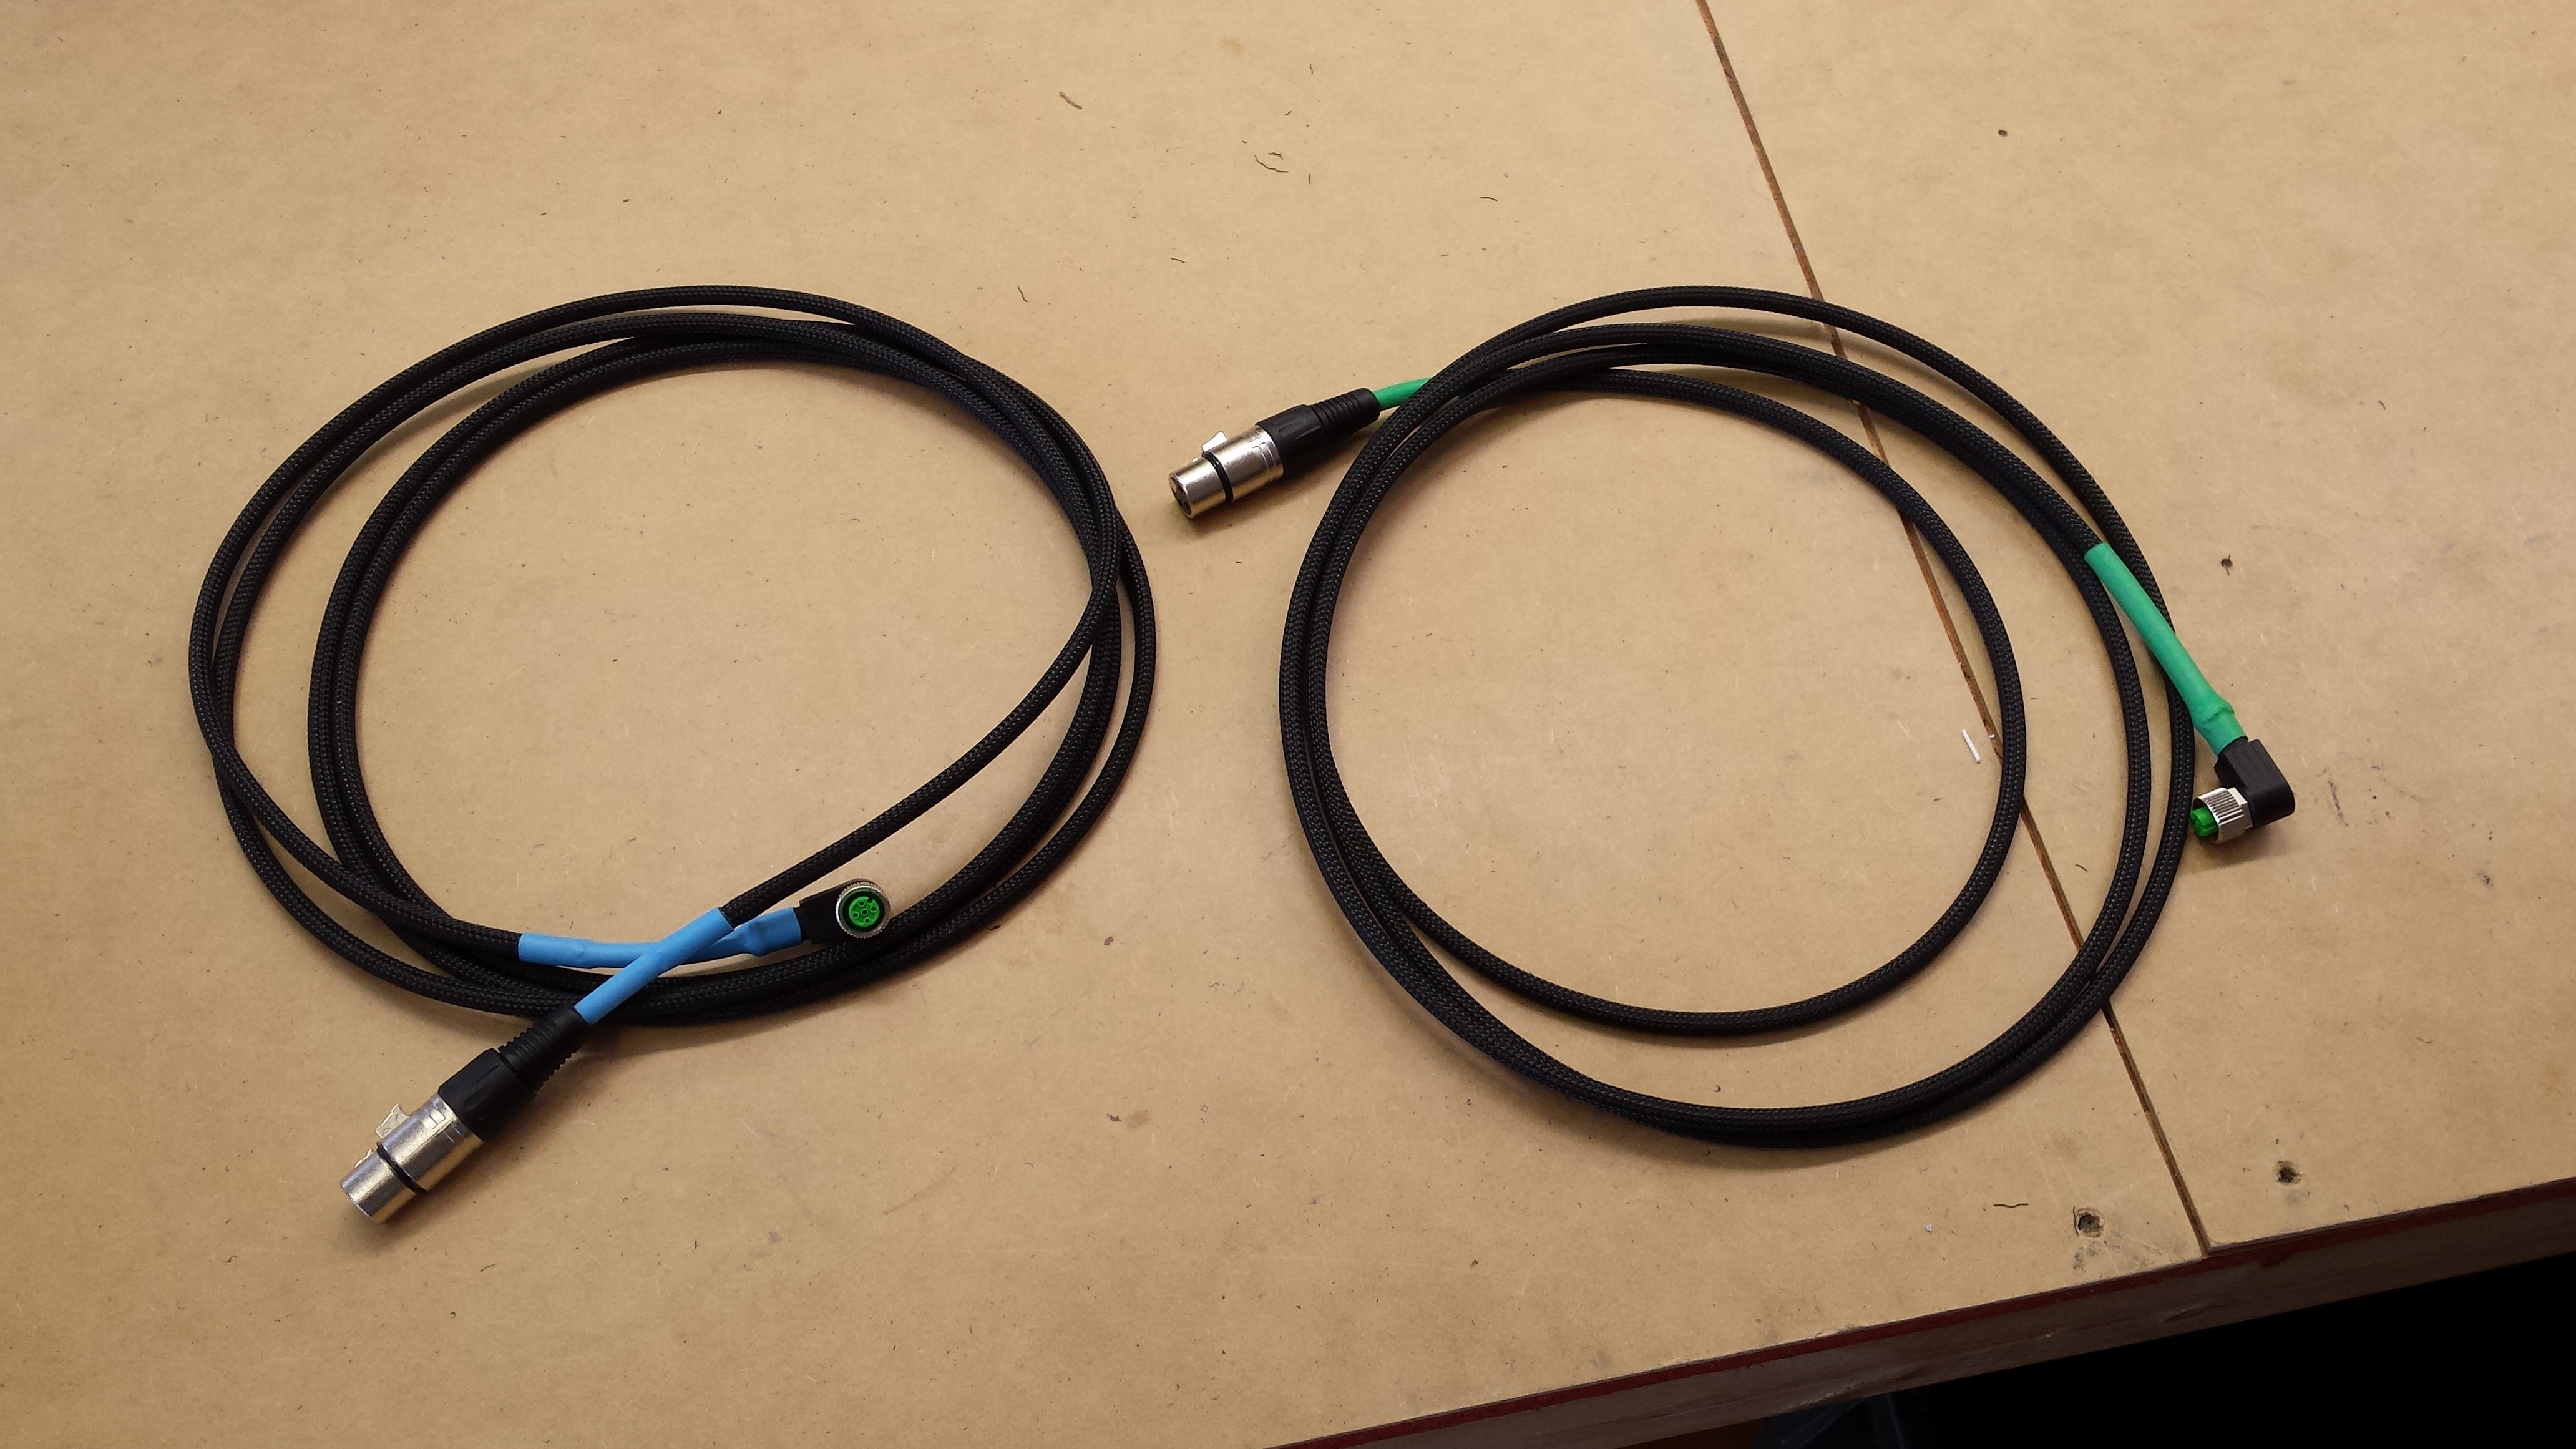
Cut off the GFI power cord that comes with the unit and save that for the control panel, then wire a new power cord for the A/C unit with a twist lock style connector. Also cut the standard connector off the pumps and replace with same twist style connector:
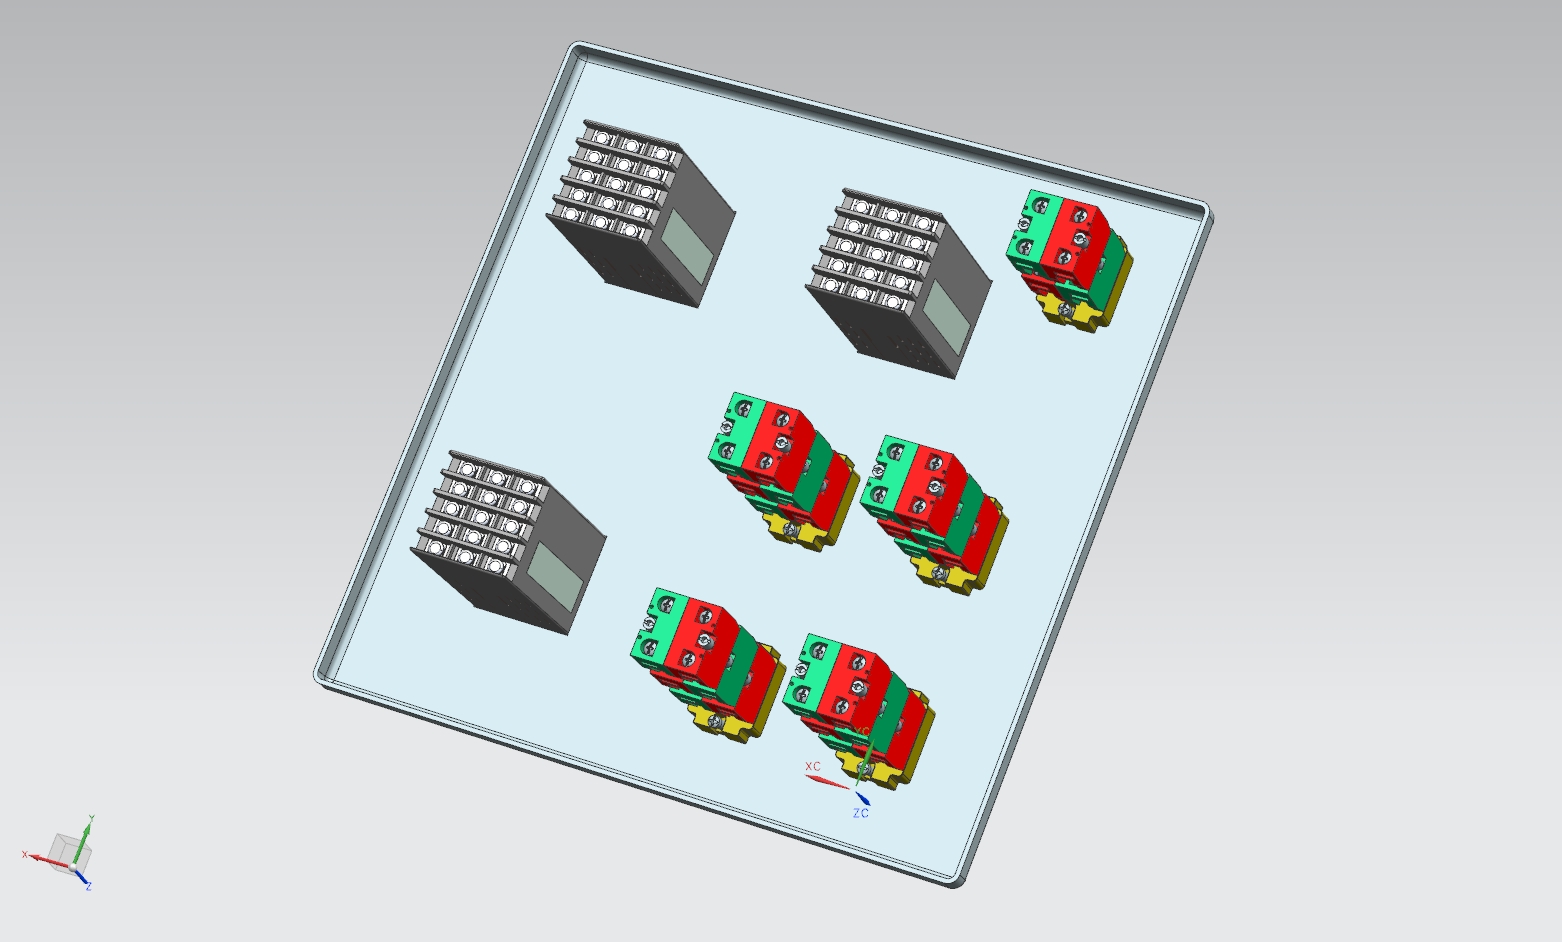
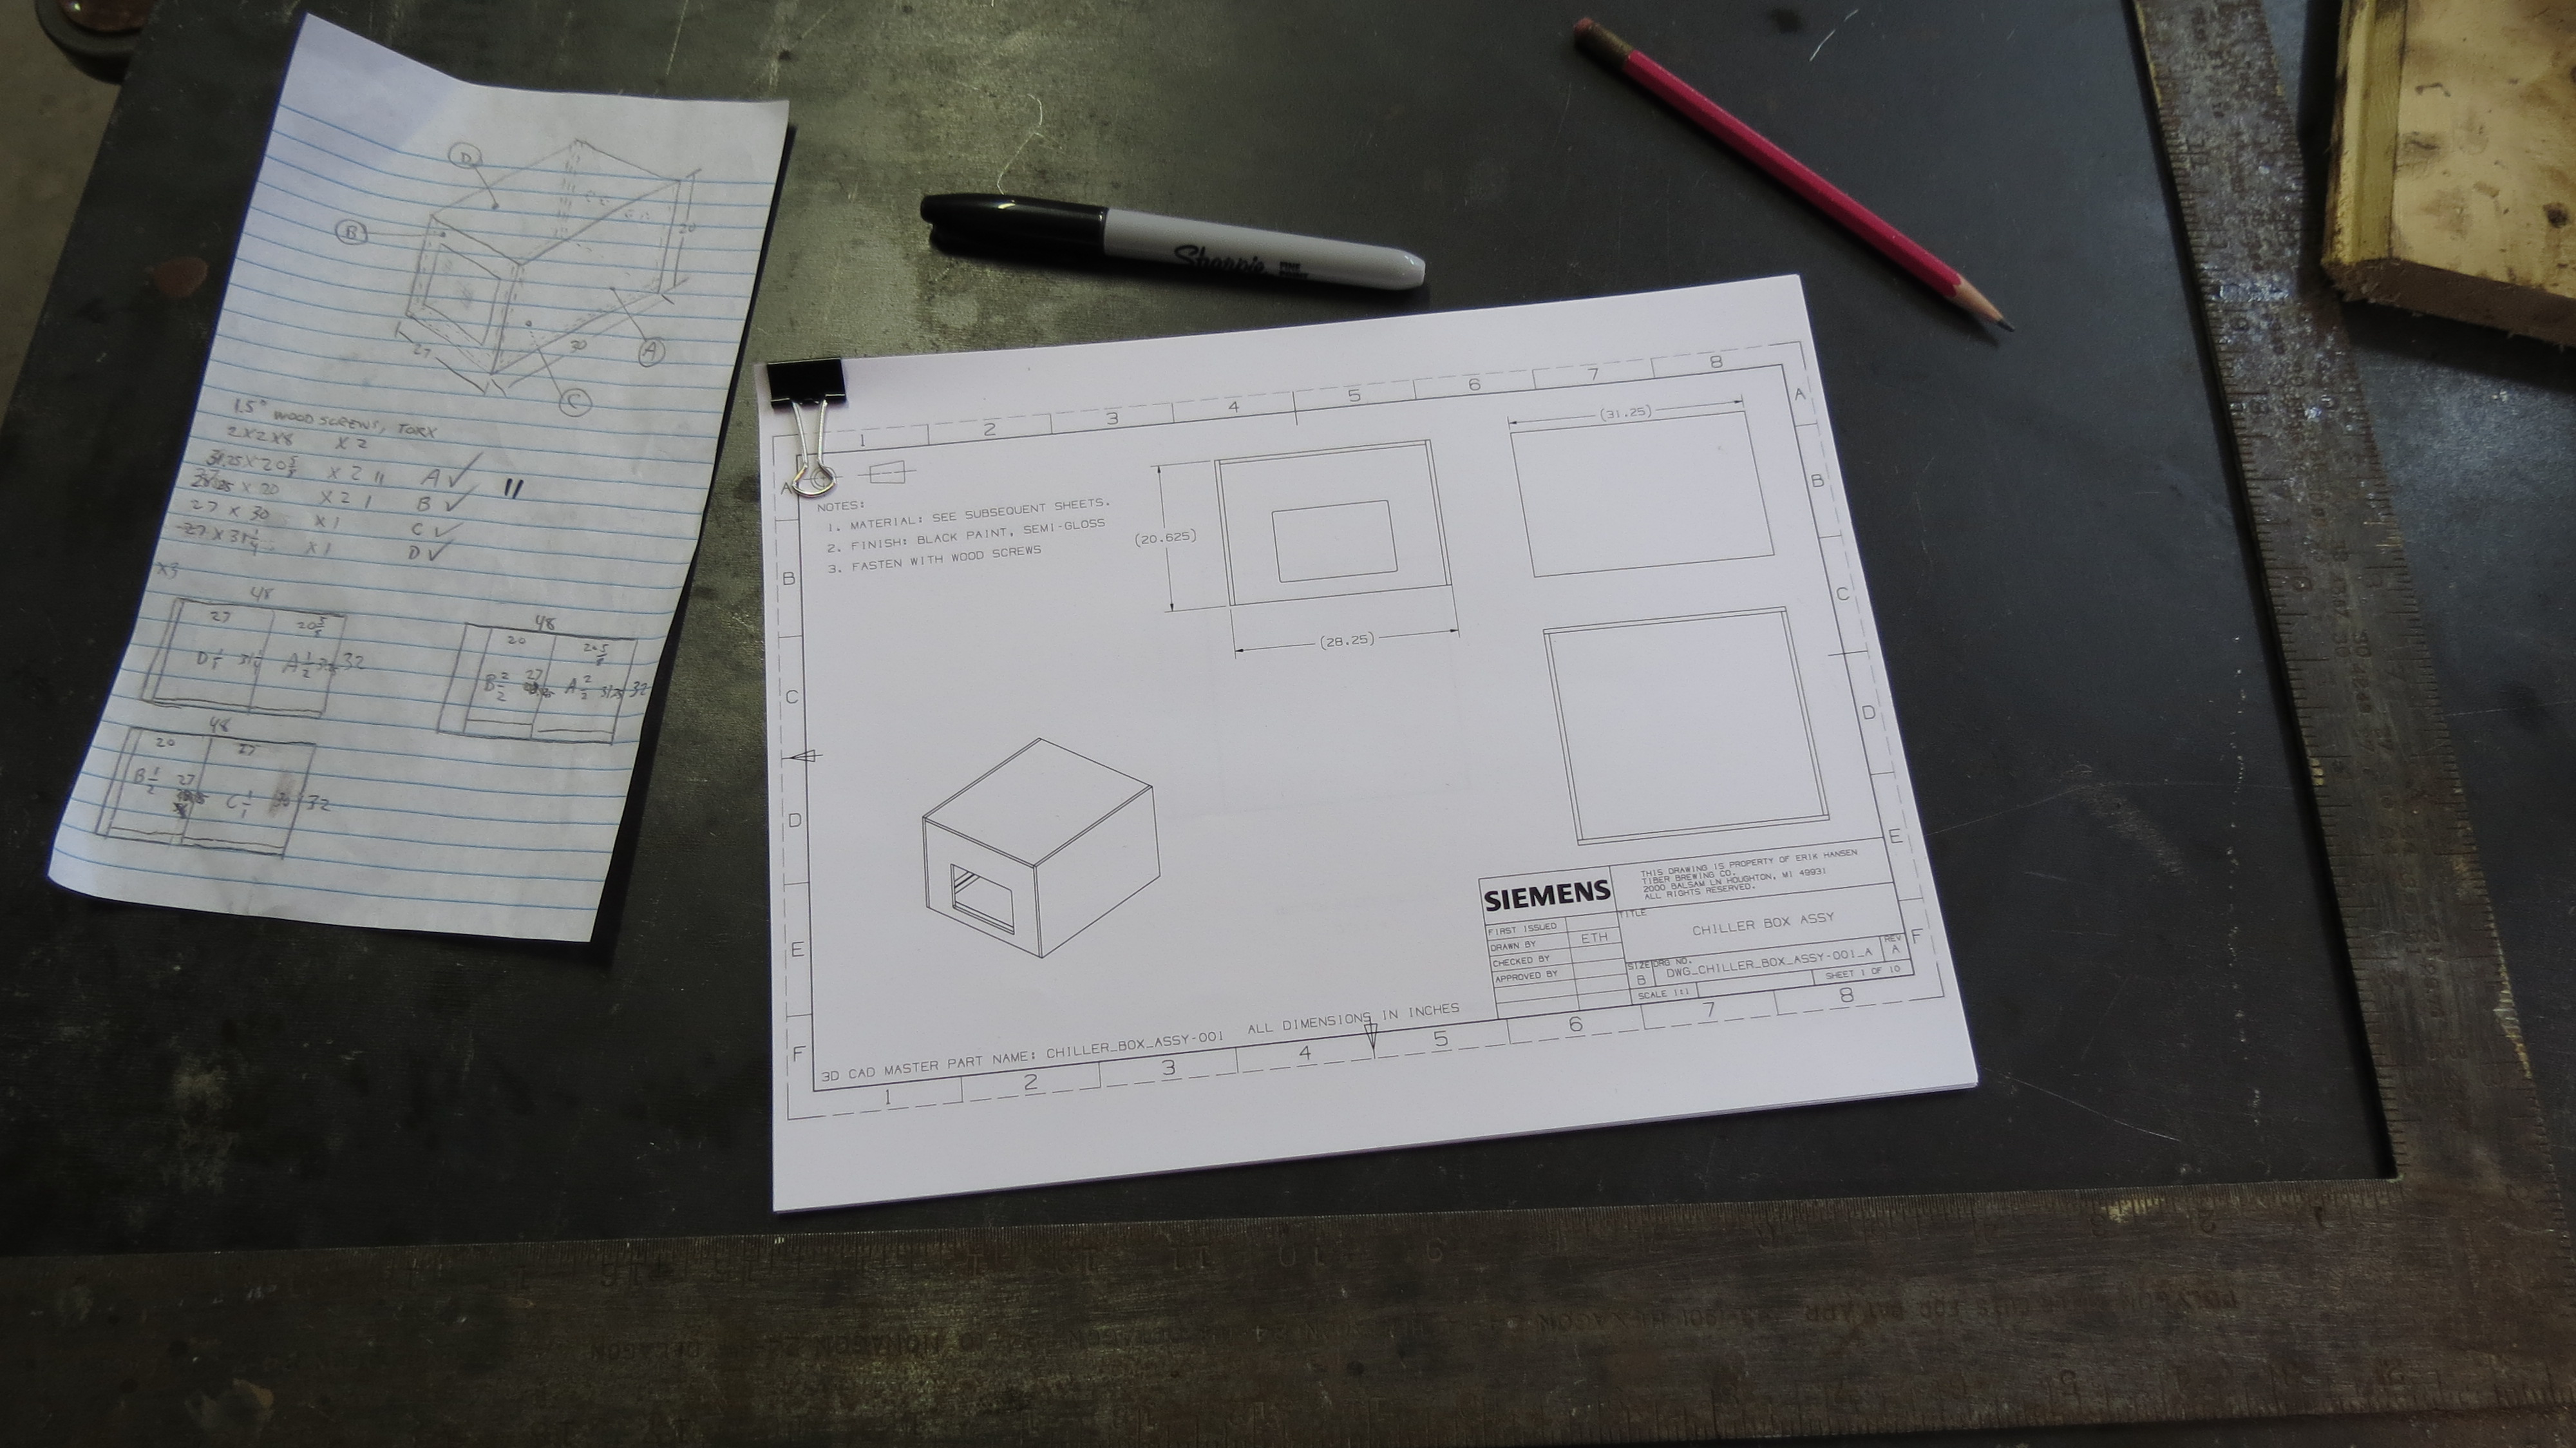
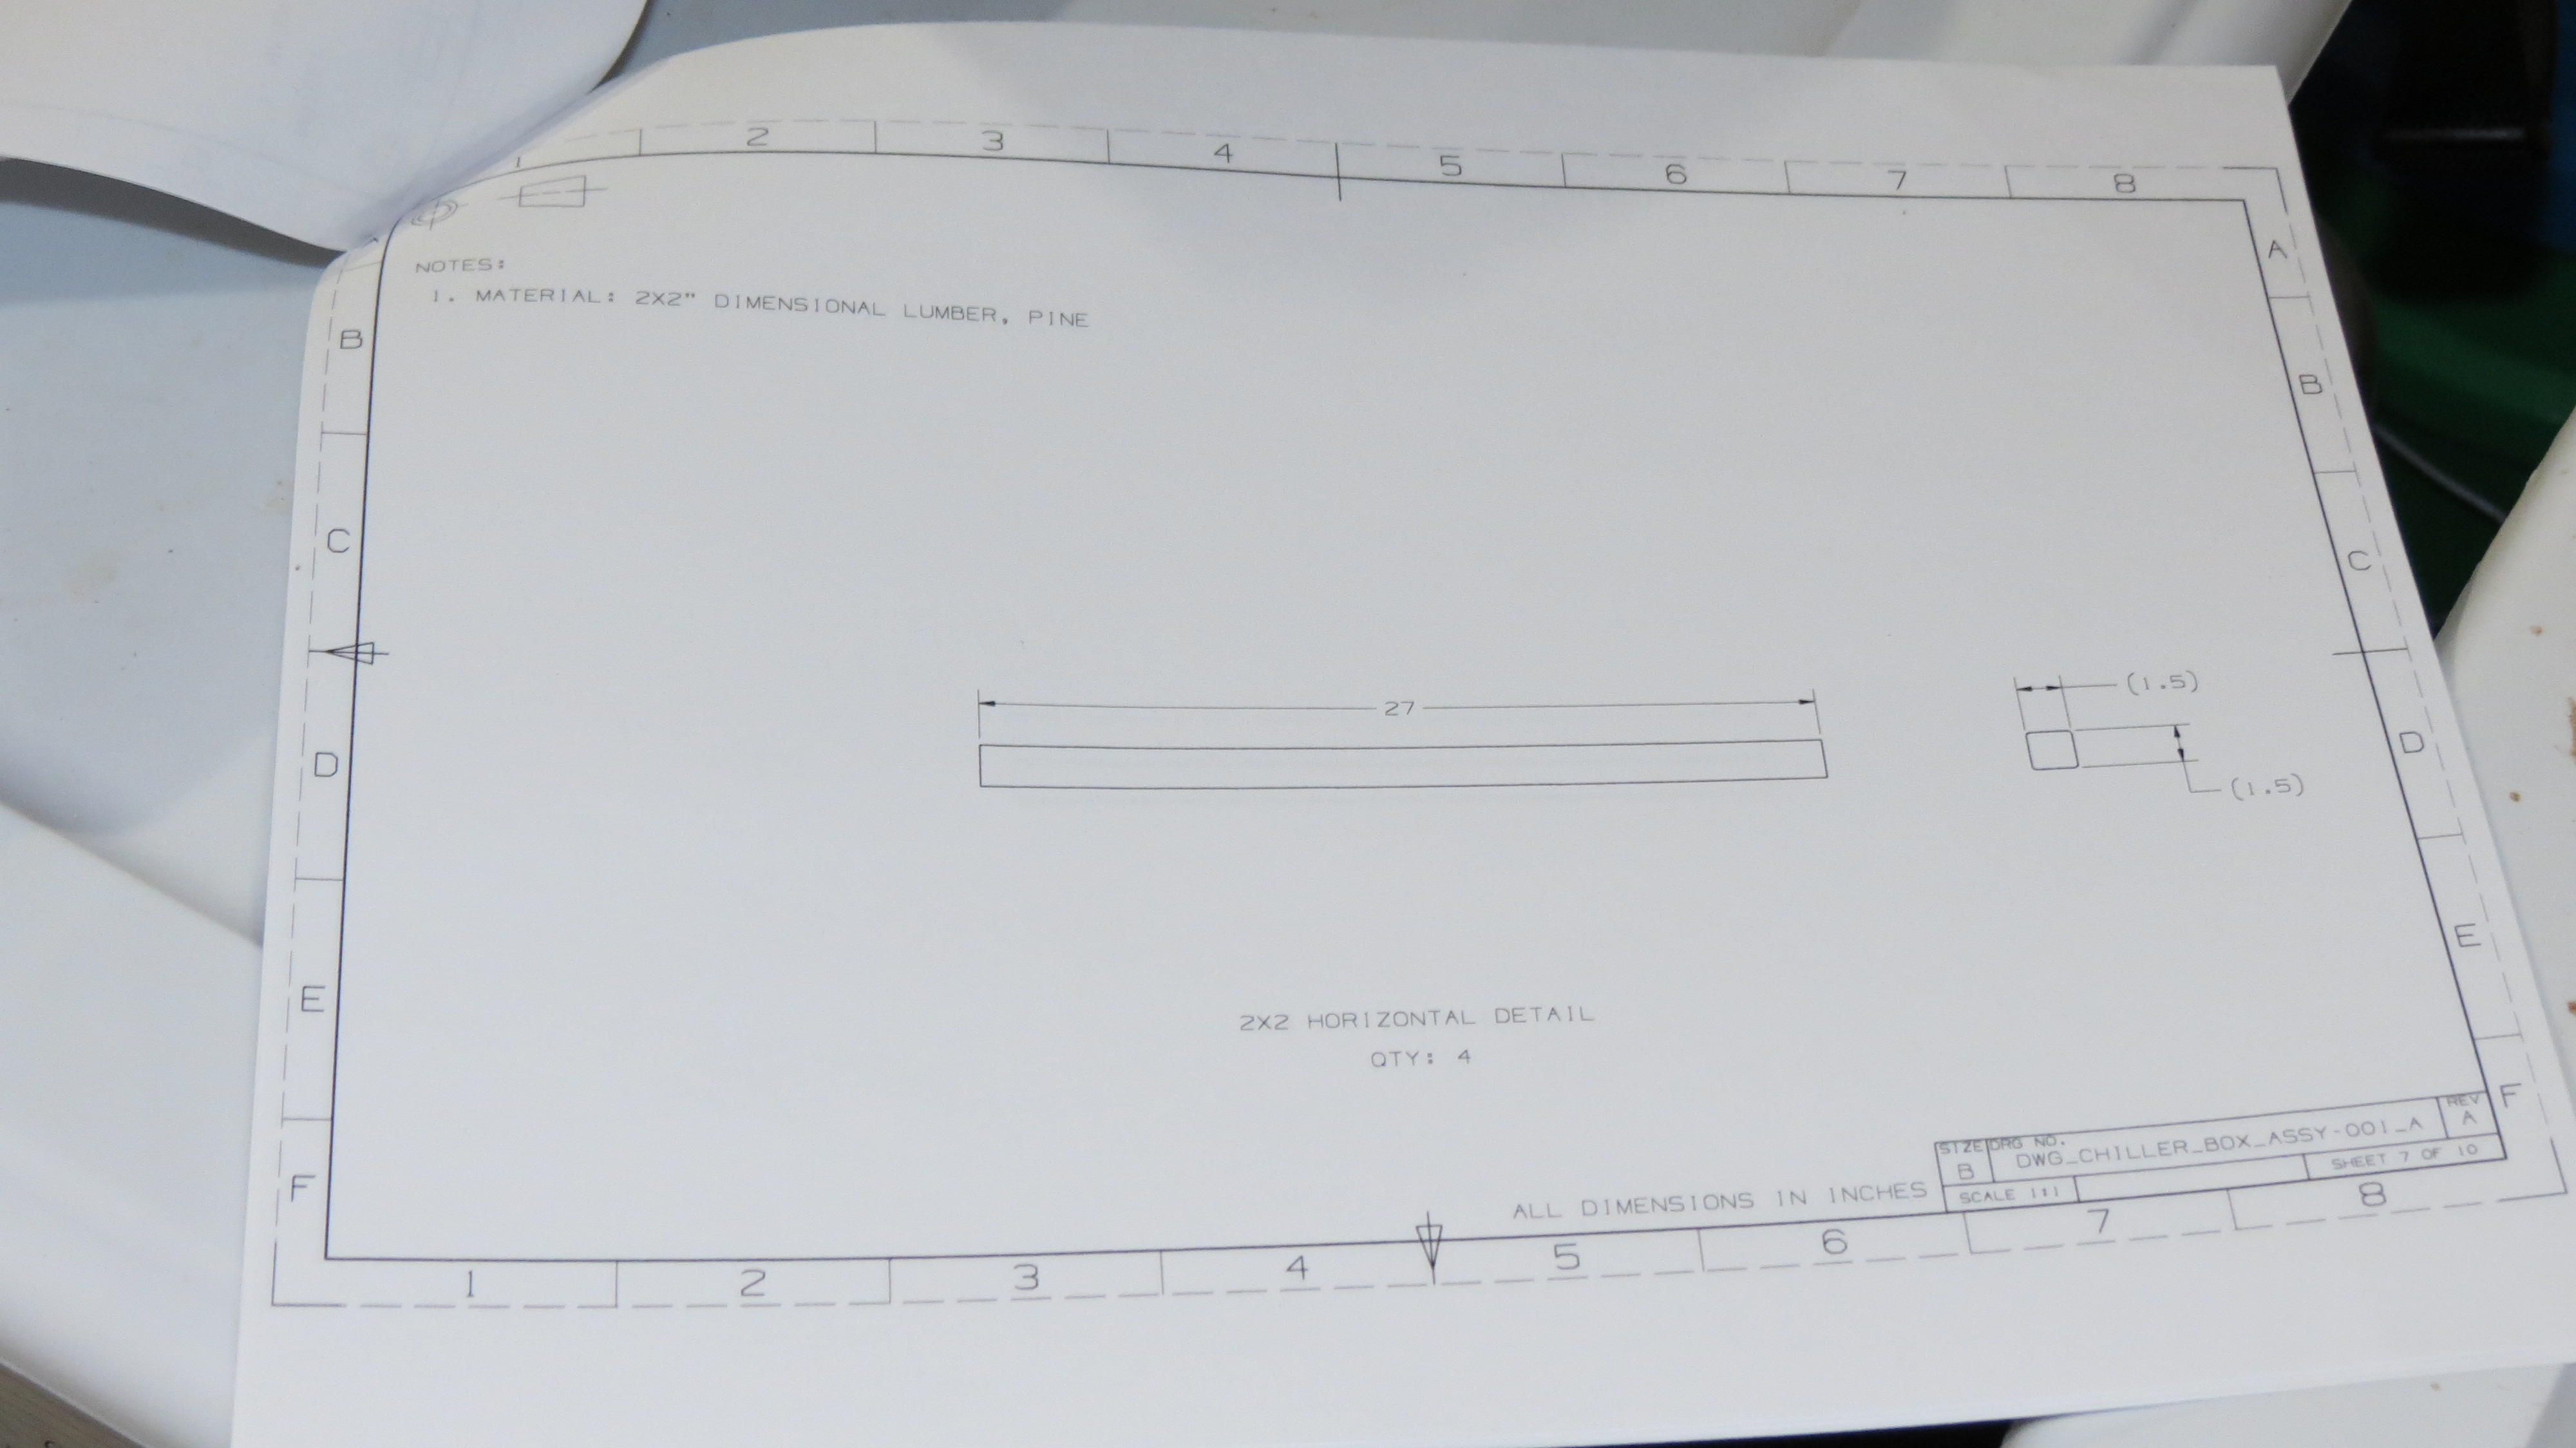
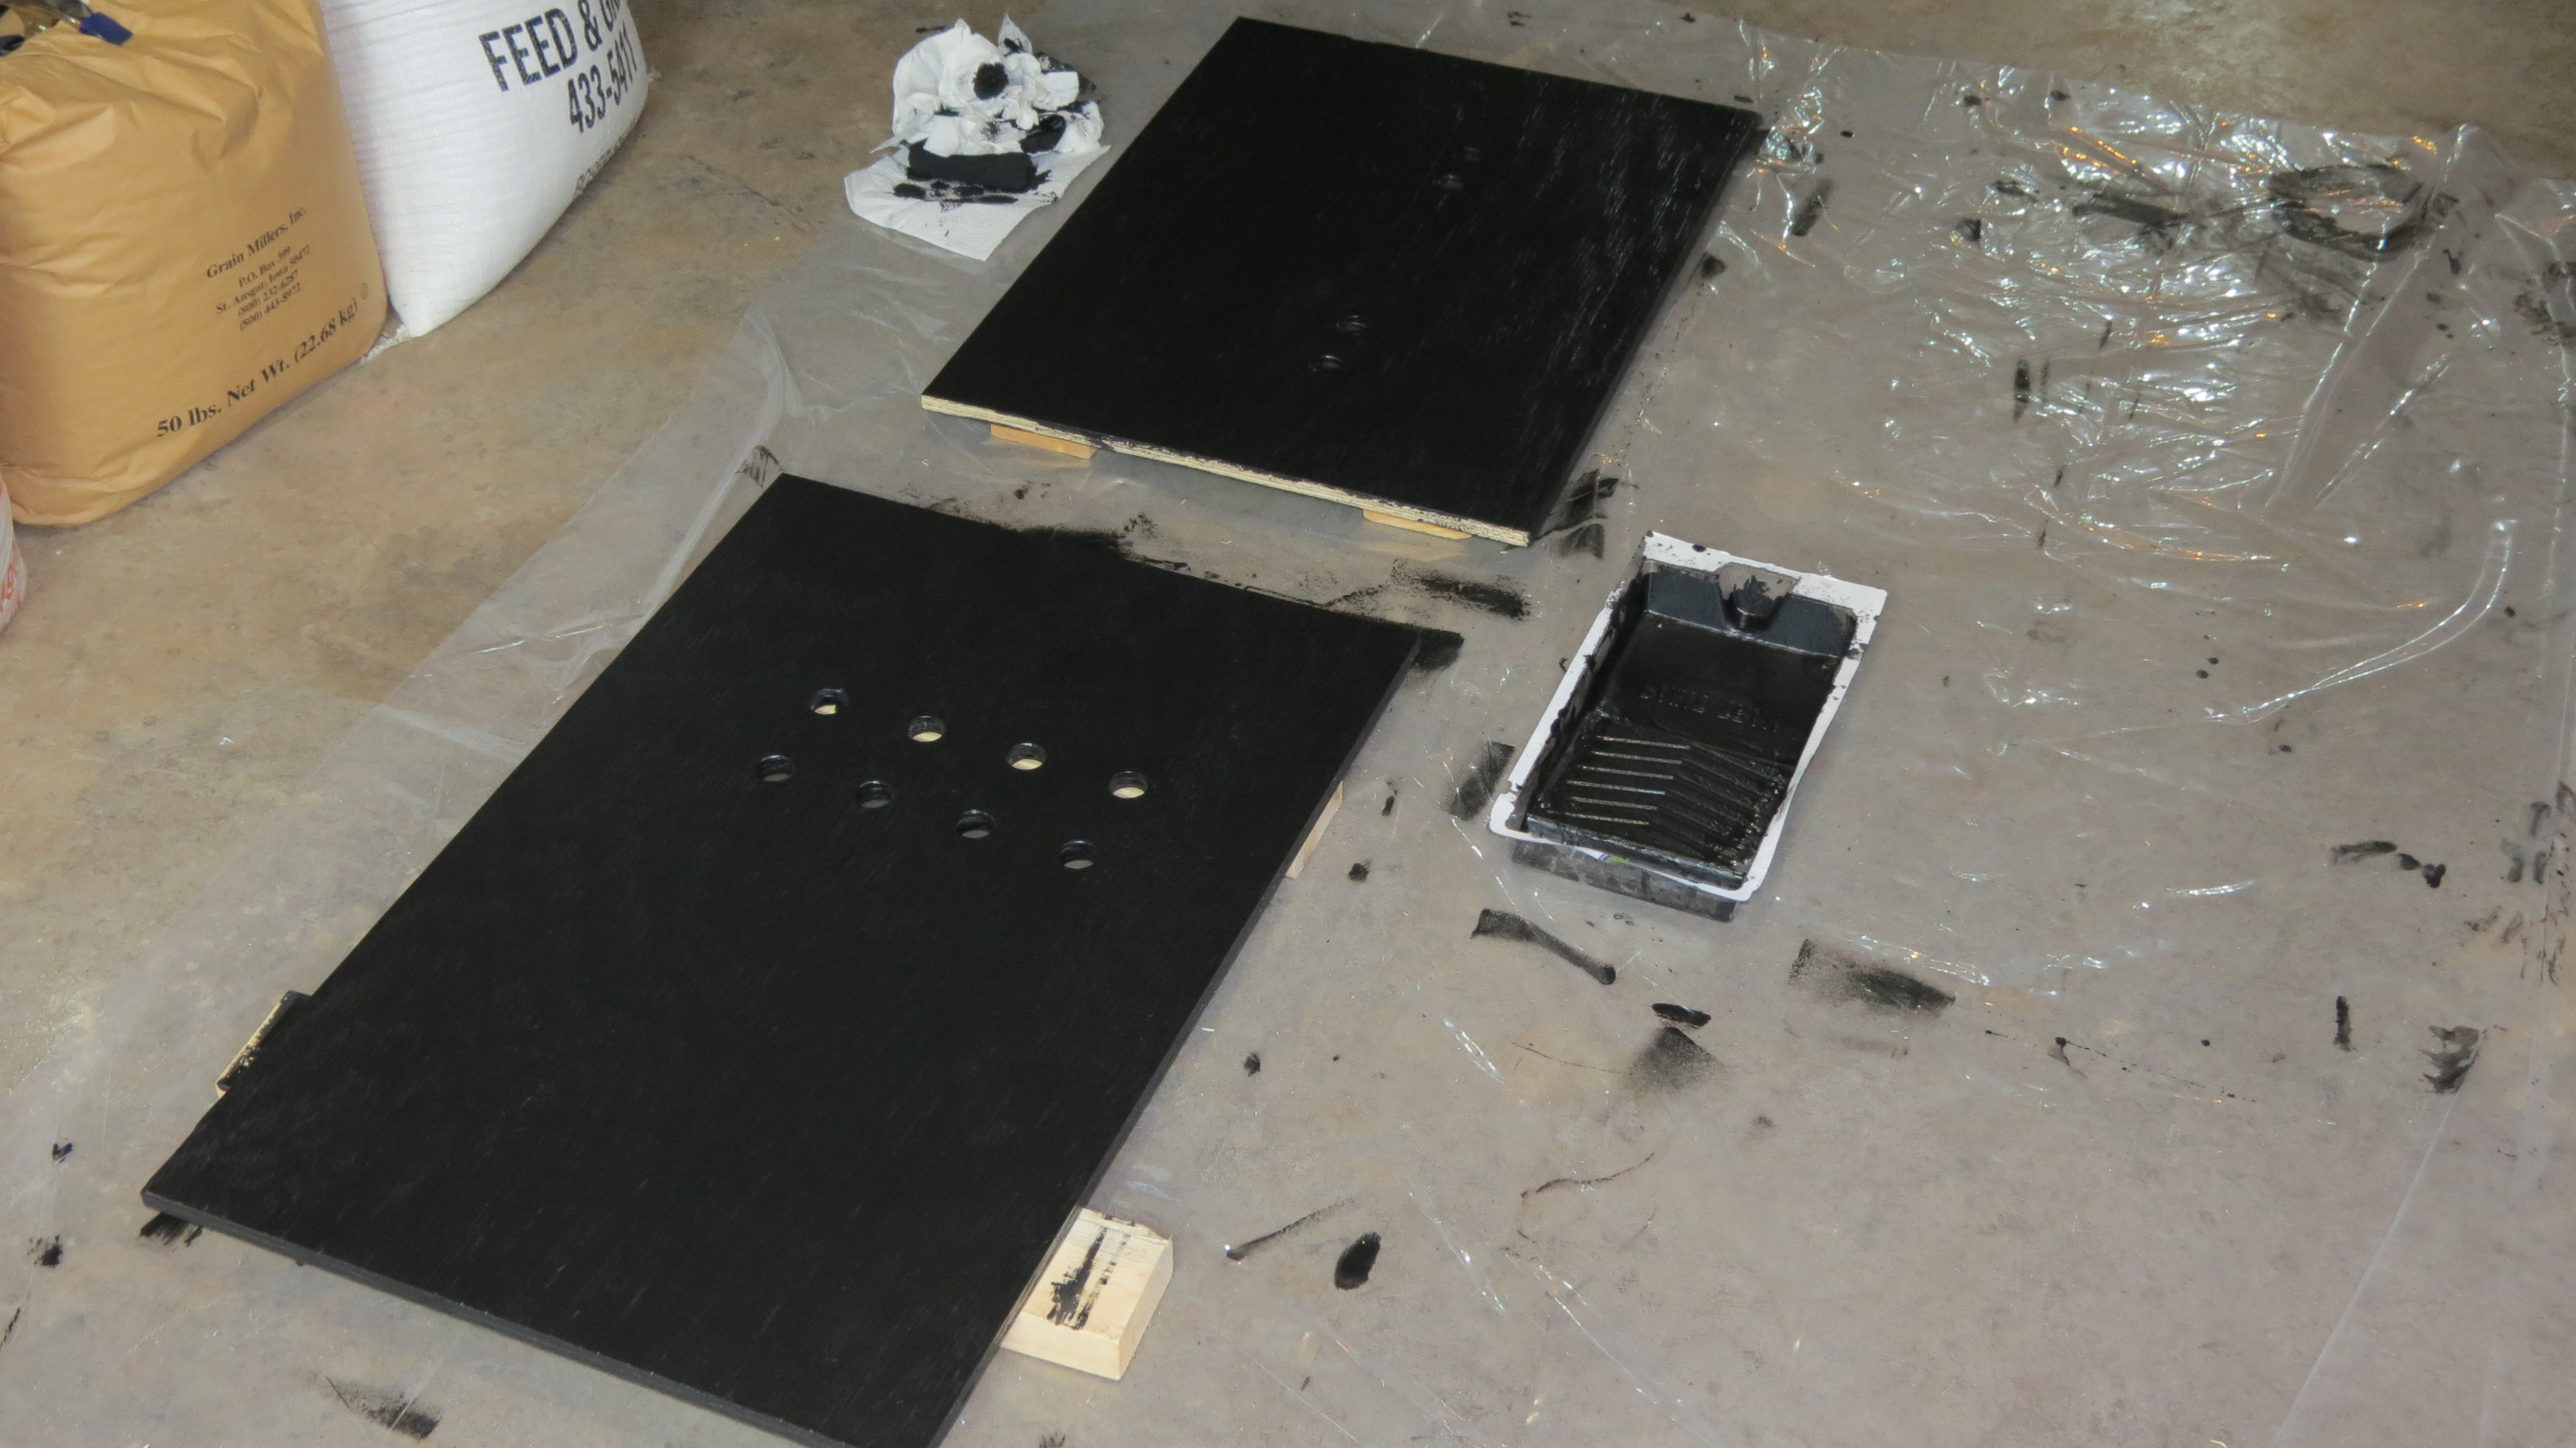
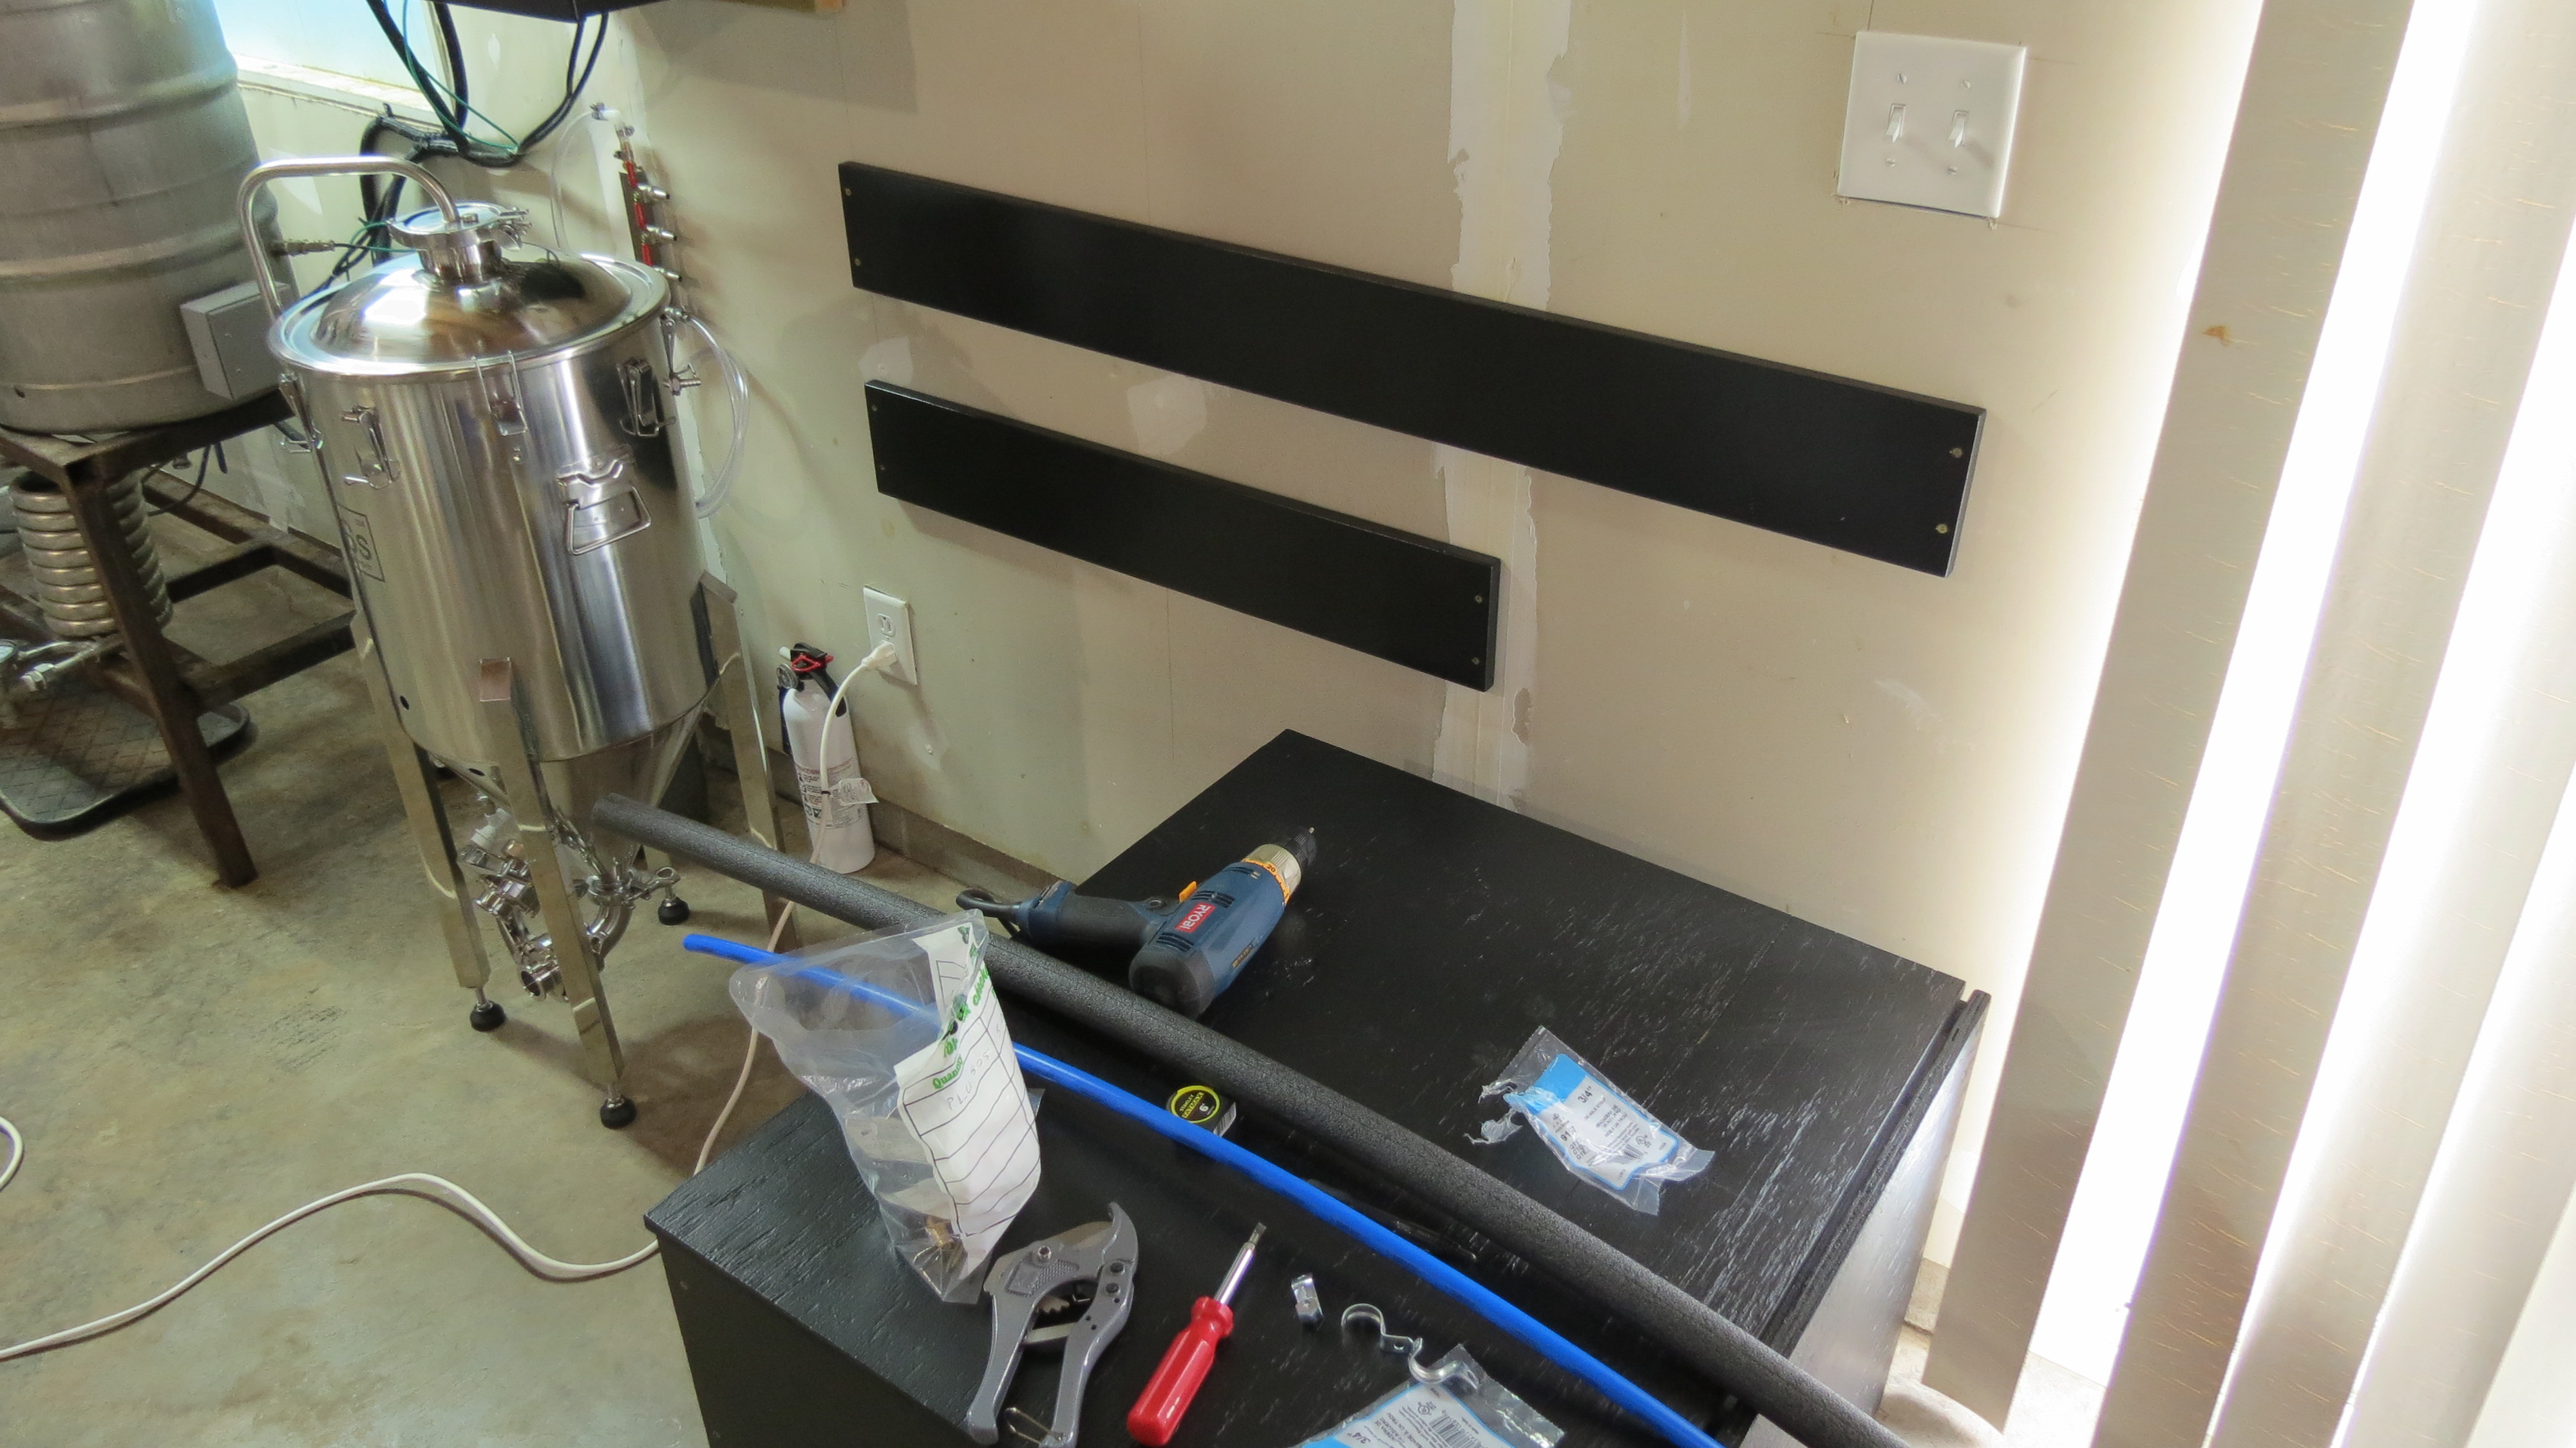
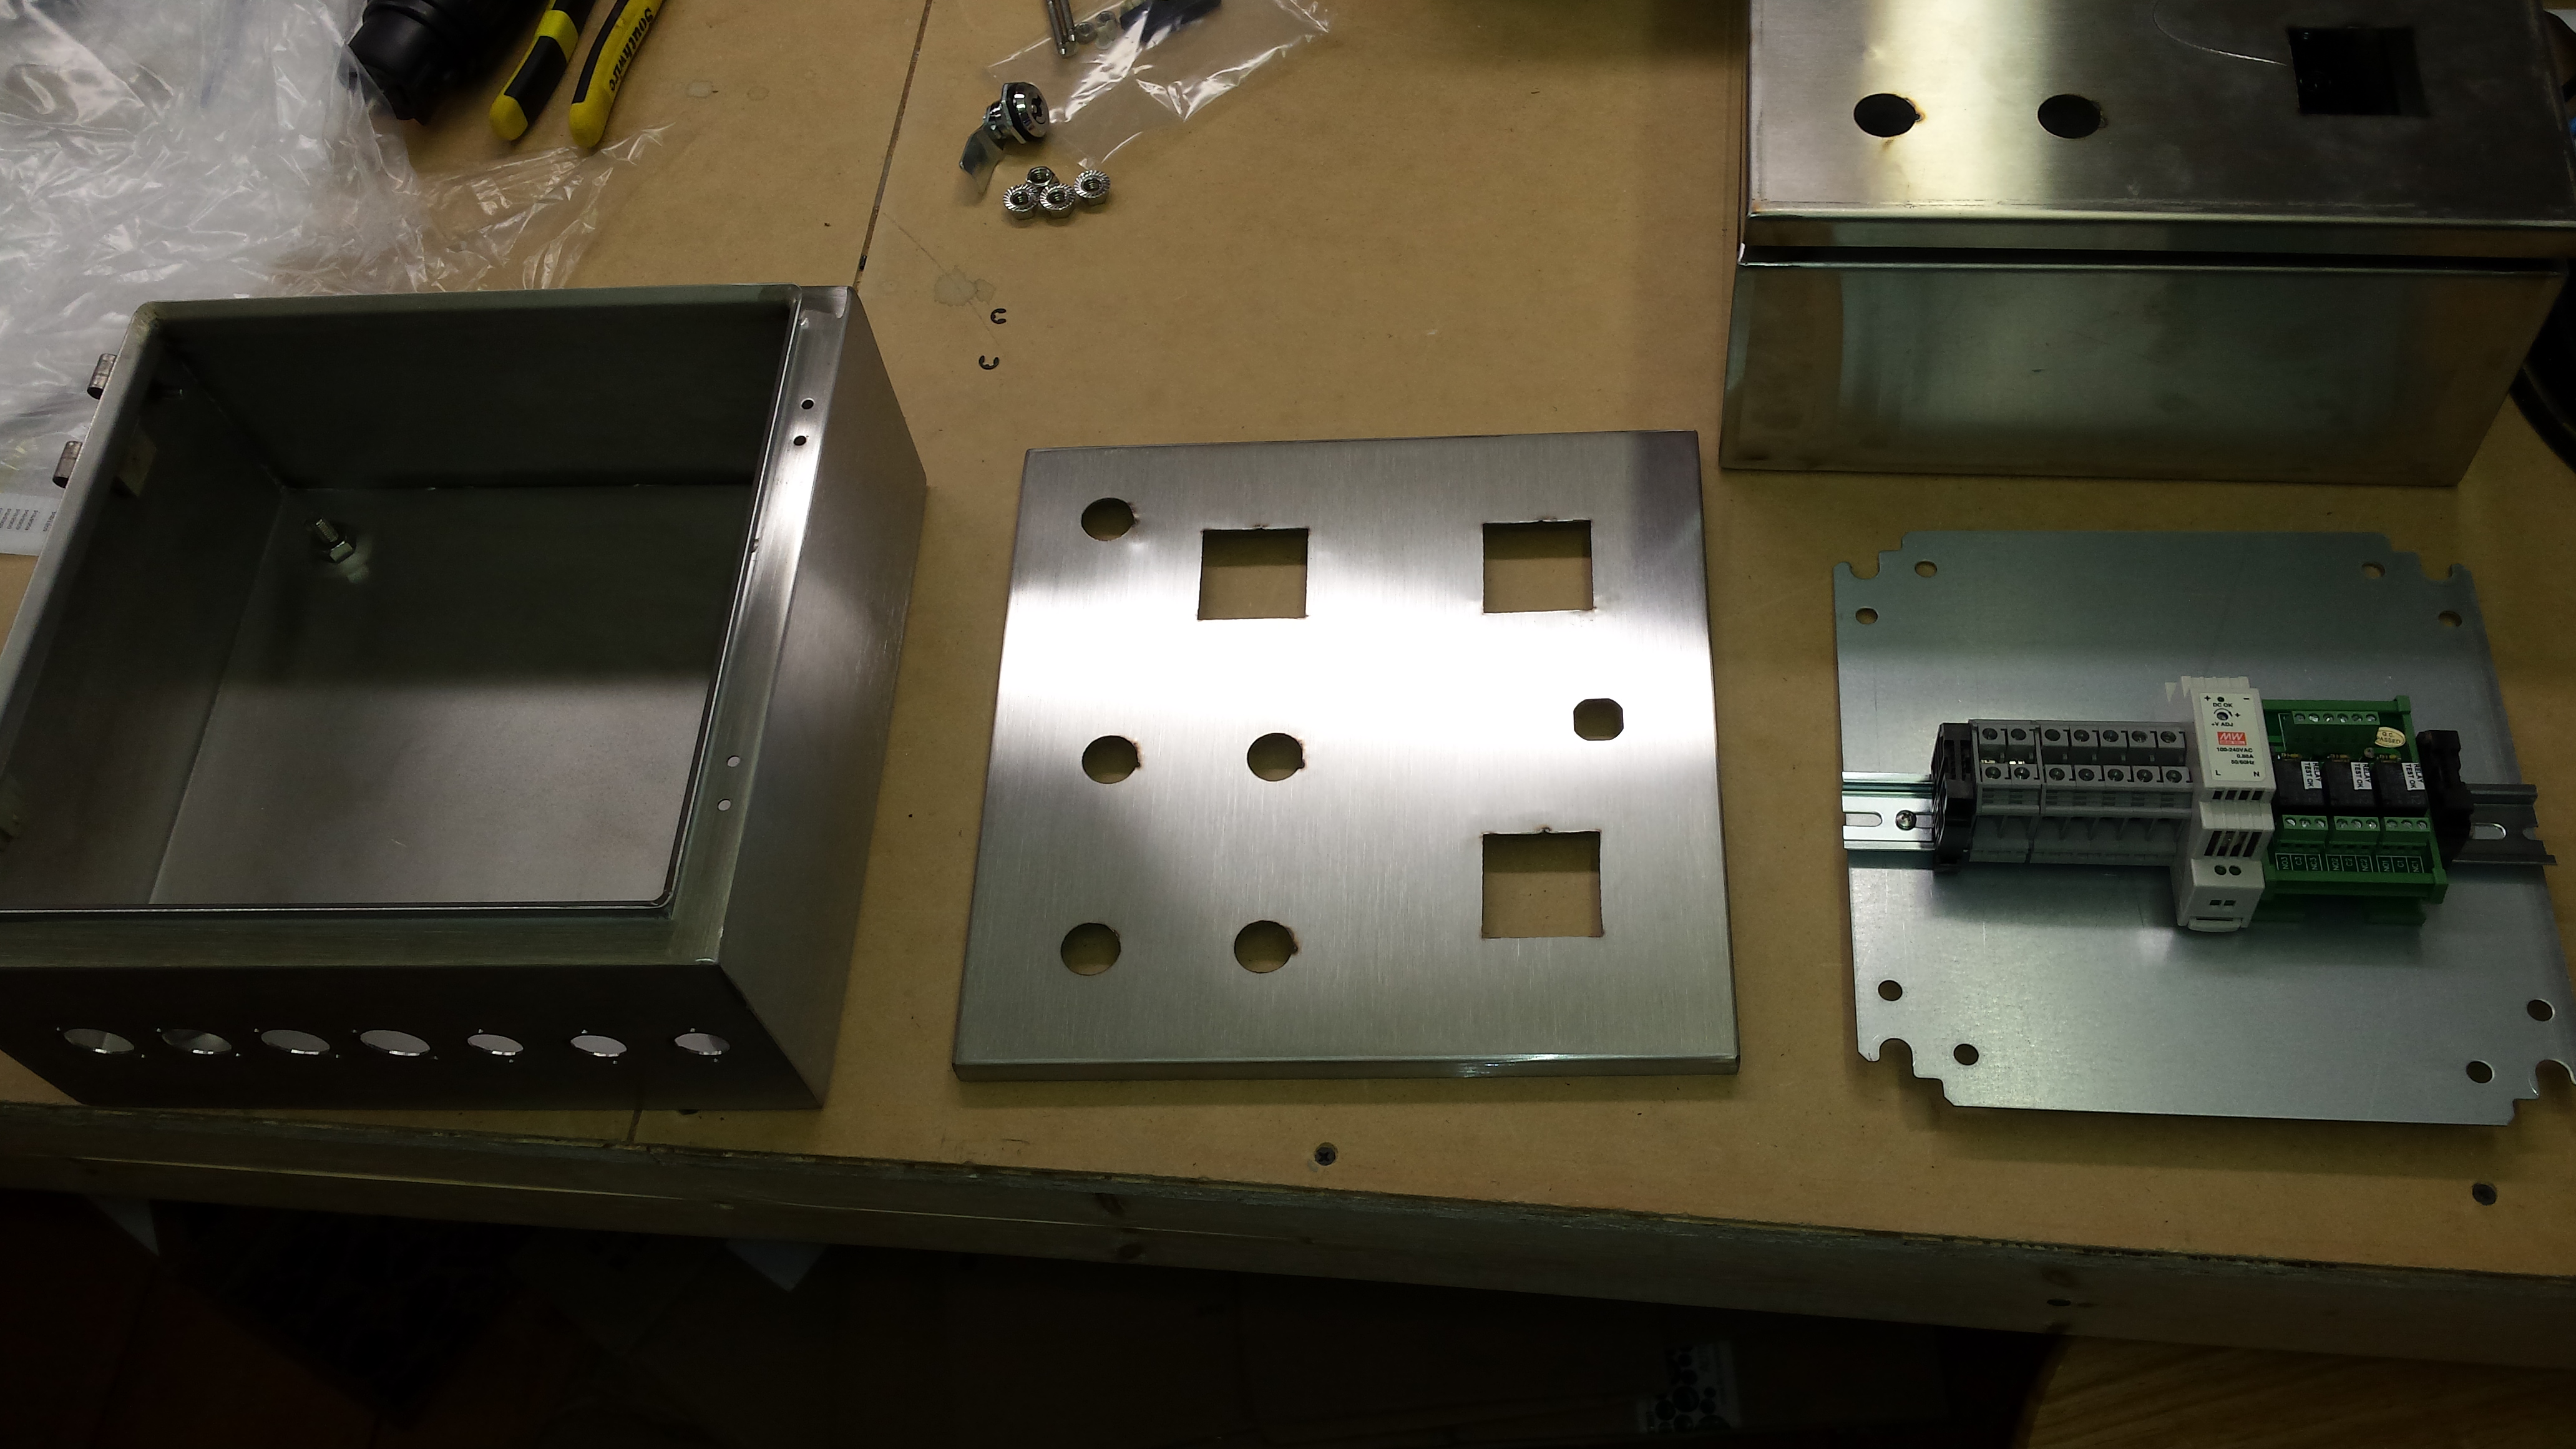
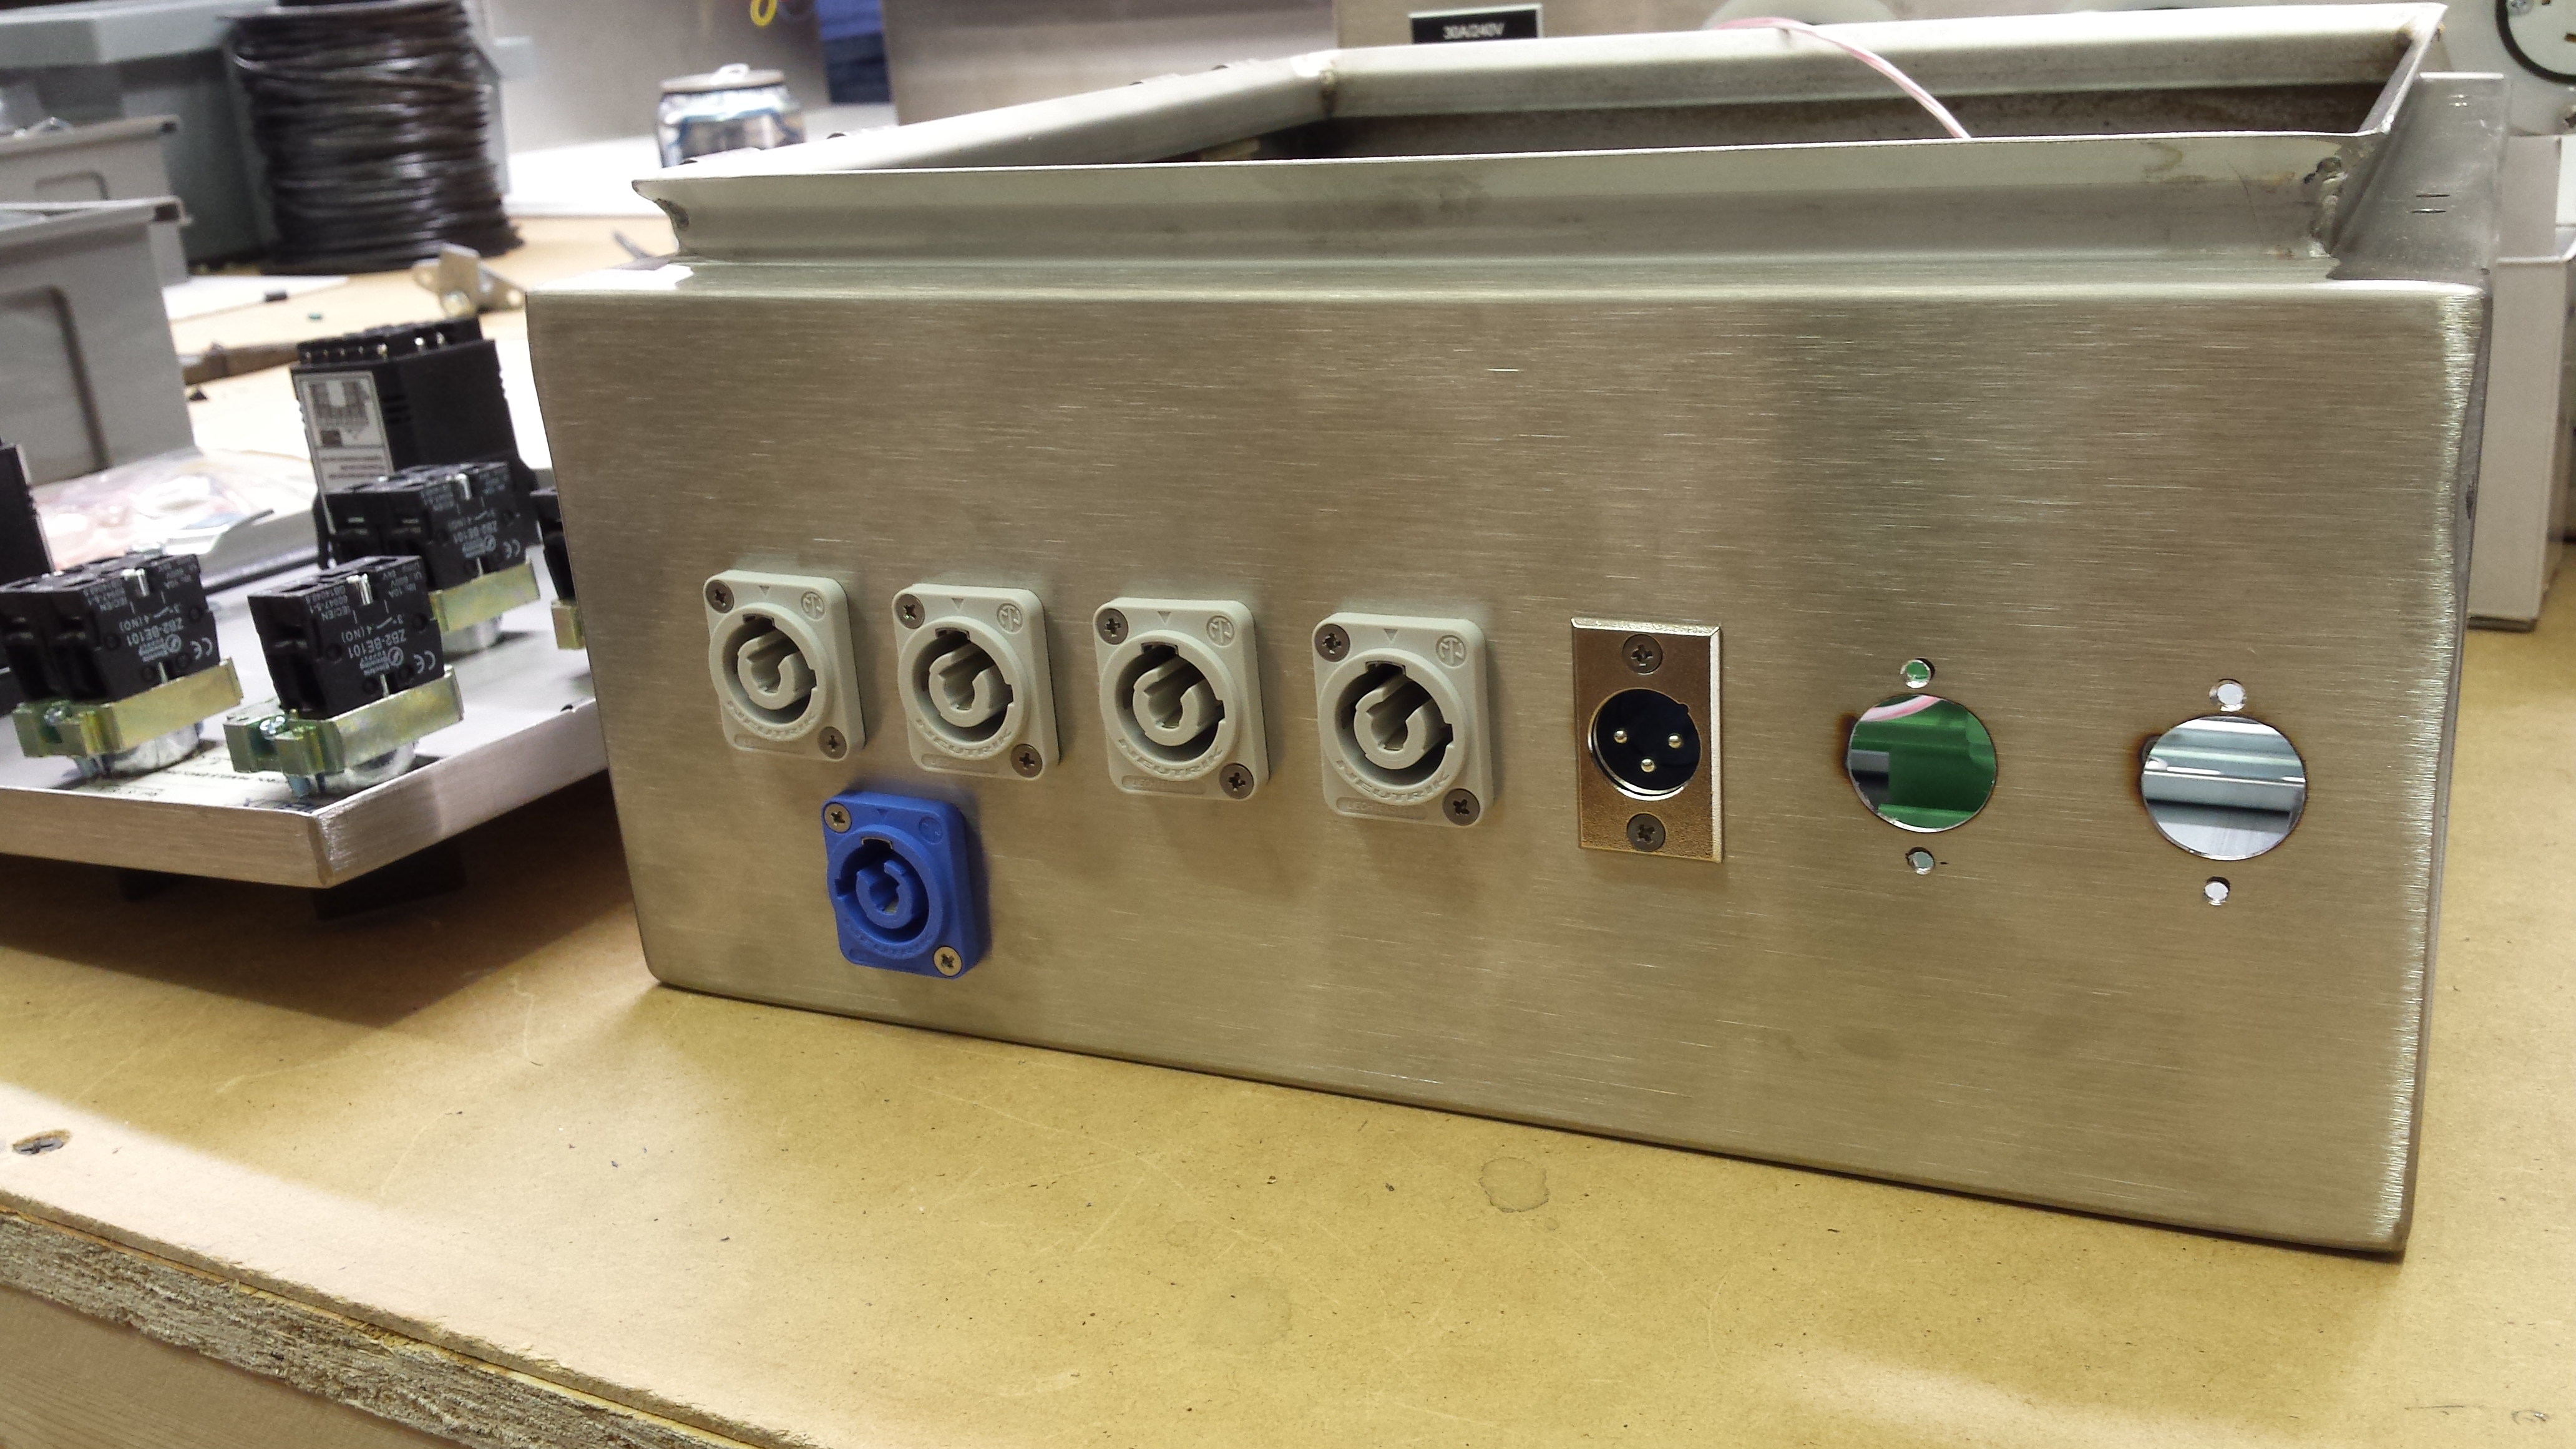
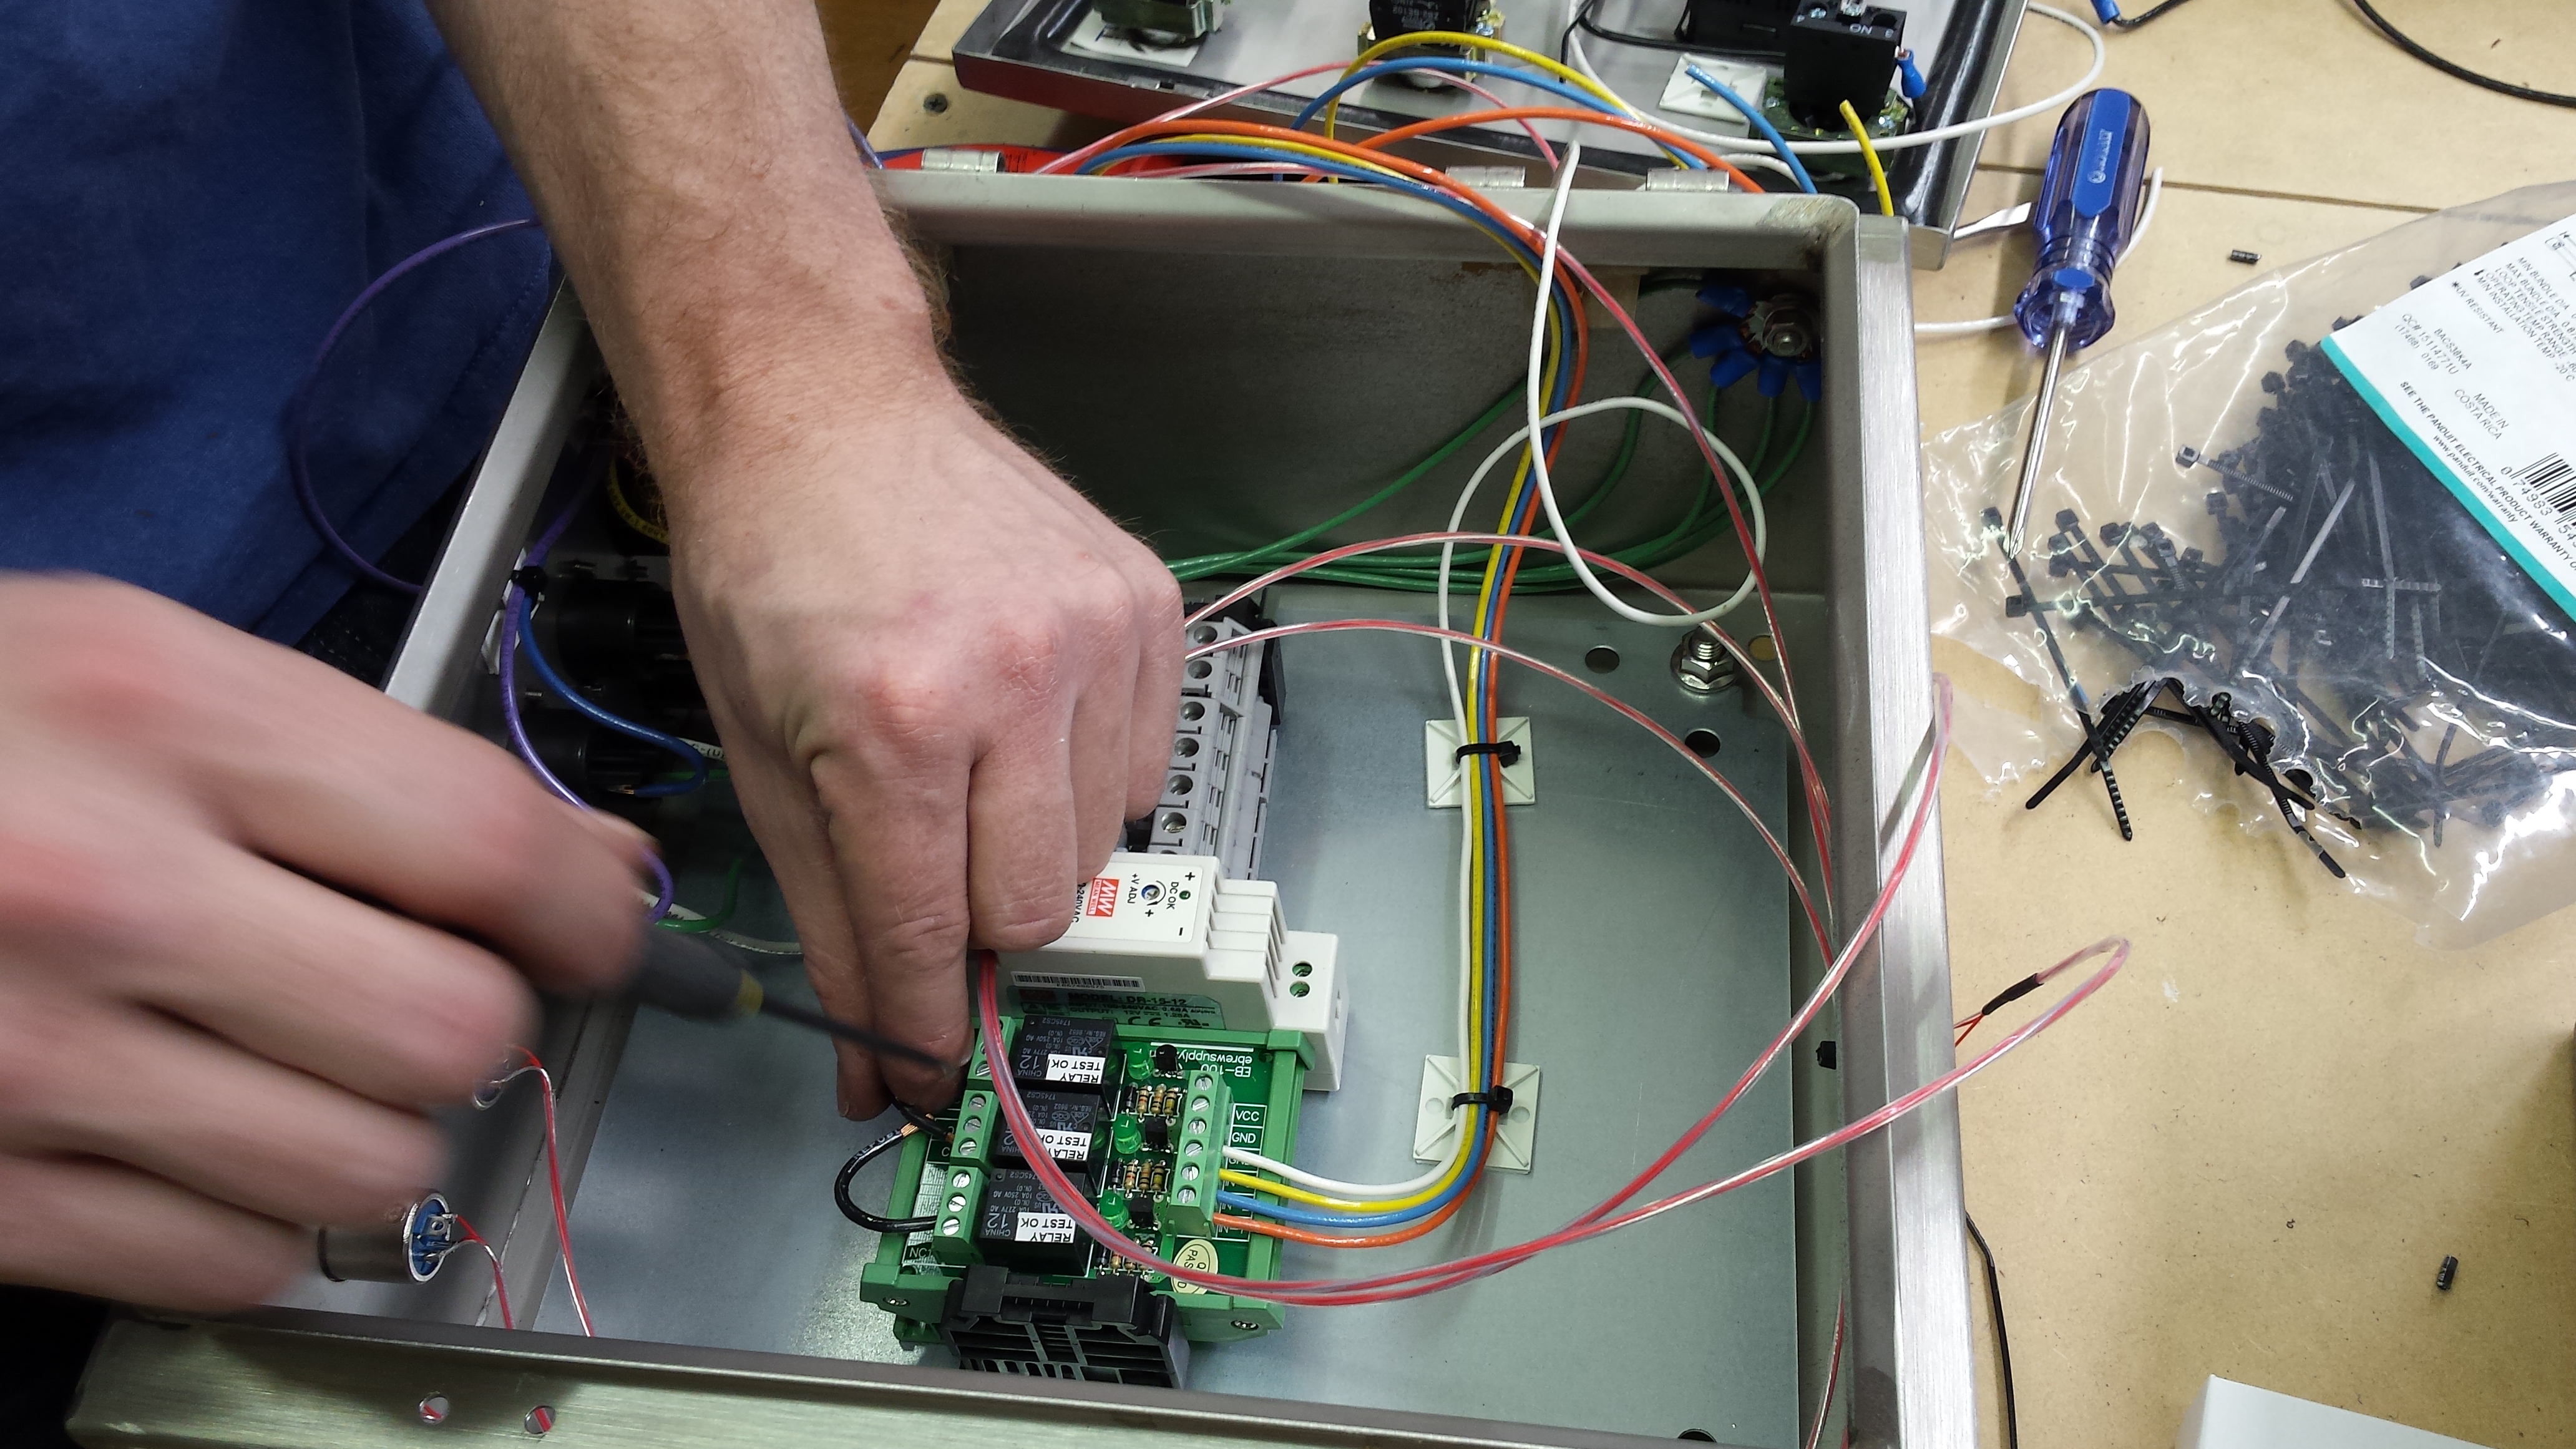
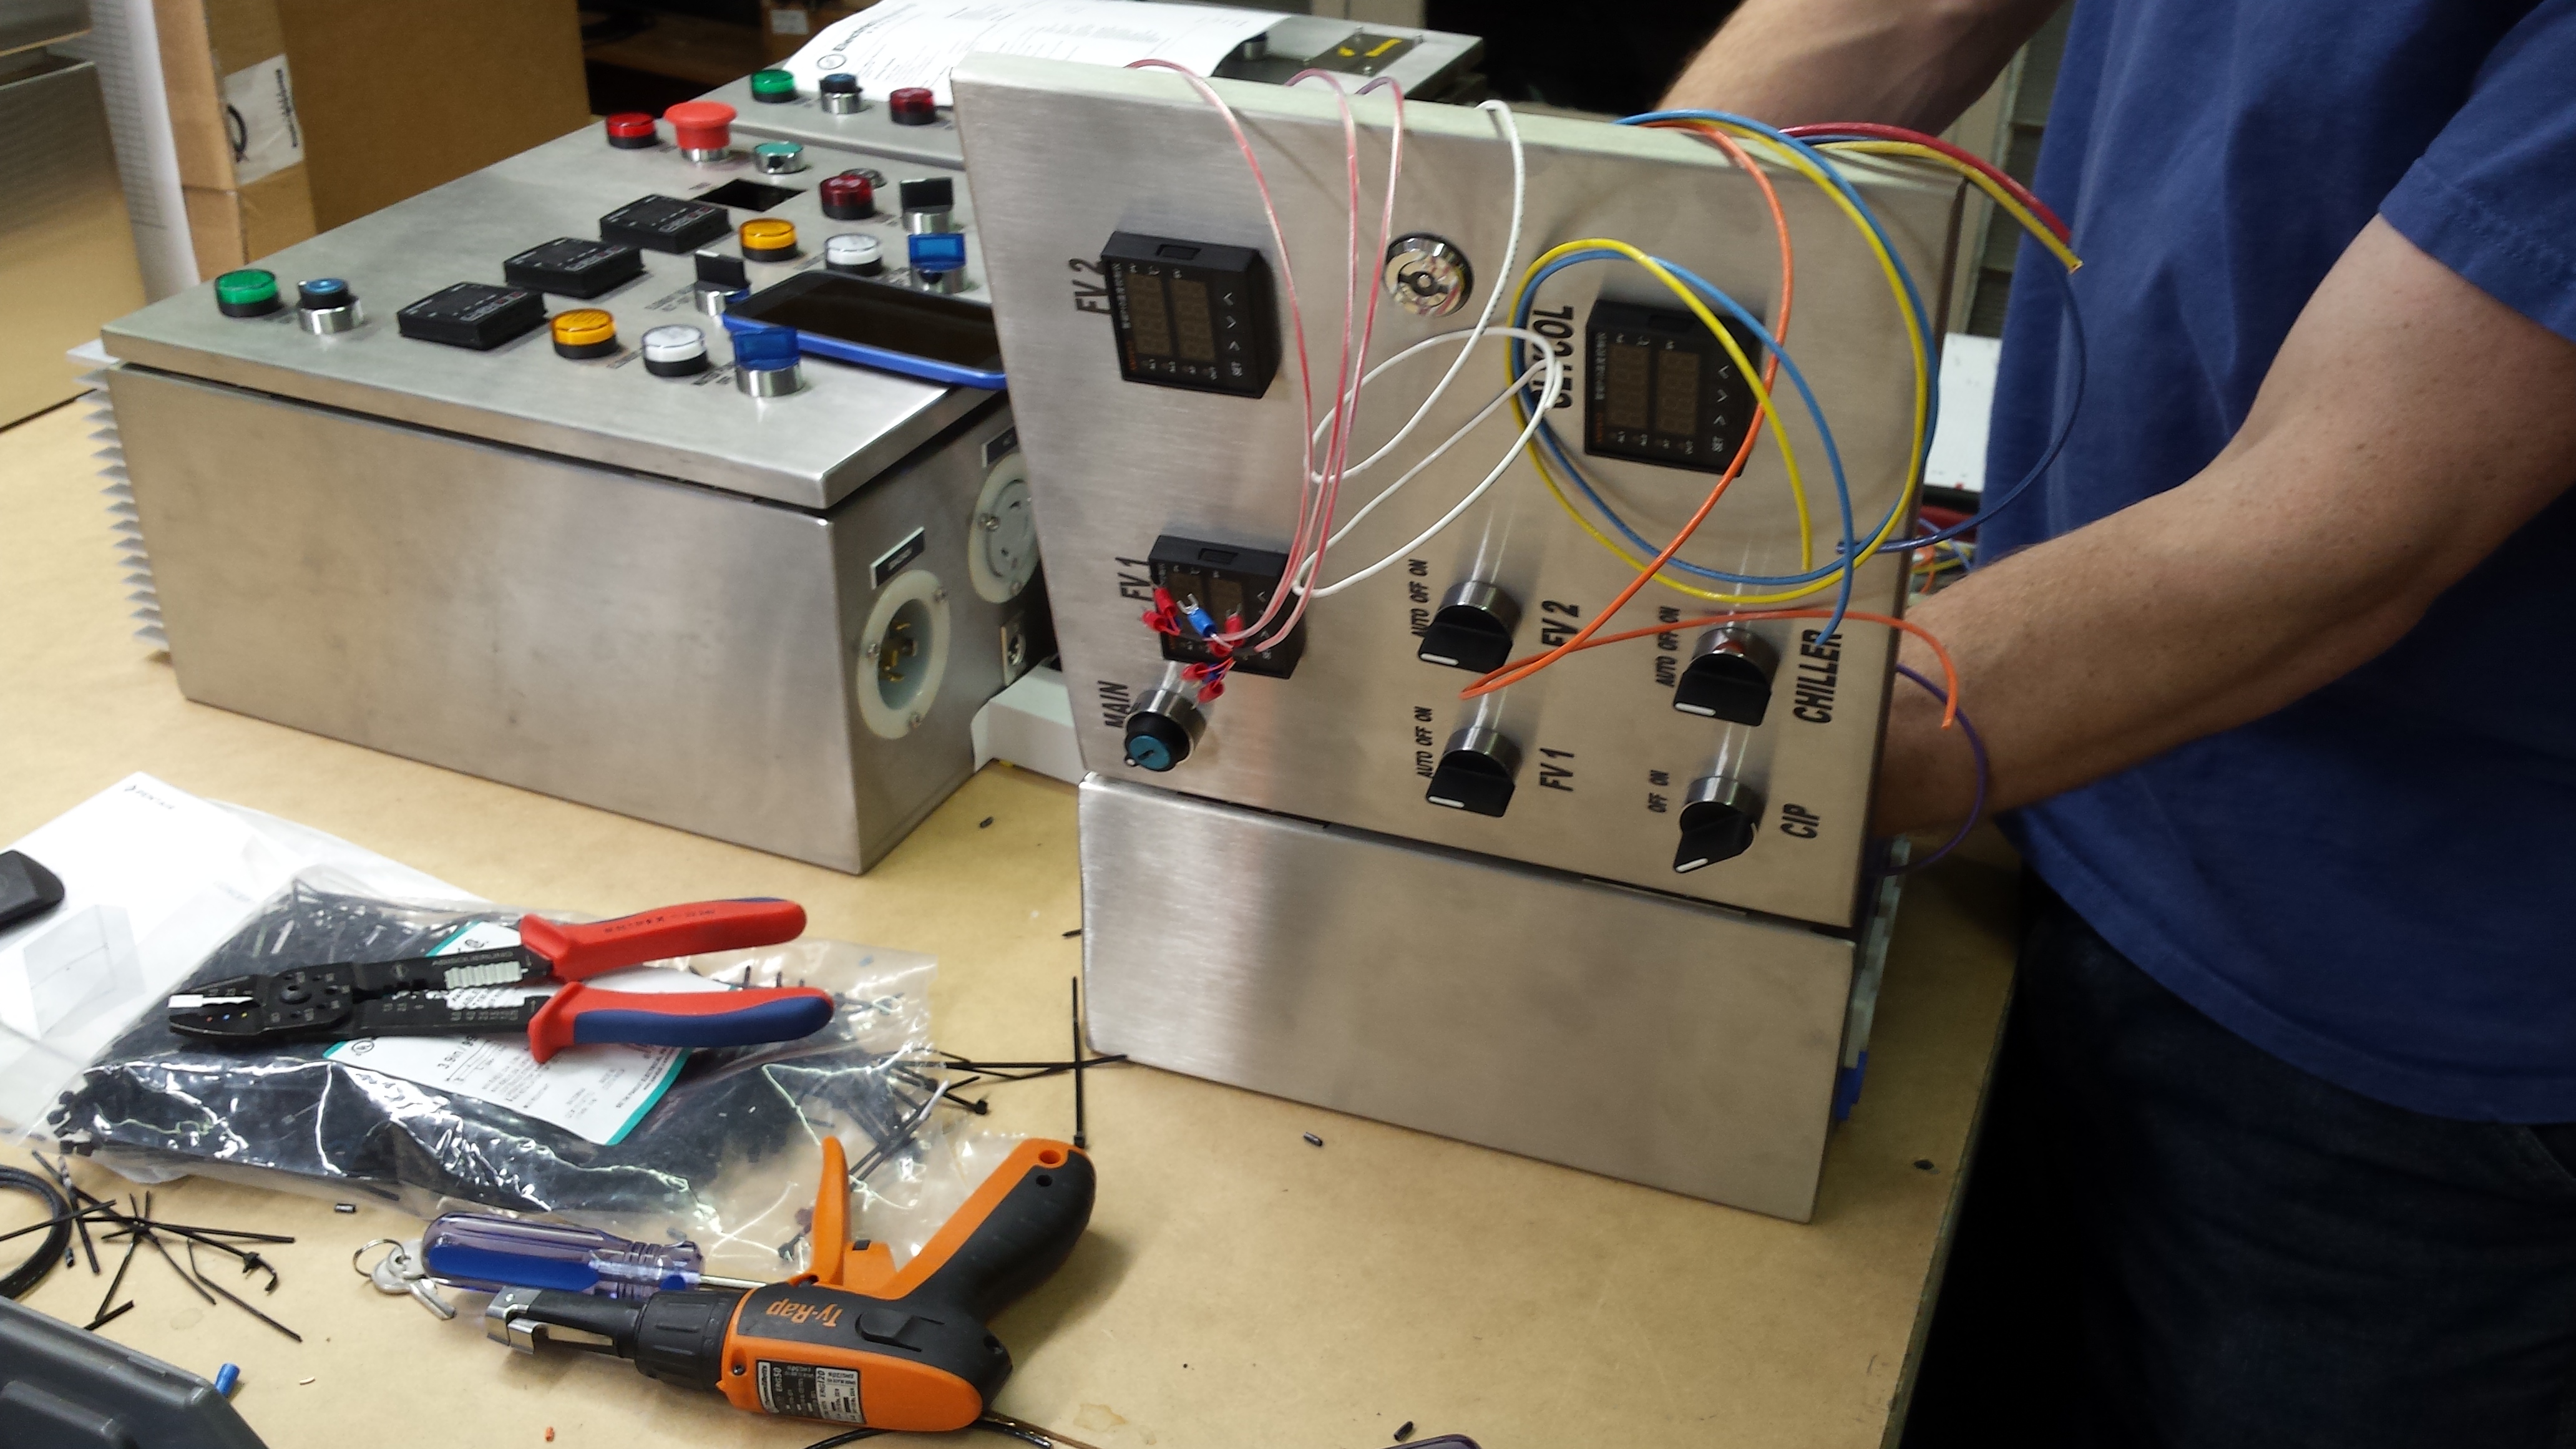
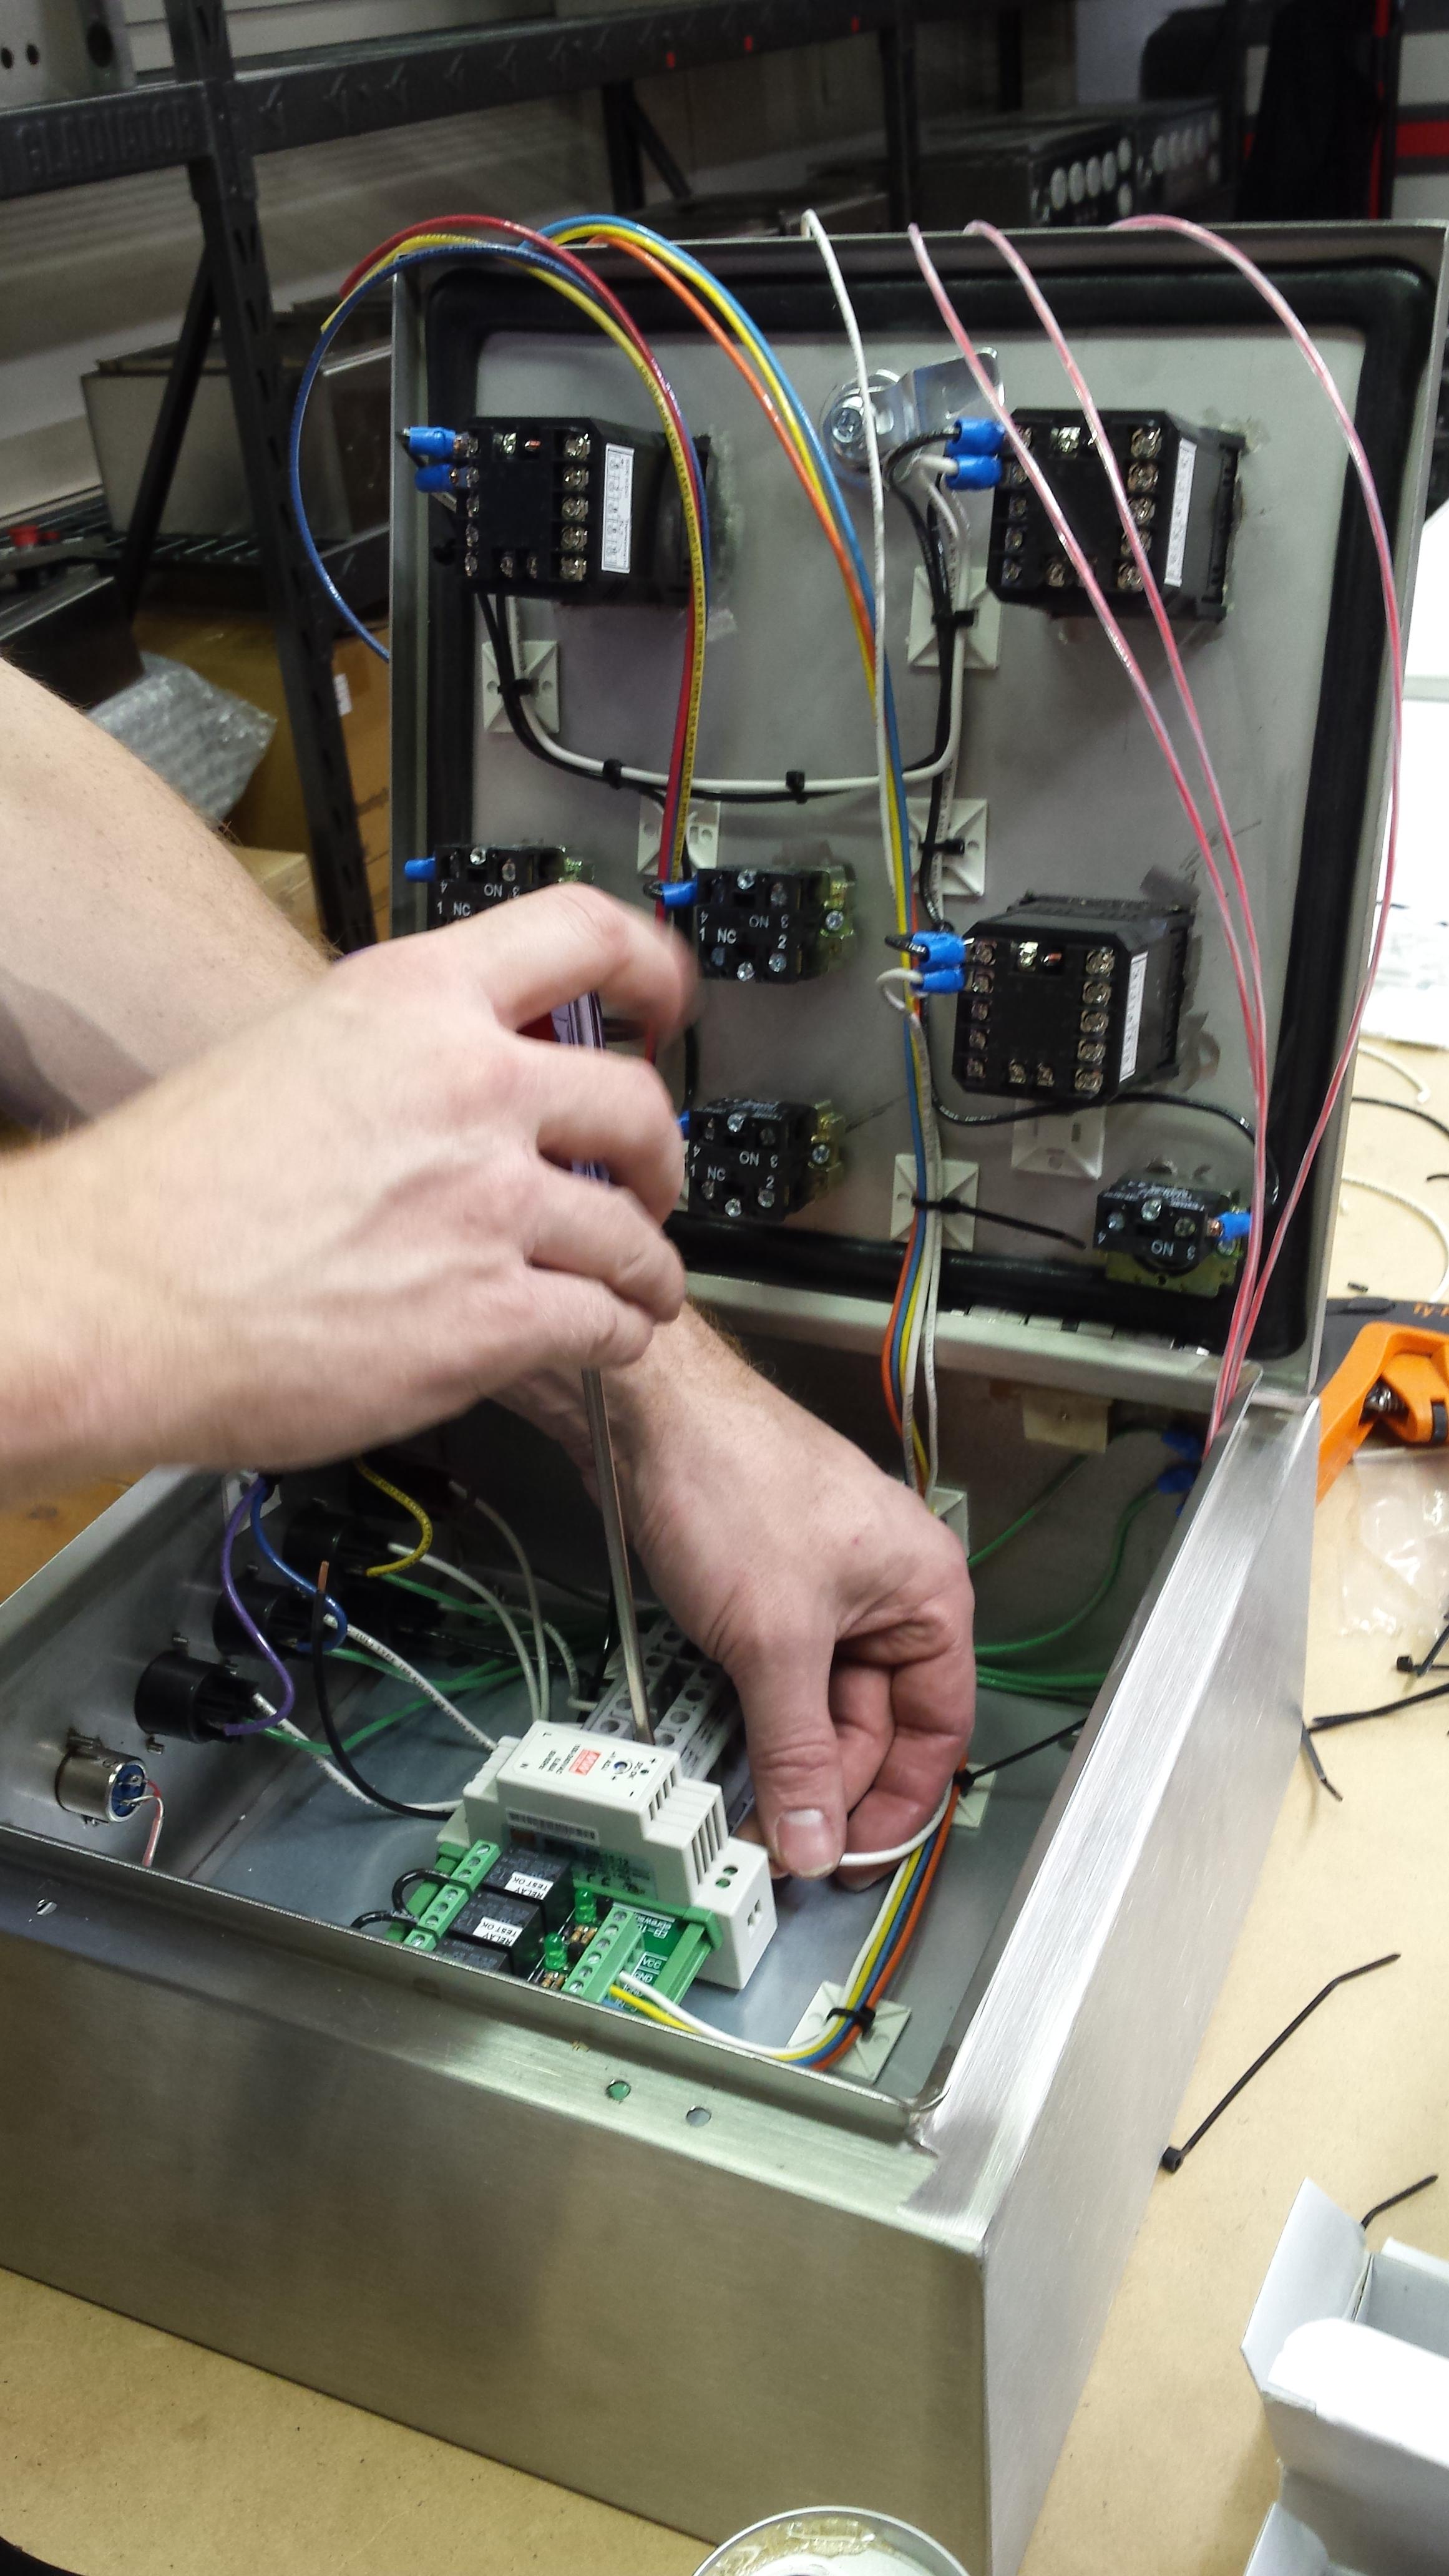
Meanwhile I modeled up a design for a control panel in CAD and sourced the materials through ebrewsupply. Ryan came up with the wiring schematic that would best fit my needs.
continued...
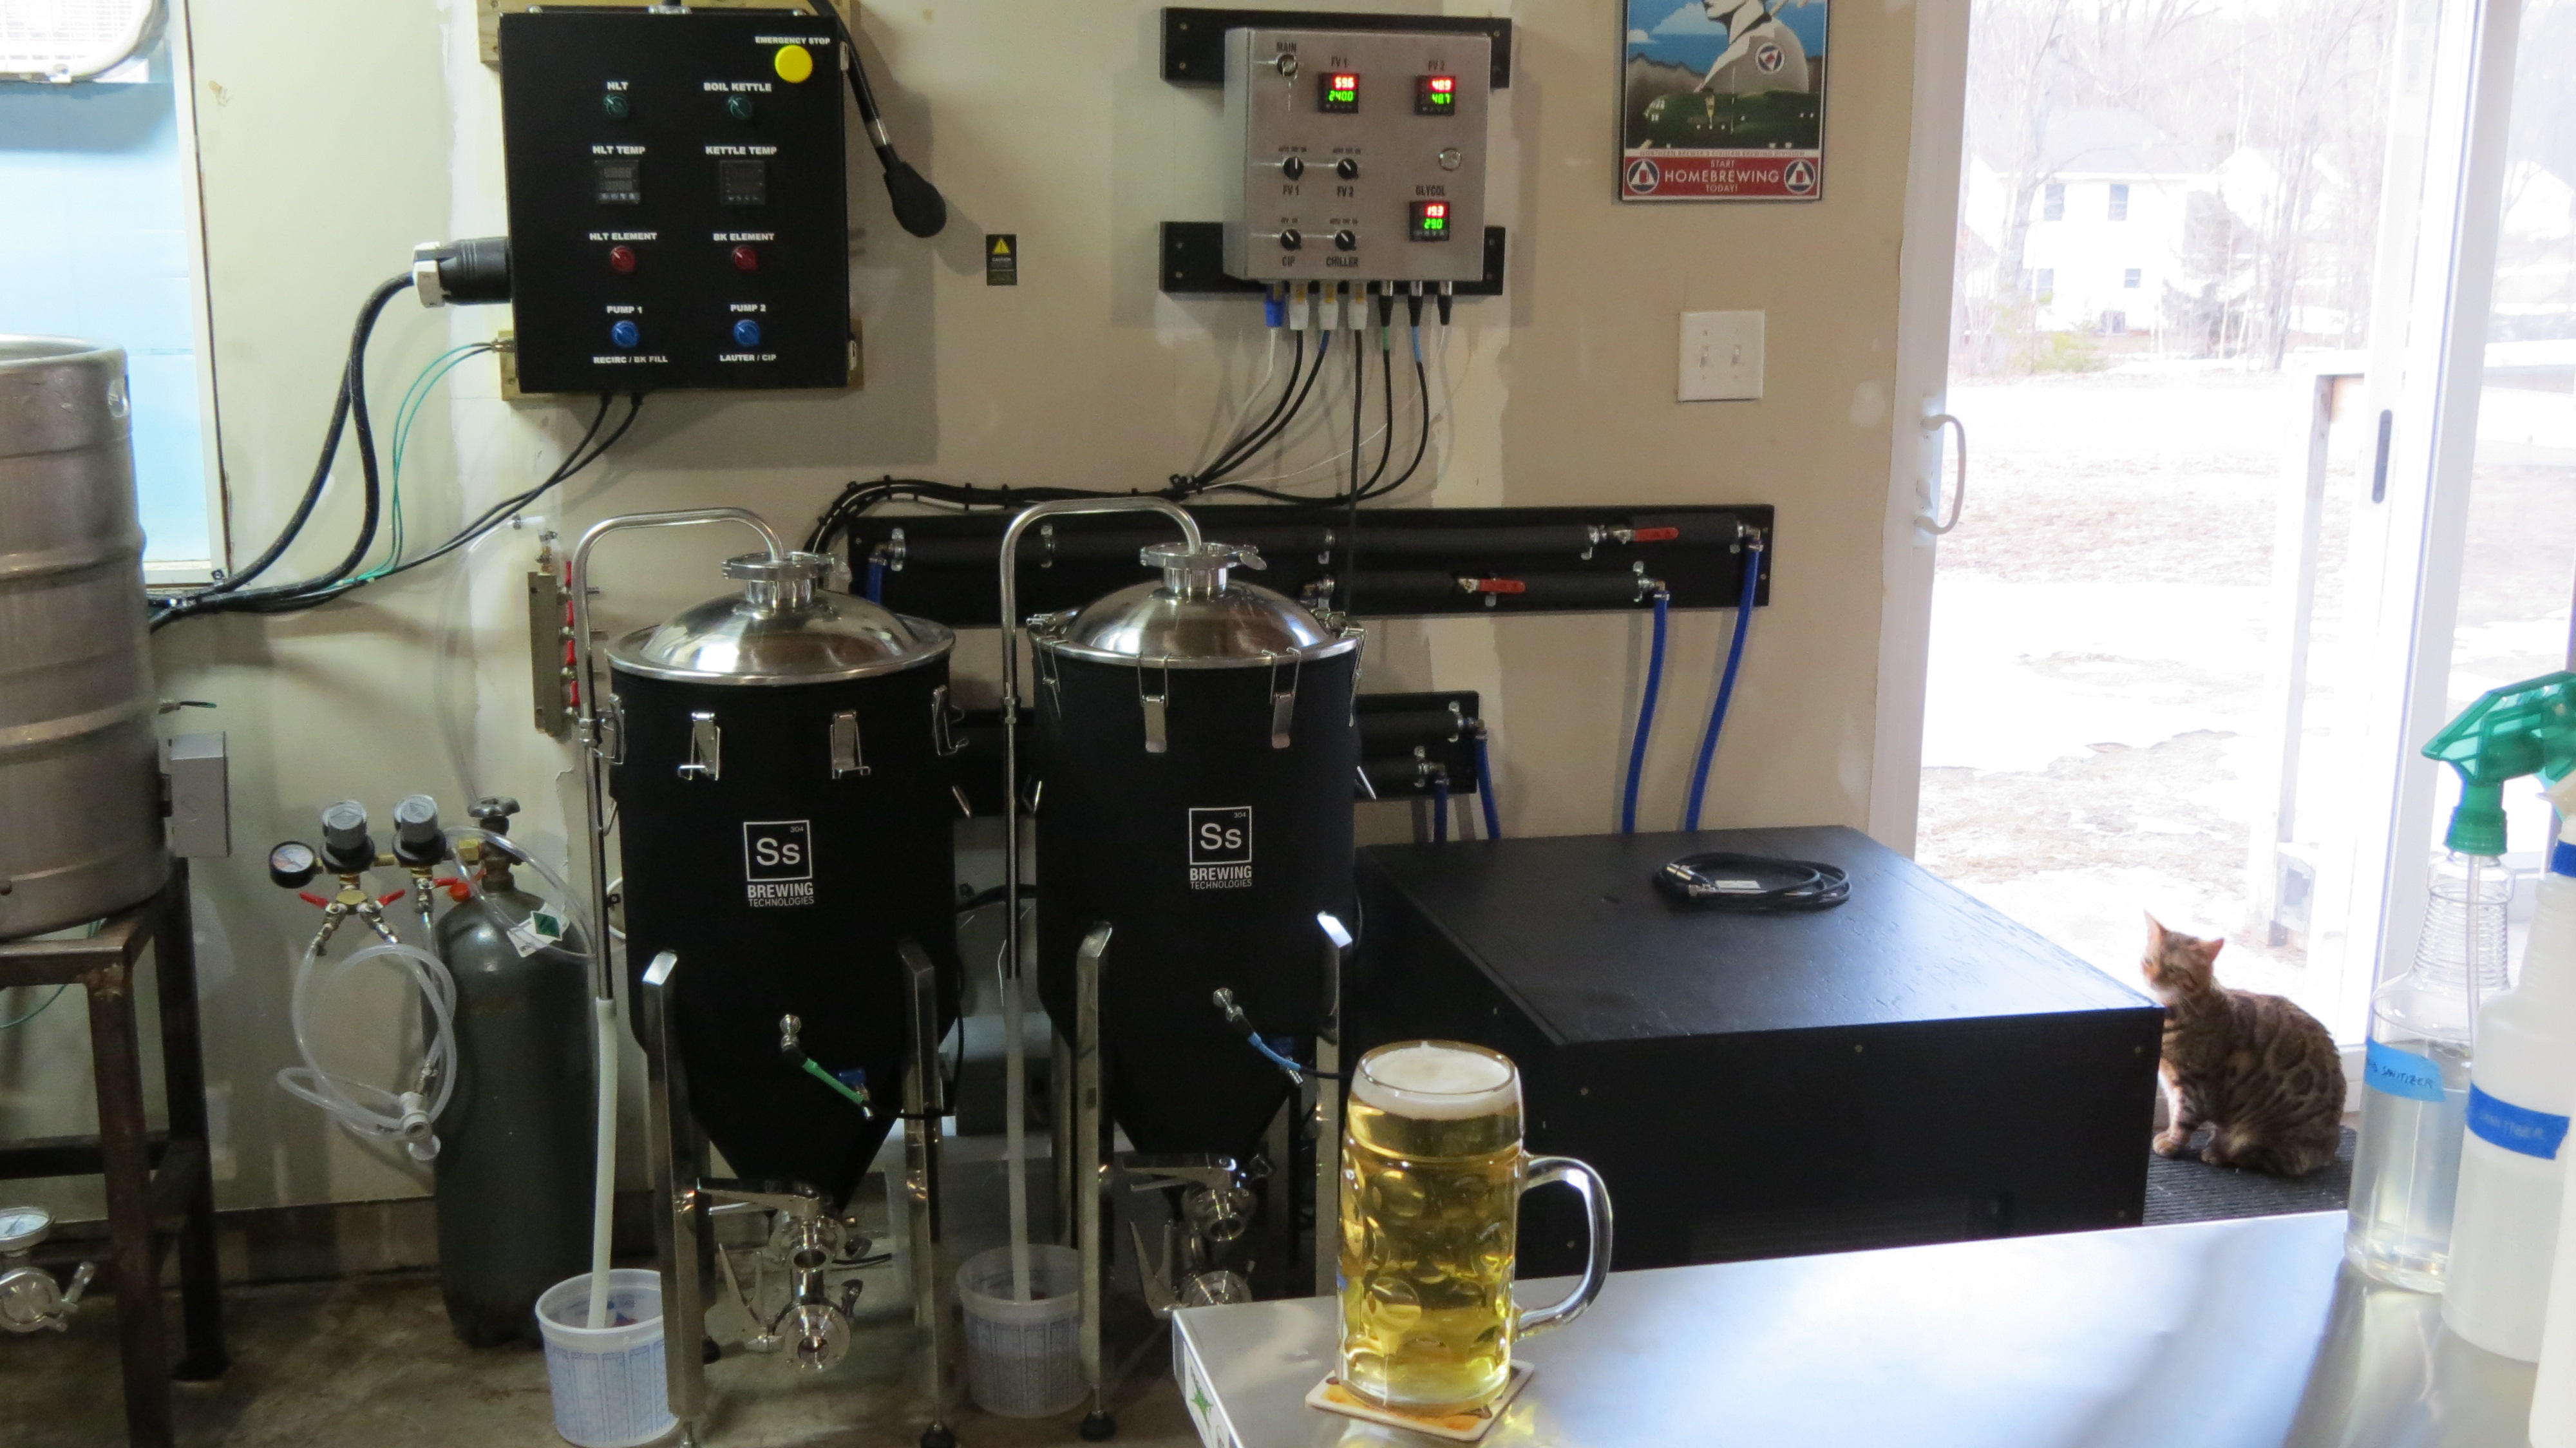
Finished project:
How it works: the evaporator from the A/C unit is submerged in a glycol solution inside a small cooler and is controlled by a PID unit in ON/OFF cooling mode. I chose one that has anti-short cycle delay to protect the compressor. The glycol PID gets temperature data from an RTD in the glycol solution. There are two submersible pond pumps - one for each fermentor - that are each controlled by a PID in ON/OFF mode. Temperature data is sent via RTDs in the thermowell on the conicals. When the beer reaches a certain temperature (SV+Hy), the PID turns on the pump, which pumps ~19F glycol solution through a coil in the fermentor, and back into the cooler. When the glycol temperature reaches upper control limit, the PID turns on the compressor/fan and cools the solution as needed.
I also opted to include a 120VAC switched outlet on the panel for a CIP pump. With that, I can do all the CIP & SIP required for the conicals without having to use an extension cord or have a separate switch box - it's all in the fermentation control panel!
A big shout out to Ryan at eBrewSupply for his help. He was generous with sharing his knowledge, wiring the panel, and helping me acquire some equipment.
I started with a 5,000 BTU window A/C unit. Got it for about $130 at Sears.
Then tear it down and discard any unused parts:
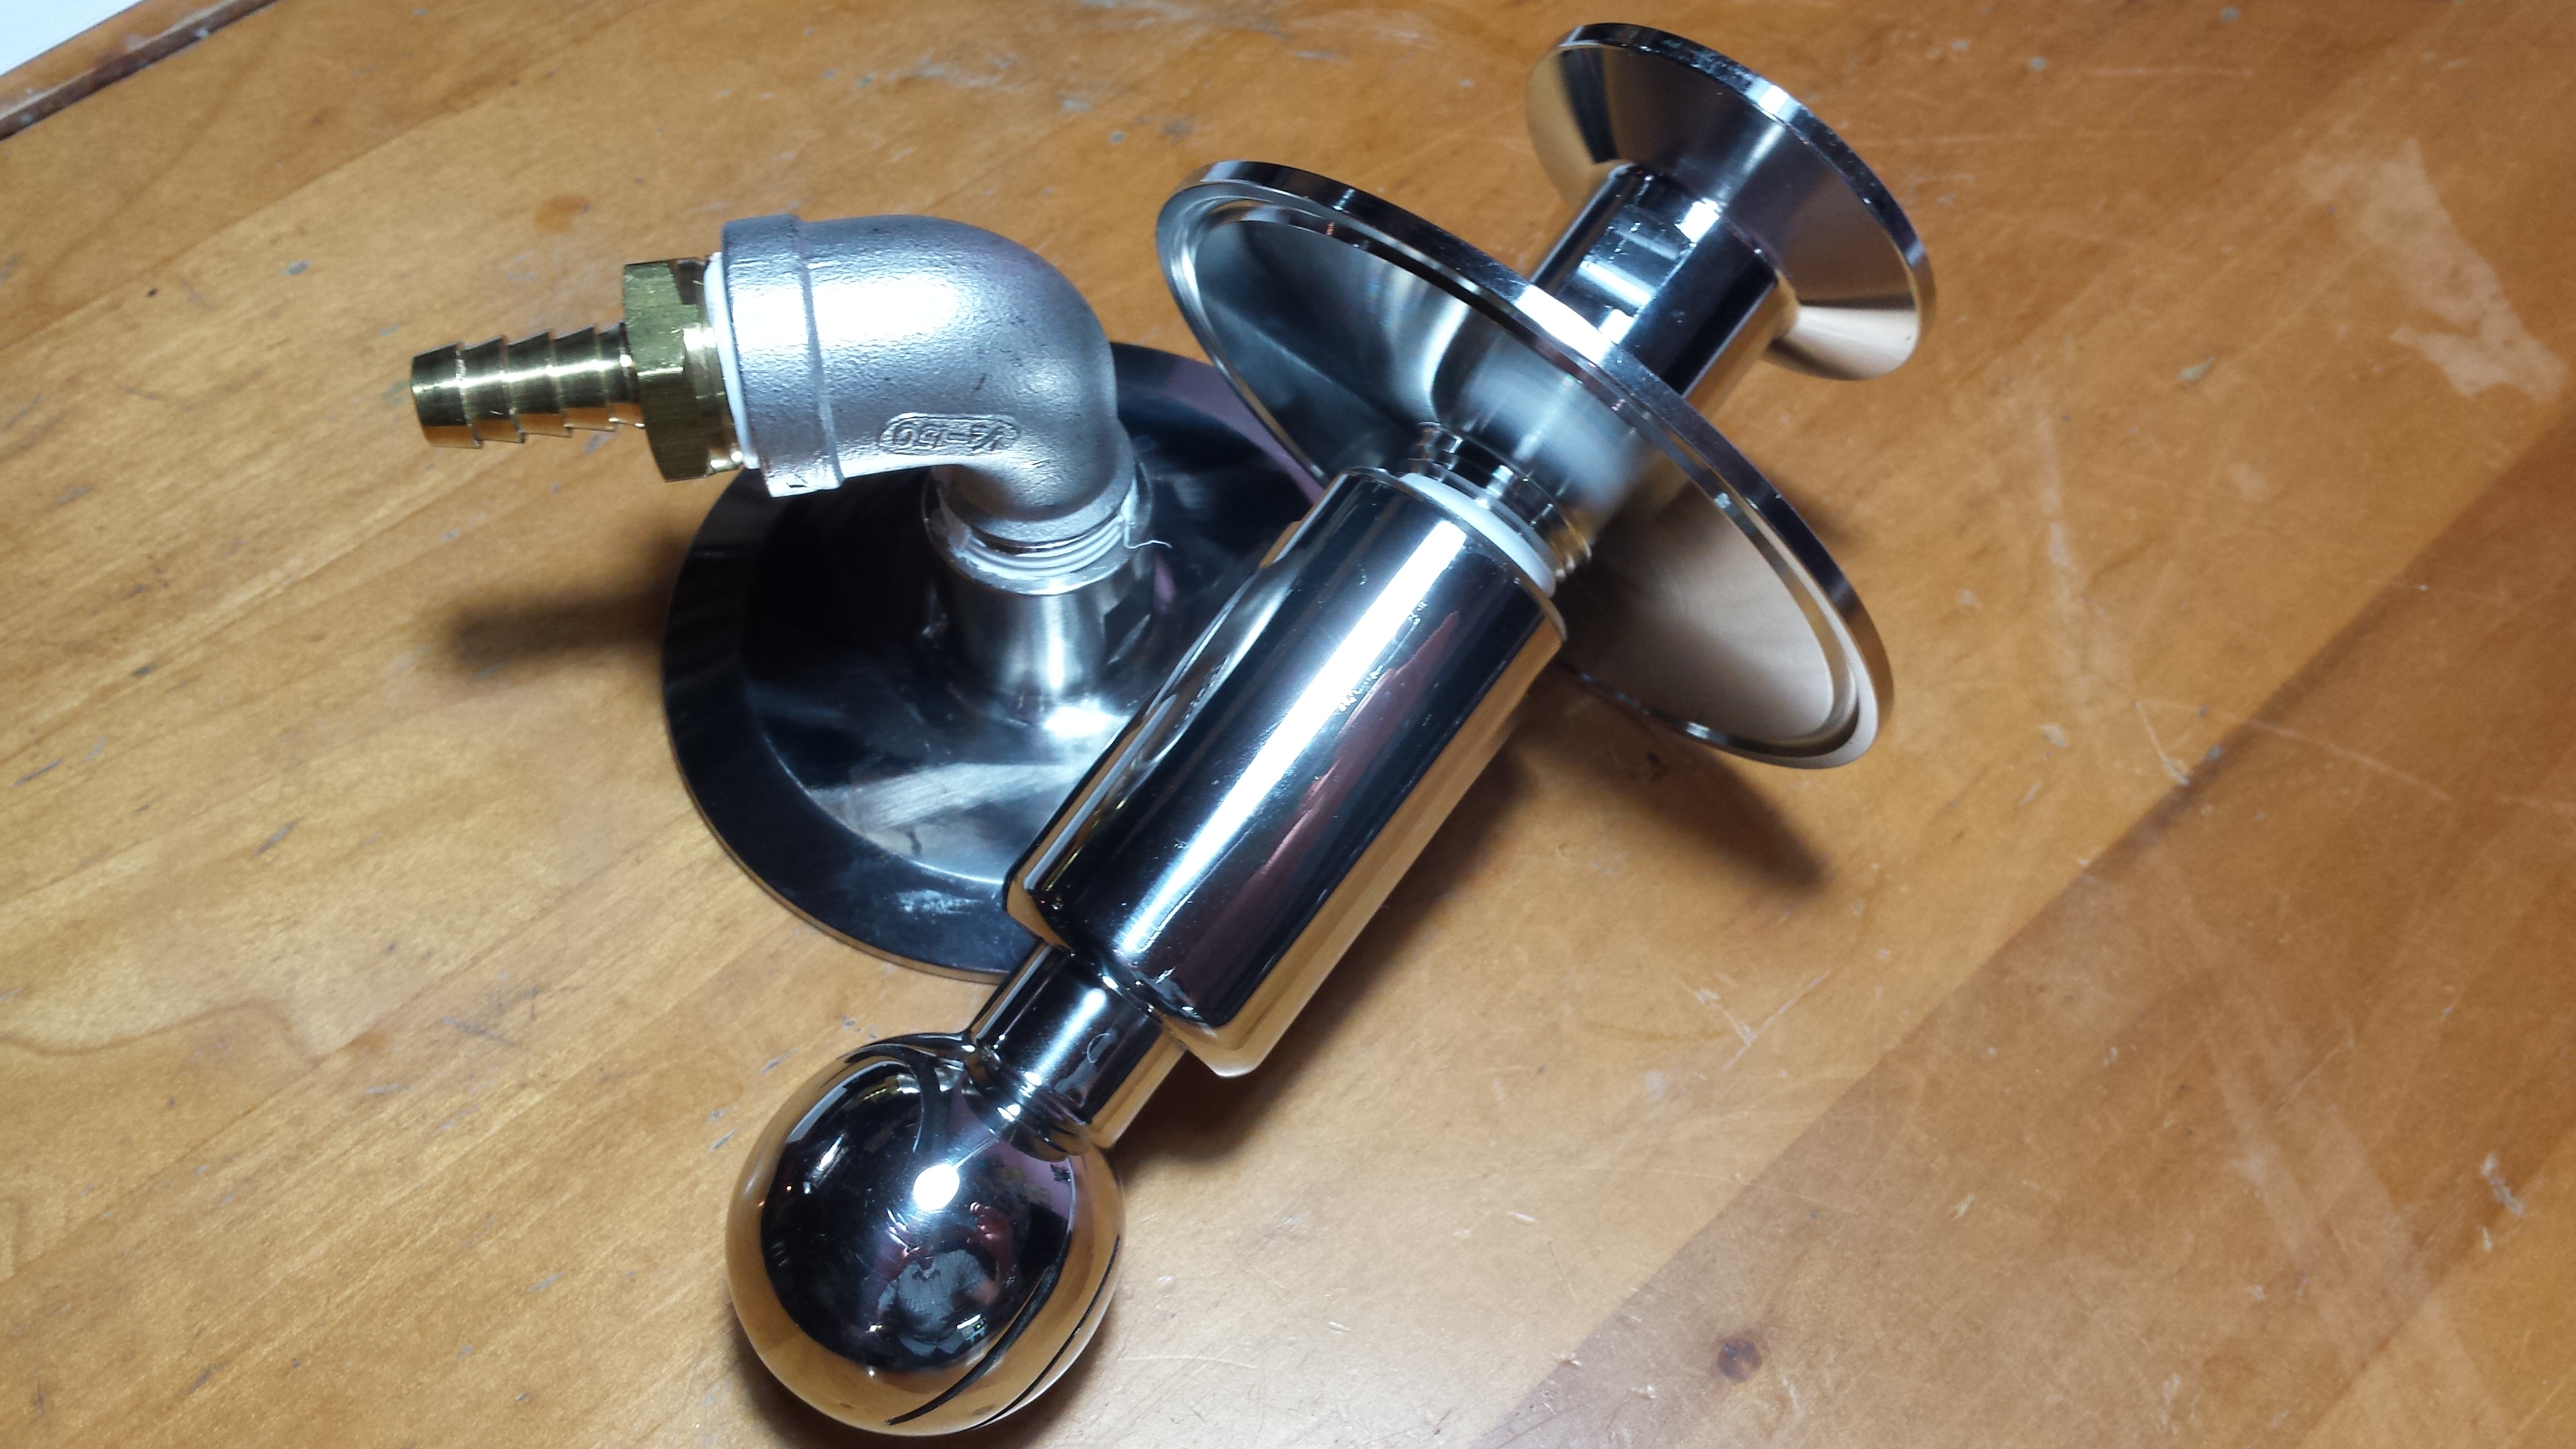
Carefully extend the evaporator into the cooler. You don't want to stress or kink the copper lines. I used a 34 quart cooler, which will be filled to about 5.5 gallons of glycol solution.
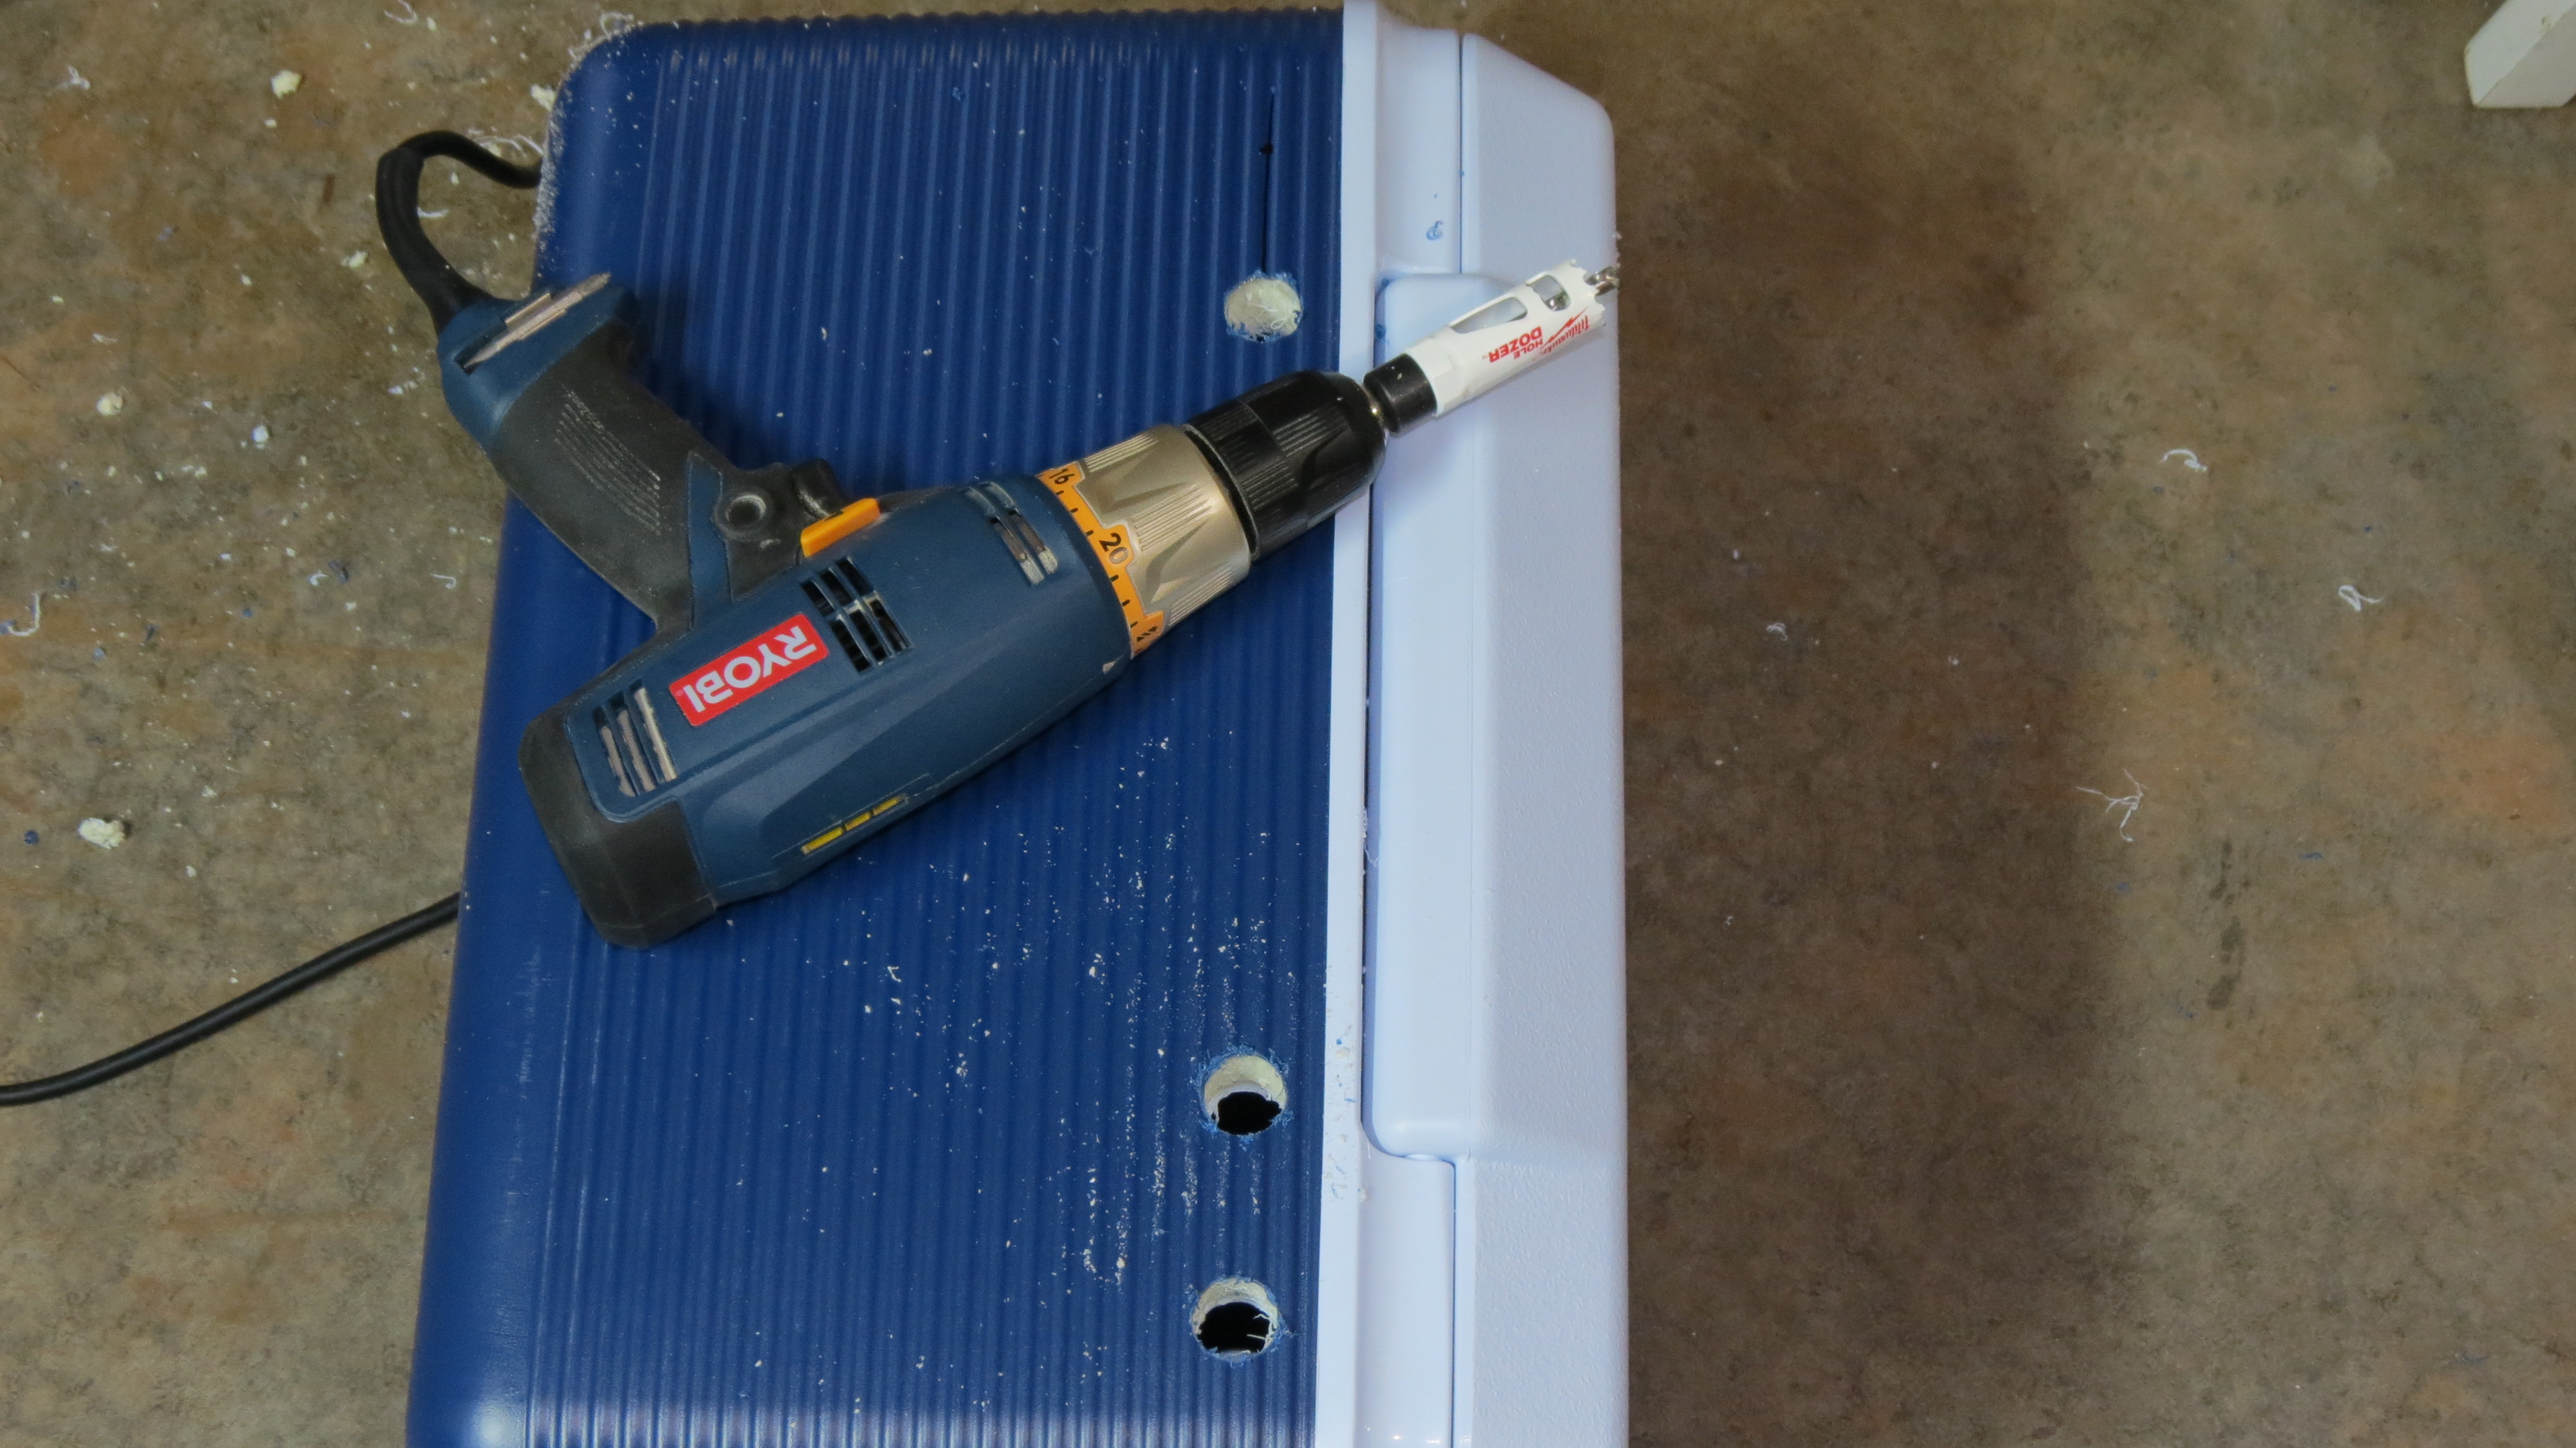
Next bypass the OEM thermostat and remove that. Make sure loose components are secured:
Cut off the GFI power cord that comes with the unit and save that for the control panel, then wire a new power cord for the A/C unit with a twist lock style connector. Also cut the standard connector off the pumps and replace with same twist style connector:
Meanwhile I modeled up a design for a control panel in CAD and sourced the materials through ebrewsupply. Ryan came up with the wiring schematic that would best fit my needs.
continued...


")
