
So, by request (and after a long delay), I'm posting the details of what I did for the drip tray to go on my 1954 Frigidaire Kegerator (https://www.homebrewtalk.com/f51/vintage-1954-frigidaire-kegerator-build-334079/). Thanks for keeping on me about this.
First, I wanted to do something more than the standard, rectangular drip tray; something that kind of follows the lines of the fridge. I actually traced the footpad on my Harley first, but it was too small. I expanded it to a larger size, traced the curve of the front of the fridge along the top, and here's what I came up with:

I found a 5x12" set-in drip tray online and played with the size of the template until it fit the tray. I cut it out of foam board, then traced/cut two pieces of 5/8" plywood. Two layers: one solid for the bottom and a cut-out on top for the tray to sit into.
I traced the drip tray into the 'top' piece of plywood:

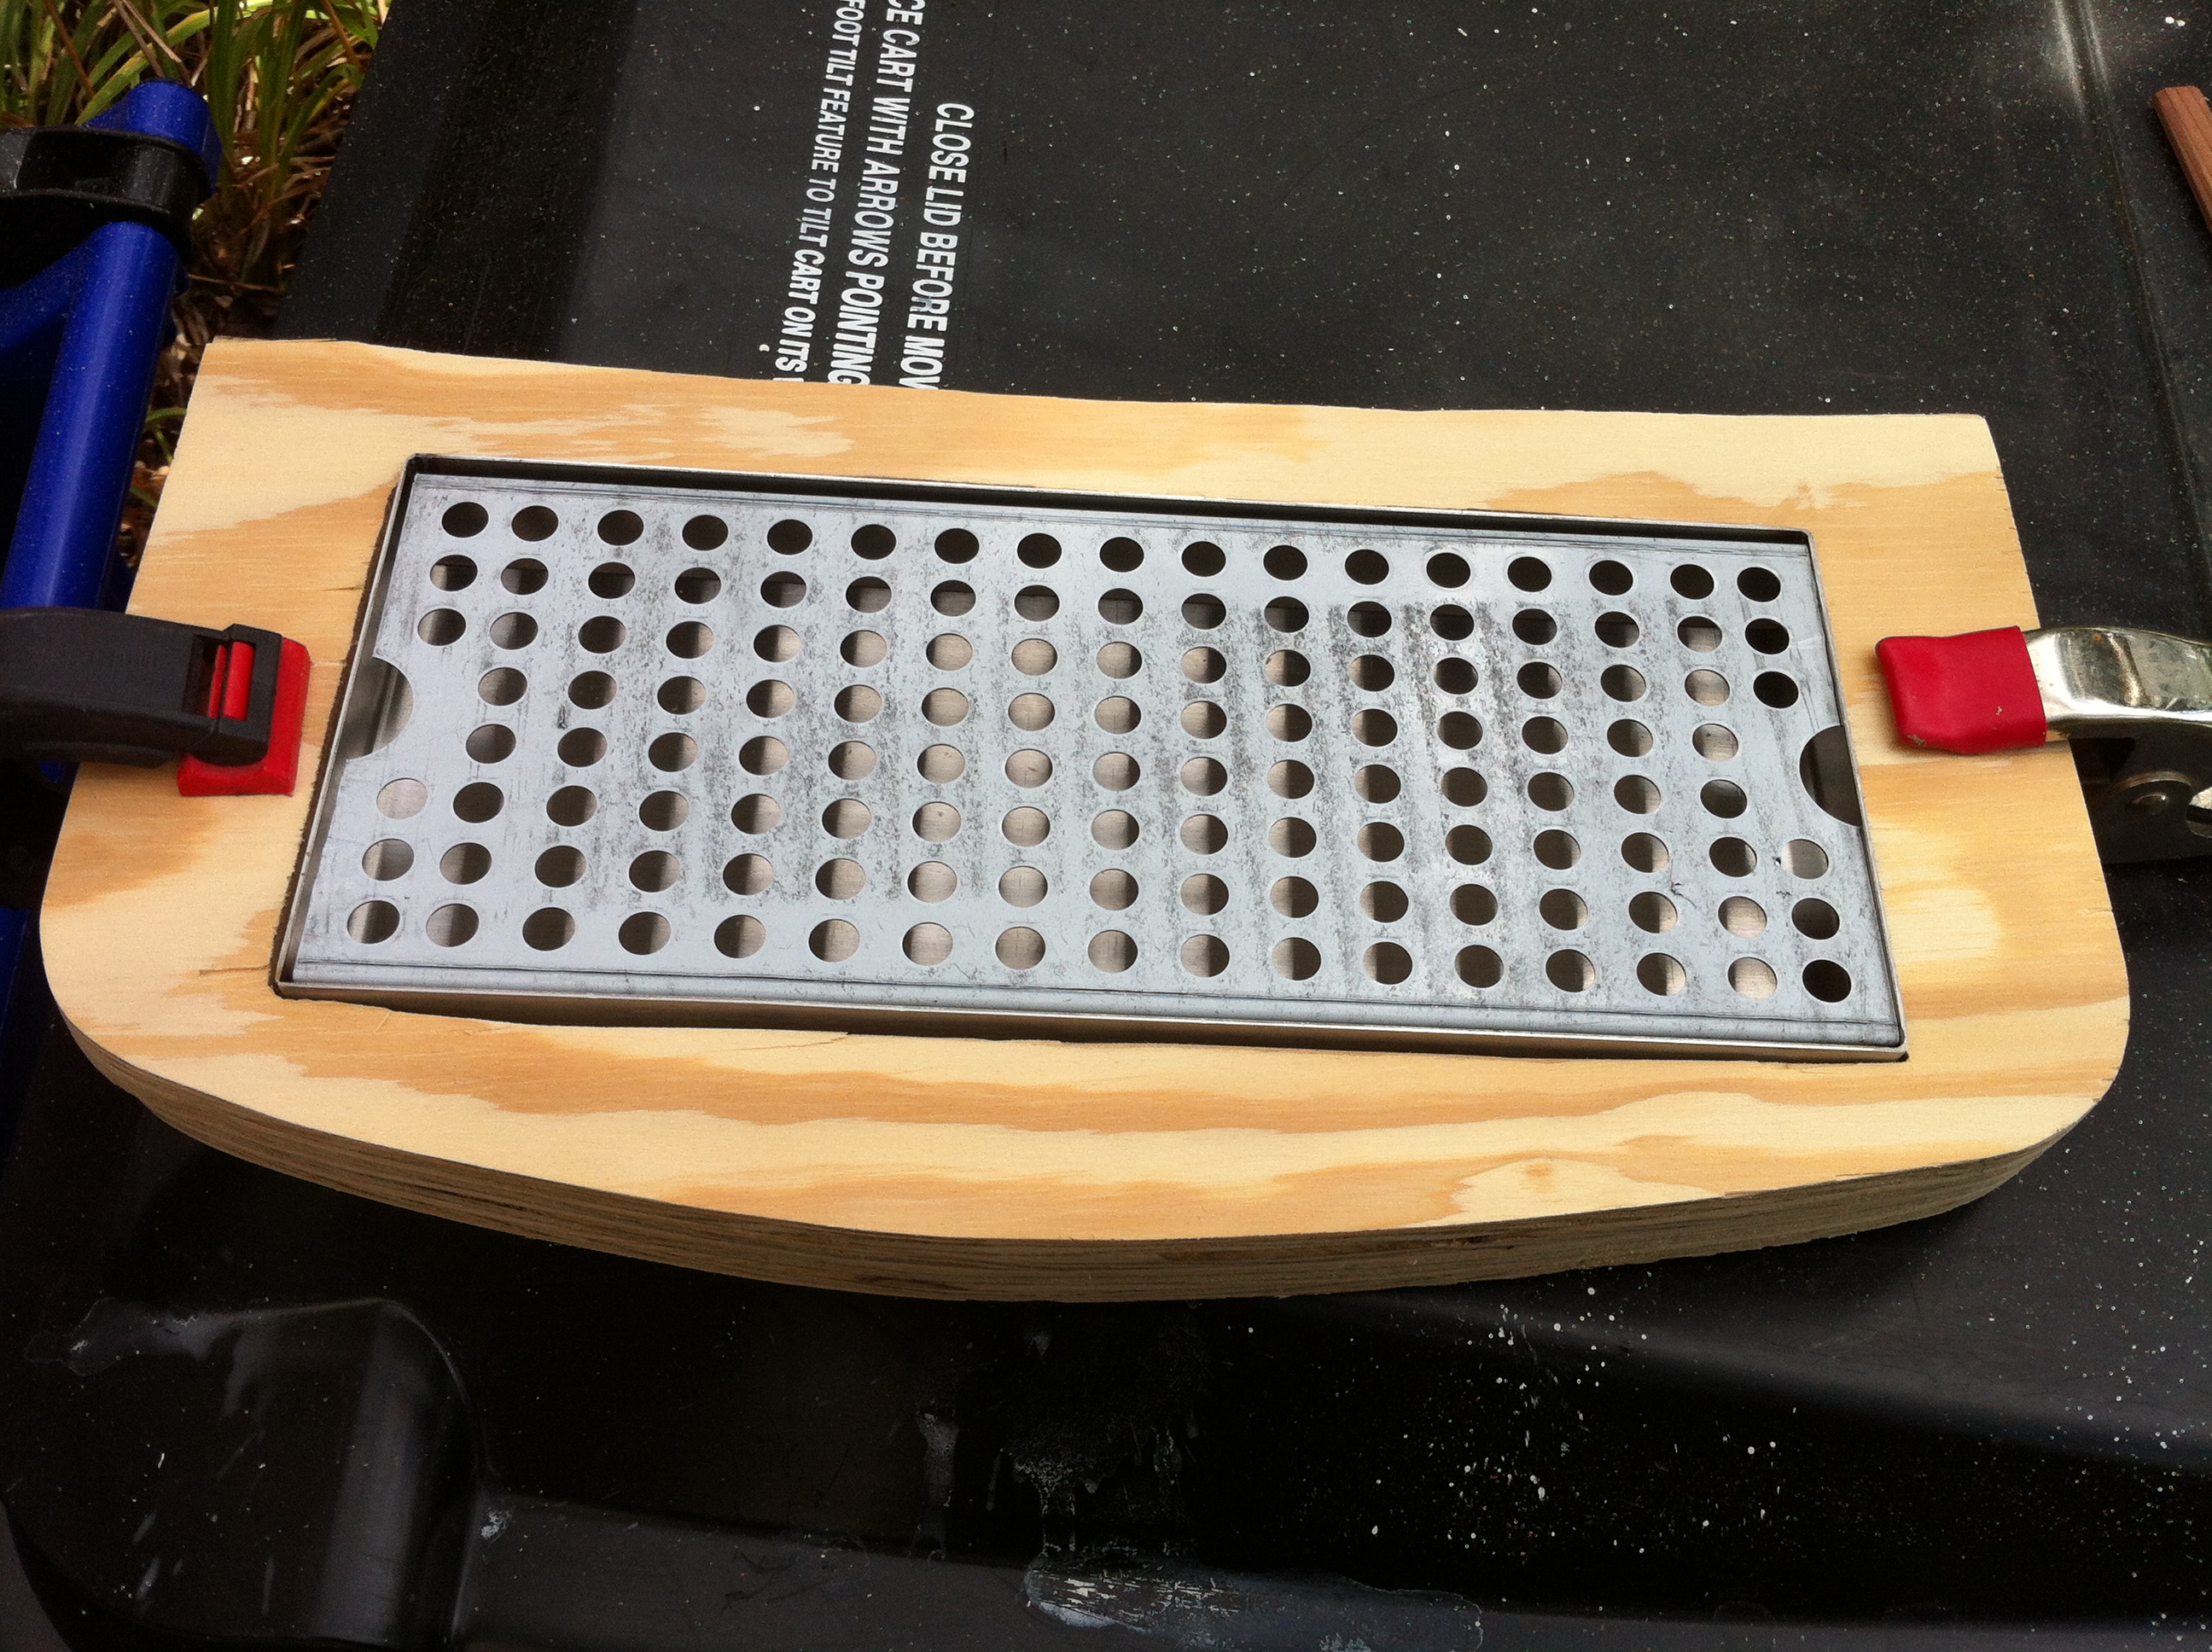
I gorilla glued and clamped the two pieces together. Shown here with the drip tray inset into it:
I originally wanted to cut a thin sheet of stainless steel to fit this form, but my attempts to hammer the edges into the cut-out piece were, um, not pretty. Someone with the right tools could make a nice looking skin to glue onto the top of the shape. After attempts at painting, etc., I came upon some 6" chrome tape at O'Reilly Auto parts and opted to try that, if not temporarily. It actually came out pretty well:

It has lasted nearly a year now. Maybe eventually, I'll try and find somebody who could fabricate a stainless top for this. Any appreciative readers out there who might cut me a deal??
For the edges, I went with the original plan and used a 1.25" strip of thin stainless steel I picked up at Home Depot. I pre-drilled a few small pilot holes through it, then wrapped it around the edge of the drip tray form (not along the back edge), gorilla glued and tacked it in place with some brad nails:

To cover the brad nails, I used some of the left-over 1/2" self-adhesive chrome strip in the middle, and covered the lower 1/4" not covered by the stainless steel edge with the left-over 1/4" strip. Here's a close-up:

To attach it to the fridge, I used 3" L-brackets and screwed them into the bottom plywood (use 1/2" screws) and rare earth magnets to attach them to the fridge without making more holes (more on that next). First, to get the angle (remember, this follows the slight curve of the fridge, I used only one of the magnets on each bracket, then set the tray on them, leaving about a 1/4" gap between the tray and the fridge. Then I marked the holes on the plywood with a pencil, took it all off and screwed the brackets on:

And finally, the rare earth magnets. BE REALLY CAREFUL WITH THESE MONSTERS! Once they stick together, they're nearly impossible to separate--and they'll try to stick together. I found a set of four 1/4" X 1/2" x 2" rare earth magnets on Amazon.com, and they even had a chrome-looking finish. I started with one on each side, and it held fine--until my first party when I went to pull the drip tray out to empty it (this one has no drain hole, and my friends are not yet well-versed on real tap operations!). It came off and made a mess. So I went to using all four--two on each side, and it's been great ever since. It can still shift if you hit it, but it'll still sturdy. The final touch was a last little bit of left-over 1/2" chrome strip to cover each of the vertical pieces of the L-brackets:

In general, just look for things/shapes that would accentuate your kegerator, make a stencil and go nuts. Hope this helps, and again, sorry for such a huge delay getting this part posted.
First, I wanted to do something more than the standard, rectangular drip tray; something that kind of follows the lines of the fridge. I actually traced the footpad on my Harley first, but it was too small. I expanded it to a larger size, traced the curve of the front of the fridge along the top, and here's what I came up with:
I found a 5x12" set-in drip tray online and played with the size of the template until it fit the tray. I cut it out of foam board, then traced/cut two pieces of 5/8" plywood. Two layers: one solid for the bottom and a cut-out on top for the tray to sit into.
I traced the drip tray into the 'top' piece of plywood:
I gorilla glued and clamped the two pieces together. Shown here with the drip tray inset into it:
I originally wanted to cut a thin sheet of stainless steel to fit this form, but my attempts to hammer the edges into the cut-out piece were, um, not pretty. Someone with the right tools could make a nice looking skin to glue onto the top of the shape. After attempts at painting, etc., I came upon some 6" chrome tape at O'Reilly Auto parts and opted to try that, if not temporarily. It actually came out pretty well:
It has lasted nearly a year now. Maybe eventually, I'll try and find somebody who could fabricate a stainless top for this. Any appreciative readers out there who might cut me a deal??
For the edges, I went with the original plan and used a 1.25" strip of thin stainless steel I picked up at Home Depot. I pre-drilled a few small pilot holes through it, then wrapped it around the edge of the drip tray form (not along the back edge), gorilla glued and tacked it in place with some brad nails:
To cover the brad nails, I used some of the left-over 1/2" self-adhesive chrome strip in the middle, and covered the lower 1/4" not covered by the stainless steel edge with the left-over 1/4" strip. Here's a close-up:
To attach it to the fridge, I used 3" L-brackets and screwed them into the bottom plywood (use 1/2" screws) and rare earth magnets to attach them to the fridge without making more holes (more on that next). First, to get the angle (remember, this follows the slight curve of the fridge, I used only one of the magnets on each bracket, then set the tray on them, leaving about a 1/4" gap between the tray and the fridge. Then I marked the holes on the plywood with a pencil, took it all off and screwed the brackets on:
And finally, the rare earth magnets. BE REALLY CAREFUL WITH THESE MONSTERS! Once they stick together, they're nearly impossible to separate--and they'll try to stick together. I found a set of four 1/4" X 1/2" x 2" rare earth magnets on Amazon.com, and they even had a chrome-looking finish. I started with one on each side, and it held fine--until my first party when I went to pull the drip tray out to empty it (this one has no drain hole, and my friends are not yet well-versed on real tap operations!). It came off and made a mess. So I went to using all four--two on each side, and it's been great ever since. It can still shift if you hit it, but it'll still sturdy. The final touch was a last little bit of left-over 1/2" chrome strip to cover each of the vertical pieces of the L-brackets:
In general, just look for things/shapes that would accentuate your kegerator, make a stencil and go nuts. Hope this helps, and again, sorry for such a huge delay getting this part posted.