Mini Mash System for Extract Brewers

Homebrew Talk - Beer, Wine, Mead, & Cider Brewing Discussion Forum

Help Support Homebrew Talk - Beer, Wine, Mead, & Cider Brewing Discussion Forum:

This site may earn a commission from merchant affiliate links, including eBay, Amazon, and others.
I'm planning to get a 3 gallon cooler soon. I'm hoping to do my first partial mash batch sometime over Labor Day weekend. I'm working on formulating a partial mash recipe for an ESB. I'm planning on maris otter and some crystal, not sure if any other grains. Hops are going to be Fuggles and Goldings. I plan to get the gravity up where I want it by adding the necessary amount of extra light DME.
 
jar said:
I'm planning to get a 3 gallon cooler soon. I'm hoping to do my first partial mash batch sometime over Labor Day weekend. I'm working on formulating a partial mash recipe for an ESB. I'm planning on maris otter and some crystal, not sure if any other grains. Hops are going to be Fuggles and Goldings. I plan to get the gravity up where I want it by adding the necessary amount of extra light DME.
Sounds like you are right on track. Should be a good simple recipe for an ESB.
Let us know how it turns out.:mug:
 
I've posted my ESB recipe for my first partial mash batch here. I'd appreciate comments on it. Also, has anyone else set up a similar system? I'm planning to go back through the thread today and purchase materials this evening. Any further gotchas/suggestions would be appreciated.
 
Yeah, close but not quite. I'd go all the way to all grain, but I live in an apartment, and my stove won't boil much more than 3 gallons. If I do an English Mild at some point, I can probably do that all grain.
 
jar said:
I've posted my ESB recipe for my first partial mash batch here. I'd appreciate comments on it. Also, has anyone else set up a similar system? I'm planning to go back through the thread today and purchase materials this evening. Any further gotchas/suggestions would be appreciated.
That looks like a good recipe. I think you are right on track.
 
jar said:
Yeah, close but not quite. I'd go all the way to all grain, but I live in an apartment, and my stove won't boil much more than 3 gallons. If I do an English Mild at some point, I can probably do that all grain.
This is exactly the point I have been trying to make.
Thank you. :mug:
 
The partial mash ESB is boiling away now. The mash process in my 3 gal cooler went fine. It really wasn't much more work than an extract+steeped grain batch. I look forward to tasting it.
 
Didn't get back to post last night after the brew was done. I nailed the OG estimated in promash. I'm pretty happy to have gotten 75% efficiency on my first PM batch. From my limited experience, based on tasting the hydrometer sample, this is going to be a really good batch. Thanks Rich and co.
 
jar said:
Didn't get back to post last night after the brew was done. I nailed the OG estimated in promash. I'm pretty happy to have gotten 75% efficiency on my first PM batch. From my limited experience, based on tasting the hydrometer sample, this is going to be a really good batch. Thanks Rich and co.
You are quite welcome. Sounds like you did a good job. Thank you for trying this.:mug:
 
I'll throw in my opinion as someone new to the hobby (<1 year) who is considering moving to mashing. While the money/size issue is all well and good, my hesitation comes from the actual time investment in building a setup like the ones shown in this thread. Call me lazy, but when I look at the pictures and tips on valve's, drilling out spigots, removing braiding from a sink hose, etc, well I tend to tune out. It leaves me thinking, isn't there some way I can but a cheap cooler and do this without having to dig out the tools and make a trip to home depot?

Yeah, maybe I'm being too lazy, but for a first try at attempting something like this, simpler is better and not having to spend a few hours on a trip to home depot and mutilating a cooler would make me more likely to give it a shot.

The whole point of the braided hose, drilling out spigot, etc as far as I can tell is to allow you to drain water and rinse the grains without getting the grains into your wort.

My question is this, does the actual mechanism of how this 'filter' works have much impact on extraction efficiancy? What I'm getting at is, what would happen if I just went and bought a 5 gallon cooler, lined it with a grain/muslin/cheesecloth bag, or just put my 5 lbs of gain in a big mesh bad, and then used the cooler as is with no modifications? Would I get poor extraction? The only downside I can see is a potential sore thumb from having to hold a spigot button down, but if you could find a cooler with a spigot that can be latched open, that's not an issue. The upside is that I can go buy a cooler and get started right away with no tools or hardware store trips needed. This would be especially appealing to younger apartment dwellers who may be lacking in tools anyway...

Thoughts?
 
debtman7 said:
Yeah, maybe I'm being too lazy, but for a first try at attempting something like this, simpler is better and not having to spend a few hours on a trip to home depot and mutilating a cooler would make me more likely to give it a shot.

*gasp*

You're not mutilating a cooler, you would only be improving it. :)

The the grain bed is actually your filter. But you need to be able to withdraw the wort while leaving the grain bed in place. The SS braid and or a false bottom takes care of this for you.
 
Here's a simple question on this cooler...

I have one all set to go for this weekend, with one minor issue.

I was planning on buying some high-temp tubing at the HBS, but they don't stock any. The gent was kind enough to give me some real thick tubing for next to nothing, but nothing that's specifically designed for higher temperatures (like I've seen on Morebeer).

So my question is; do I need to be concerned about using high-temp tubing when the temp of the wort will be ~170, tops? Can I just use my regular food-grade tubing, probably apply a hose clamp in case it expands and tries to slip off?

Basically, does high-temp tubing simply resist expansion better than regular tubing, or is it also more resistant to leeching things from the tubing?
 
debtman7 said:
I'll throw in my opinion as someone new to the hobby (<1 year) who is considering moving to mashing. While the money/size issue is all well and good, my hesitation comes from the actual time investment in building a setup like the ones shown in this thread. Call me lazy, but when I look at the pictures and tips on valve's, drilling out spigots, removing braiding from a sink hose, etc, well I tend to tune out. It leaves me thinking, isn't there some way I can but a cheap cooler and do this without having to dig out the tools and make a trip to home depot?

Yeah, maybe I'm being too lazy, but for a first try at attempting something like this, simpler is better and not having to spend a few hours on a trip to home depot and mutilating a cooler would make me more likely to give it a shot.

The whole point of the braided hose, drilling out spigot, etc as far as I can tell is to allow you to drain water and rinse the grains without getting the grains into your wort.

My question is this, does the actual mechanism of how this 'filter' works have much impact on extraction efficiancy? What I'm getting at is, what would happen if I just went and bought a 5 gallon cooler, lined it with a grain/muslin/cheesecloth bag, or just put my 5 lbs of gain in a big mesh bad, and then used the cooler as is with no modifications? Would I get poor extraction? The only downside I can see is a potential sore thumb from having to hold a spigot button down, but if you could find a cooler with a spigot that can be latched open, that's not an issue. The upside is that I can go buy a cooler and get started right away with no tools or hardware store trips needed. This would be especially appealing to younger apartment dwellers who may be lacking in tools anyway...

Thoughts?

Can you do it? Yes.
Poor extraction? You bet.
Figure 50% efficiency for starters. So this means that after a few batches, $30 spent on PM equipment will save more than buying 1.5 times as much grain to compensate for the terrible efficiency.
The water flowing through the grainbed is paramount for stripping the converted sugars.
Although in the spirit of laziness I could suggest a few things that are easy and improve efficiency.
1: You could mash for an hour or more (long mash).
2: Use PH 5.2 or another acid to optimize your efficiency.
3: Swirl the grain bag around a lot in the mash.
4: Drain the water, leaving the grain bag in the bucket then "sparge" with new 170deg water and drain that to the kettle.

You may bump the efficiency up 15% or so with these methods.

Good luck!
:mug:
 
the_bird said:
Here's a simple question on this cooler...

I have one all set to go for this weekend, with one minor issue.

I was planning on buying some high-temp tubing at the HBS, but they don't stock any. The gent was kind enough to give me some real thick tubing for next to nothing, but nothing that's specifically designed for higher temperatures (like I've seen on Morebeer).

So my question is; do I need to be concerned about using high-temp tubing when the temp of the wort will be ~170, tops? Can I just use my regular food-grade tubing, probably apply a hose clamp in case it expands and tries to slip off?

Basically, does high-temp tubing simply resist expansion better than regular tubing, or is it also more resistant to leeching things from the tubing?

On my first few batches I didn't have any high temp tubing, so I used the same tubing I had on my carboy cap. It works, but becomes very flexible and can easily come off even with the clamps really torqued down.

Now I still use the regular food grade to attach my false bottom to my ball valve. It works fine being that its only 2 inches long, and doesn't get the opportunity to move much inside the tun. I kept it because its easier to install and take off that the high temp stuff. WHen its that short of a length, its just a ***** to get it positioned right. Ive have put the high temp stuff on the outlet of the valve since then. Its just more beefy and holds up much better while I recirculate and drain.
 
Chimone said:
*gasp*

You're not mutilating a cooler, you would only be improving it. :)

The the grain bed is actually your filter. But you need to be able to withdraw the wort while leaving the grain bed in place. The SS braid and or a false bottom takes care of this for you.

Right, but how is a ss braid better than just having the grain in a mesh sack at the bottom? Either way you're drawing off water through the grain bed. Or, alternatively, if you could find a high temp waterproof adhesive, you could just glue a steel mesh screen over the stock cooler spigot.

My question, I guess, is what does the ss braid do better than these methods? To my novice eyes, seems like either way you're drawing water through a bed of grain. I'm just looking at ways to do that which require less effort/tools.
 
well you can always draw the wort out, but....If you dont have it setup properly, then the wort will take the quickest way out, and not run over all the grains evenly. Giving you poor extraction. Make sense? This is why you see people run their SS braid over as much of the bottom as they can to let the wort run out as evenly as possible.

There are those who use a grain bag, and say it works great. Ive never used one so I cant comment.
 
You wouldn't want to glue a mesh screen, I would imagine it would get clogged very quickly and you'd end up with a stuck mash. The stainless steel braid (which I'm trying out for the first time this weekend) has been described as extremely resistant to clogging.

I'm not making a judgment, but I do think that you are probably in the minority around here; most of us really LIKE building stuff.

I think you may be onto something with the grain bag idea, though; I'm almost positive that homebrewer_bill does something similar. I could be thinking of the wrong gent, but someone here has had pretty good success with what is ultimately a very easy setup.

The mash system that's described in this thread, though, requires very minimal use of tools. I had to use a hacksaw to get the SS braid off; you could buy a false bottom instead. My ball value and various connections all just twist together, you don't have to weld or solder or anything. You don't destroy anything, you don't have to cut any additional holes in the cooler.

The other thing that I've seen in some pics is where people simply remove the spigot from the cooler and replace it with a bung. They run a hose through that connected to either a stainless steel braid or that lies underneath a false bottom. Hose clamp on the outside and you're done. I don't like it because I'd be worried about knocking the bung out of place, but that would be a simple, tool-less approach you could take. I'll see if I can find some pics.

EDIT: Look at the pics here - very simple setup that looks like it would work well.
http://cruisenews.net/brewing/infusion/page1.php
 
yea the bung works well. Take out the stock spigot, put bung in, and the cut a piece out off of a racking cane. It fits perfectly.
 
debtman7 said:
Right, but how is a ss braid better than just having the grain in a mesh sack at the bottom? Either way you're drawing off water through the grain bed. Or, alternatively, if you could find a high temp waterproof adhesive, you could just glue a steel mesh screen over the stock cooler spigot.

My question, I guess, is what does the ss braid do better than these methods? To my novice eyes, seems like either way you're drawing water through a bed of grain. I'm just looking at ways to do that which require less effort/tools.

The grain bed actually acts as a filter just as the dirt in the ground filters water in the water table.

If you recirculate the mash you will notice it gets clearer because the grain bed filters out the larger parts.

You will miss out on this filtering with the bag only, and may extract tannins in the boil as a result.
 
Chimone said:
well you can always draw the wort out, but....If you dont have it setup properly, then the wort will take the quickest way out, and not run over all the grains evenly. Giving you poor extraction. Make sense? This is why you see people run their SS braid over as much of the bottom as they can to let the wort run out as evenly as possible.

There are those who use a grain bag, and say it works great. Ive never used one so I cant comment.

I don't think the wort taking the quickest way out matters so much with batch sparging. If you can somehow stir the grain well while using a grain bag, you'd probably be ok.

But using the stainless braid method is easy. I started with nothing, and in 3 hours was mashing. It would've been faster, but it involved 2 home depot trips due to poor planning. I bought the hardware at HD, then picked up the cooler, discovered that the spigot was different than on Rich's cooler, so I went back to HD for more parts.
 
jar said:
I don't think the wort taking the quickest way out matters so much with batch sparging. If you can somehow stir the grain well while using a grain bag, you'd probably be ok.


Ahh, yes good point
 
I built my MLT as described in this thread (thanks guys!) and started making all grain batches with it recently. There's not much to it. I cut through the overbraid and hose with some wire clippers in about 10 seconds. The rest of the construction took about 5 minutes, and I only needed two pairs of pliers in addition to the wire clippers. I like building stuff, but there really was no hassle involved. On the other hand, I was talking to the guy who owns my LHBS last week about it, and he said he just uses a bung with tubing, overbraid, and an in-line plastic valve. Super cheap and easy. It seems like it would be a real PITA to deal with a grain bag every time you mash, not to mention the efficiency issues. A few bucks at the hardware store and a few minutes assembly time is well worth in IMO.
 
Ok, clogging makes sense, I can see just trying to filter at the drain being much more likely to clog than a length of braid. And yeah, I do like building things, but I also tend to want to start doing things without having to take a trip over to home depot and put something together :)

My other reasoning is that I've already got a 2 gallon cooler at home, that doesn't have a removable spigot and if there is a way I could use that to try a partial mash before going and picking up a 5 gallon cooler, that would be fantastic. And I'd prefer to keep the 2 gallon intact since we use it for margaritas during hot summer get togethers :)

What if I used a vegetable steamer lined with cheesecloth? The weight of the grains should keep the steamer spread out so the grains won't slip by and I'd effectively have a false bottom with stuff I already have at home. I also have some window screen mesh laying around, but I'm not sure how I could get that to be rigid enough to not let grains pass around the edge...

Maybe best just to go get a dedicated 5 gallon cooler :)
 
My 5 gallon cooler was only $19 at Target. If there are any left, they are probably being discounted out the wazoo these days. The 2 gallon will be kinda small (I have one that size that I rejected), it might work as long as the recipe is only using a little grain.
 
Hey debtman, here's a post of mine from several pages back in this thread. This setup was extremely simple to assemble and required no tools:

ESPY said:
I just completed my PM setup a couple months ago. I tried to consider the fact that I might one day desire to upgrade to AG and chose equipment that I'll still be able to use in the future with AG.

5 gal Igloo cooler - $20 (WalMart)
Bulkhead fitting for cooler - $10.95 (hoptech.com)
Phil's Phalse bottom - $18.95 (hoptech)
In-line ball valve - $2.50 (hoptech)

So with S&H everything totaled about $60. I do a batch sparge so I don't use a sparge arm yet. Haven't had any trouble with a shallow grain bed using 5 lbs of grain. But I'm not sold on the plastic false bottom just because it floats. Will probably eventually get as SS one.

SP
 
Making a Mash/Tun CAN be the simpliest thing you have ever done. Done and over in less then 5 minutes. Yes you are brewing your first AG in less then 5 minutes of equipment time.

You need:

5 Gal Rubbermaid water cooler.... Target and Walmart have them cheap <$20

Kewler Kit.... ok... here is where the "this looks simple enough" problem comes in. It's not. It has very specific diameters and even more specific parts. The simpliest way to do this is to just buy the damm thing. Understand, I fell in the trap and after a long time ended up buying it in the end..... It's in the range of $30 and if your me and the other 1/2 dozen or so people who have emailed me for specifics on this 'simple' part your going to go to Home Depot thinking what's the problem. Give it a shot if you wish, but remember..... this project CAN be done in less then 5 minutes.

False bottom. I and a few others seem to like the Stainless Steel one thats around $22. Palmer puts the efficiencies of false bottoms at a possible 98% or so (the false bottoms..... not the procedure that has a learning curve understand).

Couple of those screw tightened clamps.... hose.... I used standard hose and it softened up and broke loose. I now have things connected with high temp hose that works beutifully! I also got some Teflon tape in case of drips that also works incredibly.

Ok... so you have all the parts in front of you.... here is the less then 5 minutes procedure for making one.

1. Take off sprout on Rubbermaid cooler. It unscrews. Do not take out your drill.
2. Following directions attach Kewler Kit to the cooler.
3. Drop false bottom in cooler and attach the barb from cooler to the barb from false bottom with hose tightening hose clamps snugly.

Thats it. 3 or so steps. If it leaks use the teflon tape. Tell you if this takes one second longer then 5 minutes you are doing something wrong.

Here is a link to what mine looks like at any rate.
https://www.homebrewtalk.com/showthread.php?p=96676&posted=1#post96676
 
Work has had me in Virginia for a month but now that I'm back in Mason territory I got around to making me a MLT. I used:

$20 walmart 5 gal cooler
Carboy stopper
About 4' 5/16 hose
bent piece of a broken racking cane (broken side sanded smooth)
20" braided SS faucet hose
(1) small hose clamp
flow restrictor (actual name unknown)


I used all this stuff in a bucket before, but this revision is in a cooler, with the bent racking cane to draw down the bottom of the vessle and get more wort out. Also, I tucked the end of the braided SS line back into the hose clamp to hold it down to the bottom better. The loose end would sort of float up to the top with only one side connected. The thing I am calling the "flow restrictor" is necessary to slow the sparge. I have a resolution of 4 clicks from full flow to just a drip. This should be enough control. I drained about 4 gallons in 60 min on the 2nd slowest rate. I am drinking the Stout I made with rev 1.0 (cheap bucket version) and it is delicious. I'll officially test this improved version when my backordered morebeer order gets here!

Pics attached.

IMG_1652.jpg


IMG_1654.jpg


IMG_1656.jpg


IMG_1657.jpg
 
Talk about inspiration!! I just spent the last hour or so reading this whole thread again... I'm so jazzed up right now that I've gotten my 1 1/2 year old son ready and we're about to go shopping for parts. At first I was thinking of the whole mini-mash deal, but by the time I finished reading, I'm ready for my first all-grain! I'm going to do a test brew with my existing cooler (rectangular about 21"X10") and if it's good, I'm going for one of these cylindrical deals ya'll are working on!

Thanks for the inspiration guys! Keep it up.. now if you'll excuse me.. I got some brewing equipment to go purchase!
 
The tun I made worked beautifully yesterday, with the SS braid. I did hook up a ball value to control output, which was real nice as well.
 
the_bird said:
The tun I made worked beautifully yesterday, with the SS braid. I did hook up a ball value to control output, which was real nice as well.
Do you have any pics of your tun? I would like to see how others have made their's.
 
omniscientomar said:
Talk about inspiration!! I just spent the last hour or so reading this whole thread again... I'm so jazzed up right now that I've gotten my 1 1/2 year old son ready and we're about to go shopping for parts. At first I was thinking of the whole mini-mash deal, but by the time I finished reading, I'm ready for my first all-grain! I'm going to do a test brew with my existing cooler (rectangular about 21"X10") and if it's good, I'm going for one of these cylindrical deals ya'll are working on!

Thanks for the inspiration guys! Keep it up.. now if you'll excuse me.. I got some brewing equipment to go purchase!
Let us know how it goes. Enjoy! :mug:
 
I'll take some tonight (there's a front shot in my gallery, as well as a pic of my uber-ugly dual-coil wort chiller). It was very much a hit-or-miss process of staring in front of fittings at Home Depot for a half hour to find what I need, coming home and finding out that half the stuff is the wrong size, going back to HD (I make enough trips as is)... etc, etc.

I do like how it came out - it's very solid, no worries about anything coming loose during the mash, anything getting knocked out of place. The only thing I dislike is that the ball value rotates, it won't come out but I can't tighten it down enough to keep it in place; a very minor concern.
 
the_bird said:
I'll take some tonight (there's a front shot in my gallery, as well as a pic of my uber-ugly dual-coil wort chiller). It was very much a hit-or-miss process of staring in front of fittings at Home Depot for a half hour to find what I need, coming home and finding out that half the stuff is the wrong size, going back to HD (I make enough trips as is)... etc, etc.

Thats why I took everything to places I was buying for.... cooler... anything really... tried it out right there so I knew it would work. Gets very annoying to take things back again and again.
 
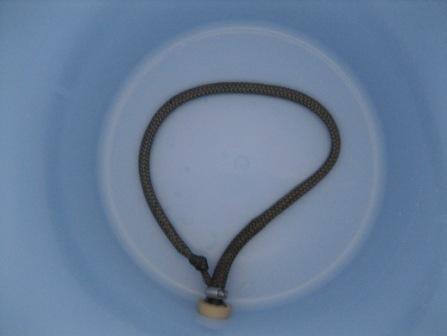
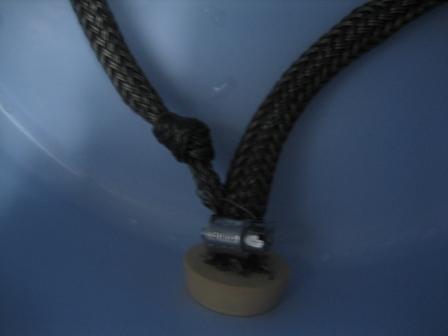
Help me out here....the braided SS hose....is it just the braided part? Or the whole hose itself? I guess I just don't understand how you can get the wort out.
Sorry, newbie here....please be patient
 
Just the braided part. You have to take the braid off the main hose, it's just the very outside layer. Be careful, most hoses that *look* like stainless are some kind of nylon or something, you have to make sure to find one that's really stainless.
 
Back
Top