
dyqik
Well-Known Member
Now I have a house to play with, I'm moving my brewing into the basement. Since my wife is changing jobs at the moment, I'm doing this piecemeal and on a budget. Once it's up and running and I can brew indoors, I'll start thinking about a more complete system, probably using a RaspberryPi based controller.
Previously I've been 3-vessel brewing for 5.5 gal batches with a single propane burner and a 11 gallon Bayou Classic pot, using a 10 gal cooler mash tun, and 5 gal cooler as a hot liquor holding tank. I already have a 2kW RIMS tube and Topsflo pump running with a simple standalone PID controller. I'm really not looking to go bigger, as it takes long enough to finish a keg as it is. I'd rather brew more different beers, or repeat a brew to get more beer.
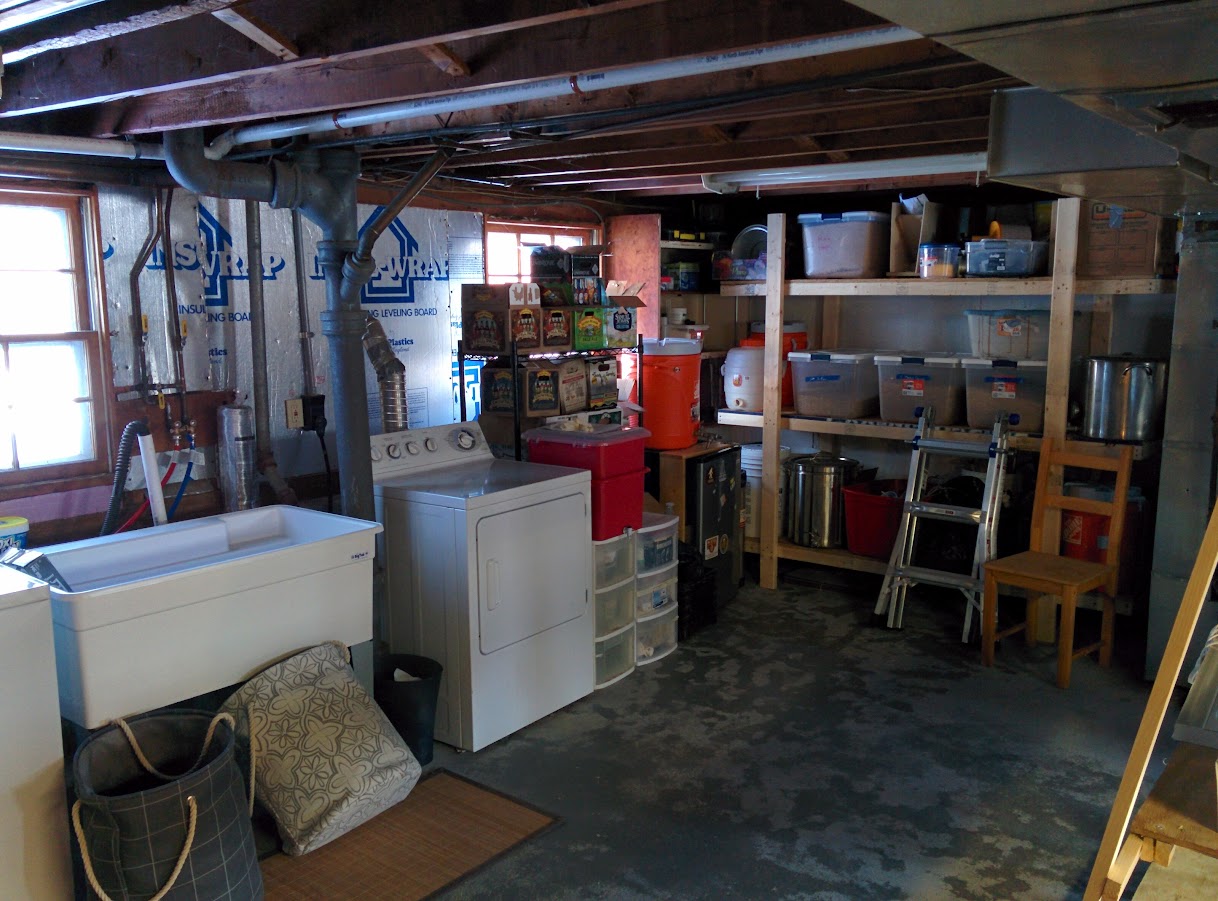
I have a quarter of the unfinished walk-out basement to play with, with a good size window to the outside right where I'm brewing. This will be my first option for ventilation with a window fan - make up air is readily available from another window. The brew area has the 30A 4-wire dryer socket, a dedicated 20A circuit and a dedicated 15A circuit, so power isn't a problem. It's also next to the sewer and vent stack and the water supply for the laundry, so fitting a utility sink isn't too hard. However, the utility sink isn't plumbed in yet, and that will have to wait until we can afford the $800 for the plumber (DIY plumbing is illegal here in MA ) to move the laundry drain down 6", fit the sink disconnects and add a hose bib to feed my counterflow chiller. I'll buy a stainless prep table soon to fit the space between the dryer and the shelves to act as the brew stand, but the wire shelving you can see in the photos below is working OK for now.
This is the space at the start,with everything where it was put when we moved house:
The weekend before last, I fitted GFCI outlets to the 15A and 20A circuits, and fitted a 30A GFCI breaker to the dryer circuit (GFCI breakers for BR type panels can be found online for about the same price as/cheaper than a spa panel). I also built my kettle and control circuit, described in the next couple of posts.
Last weekend I brewed the first batch in the system, and although I got anomalously low mash efficiency for my RIMS/Cooler mash tun compared to what I used to get, everything went well.
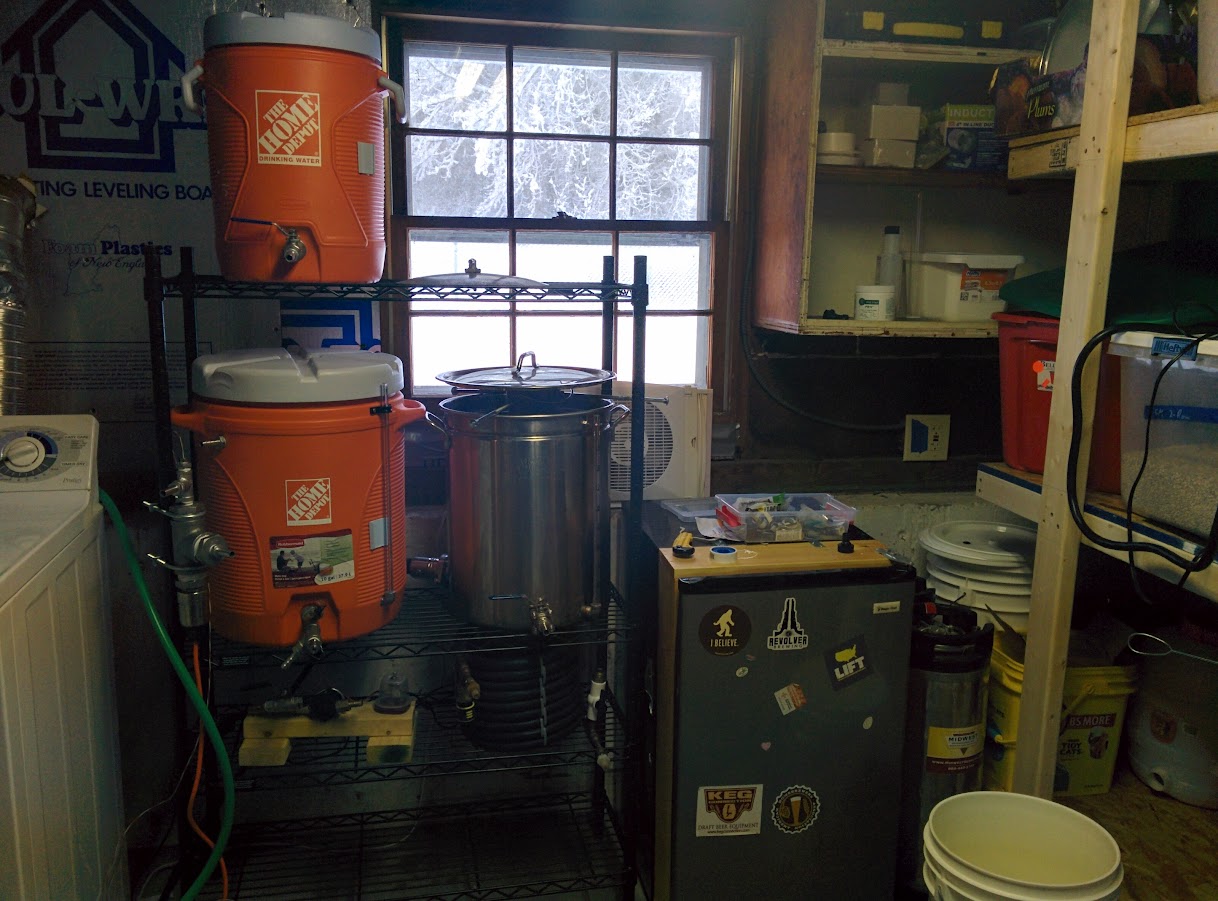
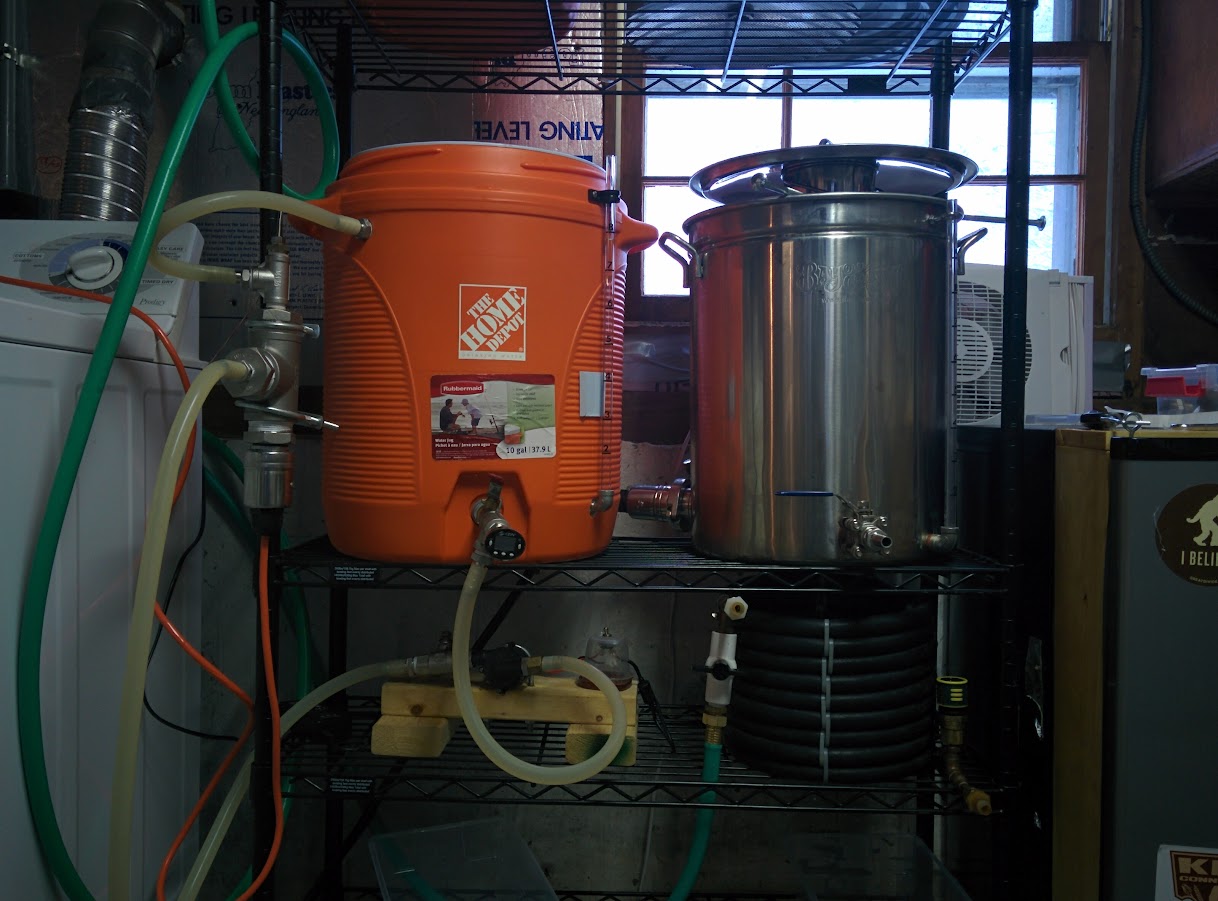
This is the system before brewing last weekend, and the final picture is testing, recirculating PBW through the RIMS tube and mash tun to clean them out after they'd sat without being used for 9 months. This is the same configuration I use for mashing. I use the 5 gallon cooler to hold the sparge water, which is heated in the kettle during the mash. The RIMS system is powered from the 15A 120V circuit, so I can run the kettle at the same time. In fact, if I want to heat my strike water _really_ fast, I can use my 2kW Hot Rod on the 20A circuit at the same time as the 5.5kW kettle element, and recirculate some water through the RIMS system to preheat the pump, tube and mash tun, so that I'm drawing a total of 9kW . In reality, it takes me longer to weigh out the grains and mill them and prep my water treatment salts than it does to heat the strike water in the kettle.
Previously I've been 3-vessel brewing for 5.5 gal batches with a single propane burner and a 11 gallon Bayou Classic pot, using a 10 gal cooler mash tun, and 5 gal cooler as a hot liquor holding tank. I already have a 2kW RIMS tube and Topsflo pump running with a simple standalone PID controller. I'm really not looking to go bigger, as it takes long enough to finish a keg as it is. I'd rather brew more different beers, or repeat a brew to get more beer.
I have a quarter of the unfinished walk-out basement to play with, with a good size window to the outside right where I'm brewing. This will be my first option for ventilation with a window fan - make up air is readily available from another window. The brew area has the 30A 4-wire dryer socket, a dedicated 20A circuit and a dedicated 15A circuit, so power isn't a problem. It's also next to the sewer and vent stack and the water supply for the laundry, so fitting a utility sink isn't too hard. However, the utility sink isn't plumbed in yet, and that will have to wait until we can afford the $800 for the plumber (DIY plumbing is illegal here in MA
) to move the laundry drain down 6", fit the sink disconnects and add a hose bib to feed my counterflow chiller. I'll buy a stainless prep table soon to fit the space between the dryer and the shelves to act as the brew stand, but the wire shelving you can see in the photos below is working OK for now.This is the space at the start,with everything where it was put when we moved house:
The weekend before last, I fitted GFCI outlets to the 15A and 20A circuits, and fitted a 30A GFCI breaker to the dryer circuit (GFCI breakers for BR type panels can be found online for about the same price as/cheaper than a spa panel). I also built my kettle and control circuit, described in the next couple of posts.
Last weekend I brewed the first batch in the system, and although I got anomalously low mash efficiency for my RIMS/Cooler mash tun compared to what I used to get, everything went well.
This is the system before brewing last weekend, and the final picture is testing, recirculating PBW through the RIMS tube and mash tun to clean them out after they'd sat without being used for 9 months. This is the same configuration I use for mashing. I use the 5 gallon cooler to hold the sparge water, which is heated in the kettle during the mash. The RIMS system is powered from the 15A 120V circuit, so I can run the kettle at the same time. In fact, if I want to heat my strike water _really_ fast, I can use my 2kW Hot Rod on the 20A circuit at the same time as the 5.5kW kettle element, and recirculate some water through the RIMS system to preheat the pump, tube and mash tun, so that I'm drawing a total of 9kW
. In reality, it takes me longer to weigh out the grains and mill them and prep my water treatment salts than it does to heat the strike water in the kettle.