
brewmastercontrols
Well-Known Member
- Joined
- Dec 2, 2008
- Messages
- 121
- Reaction score
- 12
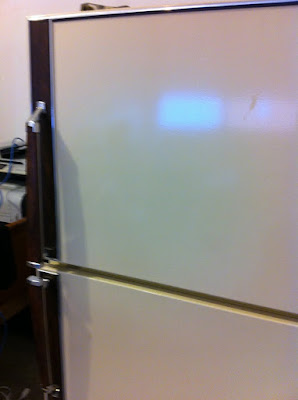
I recently moved and had to get rid of my old Kegerator, the wife said it was not worth shipping costs, and it did have a bit of rust here and there. Faced with not having a Kegerator the search was on for a new solution. Here are the steps I went through building my new on with a refrigerator I purchased off of Kijiji.com
Here is the baby before surgery:
And the guts... the lower inside of the fridge before mods.
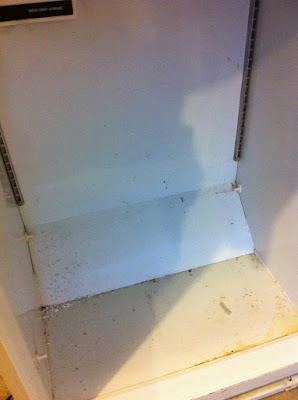
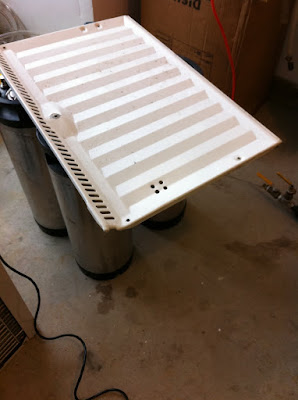
Step one, look for a good way to route your CO2 lines. I have built a couple of these in the past and the first time rushed and just threw the CO2 tubes anywhere I could get them. It looked like crap but did the job. This time through I wanted to do a nice clean job of installing the CO2 lines and manifold so I started taking the fridge apart. Here is what you can expect when you pull up the floor of the freezer looking to room to route lines.
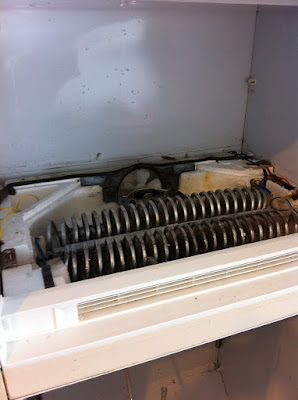
I found an area in the back left that was void of cooling tubes and not part of the drain system for condensation. This quickly became my target area for the 4 CO2 lines I needed to pass between the freezer and the fridge area. You may ask, why not just drill holes in the back of the fridge, or put the manifold in the fridge area, or on the outside of the fridge. Simple answer, I wanted a nice clean look on the outside and wanted to preserve space in the refir area below. Here is a look from above after I drilled the CO2 holes.
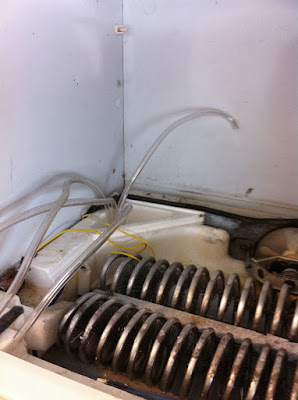
And here is a look below of their exits into the keg area:

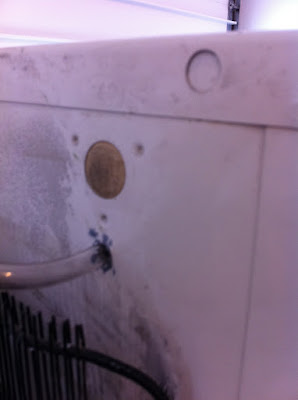
As you can see it is nice and clean looking, once I package the lines it will look very nice. As an extra little clean up I deburred and cleaned then painted the freezer floor pan where I had drilled it:
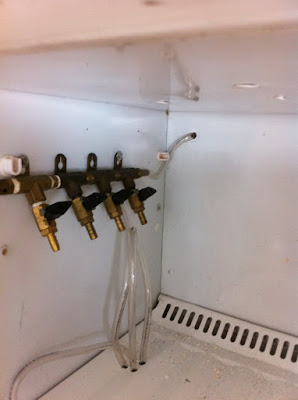
After this I was off and running to mount my manifold. The manifold has one input for the CO2 from the tank and 4 outlets to go to kegs etc. You may ask why did he install this. Another simple answer. I force carbonate and to do so must turn my CO2 up higher than serving pressure. With the manifold I can turn off particular kegs and leave others on higher CO2 pressure to carbonate. Also it is nice to just shut off the lines you are not using to avoid leaks. A look at the manifold installed:
From here I drilled a hole to let the CO2 tube from the bottle pass through the back wall into the fridge. You can see the line exit in the picture above, here is a look from the backside:
This pretty much completed the CO2 mounting and plumbing. With CO2 to the keg area and the manifold mounted I decided to move and start working on the liquid system. This will include putting the faucets into the door and routing the liquid lines.
To keep the length of the post down I will put this under Building a Kegerator Part 2.
Cheers
Here is the baby before surgery:
And the guts... the lower inside of the fridge before mods.
Step one, look for a good way to route your CO2 lines. I have built a couple of these in the past and the first time rushed and just threw the CO2 tubes anywhere I could get them. It looked like crap but did the job. This time through I wanted to do a nice clean job of installing the CO2 lines and manifold so I started taking the fridge apart. Here is what you can expect when you pull up the floor of the freezer looking to room to route lines.
I found an area in the back left that was void of cooling tubes and not part of the drain system for condensation. This quickly became my target area for the 4 CO2 lines I needed to pass between the freezer and the fridge area. You may ask, why not just drill holes in the back of the fridge, or put the manifold in the fridge area, or on the outside of the fridge. Simple answer, I wanted a nice clean look on the outside and wanted to preserve space in the refir area below. Here is a look from above after I drilled the CO2 holes.
And here is a look below of their exits into the keg area:
As you can see it is nice and clean looking, once I package the lines it will look very nice. As an extra little clean up I deburred and cleaned then painted the freezer floor pan where I had drilled it:
After this I was off and running to mount my manifold. The manifold has one input for the CO2 from the tank and 4 outlets to go to kegs etc. You may ask why did he install this. Another simple answer. I force carbonate and to do so must turn my CO2 up higher than serving pressure. With the manifold I can turn off particular kegs and leave others on higher CO2 pressure to carbonate. Also it is nice to just shut off the lines you are not using to avoid leaks. A look at the manifold installed:
From here I drilled a hole to let the CO2 tube from the bottle pass through the back wall into the fridge. You can see the line exit in the picture above, here is a look from the backside:
This pretty much completed the CO2 mounting and plumbing. With CO2 to the keg area and the manifold mounted I decided to move and start working on the liquid system. This will include putting the faucets into the door and routing the liquid lines.
To keep the length of the post down I will put this under Building a Kegerator Part 2.
Cheers