Gumby1974
Member
Wow I hope mine dont leak that bad. How hot do you figure it will get at the nozzle base? I have heard of people removing all the jets and sealing them but I cannot remember what they used.

You might use permatex #2, use rubbing alcohol to remove the permatex from your fingers afterwards.
hmm....good topic
anyone know the temp rating for teflon lube? not the actual tape, but the liquid stuff?
I remember a picture from Bobby_M and it looked like he put something on his. Let me find it
*edit no luck

Here is a link to the manual for the TS temperature switch by love controls http://www.dwyer-inst.com/htdocs/PDFFILES/iom/temperature/TS_iom.pdf
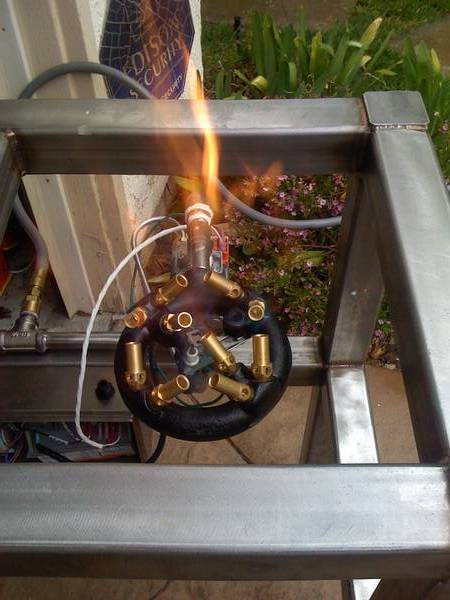
With the multi-jet burners you can not use the air-gas mixer like other burners use. If the flame is large and yellow you probably have the NG jetted nozzles (way to much gas flow when used with 11" wc propane). Looks like the nozzles would need to be replaced unless you could find some threaded jets and drill and thread the nozzle inlets to convert it to LPG.
Just finished my acid and PBW wash
couple things....
1. dont think my regulator is big enough. If I run one burner its fine, two and I dont get much flow.
2. not sure how the LOVEs should be set
anyone have an instruction manual for the LOVE controllers?
With the multi-jet burners you can not use the air-gas mixer like other burners use. If the flame is large and yellow you probably have the NG jetted nozzles (way to much gas flow when used with 11" wc propane). Looks like the nozzles would need to be replaced unless you could find some threaded jets and drill and thread the nozzle inlets to convert it to LPG.
korndog said:You need to go into programming and set D0 to ht. It's set for cooling by default.
yea the amount of soot on the bottom of my keg was insane. I ordered the LP burners so they should of come with LP nozzles....who knows though.
Can you give me a quick run through on how to do that?

Can you use a JC 419 controller to control a solenoid valve? I ask, because they seem to just have a standard three prong power connection. Anyone know?!
I think it functions just like the Love switch. It's a SPDT output with heating and cooling modes.

Hey guys
I am trying to tweak the burners and flames for brewing. If I turn valve up to get blue flame to the kettle, I get major flames up the sides. Any advice on burner adjustment would help. Thanks.

I had the same problem and as I see it there are two fixes for it.
1.) Lower the burners two inches.
2.) Put the keggles two inches higher.
I opted for option #2 as a temporary solution. I bought some 2x2x8 patio pavers for 38cents each and used a mason chisel and chopped those suckers in half. For a temporary solution that cost only a couple bucks it worked great.
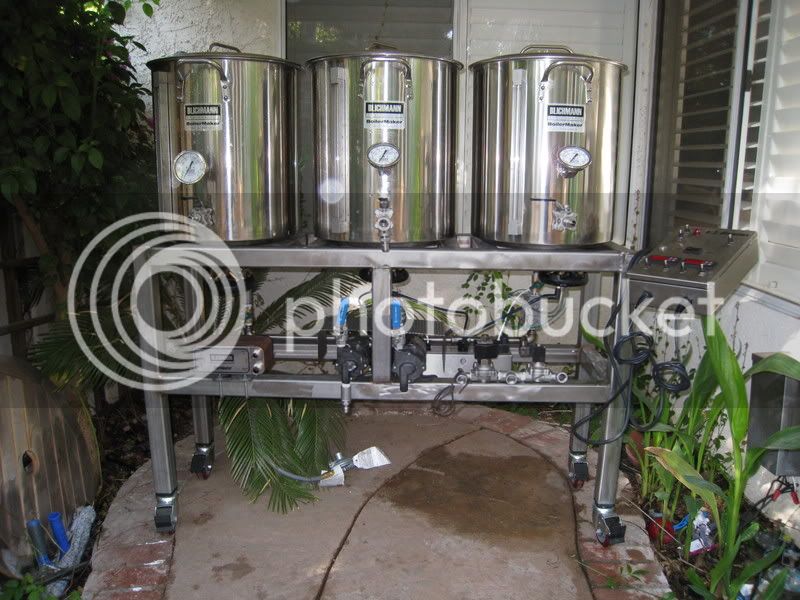
well jsut finished my first brew
couple things.....
I dont like these 23 jet burners
i hate the wind
I love fly sparging so much more than batch
I got 84% efficiency which isnt bad. I have a few things Im going to tweak, but once I have this dialed in its going to be the a piece of cake to brew great brew.
HOW did you get electronic ignition!? That looks nice... Id love to build mine with the same electronic ignition. What components do you need?
I might be wrong but i thought the ring burners were meant for low pressure NG (4" wc)and LP gas(11"-13" wc).
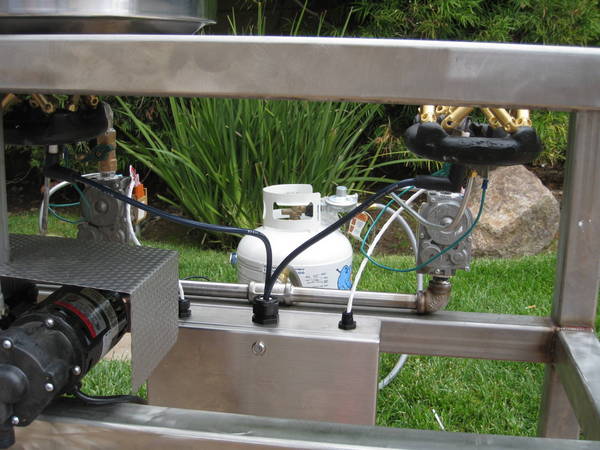
kladue said:If you have the flow control valve before the solenoid valve move it to after the solenoid valve and as close to burner inlet as possible to help reduce the whoosh factor on startup.
I might be wrong but i thought the ring burners were meant for low pressure NG (4" wc)and LP gas(11"-13" wc). If you have the flow control valve before the solenoid valve move it to after the solenoid valve and as close to burner inlet as possible to help reduce the whoosh factor on startup.
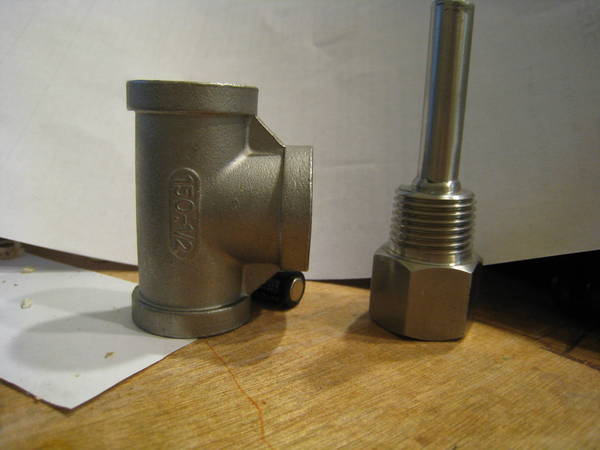
Any reason this thermowell wouldn't work for a Love controller/SS Tee fitting setup? Its $9 plus shipping on Ebay. There's also a 4" stem for about $12.
"1/2" FEMALE GAUGE CONNECTION
2-1/2" STEM LENGTH
1/2" FEMALE PROCESS CONNECTION
STEM INSIDE BORE DIMENSIONS: .260" bore
304 STAINLESS STEEL
FACTORY NEW"
http://cgi.ebay.com/THERMOWELL-304s...VQQcmdZViewItemQQ_trksidZp1638Q2em118Q2el1247
I bought two from him. The Love probe fits inside without modification. The are slightly larger, so flow is a bit more restricted if using inside a tee. I cut mine down for this purpose and filled with JBweld. Good product.
Hey Korndog. Cool. Did you cut down the 2.5" or 4" and what was the final length? Also, would it make sense just to extend the T a bit to pull the tip of the thermowell back and free up some of the flow?

Enter your email address to join: