insp79
Well-Known Member
Yet another "Coffin Keezer" Build.
Thank you to all of HBT members for the plethora of knowledge and information shared in this forum.
I started building this keezer in July and hope to have it finish by the end of October. My woodworking skills have improved considerably during this build.
I bought the freezer from Home Depot on sale for $185 and used my DD214 for an additional 10% discount. Nod bad. I plan on cramming 4 corny kegs into the freezer. It is a 7.2 cu ft.
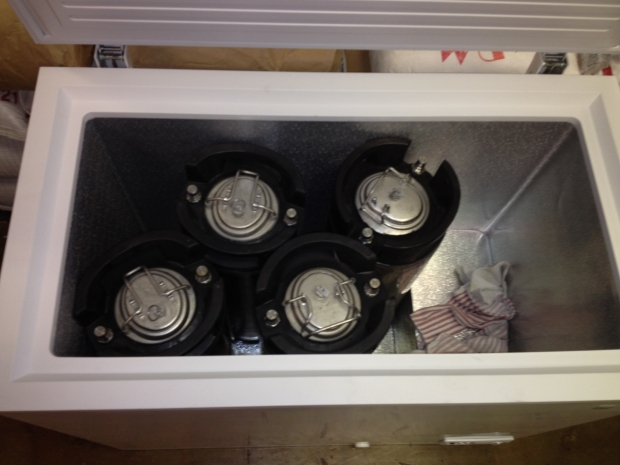
The only way to get them to fit is by starting in the front right hand corner, and then slide the rest in. If you start in the back right hand corner, they will not fit by 3/8". Go figure.
I bought a bunch of stud 2x4 boards and some casters, and spent the next few weeks trying to figure out the best way to assemble this base. At this point I had close to zero woodworking experience.

Then I made the collar, which was redone several times.

.

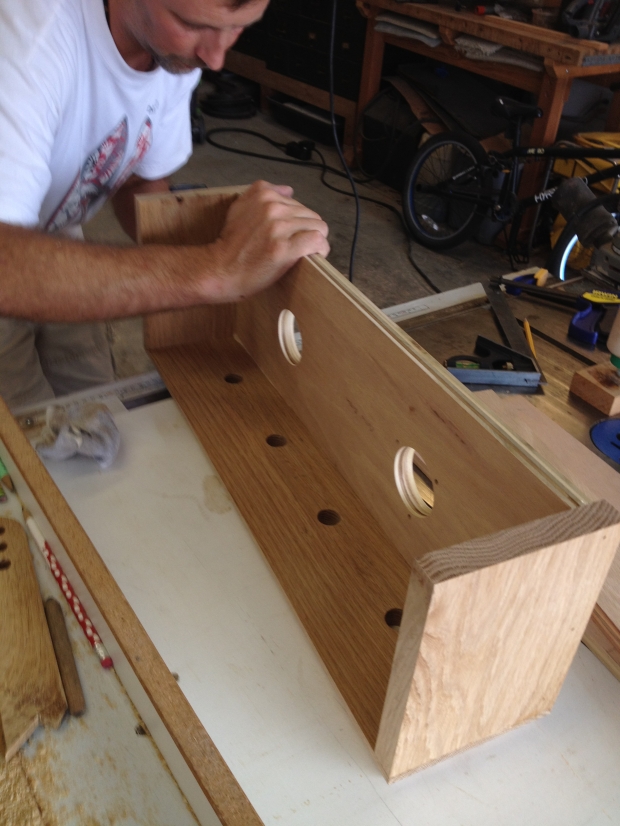
Fast forward. I made my gas manifold. I wrapped the collar with 12" aluminum speed tape to form a reveal for the seal to adhere to. I also placed 1 1/2" foam seal beneath the collar to seal the collar to the freezer chest. Then I ran a bead of silicone to seal the gap.

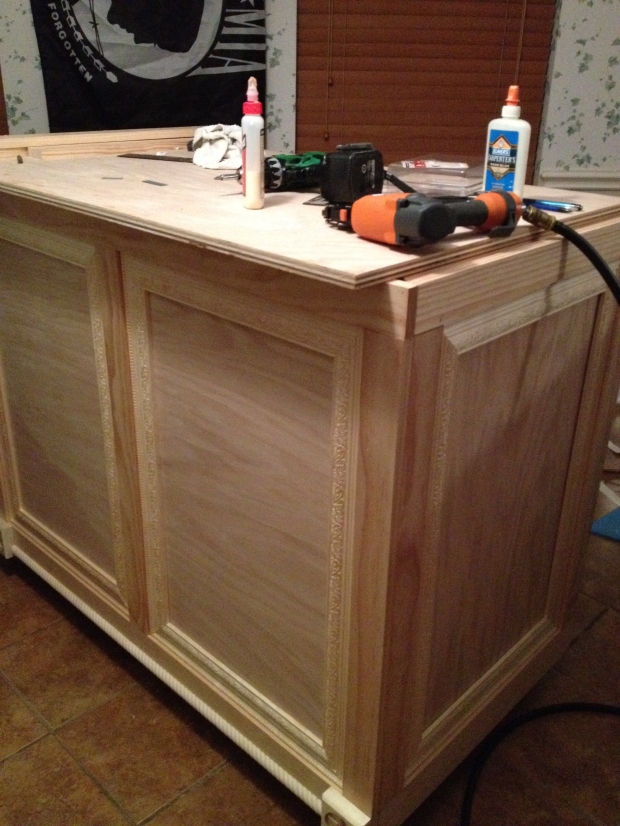
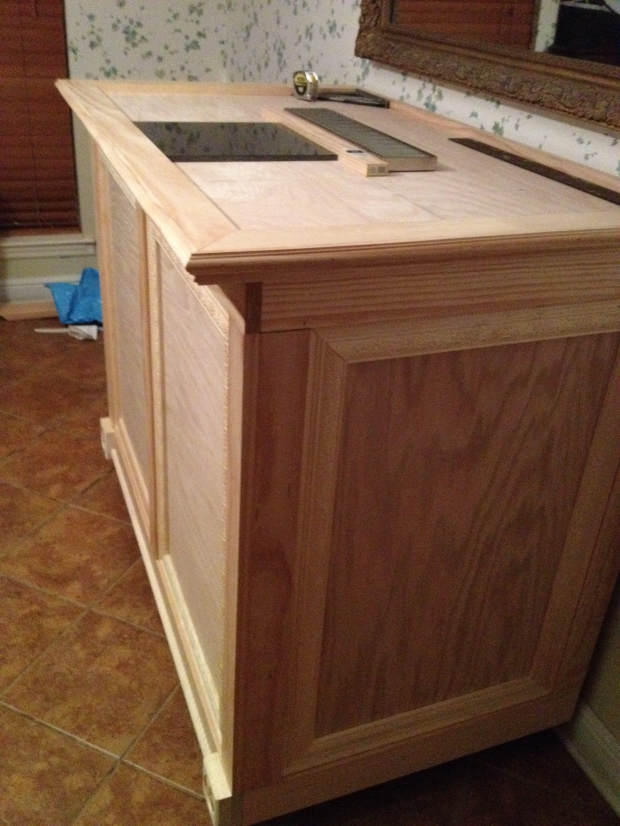
I used 1/2" Oak plywood on the sides of the cabinet, and 3/4" oak on the top and front. Then I started trimming it with the ornamental pine trim from Home Depot. I started trimming the cabinet.

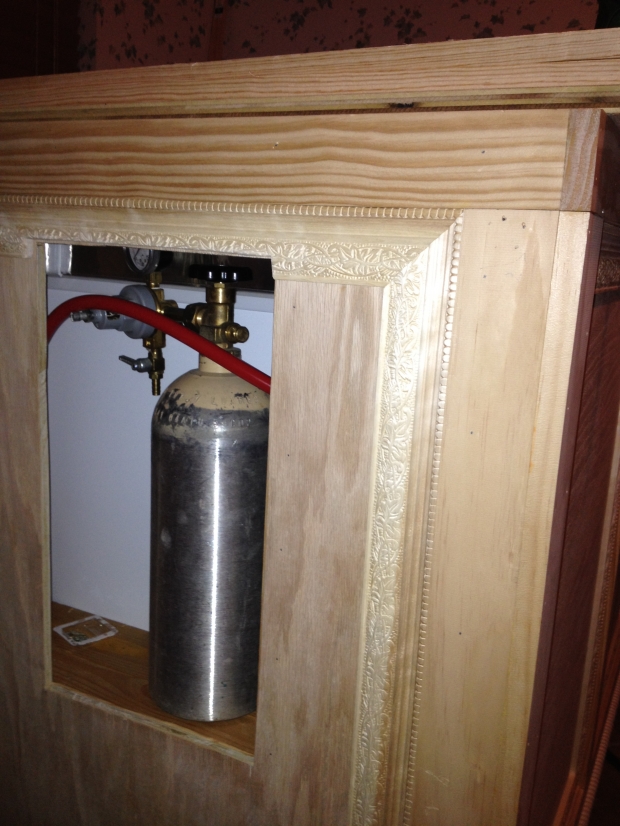
The CO2 bottle will live behind a door on the side.
I trimmed out the top with pine 1x3

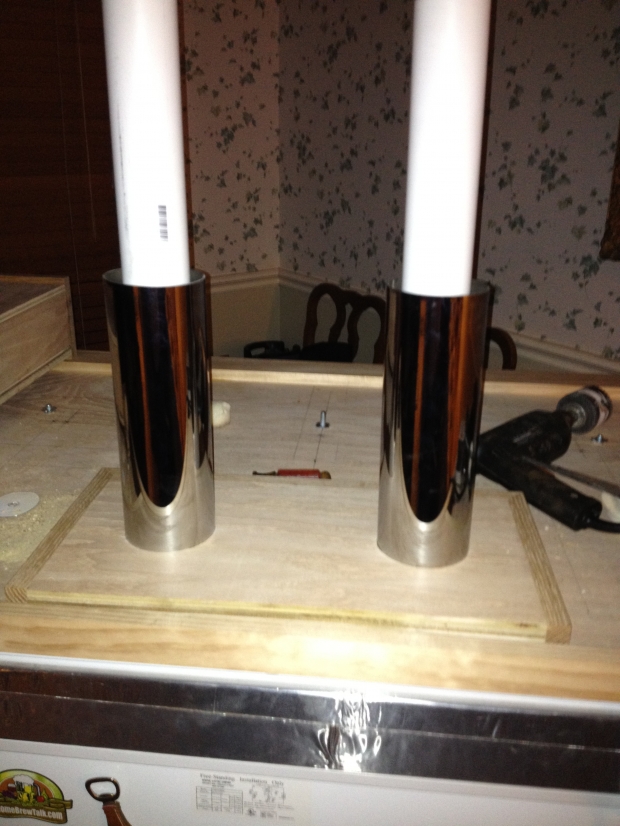
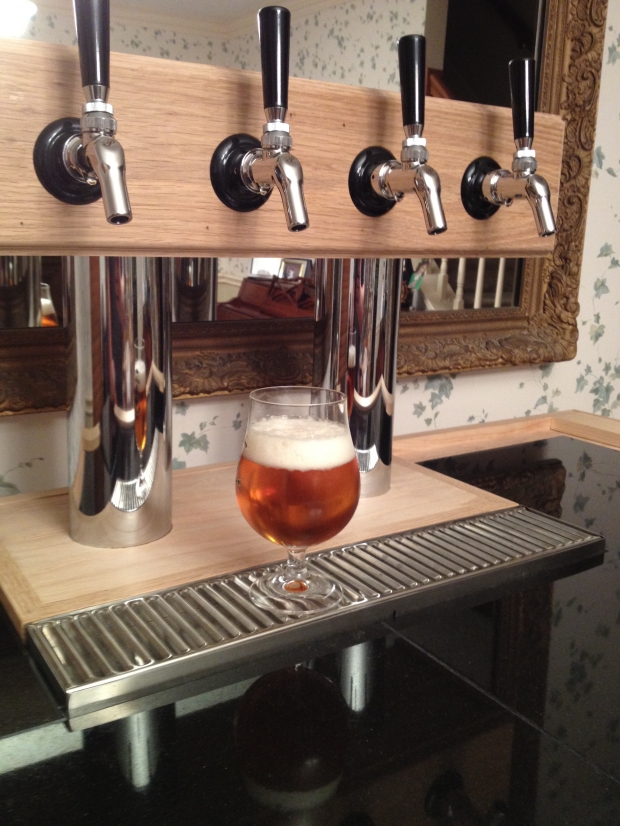
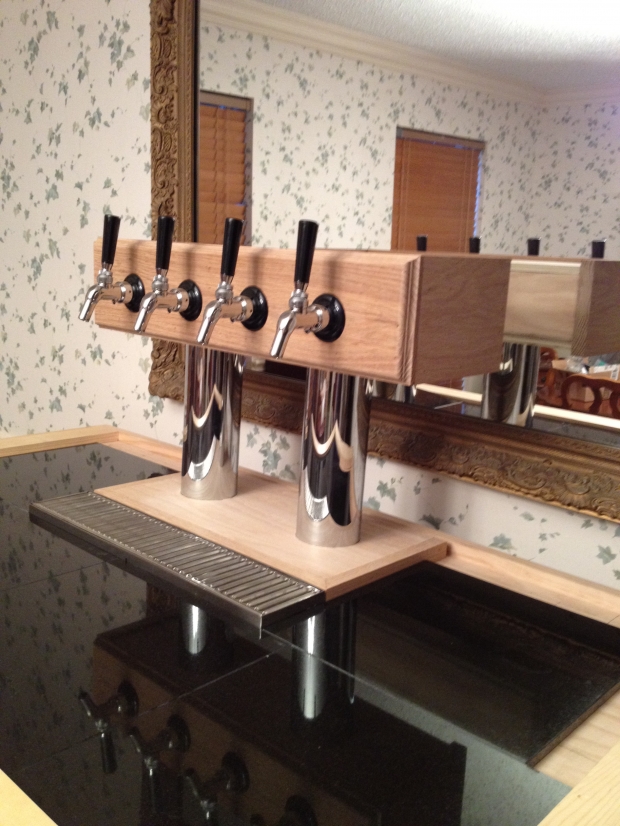
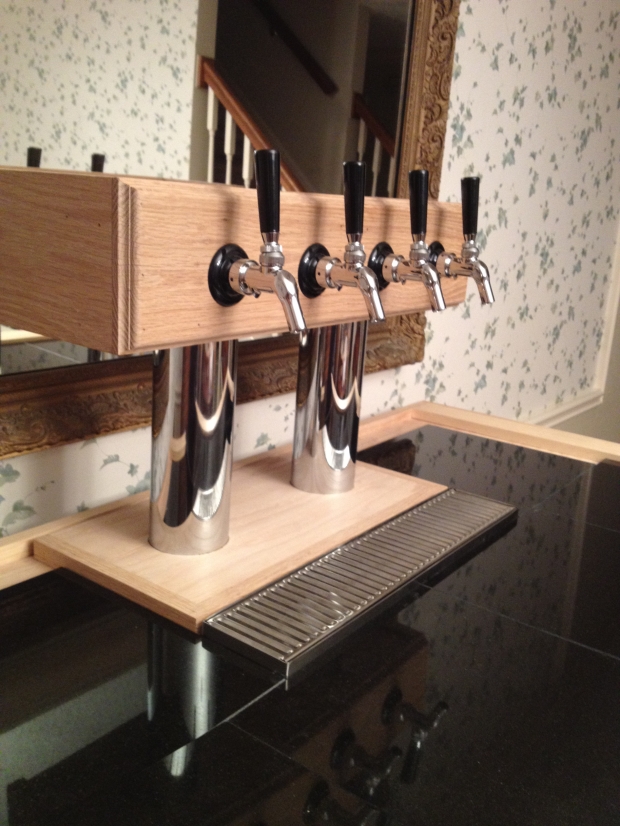
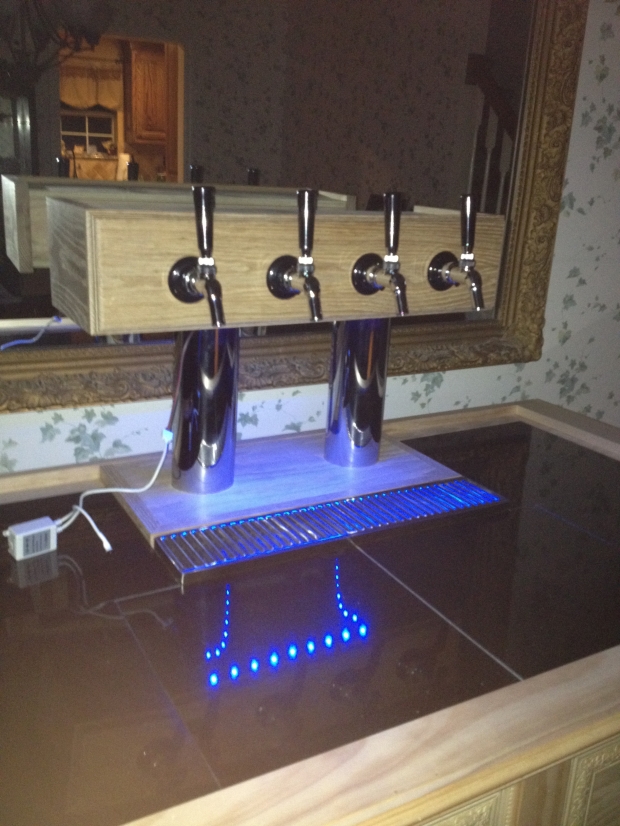
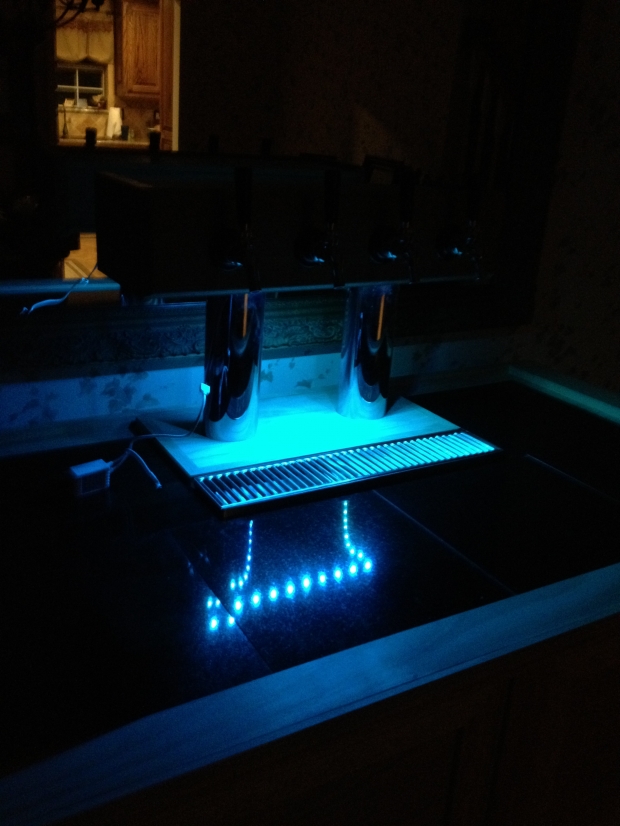
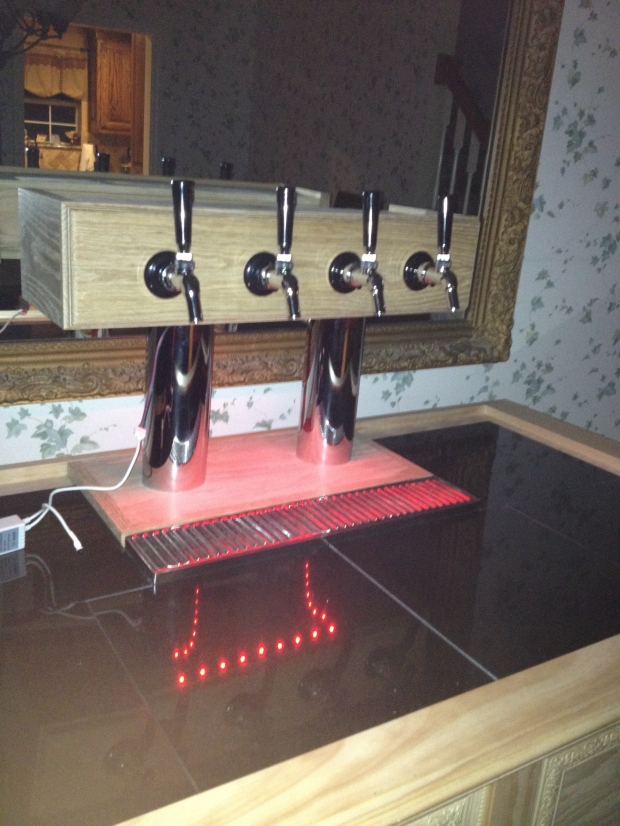
Time to layout the top. I plan on a 19" drip tray. 6 bolts to secure the top to the freezer lid. and black granite tiles.

Thank you to all of HBT members for the plethora of knowledge and information shared in this forum.
I started building this keezer in July and hope to have it finish by the end of October. My woodworking skills have improved considerably during this build.
I bought the freezer from Home Depot on sale for $185 and used my DD214 for an additional 10% discount. Nod bad. I plan on cramming 4 corny kegs into the freezer. It is a 7.2 cu ft.
The only way to get them to fit is by starting in the front right hand corner, and then slide the rest in. If you start in the back right hand corner, they will not fit by 3/8". Go figure.
I bought a bunch of stud 2x4 boards and some casters, and spent the next few weeks trying to figure out the best way to assemble this base. At this point I had close to zero woodworking experience.
Then I made the collar, which was redone several times.
.
Fast forward. I made my gas manifold. I wrapped the collar with 12" aluminum speed tape to form a reveal for the seal to adhere to. I also placed 1 1/2" foam seal beneath the collar to seal the collar to the freezer chest. Then I ran a bead of silicone to seal the gap.
I used 1/2" Oak plywood on the sides of the cabinet, and 3/4" oak on the top and front. Then I started trimming it with the ornamental pine trim from Home Depot. I started trimming the cabinet.
The CO2 bottle will live behind a door on the side.
I trimmed out the top with pine 1x3
Time to layout the top. I plan on a 19" drip tray. 6 bolts to secure the top to the freezer lid. and black granite tiles.


")