My basement brewery build

Homebrew Talk - Beer, Wine, Mead, & Cider Brewing Discussion Forum

Help Support Homebrew Talk - Beer, Wine, Mead, & Cider Brewing Discussion Forum:

This site may earn a commission from merchant affiliate links, including eBay, Amazon, and others.

Pharaoh

Member
Joined
Jul 9, 2015
Messages
23
Reaction score
5
After being in our house for a bit over a year and doing very little work to get brewing again I decided it was time to get things rolling again. The space is a chunk of the basement that's around 350 sq ft or so. So far I have done some minimal extra framing and with the help of my father-in-law (certified electrician) wired in a couple outlets including a 240v drop with a GFI breaker.

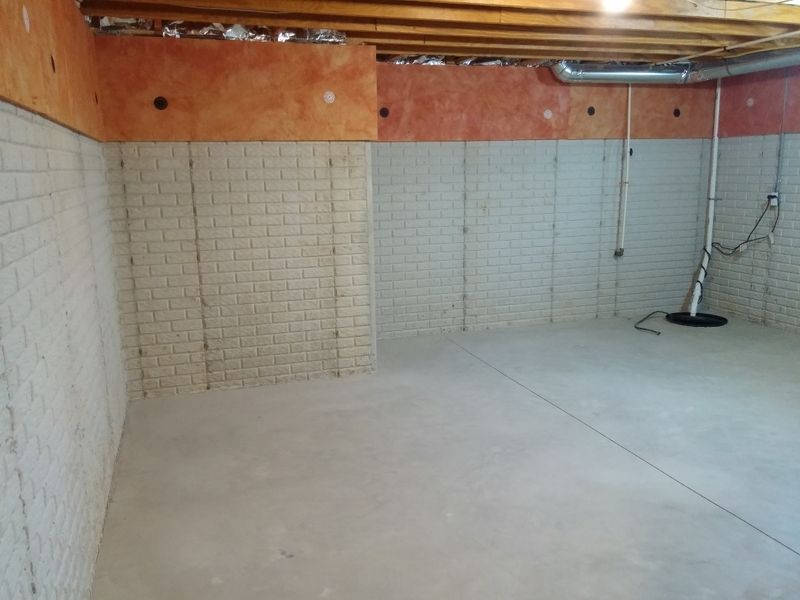
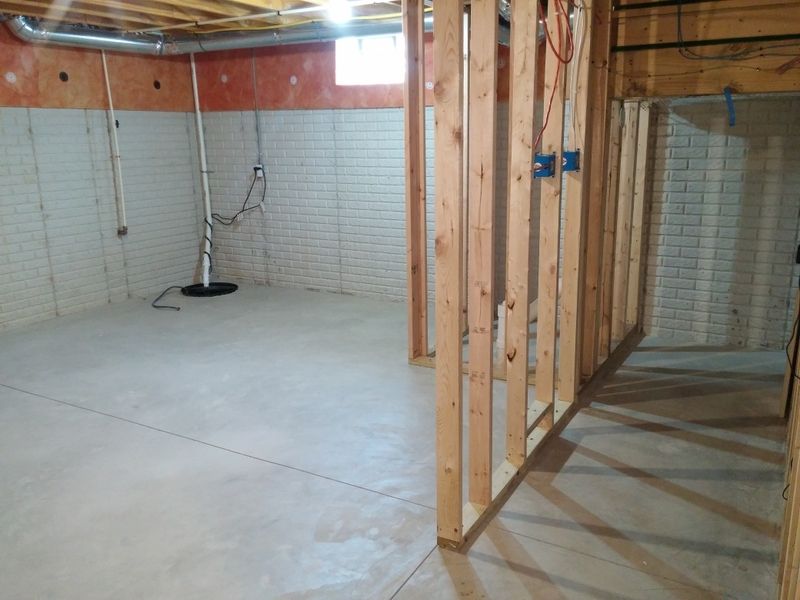
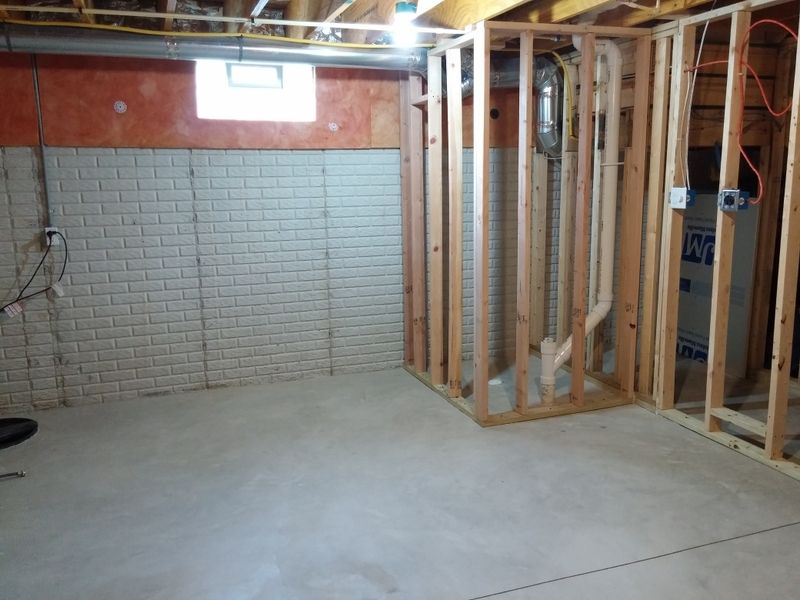
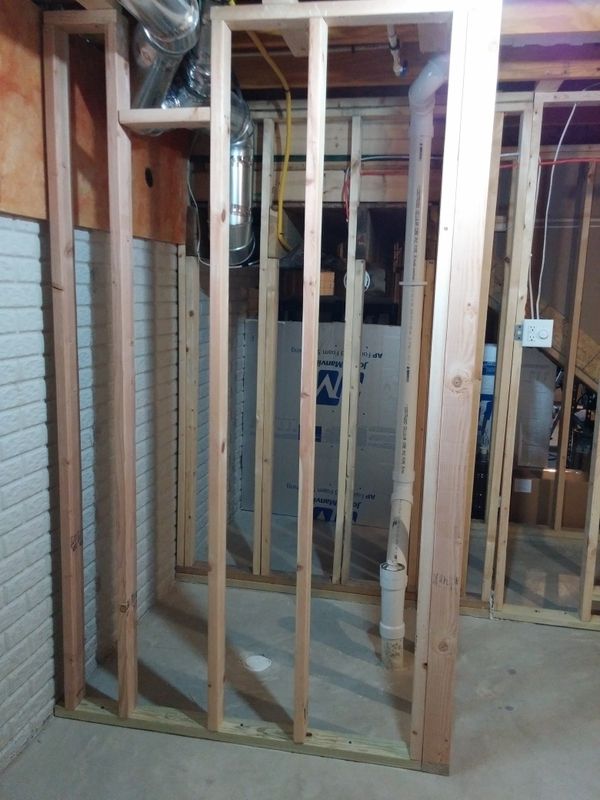
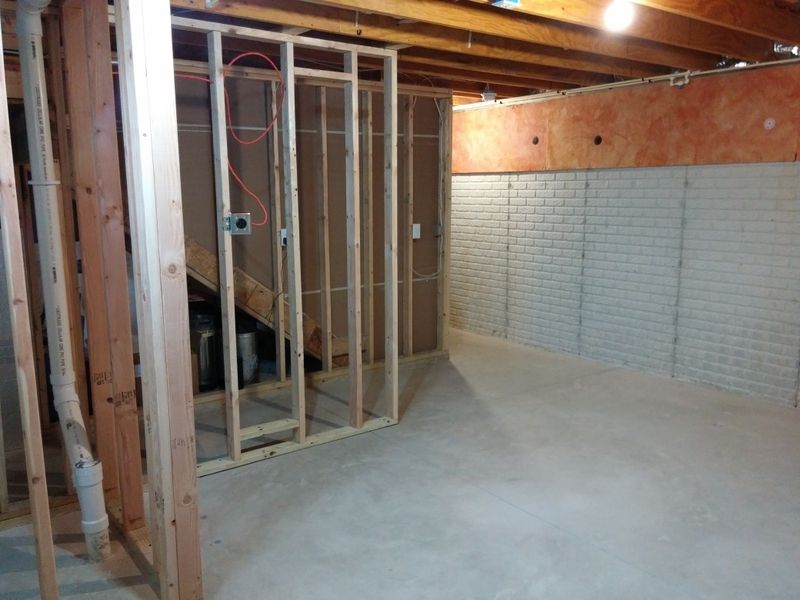
Some pictures of the space:


I am jealous of your "canvas". Starting out with what appears to be an open drain in the floor, a window to vent exhaust, and some sweet exposed brick.
 
I am jealous of your "canvas". Starting out with what appears to be an open drain in the floor, a window to vent exhaust, and some sweet exposed brick.

That open drain is my sump pump it, can't really dump stuff in there since it'll get pumped out into the street. I actually have a lift pump for a sanitary tub I'll be installing later.

The window won't be used for exhaust, already have some ducting and a fan to install a proper vent to the exterior.

As for the brick, that's from the molds on the poured concrete foundation. I keep going back & forth with whether I want to frame all the walls or leave a couple exposed for effect.

Also still kicking around how to finish the floor, debating a coating or maybe waterproof laminate.

Any suggestions or opinions are always welcome, my plan isn't full set in stone & I love hearing folks ideas.
 
Quick update, framed an extra wall over the weekend. Tested our house twice for Radon, both tests came back positive so I'm on hold until I get a quote for a mitigation system.

Quick pic of the current mess:
 
So the radon mitigation system is going to be installed next Monday, ran a new electrical line & installed a breaker over the weekend to power the radon fan. Fortunately the radon contractor agreed to place the system in a less conspicuous area of the house.
 
As far as the "brick" wall goes I would leave it exposed. I would even think about painting it to look like real brick to give it that old timey look. If space allows I would have a large sink, like one of those 3x3x2 sinks, and one of those overhead faucets you see in restaurant kitchens to wash equipment. Also I would have some counter space with storage below and would consider cabinets above as well. It's always better to have too much storage. A central drain to wash down the entire brewery floor would be great but that probably isn't feasible in this situation. Don't forget at least one refrigerator to hold beverages to lubricate the brewer and any other brewery gophers. More refrigeration may be a good idea for ale and/or lager fermentation.

Good luck with the build I look forward to seeing it progress.

:mug:

-Brian

Brian,

Those are some great suggestions.

Upon closer examination of the framing setup we'd require for one of the walls we decided to pull down the insulation panels & leave that wall bare "brick". The upside is that wall is between the house & garage so the loss of insulation will be minimal.

For a sink I've already purchased a rather large wash tub. The counter/work surface is a laminate counter top mounted to a large heavy metal frame. I've considered switching out the metal frame for cabinets. The flip side is we have an abundance of shelving we purchased on sale not long after moving in, so there should be plenty of storage available.

Cooling concerns, I have a fermentation chamber I built some time ago. We have two kegerators but they'll live elsewhere in the basement where the bar/TV/bathroom will live.

Floor drains are a big no-no where I live. We have the sump pump pit and a tiny drain hole for the A/C condensation runoff.

Today the radon mitigation system is being installed so progress should continue very soon.

Still not sure what to do with the ceiling.
 
A pic of the mitigation system for S&G's. Also the future home of the bar & bathroom.


Up close shot of the pipe, gotta love the radioactive symbol on it.
 
After two weeks off I got back to it. Decided in the end to go with the suggestion of utilizing the brick wall, keeping the long one bare and took down the insulation since that wall faces the garage.

Finished the last wall:


Great progress so far! I'm debating what to finish the concrete floor with in my barn brewery so let us know what you decide on. We're leaning toward a coating in the brewery area, we do have a floor drain, and laminate by the bar.

Idea on the ceiling; Used redwood fence boards which you can usually find on CL for cheap. 1"x6"x5-6' You could put up a moisture barrier then the fence boards, that is if you like the rustic look.

Keep the updates coming please! Great build.
 
I think we've settled on a floor coating ourselves. We put one out in our garage with mainly color flakes to improve traction, lesson learned as it's treacherous when wet. A local store had the floor coatings on sale so I bought more than enough to do the basement plus some additive to make it non-slip. The stuff in the garage has been pretty bomb proof so far and I'm not exactly gentle with it (examples include brake cleaner, oil spills, a small motorcycle engine put a couple scratches when I opted to drag it around).

As for ceiling starting to lean towards a drop ceiling with different tiles. Reasoning so far is mainly two things. The first is the hood I have is actually a vent for a drop ceiling I chopped up to fit my needs, but the bigger reason is to allow access for the various valves in the ceiling as well as allow easy access to conduit passing between the floors of the house I ran for low voltage goodies I've yet to install. I'm sure the brewery will get set up with that fun stuff as well.

Unfortunately with the radon system it really derailed things since I had to empty the basement, now I'm putting stuff back but taking my time to keep part of it set up as a little hobby/work area for tinkering with electronic junk.
 
Quick update on things. Currently been working on a table top for the brew stands, that has become a lot bigger project than I initially had believed.

The other update is I managed to get a 50A 240V GFI breaker for the absolutely wonderful price of 50 cents. I currently am wired up with a 30A in the box and the matching wire, but with the cheap price of the 50A breaker I'm debating whether to pony up & run the heavier gauge wire over to the brewery and really have a ton of headroom/potential. Also contemplated running the 50A to a subpanel in the garage for other fun projects. Then there's the last option of selling the breaker and pocketing the profits.
 
Not sure of the distance of the run, but I would run the wire for the 50A. You would kick yourself down the road if you decide you want to upgrade your system.

I've been leaning towards the bumping up the system.

The run is decently short. I believe the roll of 10/3 we ran was about 25' with maybe 5 to 10' left over, so I don't think this will be horribly expensive. What I'm not looking forward to is trying to route the 6/3 through the path we made, I can see that requiring quite a bit of manhandling.


Unrelated but here's the tabletop I've been working on for the brew stand. It's a nice hodgepodge of reclaimed lumber I got very cheaply, I then filled some spots in with wood filler and that made my OCD flare. Next thing I knew I had sunk way too much time & the wife had to remind me to let it look a bit rustic/half-assed.
 
If I were you, I would definitely wire for 50a just in case. You don't have to use it, but it is definitely nice to have.
That whole space is awesome.
 
I'm jealous. I dearly miss having a basement.... basements are pretty rare here in Florida. On the other hand I don't miss living in the frozen north where I did have a basement.
 
I'm going to use this thread to convince my wife that her storage room needs to become a brew room! :D
 
Any Progress???

Only recent progress was last Thursday I drilled a hole for the exhaust vent, also managed to let the smoke out of my cordless drill while putting that nice 4.25" hole saw through the rim joist & sheeting.

I have the lumber to finish out framing the soffit ladders but haven't been able to find the time to take care of it or much else. The exhaust vent was a necessity since the weather is starting to get colder and I needed the caulking to be warm enough to cure.
 
Some vent pictures, the lighting makes them look a bit crooked but it's pretty straight and the insulation goes around the entire pipe.

Vent from exterior:


Vent from interior:


Bonus pic of one of the things that derailed me for a bit, made it for the wife for our anniversary:
 
Like that wine box

How'd ya get proper thickness on that channel for the door? Dado blade or is the standard blade wide enough?
 
Like that wine box

How'd ya get proper thickness on that channel for the door? Dado blade or is the standard blade wide enough?

No dado unfortunately, that was a couple passes with the standard blade. Did the same for all of the joints as well, was a bit time consuming
 
No dado unfortunately, that was a couple passes with the standard blade. Did the same for all of the joints as well, was a bit time consuming


Did you freehand it or use a fence? Bet it was interesting trying to keep uniform thickness.

Great build by the way I can't wait to build my basement brewery. Of course, I need a basement first.
 
Did you freehand it or use a fence? Bet it was interesting trying to keep uniform thickness.

Great build by the way I can't wait to build my basement brewery. Of course, I need a basement first.

I used a fence but had to remove some of those nice safety features to be able to do the cuts easily, something I really don't recommend.

I'm excited for you to get this done so you can start enjoying it.

Yeah, I've had the itch to brew and this is starting to kill me that I haven't had enough time to get it done.
 
I'm an electrician and if I lived closer then I would totally help you out. Keep us posted on how its coming along
 
After two months I'm back at it. Found a few goof-ups I made while framing, those have been fixed. Now I have the last bit of framing left to do with soffit ladders/bulkheads around the ductwork in the area. Upon closer inspection I'm a bit puzzled how to handle it, the duct is within a foot or two of the window and I'd prefer not to have it in the way. I've considered switching out the 6" round duct for a rectangular or oval duct for the stretch through the room. Alternatively I thought of re-routing the duct completely to move where the bulkhead would be, I'm sure I'd lose some flow but fortunately that duct is in our dining room which is empty. The wife was good with the second option since the room would see minimal use.

I will post some pics in a bit, for now my photo hosting site is down.

As usual, I'd love to hear anyone's recommendations or ideas.
 
Left side of duct -


Middle of duct (this is the one responsible for partially blocking the window) -


Finally the right side of the duct where it T's off -
 
Can we get a shot with your window to your back and out? Basically the room from the other direction.
 
Picture of the offending duct from directly below with the window location noted -


Right side of room with back to window -


Middle of room with back to window -


Left side of room with back to wall (you can see my brew stand up-ended along with my craptastic fermentation chamber that needs rebuilt) -
 
Just to make sure I'm clear also, you are basically bothered by the duct being I front of your window? If so that is completely understandable.

And what I would look at would be flipping the route 180 degrees on end, as well as 180 degrees on axis. So basically leave the main trunk, bring your duct up into the floor joist, then when you get out even to where you'd have to turn and go to your vent, I would drop it down below the floor joist and ride the bottom of them until you get to your vent hole. There would be a formed hump down the "middle" of your room instead of in front of the Window. You could also possibly reuse some of what you have and just have to add a bit of flat rectangular duct to get you across the room and as close to the ceiling as possible.
 
Just to make sure I'm clear also, you are basically bothered by the duct being I front of your window? If so that is completely understandable.

That's exactly it, figured I have so little natural light I didn't want to give it up.

Ended up relocating the duct today very similarly to how you suggested.


It's not sealed yet, that'll be a tomorrow job along with general cleanup.
 
If it were menu would consider installing some can lights directly above your work area. Led can light are great for this and add lots of light with less power consumption. This looks good and there shouldn't be any difference in flow rate out of your vent.
 
Back
Top