My Keezer Build for Dummies

Homebrew Talk - Beer, Wine, Mead, & Cider Brewing Discussion Forum

Help Support Homebrew Talk - Beer, Wine, Mead, & Cider Brewing Discussion Forum:

This site may earn a commission from merchant affiliate links, including eBay, Amazon, and others.

CarsonCE

Well-Known Member
Joined
Aug 13, 2009
Messages
147
Reaction score
4
Location
Houston, TX
dsc01070.jpg


My Keezer Build:

Simple, but decent looking Keezer build! Trust me, if I can do this, anyone can. I’m going to go ahead and apologize for the wall of text, but my keezer turned out much better than expected, so this can be a template for anyone who might need it.

I measured the outside dimensions of the freezer (at the lid) and cut up a standard 2x8 to match my dimensions. Being lazy, I didn’t sand (the saw made the ends decently smooth). I did use a file to clear off any major rough spots.

I stained one side and the edges of each piece using some dark wood stain (to look good with my black freezer) and waited 24 hours. I then flipped them over and stained the other side. Because I used soft wood, this was plenty dark for me (I would probably do another pass for hardwood). I did stain the ends twice because I wanted them to be very dark at each side of the front (I made them visible on the front so the screws would be hidden, it turned out pretty nice).

Next, I did the same 2 day process for the polyurethane, except I left the top and bottom edges like they were (for a better seal with the liquid nails).

Once my wood was ready, I lined everything up and used pilot holes and 4” screws to attach each piece. I got a surprisingly good seal this way. The thing was rock solid, but I added some 90* angle brackets to really secure the thing.

Next, I measured my faucet locations. I spaced mine 5” on center. Once marked, I drilled my pilot holes and then drilled the holes with a cheap 1” wood bit. I only did 2 faucets at first, but ended up regretting it (luckily I spaced them knowing I would add the third in the future – one was in the center and the other 5” to the right).

After that I drilled a ½” hole in the back for my fan power and temperature probe. For air circulation, I used a computer fan spliced into a cell phone charger that runs constantly. I didn’t plan ahead and wired the fan up before drilling the hole. Of course my fan didn’t fit through the ½” hole, so I had to cut the wires and do it again (not too much trouble, but stupid nonetheless). I used some heavy-duty double sided foam mounting tape to attach the fan to the collar, and that thing is surprisingly solid.

I removed the screws attaching the lid to the freezer and took it off. I unscrewed the plastic underneath the lid and removed the rubber seal. I lined up the rubber seal around the opening and then applied a strip of liquid nails all the way around. I carefully set the collar on the rubber strip and lined everything up, making sure the collar was flush against where it would be attached to the hinge in the back.

Next it was simply a matter of applying another strip of liquid nails around the collar and placing the lid on top. I added a bunch of weights to the top (being careful not to dent the lid) and waited 2 hours for it to set. After that, everything was solid. I attached the collar to the hinges using two 1-¼” screws for each hinge. It is quite sturdy.

I inserted the temperature probe and plugged the freezer into my thermostat and the thermostat into the wall. It is currently set on 40* and doesn’t kick on very much at all. I just used a piece of paper towel to fill the hole for the temp probe.

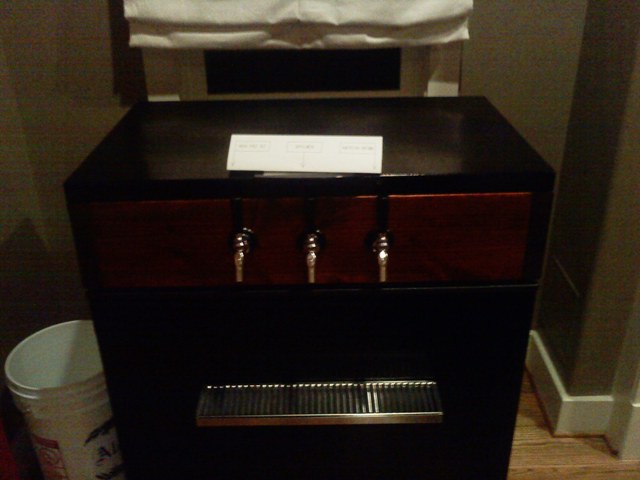
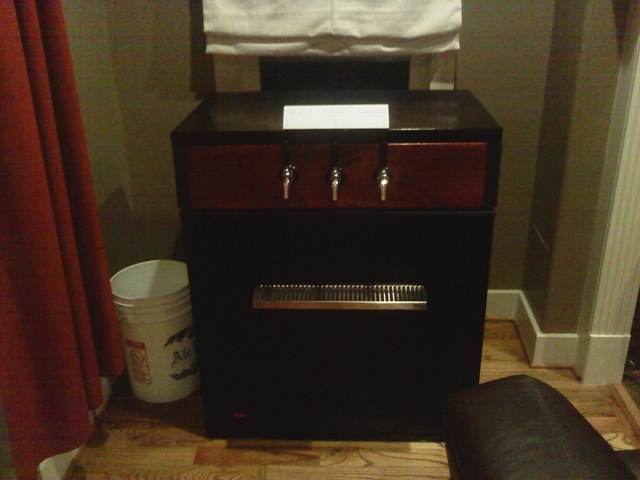
I used Perlick faucets and installed them through the holes. I had a carboy full of apfelwein and a carboy full of American Brown Ale which I had previously kegged since I got my equipment from Keg cowboy a week earlier. I had hooked the gas up at 20 psi at room temperature so it would be semi carbed. I turned the gas down to 12psi and put everything into the kegerator. I hooked the beer lines to the faucets and got everything working. I only had one traumatic issue (that resulted in a loss of about a gallon and a half of delicious beer), but luckily Jeff at Keg Cowboy is incredible and came over that day to replace a leaky faucet (Perlick’s are wonderful, but there is a 1 in a million chance you get a defective one). Now that’s service!

I cleaned up and now I have delicious beer on tap! A few days later, everything is at the right temperature and carbed up nicely

I am now in the process of installing a drip tray and a third tap. My regulator has 4 outlets so I can have 3 beers on tap and a 4th carbing using the set and forget method.

Here are some rough cell phone pictures (better ones to follow):


Thanks! Originally it was going to be banned to a closet off of the living room, but SWMBO saw it and decided it can stay in the open. Hooray!

I forgot to mention that I did add 8 felt feet on the bottom so it slides easily on the hardwood floors without scratching.
 
Here are some newer (but still crappy quality) pictures of my keezer with the third tap and drip tray.

BITYh.jpg


v69NT.jpg


Y8JGV.jpg


These are the custom handles I made to match the keezer that SWMBO informed me we can't use because they are dirty (What would company think!)...

NgfJS.jpg
 
Questions on how you installed the drip tray?

Did you drill, glue, other method?

Looks good. I like the black and dark stained wood combo.
 
I used some 5 minute epoxy and three 4" x 4" x 1/2" wide angles. I used black hammered gloss spray paint to paint the angles. The epoxy strength was 250 psi which would yield a strength of about 500 lbs for each angle. I don't think that thing is going anywhere. I used a small piece of velcro on top of each angle to keep the drip tray from sliding around and still be cleanable.

The key is to measure carefully so all three angles are level. I didn't want to tray to move around.

To be sure it was sturdy, I tested it about an hour after attaching the angles, and it held 3 full pint glassed without any hints of moving.

Here is the drip tray I used: http://barsupplies.com/stainless-steel-drip-tray-p-349.html
 
...Are you happy with their products?

I can't say enough good things about Jeff and kegcowboy. I called him multiple times (I'm not sure how much of his time I wasted) while putting the kit together, and he helped me put the perfect kit together for my needs. I got unlucky and got one of the very rare leaky Perlick Faucets. He got my address and came over the same day to replace the faucet (he is based in Houston).

Another thing, when he was putting my kit together the 3 way manifold I ordered was leaking. When I came to pick up my equipment, he gave me a four way splitter and an extra gas line and Ball Lock disconnect at no cost. He really goes out of his way to make sure his customers are happy.

I will add more pictures,soon but my camera is MIA.
 
I'm here in Houston, and looking to do pretty much the same thing. Which freezer are you using? I went to the worstbuy on Fry and I-10 to measure up their 5cf and it was only 16" front to back on the inside. Not big enough, by my calculations, to do much. I'll be ordering my stuff from Keg Cowboy soonish - looking for a 2 keg setup at first, but I'd like to be able to expand that in the future. Any suggestions on a freezer model would be great.
 
I spent a little extra to get it in black. I used the 7.2 cubic foot Frigidaire from Lowes. I got it for just over 200 bucks, but it looks like they are selling them for 259.00 now though. It easily fits 4 kegs and a CO2 tank. I can get 5 kegs with the CO2 tank outside, but I don't need that many. With 4 I can have 3 on tap and one extra carbing.
 
I followed this guys instructions http://www.mikebeer.net/chestfreezer.htm
along with Carson's - I think now I would have gone with black too, but man were you ever right about those Keg Cowboy Kegerator Kits - not only were they the lowest price but the kit came with quick disconnects included and it was already put together making installation almost instant. I think the regulator looks a lot nicer than anyone else's too. Carson thank you for your thorough instructions and kegerator photos.
 
I spent a little extra to get it in black. I used the 7.2 cubic foot Frigidaire from Lowes. I got it for just over 200 bucks, but it looks like they are selling them for 259.00 now though. It easily fits 4 kegs and a CO2 tank. I can get 5 kegs with the CO2 tank outside, but I don't need that many. With 4 I can have 3 on tap and one extra carbing.

Thanks, that'll help a lot!
 
Thanks Jason, We are working on getting some of the customer kegerator photos / keezer photos up on the wall at the new shop that just opened and we will defenitely be including one of these photos. Currently working on a custom freezer conversion for 2 15.5 Sanke kegs and a glycol alternative setup for our Keg Cobra Tower. Let me know if you have any more upgrades or you want to pose with your rig!

Keg Beer Dispensing Equipment & Kegerator Parts
2017 S Shepherd (between San Felipe & Westheimer)
Houston, TX 77019
281-888-0507
kegcowboy.com
 
Hi Jason, I wanted to let you know that we have our indivdual ingredients in stock now and that all grains are cold-stored in our steel grain vault to keep them fresh and reduce pest invasion. - Jeff
 
What thickness wood did you use? would oak work. i have a white freezer and was thinking about using oak and just polyuretaning it to bring out the natural wood color. I think the oak will pair well with white.


Thoughts?
Also how did you attach the wood to the top or the freezer lid
and how did you attach the seal to the wood bottom?
 
ok i read it again and saw that you used liquid nails to attach the strip.

you said attach to the collar. im not sure i understand (sorry hate to sound dumb but i would rather ask than screw something up)

what size screws did you use?

and what did you mean by angles? is that like a bracket for the drip tray?
 
What thickness wood did you use? would oak work. i have a white freezer and was thinking about using oak and just polyuretaning it to bring out the natural wood color. I think the oak will pair well with white.


Thoughts?
Also how did you attach the wood to the top or the freezer lid
and how did you attach the seal to the wood bottom?

I used standard 2x8 building lumber from Lowes (which in my area is Southern Pine, I believe). The 2x8 is technicaly 1.5" thick. The oak will look good. I'm assuming it is less thick than my 2x8. If it is less than 1" thick, I would think about adding some insulation.


ok i read it again and saw that you used liquid nails to attach the strip.

you said attach to the collar. im not sure i understand (sorry hate to sound dumb but i would rather ask than screw something up)

what size screws did you use?

and what did you mean by angles? is that like a bracket for the drip tray?

You don't sound dumb. You sound thorough, which is a good thing. I used liquid nails to attach the original lid to the top of the wood frame (which I called the collar). I also used liquid nails to attach the strip to the bottom of the wood frame. This way the whole thing (top, wood frame with taps, and the seal) all rotate up. Look at some of the pictures farther down on the first page to see what it looks like open.

I used 1-1/4" wood screws. I used two screws in each hinge (for a total of 4 screws).

The 4"x4"x1/2" wide angles are shelving brackets. I used 3, but probably only needed 2. They are attached to the keezer using epoxy. The drip tray is attached to the bracket with a few small pieces of velcro to make cleaning easier.
 
how did you measure your holes? i was thinking about taking a straight edge and marking a light line on the inside face of the wood from opposite corners diagonalling Left top to right bottom and the same for the opposite way giving me a perfect center for the center faucet then using a hole saw to get a good pilot hole and perfect circle hole. does that sound right?

also how did you measure your other two taps... I believe im going to make mine as a model like yours with only three. i could use 4 but i would leave the last space in the freezer for lagering/cold conditioning.

Lastly since im doing three but only have two (expand later) what could I use for a plug. I would rather drill all out now and then punch out a rubber grommet/gasket when I install my third rather than re-drilling.

Thanks this is a HUGE help.
 
could you use 2x4 instead of 2x8's if you don't want it so tall? will the taps still fit in the middle of a 2x4?
 
thyirishmen said:
could you use 2x4 instead of 2x8's if you don't want it so tall? will the taps still fit in the middle of a 2x4?

The 2x8's are to make sure the kegs on the ledge (over the compressor) fit. Otherwise the lid would hit the tops of those two kegs and potentially not close.
 
Back
Top