Show us your sculpture or brew rig

Homebrew Talk - Beer, Wine, Mead, & Cider Brewing Discussion Forum

Help Support Homebrew Talk - Beer, Wine, Mead, & Cider Brewing Discussion Forum:

This site may earn a commission from merchant affiliate links, including eBay, Amazon, and others.
Here's my three tier about to be put to use last weekend. I made it from extra shelf unit uprights and a couple pieces of square tube. You can see where I toasted my cooler tun the first time I brewed with it. :eek: I installed a piece of sheet metal between the tun and the top burner and fixed that little problem. My back is as happy as my taste buds now.

2011-04-17 12.30.02.jpg
 
Here is my brew rig, just got her all put together Saturday and brewed my 1st AG batch on Sunday. I've got a few quirks and kinks to work out of it. Not to mention all the things I'll do different next time. It only took me all day Saturday to find the fittings for the wort in and out for my chiller so that I couls use QD on it.

IMG_1080.jpg


IMG_1081.jpg


IMG_1082.jpg


IMG_1083.jpg


IMG_1084.jpg
 
brocko492 said:
Hi guys, just built a new two tier system and converted the kegs myself. I am a bit concerned because I filled them with water and opened the valves only to find that they don't drain all the way to the bottom of the pickup tubes. They drain below the bulkhad but still leave almost 2 gal of water. I checked everything to make sure it was tight and don't perceive any air getting into the line/ joint/ bulkeads.

Any other perceived problems??? Open to suggestions, I would imagine pump will provide suction enough to drain more, but haven't hooked up yet.

My keggles are the same, I actually decided not to install a diptube on the boil kettle because it gives space for the hop trub to settle out after the whirlpool. I know some on here thinks whirlpooling is bs, but it works well for me. I just plan for the dead space when formulating my recipe, it only equates to a couple extra dollars in grain
 
My keggles are the same, I actually decided not to install a diptube on the boil kettle because it gives space for the hop trub to settle out after the whirlpool. I know some on here thinks whirlpooling is bs, but it works well for me. I just plan for the dead space when formulating my recipe, it only equates to a couple extra dollars in grain

Maybe make your dip tube come to a 90 degree elbow and suck off the side of your keggle?
 
Maybe make your dip tube come to a 90 degree elbow and suck off the side of your keggle?

This is what I did. my trub loss depends on how much hops I use but when I optested it with just water I only have maybe 1/4 cup left in my BK. I'll post pics when I get home.
 
EricT said:
This is what I did. my trub loss depends on how much hops I use but when I optested it with just water I only have maybe 1/4 cup left in my BK. I'll post pics when I get home.

Have you posted the pictures yet?
 
Nice looking piece! Do you notice an flow restriction with the several 90 degree elbows? Also do you notice and trub getting into your primary vessels?

I hardly get any trub at all, I usually get a nice hop cone. My system is gravity fed, with the CFC below the BK and the Carboy below that, gravity sucks the wort right out. My CFC is 3/8 copper and my fittings in the BK are 1/2 inch so it can only flow so fast.
;)
 
Ship Wreck Brewing

This is a hand built 2-tier RIMS setup...like everyone else it is a work in progress! Still trying to figure out where to permanently attach the 10 plate chiller I got (and the main mast :)

Also working on getting some kind of arduino setup that will yell at me when i hit target temps and such.

There are a few more pics on the website if your interested!

brewsculpt.jpg
 
Ok here's my mostly homemade rig. It's simple but it makes good beer.

The hot liquor tank is my old boil kettle. A 7.5 gal Turkey Fryer that came with the burner. The new boil kettle is a 9 gal SS Steamer Pot made by the same company (Bayou Classic).
I have all SS 3 piece valves and fittings. I made the two tables from 100% scrap wood that was laying around the house. The table top used to be a leaf out of a table.

IMG_8341.JPG


My homemade kettle screen. I made it by putting a SS coil of wire inside a aircraft quality SS overall shield braid and clamping it to the SS "T".
IMG_8342.JPG


Here's my homemade sparge setup. Just an old pie plate that I drilled holes in.
IMG_8344.JPG


This is the false bottom inside my mash tun.
IMG_83461.JPG


It's not fancy but it'll get the job done. :rockin:
 
Last edited by a moderator:
I almost have my wooden rig finished, 90% of it is made from lumber I had leftover from a recent home improvement project, eventually I plan on covering the outside with tongue and groove pine. The keggles are done except for sightglasses, which I will probably order today along with the march 809 and qd's. Could someone tell me what HERMS and RIMS stand for, ive deduced that they have something to do with recirculating the mash. And while your at it, I would also like to know what SWMBO stands for, again have deduced that it is a reference to the significant other, but cant figure out the ackronym
 
Descriptions & references, hope this helps mate:

-------------

From www.urbandictionary.com

SWMBO:

Abbreviation for "She Who Must Be Obeyed"; used as shorthand for wife, girlfriend, etc. Usually pronounced "swim-bo".

The term originates from the H. Rider Haggard novel, "She" (first published 1886). The character Ayesha, known as She-who-must-be-obeyed, the Queen of Death, the White Goddess,of the lost city of Kôr who rules her kingdom with terror, She is the very image of the Femme Fatale. To disobey her or to scorn her is to earn & receive instantaneous death.

---------------------

From https://www.homebrewtalk.com/wiki/index.php/RIMS#RIMS

Types and components of recirculating mash systems:

RIMS:

RIMS stands for Recirculation Infusion Mash System. This refers to a recirculating mash system in which the recirculated wort is passed over direct heat. The direct heat may be applied by an electric heating elment suspended in a tube after the pump. It may also be applied via direct heat under a metal mash tun (this would be called a direct fired RIMS to distinguish it from the previously mentioned version). In just about all RIMS systems, the pump operates constantly during the mash, and the heat (flame or electric) is cycled off and on to maintain the desired mash temperature. Common heating elements used in home-built RIMS systems are home hot water heater elements encased in a copper pipe with an inlet and outlet.

HERMS:

HERMS stands for Heat Exchanged Recirculating Mash System. In a HERMS system, the wort is passed through the heat exchanger, usually a copper manifold, that is suspended in hot liquid. Usually the hot liquor tank is used for convenience since water will be used for sparge afterwards. The most accurate and preferred method of mash temp control is inserting the temperature controller's sensor inline with the wort at the exit of the heat exchanger. The controller will then cycle HLT heating on and off to keep the wort returning to the mash tun at your setpoint.
 
How does one go about "earning" the right to an ackronym? Anyway, getting back to something relevant, as long as my pump is below the fluid level, do I need to do anything special to prime it? Seems to me like the valve on the outflow side would need to be cracked to bleed off any air in the system
 
Google search for rims turned up only rims, as in what tires are mounted on, and I figured swmbo was some inside code exclusive to this forum. Sorry for ruffling feathers, was just trying to sort out the jargon. I'll post pics of my rig as soon as it is a little more complete
 
Still have some work to do but getting close, I've done everything myself except for the counterflow which I inherited from an area brewer who upgraded to a plate chiller. Wood wasn't my first choice, but I don't have access to a welder and refuse to pay someone. The sightglasses, pump, qds, and other burner are on the way, other than that, all I have to finish up is the whirlpool and diptube in the boil kettle. Also need to finish hard plumbing for the hlt fill pipe and cfc. I know its a little bit hillbilly looking, but its a huge step up for me. Questions and criticisms are welcome...wnc

ForumRunner_20110508_195259.jpg


ForumRunner_20110508_195423.jpg
 
I've been a long time lurker of this forum and I finally registered with HBT. After seeing others build functional and often beautiful brewstands, I decided to take the plunge. I've never welded before, so I watched a few youtube videos and took some advice from older HBT posts. I picked up a mig welder and some stainless tubing. My plan is to control the morebeer low pressure propane burners with auber PID's and honeywell intermittent pilots. For now, I'll do the pumping manually (meaning with pumps, but without electric valves).

I'll post some more pics once I've ground out the welds and mounted the burners.

Thanks to all of you who went before and posted pictures of your rigs - I've taken ideas from lots of people.

photo (5).jpg


photo (4).jpg


photo.jpg


photo (2).jpg
 
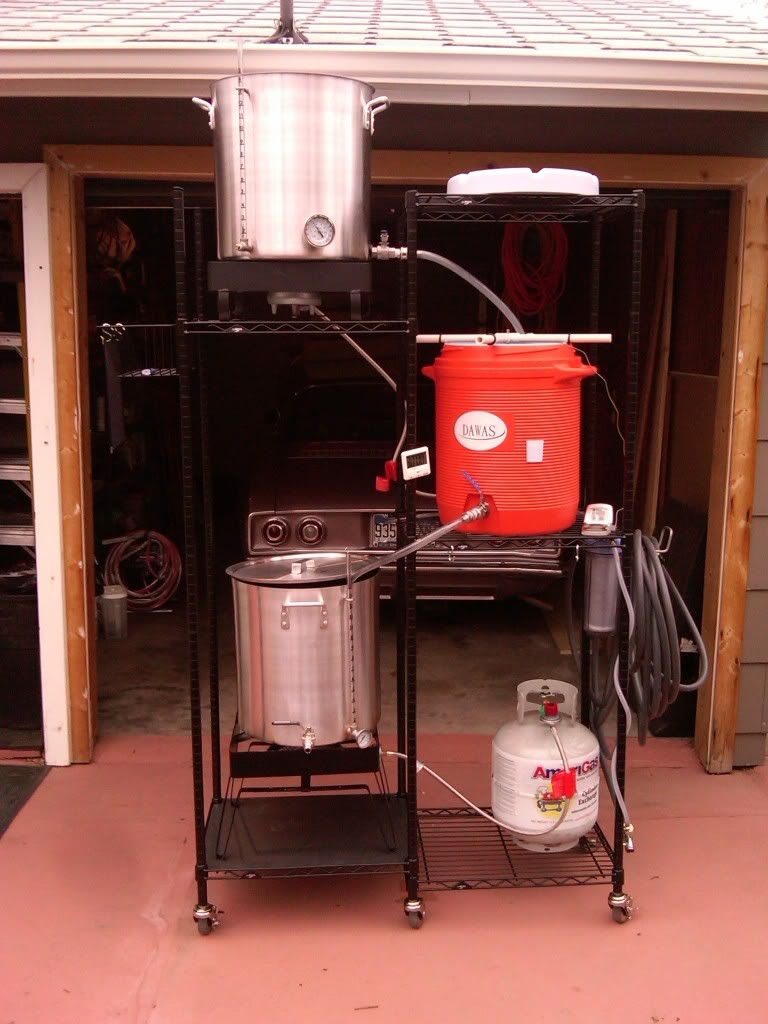
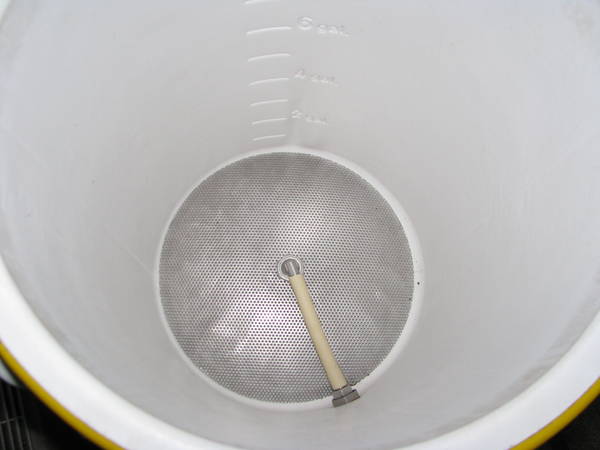
It has been months since I started. I added a bunch of things, since the original wet test drive reared several design flaw monsters I went back and welded steel tops and reinforced burner cages/supports. I added a water filter that I had laying around. I am ready to brew. Let me know what you guys think. Thanks to all that have helped me with this project.
Front View
Lid additions to all keggles. MLT loc line for sparge arm through top for heat retention while mashing
New top plates with heat shield to protect heat exchanger wires. The wires are wrapped in silicone hose in the tube
new sparge arm I made to replace original design
Control panel. QD for temp sensor on left side
40 plate heat exchanger. O2 setup with SS QD for easy removal of unit from heat exchanger

New mash paddle I made out of maple
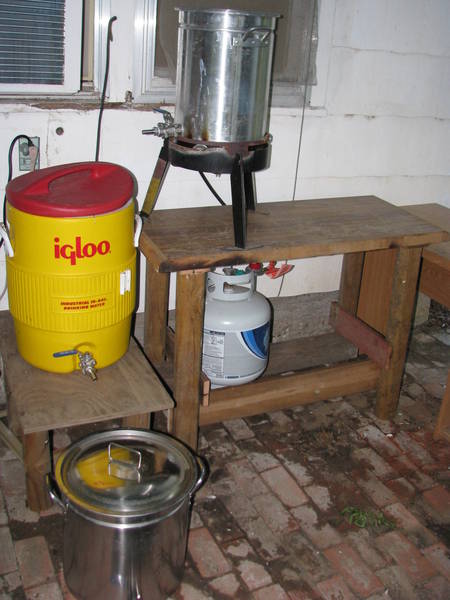
Top view of burner plates. Below the 10" I had to make some reinforcements out of 1/2" x 2 flat stock. On my first test runm the flame was lapping up the keg. I added the 1/8" steel plates with 10" circles plasma cut out of them and fired it up...the steel was melting and I about cried. I added the supports between the original burner cage and the 1/8" steel and welded them up...fired it up and no more melting.

Two 6' sections of silicone 1/2" hose eah with a female SS QD are all I require for fluid transfer. Everything is SS or copper...no brass anywhere except for the two flared end caps. It took me a few months of seperate purchases but I managed to get rid of all brass.

This thing should give me years of trouble free service.


HOLY CRAP....cant believe this post is still going. Took a hiatus, but ready to brew magic gold again....nice rigs everyone has made since Ive been gone
 
Runtgun said:
I've been a long time lurker of this forum and I finally registered with HBT. After seeing others build functional and often beautiful brewstands, I decided to take the plunge. I've never welded before, so I watched a few youtube videos and took some advice from older HBT posts. I picked up a mig welder and some stainless tubing. My plan is to control the morebeer low pressure propane burners with auber PID's and honeywell intermittent pilots. For now, I'll do the pumping manually (meaning with pumps, but without electric valves).

I'll post some more pics once I've ground out the welds and mounted the burners.

Thanks to all of you who went before and posted pictures of your rigs - I've taken ideas from lots of people.

Very well done, especially for a first time welding project. My first welds looked like bird s**t, and still aren't great.
 
Runtgun, Great start, welcome to HBT! I wish the rest of you lurkers would just man up and jump in, the more the merrier!
 
Here is my Space saver gravity system so far still have to build the bottom burner that will stack on this part to be storred away in a 16" X 36" area of the floor. Thanks to all the people on this great forum who gave me the ideas for this.
:mug:

20110507_11.jpg


20110507_10.jpg
 

Latest posts

Back
Top