Just wondering if you had any pictures of the process and a list of materials used. Looking into building something similar and any extra information would be greatly appreciated. Thanks
I have lots of pictures of various stages of the build process on my Flickr page, here:
http://www.flickr.com/photos/22117429@N08
They're not in any particular order, but I tried to take pics at each major stage. Basically anytime I made significant progress, I snapped a few pics. If you'd like a close-up of a particular part, let me know and I'll see what I can do.
I don't have any plans or instructions made up for building this. It was the product of research I did on this forum and me sitting down with some graph paper and scratching out some designs. Much changed through the process, so even those basic designs aren't really what I ended up with.
However, I can tell you a bit about the materials. This is sort of going to be a brain dump from memory. Hopefully it makes sense. Let me know if I missed something or you have any questions. Here goes!
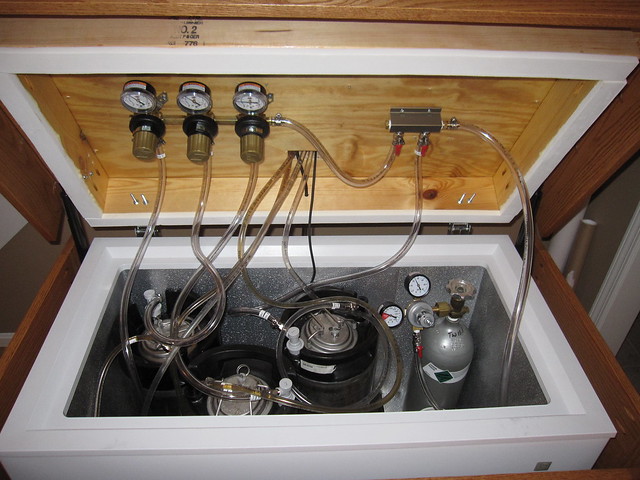
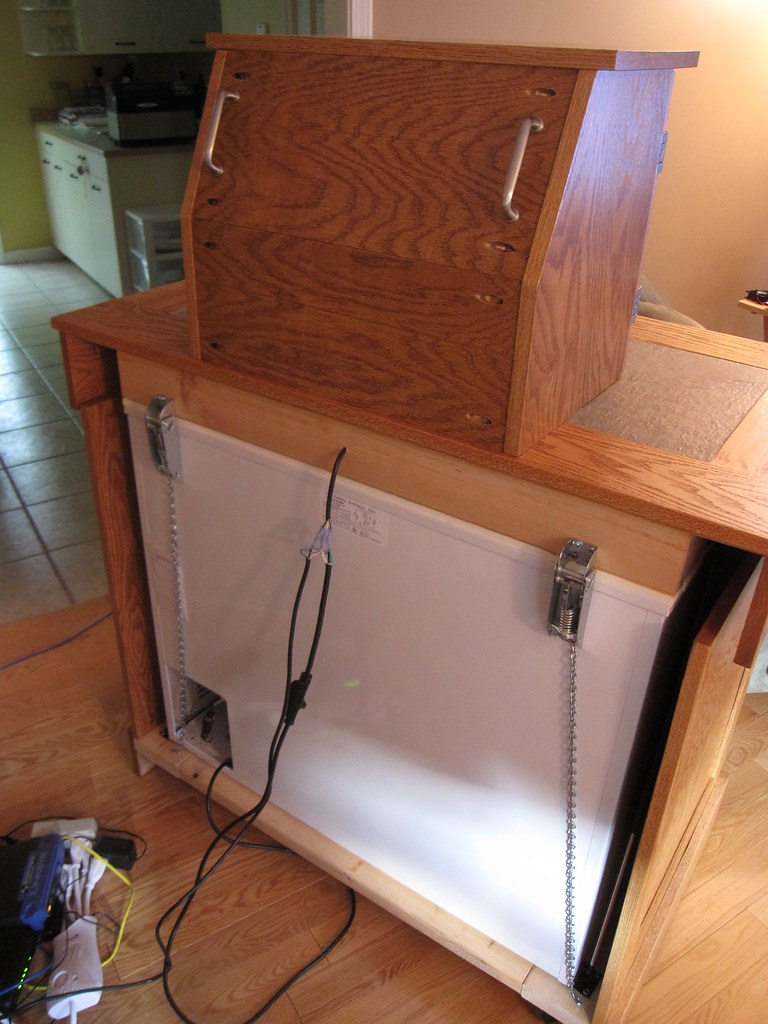
The freezer is the 7cf GE freezer from Home Depot. I recently picked up a 7cf Holiday freezer from Lowe's and it's identical except for some cosmetic changes. No, I'm not building another kegerator. The 2nd one will be a fermentation chamber. For the kegerator, I removed the original lid, built a new one out of 2x4s and plywood as the base of the top of the kegerator, and used the original hinges from the freezer. I used some Gorilla Glue to attach some foam strips to the 2x4s to seal with the freezer. The foam strips are made for filling gaps between windows and air conditioner units and I found it at Lowe's in the weather stripping section for a few bucks. The temp controller is a Love Controls TS2-010 (
http://www.dwyer-inst.com/Products/Product.cfm?Group_ID=149).
The freezer itself sits on a dolly made of 2x6s and has casters (I think about 3" casters). The paneled side sections create a cabinet surround and attach directly to the dolly. The panels don't attach to or touch the freezer or the lid at all. All of the wood parts that show are 1x4 and 1x6 (nominal, so really 3/4" thick) red oak boards, mostly from Lowe's, some from Home Depot. The panels are 1/4" oak plywood from Home Depot. I cut slots into the boards that framed the panels with a dado attachment on a table saw. The plywood panels simply slid into place.
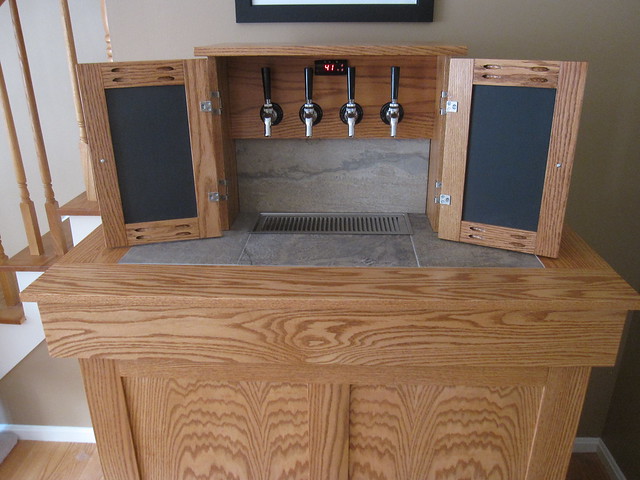
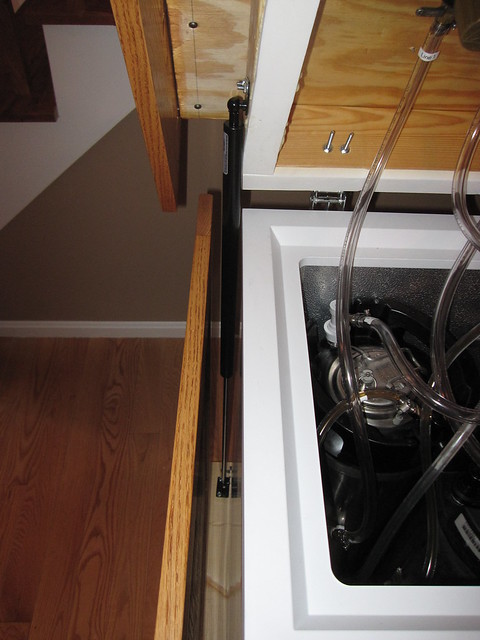
The tiles are porcelain and are mortared onto cement board, which is screwed onto the plywood base of the top. When I was looking for grout for the tiles, I didn't need to look very long. I found a color called "DeLorean Grey" and knew it was meant to be! It looks great with this tile, too. The lift-assist gas springs are from Lift Support Technologies, Inc. (
http://www.customgassprings.com or
http://www.lstechnologies.ca). The completed lid is really heavy and those gas springs are a life-saver! They were custom made for this. If you're thinking of using these, give them a call and have your plans ready. They'll work it all out and give you a design drawing showing how to attach them. f course, this isn't a common use for their products, so be prepared to explain everything and send them some pics and measurements. They were very easy to work with.
The stain is Cherrywood Gel Stain from Minwax. The taps are Perlicks with basic black plastic handles. One downside of having the taps enclosed in a cabinet is that I can't use big, fancy tap handles, but I like it the way they are.
The doors gave me some trouble. The panels are 1/4" oak plywood, and the frames are 1x3 red oak boards, trimmed down to 2". Some of the boards split when I was trying to screw the pocket screws into them. I had to make a couple extra trips to Lowe's. The outside-facing panels are finished the same way as the rest of the unit, but I put a few coats of black chalkboard paint on the inside-facing side. In hindsight, I would have done something to smooth out the wood grain on that side a bit more. The grain is obvious even after 3 coats of the paint and makes writing on it a little harder. Not a big deal, and I'm not going to redo it, but just worth noting. Also, the hinges took some adjusting to close properly. Make sure you get all of the screws in all the way, or they'll rub up against the wood, scratching the finish, and the hinges won't close properly.
I think that's it. Sorry it was so long, but I wanted to be thorough. I hope it helps! Good luck with your build!