DIY temp controller build

Homebrew Talk - Beer, Wine, Mead, & Cider Brewing Discussion Forum

Help Support Homebrew Talk - Beer, Wine, Mead, & Cider Brewing Discussion Forum:

This site may earn a commission from merchant affiliate links, including eBay, Amazon, and others.

android

Well-Known Member
Joined
Jan 31, 2009
Messages
3,058
Reaction score
55
Location
Ames, Iowa
EDIT: the project is now finished and you can find the pictures of the completed project on page 3.

well, after much deliberation, i decided to just build a temp controller myself... i know there are probably benefits from just getting a love/johnson/ranco, but i like building stuff, so that was justification enough for me to give it a whirl. i based the project off this persons plans.
all i have left to do is wait for the SSR from ebay to arrive and i will be able to hook up the wires, plug in the fridge and go. i will update with more photos of the SSR hookup when it comes.

parts list:
1 hunter thermostat - $20 (walmart)
1 spool soldering wire - 3$ (radioshack)
1 solid state relay - $7 (ebay)
- min 10A, mine is 25A
- 3-32 vdc supply
- 24-480V AC load
1 pack heat shrink tubing - $2 (lowes)
old telephone cord
old extension cord - plug part
small piece of thermostat wire
old DC converter plug from who knows what (3-32 vdc)
job box - $3 (lowes)
cover plate - $1 (lowes)
15A receptacle - $2 (lowes)

approximately $38 if you have some extra stuff lying around, maybe even less if you do it right.

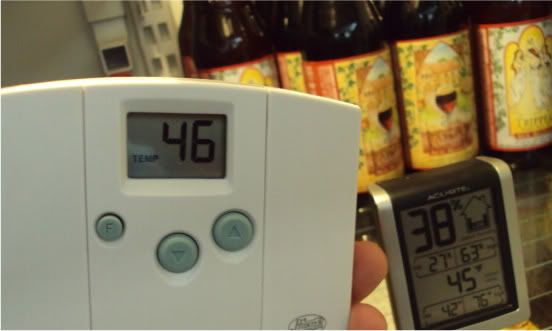
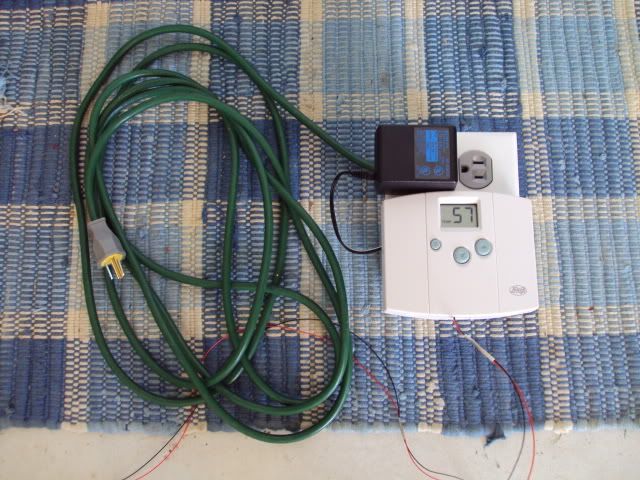
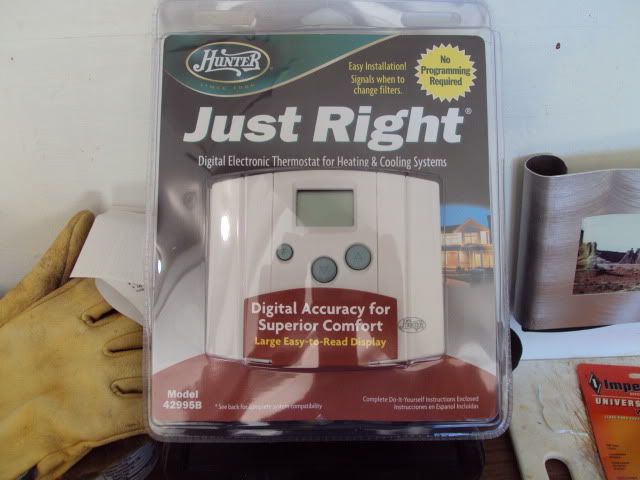
here's the thermostat i got:
DSC00585.jpg


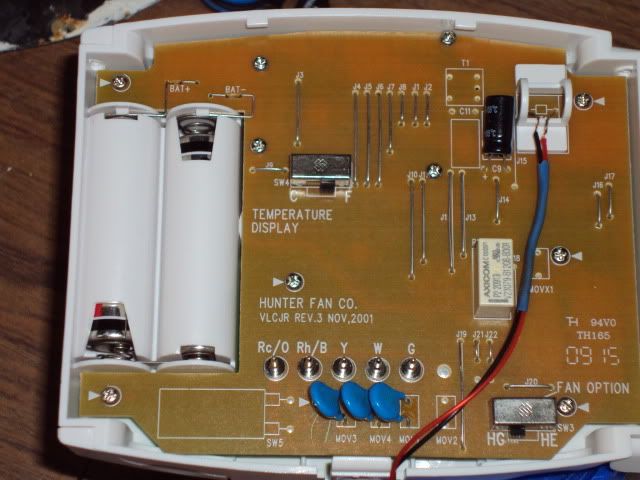
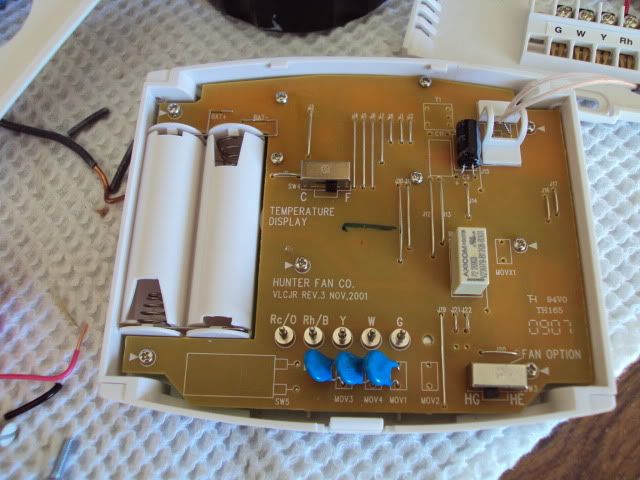
step #1: take off back, finagle out the circuit board by removing all screws with an arrow next to them and freeing battery terminals with a screwdriver or something small. there is one screw hiding beneath the furthest left little circular blue resistors or whatever they are
DSC00573.jpg


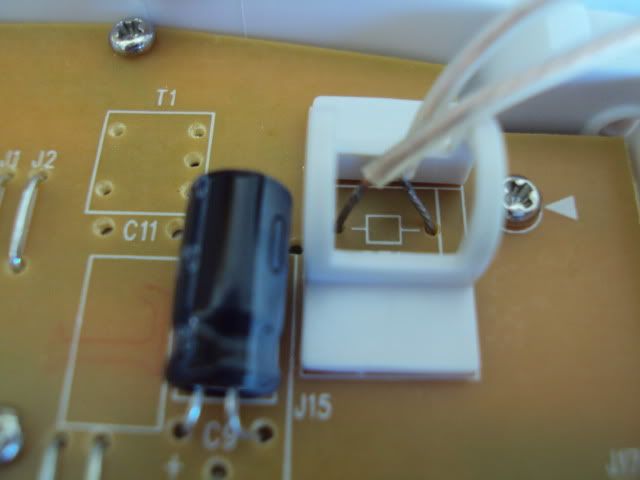
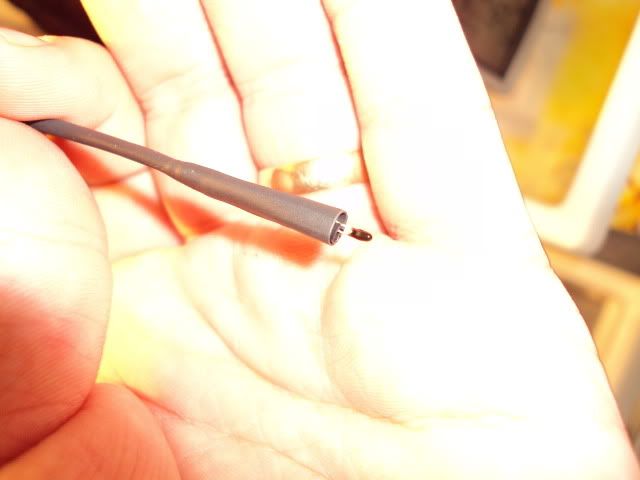
step #2: use soldering iron to desolder the thermistor (just hold the solder end up to the tip of your gun until it liquefies and you can pull out the wire one side at a time) i was pretty worried about the fragility of the thermistor but it turns out they are pretty tough (DAMHIKT). then, solder a piece of speaker wire or telephone wire into where the thermistor used to be. now, solder the thermistor on the end of the wire lead. use some heat shrink on each individual thermistor wire and then a larger piece on top of the separate wires, it'll look something like this when done:
DSC00574.jpg


DSC00583.jpg


continued...
 
step #3: route the new remote thermistor through the housing of the thermostat and test it out.

DSC00581.jpg


close enough for government work.

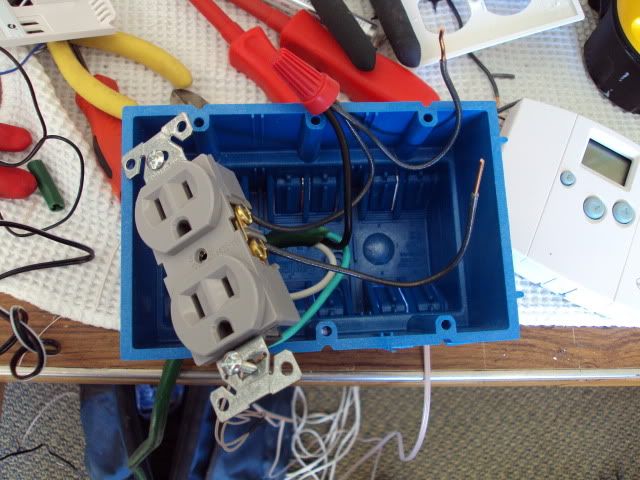
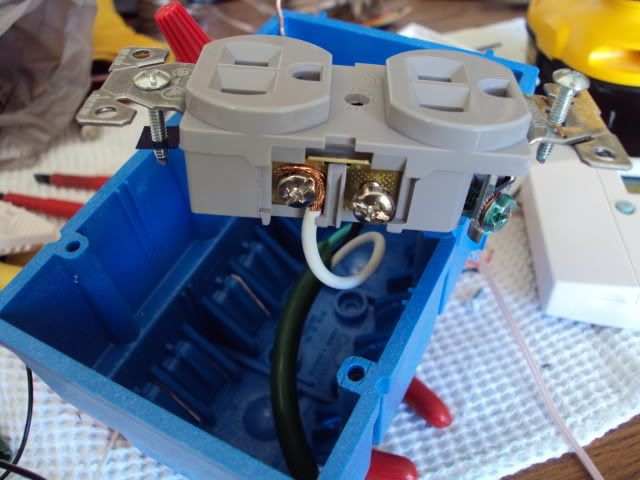
step #4: wire up the box/receptacle/power plug according to the wire diagram (i would post the diagram, but the other guy technically did it, so look at it in his post for clarification)

DSC00577.jpg


DSC00578.jpg


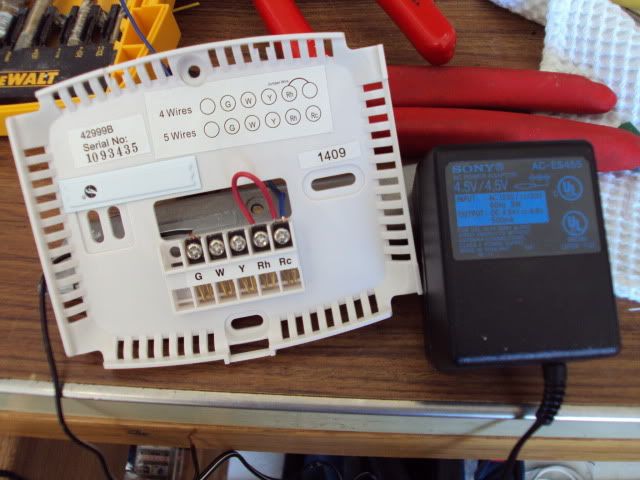
step #5: connect DC plug and wire to SSR to appropriate terminal on thermostat (according to diagram)

DSC00580.jpg


step #6: connect wires to SSR (not done yet, 10-15 days away)

step #7: mount it all up to the job box and fire away.

DSC00586.jpg


i'm no expert in electrical tinkerings by any stretch of the imagination. if i can do it, so can you. any questions, feel free to shoot. like i said, i'll update innards pics with the SSR hooked up when it arrives.
 
What's the model number on the thermostat? I can't seem to find it on Wally World's website.
 
I've converted quite a few of the $23 thermostats from HomerDepot. One thing that I've found helpful is to clip the thermistor wires about 1/4" to the circuit board and then solder the extension wire to those protruding wires. I destroyed one thermostat because it was being a real ***** and I applied too much heat and popped the traces off the circuit board... oops. Leaving the short wires gives you something easier to solder too.

Just my .02

Nice job on the conversion
 
model 42995B is what it says on the package... but inside the back cover it says 42999B, so i'm not 100% sure what it is.
 
I was thinking of doing something just like this. Would this be able to control 2 units (Heater/Fridge)? Would you then need a second set of everything but the Thermostat?
 
I was thinking of doing something just like this. Would this be able to control 2 units (Heater/Fridge)? Would you then need a second set of everything but the Thermostat?

i'm pretty sure it's possible, but i just plan to keep the jumper wire in place and switch it over to heat when i need it. i assume there will be a period of time when i need both, but i'll just use my basement to ferment in until i can just use the heating.
 
Just a couple of quick questions...

How low can you set that thermostat?
Do you have to modify it in any way to get to 33 degrees?
It just seems that most I've seen only go down to 55 degrees.

Thanks.
 
Just a couple of quick questions...

How low can you set that thermostat?
Do you have to modify it in any way to get to 33 degrees?
It just seems that most I've seen only go down to 55 degrees.

Thanks.

sorry i missed this reply... the thermostat in the pictures goes down to 45, which is fine for me as i'll only be using it for a fermentation chamber... i guess if you want to lager, you'd have to get one that goes lower or use a traditional temp controller... i don't know if there's any way to modify the thermostat to go any lower.
 
got the SSR in but i'm having issues getting power to it... i don't know if the DC plug i found in the basement doesn't work anymore or what but I can't get any power to the SSR so it won't switch the plug... i'm gonna go to the salvation army tomorrow and see if i can find another DC plug to try out...

edit: does anyone know if the little red light on an SSR should always be illuminated or does it just glow when power is being transferred?
 
I am a diy'er as much as the next guy but I bought a new pre-wired with piggyback plug controller that goes from 30 to 100 for $35 from CHI.

I paid $29 delivered for my double throw prewired JC-A19 off of e-bay.

I know you're only supposed to put milk on corn flakes but this is just an fyi.
 
too late for me now, but thanks for the info.

does anyone have experience with the SSR light and whether or not it's always supposed to be on or just when it's transferring power?

edit: found out by trial and error, the light only comes on when the thermostat clicks on.
 
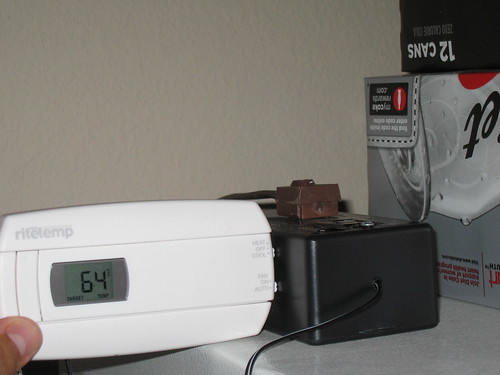
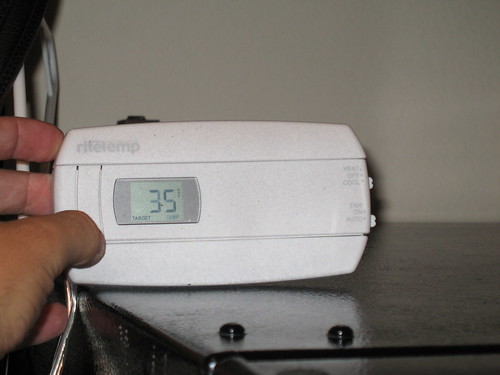
I did this same thing, with a Rite Temp thermostat, it cools down to 30 degrees, and has worked perfectly for me, it can control both cooling and heating, you just need one extra relay for the heating side.

However, living in Texas, haven't needed the heating side yet.....

3919215007_240bbdcb12.jpg
 
cool, thanks for the post. so you took out the jumper wire from Rh to Rc in the thermostat, got a second SSR and did you have to splice the DC adapter to connect to both SSRs? hopefully my question makes sense. also, how do you determine which wire is the (-) on the DC plug and which one is the (+)? i'm running into some problems getting mine to work, i don't seem to be getting any power to it...
 
I did this same thing, with a Rite Temp thermostat, it cools down to 30 degrees, and has worked perfectly for me, it can control both cooling and heating, you just need one extra relay for the heating side.

However, living in Texas, haven't needed the heating side yet.....

3919215007_240bbdcb12.jpg
Thats funny, when I demoed mine it was at the same temp as yours :D

4186d1201139031-if-i-burn-down-house-swmbo-wont-let-me-brew-5.jpg
 
cool, thanks for the post. so you took out the jumper wire from Rh to Rc in the thermostat, got a second SSR and did you have to splice the DC adapter to connect to both SSRs? hopefully my question makes sense. also, how do you determine which wire is the (-) on the DC plug and which one is the (+)? i'm running into some problems getting mine to work, i don't seem to be getting any power to it...

I didn't have to split the DC adapter going into the thermostat, I left the jumper connected on the thermostat.

Then I ran a wire from the Y terminal on the thermostat to the cooling relay, and a wire from the W terminal to the heating relay.

The other end of the DC adapter was split and run to both relays.

Then I just used one relay to control one plug of a standard household outlet, and the other to control the other, just have to remove the jumper from the outlet.

Plug your refrigerator/freezer into the cool side, and a space heater or equivalent into the heat side. You still have to flip the switch on the thermostat, but I have seen some that switch automatically.

BTW, I didn't use solid state relays, I used automotive relays.
 
gotchya, i got mine figured out earlier today. i forgot to remove the jumper from the outlet and had the 'fan option' switch in the back of the thermostat on the wrong side. everything was wired OK and once i did those two things, it worked fine. here's the remaining pictures of the SSR connections and back of the inside of the thermostat:

NOTE: i wired the outlets opposite of what they are in the first page of this thread. the DC adapter needed to be plugged into the bottom outlet, so the top outlet became the switched one.

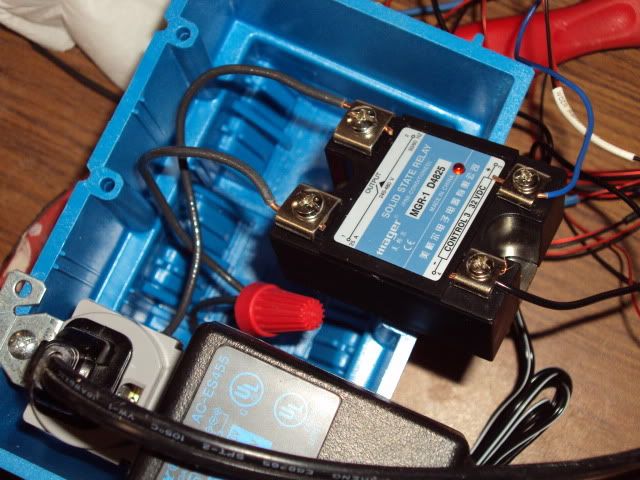
first pic is wiring for the SSR:

black wire top left goes to the wire nut which connects a wire to the bottom outlet (non switched, same outlet that gets the neutral) and the hot wire from the extension/power cord.

black wire top right goes to the top (switched) outlet. make sure to break the jumper from the two outlets.

black wire bottom left is the (+) side of the DC adapter.

blue wire bottom right is the wire that connects to the Rc terminal on the thermostat.
DSC00703.jpg


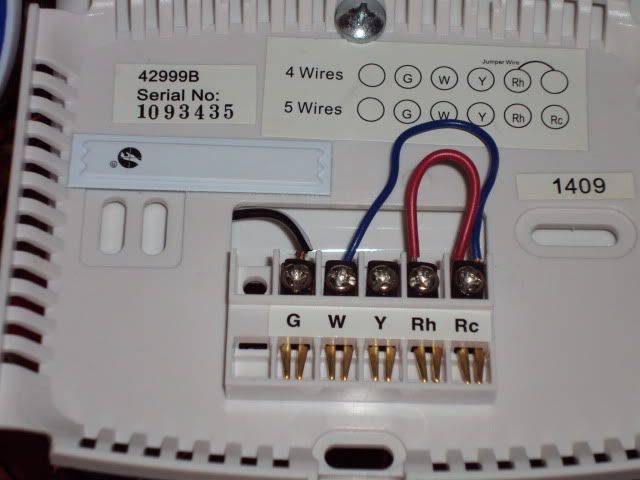
second pic is the thermostat terminals (it looks like the blue wire is also connected to the 'W' terminal, but it's not, it's just where it comes in right behind it):

the blue wire is the one that connects to the SSR in the previous picture.

the black wire on 'G' is the (-) side of the DC power plug.

the red wire is obviously the jumper wire if i want to switch to heating.
DSC00707.jpg


last pic is another of the thermostat brains. i needed to switch the 'fan option' to 'HG' in order for it to work on 'auto' instead of just 'on'.
DSC00708.jpg


anyway, that's it, it works great. i know there are concerns with defrost cycles and whatnot, but I will probably only be using this for a fridge for 1-2 weeks of fermenting at a time for lagers (my basement seems to work great for ales) and then back to regular fridge function of beer storage, so I don't expect this to be a problem. the only problem i see is if the fridge needs to go down so low to get the carboy to the desired temp that it goes below the built in thermostat. i guess i can just break into it and wire the input/output from the thermostat together to avoid this.

:mug:
 
This is great I was thinking about something like that this morning. I've got a (not being used) thermo is my cupboard. Gonna give it a shot. thanks.
 
I will be finishing up mine this evening. I basically took an arduino i had laying around, added a serial lcd for a display, 2 1-wire thermometers *one inside the fridge and one for room temp* and a sparkfun relay kit to switch the power... just finished the code here at work a few min ago ;-) the nice thing about doing it this way, is that theoretically i could control something like 18 different fridges :) with having to do nothing more than spend an additional $7 to add another to the setup per fridge.
 
interesting, i'm not familiar with an arduino, can you explain a little more? a write up of yours would be nice to see as well, thanks for the info.
 
i plan on putting one together as i finish it up... need to make it look a lil prettier though as its still just in a prototyping board... but that should be done by tonight or tomorrow. Basically an arduino is a micro-controller that is based on open-source hardware and software. Arduino - Wikipedia, the free encyclopedia you can can control all kinds of devices and hardware with them, everything from synchronizing your xmas lights on your house to music, to controlling a keezer.
 
interesting, i'm not familiar with an arduino, can you explain a little more? a write up of yours would be nice to see as well, thanks for the info.

Well the Brewtroller guys have also made it capable of being a fermentation temp cotroller as well. Uses the Sanguino chip (very similiar to the arduino).

Check it out
Latest Updates | BrewTroller

Already put together and functioning, no need to code something up yourself.
 
I did this same thing, with a Rite Temp thermostat, it cools down to 30 degrees, and has worked perfectly for me, it can control both cooling and heating, you just need one extra relay for the heating side.

However, living in Texas, haven't needed the heating side yet.....

3919215007_240bbdcb12.jpg

Does the 6020 really go down that low to 30 degrees?
 
In this SSR application, is a heatsink required? I can't tell if you have used one or not. If you have, where have you placed it?

Cheers,

Rhino
 
If I plan on using a window ac unti can I just wire this in place of the units original controls. I assume I would not need a relay since it would essentially be functioning as an ac in your house. Does anyone know if the window unit also uses the same voltage as a house system would?
 
i think there is a relay built into your thermostat wiring system in the furnace/ac, i'm not 100% sure about that, but I would guess that is the case. so, i think the relay would be necessary. it's not too hard to wire up and you could just plug the AC into the box if you wanted to and it might be a little less messy than if you tapped into the thermostat (although i think you might need to anyway, just to get it into a warm area so it doesn't kick off the unit).
 
I just finished assembling one of these devices using a Ritetemp 8029. It isn't switching the freezer on, no matter what temp I set it at. I've double-checked the wiring (made sure I was plugging the freezer into the switched receptacle) and can't figure out what the problem is. I'm using a 5 volt DC adapter and a new SSR I bought through eBay (ie, direct from China). The freezer does power on when plugged into an unswitched outlet.
Any ideas?

Nevermind -- I just checked it yet again and as it turns out, the color coding on my DC adapter wires is the reverse of what I'd expected -- black is positive and red is negative. However, I am finding that if I can get the freezer to switch on the first time, if I set the thermostat lower than the internal temperature, and then can get it to switch off if I raise the target temp. However, I cannot get the freezer to switch back on if I drop the target temp again. Is there some sort of delay built into the thermostat?
 
...However, I am finding that if I can get the freezer to switch on the first time, if I set the thermostat lower than the internal temperature, and then can get it to switch off if I raise the target temp. However, I cannot get the freezer to switch back on if I drop the target temp again. Is there some sort of delay built into the thermostat?

There may be a delay - even in your freezer...I would wait 5 -10 minutes between switching actions, to verify, (and to minimize the strain on the compressor).
 
Just finished building mine. Got the fridge off Craigslist for free since it "wasn't cooling well." Ended up just needing a evap. fan motor. Got a used one off of eBay for $9. With the parts for this controller being around $40, I figure I got a temp controlled fermentation fridge for $50. Can't beat that.

Pic:
temp_controller.jpg


Looks a little sloppy, but I'll clean up the build tonight. Thanks for the plans and the link to the relay on eBay. Much appreciated.
 
Johnson Controllers (A19 type) can be had from ebay for < $30. That's where I bought mine. You do have to supply your own power cord, but that's it.

Its good you can do all of that stuff but those costs add up and that makes less time for the pretty stuff. For 70 bucks, why not buy the Johnson electronic (not mechanical) control with adjustable time-delay and differential and all you have to do is plug it in (and drop the probe inside). We are selling more and more of these. It takes 3 minutes to read the instructions and about 1 minute to program it.
 
Back
Top