• Please visit and share your knowledge at our sister communities:
  • If you have not, please join our official Homebrewing Facebook Group!

    Homebrewing Facebook Group

Vintage GE Kegerator

Homebrew Talk

Help Support Homebrew Talk:

This site may earn a commission from merchant affiliate links, including eBay, Amazon, and others.

kerber

Well-Known Member
Joined
Aug 7, 2011
Messages
178
Reaction score
19
Location
Fargo
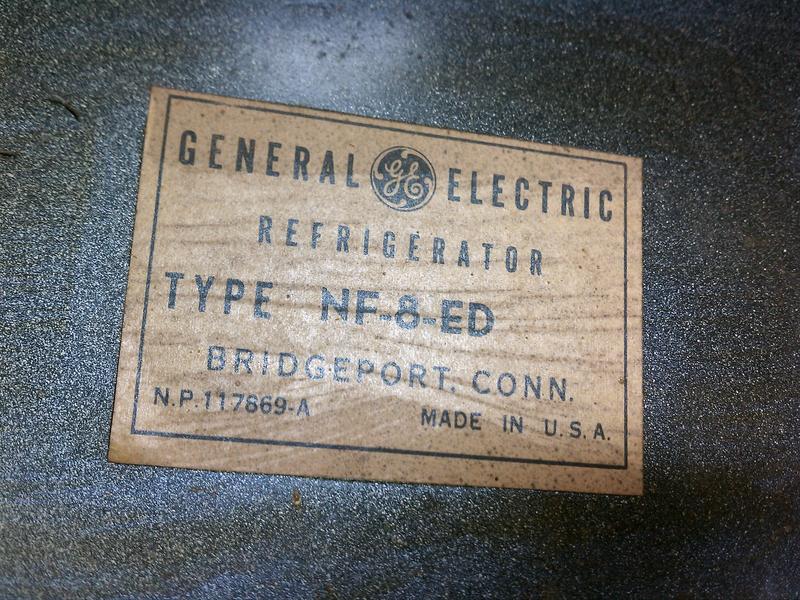
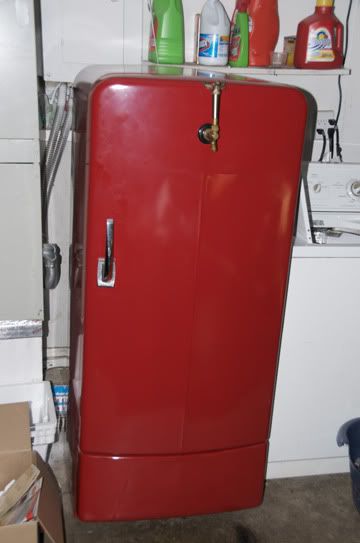
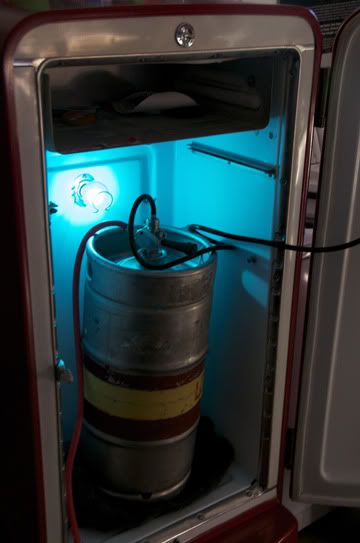
A couple weeks back, I acquired a 1950's GE refrigerator for $75 off craigslist. Happily, it's in great shape and everything works! I'd like this ol' box to continue working well for years to come, so I'm going to give it some love.

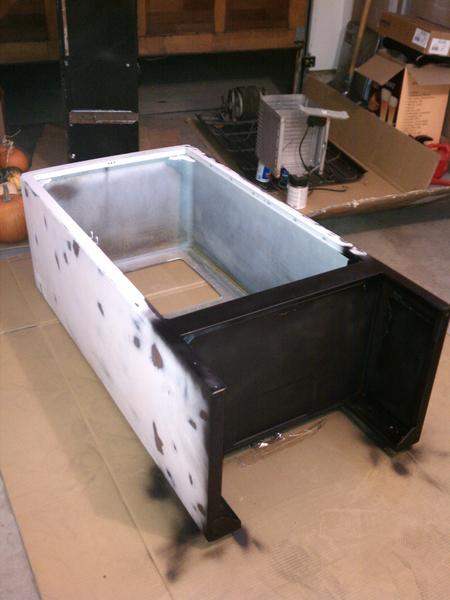
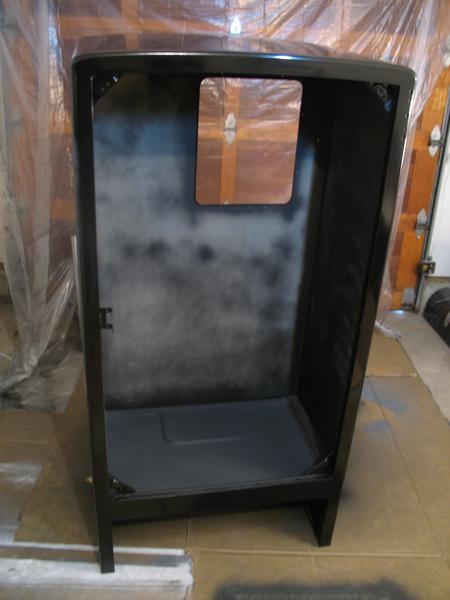
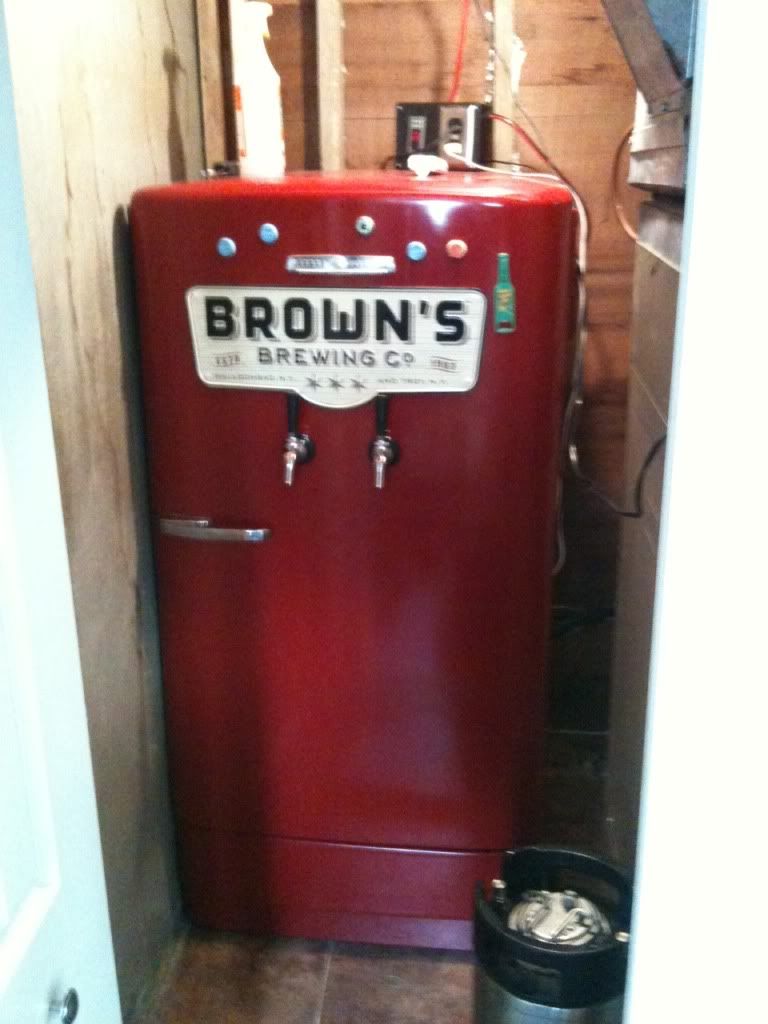
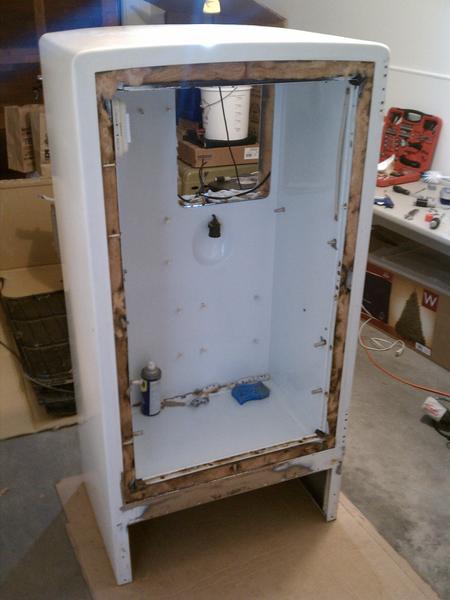
The entire thing is being disassembled to make a full cleaning and repainting easier. The unneeded shelf mounting hardware will be removed. A large amount of the wiring is being replaced. It's getting sanded down to remove any scattered surface rust. Any small dings will be filled with bondo and sanded. The whole thing will be primed and receive a few coats of white Rustolium appliance enamel spraypaint. A new gasket will be added to help seal it. At some point, I'll be adding some black and red accents.

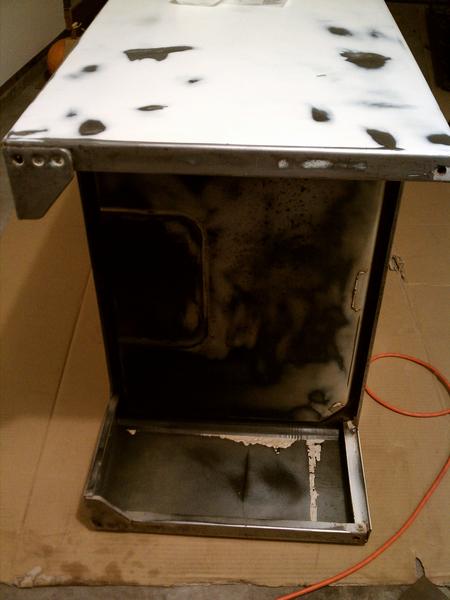
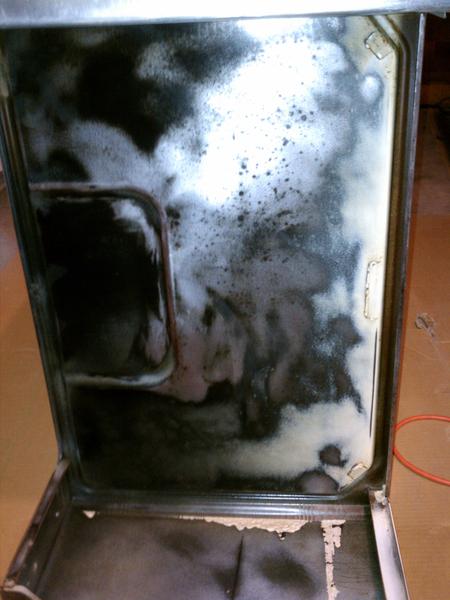
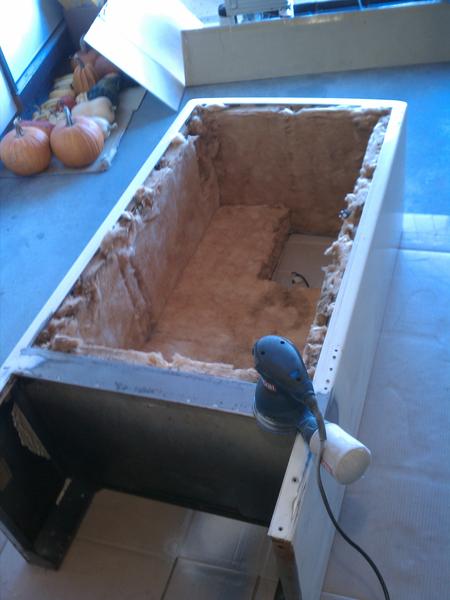
Here are a few before and after deconstruction pics
[Descriptions below photos]


eF5cH.jpg

1AnjL.jpg

d1lXI.jpg

ieQZS.jpg

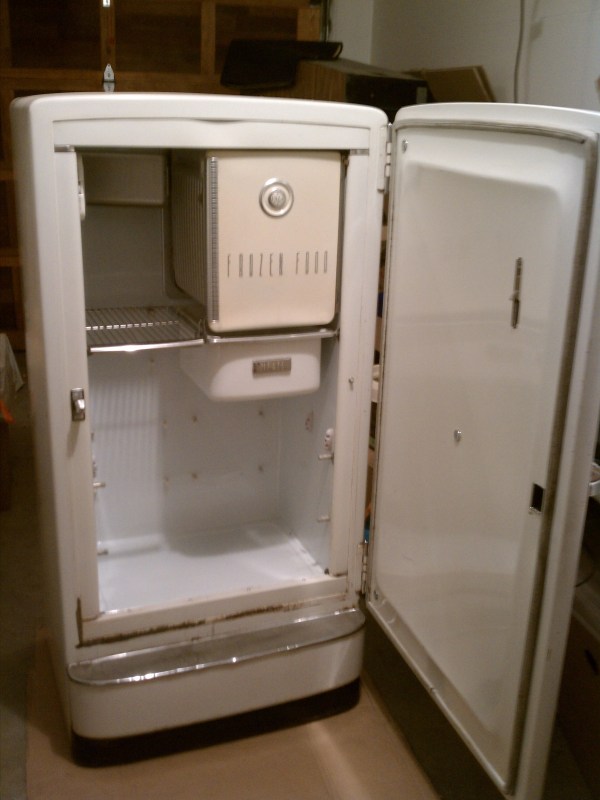
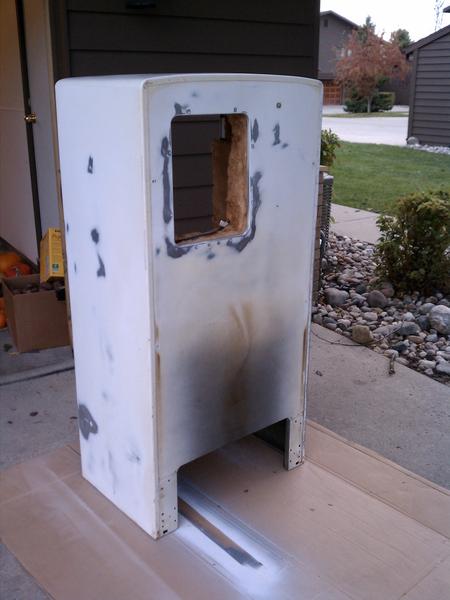
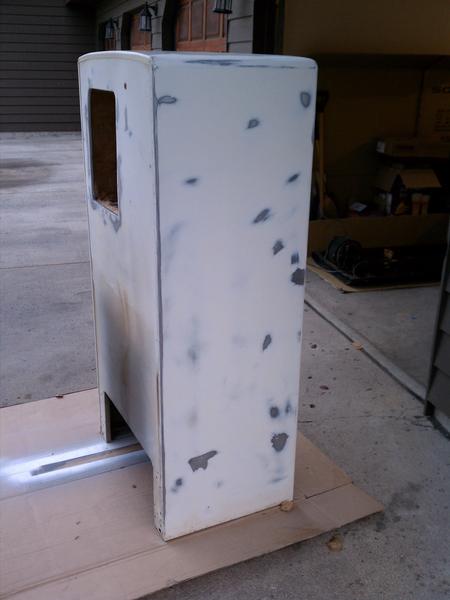
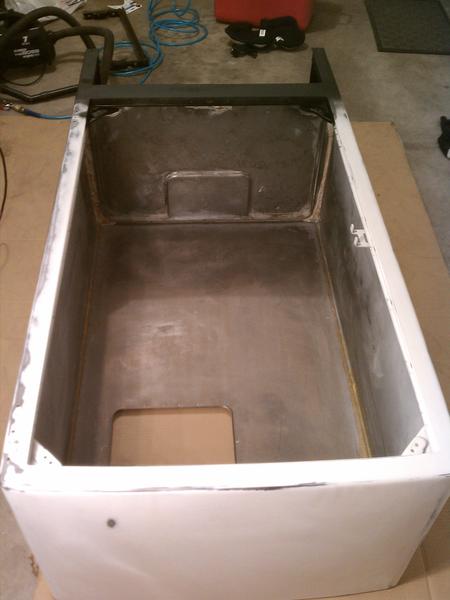
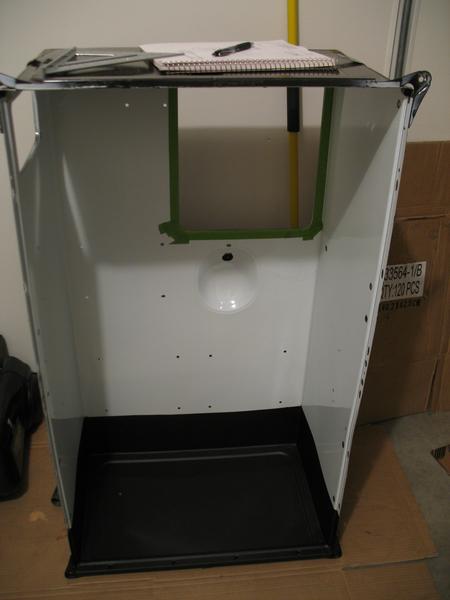
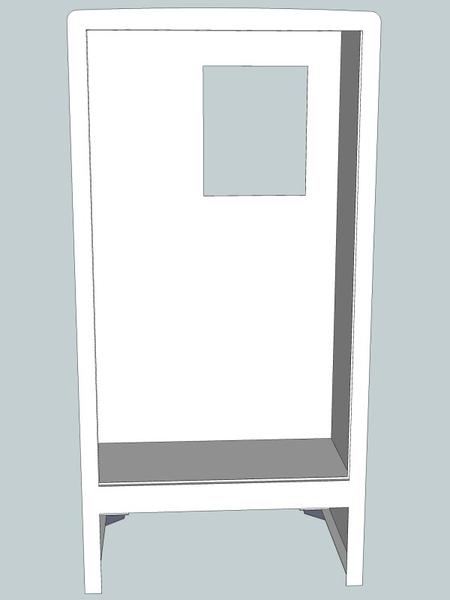
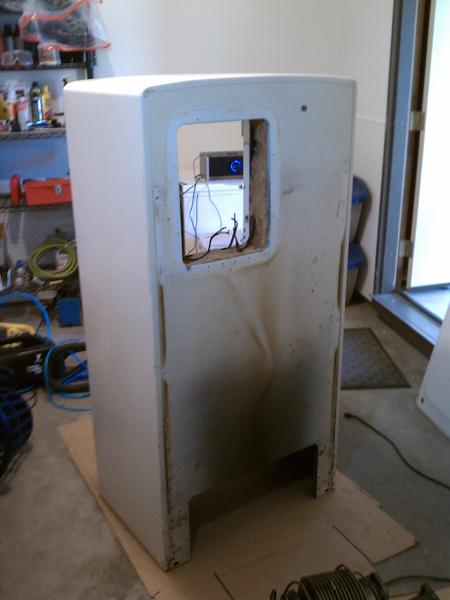
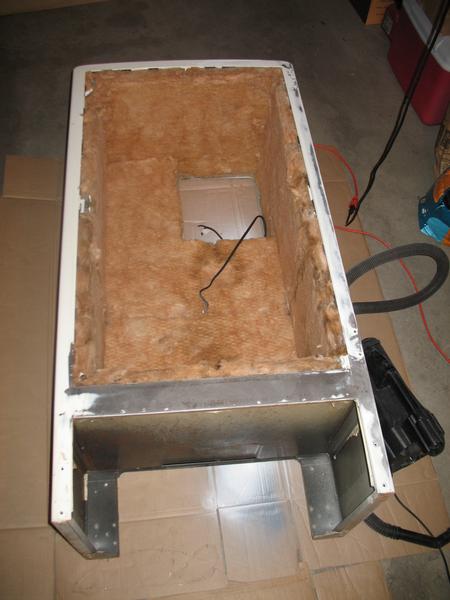
Even without cleaning, this thing is in great shape. I was afraid I wouldn't be able to take it apart much, as I didn't want to stress connection on the old cooling lines.


CB9Pc.jpg

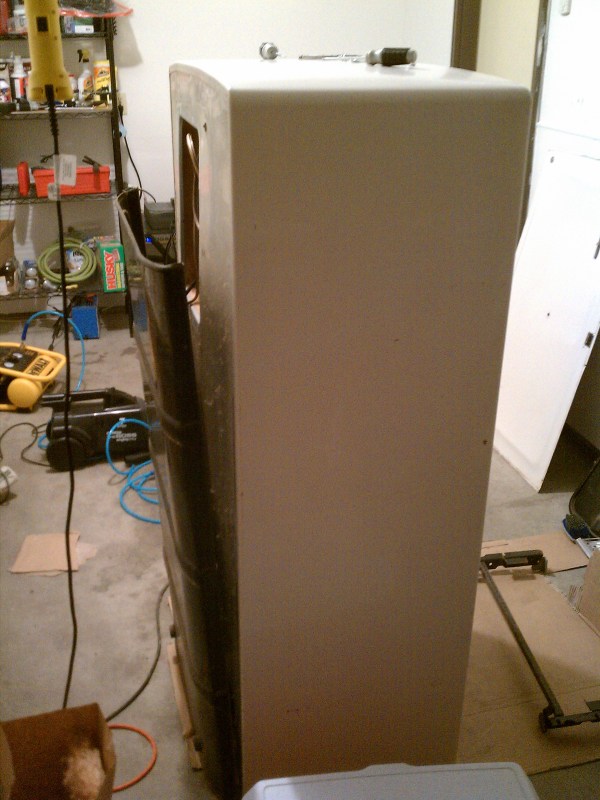
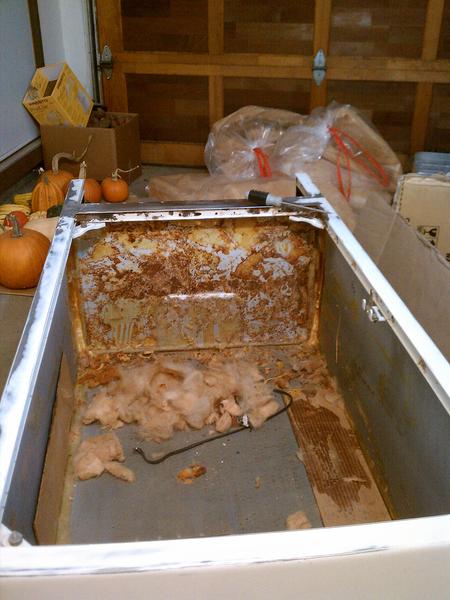
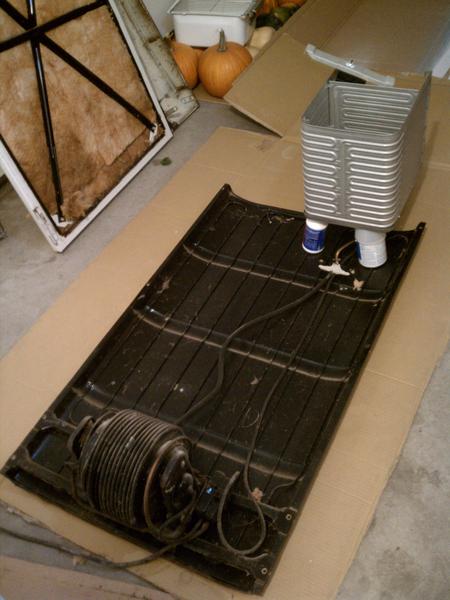
As it turns out, the entire refrigeration system is put together as a separate piece that can be dropped in to the chassis.


WVXSC.jpg

oPosc.jpg

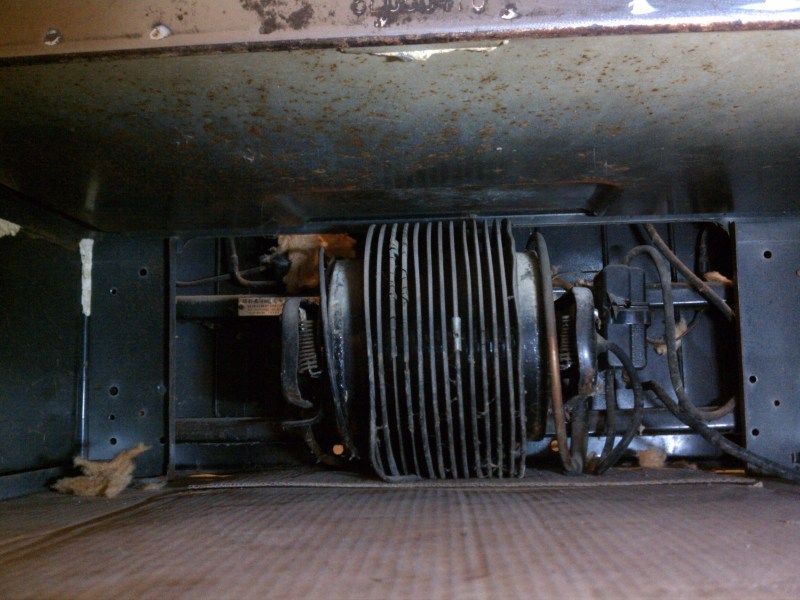
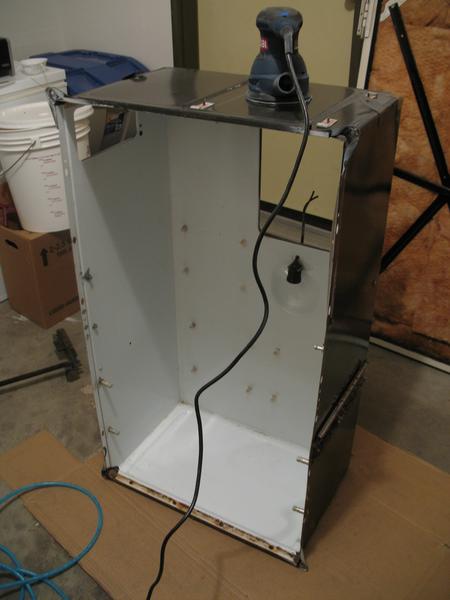
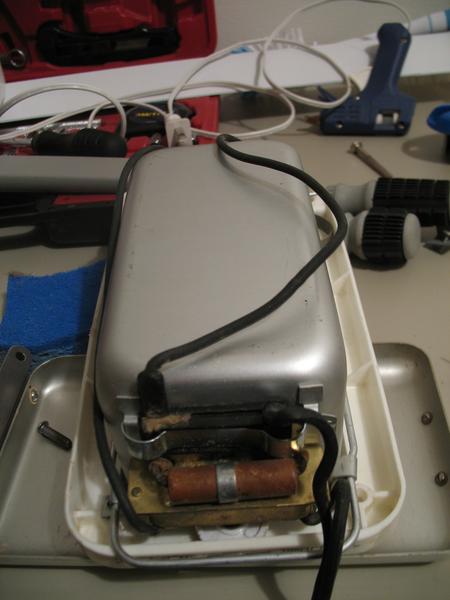
The back plate contains the condenser lines and serves as a mount point for the compressor and electronics.


lusmo.jpg

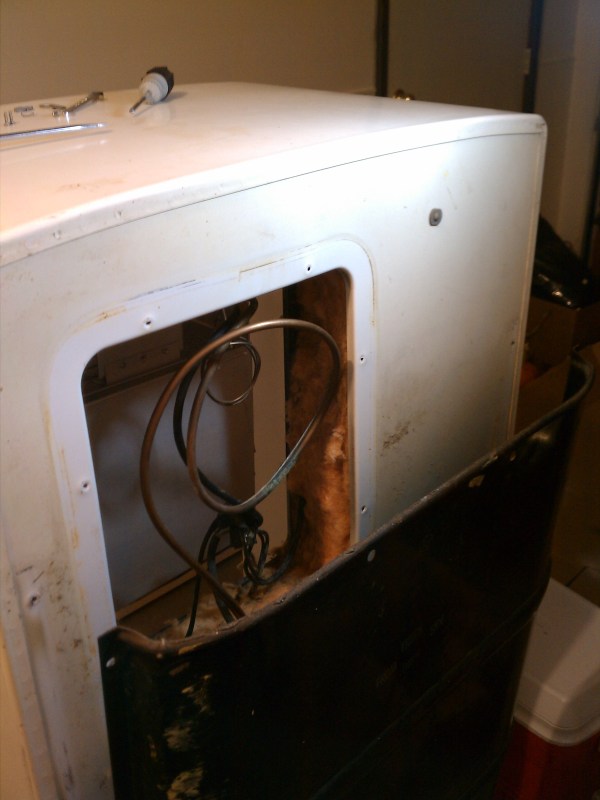
From the top of the compressor runs a copper line to an access panel on the back of the fridge.


RrcUL.jpg

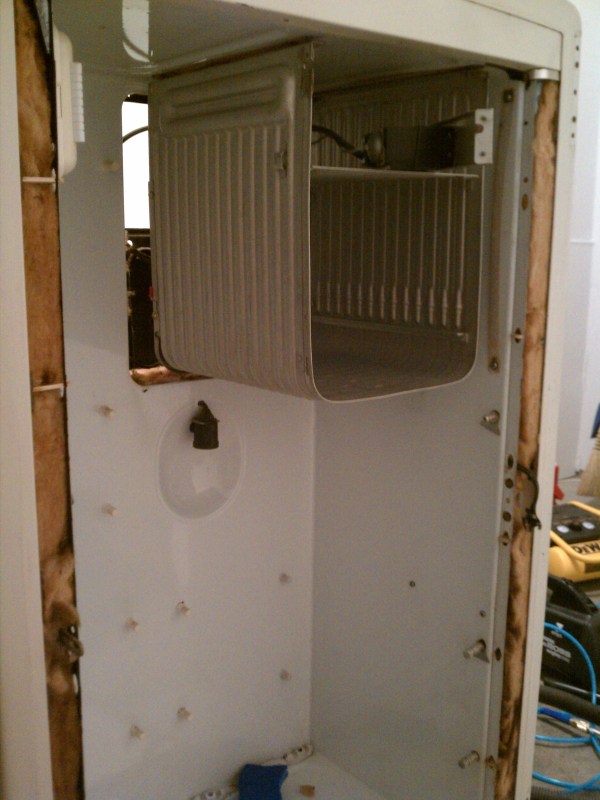
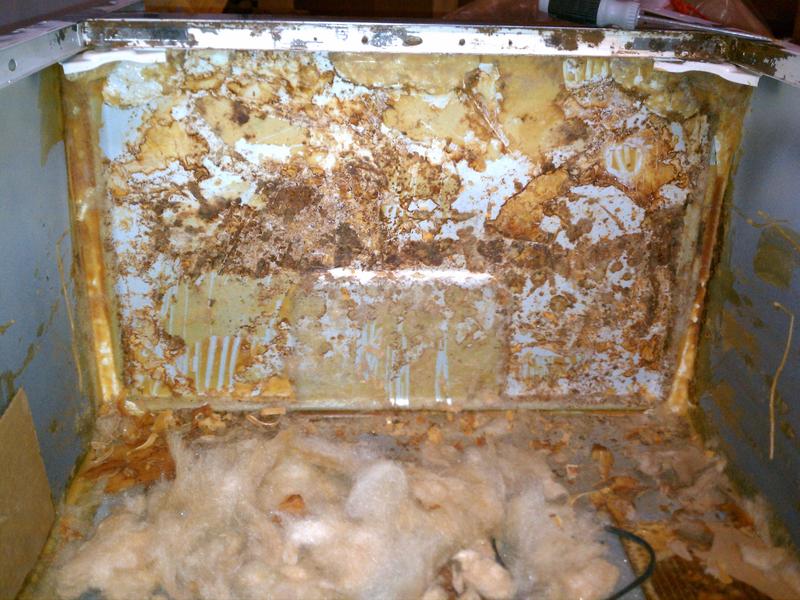
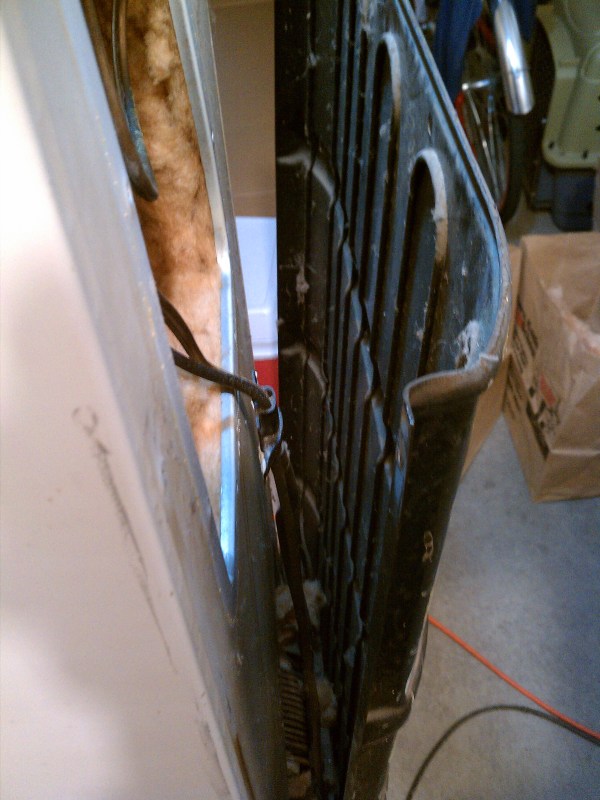
After removing some insulation and plates, the evaporator can pass through the hole in the back of the chassis.

GkBQF.jpg


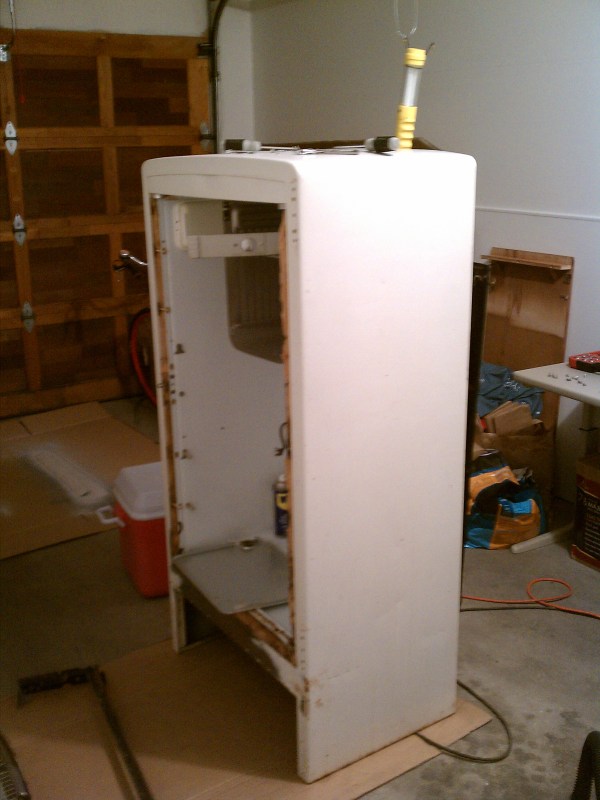
Well, that's all I was able to get done this afternoon. Not bad for a first day, though.
 
Nice find.
That's going to be incredible looking....keep the pictures coming.
 
Nice choice. Here is a crappy cell phone pic of mine. I have mine on an ebay aquarium temp controller from the DIY forum and it is pretty darn efficient.
photo1-1.jpg

photo-17.jpg
 
Another productive day! I was able to get the chassis and refrigeration system separated. Here are the pics...

U9lcQ.jpg

After all electronics were disconnected, the fridge was laid on it's back. The remaining backplate bolts were removed and the entire chassis was lifted off the refrigeration system.

O6DXB.jpg

fNwch.jpg

Chassis sans cooling.

89Zrf.jpg

The internal box was detached and lifted out, leaving the insulation and shell.

5V58P.jpg

The box will have all unnecessary posts removed and filled, primed, and repainted. Thinking of doing some sort of 'tough coat' surface on the floor to protect from kegs.

ljKnO.jpg

Electronically cooled butter compartment.

ith4q.jpg

The doctor is in.

tAoIT.jpg

One side is all sanded. The new orbital sander definitely beats doing it by hand.

I'm also going to be keeping an imgur album with all these photos.
http://imgur.com/a/pcHto.
 
Well... I've been trying to keep this up to date, but I have submitted my reply twice now and it doesn't look like the mods are letting it through.
[EDIT] Looks like it posted this time! Woo!
 
I had considered replacing the insulation, but it appears to all be in good shape, so I think it would be unnecessary.
 
It's getting to be that time of the year where sunlight doesn't last me more than an hour or so after I get home from work. I've been making good use of what sunlight I've had by sanding outside. The garage door is pulled down and the vacuum is attached to the sander. I'm trying to do what I can to keep the dust out of where we'll be painting (and my lungs).

SPPZW.jpg

Right side and top half of rear finished. 220 grit with a vacuum attached to my orbital sander. Lead paint is not tasty.

jGROC.jpg

Left side sanded. Very few small spots where scrapes had rusted.
 
Last night I finally got the chance to spend some time on it.

3C9E2.jpg

I almost didn't take out the insulation. After seeing the state of the bottom plate, I'm glad I did! Here is the result of 60 years of condensation and spills.

4xkyi.jpg

Once I get all the glue cleaned off, I'm hoping the rust won't be so bad.

HaJUf.jpg

As a bonus, I snapped a picture of the model tag underneath.
 
I was able to spend a whole heap of time on the fridge this weekend and I made some fantastic progress.


30Pe7.jpg

This took a whole lot of elbow grease. I started with just scraping as much glue off as I could with a flexible putty knife. A goo gone soaked rag eventually got rid of the rest. With some sanding, it finished up really nice. This is going to get a coat of rust transformer primer to seal it up.

NEwh5.jpg
bQlar.jpg

Another spot that was pretty rusty and dirty. Mineral spirits, a rag, and some sanding made short work of it.

I26DU.jpg

Here it is with a fresh coat of rust transformer primer. Tomorrow it will be cured and I can do the finishing undercoat! It's all starting to come together.

Next update I'll show you the casters that I picked up for it :D
 
Another productive weekend! Last week, the fridge received 2 light coats of spray primer. Turns out over-spray is not a lot of fun. Everything in the garage is covered in a thin layer of gray dust. Rookie mistake.

Solution? Weekend Paint Booth!

After using it to apply the final coat of primer tonight, I couldn't be more pleased. It kept the fumes and airborne paint out and left my surface dust free. Perfect for occasional painting.
 
Right on! Heres the one I refurbished, not great pics but you get the idea, the area under the fridge where the compressor is left plenty of room for a stealth install of the CO2 and regulator. Mine is a Philco from the 50's. It holds two 5 gal ponies or one 1/2 bbl. Looking forward to seeing yours!

DSC_0384_22.jpg


DSC_0386_22.jpg
 
I hadn't thought of putting the CO2 tank underneath! I'll have to do some measurements... I did the math and I have room inside for either 3 cornies or 2 cornies and a CO2 tank. For now, I'm thinking of going the latter route and moving the CO2 tank out at a later time. I'll have to see how I feel when I get to that point!

Tonight, there were bottles a plenty to wash and remove labels from. I'm thinking of painting tomorrow. I've got 3 cans of black Rustoleum appliance paint... Wish me luck!
 
EndlessWinter77
Looks great but the "area under the fridge where the compressor is left plenty of room for a stealth install of the C02 and regulator" is your tank & regulator laying down ? Co2 tanks are designed stand up. Laying down you will push liquid Co2 into the regulator and then its by by regulator.
 
Co2 tanks are designed stand up. Laying down you will push liquid Co2 into the regulator and then its by by regulator.

Bummer.... this is news to me. It is laying down. So far have not had any issues and the reg. has never froze up from liquid CO2 being pushed through. This will have to be changed immediately though. Thanks for the heads up! even though my ingenuity bubble has been burst big time...
 
I will have to post pics of mine later. I decided on a good cleaning and leaving the rust and dings for character. using pin lock Kegs I currently have 3 kegs and my bottle inside. If I move the bottle out I can fit 4 kegs. I finished it last Thursday night. Saturday we had a party to celebrate the birth of our daughter, the kegerator and the beer and mead flowing from it were both huge hits.
 
Some day I'd love to replace my kegerator with a vintage fridge.

On the Micro Matic forums a few years back someone did an awesome job on an old fridge like this. If I recall correctly, after he was finished, he plugged it in and it no longer worked. His last post was that he was going to junk it and he never replied back. A shame because there had to be something simple like a wire knocked off or something because it worked before he started.
 
That's so sad to hear! I'm planning on eventually replacing the entire electrical system in the thing. All sorts of goodies in store for this fridge... In the event something goes wrong with the cooling system, I'll probably just fix it. After all, these are meant to be repaired!
 
Over the last week, I've finished priming and getting the initial coats of paint on the main shell. It still needs a final touch-up coat, but this stuff requires 1 week cure time before another coat can be applied.
FOLpU.jpg

Initial coat is promising.

IRAOB.jpg

The interior was sealed with rust transformer primer.

3t7eE.jpg

To help protect the interior, I coated the bottom 5.5" of the cabinet with rubber undercoating.

2UrrQ.jpg

I've been making SketchUp models of the fridge and major components to aid in design and any fabrication.
 
Awesome work, I've been searching craigslist for a while to find a similar fridge. Thanks for the inspiration!
 
Keep it up, it took 2 weeks to paint mine. It's not a quick process but you will have a great outcome when it's done. The only thing I would change on mine is to run bulkheads thru from the outside for the gas. I just drilled holes and used rubber grommets on the hose, but for hose replacement the bulkheads would be much better. What kind of insulation are you going to use to replace the old stuff?
 
Back
Top