I've visited this forum over the years and found it useful for design ideas and brewing help and figured I should make an account to share my progress, and maybe it will also help someone else with their own project.
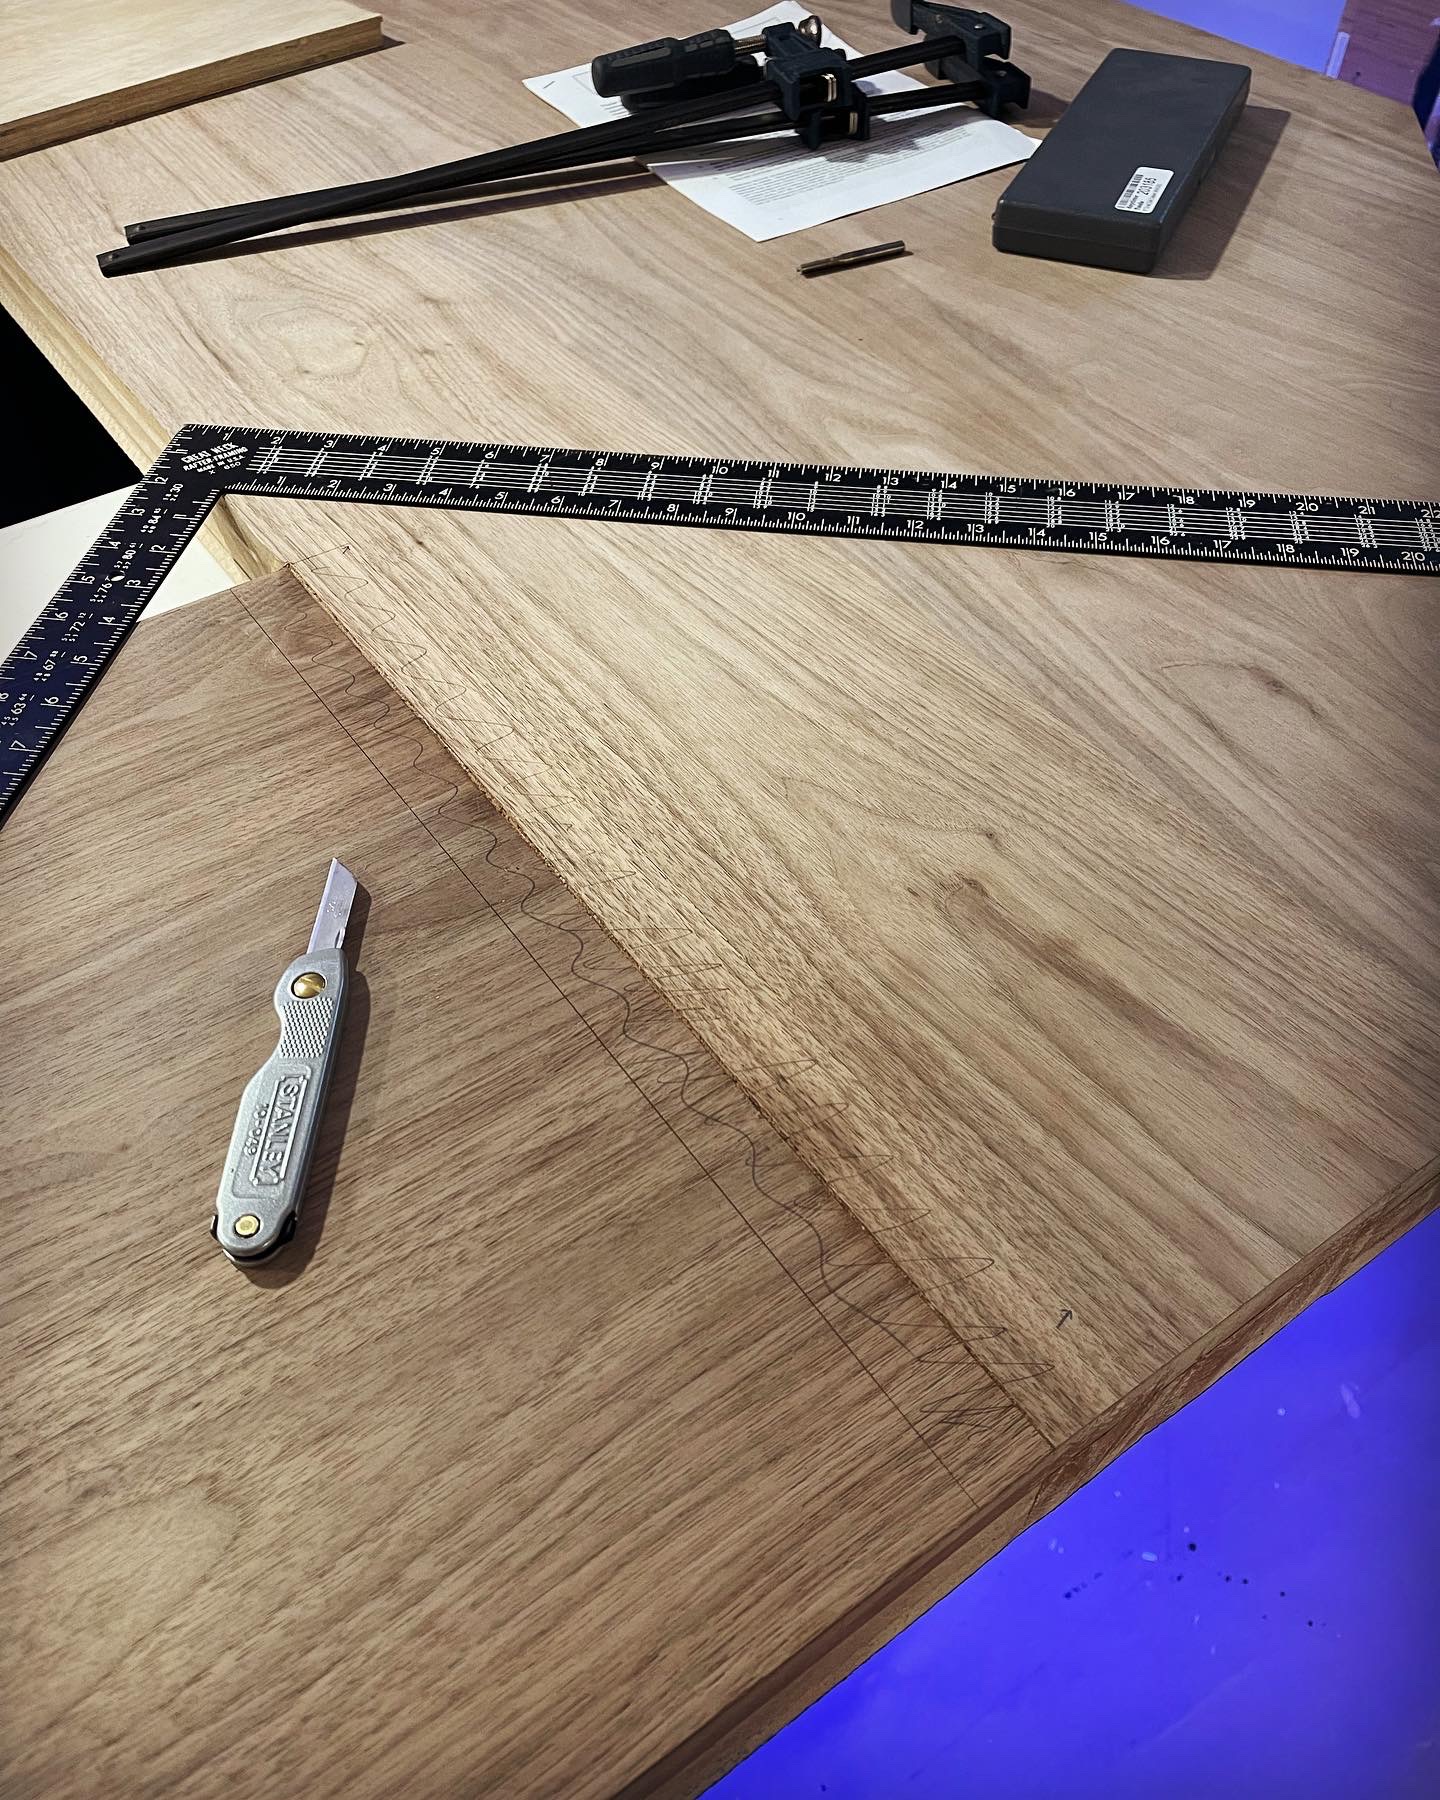
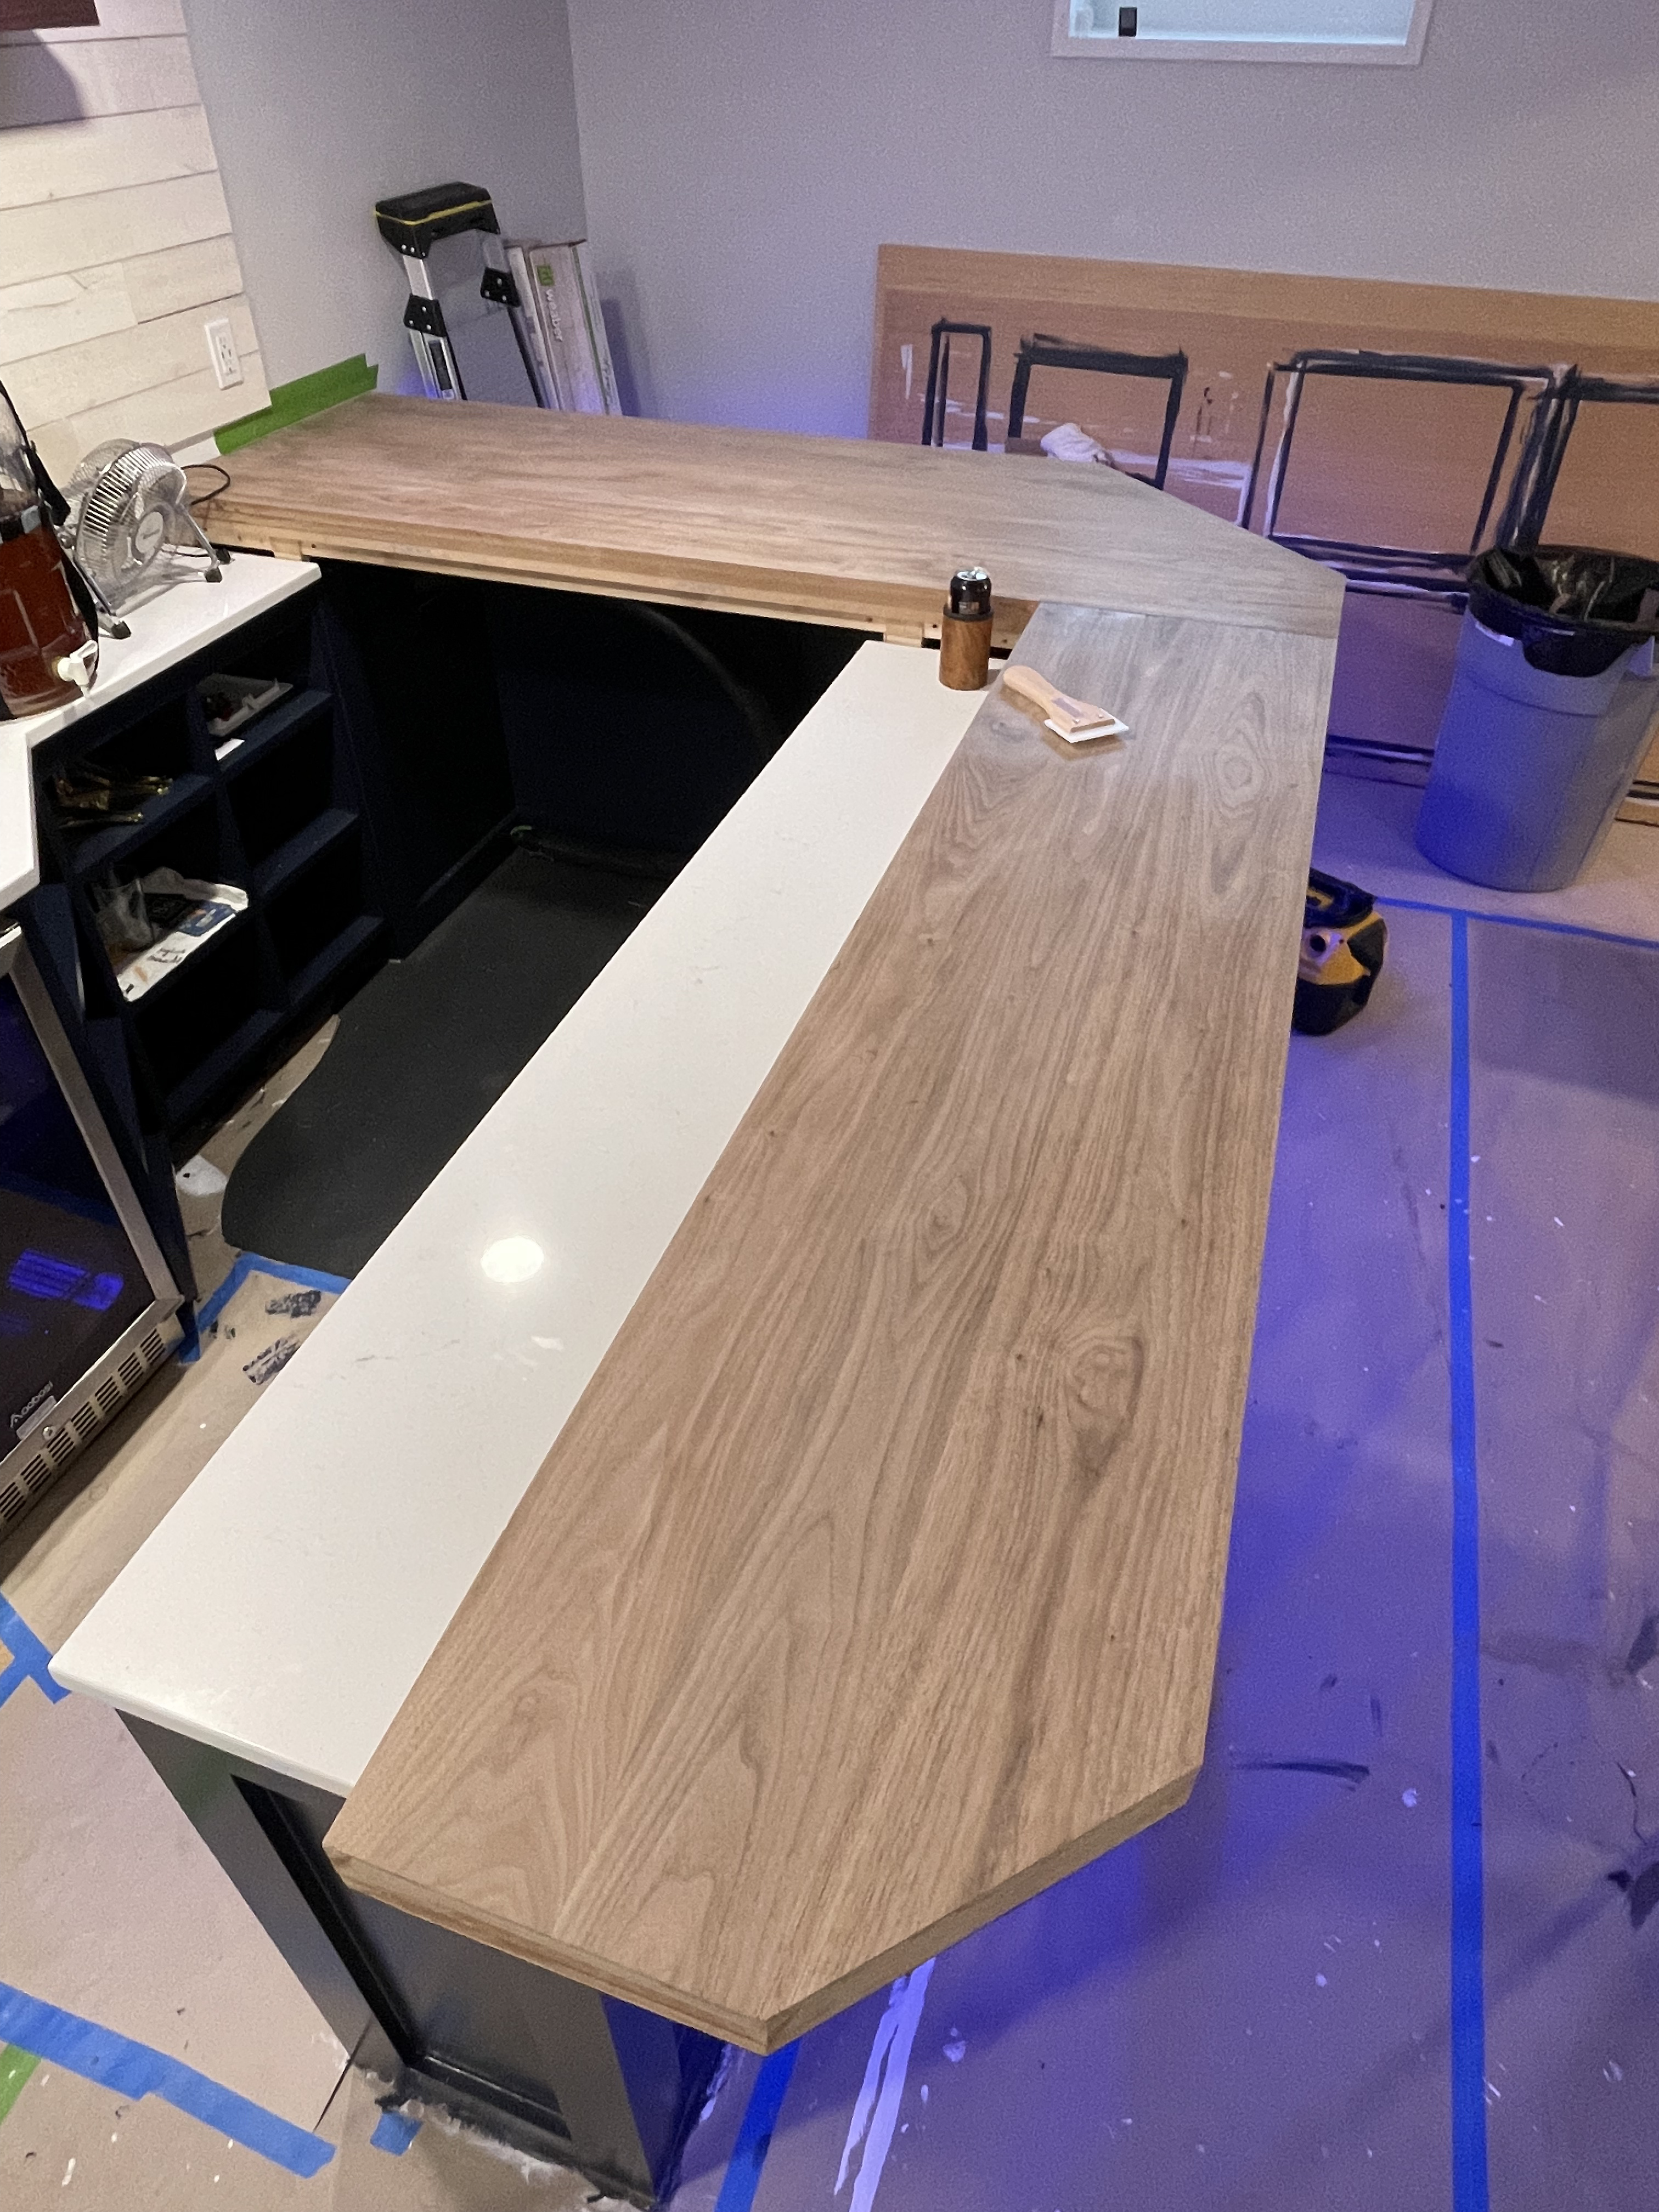
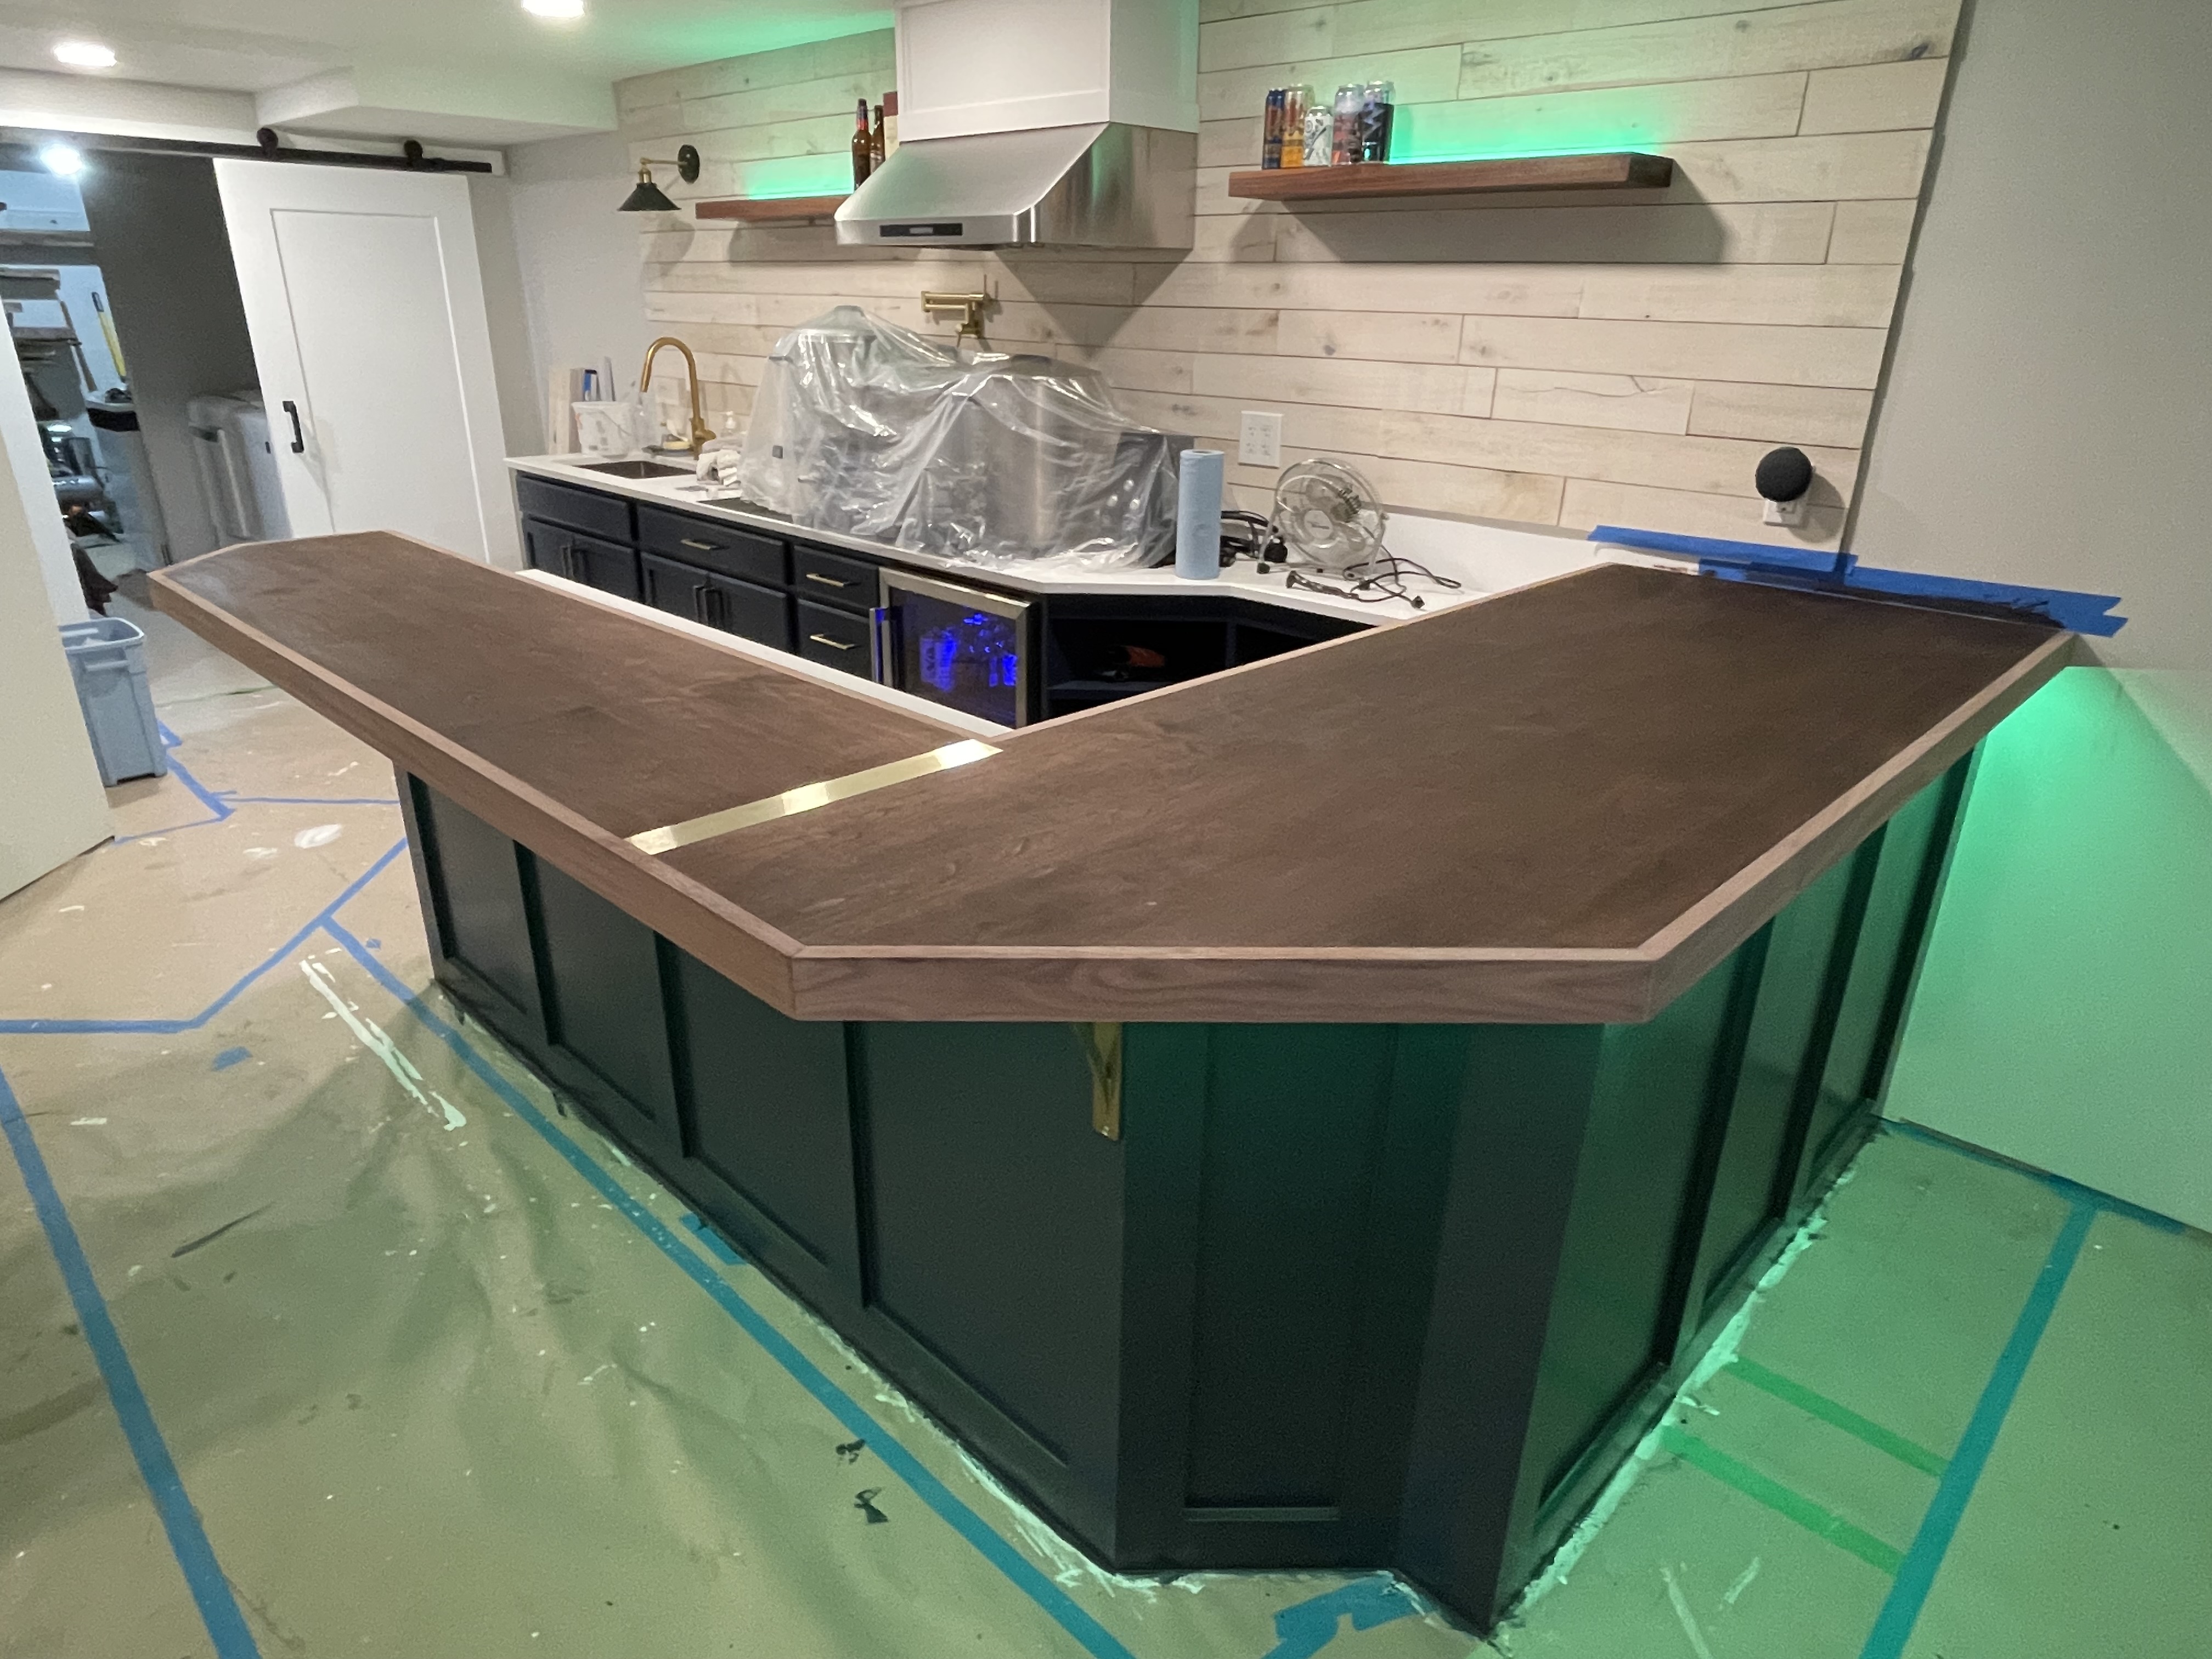
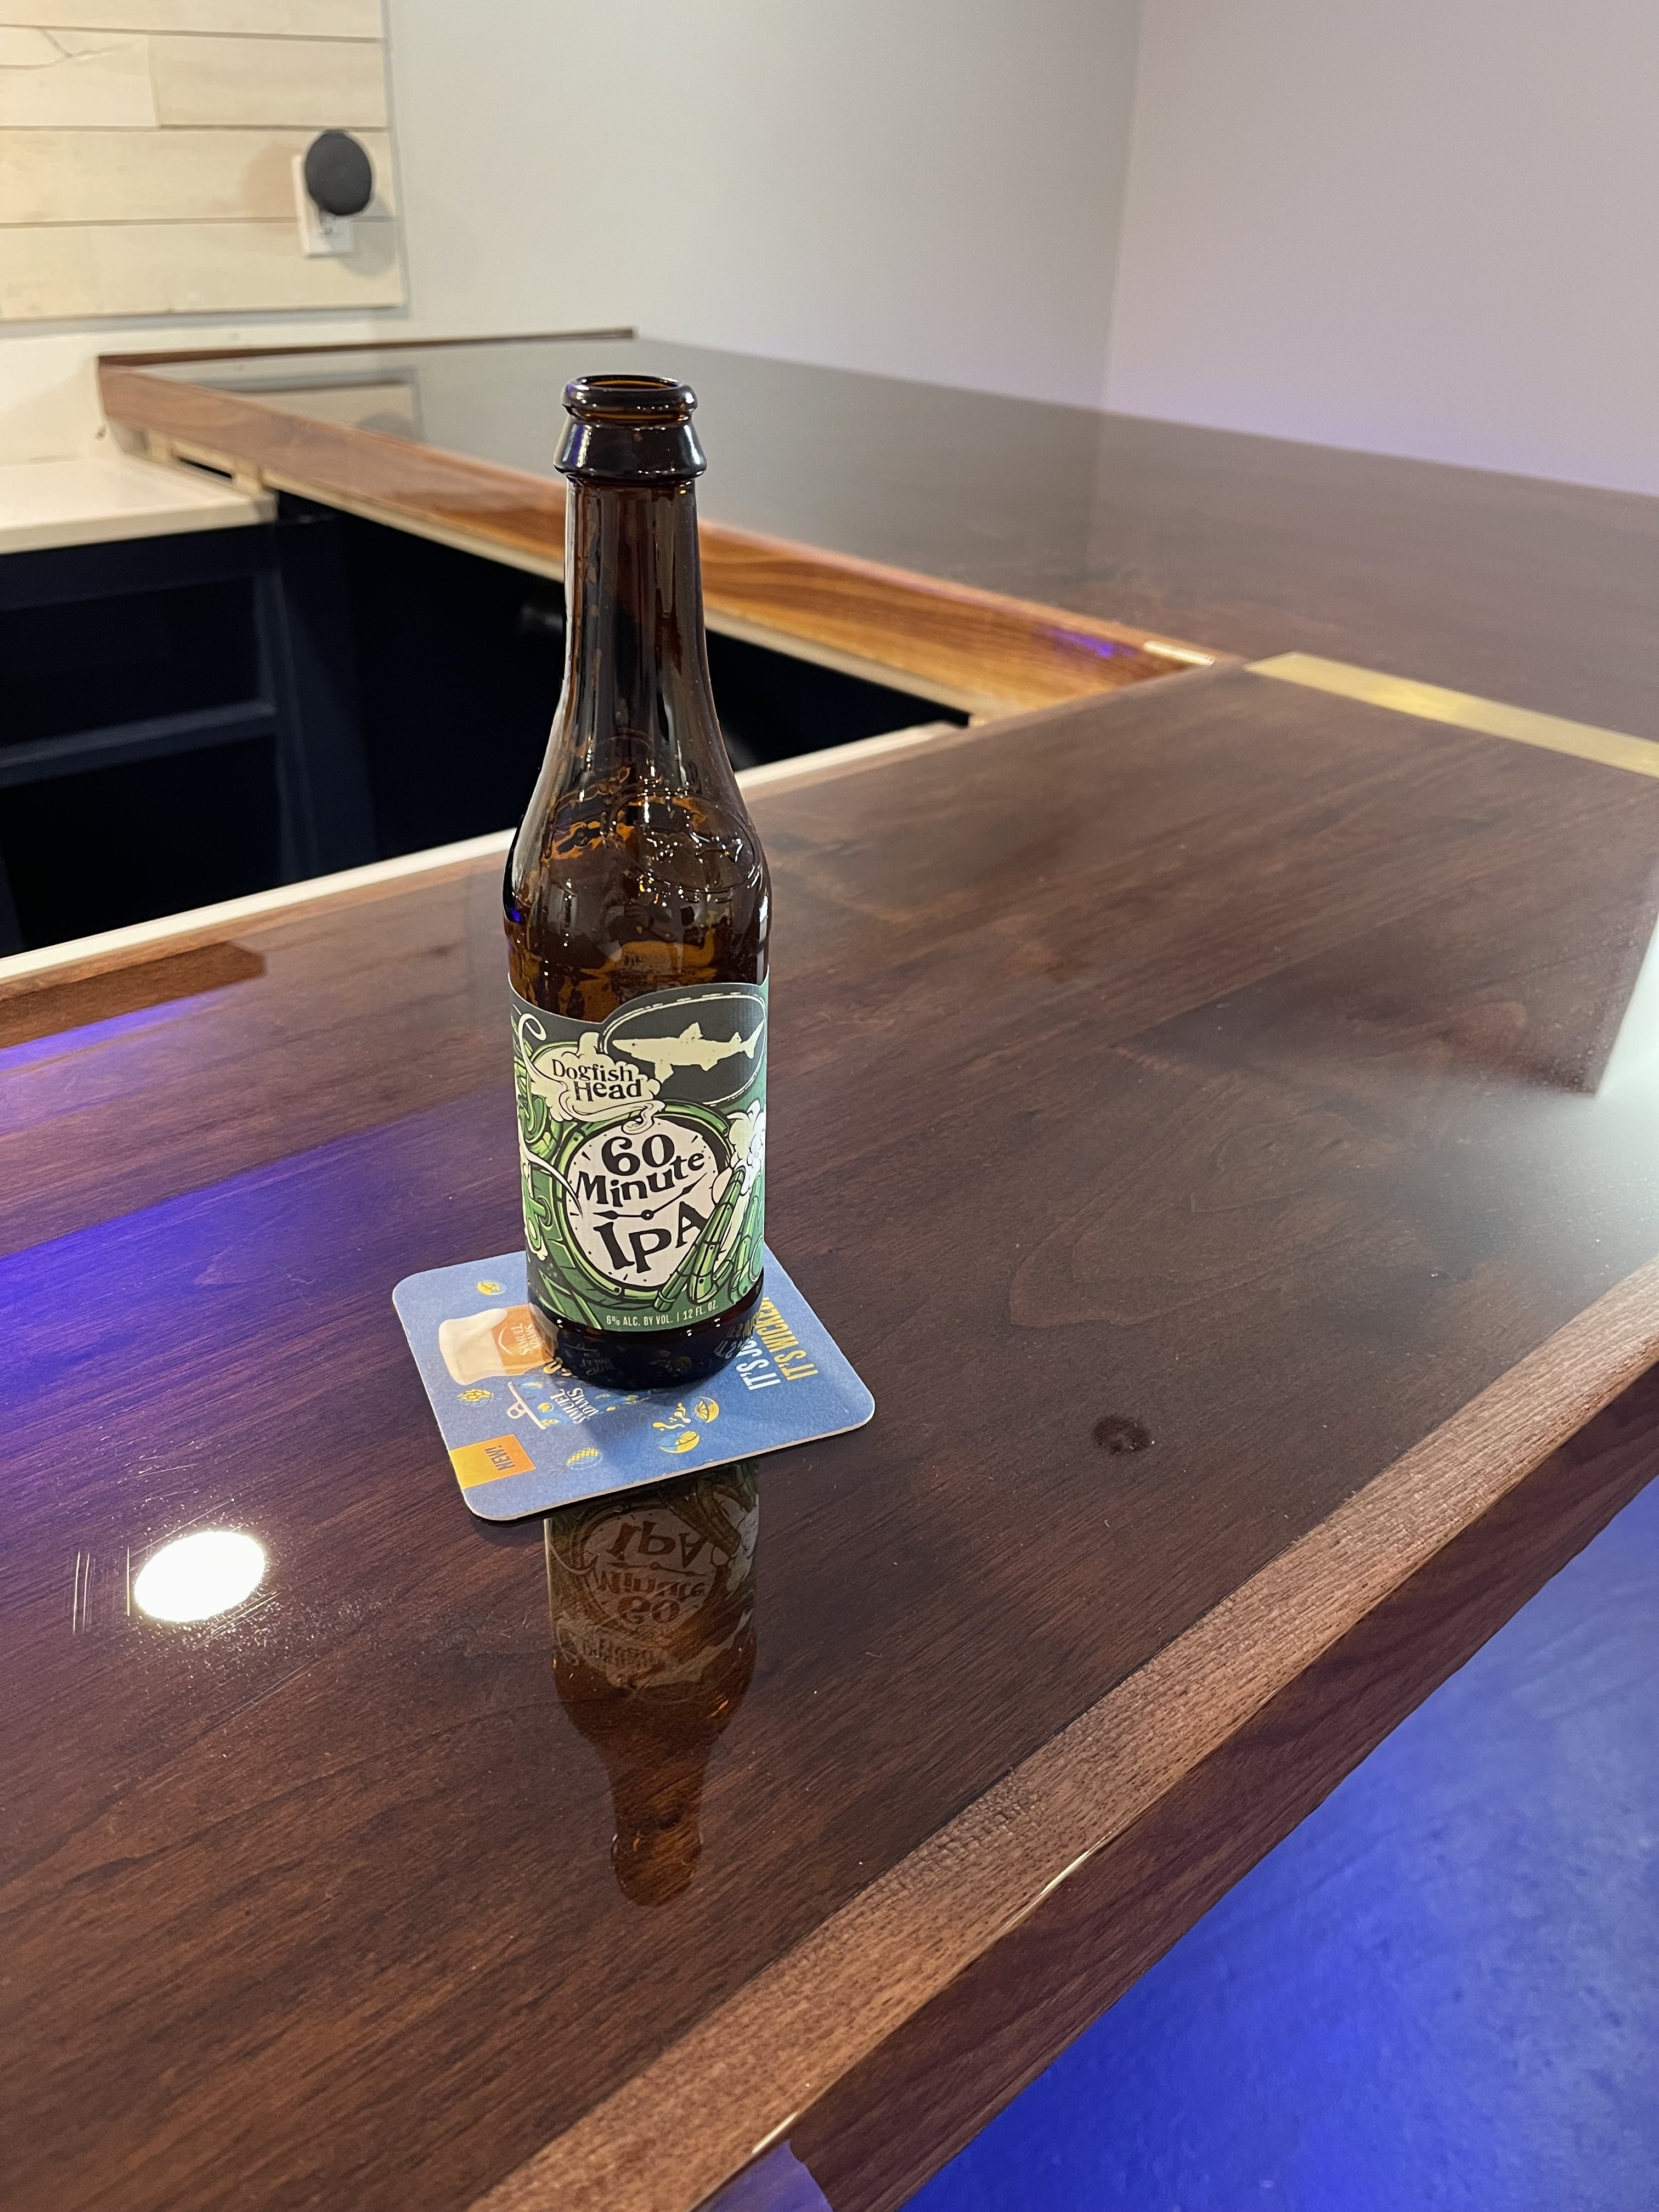
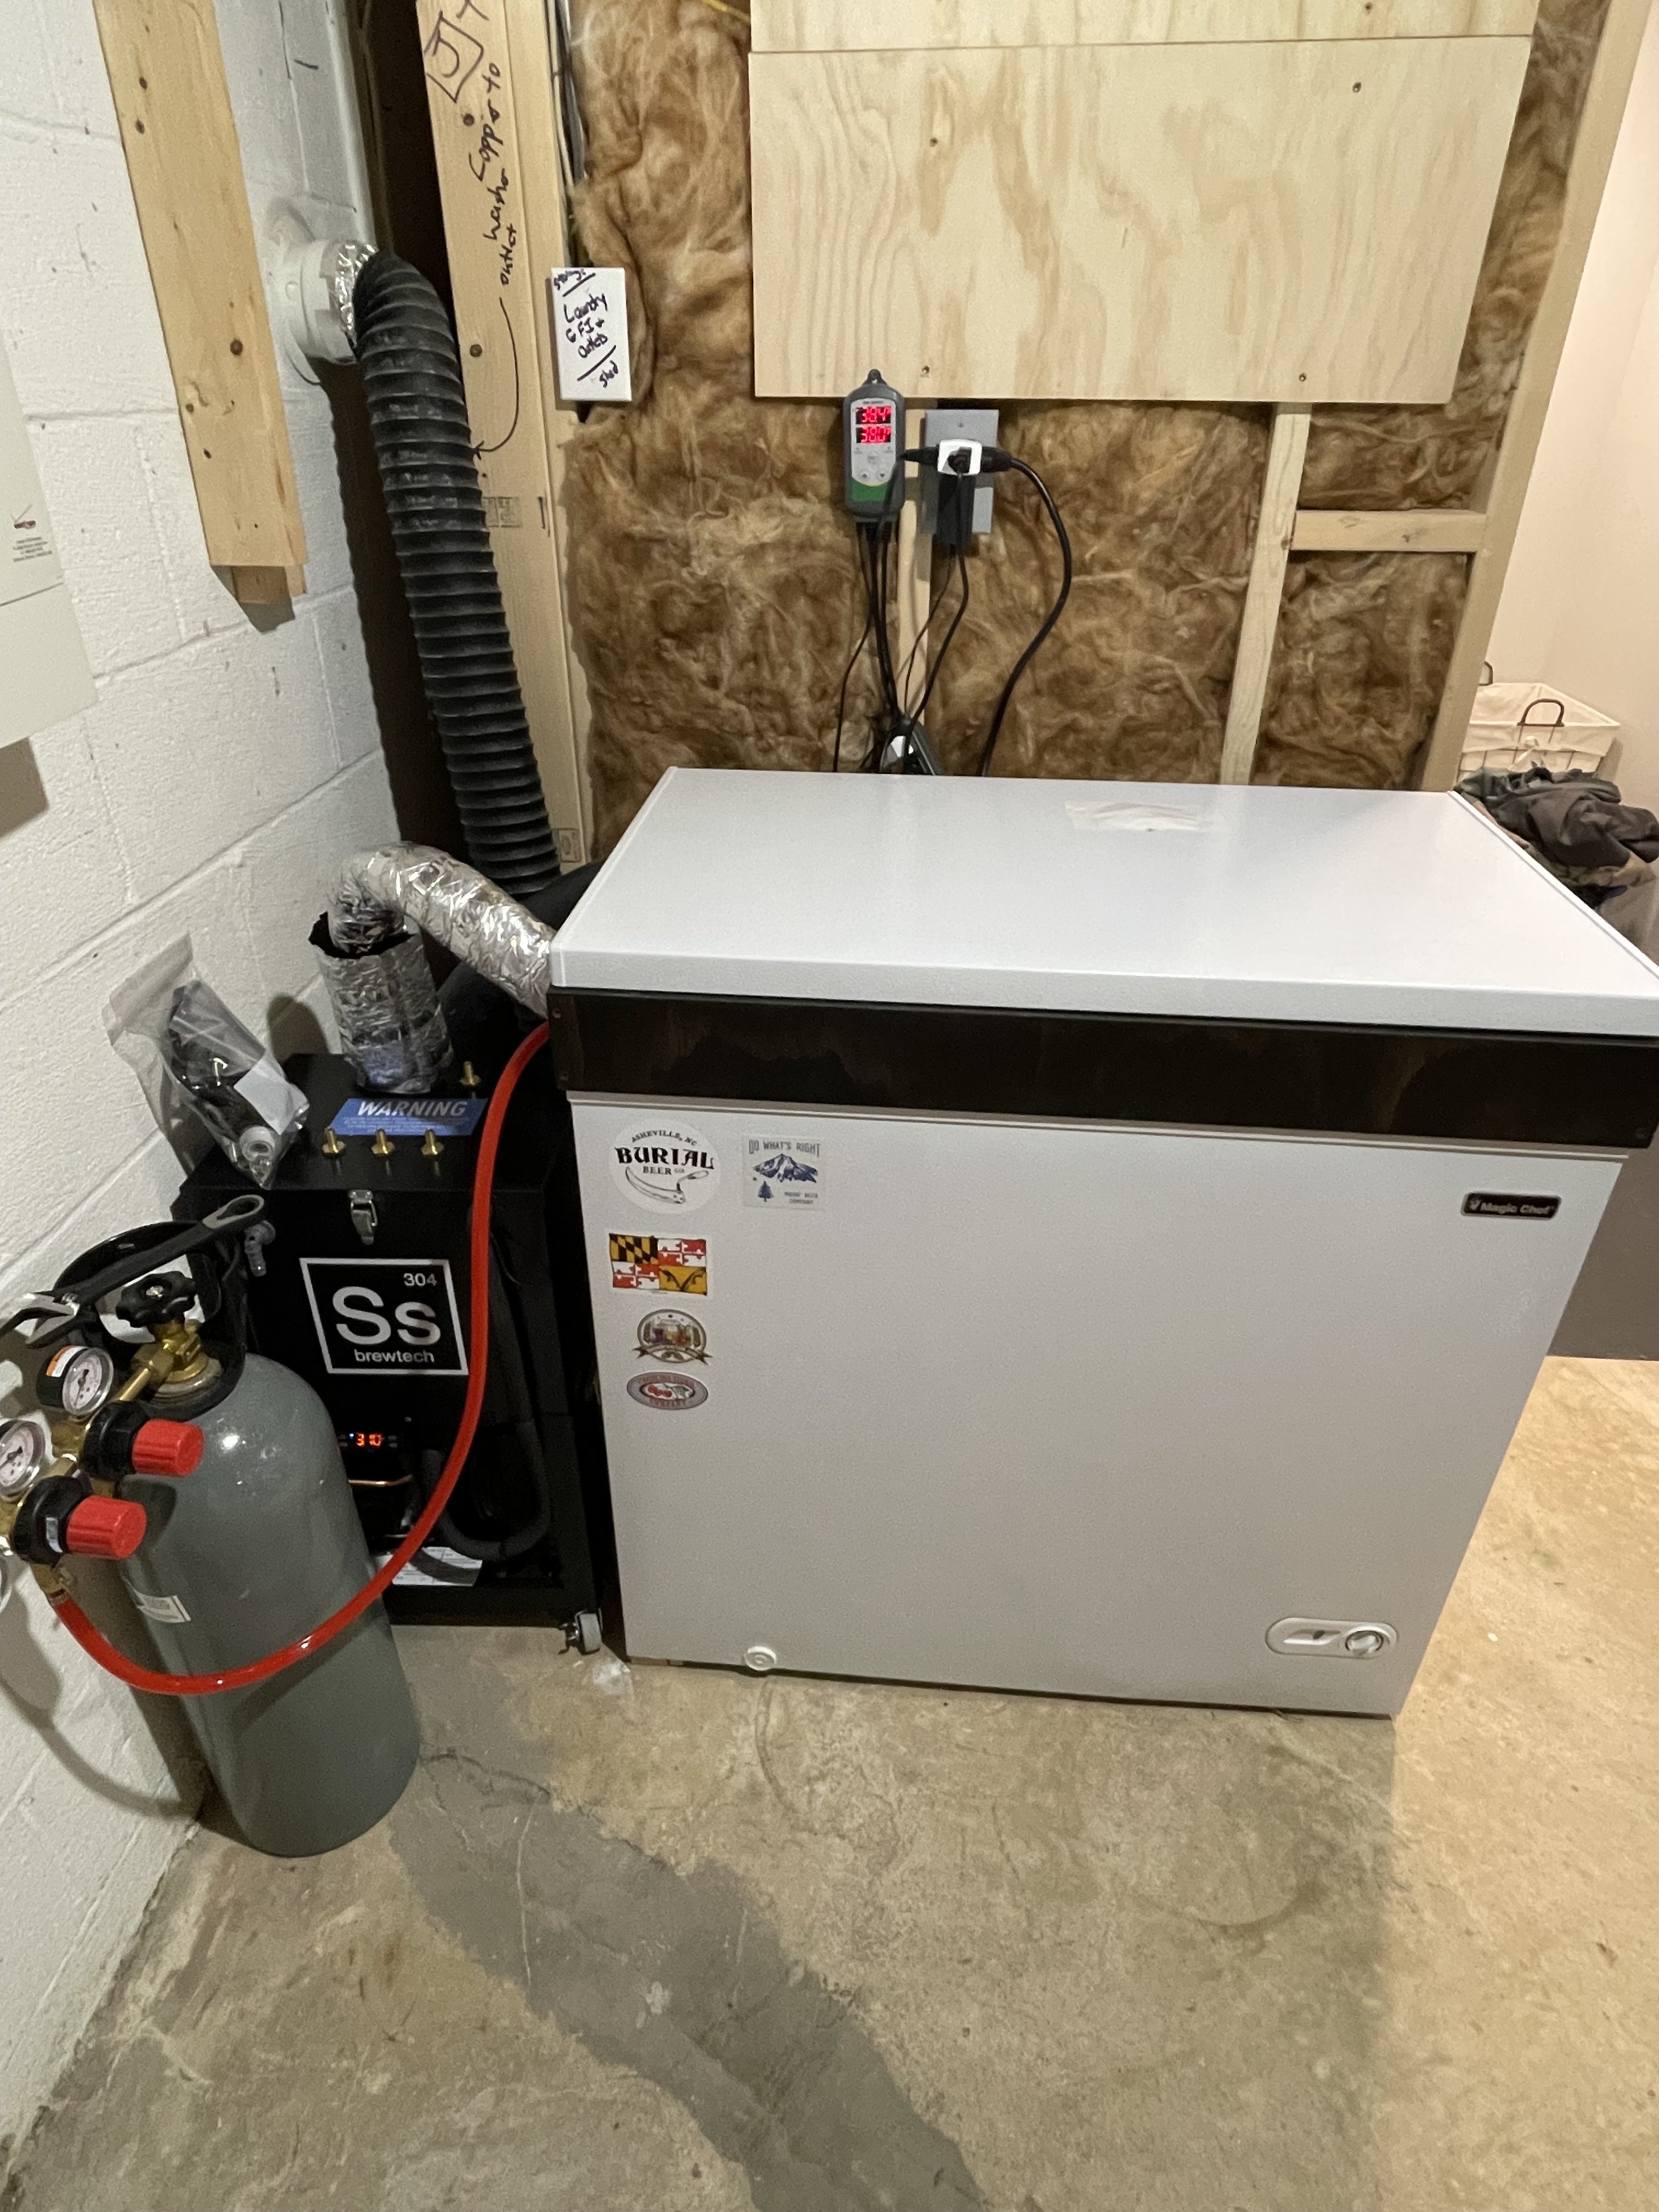
So far, I have finished out about 2/3rds of my basement (1600sq rancher with a full basement). It was bare concrete block and I did all the framing, drywall, and finish work. I started in the summer of 2019 so we are almost at the 4-year mark of the project. Last summer / fall I began work on the bar and brewery area. The design accommodates a 3 vessel setup from SS brewtech (started as 1V but needed to expand due to some design constraints), a beverage cooler, and a large L-shaped bar with room for a keezer setup on the short side. I also want the bar tower mounted on the bar top itself and have a nice drip tray and glass rinser to install as well. The bar itself is a thick MDF core that will be wrapped with walnut veneer and solid walnut edge trim. Still waiting on some countertop supports to be fabricated and delivered. We purchased cheap basic cabinets from lowes, primed and painted and upgraded to soft close hardware. The counters are quartz and we had them installed through Ikea. The beer cooler was a black friday special on Amazon and the huge sink, pot filler (which is UF filtered), faucet and vented hood were all also from Amazon. It's a lot of stuff but it's also been a few years of steady progress.
Progress pictures from the construction phase:
Progress pictures from the brewery / bar phase:
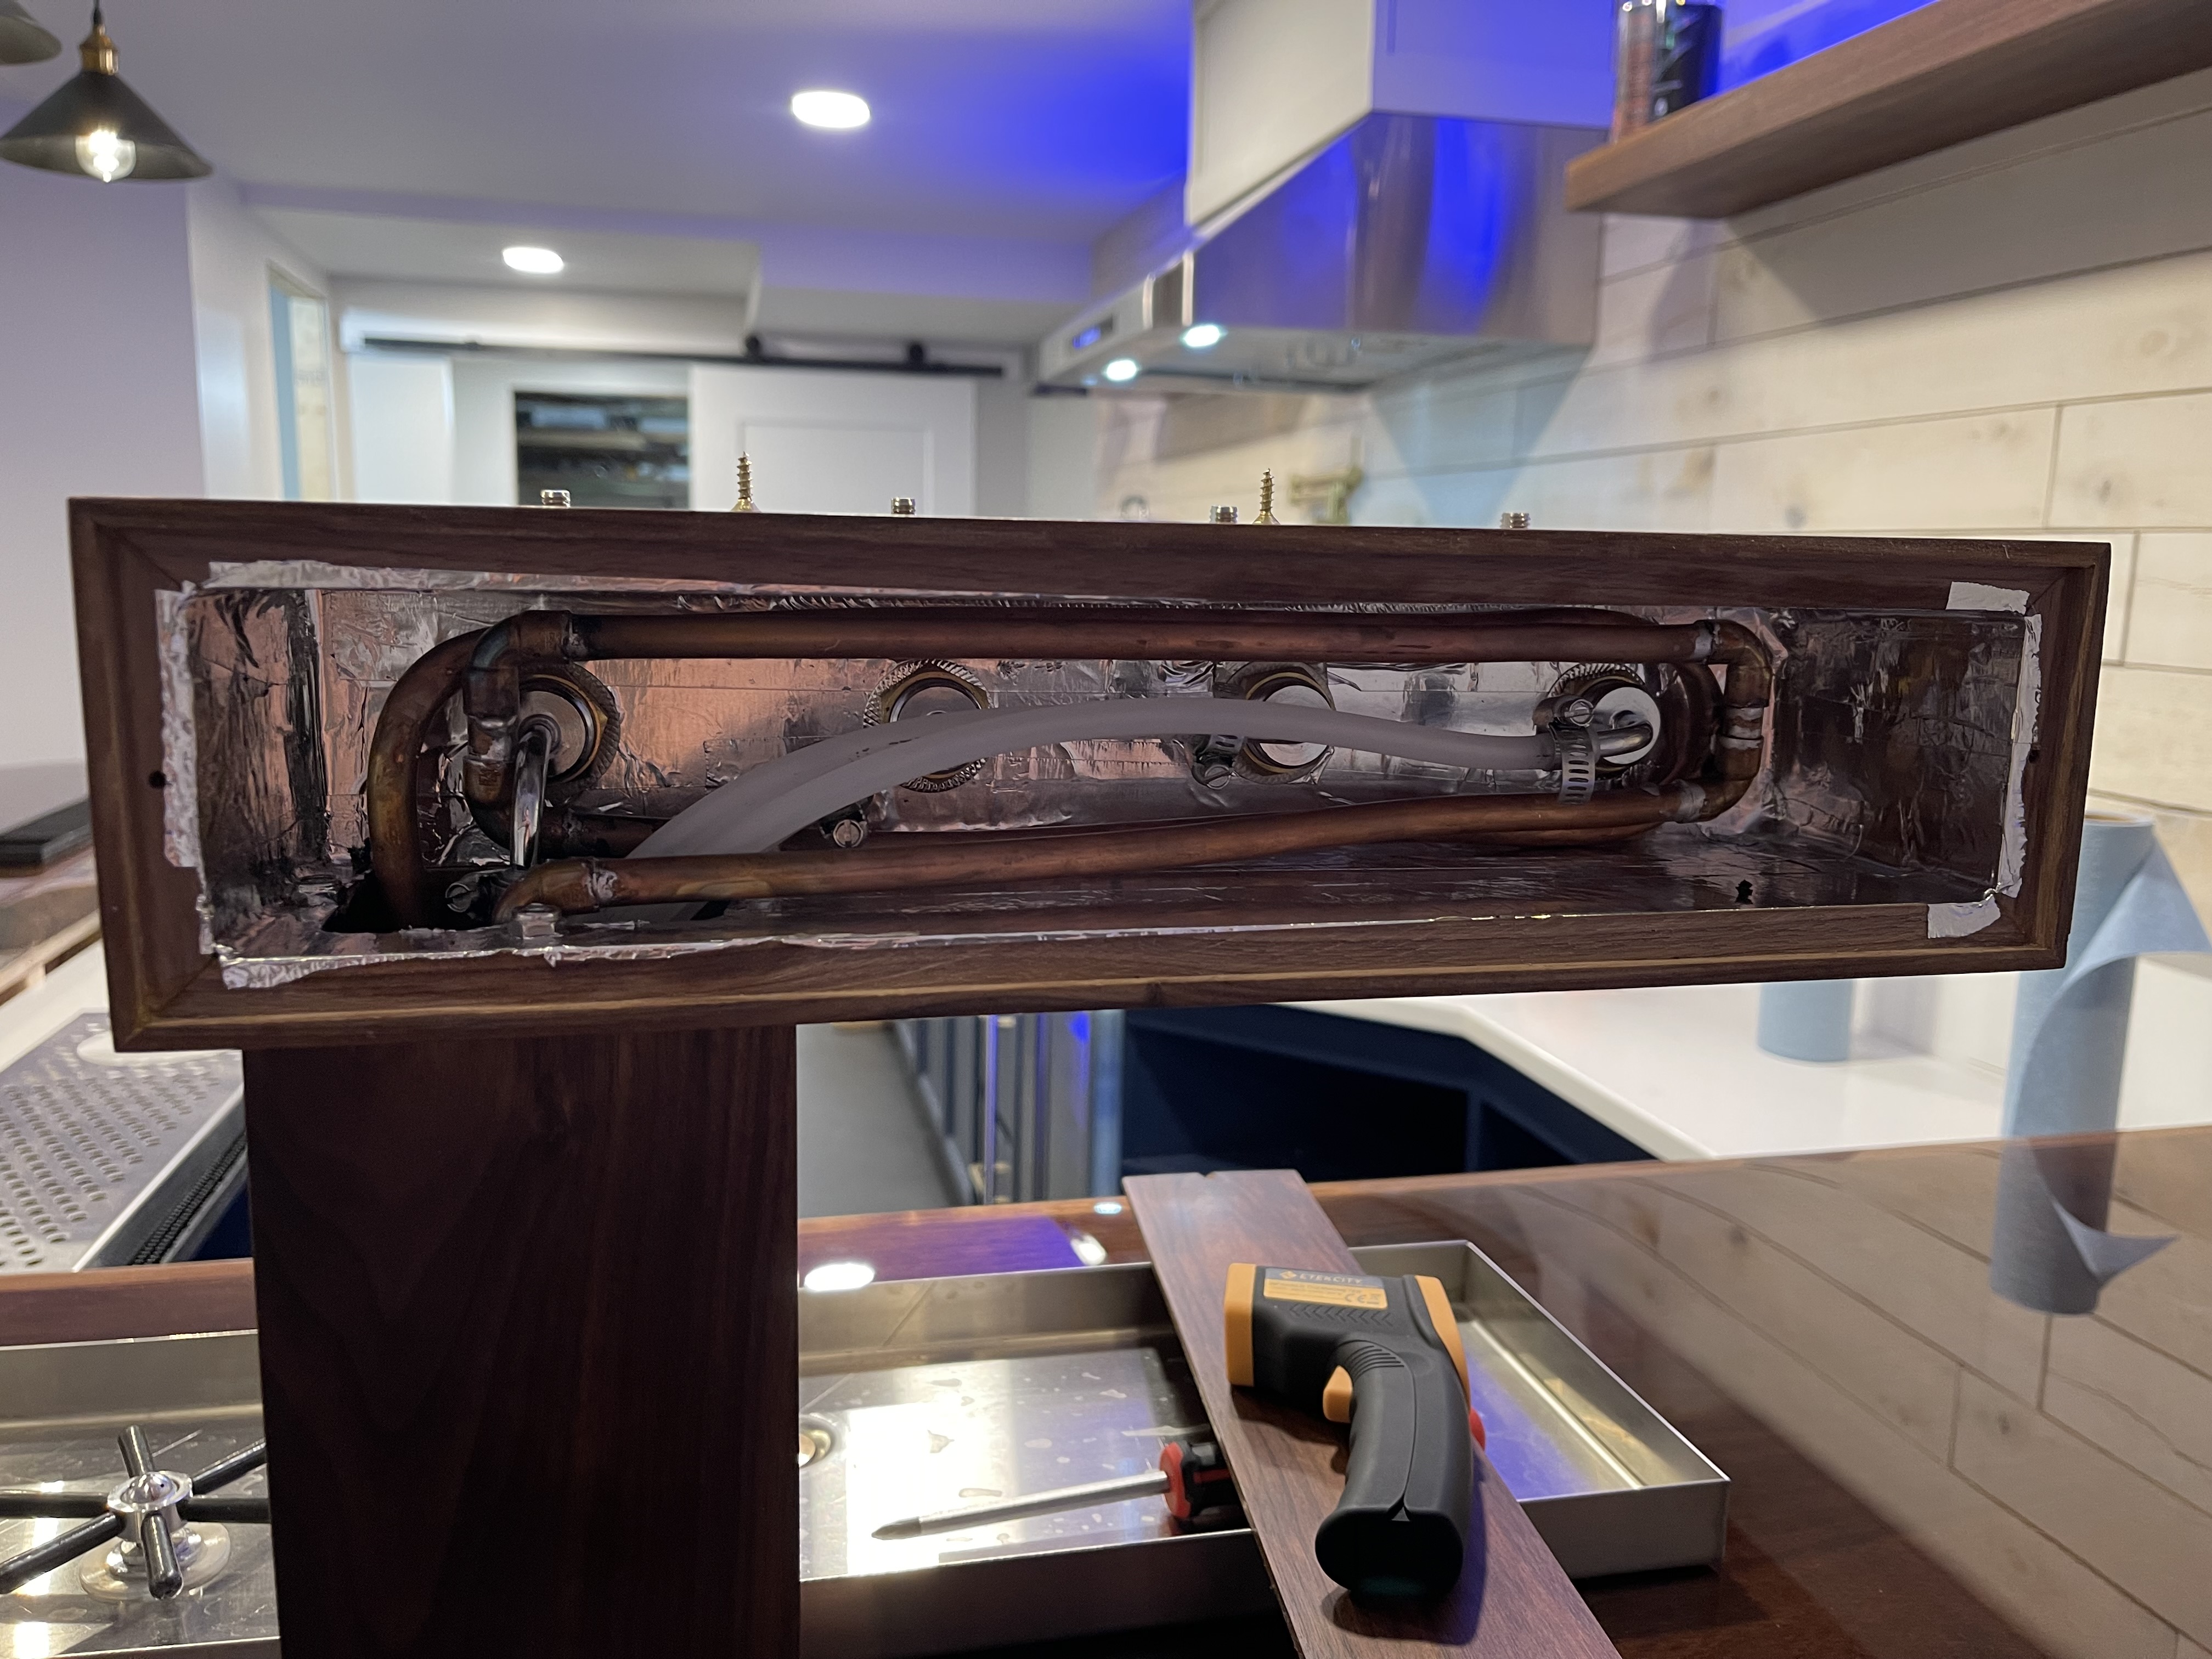
Now I have reached probably the most complex challenge (so far) and that is how to cool the DIY beer tap tower while using flexible beer lines and still being able to slide the keezer out to access kegs and clean lines.
I've explored a few ideas so far and also looking for advice if anyone has any. I got a little ahead of myself and spent the money on some aluminum threaded pipe for a DIY tower but I am realizing that it may not work well enough due to the smaller 3" pipe size (roughly 2-1/2" ID). I also bought a cheap chest freezer and tried a PVC duct with a union, thinking I could unscrew the union, pull the freezer out, and have slack in the beer lines pull through from inside the freezer. What I didn't think about is how inflexible vinyl tubing gets when it's cold and with just one tube installed, it would not easily slide out without kinking and getting stuck and I fear pulling too hard would mess up the connections from the faucet end or worse, have them pull loose inside the tower.
First option:
Air chill the lines using a ducted fan of some sort inside the keezer, blow cold air through a tube containing the beer lines that goes into the tower. From what I've read, I need that tube to be insulated and have enough space inside to allow air to flow through with the beer lines in there as well. Then, that is supposed to be put inside another larger tube that connects to the beer tower and also needs insulation on the outside. All of that would need to be at least 6-7 feet in length and flexible enough so I can slide the keezer out and back under the counter. The slack would just hang down next to the keezer under the bar. Then, in addition to that, I don't even know if the freezer would handle the heat load that would be coming from the beer tower. I think this is the main concern. Being aluminum, the beer tower is going to be an effective heatsink in both directions while trying to equalize with the ambient air in the basement (65-75F).
Maybe I am overthinking it but it seems like the return air is going back into the keezer having pulled some ambient heat from the aluminum beer tower, and with the chest freezer itself only having a cooling capacity of around 400BTU (based on my rough math) I don't think it's going to be cold enough.
Second option:
A separate glycol chiller placed elsewhere in the basement (to reduce noise) and run insulated glycol lines into the keezer, back out with the beer lines and into the tower. Not an easy task but doable based on the access I have to pull the glycol lines through the ceiling and down into a wall. This would probably be close to a 40 foot run and I have no idea what to get for that but I bet it's expensive. I've seen a couple glycol fermentation chillers for $600 - $1000 plus lines would be around the $1500 mark but again, no idea if that's enough for a 40 foot run.
Third option:
Scrap the freezer, spend $1k + on one or two front load fridges or kegerators and plumb the beer tower with rigid tube and plenty of insulation. Then there's still the concern of having enough cooling capacity and getting that cold air into the tower.
Whew, that was a lot and hopefully, someone can chime in with their thoughts on the cooling situation. I'll try to keep this thread updated as I go and hopefully get things finished this spring. Cheers!
So far, I have finished out about 2/3rds of my basement (1600sq rancher with a full basement). It was bare concrete block and I did all the framing, drywall, and finish work. I started in the summer of 2019 so we are almost at the 4-year mark of the project. Last summer / fall I began work on the bar and brewery area. The design accommodates a 3 vessel setup from SS brewtech (started as 1V but needed to expand due to some design constraints), a beverage cooler, and a large L-shaped bar with room for a keezer setup on the short side. I also want the bar tower mounted on the bar top itself and have a nice drip tray and glass rinser to install as well. The bar itself is a thick MDF core that will be wrapped with walnut veneer and solid walnut edge trim. Still waiting on some countertop supports to be fabricated and delivered. We purchased cheap basic cabinets from lowes, primed and painted and upgraded to soft close hardware. The counters are quartz and we had them installed through Ikea. The beer cooler was a black friday special on Amazon and the huge sink, pot filler (which is UF filtered), faucet and vented hood were all also from Amazon. It's a lot of stuff but it's also been a few years of steady progress.
Progress pictures from the construction phase:
Progress pictures from the brewery / bar phase:
Now I have reached probably the most complex challenge (so far) and that is how to cool the DIY beer tap tower while using flexible beer lines and still being able to slide the keezer out to access kegs and clean lines.
I've explored a few ideas so far and also looking for advice if anyone has any. I got a little ahead of myself and spent the money on some aluminum threaded pipe for a DIY tower but I am realizing that it may not work well enough due to the smaller 3" pipe size (roughly 2-1/2" ID). I also bought a cheap chest freezer and tried a PVC duct with a union, thinking I could unscrew the union, pull the freezer out, and have slack in the beer lines pull through from inside the freezer. What I didn't think about is how inflexible vinyl tubing gets when it's cold and with just one tube installed, it would not easily slide out without kinking and getting stuck and I fear pulling too hard would mess up the connections from the faucet end or worse, have them pull loose inside the tower.
First option:
Air chill the lines using a ducted fan of some sort inside the keezer, blow cold air through a tube containing the beer lines that goes into the tower. From what I've read, I need that tube to be insulated and have enough space inside to allow air to flow through with the beer lines in there as well. Then, that is supposed to be put inside another larger tube that connects to the beer tower and also needs insulation on the outside. All of that would need to be at least 6-7 feet in length and flexible enough so I can slide the keezer out and back under the counter. The slack would just hang down next to the keezer under the bar. Then, in addition to that, I don't even know if the freezer would handle the heat load that would be coming from the beer tower. I think this is the main concern. Being aluminum, the beer tower is going to be an effective heatsink in both directions while trying to equalize with the ambient air in the basement (65-75F).
Maybe I am overthinking it but it seems like the return air is going back into the keezer having pulled some ambient heat from the aluminum beer tower, and with the chest freezer itself only having a cooling capacity of around 400BTU (based on my rough math) I don't think it's going to be cold enough.
Second option:
A separate glycol chiller placed elsewhere in the basement (to reduce noise) and run insulated glycol lines into the keezer, back out with the beer lines and into the tower. Not an easy task but doable based on the access I have to pull the glycol lines through the ceiling and down into a wall. This would probably be close to a 40 foot run and I have no idea what to get for that but I bet it's expensive. I've seen a couple glycol fermentation chillers for $600 - $1000 plus lines would be around the $1500 mark but again, no idea if that's enough for a 40 foot run.
Third option:
Scrap the freezer, spend $1k + on one or two front load fridges or kegerators and plumb the beer tower with rigid tube and plenty of insulation. Then there's still the concern of having enough cooling capacity and getting that cold air into the tower.
Whew, that was a lot and hopefully, someone can chime in with their thoughts on the cooling situation. I'll try to keep this thread updated as I go and hopefully get things finished this spring. Cheers!
")