Starter from the beginning for you.
Wrote it up yesterday having seen your post on the taplist io forum, plus said I'd do this ages ago.
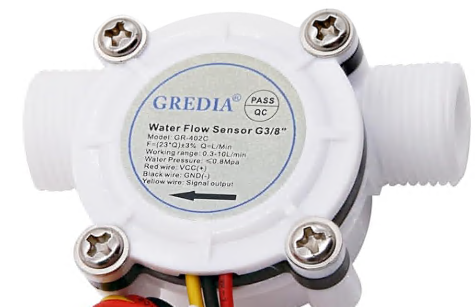
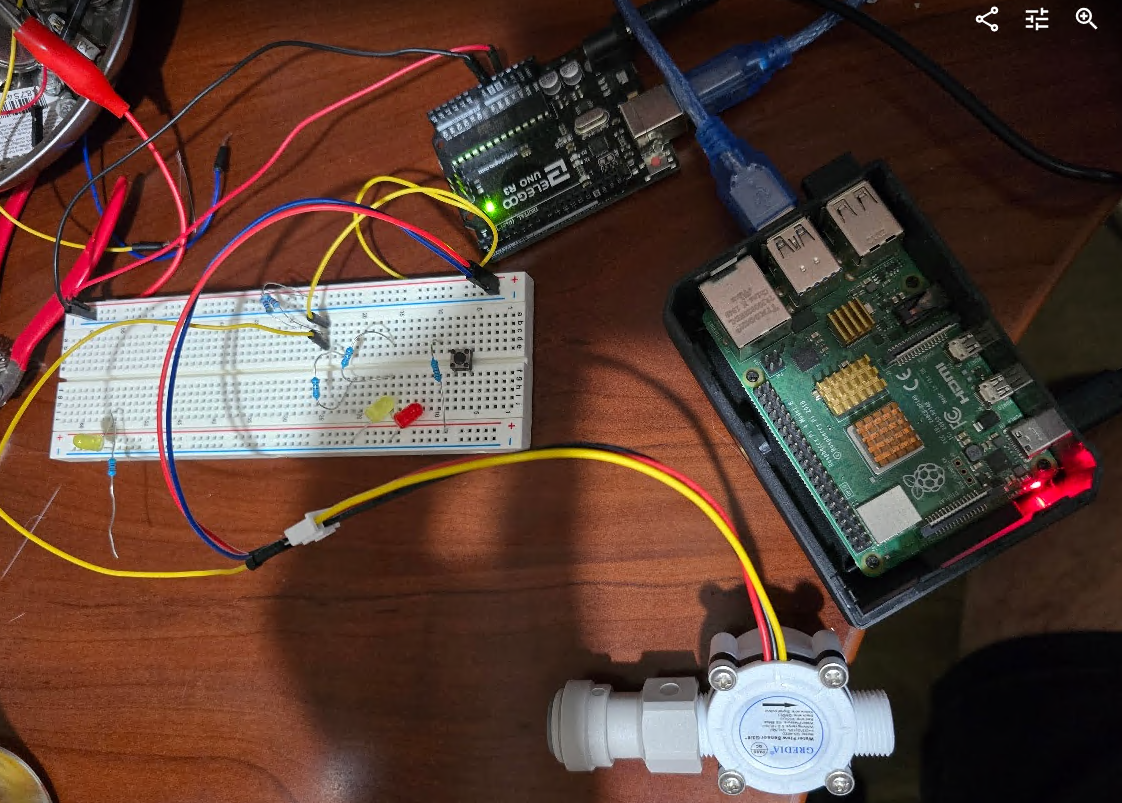
Other sensors I'll add in later.
Simple without flow meters
Raspberry Pi 3b or Raspberry Pi 4 Various memory size options available.
Power supply for your Pi. Case for Pi with or without fan.
A monitor and cables to connect to the Raspberry Pi. The Pi 3 uses standard HDMI cable, Pi4 uses smaller HDMI cable.
Keyboard and mouse wireless or corded depending on your choice.
16Gb Micro SD card or Micro SDHC card an adapter so that it can be connected into laptop or desktop.
Using another computer ( windows ) access
https://www.raspberrypi.com/software/
there is a link to download the raspberry pi operating system.
https://downloads.raspberrypi.org/imager/imager_latest.exe
Once downloaded and run the program Raspberry Pi imager requests Raspberry Pi type, type of Raspberry Pi OS 32 or 64 bit, finally select storage.
The storage is the Micro SD card plugged in via an adapter to the computer this Pi OS installer is running on.
The Pi operating system then installs you can accept the defaults during this process.
Once the install is complete the installation is verified by the RasbperryPi imager and then safely eject the Micro SD card.
Insert the micro SD card into raspberry Pi that has monitor and keyboard and mouse attached.
Power on the Pi and follow the on screen instructions.
Write down the passwords !!!
You will need to insert the Wifi password for your network or a network cable.
The Pi updates itself once running.
THE RPINTS INSTALL
Open a terminal this is normally accessed by clicking the raspberry top left corner and finding it in the menu or selecting the black monitor icon on the top left corner.
paste this and press enter.
curl -L
https://raw.githubusercontent.com/rtlindne/RaspberryPints/master/util/installRaspberryPints | sudo bash
this will start the install and follow the instructions
The defaults are good options, again note the passwords !! Do accept the dummy beer data.
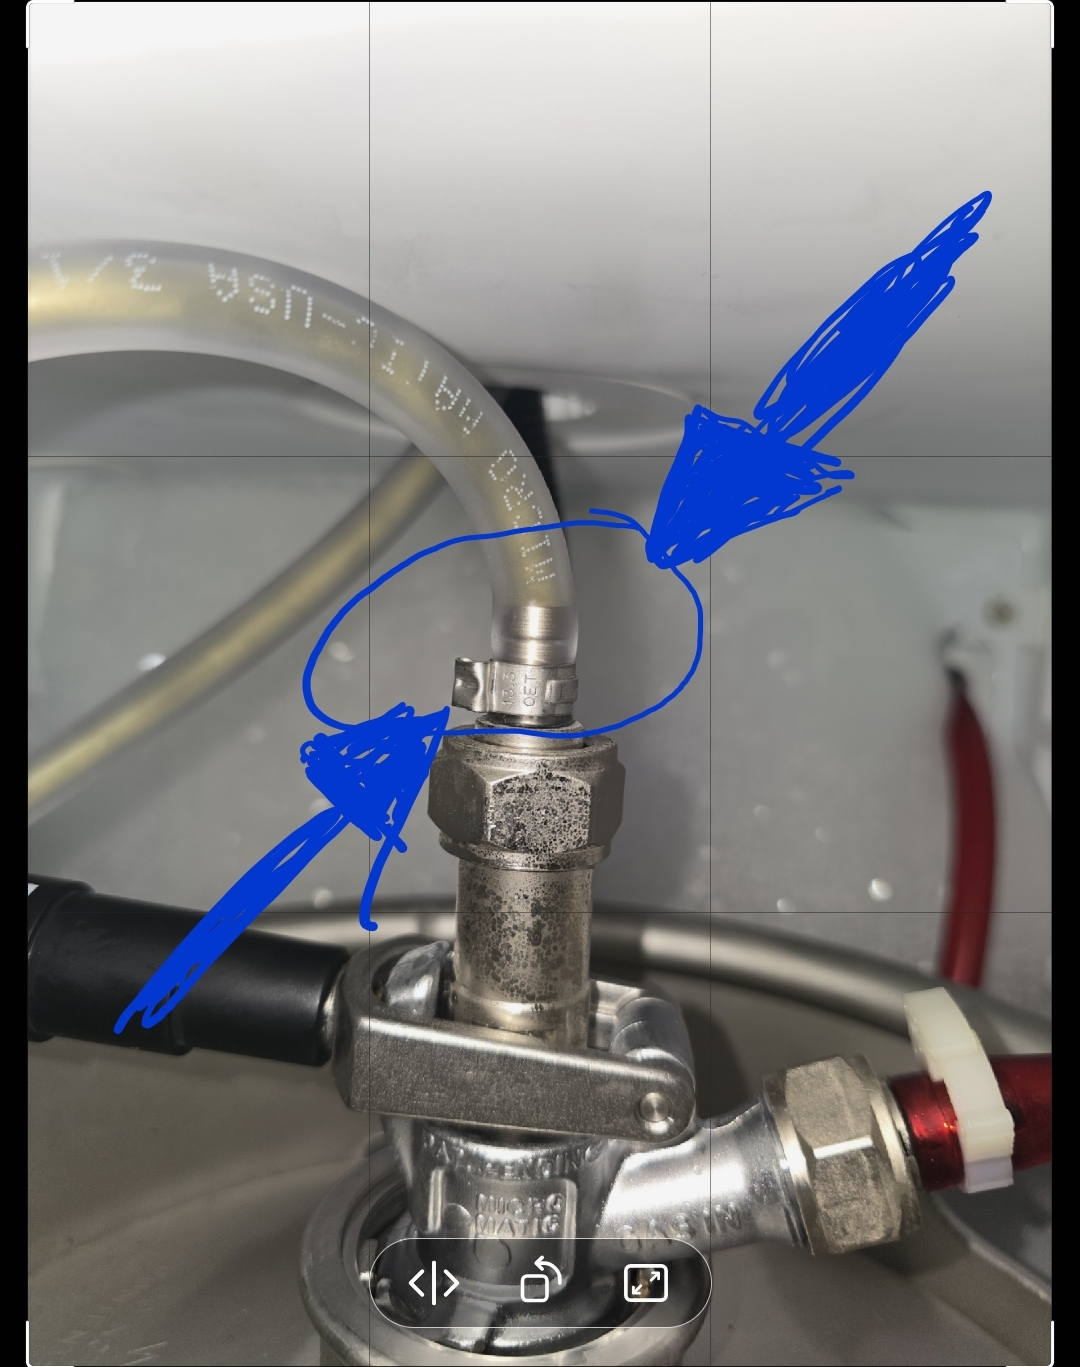
Do not select flowmeters, you are selecting to use this computer as the host server for RPints.
At the end of install the addresses to use in your browser to bring the RPInts display up.
Type one of these options into your browser, browser options on Pi OS are Chromium or Firefox.


![Craft A Brew - Safale S-04 Dry Yeast - Fermentis - English Ale Dry Yeast - For English and American Ales and Hard Apple Ciders - Ingredients for Home Brewing - Beer Making Supplies - [1 Pack]](https://m.media-amazon.com/images/I/41fVGNh6JfL._SL500_.jpg)


")