• Please visit and share your knowledge at our sister communities:
  • If you have not, please join our official Homebrewing Facebook Group!

    Homebrewing Facebook Group

Unveiling my brewery & garage build

Homebrew Talk

Help Support Homebrew Talk:

This site may earn a commission from merchant affiliate links, including eBay, Amazon, and others.
When I factored in all the time associated with properly preparing a concrete floor (it gets worse with a floor that has been used for years) for epoxy application, I realized it would be just as much work to epoxy as it would be to grind and seal.

The grinding/polishing/sealing operation will end up taking about 8 hours (DIY), and cost about $800 in rental and materials. The epoxy solution was looking more like 10 hours (DIY) and $500 in materials to really do it right. To me, those are about equal.

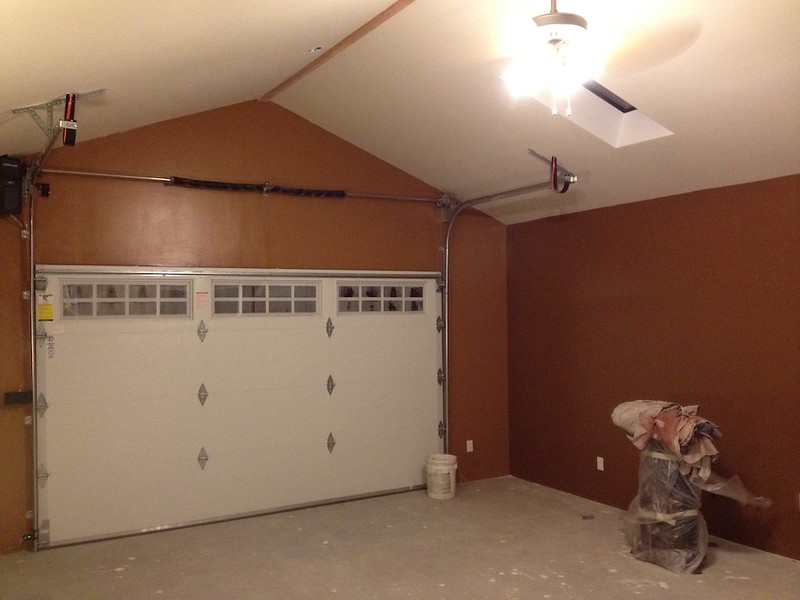
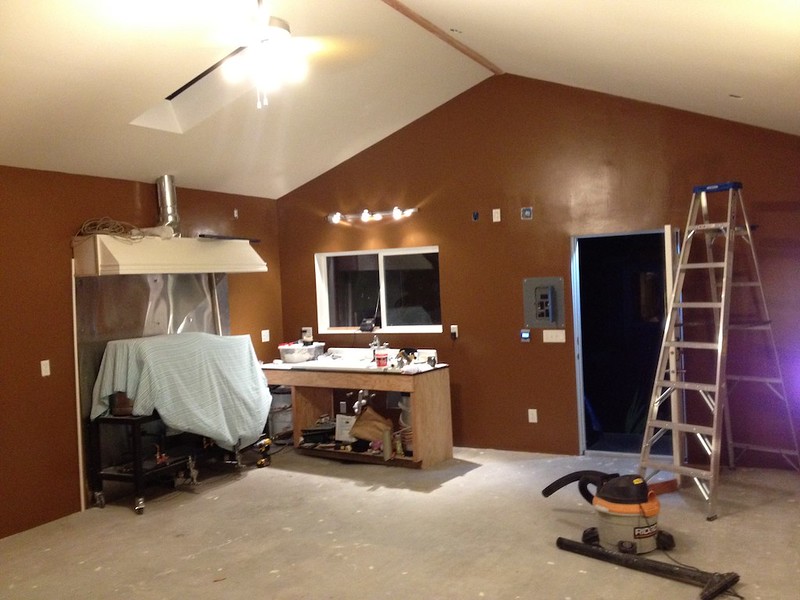
Polished concrete is more durable when it comes to stuff like welding, dropping hot/heavy things, tire traffic, etc. Both options are good for liquids, and will work with my flood drain. I believe the epoxy option is more resistant to acidic liquids, but as discussed earlier in this thread, the difference is not huge for a homebrewer.

In the end, I've seen so many beautiful polished concrete floors that I've been envious of, but have had considerably less exposure to epoxy. It's a personal decision, but I found that I liked and trusted the polished & sealed option more than the epoxy. Since it was about the same cost/effort equation, I'm going with what I know.

Here are the instruction videos for the kit I'm using, if you are interested in seeing the whole process:
 
Last edited by a moderator:
8074282851_93bdfca562_c.jpg

Priming is done. Top coats start going on this morning. Somewhere along the way, I've really lost sight of the "it's just a garage" mantra...
8077031930_951d81f002_c.jpg

:rockin:
 
Where are you planning on getting the cisterns for rain water?

I haven't figured that out yet. I haven't been able to find the tank I want locally. There are a couple of online sellers that sell it, but shipping would be $400.

I'm trying to come up with a local solution, using another thank, but haven't made it work yet.
 
I am so glad that your DIY project also takes a few months. I'm doing a bathroom downstairs and it's been very slow. I was beginning to think I may be the only one who DIYVS (Very Slowly).
 
That's the beauty and the misery of DIY, I suppose.. it goes at your pace. I really can only work evenings and weekends, with the occasional hooky day. I do have the contractor to call on for when the real work really needs to get done though. Unfortunately, this meant I missed some of the really fun days of the build.
 
Well I have some good news and bad news to share. The painting went great. We went for a 'beer colored' theme (two tone brown). I hate picking out paint colors so I steeped back and let my wife choose. What she came up with is darker and bolder than I would have, but that's exactly why I let her do it. I like the final result. We went with a semi-gloss finish to make for easier cleanup.

8094487905_00a0685a8c_c.jpg

8094500553_0a909030bc_c.jpg


The floor project on the other hand was a big helping of DIY fail. :mad: In fact, it's hard for me to share this.. but you take the bad with the good I guess. The slab as it was poured was too rough to 'dry grind' so we had to start with a wet grind. This created a ton of slurry which was extremely difficult to get off of the freshly ground and porous surface. We scraped and squeegeed as much as was possible, before moving onto the dry honing and polishing steps, assuming these would pull the remaining dry slurry off the surface.. well it didn't. Even after restarting the whole process 1/2 way through the day and doing it dry (now that the slab was smoother), I still wasn't able to get the ground in slurry removed. The rental was only for 24 hours and the unit was reserved the following day, so I had no choice but to declare defeat and finish the job as best I could. There were other problems with the machine and the pads that I rented that I won't go into. They issued me partial credit, but the damage was done.

The slab is sealed and water tight.. for now. It's ugly, and I don't expect the seal to hold up well as the sections of ground in slurry start to break down over time. I'm going to sit on it for a week or so and see how it goes, but I'm looking at bringing in a contractor to fix it for me. I think I know enough now to do it right the next time, but after the day I had on Sunday, I don't want to ever do that again.

8094500265_69ab95197c_z.jpg
 
My ex-brother in law has been doing epoxy floors for years. He does everything from small garages to huge gymnasiums. He uses some type of handheld grinder with a diamond blade and its all done dry. He just did his sons garage floor and I was shocked at how good it looked when he was done. He can grind down an uneven floor and make it perfect. Most of the work is in the prep he says, putting down the epoxy is the easy part. I saw a floor that he did that looked like marble. You have done such a nice job on the rest of the place, I would suggest you look for a pro to fix the floor for you. It would look great when its done right. I wish you were in NY, the guy I know will do a job like yours for a few hundred dollars (plus epoxy) and a few beers.
 
Despite my less than perfect experience with the floor, I'm loving the moving in process in my new garage. I've been happily completing little projects like hanging peg board and orginizing my tools on the 'shop' side of the building, and yesterday I completed my second brew day on the full new system. This one went much smoother, as I've mostly figured out the pump priming issues, as well as the finer points of mash recirculation and temperature control on the new rig. I must admit though, I'm already chomping at the bit to start automating with a BCS-462.

Next up for the building is the deck and arbor outside. The rains have returned to the northwest, and the area where the new deck is going to go is a muddy mess after getting torn up during construction. Our friends are all over us to throw a 'brewery warming' party this fall, but we've got to get the deck done first.

I'm also having an issue with rain water. The french drain we dug for my downspouts isn't quite up to the task, so I've bene having to redirect my gutters to the neighbor's yard (she is fine with it for now) to prevent it backing up into the building. I've gone ahead and ordered my rain water collection tanks (two 310 gallon tanks, to be connected in parallel). Once they are installed, I'll be building a new 'weeping pipe' overflow system that'll run under the new deck. It's a hassle having to deal with this after I thought I'd solved the issue, but at least it's good motivation to get the cisterns installed sooner than later.

On the brewery side, I'm turning my attention to a fermentation chamber. After passing on an amazing 50.1cf two door commercial fridge (it was an awesome deal, but just too big for me), I've narrowed my focus in on a large (~25cf) side by side fridge/freezer. From the research I've done, I'm expecting to be able to fit 4 better bottles or one conical and two better bottles in the fridge side, and 2 better bottles (or corny kegs) in the freezer side for laggering/conditioning. There are a handful of threads (like this) on the forum from folks that have done this successfully, and I think this represents the best functionality vs space equation for me. Your thoughts are appreciated.

Brew day #2 on the new system. This was a Marris Otter and Willamette SMASH, with homegrown hopps.
8113423519_680785b38c_c.jpg
 
Awesome Job on everything! As many have said on this thread I am insanely jealous yet inspired by your design and taking notes. Thanks for keeping this thread updated with tons of pictures!
 
As mentioned above, I've turned my attention to my fermentation setup in the new garage. I've contemplated a lot of options from a purpose built chamber, to multiple chest freezers, to an awesome two door commercial fridge I almost bought (it was a killer deal). Ultimately I settled on a large side by side fridge/freezer which I will convert into a dual zone fermentation chamber. The laggering side (freezer) will do double duty and be able to serve from a keg or two, making sure I can keep something on tap in the garage. Most of the beers will still be on tap in the house from a coffin keezer I plan to build in there. Once both of those projects are done, I'll pass on my 2 tap mini-fridge kegerator (currently serving the house) to a friend who is just getting into kegging.

I did fairly well on craigslist, and picked up this nice GE stainless steel 25cf side by side for $200. It's a little more than I had planned to spend, but it is way nicer than I had planned on getting too.

Poor fridge, you have no idea what is about to happen to you.
8119977745_db84c0e4b2_c.jpg


Inside with most shelves removed, temperature testing (it works great)
8120033491_b00b0d316d_c.jpg


Fridge guts
8120046382_2fe4c1ef8d_c.jpg


Based on my initial tests with empty bottles, I am confident I can fit 4x 6 gallon better bottles in the fridge side. I believe I could also fit one 14 gallon conical and two better bottles in that side in the future. The freezer will take two better bottles or at least 2 corny kegs. I won't know for sure until I get more of the door disassembled, but I *think* I can fit three.

Wiring for temp controllers and a dispensing setup in the freezer door start tomorrow. It'll wind up similar to this one, though I'm going to keep my temp controllers in separate boxes for now, as I intend to control the chamber with a BCS-462 in the futre, so I don't want the holes.
 
A minor setback on the fridge situation here. It turns out that not all fridges with 'analog' temperature control dials are controllable in the method described in the previously linked thread. My fridge is newer and despite having analog looking control dials, it is actually fully digitally controlled by a computer circuit board.

Long story short, I can't simply connect an external temp controller like the HTC-1000 or a LOVE controller in the way I had planned. I've done some more research and I've figured out a way to make it all work with a modern digitally controlled fridge, but it's more work and will require more modification of the fridge. Its a work in progress, so I'll post back as I get more results.

What I have done:

* Using two HTC-1000 temp controllers, one single stage (for the freezer), one dual stage (for the fridge).

* The freezer controller is used to control the power to the entire cabinet (the original wall plug), just like we have all done with our freezers, etc. There was some concern about doing this with a modern fridge, what with it's automatic defrost, evaporator control, compressor timing, etc. As far as I can tell, as long as the compressor delay time is set higher than about 5 minutes on your temp controller (F3 on an HTC-1000), it is a non issue. There are some threads supporting this idea, but we'll see how it goes.

* The fridge side temp controller is connected to a small space heater for heat, and for cooling a 4" 120v computer chassis fan that I have mounted over the hole connecting the two compartments, previously occupied by the damper flap/motor. On top of the fan I've placed a piece of cardboard (though I plan to replace this with some thin rubber for a better seal), which provides thermal separation between the two compartments when the fan is not running. When it is running, the flap blows open (slightly) to allow airflow. I would have loved to have simply hacked/repurposed the old damper control, but I discovered that it is actually a stepper motor, which requires a computerized control module to run (it's not as simple as applying/cutting power to get it to open/close).

I do have some experience with adruino projects and some basic stepper motor control, so I know what is possible and I know I COULD make it work. I may build a more advanced Arduino based control for all aspects of the fridge in the future, but for now I've removed the damper and gone with the fan & flap approach.

The experience so far:

I've tried a couple of combinations of set points on my two HTC-1000 controllers and found that this solution works pretty well. For testing, I've brought the freezer side down to 1ºC, and then set the fridge side to various temps between 7ºC and 15ºC. The control methods seem to work pretty well, and eventually both sides settle in at their desired set points. I have not yet set the fridge side to a higher ale temperature requiring the heater to be more involved, and I'll be really curious to see how that effects the freezer side.

One thing I have observed, not necessarily a problem, since the fan I've installed in place of the damper moves a lot more air than the previous method which relied on convection to cycle the air, the fridge side tends to steal a lot of the cold air from the freezer when initially lowering the temps (say setting the fridge side from 10ºf to 1ºF to cold crash). The fridge temp lowers and the freezer temp raises (slightly, a few degrees) until the compressor has a chance to catch up. Eventually, both sides settle in again at their desired set points.

So far so good! It is going to be a process of continuous improvement though I feel. I'll post a follow up as the strategy evolves. I have observed that the built in fridge functions (automatic coil defrost, etc) seem to work just fine with this method. When dropping them temps from high to low and working the compressor hard, I've observed the heating element kick on after a while and take care of the ice build up, before resuming cooling.

If I had to do it over again, I'd definitely have bought an older fridge with true analog control as suggested in the thread I linked to above. I thought this was what I was buying, until I got it home and took a closer look at the wiring. These older style control panels have 120v wired through the nobs, so you can simply wire in your temperature controllers in place of these nobs.

I'll add some pictures of the solution I have in place, after I confirm it works well with the heat brought into the equation.
 
I put together a rough timelapse from the webcam I had aimed at the garage build this spring/summer. The camera isn't the greatest and it got bumped a few times (as well as stuff put in front of it), but it is still kind of neat to see the progression.

This covers the build from the forming of the slab to the final exterior paint, from April - August. When this video ends, there was still a ton of work to be done inside, but it didn't make for very interesting viewing from outdoors.

I make a few brief appearances in this, but you see a lot more of my contractor. I guess we know who really gets the credit for this build.

 
Last edited by a moderator:
Nice job. That's pretty cool. Did you have a ton of JPG's that got stitched together to make the video or did the camera capture the time lapse with a built in function? I did this for the building of our pool several years ago, but all the video editing programs I tried choked when I tried to sequence about 100,000 still images. I'd still like to do it if you can suggest a good program.
 
I used Time Lapse Assembler on the mac to stitch together jpegs that my camera uploaded to my nas device. This one was only about 3000 images, but I've used this program before with 30,000+ and it did fine.

It seems like it only loads the current image into memory and when writing to h.264 output files it doesn't keep the output file in memory either, so it's pretty lightweight.
 
There are a few updates to share with those of you following along on my progress. It has been a month of ups and downs on the project, but for the most part I am absolutely loving my garage now that I am somewhat moved in.

I've been puting together some of the non brewing areas of the building a little more. There are many enjoyable evenings of work remaining, but the building of the garage spaces and the working in those spaces have begun to blend together.

Pegboard and cabinet sitting where the workbench will go
8120032481_fb03c1698b_z.jpg


I didn't want to buy a new TV so I've repurposed a 24" computer monitor for the time being, connected to an AppleTV. So far I've found I use it most for internet radio streams, but it'll be nice to be able to put on some TV shows. Not so good for watching live sports though :(
8120032911_3241390e8f_z.jpg


Meanwhile work has begun on the conversion of the freezer side of my fridge to add serving capabilities. It's messy work, but fun. The whole fridge project reminds me of being that kid that takes apart his dad's stereo and then tries to put it back together.
8145171747_264be0d193_z.jpg

8145205182_e11350a481_z.jpg


For the tap board I'm using a piece of poplar board. It's 1", so it's actually 3/4" thick. I cut it down to size to fit the hole vacated by the door front assembly, and then decided I wanted to notch out the edges so it sits into the hole a little, and has a thinner appearance on the door front.
8145205814_91fa5b67a5_z.jpg


I resisted the temptation to go out and buy a router & table for this job (though I want one and will buy in the future at some point), and instead decided to bust out my chisels - one of my favorite tools.
8145174577_0e68fc0d42_z.jpg


Its a nice fit, and will be even better after some sanding. When stripping out the in-door assembly, I left the 12v DC leads exposed so I can use them for lighting. I'm still not sure how I'll utilize it exactly, but I plan to place a narrow piece of trim on the top of the bar with some soft LED lights under them, subtly illuminating the taps and your glass when filling.
8145174075_ce24c8a7ed_z.jpg


From the back of the door
8145622357_198b93f07a_z.jpg


I expect to have the board drilled and painted, and the door assembly (minus the shanks) in the next couple of days. I'm hosting a party for a friend in the garage next week, and have promised them beer on tap (without having to treck into the kegerator in the house).. it's good to have motivation.
 
Great Job Fall-line,
and please keep the updates coming! I can appreciate your angst with the side-by-side, thinking it's going to be a straight forward conversion, and then finding out you need to deal with digital over analog. Ouch!!

By the way, very early in this post, you mentioned

"Stainless steel backing. I had planned to use cheap whiteboard material, but heat was definitely going to be an issue. Stainless sheets were $250 (as opposed to $100 for the white board), and protect the wall from heat, as well as looking infinitely cooler"

Did those sheets cost you $250 each (for a 4'x8'?), or was that $250 total for the entire SS backsplash?? I'm trying to design that part of my brewery now, and am wondering what my options are.

Thanks, and good luck with the party!
 
Well I have some good news and bad news to share. The painting went great. We went for a 'beer colored' theme (two tone brown). I hate picking out paint colors so I steeped back and let my wife choose. What she came up with is darker and bolder than I would have, but that's exactly why I let her do it. I like the final result. We went with a semi-gloss finish to make for easier cleanup.

8094487905_00a0685a8c_c.jpg

8094500553_0a909030bc_c.jpg


The floor project on the other hand was a big helping of DIY fail. :mad: In fact, it's hard for me to share this.. but you take the bad with the good I guess. The slab as it was poured was too rough to 'dry grind' so we had to start with a wet grind. This created a ton of slurry which was extremely difficult to get off of the freshly ground and porous surface. We scraped and squeegeed as much as was possible, before moving onto the dry honing and polishing steps, assuming these would pull the remaining dry slurry off the surface.. well it didn't. Even after restarting the whole process 1/2 way through the day and doing it dry (now that the slab was smoother), I still wasn't able to get the ground in slurry removed. The rental was only for 24 hours and the unit was reserved the following day, so I had no choice but to declare defeat and finish the job as best I could. There were other problems with the machine and the pads that I rented that I won't go into. They issued me partial credit, but the damage was done.

The slab is sealed and water tight.. for now. It's ugly, and I don't expect the seal to hold up well as the sections of ground in slurry start to break down over time. I'm going to sit on it for a week or so and see how it goes, but I'm looking at bringing in a contractor to fix it for me. I think I know enough now to do it right the next time, but after the day I had on Sunday, I don't want to ever do that again.

8094500265_69ab95197c_z.jpg

A few years back I rented a diamond grinder to do my 90 year old basement floor. I then used a 100% solids epoxy on it. The diamond grinding was just a horrid experience. Absolutely brutal. The older the cement, the harder it is and with a 90 year old floor I put in an 18 hour day on it. When I returned the grinder, I didn't say a word, but the guy behind the counter nodded to me and said, "every floor is it's own special brand of hell."

I'm not 100% happy with the epoxy I got from epoxy-coat.com. It holds up fairly well, but it has scratched in a few spots from metal mops. We got white and even though it's in the basement with just one small window, it has yellowed. This really bothers me because we paid extra for an additive that was supposed to prevent this.

If I had it to do again I would have definitely stained it.

Great build, sir.
 
Back
Top