Turning your Fermonster into a complete closed transfer system for cheap!

Homebrew Talk - Beer, Wine, Mead, & Cider Brewing Discussion Forum

Help Support Homebrew Talk - Beer, Wine, Mead, & Cider Brewing Discussion Forum:

This site may earn a commission from merchant affiliate links, including eBay, Amazon, and others.
https://www.brewhardware.com/SearchResults.asp?Search=locknut&Submit=It doesn't mention the groove in the title, but it does in the desription. I've experimentally tried flat washers with hit and miss results...the only way I've had a flat washer hold pressure was using the flanged nut and a good amount of teflon tape then tightening it a bit beyond my comfort level. Now I'll often include a spare grooved one or 3 plus o-rings to add on to orders when I need to spend just a bit more to hit the $150 free-shipping limit... better to have and not need than need and not have.
:mug:
Thank you, what are you using on the top of the lid, if anything?

So these 2?

https://www.brewhardware.com/product_p/locknutpremium_14.htm
https://www.brewhardware.com/product_p/kegpost_oringred.htm
 
I did put a flat silicone and flat SS washer on top, but not to seal it (I rely solely on the captive internal o-ring for that) ; I prefer to minimize the amount of threads exposed inside, plus I don't like to torque down hardware by twisting it and possibly digging in to bare plastic, so it's mostly a spacer with a smooth top for tightening down my cross on and not really needed for anything but personal peace of mind while assembling.
 
I keep getting leaks after re-Teflon taping the threads a few times. It’s on there pretty thick now and out of desparation added some hot glue around all potential leak areas on the outside of the lid
 
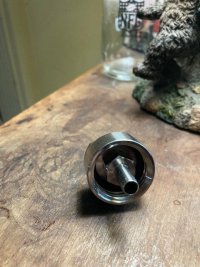
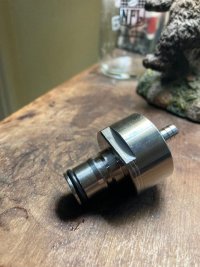
I just went to my 'beer-bits' bench and threw this together to give you a rough idea;
View attachment 839456
View attachment 839457
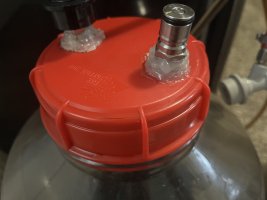
Of course though, you'll run into a similar problem that @Brewer Mike is having and won't have access to a diptube (at least not easy-access, and you'll probably have to put a female NPT>barb fitting on the inside;
View attachment 839458
I used a 1/2" barb because that's what I had laying around... finding one in stainless seems to be problematic. @Dgallo 's nylon barb suggestion is probably your best bet.
Just spitballin' and hoping to be helpful... let us know what you end up doing.
:mug:
Thanks for the pictures.
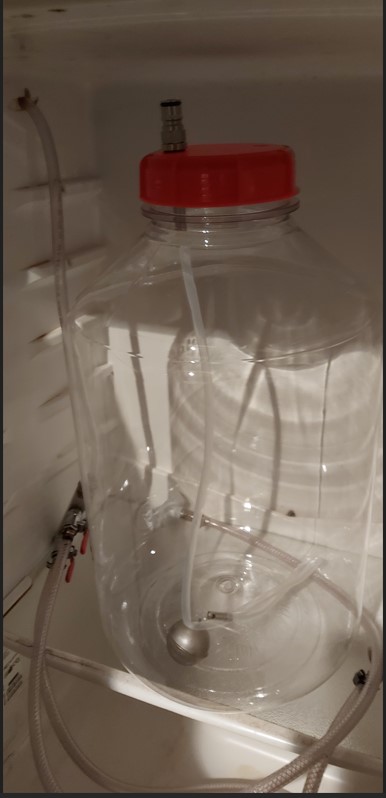
I just got the 6 gallon fermonster delivered and it fits in my fridge :ban:
It will be tight but should be possible to add a ball lock adaptor on top.
6 gallon fermonster.jpg


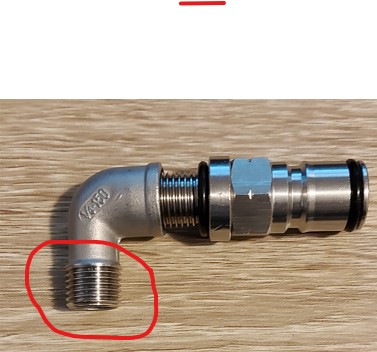
I also ordered an 90 degree angle just in case.
I'm still waiting on the barb and grooved locknuts.
But now I see the threads on the angle are a bit short for putting through the hole in the lid and connecting a barb.
I guess I need some kind of extention piece but I'm not exactly sure what it's called to do a search.
Or is it better to search for an angle piece with longer threads?

90o Angle.jpg


Thanks! :mug:
 
Looks like you bought the street-elbow rather than the regular female/female elbow...my first thought is that you'd need the grooved locknut/o-ring on the outside of the lid and anchor it with an internal female NPT>1/4" barb (which seems to not be easily sourced unless you want brass, or nylon..nylon being unlikely to take the needed torque.) ..and you'd still not be able to connect the hose directly to the diptube.
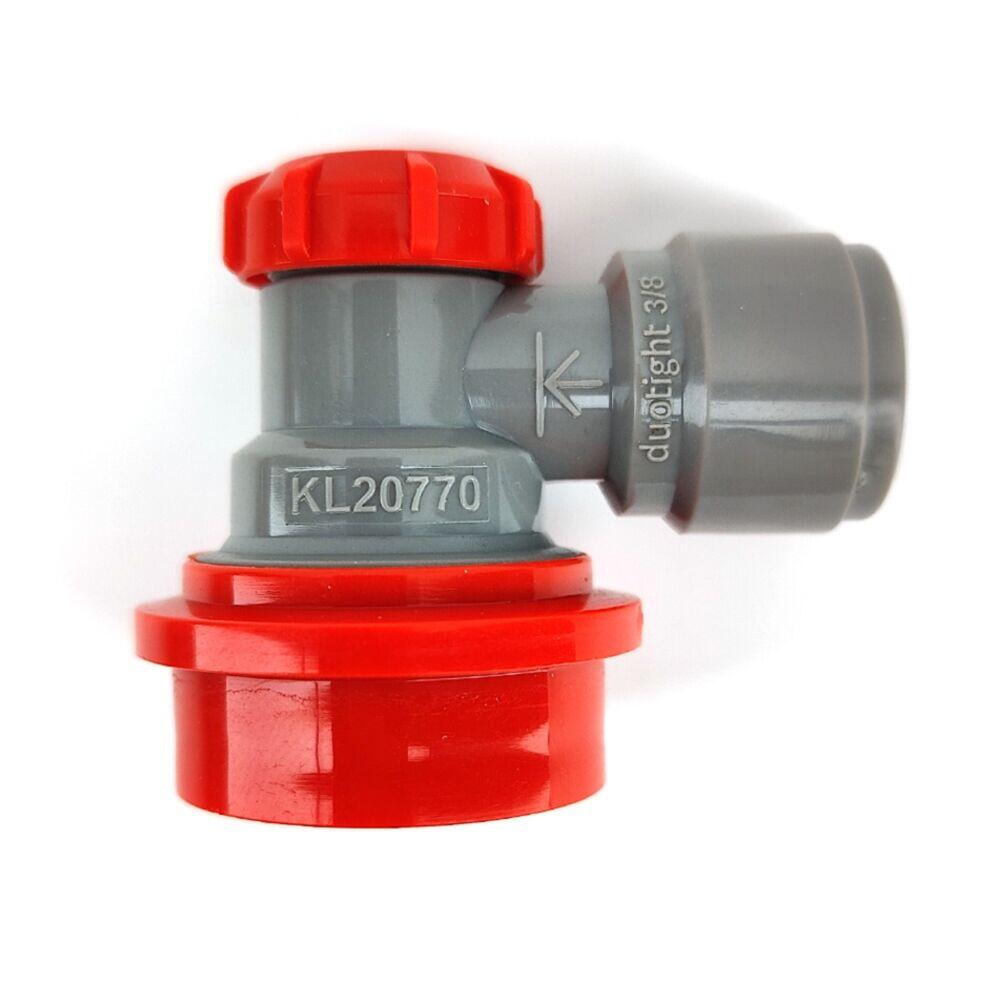
Going by your pic, it looks like you have room, but if you don't, or if it's too close for your comfort; Rather than reinvent the wheel, you can keep @Dgallo 's excellent original design and just use the low-profile duotight disconnects;
duotight dis.jpeg

https://www.brewhardware.com/product_p/keg_ball_qd_duo_liquid_tiny.htmLet us know your choices.
:mug:
EDIT: I just went to my bench and put a grooved locknut and o-ring on to a street-elbow. and the remaining threads barely make it through the Fermonster lid..not enough to fit anything at all on the inside.
 
Looks like you bought the street-elbow rather than the regular female/female elbow...my first thought is that you'd need the grooved locknut/o-ring on the outside of the lid and anchor it with an internal female NPT>1/4" barb (which seems to not be easily sourced unless you want brass, or nylon..nylon being unlikely to take the needed torque.) ..and you'd still not be able to connect the hose directly to the diptube.
Going by your pic, it looks like you have room, but if you don't, or if it's too close for your comfort; Rather than reinvent the wheel, you can keep @Dgallo 's excellent original design and just use the low-profile duotight disconnects;
View attachment 839842
https://www.brewhardware.com/product_p/keg_ball_qd_duo_liquid_tiny.htmLet us know your choices.
:mug:
EDIT: I just went to my bench and put a grooved locknut and o-ring on to a street-elbow. and the remaining threads barely make it through the Fermonster lid..not enough to fit anything at all on the inside.
Yes I did indeed buy the wrong type of elbow but not to worry as I have to order a few other bits and pieces and can add the correct type.
For the 6 gallon FerMonster the original setup is working but with the connector pointing upwards the tubing is a bit crimped so the low-profile duotight connectors you linked would be a good option.
However if I do go the elbow route with the correct female/female elbow what are you using to connect it to the barb?

BTW I saw these which might work with the elbow I have but could only find them in 1/2" not 1/4"
extention.jpg
 
I’ve posted this in a few thread and I get quite a bit of messages regarding my process of doing this so I figured I would create a thread on the process. This is by far the cheapest closed fermenting/ transferring system.


So what you will be doing is modifying a fermonter’s solid lid and fitting it with both liquid and gas keg posts and a floating dip tube.Here is the easiest/cheapest way to go;

1) 7 Gallon Fermonster with spigots (makes hydro samples easy) with solid cap $33.99
FerMonster Carboy With Spigot - 7 gal. | MoreBeer

2) Fermontisourus pressure kit $29.99 - you’re buying this to take the parts, the liquid and gas posts and the floating dip tube to use for your solid lid.
Fermentasaurus Pressure Kit | MoreBeer
Optional pressure kit for the Fermentasaurus Concial Fermenter allows you to ferment under pressure, carbonate, and serve all in one vessel!
www.morebeer.com
www.morebeer.com

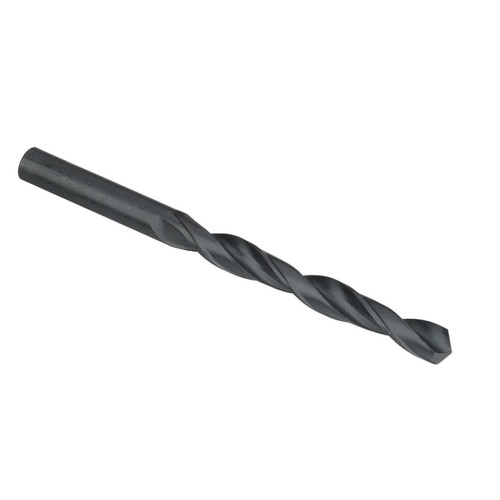
3) 7/16” or 1/2” drill bit so you can drill out the solid cap for the posts. Make sure you measure so that have them far enough a part so both ball lock fittings can go on at the same time but close enough when you maintain the stability of the lid. $2.
drillsandcutters.com

7/16" HSS Black Oxide Jobber Length Drill Bit, Qualtech
7/16" HSS Black Oxide Jobber Length Drill Bit, Qualtech. Find this item and other cutting tools on DrillsandCutters.com.
drillsandcutters.com

4) then you just needs some hose, clamps, and balllock fittings for your transfer lines.

all together you’re looking at just below $70 for a fermenter with closed transfer and pressure dryhoping capabilities. It’s also light weight and incredibly easy and quick to clean


30FEFF3A-3AB0-4993-BAE5-F262FCF3B52B.jpeg


Benefits of doing this verses fermenting in the keg;
1) You will yield a full 5 gallons of trub free beer from each of your recipes helping you become more consistent
2) You now can use all your kegs for serving purposes.
3)You can see fermentation take place which for me is almost as good as watching a fire lol
I have a problem. I received everything to put this together BUT - the gas/liquid out are hard connected to the piece that is supposed to screw on to the ferzilla. See pictures. How can I use this on the fermonster.
 

Attachments

  • connector 2.jpg
    connector 2.jpg
    69.2 KB · Views: 0
  • Connector 1.jpg
    Connector 1.jpg
    63.2 KB · Views: 0
In re the cold crash/suckback questions. I have the space(usually) to put both my Fermonster and the attached keg in a fridge. Has anyone tried using that keg in the same way as some use the balloons full of CO2? I would disconnect the liquid out post. Figure fermonster would be ok it’s the keg I’m more concerned with.

Insert generic apology if this has been covered already.
You certainly could. You just want to make sure it’s at about 3 psi as the psi in the keg will drop fast otherwise and you’d have the keg vacuuming first and pulling from the fermonster
 
Is anyone else getting cracked lids? I’m on my second one. Not over tightening and no more than 5-7psi applied for my transfersIMG_0834.jpeg
 
Is anyone else getting cracked lids? I’m on my second one. Not over tightening and no more than 5-7psi applied for my transfersView attachment 843666
Are you checking your psi constantly. Because over 10 psi will crack it. I haven’t cracked a lid in 3 years since always keeping it below 10.

Next question is how are you cleaning your post if youre siliconing them down ?
 
Before I attempted my own, I read a lot about cracked lids in this thread and maybe I'm wrong but I believe the lids can't take repeated connecting and disconnecting without excessive flexing of the plastic. That's why I went my own "FermHead" route; so I can hold the cross and let my hand take the pressure of reconnecting.
 
Are you checking your psi constantly. Because over 10 psi will crack it. I haven’t cracked a lid in 3 years since always keeping it below 10.

Next question is how are you cleaning your post if youre siliconing them down ?
My regulator is set to 10, so there's no way it's going over, unless my regulator is malfunctioning. And I do not even let it fully pressurize, I connect the gas line every few minutes just to keep my blow off bucket bubbling.

I hot-glued them down to provide a seal right before I put in an imperial stout. I've tried different variations of gaskets but cannot get them to seal to the lid.
Before I attempted my own, I read a lot about cracked lids in this thread and maybe I'm wrong but I believe the lids can't take repeated connecting and disconnecting without excessive flexing of the plastic. That's why I went my own "FermHead" route; so I can hold the cross and let my hand take the pressure of reconnecting.
Yeah, its pretty frustrating. I'm likely going to pickup one of Anvil's stainless bucket fermenters. I can't rely on the Fermonster anymore.
 
My regulator is set to 10, so there's no way it's going over, unless my regulator is malfunctioning. And I do not even let it fully pressurize, I connect the gas line every few minutes just to keep my blow off bucket bubbling.

I hot-glued them down to provide a seal right before I put in an imperial stout. I've tried different variations of gaskets but cannot get them to seal to the lid.

Yeah, its pretty frustrating. I'm likely going to pickup one of Anvil's stainless bucket fermenters. I can't rely on the Fermonster anymore.
What kind of disconnects are you using? Do they go on and off easily? (I'm a stickler for genuine CMB's myself)
 
What kind of disconnects are you using? Do they go on and off easily? (I'm a stickler for genuine CMB's myself)
I have some CMB's and NSF (?). Some are a pain to connect but I do not force them as I know the lid and seal is on the line if I force it. If they do not go on easy I switch to a different one. I just bought new posts for one of my corny kegs and I cannot get the liquid line fitting to connect all, pretty annoying. The posts had good reviews on Amazon, too.
 
I have some CMB's and NSF (?). Some are a pain to connect but I do not force them as I know the lid and seal is on the line if I force it. If they do not go on easy I switch to a different one. I just bought new posts for one of my corny kegs and I cannot get the liquid line fitting to connect all, pretty annoying. The posts had good reviews on Amazon, too.
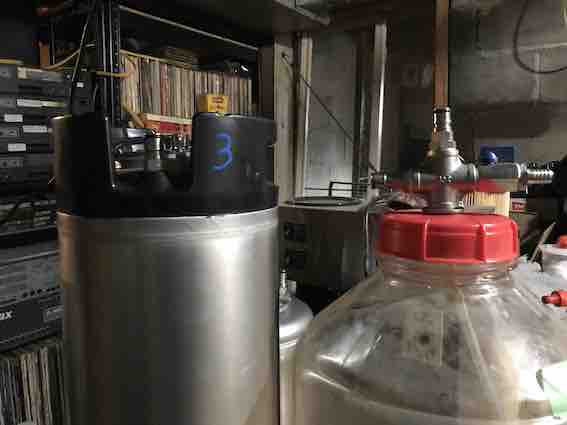
Do you use keg lube? (sorry if that sounds obvious..just trying to cover all the bases). It'd be a shame to see a Fermonster go to waste....if you just want some food for thought, adding the cross and valve and only using a single hole really does take the stress off the lid:
IMG_1593.jpg
 
Do you use keg lube? (sorry if that sounds obvious..just trying to cover all the bases). It'd be a shame to see a Fermonster go to waste....if you just want some food for thought, adding the cross and valve and only using a single hole really does take the stress off the lid:
I do not use keg lube. What do you mean by adding the cross and valve?
 
My regulator is set to 10, so there's no way it's going over, unless my regulator is malfunctioning. And I do not even let it fully pressurize, I connect the gas line every few minutes just to keep my blow off bucket bubbling.

I hot-glued them down to provide a seal right before I put in an imperial stout. I've tried different variations of gaskets but cannot get them to seal to the lid.

Yeah, it’s pretty frustrating. I'm likely going to pickup one of Anvil's stainless bucket fermenters. I can't rely on the Fermonster anymore.
To clarify for you, the regulator does not work the way your thinking. It’s not a spunding valve. When you set it to 10 psi it means the co2 coming out of the co2 tank can’t exceed 10 but doesn’t mean the pressure in the fermenter can’t exceed 10. You need to constantly monitor the reading on the regulator as the temperature changes in both vessels can change the pressure
 
To clarify for you, the regulator does not work the way your thinking. It’s not a spunding valve. When you set it to 10 psi it means the co2 coming out of the co2 tank can’t exceed 10 but doesn’t mean the pressure in the fermenter can’t exceed 10. You need to constantly monitor the reading on the regulator as the temperature changes in both vessels can change the pressure
But how would the pressure in the fermenter exceed the max that the regulator would output? -- the fermenter has no pressure when I started my transfer today. I did peak up at it and if anything it would fall below 10.
 
Sorry..sometimes my brain gets non-linear..
I meant to recommend trying my 'FermHead" version for less lid-stress;
Knowing that the lid is temperamental I'm not sure I want to invest any more money into it. I already have a problem with getting the posts to seal on the lid, in addition to this cracking issue. I'm thinking of going with the stainless bucket from Anvil and calling it a day.

It would be cool if I could get this thing to transfer using gravity, with a spigot towards the bottom.
 
But how would the pressure in the fermenter exceed the max that the regulator would output? -- the fermenter has no pressure when I started my transfer today. I did peak up at it and if anything it would fall below 10.
Temperature changes making the gas expand and Co2 getting knocked out of the beer during transferring
 
I don't own Fermonsters, just use brew buckets, but they've always been on my short list for when I want to change that.

It's not just the fermonsters that suffer from cracked lids. From what I've read, Kegland's All-Rounders seem to have their weak spot in their collar (the lid is made up of a flat disk plus a separate threaded collar). They look to be made of similar material as these one piece lids.

I wonder if using a flat round piece of plexiglass on top of the lid will strengthen it enough and reduce the amount of flex.
 
Mine's not a TC.. It's just a regular NPT tee and close-coupler with a flat SS washer under the tee, and a flat silicone o-ring between that and the the tee (allows you to just tighten it by hand), and on the inside of the lid; a simple grooved locknut and o-ring.
1-gas bulkhead (1/2"NPT)
1-liquid bulkhead (1/2"NPT)
1-ball-valve (1/2"NPT)
1-1/2"NPT>1/2" hose barb
1-1/2"NPT cross
1-1/2"NPT close coupler
1-flat SS washer
1-flat silicone washer
1-1/2" o-ring
1-1/2" grooved lock nut

Just curious Broken Crow. Did you get all of that at Amazon? What is the overall height of your Fermonster with the Fermhead attached?
 
What about just transferring at a lower pressure? You guys seem brave pushing the Fermonsters to 10psi. When I had mine, I never went above 2-3psi when transferring.
I was too lazy to adjust my regulator, I figured I'd just give it bursts of co2 on occasion when the bubbling slowed down. Would be cool if someone fabricated a metal lid, or 3d printed one that is stronger.
 
I was too lazy to adjust my regulator, I figured I'd just give it bursts of co2 on occasion when the bubbling slowed down. Would be cool if someone fabricated a metal lid, or 3d printed one that is stronger.

Thought the same thing yesterday. A 3D printed lid would be stronger, but I'd prefer a metal one though 🤘
 
Personally, I’d rather the lids crack at greater than 10 psi. I think of it as a fail safe. No one gets hurt and no beer is lost. A stronger cap may cause knuckle heads to push the psi and have the seam in the fermenter fail
 
Last edited:
Personally, I’d rather the lids crack at greater than 10 psi. I think of it as a fail safe. No one gets hurt and no beer is lost. A stronger cap my cause knuckle heads to push the psi and have the seam in the fermenter fail


Can't argue that. Speaking for myself, I've thought about buying a Fermonster or two and do the "Fermhead" mod like Broken Crow's. I'd keep the new ones (way) under 10psi like I did my old ones. A stiffer lid is just peace of mind for me. I don't like to tempt fate.


But wouldn't that be a sight to see. A Fermonster full of beer failing, say, around 35-45psi. Hello, Mythbusters?
 
I ended up cracking my vessel doing a (not so attentive) 3 psi pressure transfer with a clogged dip tube. It bulged out the bottom. Worked great up until then :).
Someday I'll probably buy another vessel for small batches since I still have uncracked lids...
 
Just curious Broken Crow. Did you get all of that at Amazon? What is the overall height of your Fermonster with the Fermhead attached?
Sorry for the delay... I don't think I'd ever measured the height which is a major downside for many (I don't have a ferm-chamber), so i just went and checked;
It looks to be 25-1/4", so not a lot taller than a corny;
IMG_1594.jpg

I try and buy NPT fittings in batches when I can find a good price from a reliable source and being in Canada, amazon is not reliable...The prices for parts from the US are insane on there...heck; even the Flotit costs $39.99 on the .ca site. If I coud, I'd buy everything from @Bobby_M he's got all the parts. As it is the posts came from a highly reliable Aliexpress dealer;
https://www.aliexpress.com/item/330....order_list.order_list_main.10.10b11802bbHZwU
..most of the bits are from Canadian sources.
:mug:
 
I wonder if using a flat round piece of plexiglass on top of the lid will strengthen it enough and reduce the amount of flex.
I really like that idea! If I ever crack a lid I think I'll try it.
I don't have any brewbuckets, but I was considering milk-cans (inspired by Bracconaire) and this Fermhead is supposed to be "One Closed-Transfer System To Rule Them All" :p It's not exclusive to Fermonsters and you can put it on any vessel you can drill a 13/16" or 7/8" hole into as long as it holds pressure...of course I also have one on a 2" TC fitting for a sanke keg so I can use that without having to weld on any oversize TC fitting.
:mug:
 
Fermenting in the serving keg is by far the easiest and my go to for 99.9% of batches. I only broke out a separate vessel since i am doing an imperial stout and conditioned on cacao nibs. If you haven’t tried it, try it.
 
Fermenting in the serving keg is by far the easiest and my go to for 99.9% of batches. I only broke out a separate vessel since i am doing an imperial stout and conditioned on cacao nibs. If you haven’t tried it, try it.
I personally do not get to brew enough to only yield 4 gallons of beer. That’s my down side to same vessel serving. At least in 5gallon kegs.
 
I personally do not get to brew enough to only yield 4 gallons of beer. That’s my down side to same vessel serving. At least in 5gallon kegs.

If you have enough spare kegs, you could just do an 8 gallon batch split to two 5 gallon kegs to help tie you over until you're able to brew again. It's cheaper than buying a 6 gallon keg.
 
Fermenting in kegs is really nice. You can ferment and dry hop under pressure and kegs can handle A LOT of pressure, so it's less to worry about. They are also crazy durable and last forever. I use a 6 gallon keg and end up with at least 4.5 gallons of finished beer when I dry hop with 6 oz. Like mentioned, you can also serve out of the same keg you ferment in (although I'm still not sure if keeping beer on the trub for months is a bad thing, but that's another story). Can't complain.
 
Is anyone else getting cracked lids? I’m on my second one. Not over tightening and no more than 5-7psi applied for my transfers…

This may be anecdotal, but I left one of my lids in StarSan for longer than I intended and it cracked rather easily on its next use.

Is it possible that you are doing this?
 

Latest posts

Back
Top