• Please visit and share your knowledge at our sister communities:
  • If you have not, please join our official Homebrewing Facebook Group!

    Homebrewing Facebook Group

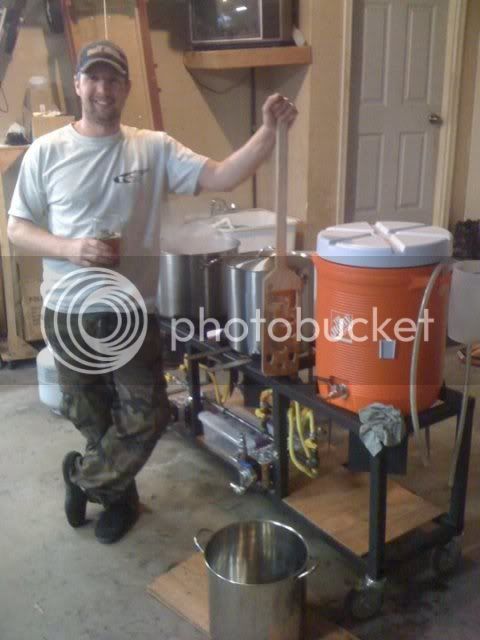
The life story of my brewery

Homebrew Talk

Help Support Homebrew Talk:

This site may earn a commission from merchant affiliate links, including eBay, Amazon, and others.
Gosh all these MN people!

I am Just Past the outlet malls in Albertville. I also have a Homebrew Club in Monticello, we pull quite a few from the cities. You guys on the Midwest Forum at all?
 
Gosh all these MN people!

I am Just Past the outlet malls in Albertville. I also have a Homebrew Club in Monticello, we pull quite a few from the cities. You guys on the Midwest Forum at all?

I'm in Maple Grove so just south of ya. I've watched your brewery build progress over in the Midwest forums, just awesome by the way.
 
Ok, Here's the pieces and parts:
Estimation of total spent on card: $630.00
(I'm sure I forgot something so I'll edit the post if something comes to mind)

The steel tubing:
1 1/2" x 1 1/2" 14 gauge
(4 count) 62" pieces
(8 count) 17" for the vertical legs
(8 count) 13.5" for the corners and keg holders
(12 count) 7" wide x 8" tall plates for the burner mounts.
I had a 3/8" slit plasma cut into each, I think it's 4" tall
Cost: Beer

Ebay casters from sescasterco:
"Caster 5". Total Lock Threaded Stem. Rubber Wheel"
Cost: $8.29 a piece
They require a 1/2" hole, so have a sharp drill bit.
http://cgi.ebay.com/ws/eBayISAPI.dll?ViewItem&item=150385618042&ru=http%3A%2F%2Fshop.ebay.com%3A80%2F%3F_from%3DR40%26_trksid%3Dp3692.m570.l1313%26_nkw%3D150385618042%26_sacat%3DSee-All-Categories%26_fvi%3D1&_rdc=1

Stainless washers and stainless nylon lock nuts for the casters - hardware store

BG-14 burners
Supplier: Agrisupply www.agrisupply.com
http://www.agrisupply.com/product.asp?pn=64494
Cost: $29.95 each

And the High pressure adjustable regulator
http://www.agrisupply.com/product.asp?pn=64484&sid=&eid=
Cost: $19.95

And the LP gas hose assembly
http://www.agrisupply.com/product.asp?pn=36108&sid=&eid=
Cost: $5.99

Hardware store:
This hardware is to connect the burner to the plates. There is a bit of room between the 7" wide plates and the burners. It was a slight mistake but it ends up working out well as it leaves some room between the flame and the burner mounts.
(12 count) 1 1/2" stainless bolts (M3 pitch)
(12 count) 1/4" aluminum spacers
(24 count) stainless fender washers

I went with two "Little Chugger" pumps from Ebay. They are like the march pumps but were cheaper due to a manufacturing flaw. I can't remember the exact cost but I think they were in the ballpark of $80-$90 each.

I just used a couple small plates with holes to mount the pumps to the frame.

For pump switches, I'm going to run a "double ended" extension cord from a GCFI outlet in my garage into a plastic shoe box mounted to the bottom of the frame. I'll have two remotes and receivers - one for each pump. I got the Skylink WS-100 from Amazon:
http://www.amazon.com/Skylink-WS-100N-Wireless-Control-Channel/dp/B00008X5D5/ref=sr_1_4?ie=UTF8&qid=1297129088&sr=8-4
Cost: ~$18.00 each

Three cans of Rustoleum High Heat flat black, again from Amazon:
http://www.amazon.com/Rust-Oleum-248903-Automotive-12-Ounce-Degree/dp/B003CT4AKC/ref=sr_1_1?ie=UTF8&s=hi&qid=1297129164&sr=8-1
Cost: $8.09 each

I'll let Paul post the pieces for the manifold, the yellow flex-gas lines, the brackets for holding the manifold to the stand and the parts that connect the lines to the burners. These last fittings were a pain in the butt to find. We ran 1/2" black gas piping, two T's one elbow, three valves, three short nipples... I think the manifolds were about $100.

I also dropped between $50 and $100 at the hardware store and the Depot on misc. crap like angle grinder brushes, stock steel pieces (straps and angle) both 14 gauge and 1 1/2".

Tools to have on hand:
Welder
Welding mask
Welding gloves
90 degree magnets
Vice grips or quick clamps
Wire Brush
Side cutter
Angle grinder (cutting wheels, grinding disks and knotted brushes)
Tape measure
Quick square
A marker or 3
Drill
Drill bits
*Hearing Protection
*Eye protection and a face mask
 
Last edited by a moderator:
That is one sweet setup! Kudos for having a step-by-step pictorial of your brew stand build.

I have a random question for you. I have a detached garage in which I plan on turning into a brewspace. What did you do to prepare the space before the build? My concern is sanitation. Did you powerwash the garage at all? Bleach floors? Run an ion filter?

Maybe I am being paranoid, but I plan on putting my grain and other items in there for storage in a space that is currently occupied by oil spills covered in cat litter and other fluids used for servicing the car.

Thanks :mug:
 
Thanks Danbreeze,
I didn't do anything to the space and my garage floor is probably just as dirty as yours. I keep my grain in my refrigerator that's clean and keep all my stuff covered with plastic garbage bags. I'm sure to rinse and sanitize everything before use, obviously, but as long as you keep your stuff off of the floor, you should be fine. I don't wash my floor or anything. I sweep or shop-vac it every once in a while but that's it. I just clean and sanitize the stainless table in there and work off of that.

My garage floor is absolute crap and needs to be taken out and replaced but that's probably not ever going to happen. If it was in good shape, I'd prep it and epoxy coat it or something. There has to be a way to prep concrete so that stuff will work, but because it's not an option for me, I haven't looked into it.
 
That is good to know thanks. I plan on putting epoxy on the floors and putting in insulation to shield the temp.

How about ventilation? Do you open/crack the garage door when you brew or have a way of letting the fumes escape?
 
Yeah, I usually crack the garage door every now and then depending on how cold it is outside. If it's -17 like it is today, I'll only crack it only a few times as needed. If it's summer-ish and not extremely windy (I effing hate wind) I'll just leave the garage door open.
 
HA! Thanks. :)
I would see if you can borrow or rent one first - unless you think you'll need it quite a bit more.
 
Walter filter? Up in these parts, we call Walleye "walters"..
7lb 3oz. 27"
3189_77830878845_596098845_1660724_717754_n.jpg

Enough bragging...

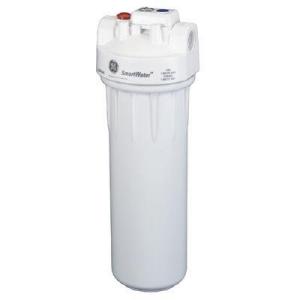
I think I got this one from the Depot:
a52f9ee5-e3f3-411c-a447-d27cfd58e7a0_300.jpg

http://www.homedepot.com/h_d1/N-5yc1v/R-100471282/h_d2/ProductDisplay?langId=-1&storeId=10051&catalogId=10053
There are a few there like it and three or four different filters you can throw in.
I'll be marking a piece of masking tape on the filter cup wit tick-marks to keep track of how many times it's been used.
When the water starts tasting bad again, I'll know the life of the filter.
 
Hey Gridlocked,

It's been a while since I have visited your thread...nice work! The rigs look awesome. Now I can't wait to start on mine. I'm working crazy hours, so my progress in my basement has once again slowed to a crawl. I still have the drop ceiling and carpeting to complete. I also have some odds and ends like building shelving (pantry/closets) and building the wine racks/beer shelves in our wine/beer cellar. Too much to do....too little time. :drunk: Against my better judgement and against my wife's wishes, I started a keezer build. I am so frickin' burned out with the basement build that I needed to change gears a little. I got my hands on a new 7 cf GE freezer on CL for cheap last week, so I started the build on Sunday and also started a thread. I am soooooo sick of bottling, so the keezer has become a priority at this point. I'm building it to match the rustic decor in my bar, check it out if you get a chance. I promised my wife that I would have the rest of the basement done this spring, at which point I will begin my single tier build. Your build turned out spectacular, so I may have to steal some ideas from you. :D Again, awesome job!
 
Very nice build. I was planning on putting together a weldless stand in the somewhat near future, but the more I look at this thread, the more I guess I need to buy a welder, teach myself to weld and do it right.

...of course this is all contingent on buying a house. We are renting ATM and our lease is up in July. I am hoping we can find just the right place where I can have a workshop for all my projects I need to get caught up on.
 
Thanks guys!
Hoppopotomus - your project is awesome! Great craftsmaship and way to stick with the theme!!! If you ever fall into some extra cash or just get sick of that machinery making all that noise, let me know and I'll help you out quieting it all down. :)

Mr.Goodwrench - I would say that the purchase of a house trumps a single tier system, but that's up to you. It's spendy and I'm only able to drop the extra cash because of a kick ass year end bonus. It is damn nice having my own garage though! Keep in mind I'm sure you can bolt together a stand that's plenty strong. Even these are SIGNIFICANTLY over built for what we'll use them for.

Update: I picked up a couple remote control switches from amazon and wired plug ends onto my Chugger pumps. I bought all the crap to put a GFCI and light switches in but that crap was flipping expensive! So now I'm taking a clear Rubbermaid shoebox size storage tote with snap down lid and two remote switches so I can turn my pumps on and off with a remote. I'm going to run a double ended extension cord from a GFCI outlet in my garage to the stand, up and into the bottom of the tote and have all my connections in there. They will be held to the side of the box with velcro. I'm going to silicon all of my connections as an extra precaution.

I'll try to add pictures soon

Easy-peezy lemon squeezy.
 
Yeah, the house is priority #1. Of course, once we have the house, SWMBO's scrapbook studio will be the first order of business then I can get down to getting my brewery set up. I'm sure that I will probably put a weldless stand together at least for a temporary basis once I am in there. We are renting a house now ~ we moved down here from NY last summer for a new job and decided to rent for a year so we can find the right place to buy instead of just the first thing we found. Meanwhile, I'm gonna start getting other things together as I find them (keggles, etc.) Definitely looking forward to the new pics.
 
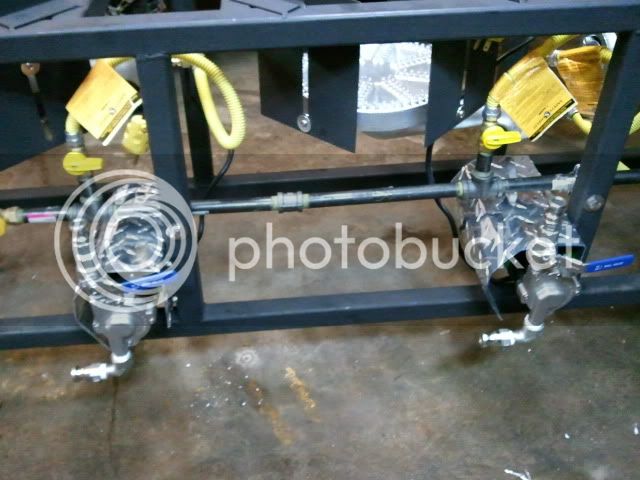
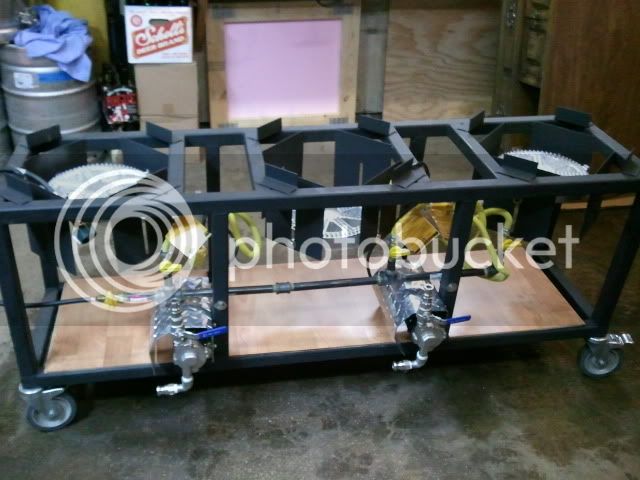
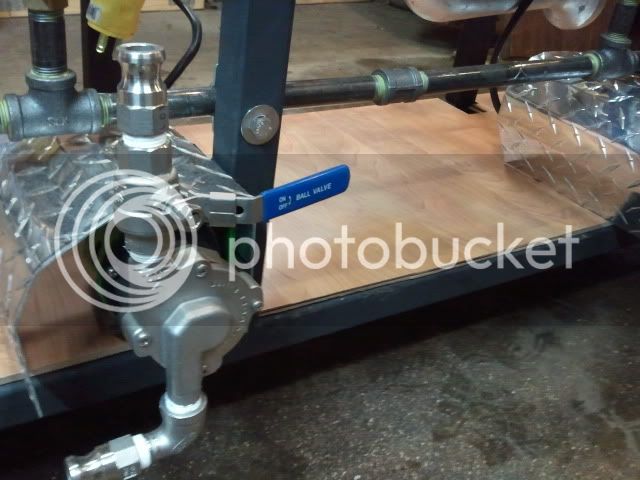
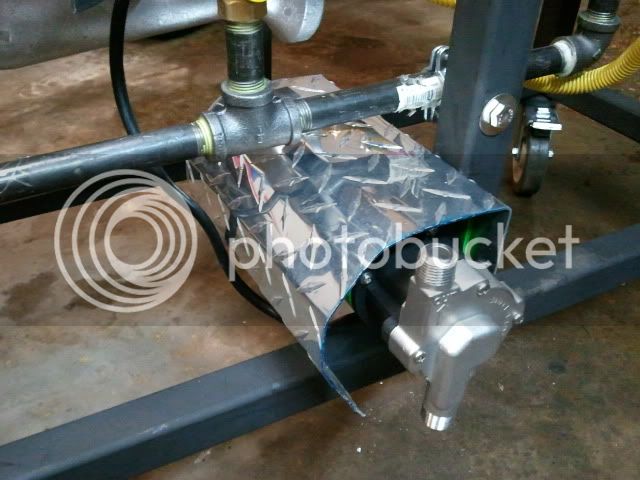
I was able to get some work done tonight, finally. With my hands, a bar of metal and some quick clamps, I bent up some splash guards from some aluminum diamond plate, mounted the pumps and put in some click-together laminate flooring that I had laying around. The theme is an old woody-style hotrod. I didn't have time to mount and play with the pump switches but I'm close. It looks like I need to get used to taking pics with my new phone.

2011-02-21225733.jpg


2011-02-21231239.jpg


2011-02-21235510.jpg


2011-02-21235530.jpg
 
Nice man. Pump shields look great! And the laminate shelf underneath is brilliant. Got me thinking now, would be nice to have a shelf under there.
 
Thanks boys!
Hop, I wish I had your woodworking skillZ! Welding is easy with a bit of practice. Paul welded most of his own stand together and hadn't done any before that.
 
Thanks boys!
Hop, I wish I had your woodworking skillZ! Welding is easy with a bit of practice. Paul welded most of his own stand together and hadn't done any before that.

I had never touched a welder before this and its fairly easy to pick up and make two pieces of metal stick together. It just takes a bit of practice and experience to make it look pretty. We just used the angle grinder a lot more on mine to clean it up :D

I figured I did pretty good having only set myself on fire once and fused only one tip.
 
Was up until 1:30 this morning working on the project. Man, I'm too old for this. I got the pump switches mounted and into their little plastic box. I should have taken a picture of the set up. I'll add that later. I also played around with the burners and think I have them adjusted well enough to brew with the thing this coming weekend.

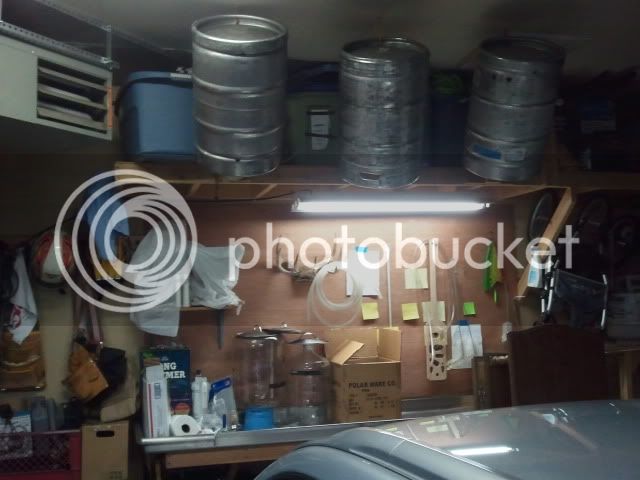
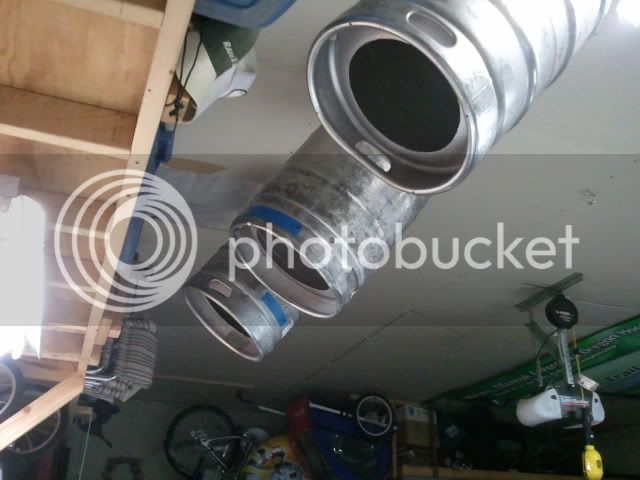
I spent some much needed time cleaning and organizing my garage. Put hooks into the ceiling as temporary keg storage and poked holes into the HLT and boil kettle. I didn't have time to clean up the holes or install the fitting and I've still got some research and figuring to do for the MLT, how I want to set up my fly sparge arm and where and how I want to install my boil kettle recirculation arm.

2011-03-01010451.jpg


2011-03-01010530.jpg
 
Looks great.....Can't wait to see the updated pics. and the finished all grain system when complete. You do realize that I am stealing all of your ideas for this build. :D It's gonna be my "summer project". In the meantime, I'll continue with extract brewing. BTW....Nice rack above the workbench....looks like the one I shot this year. :mug:
 
Thanks man! Me too! It looks like I'll be pulling a late night this week to get a batch made for an April "contest" that I put together.

As far as the stand goes, I was thinking about putting a DIY kit together for the stand that I built and selling them, so if you want either the plans or the kit, let me know. You should be able to build it fairly question free from the info that I've posted.

As far as the rack goes, thanks! It's a 1/4" short of a 10. Got him opening morning this past year, 130 yards dead-nuts on through both shoulders. He was beautiful.
 
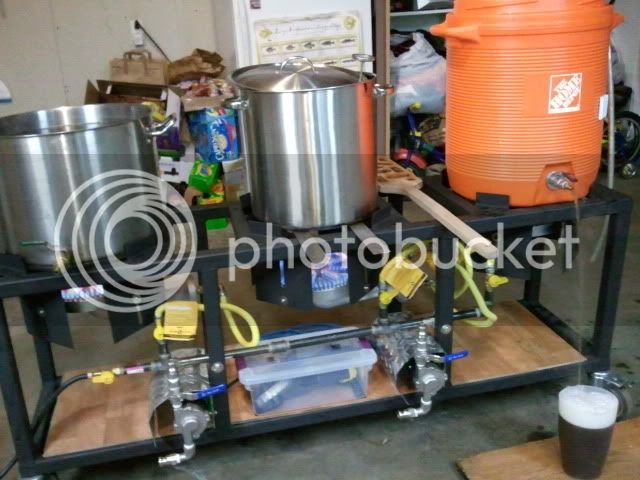
I was finally able to USE my brew stand/cart/thing last night! During the session I was also able to spend some time working on the boil keggle. First pics, then details:

2011-03-01215034.jpg


Even though it's not totally done, the stand is absolutely awesome! Right after striking up the burner there was the smell of burning oil and some popping of the metal as it got hot. The oil smell was coming out of the inside of the tubing from the manufacturing process. I drilled small holes in all of the tubing that ended up closed off to allow the thing to breathe but most of this smoke was coming out of the end of the long pieces.

It is so much more solid and a lot safer than the old system that I had. Not only is the cart perfectly stable, it's lower to the ground. I had to lower the burner a little to allow for the right flame but I was able to perfectly dial in the flame height with the regulator which was EXTREMELY nice. I didn't use the pumps as I still need to do some flushing and cleaning (and hooking up the silicon tubing) but they're pretty much ready to go.

2011-03-01232002.jpg


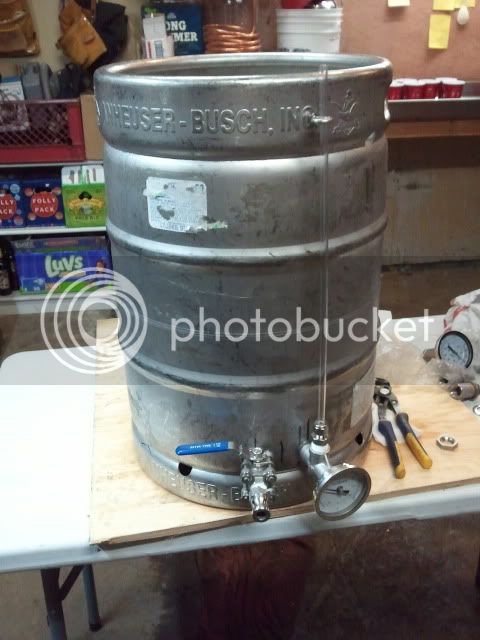
I used the dremmel and a grinding bit to clean up the holes for the boil kettle and installed the ball valve and thermometer and sight tube. I need to get the parts for the pick-up tube on the inside and for the wort recirculation tube that I will be using to cool the wort faster and persuade all of the break and hop material into the center of the keg.

2011-03-01211804.jpg


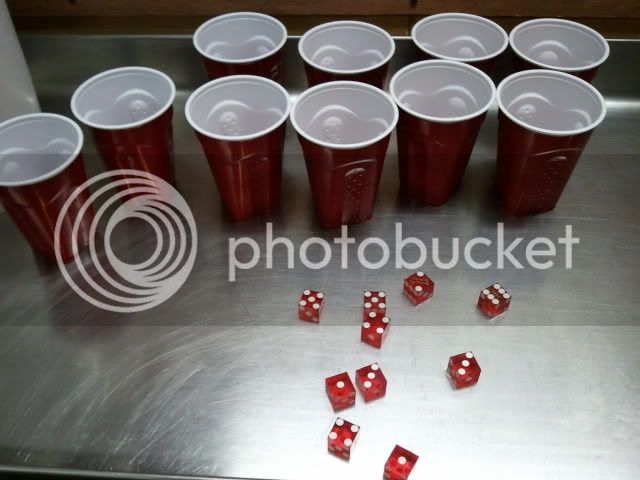
What's the dice and cups, you ask?
 
I presume that the fittings for you BK are weldless? If so, where did you get them. I have 3 kegs and started polishing them a while back....then I started the keezer build and got side-tracked. The keezer should be done in the next 2 weeks, so then onto the brewing rig and outfitting the kegs for a HLT/MT/BK. I most likely will go with Bobby M...mostly because I have learned so much about brewing by watching his brewing videos. I would like to cross compare prices, however, but even if he is a little higher I'll go with his company.

Are you gonna polish those bad boys up or leave them "natural"?
What exactly are the cups and dice for?

When will the maiden voyage be happening for the entire system in it's fully functioning state? Looks awesome so far! :mug:
 
Yep, weldless fittings from bargainfittins.com. I would highly recommend them as all of my experiences have been great. Their prices are awesome. Let me know if you want the links of what I got.

It's more important to me to be able to use these things than worry about what they look like so, for now anyway, I'm using them as-is. I may clean them up down the road but time will tell. I'm a pretty lazy bastard and once something is working I'm usually doing something else and don't go back to it. I took a standard steel wire angle grinder wheel to the first keg and had to repassivate the stainless and that whole experience scared me, so unless I can find a stainless angle grinder wheel, I'll probably leave them alone.

dice cups explanation here: https://www.homebrewtalk.com/f14/my-spring-ipa-challenge-229307/

Not sure as to when I'll have it up and functional - this weekend should be a good sign of when. I have an ice fishing tournament on Saturday morning and just found out that my wife is taking my kids to her parents house and not returning until mid-day on Sunday! So, I'm planning two back-to-back batches on Saturday evening and night and working on the kegs the entire rest of the time!!! I'm so flipping pumped!
 
Your stand is looking really good. I like the height that you chose. I built mine about a year ago and kept it really low because I am a GIANT LEPRACHAN. lol Your stand design is almost identical to mine in regards to dimensions. I am going all electric and that portion isn't done yet. I have pics but I am waiting until the thing is done so I can put together a build thread of my own. I'm kinda in limbo right now, living in one state and working in another. Hopefully by summer life will be back to normal and I can get back to brewing and finish my set up.
 
Thanks Fujieagle!
The height was Paul's idea and I'm glad he came up with it! It's so nice to be able to look into the top of the kegs (although I have not used them yet) or stir the MLT without having to step onto a ladder or step-stool.

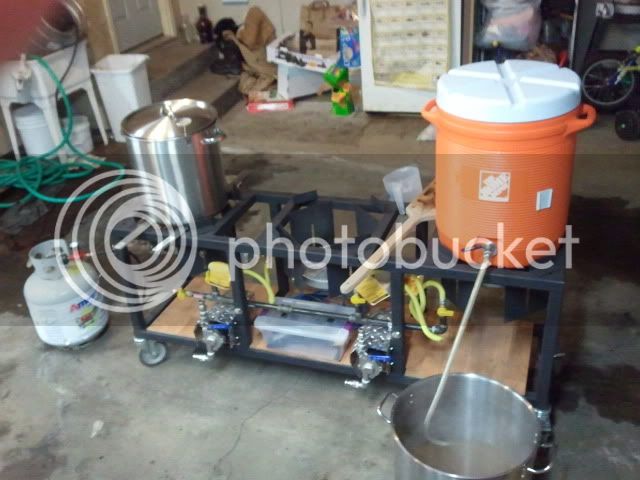
I have gotten three six-gallon batches through it so far and I love it a little more each time. I have a few hours of keg-work to do before I can really use all of it, so I'm making it work with the equipment that I already have. This past Saturday night I brewed a Janet's Brown and a Honey Pale (that turned out super dark) and was able to do more than one thing at a time. SO Slick! My old 7.5 gallon kettle (middle burner below) is a bit too small for these burners so I threw a couple pieces of steel across the stand for stability. But, even with the middle burner going, the tubes near the cooler never got hot to the touch. We were checking every few minutes. I only had the burner on for a few minutes - until the kettle on the left was cooled.

2011-03-05213518.jpg


197122_10150157983951063_674451062_8749747_5130914_n.jpg
 
Back
Top