And I would have come up and helped, if you had asked!
You are using an out of date browser. It may not display this or other websites correctly.
You should upgrade or use an alternative browser.
You should upgrade or use an alternative browser.
Still alive - just tackling a HUGE DIY
- Thread starter Jester369
- Start date

Help Support Homebrew Talk:
This site may earn a commission from merchant affiliate
links, including eBay, Amazon, and others.
ScotBrew
Well-Known Member
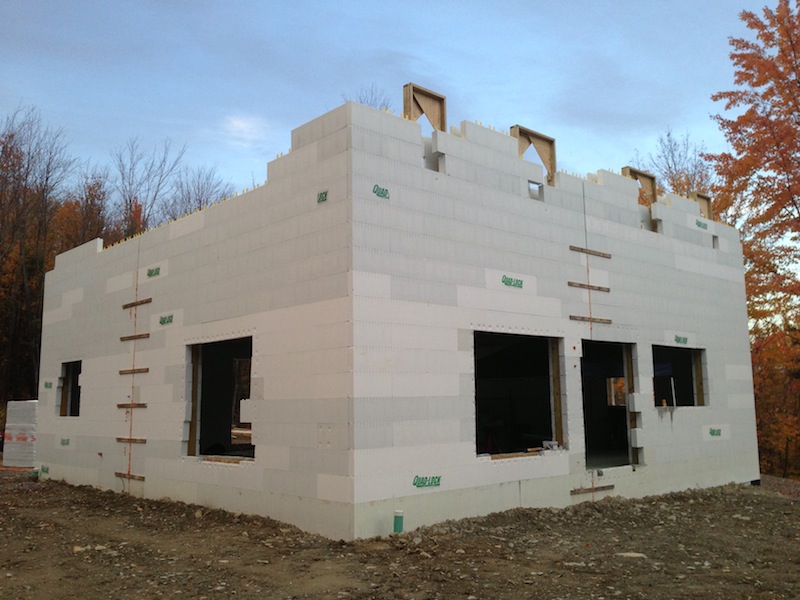
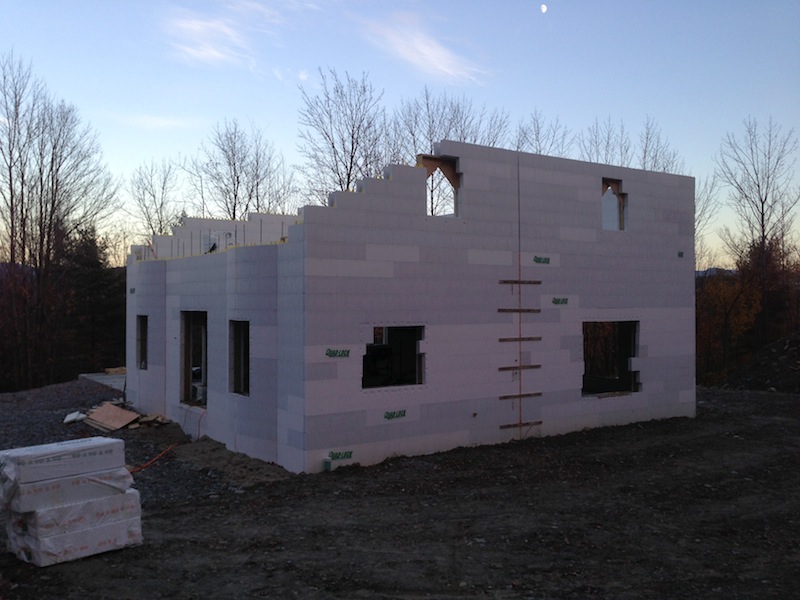
I was finding it hard to find some sort of perspective on the size of the house and thought it looked small. Then when you're taking pics at 'ground' level or inside you get an idea of just how big it is!
Looks really good. Now that I've seen the back fill getting done you really get an idea of what a house is going to look like.
Looks really good. Now that I've seen the back fill getting done you really get an idea of what a house is going to look like.
OP
OP
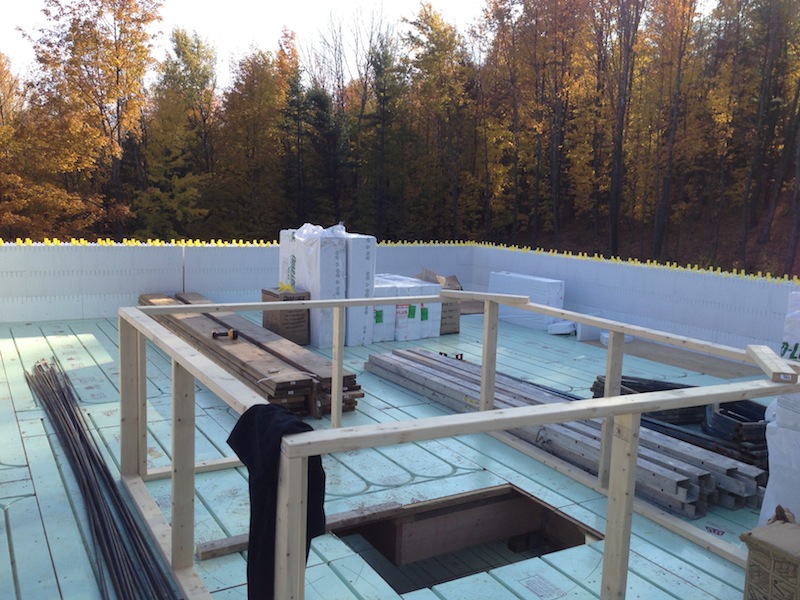
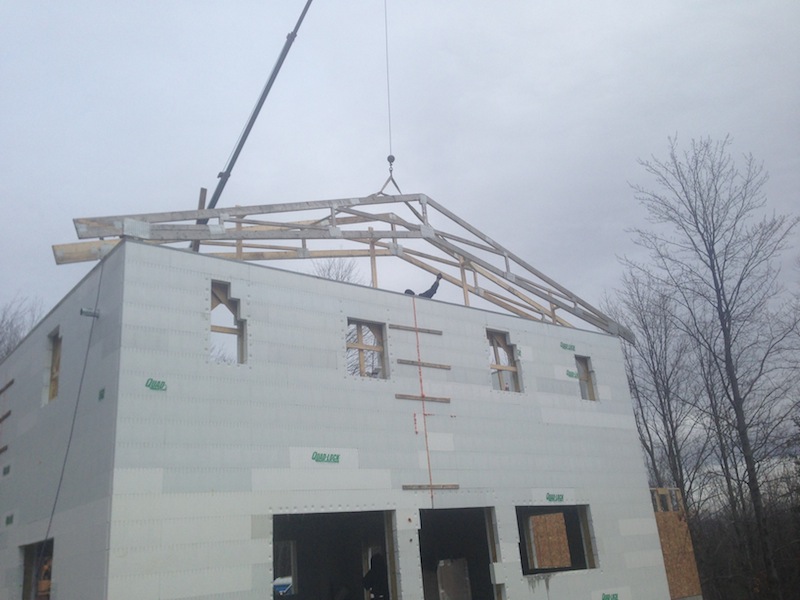
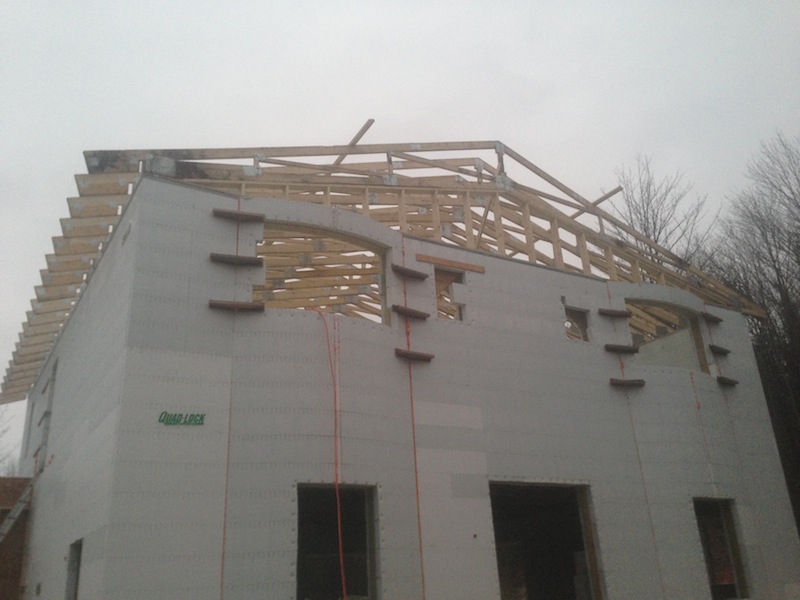
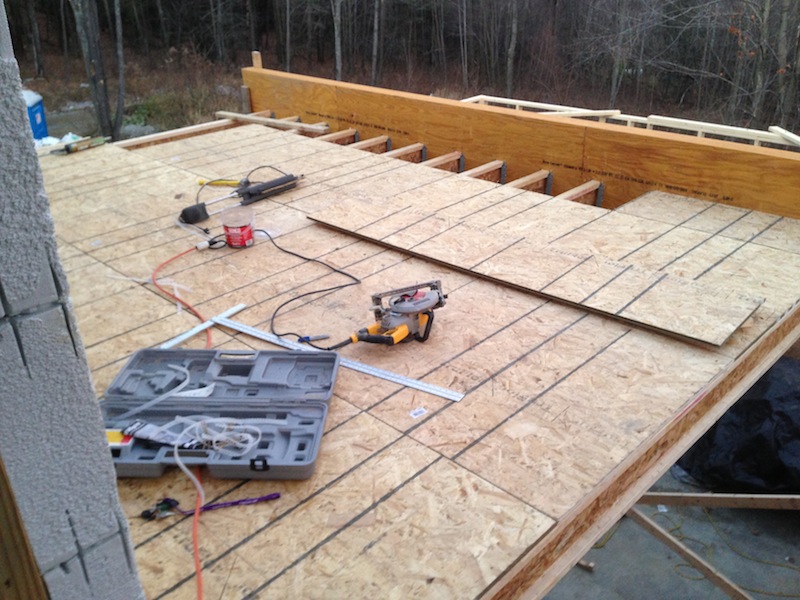
Next, I had a crane lift up the subfloor for the second floor - remember where I said they were 110 lbs a sheet? Yeah, no way this dog was up for that! Installation commenced:
Aaaaaand back to stacking. By now I was getting pretty good at it, not that it is particularly difficult to do. Actually, if it wasn't for the curved bits it would have been downright easy!
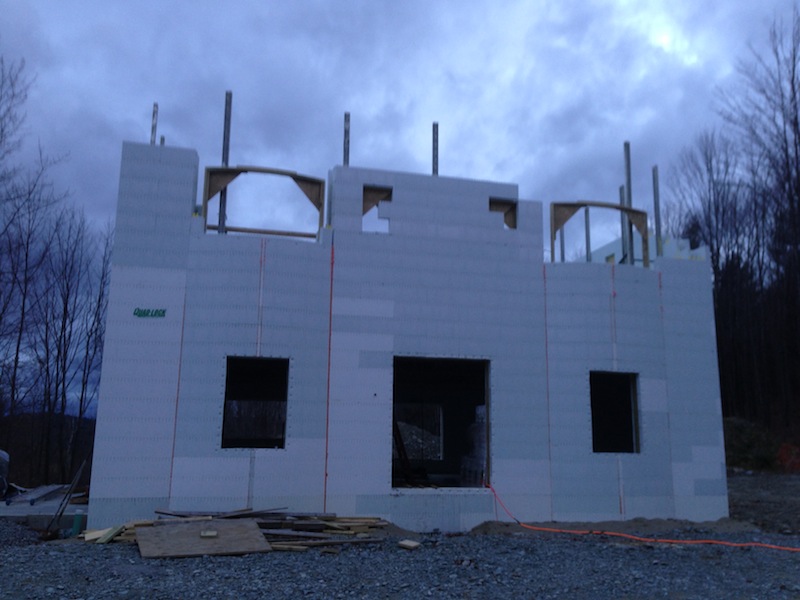
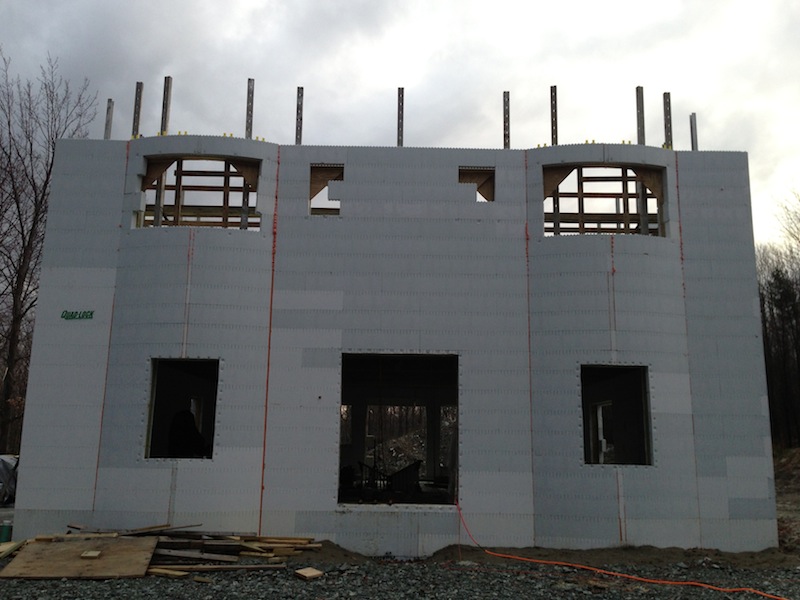
Aaaaaand back to stacking. By now I was getting pretty good at it, not that it is particularly difficult to do. Actually, if it wasn't for the curved bits it would have been downright easy!
OP
OP
I was finding it hard to find some sort of perspective on the size of the house and thought it looked small. Then when you're taking pics at 'ground' level or inside you get an idea of just how big it is!
Looks really good. Now that I've seen the back fill getting done you really get an idea of what a house is going to look like.
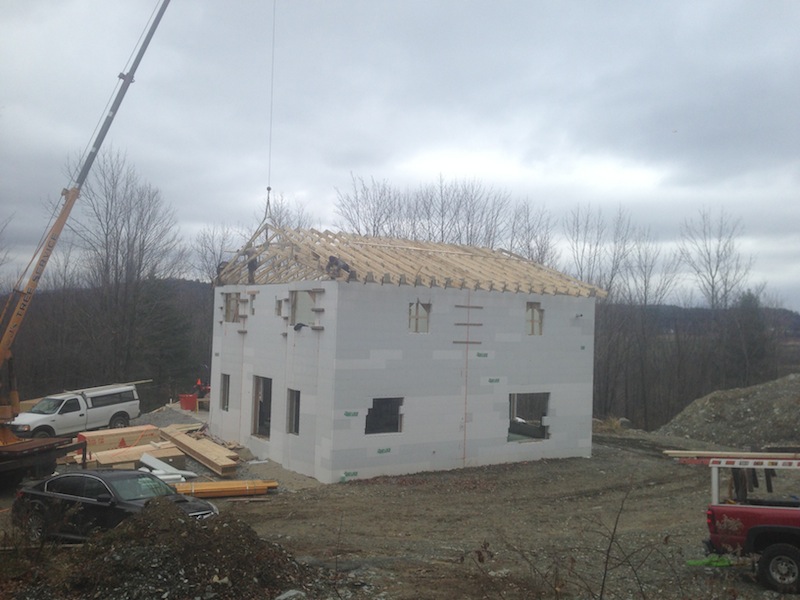
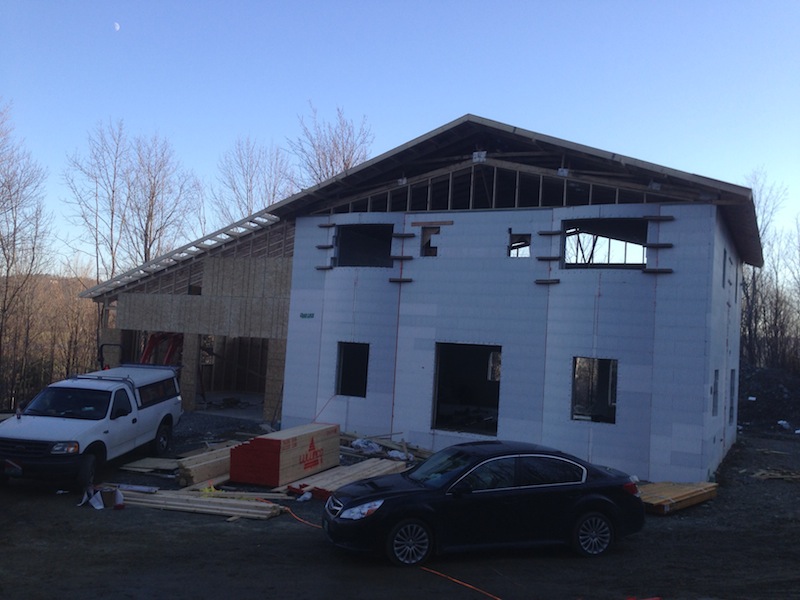
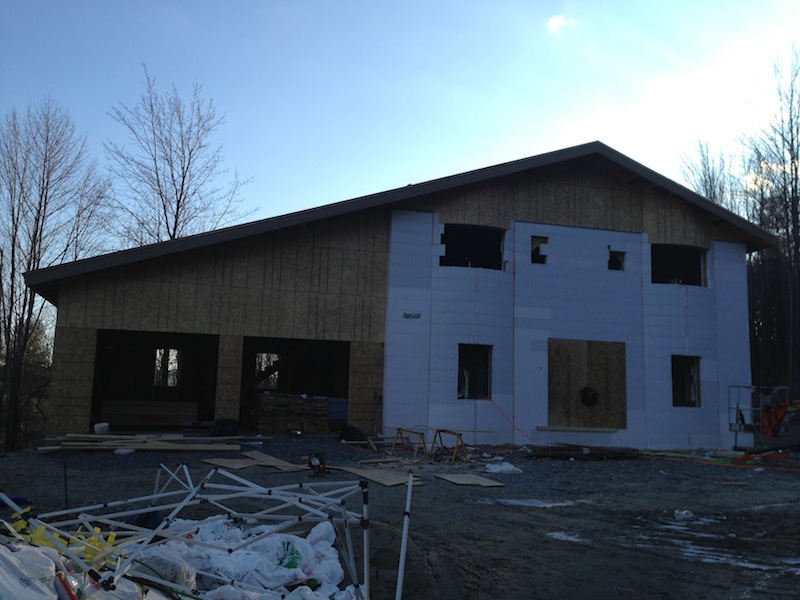
Yeah, from a distance it does look small - then you stand next to it! It's about 28 feet from grade to roof peak, 2 feet short of the max allowed in the area. It ended up being so tall because A) I needed a full 8' ceiling in the basement for the man cave B) the first floor has 9' ceilings and C) that floor truss is 26" deep!
And for additional perspective, that front door is 8' x 6'
OP
OP
And I would have come up and helped, if you had asked!
That would have been a hefty commute!

Hang Glider
Beer Drinker
I suspect plenty of closet space has been designed in...(cough, cough...)


$20.94
$29.99
The Brew Your Own Big Book of Clone Recipes: Featuring 300 Homebrew Recipes from Your Favorite Breweries
Amazon.com


![Craft A Brew - Safale S-04 Dry Yeast - Fermentis - English Ale Dry Yeast - For English and American Ales and Hard Apple Ciders - Ingredients for Home Brewing - Beer Making Supplies - [1 Pack]](https://m.media-amazon.com/images/I/41fVGNh6JfL._SL500_.jpg)
$6.95 ($17.38 / Ounce)
$7.47 ($18.68 / Ounce)
Craft A Brew - Safale S-04 Dry Yeast - Fermentis - English Ale Dry Yeast - For English and American Ales and Hard Apple Ciders - Ingredients for Home Brewing - Beer Making Supplies - [1 Pack]
Hobby Homebrew


$76.92 ($2,179.04 / Ounce)
Brewing accessories 1.5" Tri Clamp to Ball Lock Post Liquid Gas Homebrew Kegging Fermentation Parts Brewer Hardware SUS304 Brewing accessories(Gas Hose Barb)
chuhanhandianzishangwu


$19.99
$22.99
How To Brew: Everything You Need to Know to Brew Great Beer Every Time
Simon & Schuster Digital Sales LLC


$10.99 ($31.16 / Ounce)
Hornindal Kveik Yeast for Homebrewing - Mead, Cider, Wine, Beer - 10g Packet - Saccharomyces Cerevisiae - Sold by Shadowhive.com
Shadowhive


$28.98
Five Star - 6022b_ - Star San - 32 Ounce - High Foaming Sanitizer
Great Fermentations of Indiana

$479.00
$559.00
EdgeStar KC1000SS Craft Brew Kegerator for 1/6 Barrel and Cornelius Kegs
Amazon.com

$172.35
2 Inch Tri Clamp Keg Manifold With Ball Lock Posts, Pressure Gauge, PRV (0-30 PSI) – Homebrew, Fermentation, Kegging System
wuhanshijiayangzhiyimaoyiyouxiangongsi


$719.00
$799.00
EdgeStar KC2000TWIN Full Size Dual Tap Kegerator & Draft Beer Dispenser - Black
Amazon.com


$53.24
1pc Hose Barb/MFL 1.5" Tri Clamp to Ball Lock Post Liquid Gas Homebrew Kegging Fermentation Parts Brewer Hardware SUS304(Liquid Hose Barb)
yunchengshiyanhuqucuichendianzishangwuyouxiangongsi


$176.97
1pc Commercial Keg Manifold 2" Tri Clamp,Ball Lock Tapping Head,Pressure Gauge/Adjustable PRV for Kegging,Fermentation Control
hanhanbaihuoxiaoshoudian

$44.99
$49.95
Craft A Brew - Mead Making Kit – Reusable Make Your Own Mead Kit – Yields 1 Gallon of Mead
Craft a Brew


$58.16
HUIZHUGS Brewing Equipment Keg Ball Lock Faucet 30cm Reinforced Silicone Hose Secondary Fermentation Homebrew Kegging Brewing Equipment
xiangshuizhenzhanglingfengshop


$11.99
DERNORD 1/2 Inch Stainless Steel Quick Disconnect Set - Beer Brewing Connector Kit (Barb Female/FPT Male)
denuodianqiyouxiangongsi

$7.79 ($7.79 / Count)
Craft A Brew - LalBrew Voss™ - Kveik Ale Yeast - For Craft Lagers - Ingredients for Home Brewing - Beer Making Supplies - (1 Pack)
Craft a Brew


$53.24
1pc Hose Barb/MFL 1.5" Tri Clamp to Ball Lock Post Liquid Gas Homebrew Kegging Fermentation Parts Brewer Hardware SUS304(Gas MFL)
Guangshui Weilu You Trading Co., Ltd

$33.99 ($17.00 / Count)
$41.99 ($21.00 / Count)
2 Pack 1 Gallon Large Fermentation Jars with 3 Airlocks and 2 SCREW Lids(100% Airtight Heavy Duty Lid w Silicone) - Wide Mouth Glass Jars w Scale Mark - Pickle Jars for Sauerkraut, Sourdough Starter
Qianfenie Direct

$22.00 ($623.23 / Ounce)
AMZLMPKNTW Ball Lock Sample Faucet 30cm Reinforced Silicone Hose Secondary Fermentation Homebrew Kegging joyful
无为中南商贸有限公司
OP
OP
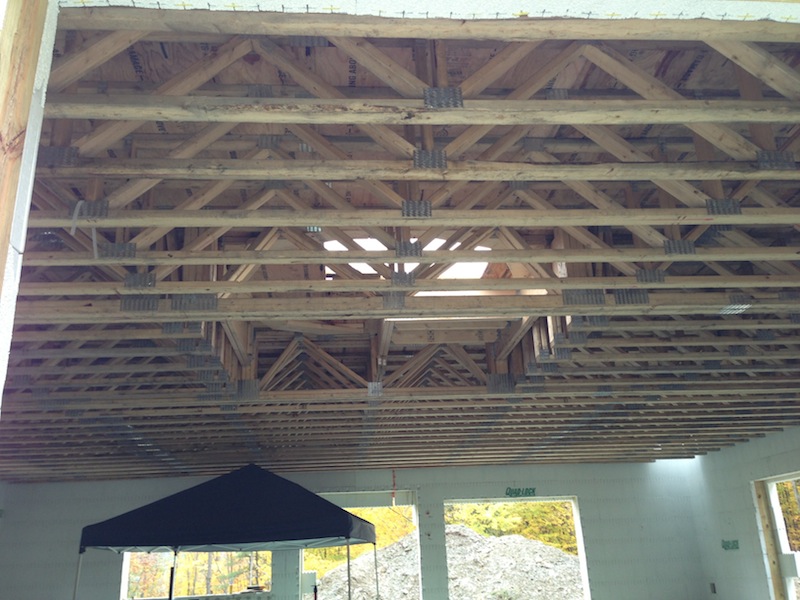
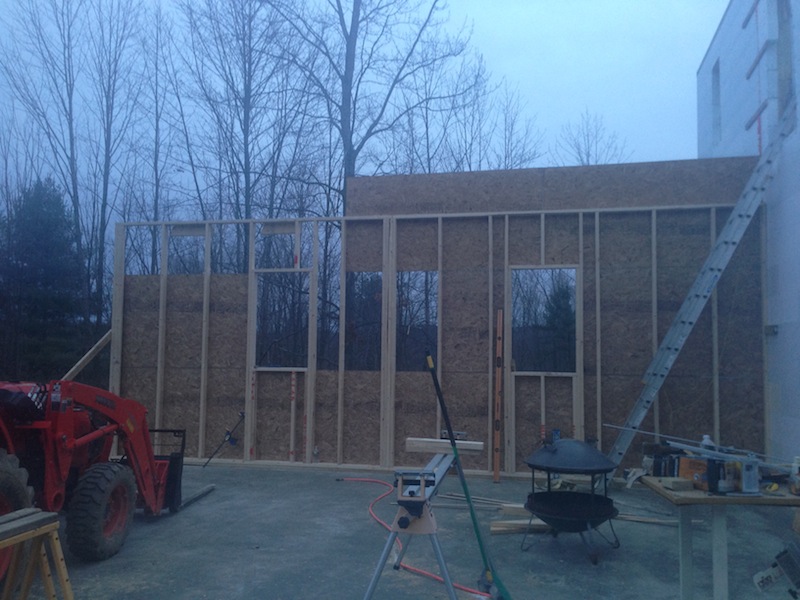
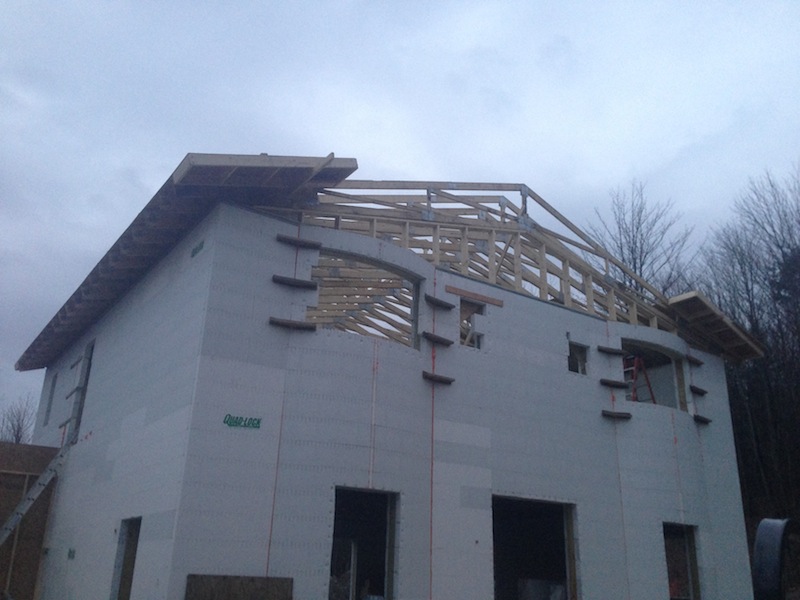
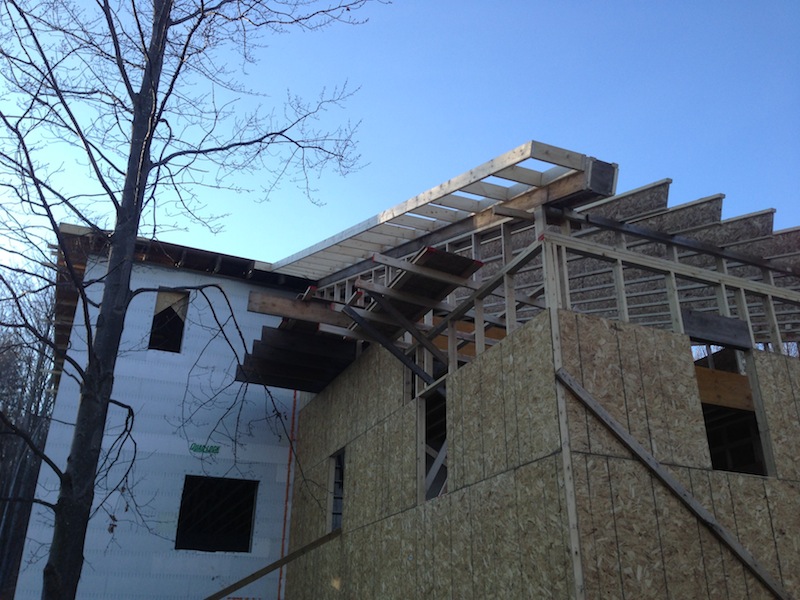
Now things are really starting to take shape. I started framing the garage while the hired guns set to work installing the roof truss:
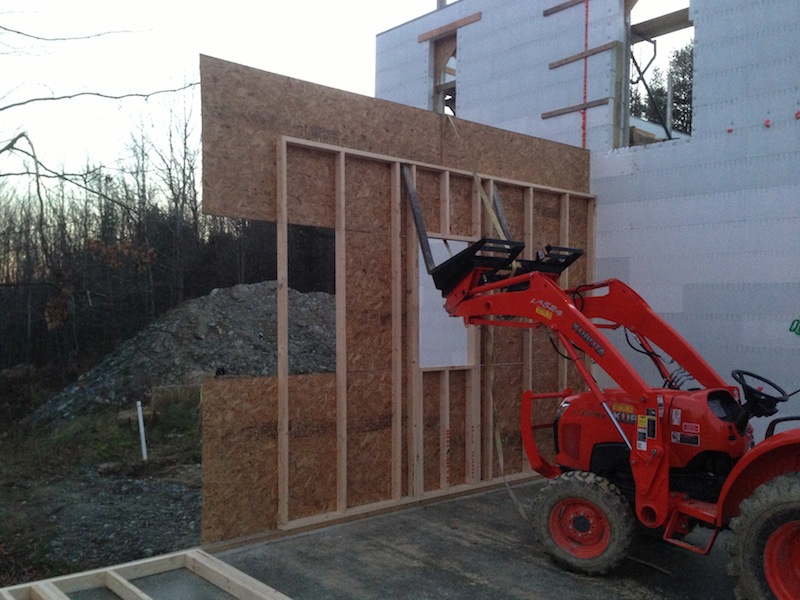
Who knew how handy those forks were going to be? Not me - I didn't decide to buy them until the last minute.
Who knew how handy those forks were going to be? Not me - I didn't decide to buy them until the last minute.
OP
OP
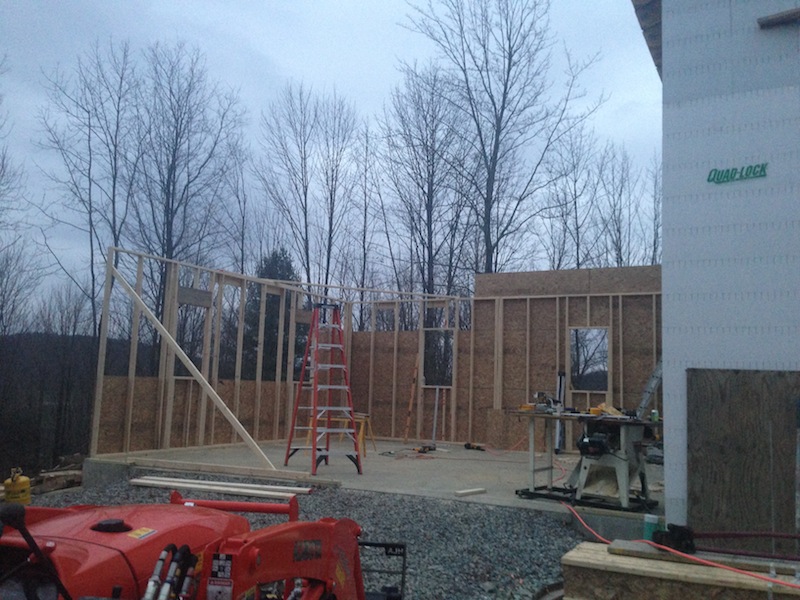
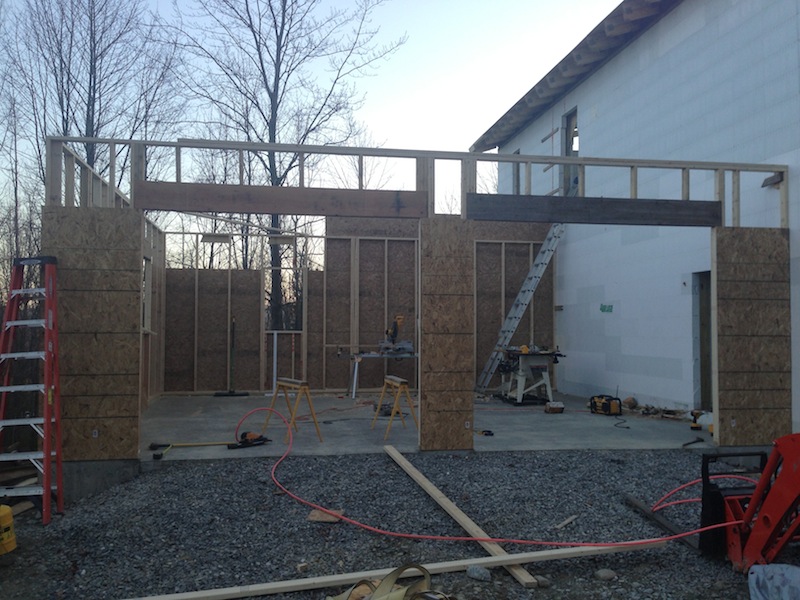
More garage framing. I love this sh*t.
And they started the roof decking and the ladder overhangs:
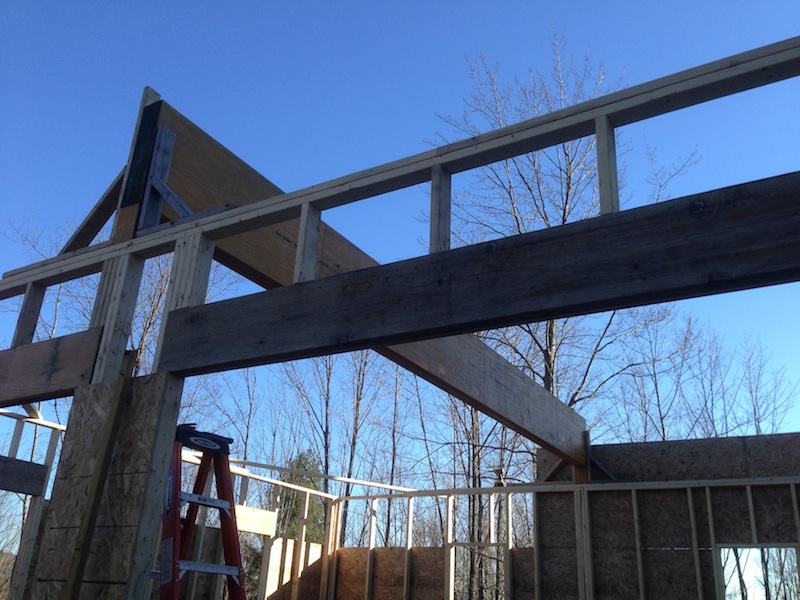
This is the first of 3 LVL beams that get put together, and it's a whopping 24" deep! Heavy bastard, too. Again, forklift to the rescue:

Full beam:
And they started the roof decking and the ladder overhangs:
This is the first of 3 LVL beams that get put together, and it's a whopping 24" deep! Heavy bastard, too. Again, forklift to the rescue:
Full beam:
OP
OP
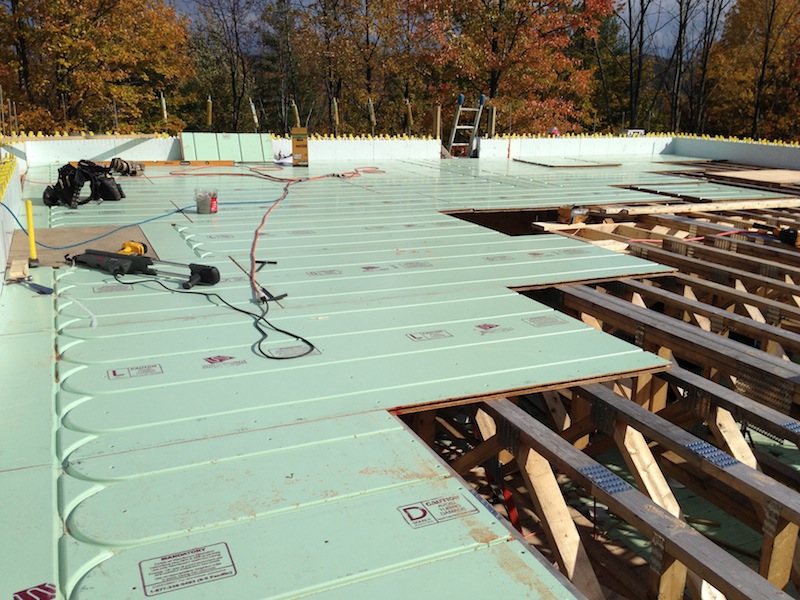
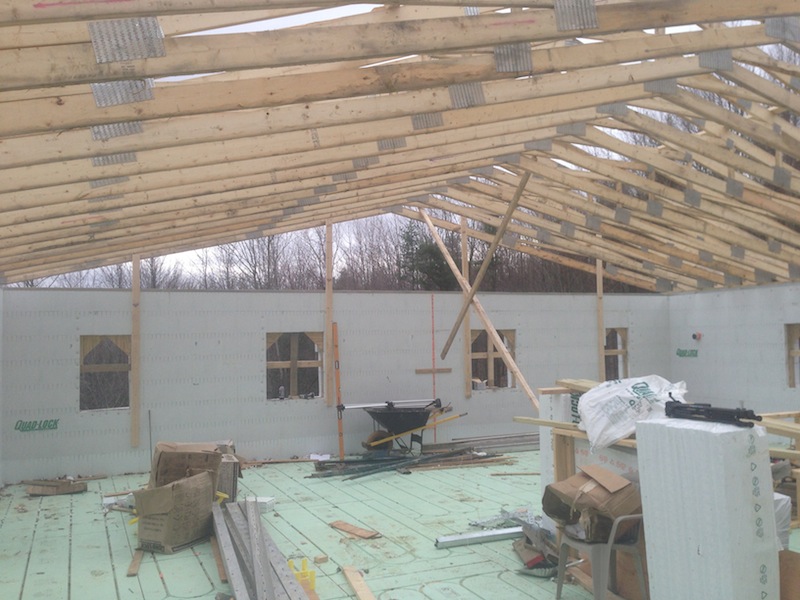
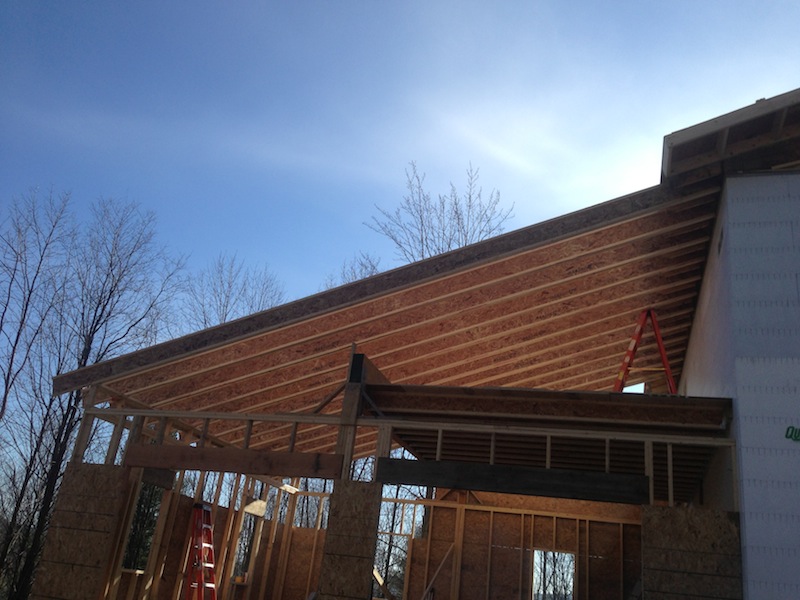
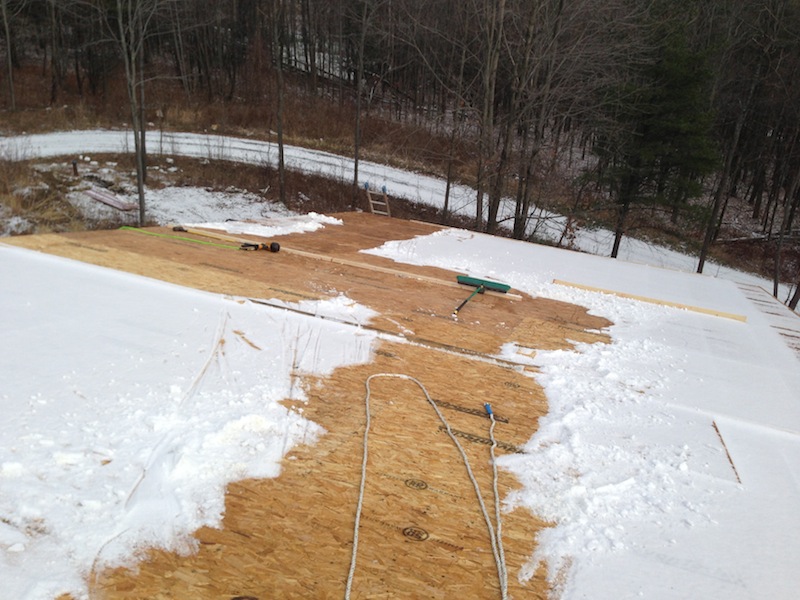
Roof decking done. Once again, glad I paid those young backs to haul all that material up there!
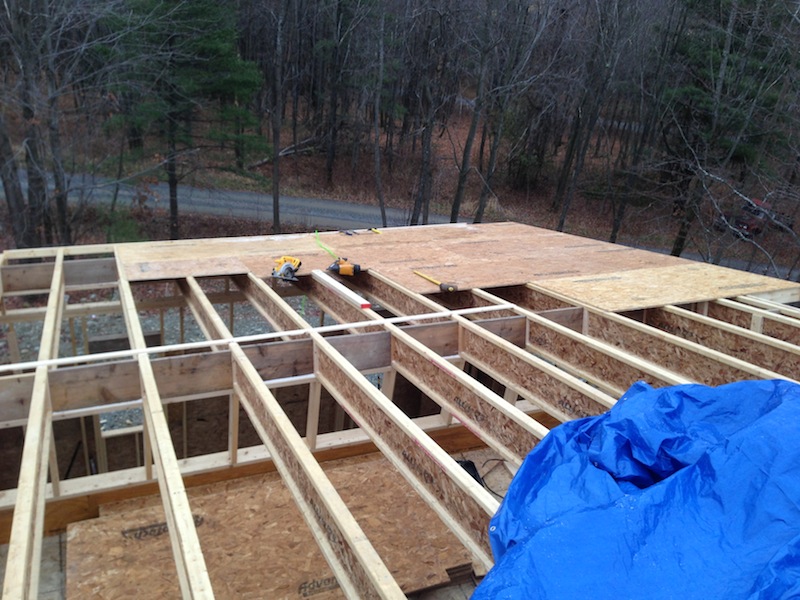
First floor joist set for a cold storage room above half the garage:
Almost done with cold storage floor deck:
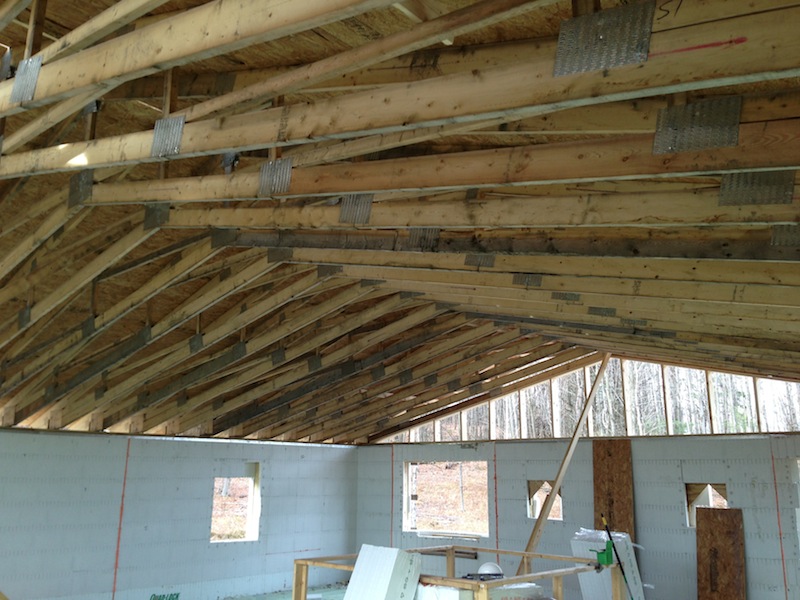
I placed a couple of the 30' rafters to get the end support at just the right height. Wanted to be sure that I had one continuous line from the truss roof all the way through the garage roof.
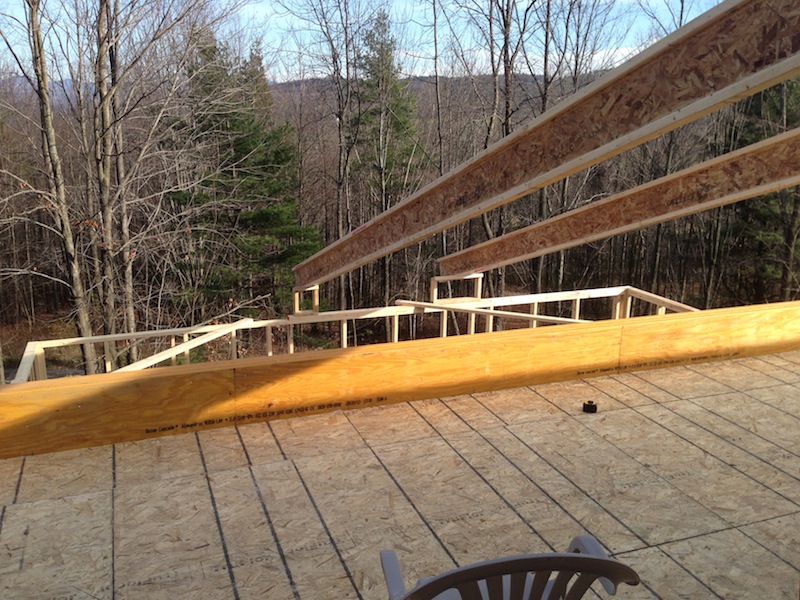
Once I was sure of the height of the end wall, I built it, and moved the test rafters to the outermost positions of the roof. I particularly like this shot, because it is the first time the real outline of the house is starting to show:

Then it was just a matter of slapping in the remaining pieces:
First floor joist set for a cold storage room above half the garage:
Almost done with cold storage floor deck:
I placed a couple of the 30' rafters to get the end support at just the right height. Wanted to be sure that I had one continuous line from the truss roof all the way through the garage roof.
Once I was sure of the height of the end wall, I built it, and moved the test rafters to the outermost positions of the roof. I particularly like this shot, because it is the first time the real outline of the house is starting to show:
Then it was just a matter of slapping in the remaining pieces:
OP
OP
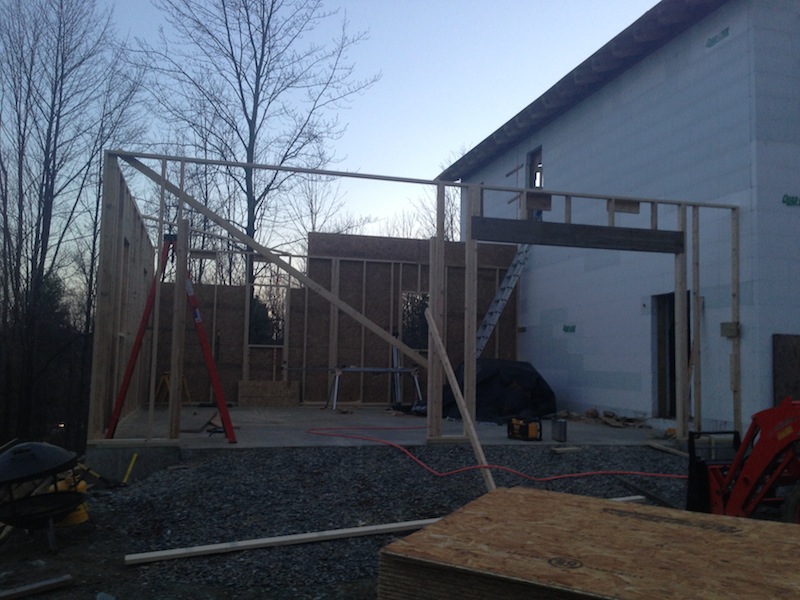
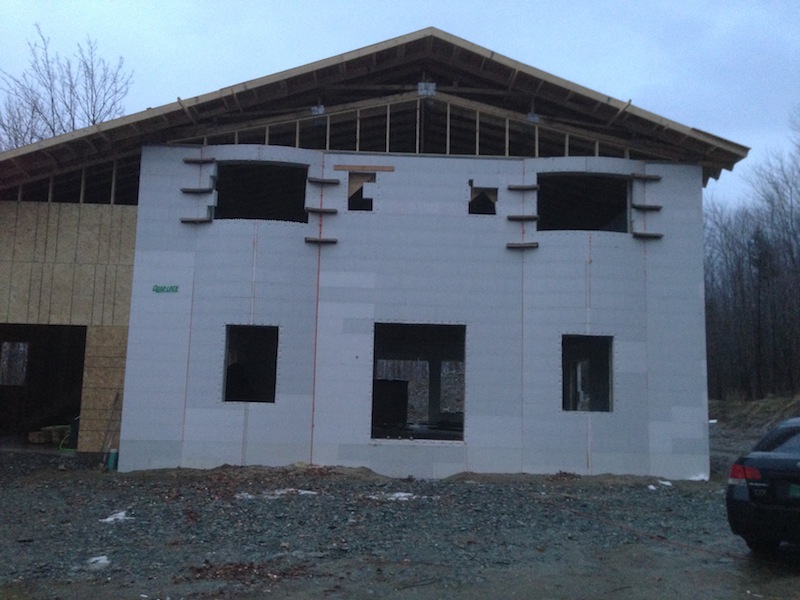
Gable end on garage:
While trying to get the back ladder extension framed on the garage, came up with this ghetto scaffolding. Hey - worked like a champ!
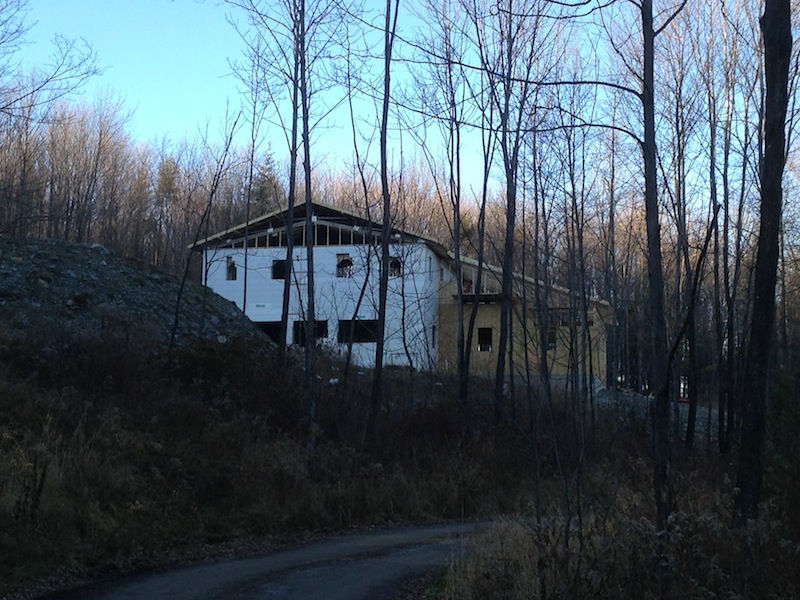
From halfway up the driveway:
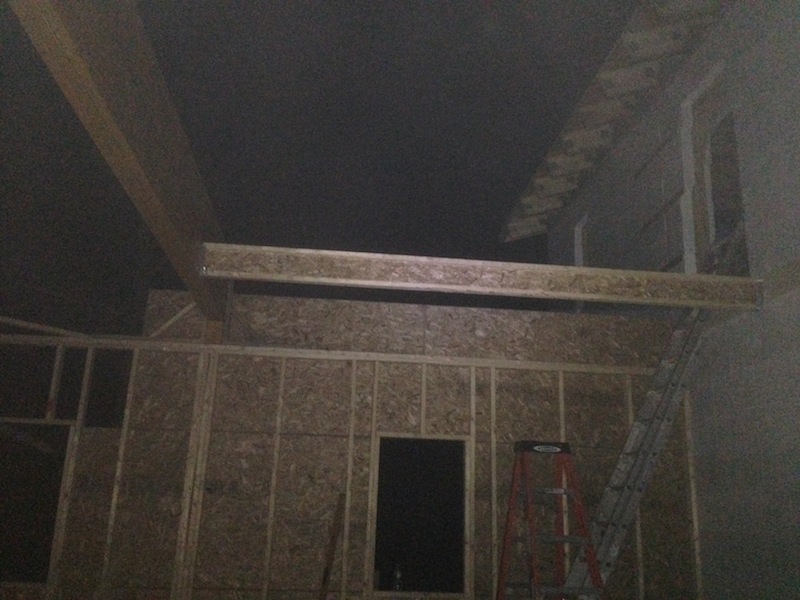
Getting the garage decking on. Unfortunately, I had to lift all that myself. No more hired guys until it's time to set my picture windows and double doors.

While trying to get the back ladder extension framed on the garage, came up with this ghetto scaffolding. Hey - worked like a champ!
From halfway up the driveway:
Getting the garage decking on. Unfortunately, I had to lift all that myself. No more hired guys until it's time to set my picture windows and double doors.
OP
OP
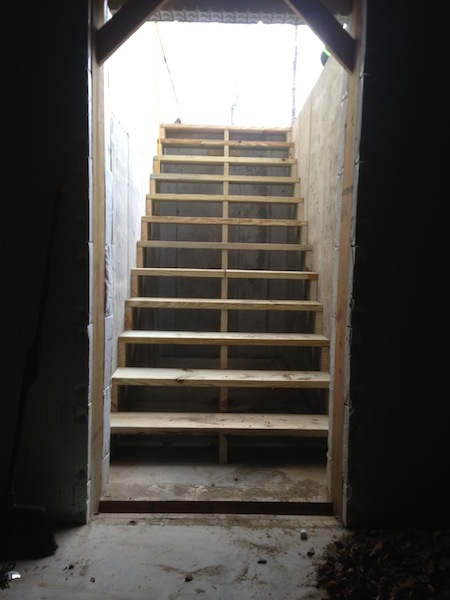
Sometime soon here I'm going to have to post some renders of the interior, so the pictures make sense. For now, just know that there is a spiral staircase that goes from the basement up to the second floor. Anyone who has lived with a spiral staircase knows that you are lucky if you can carry a shoebox up one, not to mention moving mattresses, etc. up. So, I have a nice 4' wide staircase in the garage that goes up to the master closet, and a 4' staircase down to the basement from outside (need to be able to get that pool table down there somehow, am I right?)
Here is the staircase up to the second floor:

Eventually, this staircase will be articulated, and be able to be hoisted up out of the way when not needed.
And up from the basement:
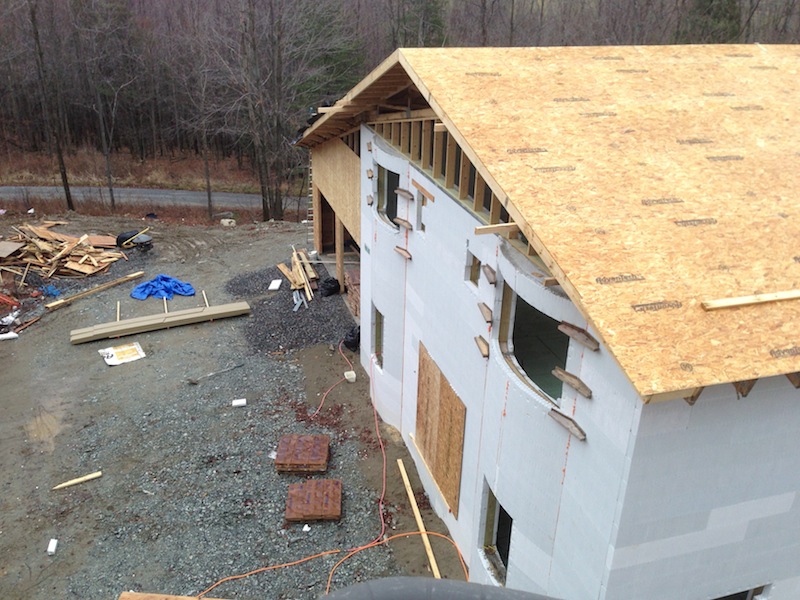
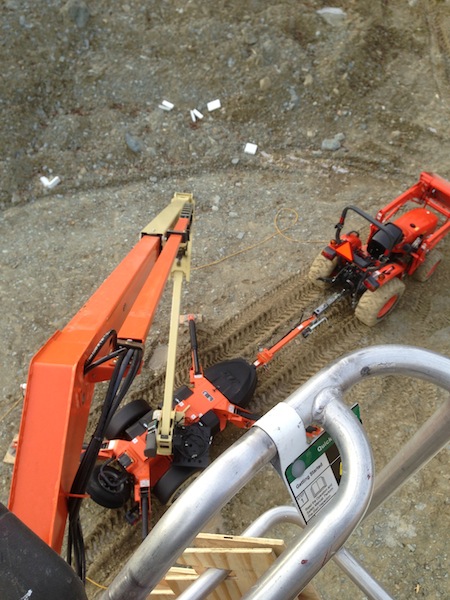
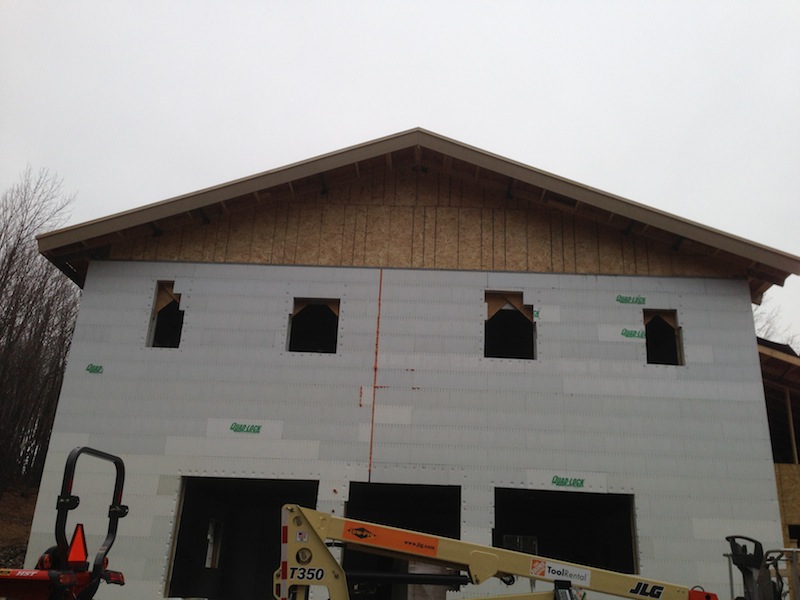
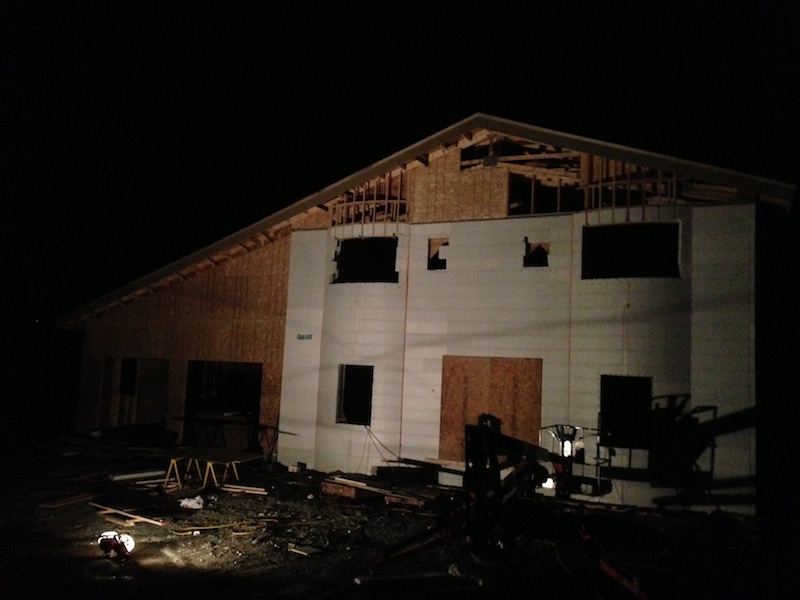
Rented a lift from the Depot to get my facia installed, sheath the gable ends and garage, and lift all the roofing material up. Took some arial shots for a different perspective:
Here is the staircase up to the second floor:
Eventually, this staircase will be articulated, and be able to be hoisted up out of the way when not needed.
And up from the basement:
Rented a lift from the Depot to get my facia installed, sheath the gable ends and garage, and lift all the roofing material up. Took some arial shots for a different perspective:
OP
OP
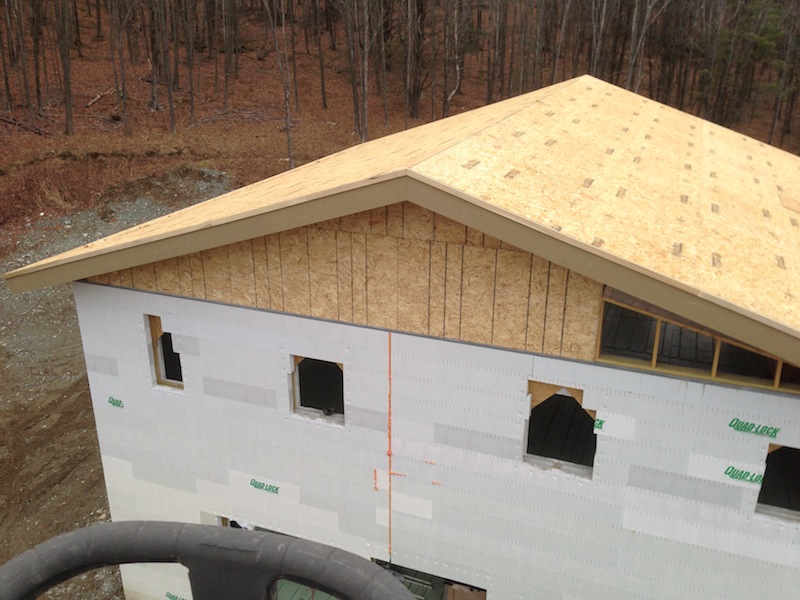
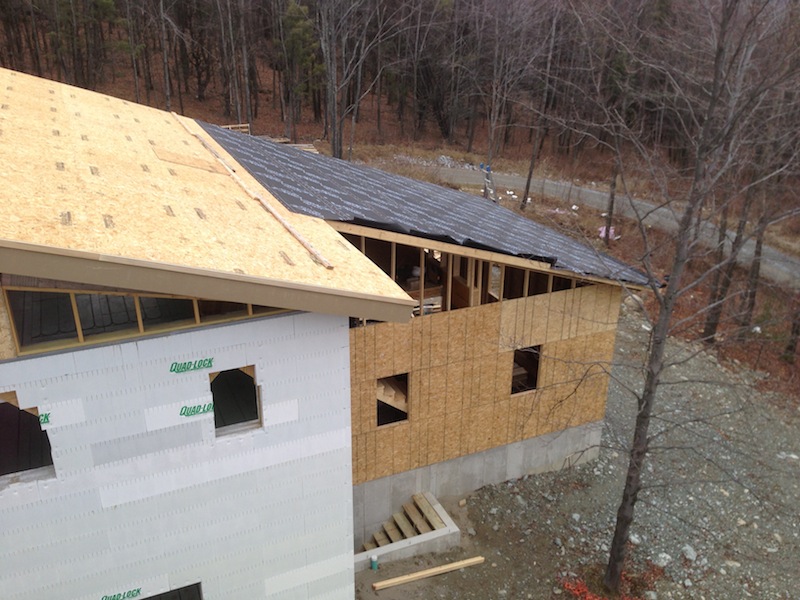
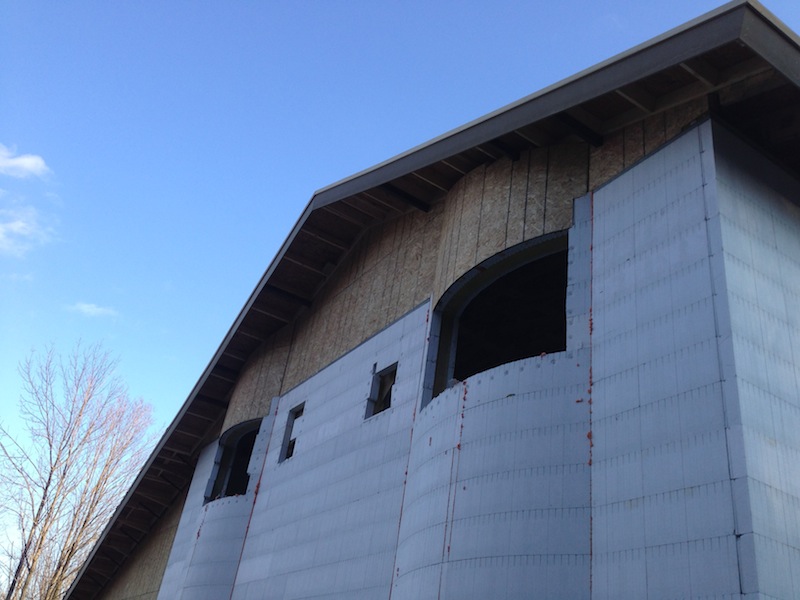
Gable sheathed, Facia installed:
A few days before Christmas, my mother in-law snuck up to the site and added a little holiday cheer:
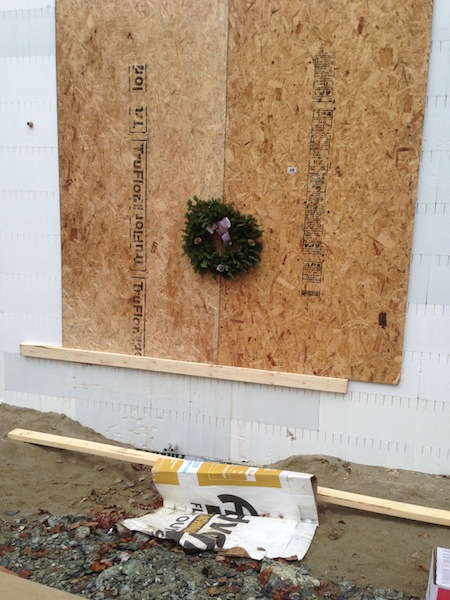
She's nutty and great! Also, that's another scale indicator: That wreath is 5' off the ground.
Here was the end result of some serious head scratching on my part:
I was VERY happy to be done with that section:
A few days before Christmas, my mother in-law snuck up to the site and added a little holiday cheer:
She's nutty and great! Also, that's another scale indicator: That wreath is 5' off the ground.
Here was the end result of some serious head scratching on my part:
I was VERY happy to be done with that section:
OP
OP
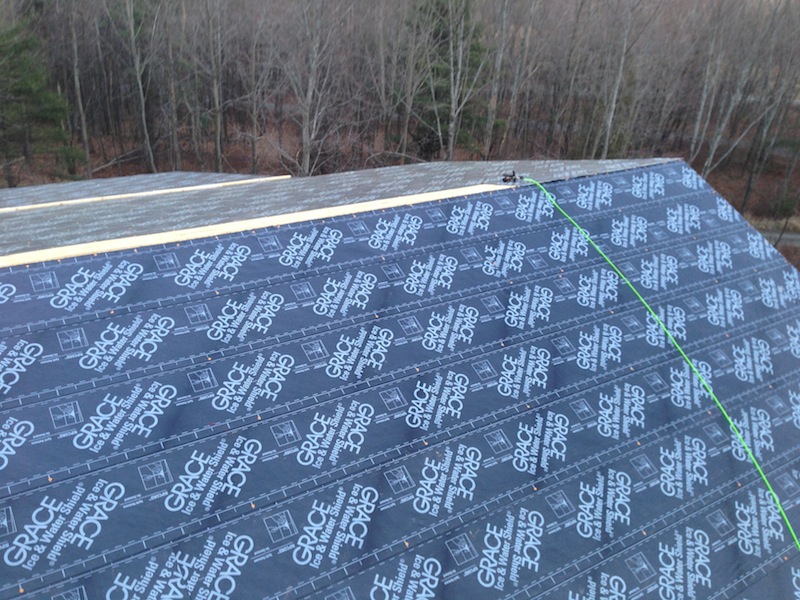
Peel and Stick membrane applied:
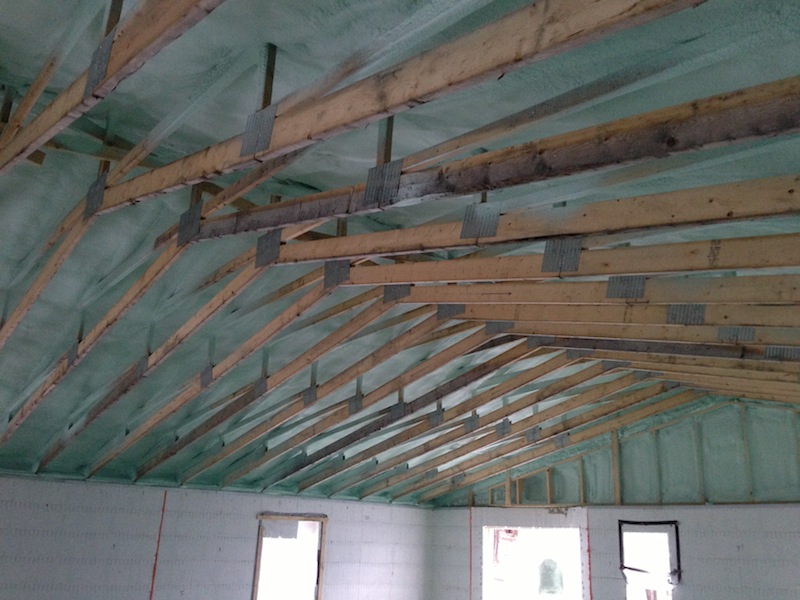
And closed cell foam shot under roof:
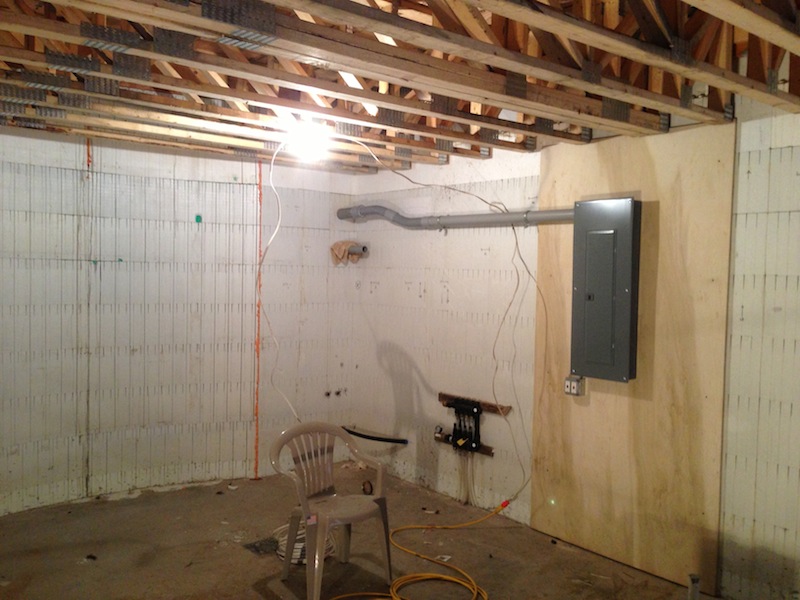
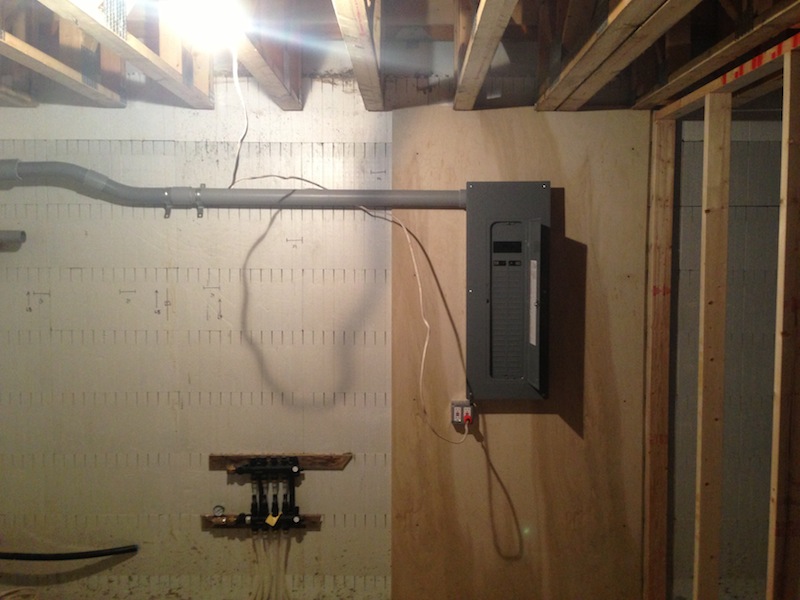
With the help of a couple of my friends, the electrician, and the tractor, we pulled the power feeder through the conduit from the house to the pole, and the service panel was installed. No juice yet (SO tired of the generator noise):
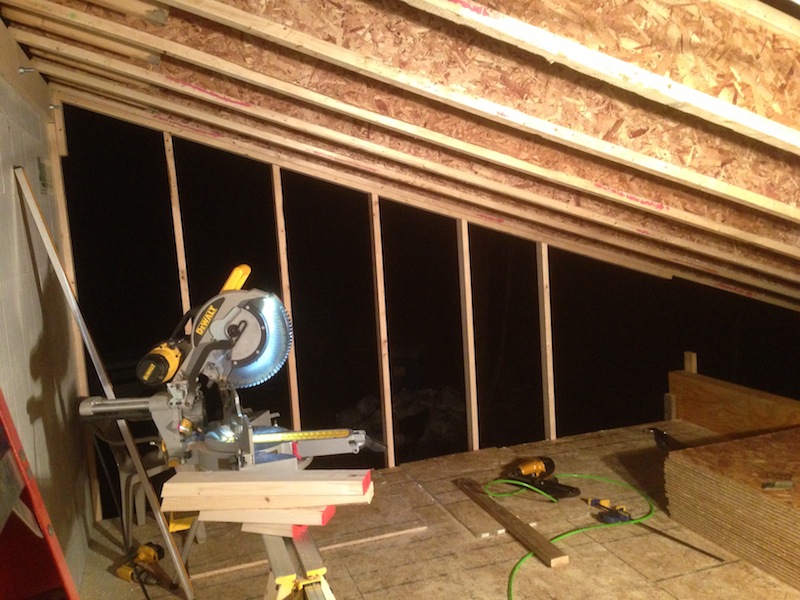
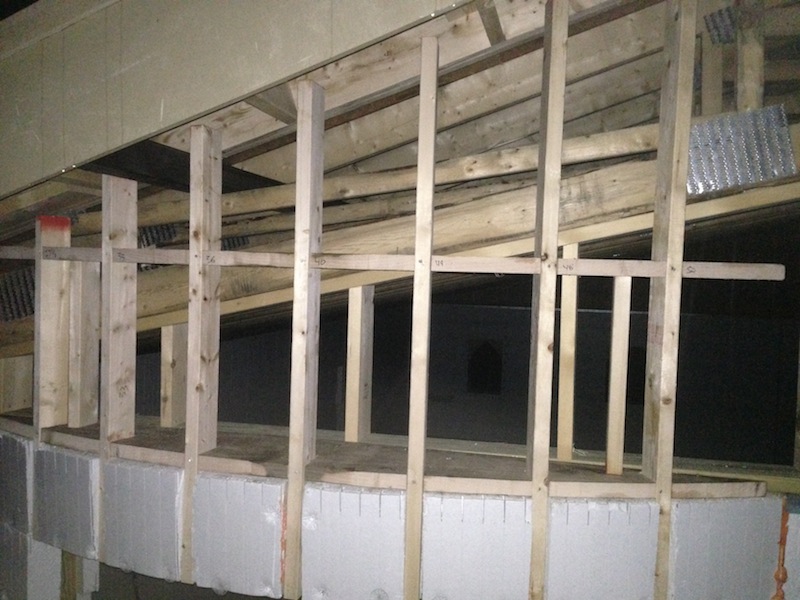
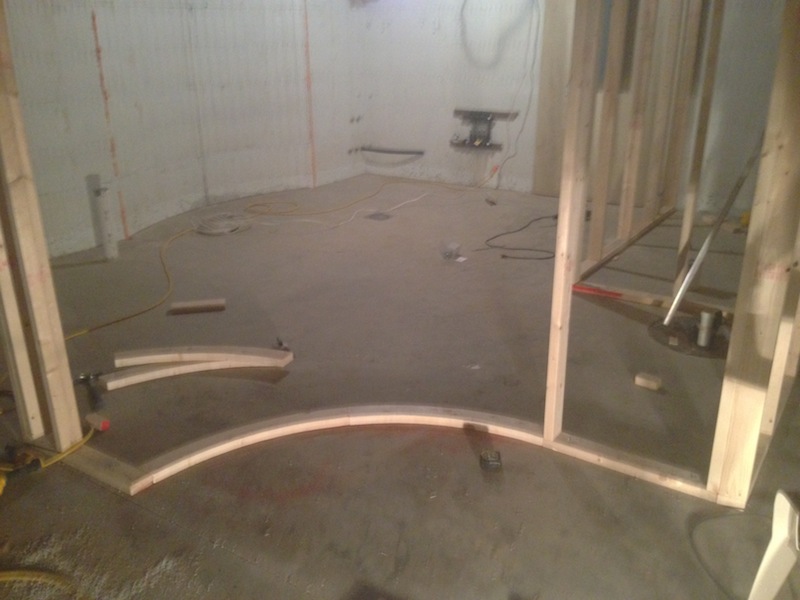
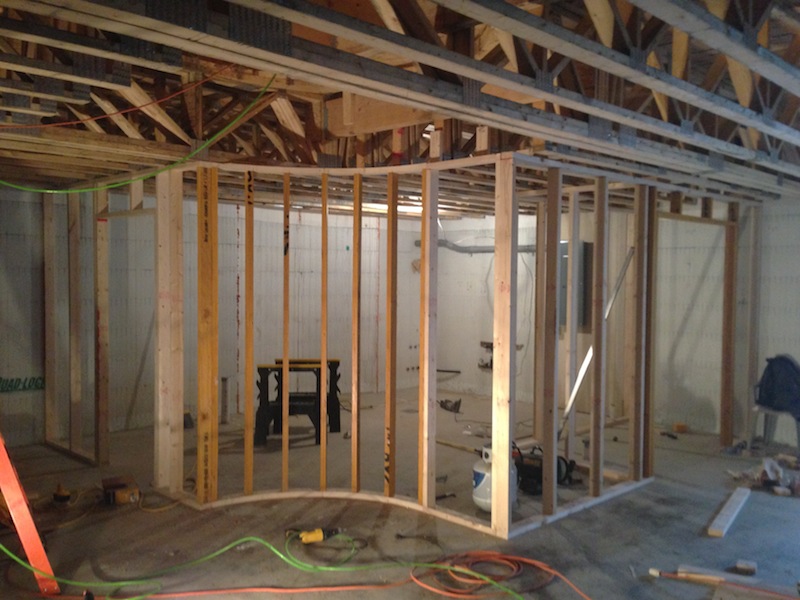
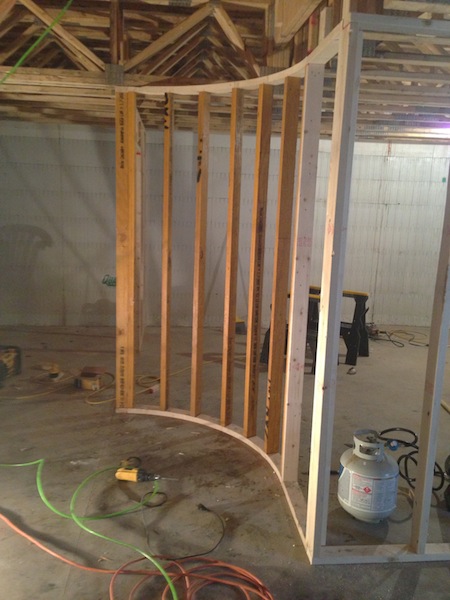
Started framing the interior walls of the basement:
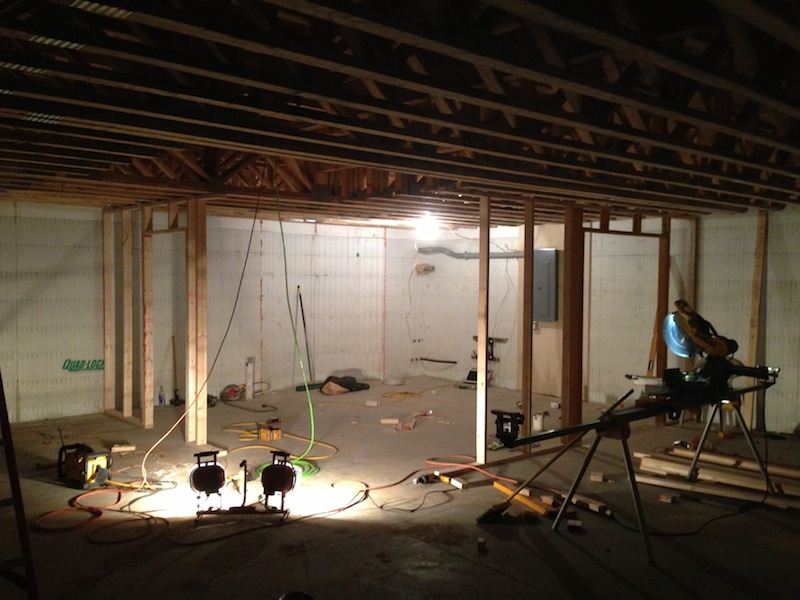
Yyyyyup - curved walls.
And closed cell foam shot under roof:
With the help of a couple of my friends, the electrician, and the tractor, we pulled the power feeder through the conduit from the house to the pole, and the service panel was installed. No juice yet (SO tired of the generator noise):
Started framing the interior walls of the basement:
Yyyyyup - curved walls.
HawksBrewer
Well-Known Member
Solid work man. Congrats.
OP
OP
How do you fit two flat windows into a curved wall? With some seriously careful figuring!

Drywall being delivered. I was blown away - included in the price was not only delivery, but also unloading and stacking wherever I wanted it - they even schlepped the basement sheets down for me. And it costs less than the local Depot!

At the same time that the drywall was being delivered, the local power company decided to finally show up to connect the power.
And at the same time that the power was being hooked up, my windows were delivered! Yup, all three big trucks on site at the same time. I had been trying to schedule these guys out over a week, but with them constantly rescheduling, they all ended up on site at the same time, all arriving within 15 minutes of each other. It took some juggling, but it got done.
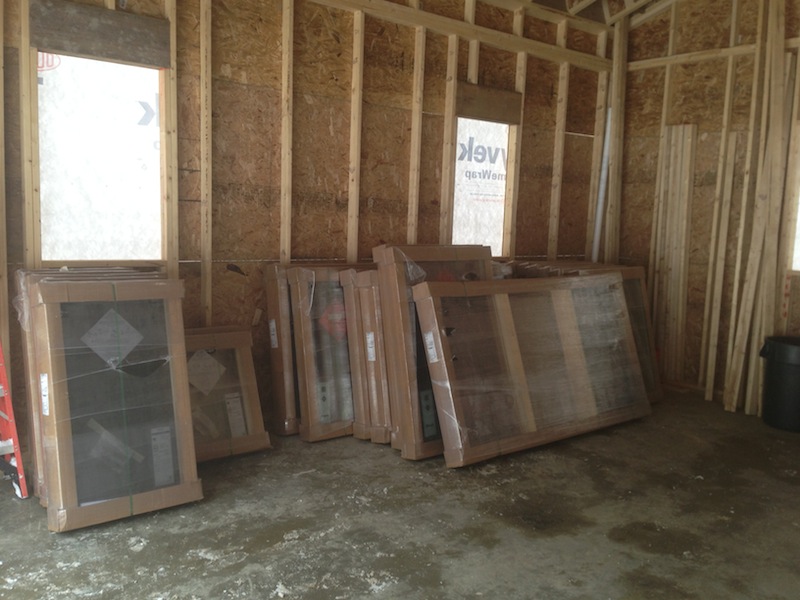
Of course, we then realized that they had forgotten to load the two bigass picture windows and the monster sliding door for the porch. No big deal - they were there the next day - with NO traffic jams this time.
Drywall being delivered. I was blown away - included in the price was not only delivery, but also unloading and stacking wherever I wanted it - they even schlepped the basement sheets down for me. And it costs less than the local Depot!
At the same time that the drywall was being delivered, the local power company decided to finally show up to connect the power.
And at the same time that the power was being hooked up, my windows were delivered! Yup, all three big trucks on site at the same time. I had been trying to schedule these guys out over a week, but with them constantly rescheduling, they all ended up on site at the same time, all arriving within 15 minutes of each other. It took some juggling, but it got done.
Of course, we then realized that they had forgotten to load the two bigass picture windows and the monster sliding door for the porch. No big deal - they were there the next day - with NO traffic jams this time.
OP
OP
Got one of the windows installed in the downstairs curved wall:

Not fully flashed out yet, but it's in!
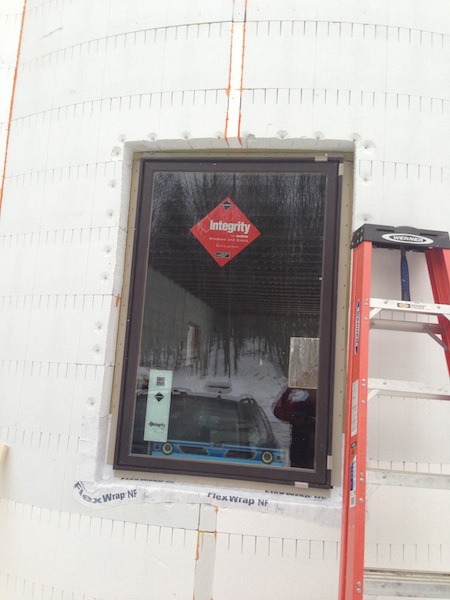
I am currently in the process of fabbing and attaching my jamb extensions. With walls 12 1/4" thick, standard 4 9/16" jambs don't quite cut it! Attaching 8 1/2" poplar extensions with pocket screws.
Not fully flashed out yet, but it's in!
I am currently in the process of fabbing and attaching my jamb extensions. With walls 12 1/4" thick, standard 4 9/16" jambs don't quite cut it! Attaching 8 1/2" poplar extensions with pocket screws.
OP
OP
And that's where I am right now. I am waiting for it to get back into the 20s to install my windows (the flashing won't really stick below 25) so hopefully by the end of next week I will be in and dry and can really start hitting it!
OP
OP
Looking great! I've done my fair share of curved walls and cabinet doors and can tell you that I can appreciate your talent. You've got some serious DIY skills!
Thanks!!
Huaco
Well-Known Member
Epic. Marathon. Posting...
This is really cool seeing your progress. Thanks. Sux that after that close call you had on the broken joist, you still ended up hurting yourself. I assume you didn't seriously injure anything or you wouldn't have been framing and decking so soon after...
This is really cool seeing your progress. Thanks. Sux that after that close call you had on the broken joist, you still ended up hurting yourself. I assume you didn't seriously injure anything or you wouldn't have been framing and decking so soon after...
tszetela
Well-Known Member
That is a great project and a great job!
This project looks fantastic. I wish I had the time and money to build my own house.
I loved the curved walls, and I know they can be a real PIA to finish, but they look great. The camera angle of the second picture of the framing of the curved wall makes it look like the wall is not anywhere near plumb. Strange what our eyes can make our brain think when stuff isn't perfectly straight.
Great work so far. I love the "extras" that you though of ahead of time that are being installed as the house is being built. Things like the extra staircase, in floor heating, etc.
OP
OP
I assume you didn't seriously injure anything or you wouldn't have been framing and decking so soon after...
Well, I was pretty tender for a few days, but I pushed on anyway. My shoulder is still messed up, but it's functional. Once the house is done I'm going to have to get it looked at.
OP
OP
The camera angle of the second picture of the framing of the curved wall makes it look like the wall is not anywhere near plumb. Strange what our eyes can make our brain think when stuff isn't perfectly straight.
A lot of that is because it was taken with my phone's camera, so it distorts things a bit. I assure you, those walls are dead nutz on!
Awesome post. Love ICF construction, seems like you got a handle on it quickly.
BrewerBrennan
Member
Too cool. Love seeing the progress!
Mischief_Brewing
Well-Known Member
Amazing stuff. I'm hoping to be able to swing something like this within the next two years.
Can't wait to see the rest of the build!
Can't wait to see the rest of the build!
Hey sorry if this was asked before, but what is the material you sprayed the underside of your roof, the green stuff and what is the overall R Value of the house. Looks like you are doing a really nice job, not too many people know how to make lumber round.
cblack85
Well-Known Member
Looks terrific. What is the overall SF of the house? (if you don't mind my asking)
OP
OP
Gear101 said:Hey sorry if this was asked before, but what is the material you sprayed the underside of your roof, the green stuff and what is the overall R Value of the house. Looks like you are doing a really nice job, not too many people know how to make lumber round.
Is a soy based closed cell spray foam. The walls of the house are R-30 and the roof is R-50. Hoping for a toasty, warm house!
OP
OP
cblack85 said:Looks terrific. What is the overall SF of the house? (if you don't mind my asking)
Without the basement, which won't get finished for a while, it's 2,450. Once the basement is done it'll be 3,675. Then there is the 600 SF garage with about 250SF of cold storage above it.
rockinmarty
Big Member
What size for the brewery Jester? I don't see it listed.
OP
OP
rockinmarty said:What size for the brewery Jester? I don't see it listed.
Probably just going to make a brew rig in the garage. I never had a great setup before, so anything will be an improvement.
ScotBrew
Well-Known Member

Well....new ones anyway!
cpl-america
Well-Known Member
and now, you are my hero!
but seriously this is my retirement plan.
but seriously this is my retirement plan.
- Joined
- Mar 12, 2007
- Messages
- 6,841
- Reaction score
- 858
Really enjoy watching the progress of this build . . .
. . . but have to admit that when I see Red in one of the pictures it brings a smile to my face. All is good in the world again.
. . . but have to admit that when I see Red in one of the pictures it brings a smile to my face. All is good in the world again.
OP
OP
Hey what is that Quad Lock like to work with? how do you get the finish siding to stay, like Hardy Board, do you just nail right to it? I'll have a bunch of questions. LOL
It is pretty darn easy. Like I say, if it wasn't for the curves I'd probably be in the house already! As for siding, there are fastening points every 12 inches that can be screwed into, and if you need continuous attach strips, they offer a version with a vertical strip every 12 - typical for lap siding. I'm actually going to be applying an acrylic stucco. Ask away!
