Starting First BIAB With New eBIAB Setup

Homebrew Talk - Beer, Wine, Mead, & Cider Brewing Discussion Forum

Help Support Homebrew Talk - Beer, Wine, Mead, & Cider Brewing Discussion Forum:

This site may earn a commission from merchant affiliate links, including eBay, Amazon, and others.

Woodbrews

Well-Known Member
Joined
Nov 5, 2013
Messages
282
Reaction score
53
Location
Arlington
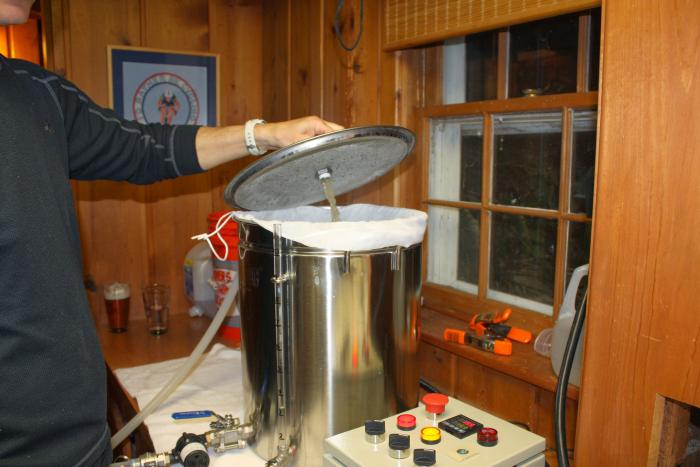
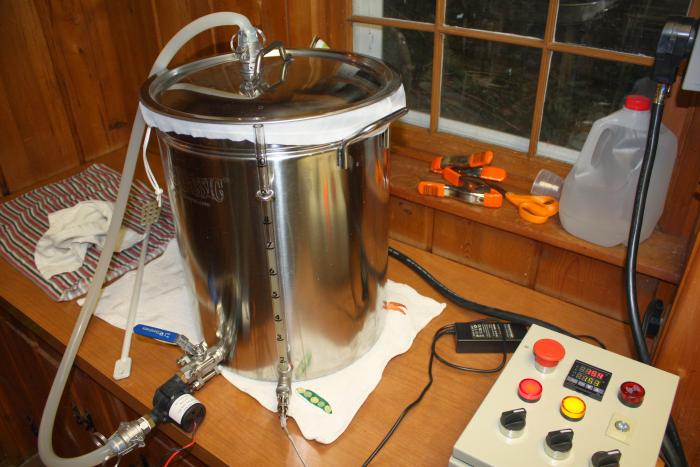
Started my first brew this evening on my newly completed eBIAB setup (see build thread here). Went with a Simcoe SMASH ale for simplicity and because I want to learn about the characteristics of individual hops.

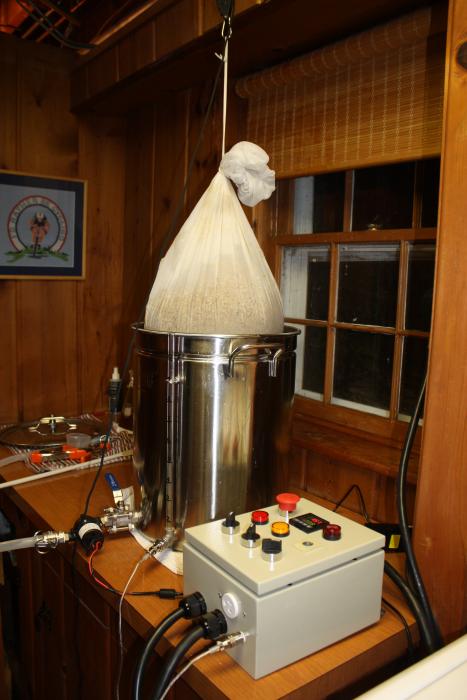
I used BIAB Calculator to determine total water volume and strike temperature. Just guessed as to boil off rate of 1.25 gallons/hour. I'll try to take SG readings pre-and post-boil and take note of volumes to begin to get a handle on how the system works. It took about 20 minutes to reach strike temp of 155 from starting water temp of 47 degrees - brrr! With the 7.75 pounds of Rahr 2-row in, I'm already starting to see temperature stratification. I suspect adding a pump and recirculating may help this, but I want to get a few brews on the system first. Opted to go without fryer basket for this brew -- I doubt that the ULWD element will scorch the bag, given how rarely it will fire during the mash. I'm also stirring every 10 minutes to distribute the grains and even out the temperature.
 
I did a MO Willamette SMASH to break in my new EBIAB system myself. Ended up getting better efficiency then planned, so my slightly hoppy SMASH became malty.
 
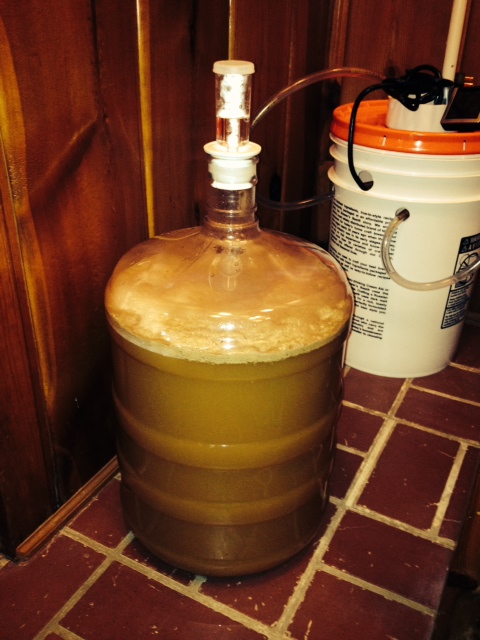
So far, so good, with this batch. Fermentation is happily under way. After one week or so I'll add the hops for dry hopping. The hops are 1 oz. Simcoe pellets, so I plan to put them in a sanitized muslin bag and weigh them down with a sanitized stainless steel washer or two.

My question is how long should I give it to settle before racking to my keg? And would it benefit from a clarifying agent, or from cold crashing before kegging?

Any experienced-based pointers would be great. Thanks!

Fermenting 2.JPG
 
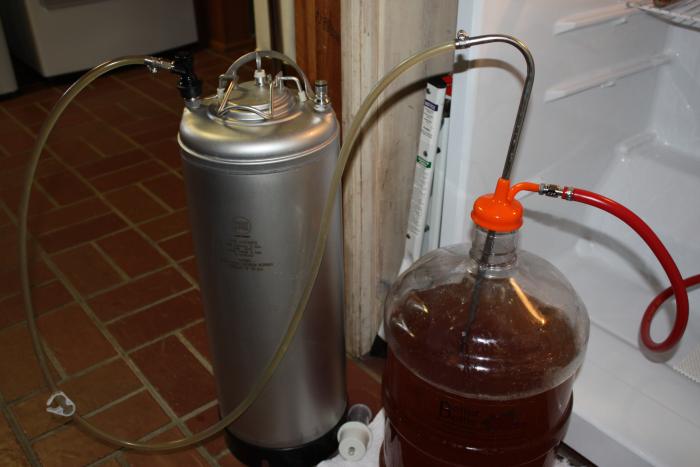
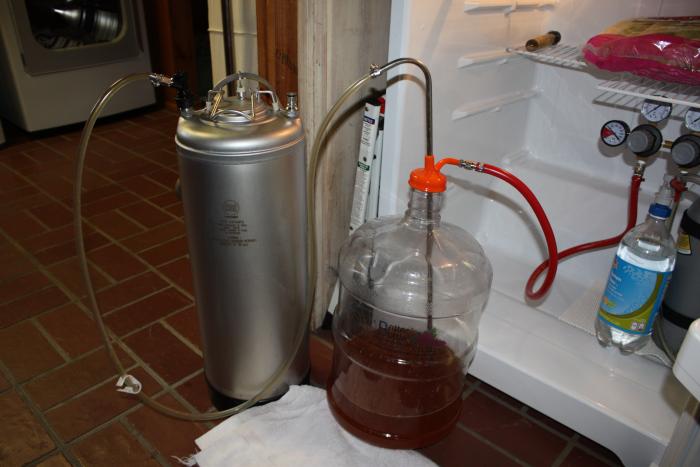
After fermenting for a week, I added the dry hops and then transferred using an auto-siphon to a second carboy so I could cold crash in my kegerator. The transfer sucked - steady stream of air bubbles in the auto-siphon. After that debacle, I researched ways to transfer without using an auto-siphon. After some research, I learned about using CO2 to transfer. Two excellent blog posts in The Beer Journals and on Humboldt Beer Works explained the process. The parts required are simple: racking cane, a carboy cap, and some beer tubing. I followed the instructions from the Beer Journals and it worked perfectly: a nice, clean transfer from carboy to keg under a blanket of CO2 and no exposure to oxygen. Pics attached!

IMG_3145.jpg


IMG_3146.jpg
 
We have beer on tap!

After siphoning using CO2 to my keg, I started force-carbonating at 30 psi. I kept it there for two days and then turned down the gas to my serving pressure of 12 psi. After reading the force carbonation thread, I learned that I need to “burp” the keg before turning it down to serving pressure, otherwise it will be serving at the boost pressure before venting down to serving pressure. So the procedure is to cut off the gas, release the air vent a couple of times, turn the gas down to 12psi, and then turn the gas back on.

I cut off the high pressure after about 48 hours at 30psi. I shut off the gas and vented the keg, then turned it down to a serving pressure of 12psi. Carbonation levels were perfect! The next day the carb levels were still good, but the first pour was a bit too foamy, so I turned down the serving pressure to 10psi.

The beer tastes quite good, but a bit one-dimensional. The Simcoe hops absolutely have a piney, resinous flavor that is quite unique and they are fairly well-balanced by the Rahr two-row malt. I like the low alcohol content of 4.4%, making this is an excellent session ale. I certainly will experiment with other types of SMaSH ales as I continue to learn this craft!
 
I've been wanting to brew a DFH 60min clone since I started brewing. After looking at all of the various recipes, it was apparent that Yooper's was pretty much the consensus clone recipe. I bought the ingredients a few weeks ago but finally made the time to brew last night. I was desperate to get this brew done, because my last batch (an APA) is nearly gone. Beer emergency!

This was my first time using liquid yeast, so I made a starter the night before. I made the yeast starter with 2 oz of DME in 750 mL of water. Boiled for 10 minutes. Transferred to the Erlenmeyer flask and cooled in an ice bath until it was cool to the touch. Shook the flask, and then shook up the yeast tube and pitched. I had to add some wort to the yeast tube and shake to get all of the yeast out. I swirled it by hand periodically and left it on the counter overnight. Didn’t see much activity in the morning, but continued to swirl it periodically. I really need to build that stir plate!

Brew Day

Now, for some details about the brew. Recirculation during mash worked perfectly; the mash temps held right on the 153 degree target for the entire time. I was able to do other things during the mash without concern.

After the mash I lifted the bag out (after having a near disaster when it dropped back into the kettle) and squeezed the heck out of it. Even with all of the squeezing, my pre-boil volume was only 5.5 gallons, .75 g short of the predicted 6.25. Pre-boil gravity was 15% brix (1.060 sg). I decided to add .5g of fresh water to bring the volume up to 6 g.

I started the boil at 60% manual on the PID, but backed it down to 40% when it became clear that my boil-off rate was too high. Hop additions were a little off; I added 1 oz of Warrior at the beginning and then mixed the Simcoe and Amarillo Gold together and added a portion every five minutes beginning at the 30 minute mark. I forgot to use the hop sock for the first hop addition, but I used it for the final 30 minutes of additions. I added the Whirlfloc, final hops, and the IC during the final 10 minutes.

I also tested the gravity and realized I would be a little lower than the target of 1.070. My gravity was 1.064, so I needed to gain an additional 6 points. I used BrewCalc on my phone to determine that I would need to add 86 grams of DME to gain 6 points. I used my scale to weigh out the grams and added that to the final 10 minutes of boil. I tested the gravity one final time and it was 1.068, which was close enough.

The chilling process took forever. I used the pump to recirculate the wort while cooling, but the whirlpool it created was anemic at best. I really don't think it sped up the process at all, just added more complexity. I used almost 20 gallons of tap water to bring the wort down to 80 F. There has got to be a way to make the process more efficient. For next time, I’ll try circulating ice water once I get to 120 F. I’ll need to come up with some fittings to make it easy to switch from tap water to recirculation so there won’t be a huge delay while I move hoses around.

Another observation is that I’ve got a lot to learn about using the pump and hoses! It’s very easy to pump hot wort into your brew area if you’re not careful. I also had a near disaster with the bag; the knot I tied around the neck of the bag came loose, dropping the bag back into the pot and splashing hot wort over the entire brew area. Made a nice mess, but didn’t really lose much volume. Pretty lame knot-tying for an Eagle Scout!

I ended up with almost exactly 5 gallons in the fermenter. I'm using a Cool-Zone system to control temps. My target temp is 63F, but I pitched at closer to 78F and it was taking quite awhile, even in the Cool Zone, to bring temps down. It was close to 70F when I finally went to bed. I'm using a cooler of ice water to chill the carboy, but I think I'll need to move the pump and water reservoir into the keezer to really make it work.

Finally, here are some pics!

IMG_3171.jpg


2014-04-15 Yeast starter.jpg


Bag & pulley arrangement.jpg


IMG_3177.jpg


IMG_3180.jpg
 
I just want to add a shoutout to Wilserbrewer for the excellent bags and pulley arrangement. But for my lame knot tying, the bag has worked perfectly, even with a 15lb grain bill.

One idea would be to include a cord lock on the bag so that the drawstring could be cinched around the rim of the pot. This would hold the bag securely during dough in and mash, but easily loosened when it's time to hoist. Just an idea.

- Woodbrews
 
Back
Top