Ss Brewtech 15 gallon Electric Kettle Conversion

Homebrew Talk - Beer, Wine, Mead, & Cider Brewing Discussion Forum

Help Support Homebrew Talk - Beer, Wine, Mead, & Cider Brewing Discussion Forum:

This site may earn a commission from merchant affiliate links, including eBay, Amazon, and others.
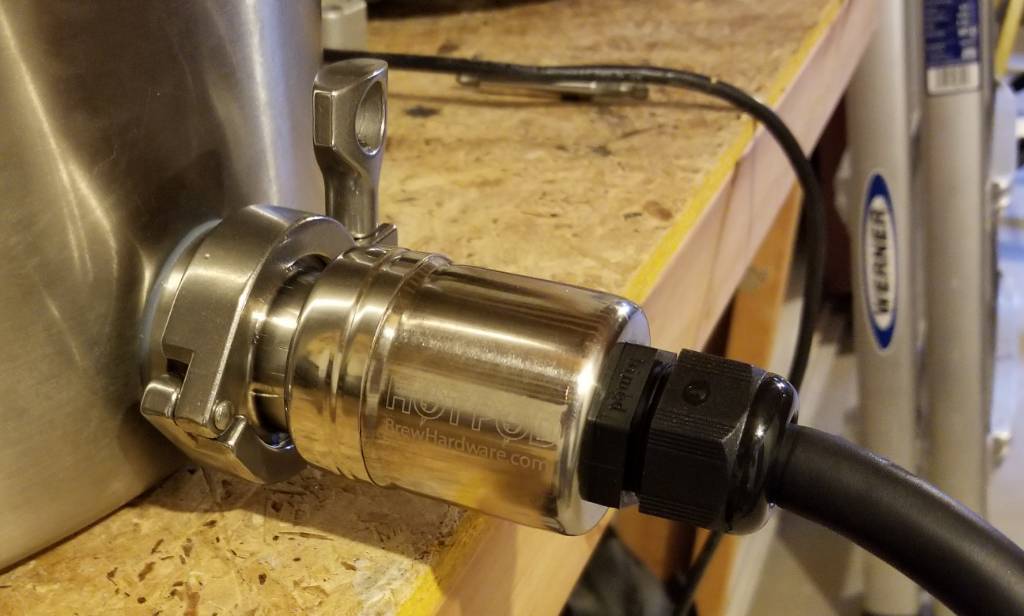
Can you tell me what kind of connector you used to protect the connections on the heater element? Is it a water tight connection to protect from splashes?


I am just using standard twist lock connectors. I just keep them out of way from splashes. At the kettle I have a hot pod from Brew Hardware.
 
Can you tell me what kind of connector you used to protect the connections on the heater element? Is it a water tight connection to protect from splashes?
For elements with integral L6-30 plugs, an o-ring between the element plug and the cord receptacle is effective at keeping liquid out of the connection.

Brew on :mug:
 
So another update.

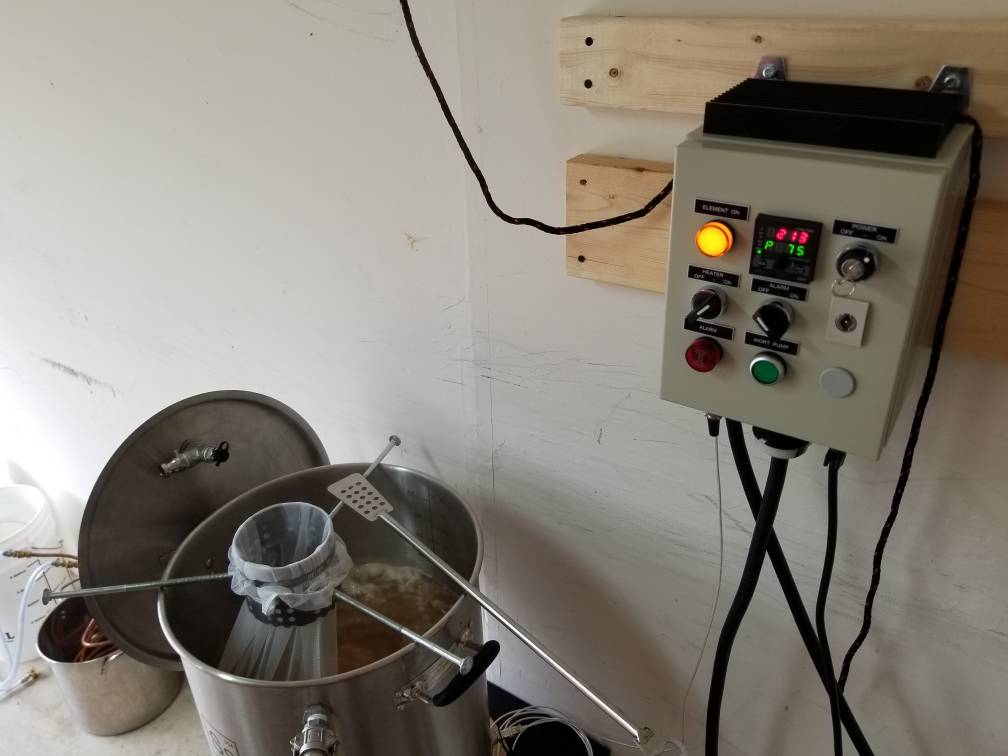
15 months ago I began the journey into electric brewing. Starting with a brew kettle with and element, then moving to the eBIAB system. I am now ready to commit more money to my controller after learning what I need. I ended up going with this kit from Auber, found here. I feel this was a great deal. I did a little modification with only 1 pump and capped off the water pump switch and outlet. Another big effort on my part was running a new 10/3 (copper) line versus my old 8/2 aluminum cable. I needed a neutral wire for my pump control and main contactor. So far I did a simple wet test to confirm the controller works without issues. I am so excited for my next brew day, however, I have to wait until after the weekend of April 15th, since I will be in Paris. So expect another update when i document my brew day with this controller.
 

Attachments

  • 20180316_172300.jpg
    20180316_172300.jpg
    1.4 MB · Views: 408
  • 20180316_172316.jpg
    20180316_172316.jpg
    1.7 MB · Views: 382
  • 20180316_181438.jpg
    20180316_181438.jpg
    1.6 MB · Views: 395
  • 20180316_181451.jpg
    20180316_181451.jpg
    1.6 MB · Views: 379
  • 20180316_181456.jpg
    20180316_181456.jpg
    2 MB · Views: 390
  • 20180317_060208 (1).jpg
    20180317_060208 (1).jpg
    2.1 MB · Views: 391
  • 20180318_182229.jpg
    20180318_182229.jpg
    1.5 MB · Views: 387
  • 20180320_053040.jpg
    20180320_053040.jpg
    1.3 MB · Views: 407
  • 20180319_203801.png
    20180319_203801.png
    1.4 MB · Views: 409
Thank you for documenting your progress, and I look forward to more updates!

Just curious. If you had it to do over again and were starting from scratch here in mid-2018 (as I am!) just wondering you'd still go the DIY route, or consider a kit from High Gravity (which offers a 15 gal SS kettle, a Blichman BoilCoil and the Wort-hog EBC-130), or perhaps wait for the SS full electric system coming out in a few months?
 
I really enjoy the DIY aspect of home brewing. So I would do it again. I would have done a couple things different or remove steps from here. One being, start with an ezboil out of the gate (still make the cheap controller first). And use a TC fitting for my element.

I see nothing wrong with the prebuilt kits, one has to determine their preference and comfort.

Good luck!
 
Finally was able to do my inaugural brew day on my new controller. I had some left over 1318 from a NEIPA and decided to try my own take on Dawson's Boat Bitter from Chop & Brew. Ended with 6 gallons in the fermenter, hitting my OG dead on.
Screenshot_20180527-083919.jpeg
20180527_073316.jpeg
20180527_070009.jpeg
20180527_081826.jpeg
 
Active fermentation kicked off about 8 hours after pitching the yeast. Added a blow off tube just in case.

Schedule for fermentation:
First day at 65F
Then slowly rise to 70F over the next 7 days.
20180528_082600.jpeg
 
Active fermentation kicked off about 8 hours after pitching the yeast. Added a blow off tube just in case.

Schedule for fermentation:
First day at 65F
Then slowly rise to 70F over the next 7 days.View attachment 572439

I really appreciate everything you have documented on this thread. I have been struggling to get out of my 10 gallon setup for some time due to being restricted by my apartment. I finally found a good deal on a 15 gallon spike locally and will probably go your route with the auber controller and having someone weld a ferrule into the kettle.

On a side note, what kind of fermentation fridge is that?
I'm not sure what type of software and hardware tofuguy is using to control the temps but thats a haier beverage cooler... We have the same one behind the bar at our brewpub.. I think home depot carries them.
 
I'm not sure what type of software and hardware tofuguy is using to control the temps but thats a haier beverage cooler... We have the same one behind the bar at our brewpub.. I think home depot carries them.
Correct, it's a Haier beverage cooler. I am using an Arduino Brewpi setup to control the wort/beer temperature. It's been running strong for nearly 3 years without issues.
 
So another update.

15 months ago I began the journey into electric brewing. Starting with a brew kettle with and element, then moving to the eBIAB system. I am now ready to commit more money to my controller after learning what I need. I ended up going with this kit from Auber, found here. I feel this was a great deal. I did a little modification with only 1 pump and capped off the water pump switch and outlet. Another big effort on my part was running a new 10/3 (copper) line versus my old 8/2 aluminum cable. I needed a neutral wire for my pump control and main contactor. So far I did a simple wet test to confirm the controller works without issues. I am so excited for my next brew day, however, I have to wait until after the weekend of April 15th, since I will be in Paris. So expect another update when i document my brew day with this controller.

Did you buy the kit with the output connector option and what size temp probe did you go with to fit in the T you have on top of the kettle?
 
Did you buy the kit with the output connector option and what size temp probe did you go with to fit in the T you have on top of the kettle?
I already had extra plugs (connectors) so no.

For the the probe I bought the PT100-L601/2NPT from before and used that. I had to screw it into the top of the tee for this to work.
 
Quick update: I recently upgraded my weldless element to be removable via enlarging my kettle's hole from 1-1/4" to 1-5/8" to fit a weldless tri-clamp bulkhead.

Details on making this transition can be found here:
https://www.homebrewtalk.com/forum/index.php?threads/656233/

This was one of my regrets after I built my kettle. I quickly realized it was not easy to clean my element between brew days thoroughly. This will be worth it.

I bought this bulkhead off AliExpress for ~$12 including shipping. It can be found here: https://s.click.aliexpress.com/e/81NEhr2
20180930_203547.jpeg
 
Very nice! I have tri clamp elements on my rig and I love being able to remove the element from the boil kettle to bring it to the sink! Cleaning the elements is so much easier when you can remove them.

John
 
@Totally I have the same kettle as you and i installed the SS Brewtech whirlpool fitting and bulkhead in the top port of the two in the bottom of the kettle (where your thermowell/probe is located). Does that thermowell/probe interfere with your biab bag at all?
 
Back
Top