You are using an out of date browser. It may not display this or other websites correctly.
You should upgrade or use an alternative browser.
You should upgrade or use an alternative browser.
Spunding valve which is best ?
- Thread starter Beavis740
- Start date

Help Support Homebrew Talk - Beer, Wine, Mead, & Cider Brewing Discussion Forum:
This site may earn a commission from merchant affiliate
links, including eBay, Amazon, and others.
Stand
Well-Known Member
I love my Blichmann tri clamp; control is excellent. Use it on a Spike CF10
I have the Blichmann TC on my CF-5. Never had a problem.
danimal92sport
Undefeated at naps
I’m using the Kegland Blowtie for the first time now and it’s great. I especially like the sharkbite outlet fitting so I can use the CO2 to purge kegs.
Dan
Dan
Off Balance Brewing
Well-Known Member
- Joined
- Jan 2, 2021
- Messages
- 110
- Reaction score
- 39
I have the kegland blowtie and find it really let's you dial in the pressure more accurately. I use a ball lock connector on mine with the duo tight fittings. Also easy to take apart and clean.
Turfgrass
Well-Known Member
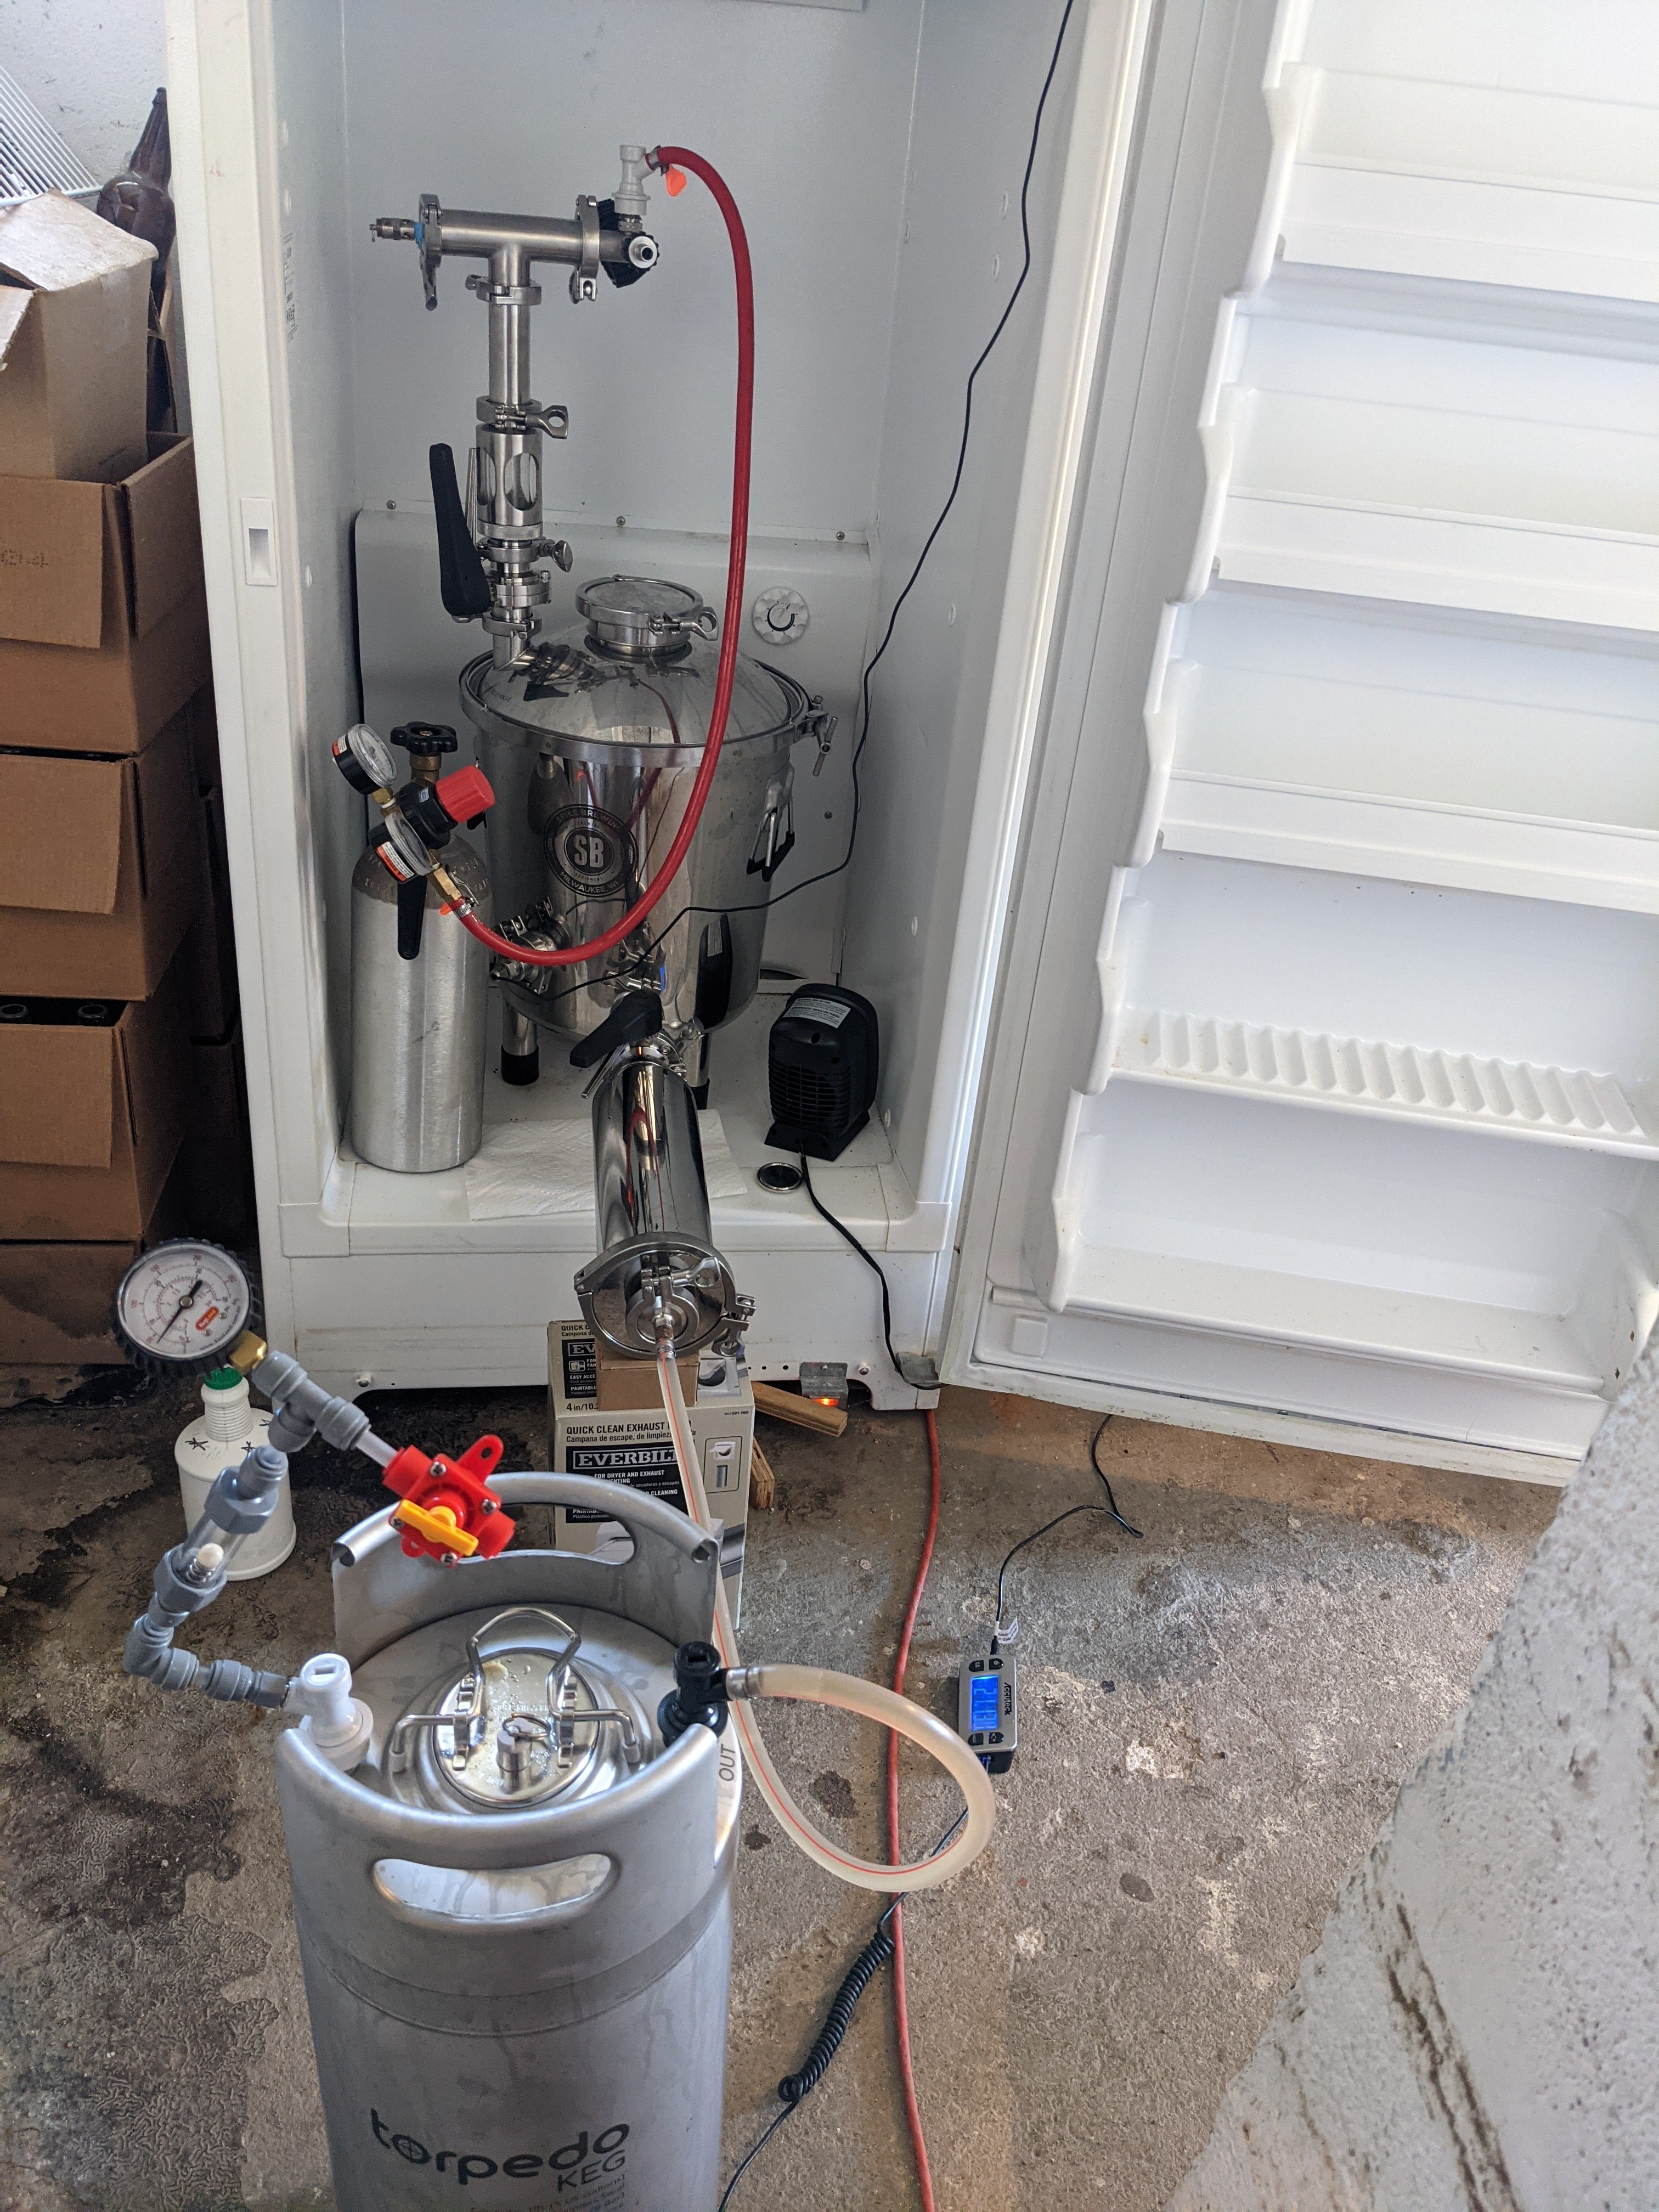
I see the spending coming off of the keg, but what is the attachment exiting the fermenter? Filter?I can't say which is best, but I use a blichmann tri clamp spunding valve on my flex+ and love it. No complaints.
twd000
Well-Known Member
Kegland Blowtie for the win
Wayne1
Well-Known Member
SPUNDit 2.0 works far better than Blowtie
SPUNDit 2.0
SPUNDit 2.0
Golddiggie
Well-Known Member
I have both the first and second gen Blowtie setups. I like the second gen better due to it having the gauge integrated into it. More compact and easier to dial in.
I have added fittings so that I can hang a small [plastic] jar off the end partially filled with StarSan for it to bubble into. Makes it easier to tell that CO2 is coming out.
In the past I tried other setups and they were iffy at best. The ones that had the valve where you screwed the end in/out were difficult to get dialed into the desired setting. I gave up on trying it until I learned about the Blowtie product(s). Simply put, these work really well.
Picture of the Blowtie gen2 (or whatever they're calling it) on my fermenter. With the StarSan jar added.

I have added fittings so that I can hang a small [plastic] jar off the end partially filled with StarSan for it to bubble into. Makes it easier to tell that CO2 is coming out.
In the past I tried other setups and they were iffy at best. The ones that had the valve where you screwed the end in/out were difficult to get dialed into the desired setting. I gave up on trying it until I learned about the Blowtie product(s). Simply put, these work really well.
At more than double the cost, it had better work better. But, it's also a more complicated setup.SPUNDit 2.0 works far better than Blowtie
SPUNDit 2.0
Picture of the Blowtie gen2 (or whatever they're calling it) on my fermenter. With the StarSan jar added.

That pic is actually two spunding valves. There's a blichmann on the fermenter I use during fermentation and then the blowtie on the keg I use during transfer (1psi differential between fermenter and keg)I see the spending coming off of the keg, but what is the attachment exiting the fermenter? Filter?
And yeah, that giant monstrosity off the fermenter is a filter. Works GREAT. I love it.
- Joined
- Jul 12, 2017
- Messages
- 485
- Reaction score
- 416
Links to the filter housing and filters you use if you would be so kind.That pic is actually two spunding valves. There's a blichmann on the fermenter I use during fermentation and then the blowtie on the keg I use during transfer (1psi differential between fermenter and keg)
And yeah, that giant monstrosity off the fermenter is a filter. Works GREAT. I love it.
https://www.amazon.com/dp/B07VDP9P8...abc_K7445J90M3D0BX14S9PP?_encoding=UTF8&psc=1Links to the filter housing and filters you use if you would be so kind.
Do you remember where you found that elbow fitting that attaches to the lid? I am looking to make a similar setup. ThanksI have both the first and second gen Blowtie setups. I like the second gen better due to it having the gauge integrated into it. More compact and easier to dial in.
I have added fittings so that I can hang a small [plastic] jar off the end partially filled with StarSan for it to bubble into. Makes it easier to tell that CO2 is coming out.
In the past I tried other setups and they were iffy at best. The ones that had the valve where you screwed the end in/out were difficult to get dialed into the desired setting. I gave up on trying it until I learned about the Blowtie product(s). Simply put, these work really well.
At more than double the cost, it had better work better. But, it's also a more complicated setup.
Picture of the Blowtie gen2 (or whatever they're calling it) on my fermenter. With the StarSan jar added.
View attachment 724466
Edit: Does that fitting actually attach to the lid, or is it one of these numbers, just resting on the lid?
I can probably get something close with these two, but not as clean
https://www.morebeer.com/products/duotight-pushin-fitting-8-mm-516-elbow.htmlhttps://www.morebeer.com/products/d...p-male-bulkhead-seated-oring-locking-nut.html
Last edited:
Golddiggie
Well-Known Member
@RyPA Amazon dude. Took enough hunting when I was looking to make that one. IIRC, these are what I used to connect into the Startsan filled cup/container.
https://smile.amazon.com/gp/product/B0886H7NVChttps://smile.amazon.com/gp/product/B089M51QKS
https://smile.amazon.com/gp/product/B0886H7NVChttps://smile.amazon.com/gp/product/B089M51QKS
@Golddiggie Perfect, thanks buddy. How is the entire blow tie setup holding up?
Golddiggie
Well-Known Member
Not in use since I went to conical fermenters and using the SS Brewtech spunding item (with the graduations/marks). Made more sense to use the TC connected item over something I'd need to connect to the gas manifold on the conical. Not sure if I'll ever use the Blowtie ever again in fact. I have the original and second version setup too. Replaced the vinyl tubing with stainless so it doesn't droop. Last time I used it was to vent the yeast brink during a harvest. Not sure if I'll do that again or not.@Golddiggie Perfect, thanks buddy. How is the entire blow tie setup holding up?
Thanks for the feedback. I just placed an order for the blow tie v2. I'm planning to ferment and serve out of the same corny keg using a floating dip tube. I'll use a blow off tube for first few days of fermentation then once it slows down, switch to blow tie until ready to fully carb/serve. I bought some anti-foam to be safe.Not in use since I went to conical fermenters and using the SS Brewtech spunding item (with the graduations/marks). Made more sense to use the TC connected item over something I'd need to connect to the gas manifold on the conical. Not sure if I'll ever use the Blowtie ever again in fact. I have the original and second version setup too. Replaced the vinyl tubing with stainless so it doesn't droop. Last time I used it was to vent the yeast brink during a harvest. Not sure if I'll do that again or not.
I considered getting the spundit since it looks like a nicer piece, but I'll see how pressurized fermentation/serving plays out with this cheaper piece and maybe I can upgrade later.
Golddiggie
Well-Known Member
I've not used any blowoff setups since I started fermenting under pressure. I've had 7 to 7.25 gallons in a 7.75 gallon sanke kegmenter without a blowoff setup and had zero issues (with the Blowtie and the container). In my current mode I'm setting the spunding valve to about 5-7psi (I aim for 5, but sometimes miss the setting and it's either 6 or 7 on the manifold gauge) since I want more of what the yeast contributes. Plus I'm using a glycol chiller for temperature control. Or, since it's winter and the fermenting room/area is in the 55-60F range, the heating pad on the cone (under the neoprene jacket).
I'm liking how I can put enough wort into the conical to get my full batch size out at the end. Last batch had 9-10 gallons go in at the end of the brewing part. It's been in conical for just over two weeks now, currently at about 5psi. I'll be starting the chill process today and get the carbonation stone connected tonight (or when it hits target temp) to get that rolling. By end of week it will be ready for keg (and serving) and can.
Right now I have two Spike CF10 units. I'm waiting for Brewers Hardware to have their 15 gallon jacketed conical available for purchase. I plan to get one to compare with the Spike. They share a lot of the same features, with a few differences. Those differences is what I want to evaluate and see if it makes things easier for me, or has an advantage over the Spike. If so, the Spike will probably go up for sale while I get more of the BH models. I just wish the price points were closer together. The BH is about half again the cost of the fully ready Spike CF10.
@Golddiggie Do you see a reduction of krausen when dialed in at 5-7? Do you go 5-7 until you're ready to drink, or do you bump it up to carb?
I am hoping to get close to 5 gallons out of my corny keg, the main concern is the krausen coming out of the gas dip tube and into the blow tie, and potentially clog it. Fortunately these kegs are rated for really high pressure, but I don't want to play with fire.
If all goes well with pressurized fermentation, I'll likely buy a nicer setup, looking to get my feet wet before splurging some serious money on it.
Golddiggie
Well-Known Member
@RyPA I let it ferment in the 5-7 range (aim for 5, let it go to 7 depending on the recipe). Once everything is done, and the yeast has settled, I attach the carb stone and infuse with CO2 that way. Advantage of a conical fermenter. ")
I doubt you'll get 5 gallons out of a 5 gallon corny keg. You might with a 6 gallon Torpedo keg. With my batches, I harvest a good amount of yeast from them. Last batch I didn't harvest, but looked to see how much matter was in the conical at the end. A solid quart or two came out (I needed to get the Tilt Pro out for the new batch due to the one I wanted to use failing). The batch in process now is chilling down to carbonate temp (aiming for 38F) and I'll put the carb stone on it tomorrow morning. I'll harvest what's left after I package the batch and save for the next stout recipe (looking to have one harvest from stouts and one from pale ales to keep things happier, same strain).
I also don't look at what's going on inside the fermenter, visually, at all. I have other ways to check. Either the pressure gauge on the manifold, or the Tilt Pro inside the conical will tell me what I need to know.
IME/IMO, switching to conical fermenters, with temperature control, was a very good move to make. It helps if you brew on the same level that you ferment in. Since the garage here is at the basement level, I can simply fill the conical, and wheel it into the basement/back room and let it ride. Since I have an electric system, with a steam condenser lid, I don't have to worry about making the walls/ceiling in the garage sticky or have carbon monoxide issues. Keep in mind, I fermented under pressure in kegmenters before going the conical route. Also had a fermentation chamber. PITA, for me at least. Getting a filled 1/4 barrel keg into the chamber wasn't fun. Going for larger batch sizes was even less fun. No problems with the conical.
Maybe down the road I'll get fancier equipment, I am going on my fourth batch after being on a 5 year brewing hiatus and am working on improvements one, or two, steps at a time.
Some background: All IPAs I've brewed suffered from oxidation after carbonating. I noticed after fermenting my very first AG batch in September, it tasted awesome coming out of the fermenter and I could not wait for it to carbonate, only to find/learn that oxygen killed it and it too tasted like garbage shortly after carbonating. This is what is driving the all-in-one vessel approach, just to see what happens. If this fixes my flavor issues, I'll likely begin investing more on equipment. I'm also going to do water adjustments this time around.
Some background: All IPAs I've brewed suffered from oxidation after carbonating. I noticed after fermenting my very first AG batch in September, it tasted awesome coming out of the fermenter and I could not wait for it to carbonate, only to find/learn that oxygen killed it and it too tasted like garbage shortly after carbonating. This is what is driving the all-in-one vessel approach, just to see what happens. If this fixes my flavor issues, I'll likely begin investing more on equipment. I'm also going to do water adjustments this time around.
Golddiggie
Well-Known Member
Not had any issues doing transfers to keg from conical. I'm using a "closed transfer" model with the gas post going into a container of Starsan during the fill. I use the Tapcooler can filler also, so counter pressure to fill the cans before they get sealed up. Zero issues to date with plenty of batches going this way. I'm still doing yeast starters (stirplate) and oxygenating the wort with pure O2 as it leaves the plate chiller (before going into the conical). IF I'm adding hops post fermentation, I use a CO2 purging hop dropper. I do that for by pale ales, both my English IPA and ordinary bitter recipe.
BTW, to carbonate in conical, it takes a few days to be at the desired level (for me). That's using the carb stone (from Spike). I've been purging the stone with CO2 once it's connected to the racking arm the past few batches. Same with when I'm ready to transfer, I purge the fitting that I connect to the racking arm. Very little volume to purge there.
BTW, to carbonate in conical, it takes a few days to be at the desired level (for me). That's using the carb stone (from Spike). I've been purging the stone with CO2 once it's connected to the racking arm the past few batches. Same with when I'm ready to transfer, I purge the fitting that I connect to the racking arm. Very little volume to purge there.
I was planning, literally a click away from ordering equipment, to begin doing closed transfers but then read up on fermenting and serving in the same keg. A lot of people swear by it so I figured I'd give it a shot. Seems like the easiest o2-free method. I do not harvest yeast so I think the only negative is the amount of beer I get to drink.
I also use a carbing stone, it seems to shave a few days off.
I also use a carbing stone, it seems to shave a few days off.
Golddiggie
Well-Known Member
I used the corny keg carbonating lid for a few kegs. It was about 2-4 days to get the keg fully carbonated. Cooling the keg was a factor there, since it's not as easy to get an accurate read of the temperature in the middle of the keg, so you need to give it enough time. With the conical, and glycol chiller (plus Tilt Pro) I know what the beer temperature is. I also can adjust things as I wish (easily).
I'll be putting the batch onto CO2 in the morning. By Friday afternoon (or evening) it will be ready for packaging. I usually let the batch setting for a day, but I might not this time. More for an experiment to see how much is left in the bottom of the keg when it kicks.
I still need to clean out the empty conical before brew day. I need to go back to the brew store to get some grain since I was warned about the grain I bought today. At least they have enough that will be good to use for the recipe on deck. I'll just need to get more sooner than otherwise, as I brew the lower ABV version. I'm brewing an imperial version coming up (estimated about 10%). The normal is in the 5-5.6% range.
I think I am much smaller scale than you are. I am the only beer drinker in the house, and I am good for maybe 1-2 12-16oz beers per day. Very few of my friends drink good beer. I primarily drink IPAs which unfortunately do not have a long shelf life. Looking forward to a chocolate coconut milk stout that is on week 2 in the carboy. Gearing up for an IPA brew day, which is my first o2 free batch. Hoping for a big improvement
All that high end equipment sounds great, but until I can get my beer tasting presentable on a small scale, I'll work with what I got.
All that high end equipment sounds great, but until I can get my beer tasting presentable on a small scale, I'll work with what I got.
Last edited:
I use one too, for the first time, and to make sure all goes well and dont overpressure I connected my older spunding valve I made of corny kegs(connected it on the blichman gas post). It has bigger gas gauge that came from a regulator. Anyhow before I digress here the old valve reads 10psi while the new blinchmann reads 2 psi. I am concerned something is really wrong with the gauge from blichmanns. I will open the blichmanns up once this batch is done but there is something going on here.I love my Blichmann tri clamp; control is excellent. Use it on a Spike CF10
Similar threads
- Replies
- 5
- Views
- 732
