Spending the time on DIY kegerator or spending the coin on turnkey?

Homebrew Talk - Beer, Wine, Mead, & Cider Brewing Discussion Forum

Help Support Homebrew Talk - Beer, Wine, Mead, & Cider Brewing Discussion Forum:

This site may earn a commission from merchant affiliate links, including eBay, Amazon, and others.

Awnry Abe

Member
Joined
Feb 3, 2022
Messages
11
Reaction score
20
I'm more than ready to switch from bottling to kegging. I had every intention of converting a freezer, but then spring time came, and my project list exploded. I'd really like to stop bottling, and am now thinking I'll just buy a rig so I can onto things that get my hands dirty outside.

For those of you that bought a ready-to-use unit, are you happy with it?
For those of that like to DIY and did so for yours, was it an lengthy project? I'd be tempted to do so if I could squeak it in on a rainy day (assuming we will have one of those).
 
I built my kegfridge, taps come out the side and then just front loading for the kegs, so not as much bending and lifting as with a keg freezer.
No need for a collar on the fridge as tall enough to fit 8 kegs in 4 each level.
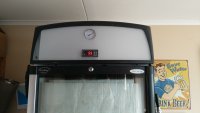
Kegs are things that breed, so more space for conditioning lagering is useful. You can put taps in the door of fridge as no risk of hitting gas lines in there, my fridge is ex commercial display one so a double glazed glass door not suitable for front taps. Can't send pictures as on work pc.
If you had all the parts and were planned you could do it in an afternoon and then like all things you'll tweak it afterwards.
 
The only thing your really need to build when converting a chest freezer to a kegerator is building the collar. Do a search for Keezer or Kegerator to see some of the builds and go from there.
 
Building your own lets you pick the exact components you want. There are very few units that have all stainless shanks and Intertap or Nukatap faucets. I'd also recommend going with 4mm ID EVAbarrier tubing for both gas and liquid lines. Upright freezers are better because you don't need a collar and it's easier to get kegs in and out.
 
The only thing your really need to build when converting a chest freezer to a kegerator is building the collar. Do a search for Keezer or Kegerator to see some of the builds and go from there.

Unless you have a brand with a wider range thermostat than I have seen, you would probably need a temp controller. Inkbirds are cheap and easy.

edit, sorry, just reread and saw the build part. But really, a temp controller and a collar, then you can start with a tank in the keezer and picnic taps until you decide (or save up for) what faucets, towers, decorations, drains, etc. you want. Or you can stop there and just have the basic. It is still beer, right?
 
My last keezer was certainly nothing much to look at, but I did go all out with secondary regulators, a false bottom with fans for air circulation, and many taps. I’d say I put in 3 or 4 afternoons, maybe 10 hours total. And I’m not terribly handy (but I do have a lot of tools.)
 
made mine from a faulty chest freezer, had to replace the compressor anyway so turned it on it's end so the compressor was at the top, placed the tap at the front, but not a quick job, also replaced the thermostat with a 12 bit digital controller (bit of overkill but not much available in South Africa at an affordable price so needed to make my own) still a whole lot cheaper than a production kegerator. takes 2 x 30 litre kegs.
 
Time wise it all depends on how many beers you plan to have on tap. Every additional tap adds time. If you are talking about something simple like the average kegerator that would have one tap or double tap tower you could probably mount a tower to a minifridge ( both cheap off Marketplace is good ) in under an hour or maybe 1 tap per 20 minutes through a fridge door. I usually will drill 1 hole through whatever I'm working on and silicone a PVC pipe in the hole for putting gas lines and an Inkbird temp probe through.
 
I bought a clearance freezer from Home Depot and an inkbird controller. The collar was a two by twelve so I could put two kegs on the hump. ($15 at the time. ) Maybe an hour construction time and overnight for stain and sealing. The taps can be as nice as you can afford.)Mine are picnic taps ($4 each) mounted thru the collar. For the difference in money its a no brainer for me.
 
Issues I had with a keezer.
Something to consider when building a keezer.
My first was a keezer, and I had about a 12-14 inch collar.
I had to get up on a stepstool to lower full kegs into the unit, then bend way over to get them all the way in.
The kegs would sweat and water would condense inside creating a pool of water in the bottom that I would have to use a shopvac to get it out, again from a stepstool.

I have since gone with kegerators and they came off of the second hand market, CL usually. Several were a couple hours drive each way, some were local.
Some I kept, some were bought to fix up and sell, some were for friends.
I have been able to find commercial kegerators ridiculously cheap, most have needed minor repairs, typically a thermostat or a fan and a good cleaning and beer line replacements. The fans and thermostats were usually under $20 when needed. Most I upgraded the towers to three faucet towers, and they came with new beer lines so no need to replace those.

BTW- I've also seen keezers on CL.
 
I had a lot of condensation issues with my first keezer. This lead to early failure of the freezer I think, developed some rust and the sides swelled reducing my original capacity from just barley 4 kegs to really only fitting 3.

On my second keezer I made a few changes:
  • went a little bigger...fits 6 kegs on floor comfortably rather than just barely fitting 4
  • got the chest freezer off the floor...plywood base with casters lets me move it to clean under and keeps moisture from collecting under and rusting it out
  • kept the collar at 4", sealed it really well with mildew resistant silicone caulk, and insulated it on the inside with rigid foam insulation
  • added a couple damp rid buckets inside along with a Yolink thermometer and humidity monitor
Condensation was not a problem even in my garage during humid summer months.

I don't really have any difficulty loading kegs into the unit and the large surface doubles as a work area on brew days.
 
I bought a mostly ready, used 2 tap kegerator and have loved it. Though now I am realizing that I want more than 2 kegs on tap at a time, plus the ability to cold condition another keg at the same time would be a nice bonus.
 
Honestly unless you already have a freezer or can get one for cheap you’ll spend close to the same on DIY as you would turnkey. But it’ll likely hold more kegs, which is great. If you only care about having a couple beers on tap I’d just get a premade.
 
Keeping a 2.5 gallon corny keg in the home kitchen fridge can work too. A picnic tap and a CO2 injector doesn't take up much room. Push aside the pickle jar and the mayo and you could have great tap beer without taking up much space. I recycled the old kitchen fridge when we updated appliances. With all the shelves out it holds 4-6 five gallon corny kegs. I drilled a 2" hole in the side (very careful not to hit a coolant line) and have three beer lines plus three CO2 lines. The three beer lines feed taps in the bar on the other side of the wall. Like mentioned before, lifting full kegs into your cooler can be a challenge, plus the condensation issues. Fridges are easy to come by, but the fun of building a personalized keezer can be rewarding too.
 
DIY: most 7 cu. ft. chest freezers will accommodate 3 kegs on the floor, and a 4th on the compressor hump (but take your measuring tape to the store). to take full advantage of the chest freezer, plus being able to use "proper" taps, you need to make a collar so you have clearance for the 4th keg plus a place to install your taps (as has been mentioned above, there are many examples of collars on YouTube).

but. to get started quickly and easily, you can use 3 kegs and picnic taps so you don't need to build a collar before your first use. that can come when you have more time and you have cold, kegged beer to help you with the project! you do, though, need to buy a temperature controller. you will turn the temperature control on the freezer to max cold, then plug the freezer into your purchased temperature controller, which will cycle the freezer on and off as needed. the capillary tube for the temperature probe for the external controller will not be harmed by closing it under the gasketed lid of the freezer.
 
Refrigerators take up less floor space than a freezer, but more wall space. Used fridges are, generally, cheaper than new freezers, often free. If you can live with picnic taps you can have a kegerator for little more than the cost of the fridge, a temp controller, a C02 bottle and regulator, and the taps. The “construction time” is the number of times you open and close the door getting everything in place.

The drawbacks of a fridge are the aforementioned wall space, they’re harder, or at least more expensive because of their size, to conceal as furniture in a finished space, and most of the cheap/free ones will be smaller and won’t hold as many kegs as a smallish freezer.

It pretty much comes down to the available space. If you have a place for a fridge, that option will almost always be faster and cheaper than a keezer.
 
I prefer to DIY something, to be honest. Mainly because you'll end up with something much better quality tailored/customised to your specific needs. It won't necessarily be cheaper. Just better. I have a 'series-x' kegerator that I'm alright with, used as a caskerator, but, tbh, it's actually very expensive cheap Chinese shite. I don't expect it to carry on running forever and I wouldn't buy another one. For less than half the price you can get a new premium quality fridge or freezer to drill the holes you need to drill. I honestly reckon it's going to serve you for much longer than a very expensive off-the-shelf kegerator. ****, even a new budget quality fridge or freezer is going to be better than a ready made kegerator.
 
I bought a turn key as you call it and have no regrets. 3 intertap faucets eva lines and duo tight connections with a regulator. Cost 700 bucks and took a couple hrs to put it all together.


Cheers
 
My Keg fridge based on Commercial fridge, the stout tap and cylinders hide on the far side outside the fridge, I used black paint on a roller. Taps and shanks about 35 pounds each, duotight T and regulators on the inside cost about the same amount. One burnt out 25mm spade drill for the holes. Only issue is I want to move it about a metre which will mean taking all the kegs out. It's a hardship. I've spurred a gauge to the outside so I can check pressure to the main lines without having to squint at the kegland inline regulator display which is tiny. STC 1000 that broke is just there for temp reading, the fridge thermostat does the job nicely. I also have an ispindel in the fridge which relays temp to brewspy and will alarm me if the temperature rises too much, ie an open door detector.
IMG-20210307-WA0007.jpegIMG-20210306-WA0002.jpeg
 
In defense of the chest freezer, I had a QD go bad once (not a CMB, guess what I buy now.) and dumped two gallons into the chest. Not fun to clean up, but nothing on the floor, and I could ignore it after I popped off the QD and deal with the cleanup on the weekend when I had time. And if you realy want to go big it is either commercial kegerator or a big chest freezer.

Not fond of the cheap freezers though, had a magic chef 7 cu ft fail after about 2 years. And the salesman had me measure the floor model and buy the boxed unit, big song and dance about not having the energy to open the new box himself, he knew the damn thing was different dimensions from the floor model.
 
Never researched a commercial made kegerator so don't know the up front cost. I am using an used fridge (150$) that has a top freezer. Has room for five pin lock kegs once the co2 tank removed. Also room for 30 16oz beers on lower shelf. Nothing fancy it's the beer fridge in the garage. It is nice having the extra freezer space for hops, steaks, and and walleye.
 
I am working on a kegerator currently, we replaced the old kitchen fridge and freezer with 2 (barely) used ones we found. The built in thermostat has gone shite but the compressor works just fine, will use a simpel external one taped to 5L water jug anyway.
To me half the fun of brewing is the DIY, spending some time here and there ghetto engineering some contraption.
But that may be my ADHD personality also...
 
I went with the turnkey route. Just purchased a dual tap Danby unit at Costco as my first attempt into keging. Next step is finding a couple corny kegs.

I don't mean to cut you down here but the big box/discount warehouse kegerators use some of the shoddiest materials available. The couplers, shanks and faucets are almost always 100% chrome over brass. The faucets are also going to be rear sealing so they will get stuck from dried beer. The tubing is PVC and more oxygen permeable than ideal. Of course you can upgrade all these things in time, but you'll spend another couple hundred in the process.
 
Hi Bobby. I know this is counter intuitive, but I did know the lower quality of gear with the unit I bought. This was an impulsive type buy. Been wanting to do it for a while, and finally just pulled trigger as I don’t think I will have the time to build my own. That being said I did order Nukatap faucets, stainless shank and EVA Barrier lines. Yep tacked on a few more $$$ to overall cost.
 
If you can find a good mini fridge with a bit of room and preferably without a freezer DIY is fairly straight forward. A hole saw, beer line(s), tower, faucet(s), silver HVAC foil tape, inkbird or similar controller, and maybe some wet starch to see where the lines are running. I'm sure this has already been discussed.

I think @Bobby_M had a good suggestion with the upright freezer if I do it again I'll go that route as they seem to be plentiful and cheap on CL.
 
I agree to the shoddy description. I bought one of the discount chest freezers, and the compressor seized after 2 years. Bought a barrel style wine cooler used, originally sold through a big box hardware. Turns out it had steel coolant lines. I say had, the lines are still there, but coolant long gone through the rust. Pity, it held a 6.5 gallon carboy really well. made a foam top that let the airlock stick out and I had a great single batch fermenter for lagers. Only paid $40 used for the cooler. I will miss it.
 
Back
Top