tigmaster
Well-Known Member
if theres anything that pisses me off bad is seeing people solder stuff....but damn dude you did a killer job on that....

if theres anything that pisses me off bad is seeing people solder stuff....but damn dude you did a killer job on that....
Tigmaster, like I said in your thread going rate was $75 an hour to have it tigged locally at a fab shop. not sure how long it takes to do one coupling, but for my broke ass, a step bit, keg tool, and Harris Stay-Brite solder and flux kit was much cheaper.
-=Jason=-


![Craft A Brew - Safale S-04 Dry Yeast - Fermentis - English Ale Dry Yeast - For English and American Ales and Hard Apple Ciders - Ingredients for Home Brewing - Beer Making Supplies - [1 Pack]](https://m.media-amazon.com/images/I/41fVGNh6JfL._SL500_.jpg)


")
On this subject... my local dealer for the Harris liquid solder only carries it in 16 ounce bottles and those are $17. If I would ever use that much, which I won't, I wouldn't mind buying the pint, however, I will never use more than a couple of ounces in the rest of my life. Do any of you know who sells smaller quantities?
Tigmaster, like I said in your thread going rate was $75 an hour to have it tigged locally at a fab shop. not sure how long it takes to do one coupling, but for my broke ass, a step bit, keg tool, and Harris Stay-Brite solder and flux kit was much cheaper.
-=Jason=-

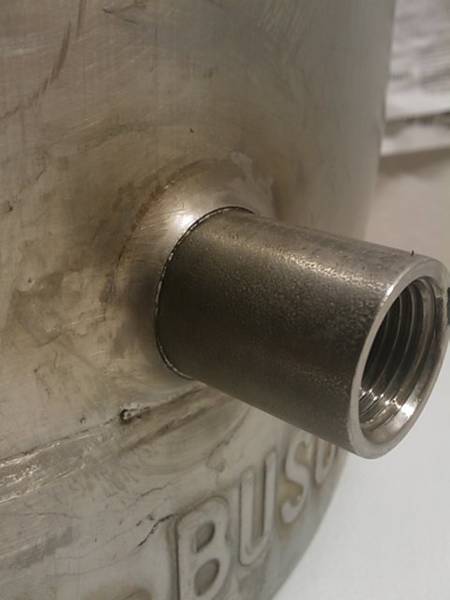
here is my second attempt at the coupling soldering.
I'm very happy with the way this turned out. I didn't use anything to clean it up, I just wiped it down with a damp rag and a little flux.
-=Jason=-
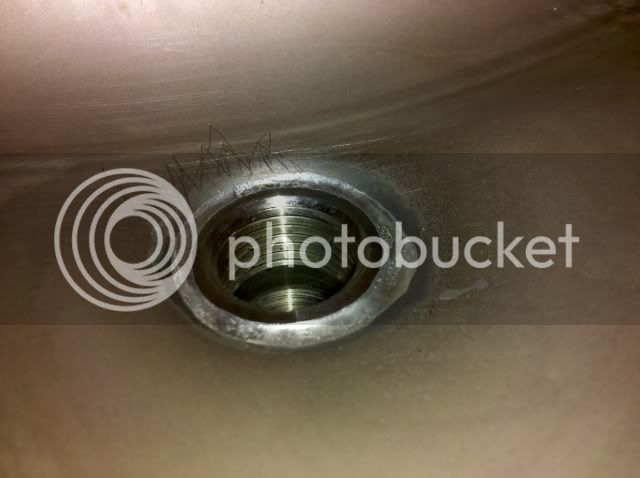
I'm confused. Why can't this be used as a bottom drain? It looks like it wouldn't leave any in the kettle.
Are folks worried about the solder melting?
Every drop comes out of the kettle, and one fewer pokey thing inside the kettle to hurt myself on when cleaning. Now we'll see how they stand up to years of abuse.$9 for a hex nipple is way out of control. Even after my markup, I'd probably sell them for around $4.50 if I decided to go that route.
You can buy Stay Brite 8 kits with the flux for under $10.

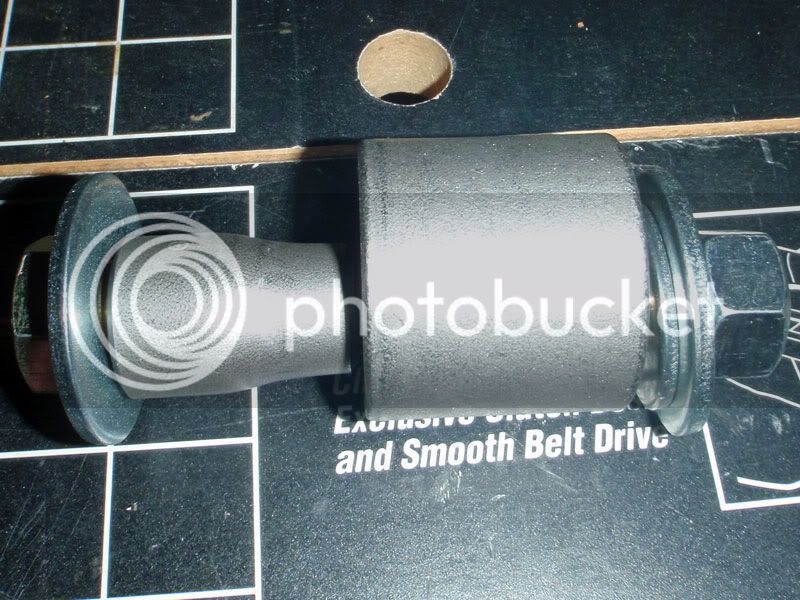
Stopped by my local big box tonight. Picked up a tungsten carbide bit for my Dremel, which allowed me to open the tapered coupler up enough for the 5/8" bolt to pass through. So I was able to finish the tool properly.
Left to right parts are:
5/8"-11 x 4 1/2" bolt
5/8" washer
3/4" to 1/2" stainless steel butt-weld pipe fitting
1" stainless socket weld low pressure coupling
1/2" washer (drilled to 5/8" with the step bit)
5/8" washer
5/8"-11 nut
yeah i started my pull and got a flare started, then removed the reducer and replaced with the coupling. once it gets started the coupling will do a fine job of centering its self and being pulled through.
-=Jason=-
I want to put a electric element into a keg with out cutting the top off the keg. so there will be no access to the inside, would you recommend that i solder a fitting onto the side, or is it possible to just thread the keg shell and screw it in?
That is not very hard to accomplish. If you are going to use the keg with the spear in place, just remove it temporarily & replace the spear when you get done with the element install. If you don't need the spear, remove it.I want to put a electric element into a keg with out cutting the top off the keg. so there will be no access to the inside, would you recommend that i solder a fitting onto the side, or is it possible to just thread the keg shell and screw it in?


