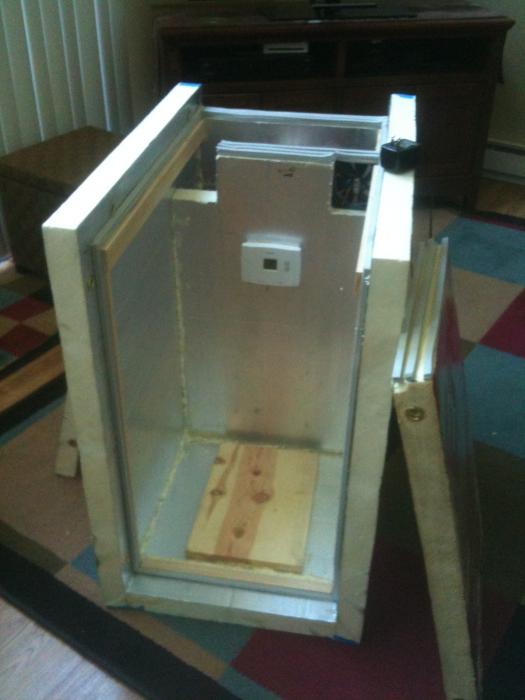
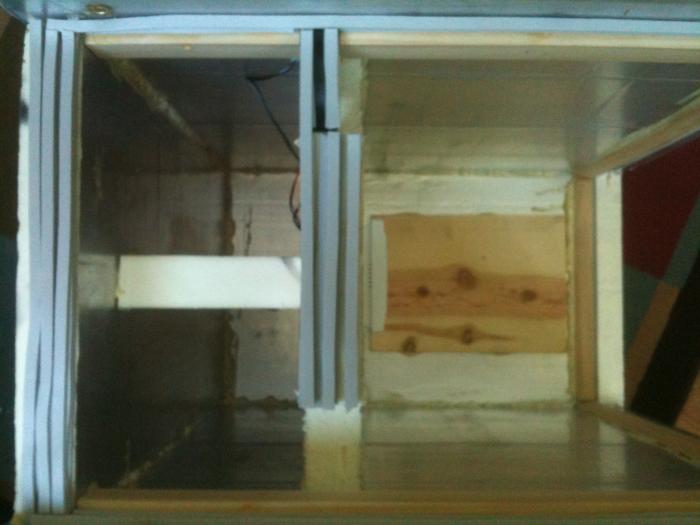
I thought I'd add my thoughts to this updated thread, after just building one of these from Ken Schwartz' plans.
I should first state that I'm a PhD engineer, so I like to mess with things - usually with disastrous, but informative, results. Secondly, I've only been homebrewing for a little over a year, so I'm still learning stuff all the time - but I tend to research things to death before I jump in.
I also thought about rearranging the cooler chamber and baffle geometry a bit. But the more I looked at the problem, the more (grudgingly) I came back to the original plan as being optimum. The cooling chambers hold on to their cold air when the fan is not running, so when it kicks in, there's a nice reservoir of cool air ready to go. As others have mentioned, hot air will naturally accumulate towards the top of the cooler.
I was going to change the dimensions a bit to make the overall size smaller, but I'm glad I didn't. Mostly out of laziness, I used Ken's cut lines (which don't account for material loss from the cutting if you use a thick blade device instead of a thin utility knife). There is just enough room for the fermenter with a nice air space around it, and perhaps a small blow-off container of some sort in the corner. The 7-in cooling chambers make a nice, tight fit for the gallon jugs - and a tight fit makes for more efficient cooling.
I also thought about a 'fresh air intake' design instead of a closed recirculating system. This would avoid having to cool down warm air from the fermenter. But this only makes sense if the ambient air is cooler than the warmest temperature generated around the fermenter - a situation which obviously shouldn't occur if the cooler is insulated properly.
Ken Schwartz made some comments about the directionality of the fan - blowing vs. sucking. I am certain that the fan should blow from the cooling chambers into the fermenter chamber, since the more turbulent downstream flow is going to help convection around the fermenter. The tortuosity of the cooling chambers and baffle ensure good convection on the cold side, regardless of fan orientation.
I do, though, think my fan velocity is too high. When it kicks on, the temperature drops incredibly fast, so I think a slower speed would make for more gentle cooling, longer ice life and even longer cycles. So I think I'll look into installing a resistor.
Thermostat placement is something not many people have talked about, but which I think is critical. I'm surprised to see several pics where people placed the thermostat on the same side of the chamber as the fan. Clearly this is not a good idea, since the system will be over-cycling as cold air hits the thermostat and turns it off prematurely. Likewise, vertical placement is important due to the natural convective gradient that will form once the fan is turned off - cooler towards the bottom, warmer towards the top. So my thermostat is placed in the opposite corner from the fan, half-way up the height of the fermenter chamber. I haven't seen any short-cycling yet.
Gallon milk jug breakage seems to be a problem with several folks. I found one guy using 1 gallon apple juice containers that were made from a much sturdier plastic and also had a nice handle on the top. But I've also been using a collection of those reusable cold packs that have been collecting in our freezer, and they seem to work just OK - they melt much faster that the larger frozen milk jugs. So I'm reserving them for emergency/backup use only. But I found some large, rectangular cooler packs (Blue Ice) at Target that work very well, and can be stacked in various configurations. They are 7 inches on their long side, so they fit perfectly.
Concerning the optional LED indicator light, Radio Shack sells an "LED Assembly" that has a resistor (850 mOhm, I think) built-in so it is ready to use with 12V, and it's only a couple dollars. If your LED is on dimly all the time, then brighter when the fan turns on, then you need to reverse the poles.
I also tried several cutting methods for the foam and was surprised that making a ~3/4-in cut with a utility knife along a straight edge, then just snapping/breaking the rest of the way through, worked best. The table saw was just OK - the foam tends to float around a lot, and my table and fence are not big enough to make 29 in wide cuts.
Finally, I found the final project cost to be quite a bit higher than the ~$70 estimates. I couldn't find any of these $10-$15 fans, thermostats, power supplies at Radio Shack, Lowe's or Home Depot. Here, some advanced planning and searching would probably have worked, but I just bought what they had available which was more in the range of $18-$20 for each component plus $25 for the foam. I went through 3 tubes of Liquid Nails, and every inch of an 8 ft length of weatherstripping! So, in the end, I was closer to $90-$100, which takes some of the fun out of it and makes other options more viable.
That being said, I had a blast making mine and it works like a charm. It's 76F in my basement right now, and I can control at 60F or 65F in the chamber no problem. i went through a full load of ice during the first night, but I think that was just the first-time start-up and warm fermenter loading. The ice jugs are lasting 1-2 days now.
I can brew in the summer now! Maple Brown Ale in the cooler now and a Black IPA coming next!

Cheers,
Dave


![Craft A Brew - Safale S-04 Dry Yeast - Fermentis - English Ale Dry Yeast - For English and American Ales and Hard Apple Ciders - Ingredients for Home Brewing - Beer Making Supplies - [1 Pack]](https://m.media-amazon.com/images/I/41fVGNh6JfL._SL500_.jpg)


