You are using an out of date browser. It may not display this or other websites correctly.
You should upgrade or use an alternative browser.
You should upgrade or use an alternative browser.
Single Vessel, All Electric, NS, NC Brewery
- Thread starter ScubaSteve
- Start date

Help Support Homebrew Talk:
This site may earn a commission from merchant affiliate
links, including eBay, Amazon, and others.
ExHempKnight
Well-Known Member
+1 to the wow. This changes everything I had planned.
Simple and elegant. Outstanding job.
Simple and elegant. Outstanding job.
ScubaSteve
Well-Known Member
- Joined
- May 21, 2007
- Messages
- 3,673
- Reaction score
- 91
More to come.....I'm actually gonna clock some hours this weekend  FWIW, I got a plate chiller to optimize real estate.....
 FWIW, I got a plate chiller to optimize real estate.....
ScubaSteve
Well-Known Member
- Joined
- May 21, 2007
- Messages
- 3,673
- Reaction score
- 91
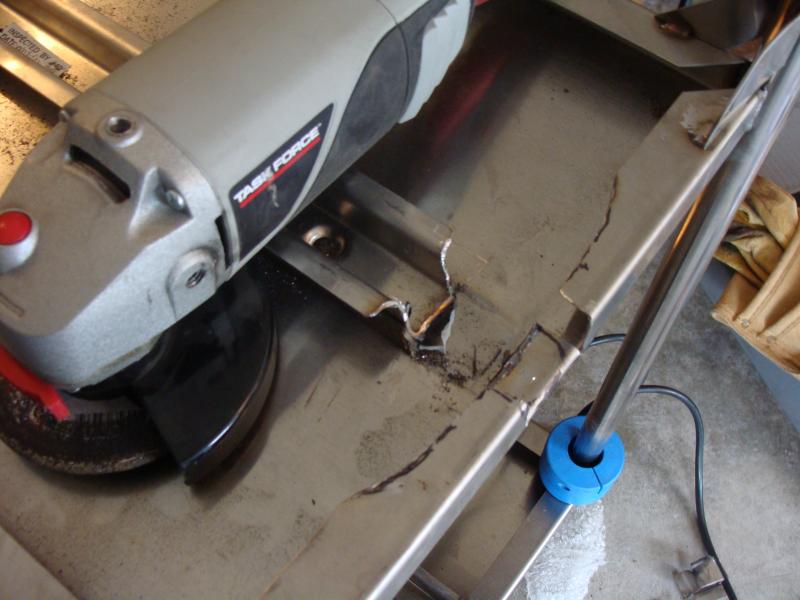
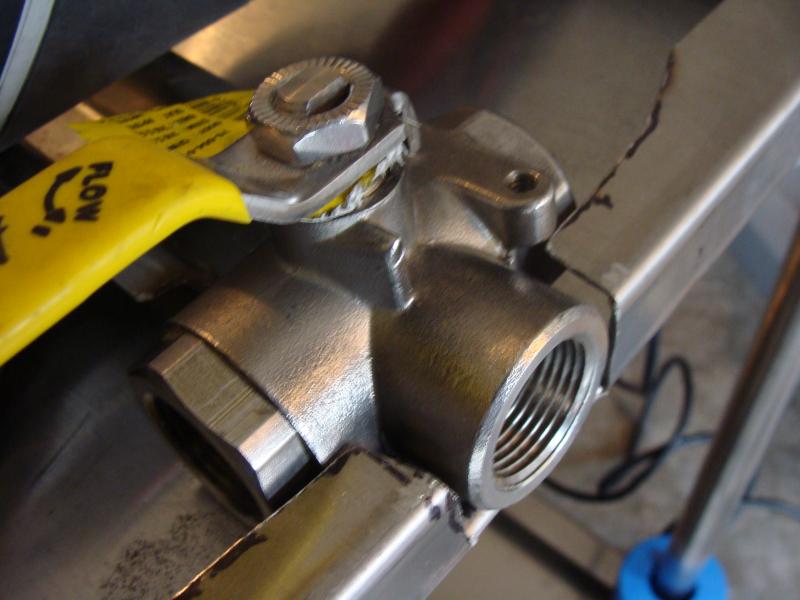
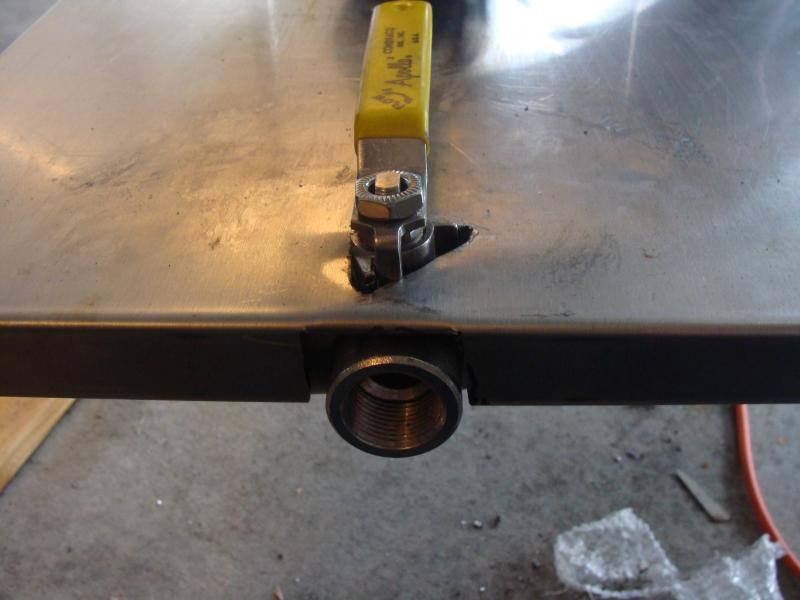
Okay, so I got some much needed work done...I pretty much put everything together, I still need a few odds/ends for the plumbing, but I've got the final configuration down. I installed a 3-way valve on the underside of the cart...it'll send water to either the filter or the chiller.


ScubaSteve
Well-Known Member
- Joined
- May 21, 2007
- Messages
- 3,673
- Reaction score
- 91
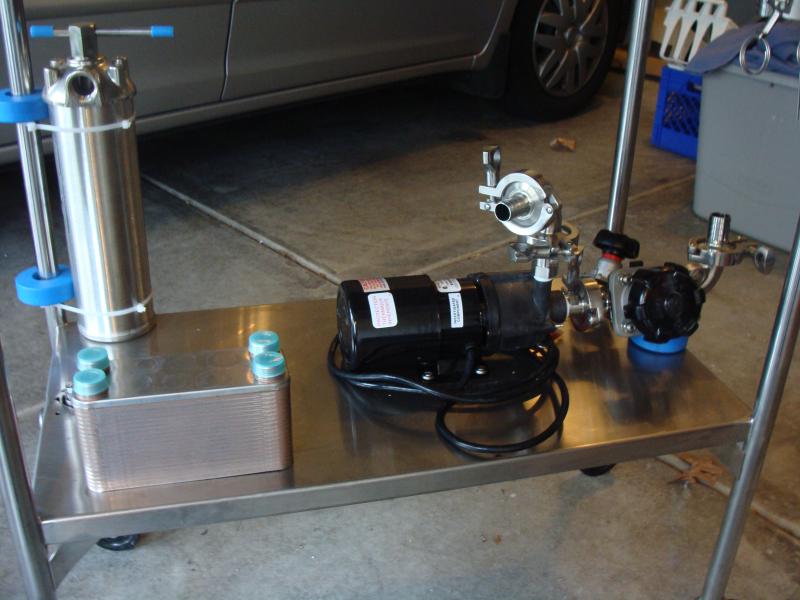
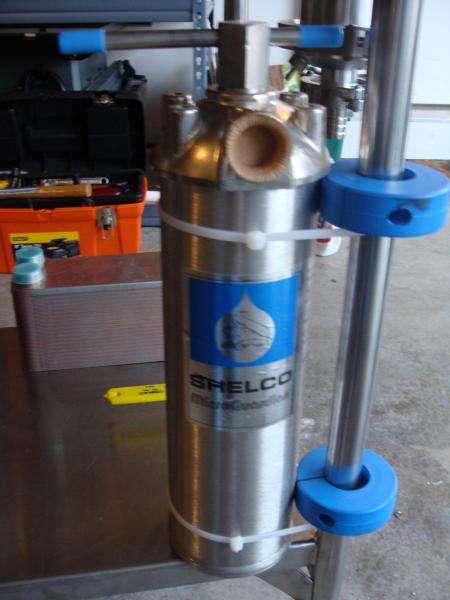
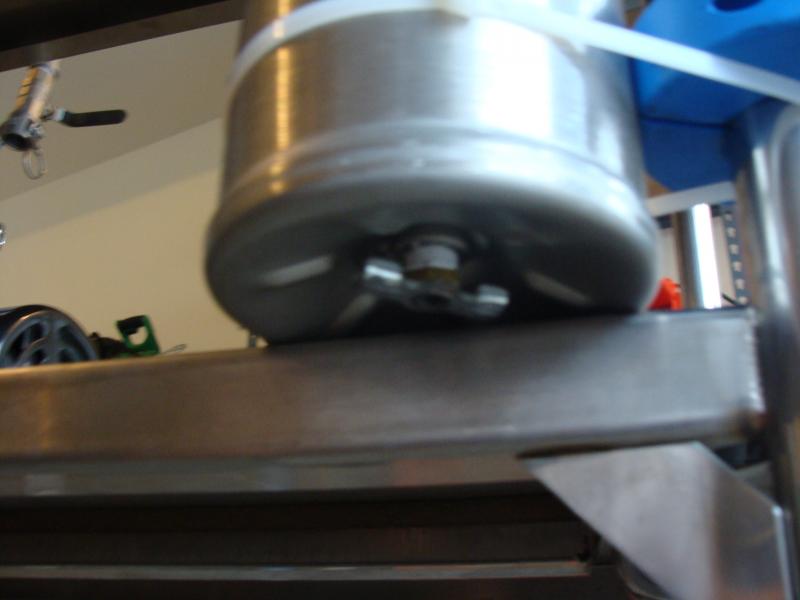
Here you can see the bottom deck...the filter and chiller will be down there, as well as the pump. The filter is pretty heavy duty, it takes regular cartridges and has a petcock on the bottom for easy drainage. Everything should be able to drain with the turn of a few valves...the chiller will easily disconnect for maintenance.


ScubaSteve
Well-Known Member
- Joined
- May 21, 2007
- Messages
- 3,673
- Reaction score
- 91
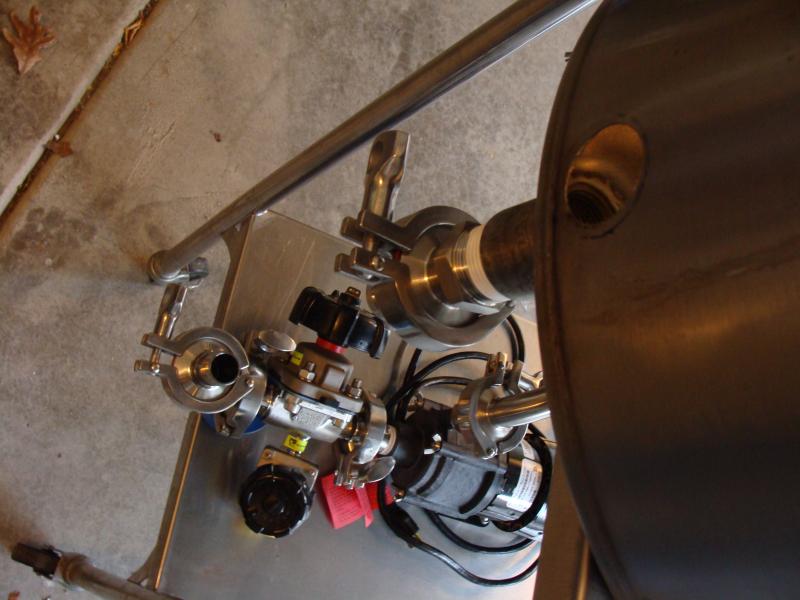
Here's a shot of the back, the bottom drain will go directly to the pump inlet....it's a massive 1" so I know the pump will not be starved. I need to get some large diameter silicone to bridge the gap, but it's ridiculously expensive and hard to find in short lengths.


$28.98
Five Star - 6022b_ - Star San - 32 Ounce - High Foaming Sanitizer
Great Fermentations of Indiana

$22.00 ($623.23 / Ounce)
AMZLMPKNTW Ball Lock Sample Faucet 30cm Reinforced Silicone Hose Secondary Fermentation Homebrew Kegging joyful
无为中南商贸有限公司

$33.99 ($17.00 / Count)
$41.99 ($21.00 / Count)
2 Pack 1 Gallon Large Fermentation Jars with 3 Airlocks and 2 SCREW Lids(100% Airtight Heavy Duty Lid w Silicone) - Wide Mouth Glass Jars w Scale Mark - Pickle Jars for Sauerkraut, Sourdough Starter
Qianfenie Direct

$10.99 ($31.16 / Ounce)
Hornindal Kveik Yeast for Homebrewing - Mead, Cider, Wine, Beer - 10g Packet - Saccharomyces Cerevisiae - Sold by Shadowhive.com
Shadowhive

$176.97
1pc Commercial Keg Manifold 2" Tri Clamp,Ball Lock Tapping Head,Pressure Gauge/Adjustable PRV for Kegging,Fermentation Control
hanhanbaihuoxiaoshoudian

$58.16
HUIZHUGS Brewing Equipment Keg Ball Lock Faucet 30cm Reinforced Silicone Hose Secondary Fermentation Homebrew Kegging Brewing Equipment
xiangshuizhenzhanglingfengshop

$7.79 ($7.79 / Count)
Craft A Brew - LalBrew Voss™ - Kveik Ale Yeast - For Craft Lagers - Ingredients for Home Brewing - Beer Making Supplies - (1 Pack)
Craft a Brew

$53.24
1pc Hose Barb/MFL 1.5" Tri Clamp to Ball Lock Post Liquid Gas Homebrew Kegging Fermentation Parts Brewer Hardware SUS304(Liquid Hose Barb)
Guangshui Weilu You Trading Co., Ltd

$53.24
1pc Hose Barb/MFL 1.5" Tri Clamp to Ball Lock Post Liquid Gas Homebrew Kegging Fermentation Parts Brewer Hardware SUS304(Liquid MFL)
yunchengshiyanhuqucuichendianzishangwuyouxiangongsi
ScubaSteve
Well-Known Member
- Joined
- May 21, 2007
- Messages
- 3,673
- Reaction score
- 91
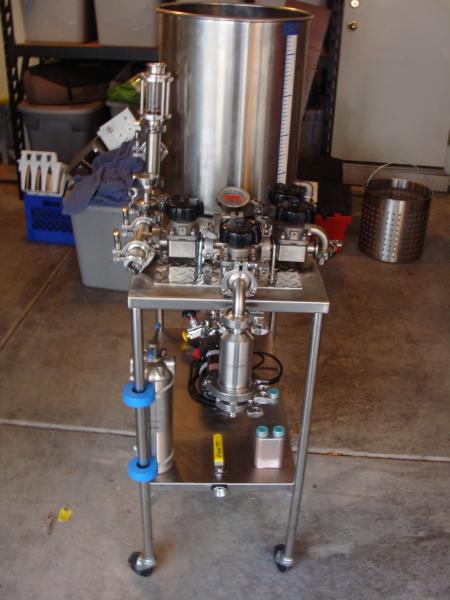
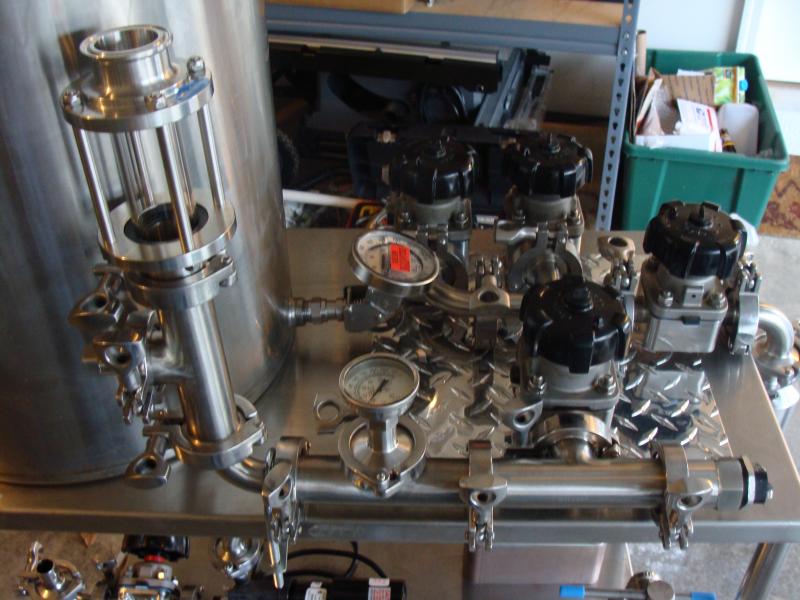
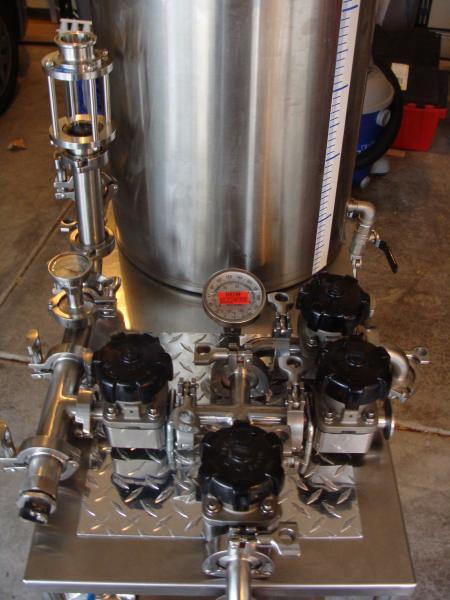
And finally, here's the bling!!!!!!...I decided to use an elbow at the end of the RIMS...I really like the configuration.


ScubaSteve
Well-Known Member
- Joined
- May 21, 2007
- Messages
- 3,673
- Reaction score
- 91
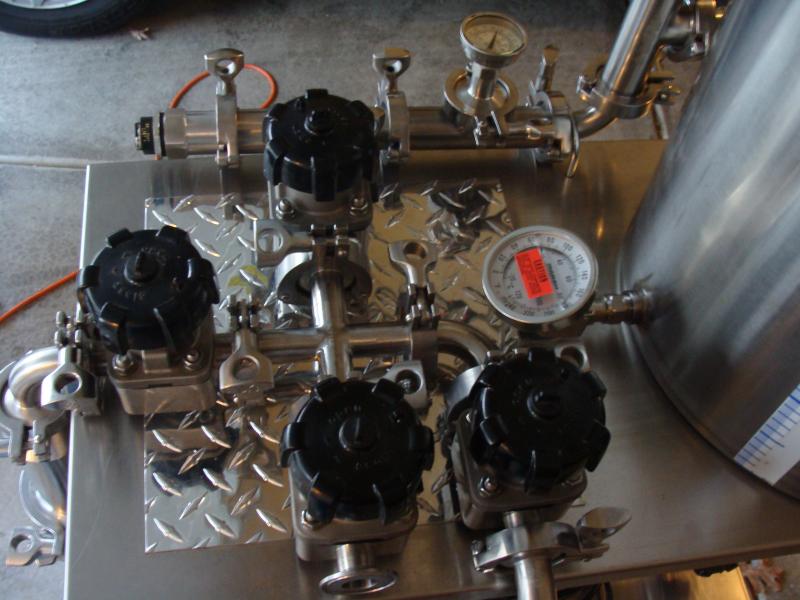
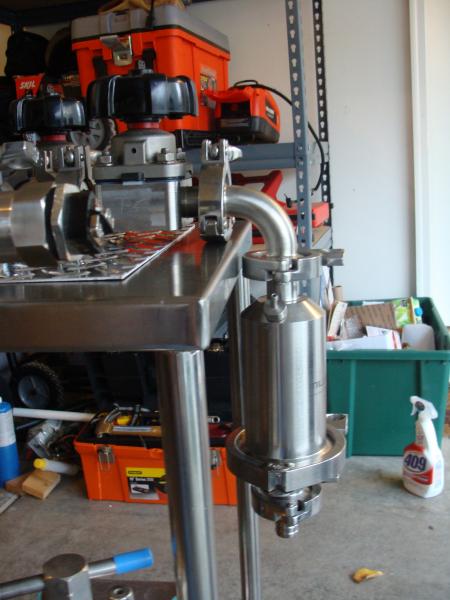
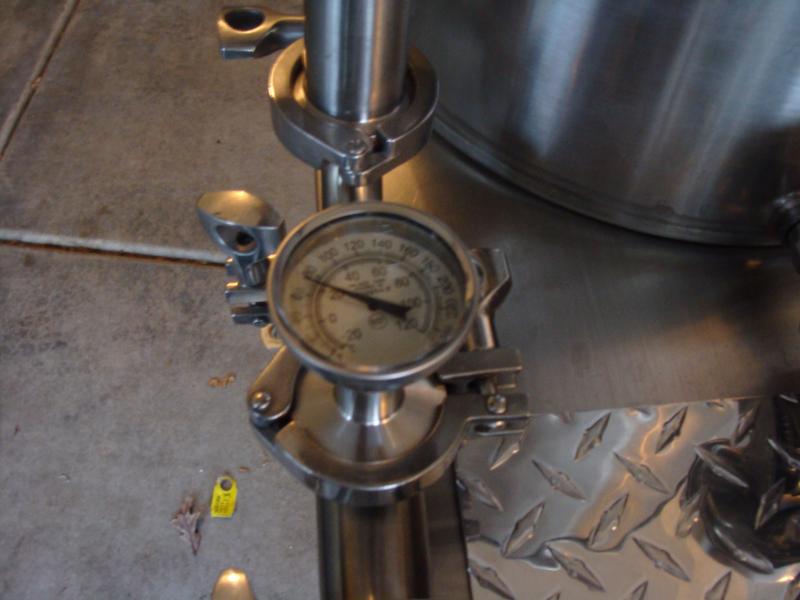
And here's some more....


ScubaSteve
Well-Known Member
- Joined
- May 21, 2007
- Messages
- 3,673
- Reaction score
- 91
Now I just need to do the electronics, I have the PID, probes, and cables.....just need to get the small items like relays, switches, etc.
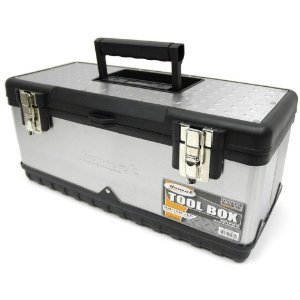
I think my current control box may be too small, so I may very well do a toolbox style controller. This way, I can keep it away from spills and I wont have to jam pack the stand with gear.
I think my current control box may be too small, so I may very well do a toolbox style controller. This way, I can keep it away from spills and I wont have to jam pack the stand with gear.
ExHempKnight
Well-Known Member
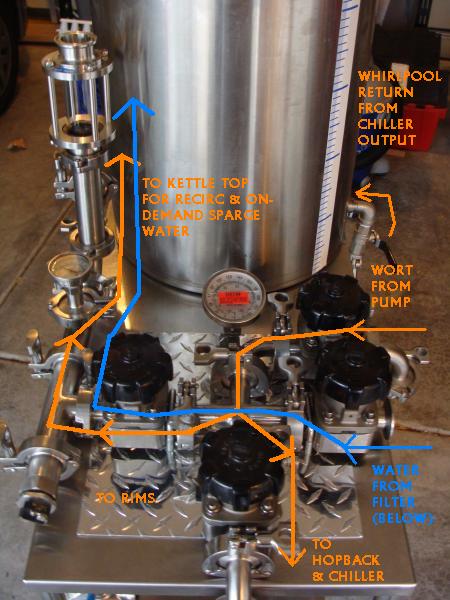
Do you have a flow schematic for the rig? I'm trying to wrap my head around how it's laid out, but it's hard when I'm dazzled by so much pretty stainless.
klyph
Well-Known Member
That is purty. A walkthrough of the process would be awesome, can't wait to see you brew on it.
BrewBeemer
Well-Known Member
Name, specs, price plus who supplied those valves would be great.
Boerderij_Kabouter
Well-Known Member
This is really coming together nicely. Great work!!!
ScubaSteve
Well-Known Member
- Joined
- May 21, 2007
- Messages
- 3,673
- Reaction score
- 91
Okay....here's the best I could do while at work  Basically, water can be run anywhere in the system for on-demand sparge water or to flush it clean. Wort can go through the RIMS or the HopBack on its way to the chiller, and the chiller output can be hooked up to the whirlpool recirc tube for whirlpooling and/or sanitizing the chiller.
Valve manufacturers? They're GEMU sanitary diaphragm valves made of Hastelloy C22. Most of the bling is stuff I got from Ebay, KLG Stainless, Brewer's Hardware, Buyfittingsonline.com, and even St. Pat's.
Valve manufacturers? They're GEMU sanitary diaphragm valves made of Hastelloy C22. Most of the bling is stuff I got from Ebay, KLG Stainless, Brewer's Hardware, Buyfittingsonline.com, and even St. Pat's.

ExHempKnight
Well-Known Member
That works. Awesome.
Not to derail, but...
I plan on a somewhat similar, albeit simpler, setup. I plan on staring with a no-sparge setup, without the RIMS tube. My valve compliment will consist of a shutoff at the kettle outlet, and 2 3-way valves (one each at the pump inlet and outlet). I'll probably also have a drain valve or 2 at the low points.
If I decide to add a RIMS tube later, I don't plan on plumbing it to the pump at all. I figure I can add an additional 3-way valve on the water inlet, and use the normal household pressure to push water through the RIMS tube, and up to the boil kettle. Does this sound feasible?
klyph
Well-Known Member
Is that the brewer's hardware RIMS tube?
ScubaSteve
Well-Known Member
- Joined
- May 21, 2007
- Messages
- 3,673
- Reaction score
- 91
Sure does. Consider a diaphragm or gate valve for fine flow control thru the rims. Also, put the valve before...not after so you don't have a steam pressure risk. I started this single vessel concept out simple but look where I ended up 
ScubaSteve
Well-Known Member
- Joined
- May 21, 2007
- Messages
- 3,673
- Reaction score
- 91
Is that the brewer's hardware RIMS tube?
Nope....but that would be nice. It's just tees and elbows.....
klyph
Well-Known Member
Oooh, then tell me where you got the 1" NPS to triclamp fitting! I've been looking for where brewer's hardware sources those.
ScubaSteve
Well-Known Member
- Joined
- May 21, 2007
- Messages
- 3,673
- Reaction score
- 91
Actually, I'd like to know where they get them myself....it's a 1" FPT x 1.5" TC  Couldn't find the right fitting ANYWHERE.....guess I'm gonna have to use a lot of teflon tape

Boerderij_Kabouter
Well-Known Member
Brewer's Hardware custom makes those (I am nearly positive). You could ask Derrin for one without the full RIMS if that is all you needed.
wyzazz
Well-Known Member
Actually, I'd like to know where they get them myself....it's a 1" FPT x 1.5" TCCouldn't find the right fitting ANYWHERE.....guess I'm gonna have to use a lot of teflon tape

Or find someone with a 1" straight thread tap. I'm sure someone here has one that they'd be willing to lend you.
ScubaSteve
Well-Known Member
- Joined
- May 21, 2007
- Messages
- 3,673
- Reaction score
- 91
The element seems to fit okay. I contacted Derrin and it's a backlogged part but he has plans to eventually sell them individually. I'll probably hit Brewer's Hardware up for a diptube at the same time....he does great work.
ScubaSteve
Well-Known Member
- Joined
- May 21, 2007
- Messages
- 3,673
- Reaction score
- 91
Anyone got any suggestions for a control box? I've been reading THIS recently and it's an AWESOME resource. I'm thinking about doing 1 of 2 things: 1) Move the water filter canister from the front to the back and put a rectangular control panel right in front, sitting atop the bottom shelf.....OR.... 2) Create a toolbox style control panel like THIS and keep it away from spills up on the dryer in my laundry room (where I plan to brew). 
klyph
Well-Known Member
I like my mobile control box, as I can use it with my 5 and 10 gallon rigs. And it's portable.
ScubaSteve
Well-Known Member
- Joined
- May 21, 2007
- Messages
- 3,673
- Reaction score
- 91
Is that your ammo can box? Does it use 220?
klyph
Well-Known Member
yes and yes.
ScubaSteve
Well-Known Member
- Joined
- May 21, 2007
- Messages
- 3,673
- Reaction score
- 91
I'll definitely post a video once I get it running. Right now I'm trying to get power to this beast! I just bought my control box yesterday:

Steve, I have a question:
I was looking at the KLG site and I see the 1.5" ss Tees the clamps and even sanitary end caps. However, I don't see a 1" NPT fitting for the heat element. Did you purchase that somewhere else. (I need to back up and re-read those pages...maybe you 'splained it). Did you do anything special for a ground?
I was looking at the KLG site and I see the 1.5" ss Tees the clamps and even sanitary end caps. However, I don't see a 1" NPT fitting for the heat element. Did you purchase that somewhere else. (I need to back up and re-read those pages...maybe you 'splained it). Did you do anything special for a ground?
Similar threads
- Replies
- 1
- Views
- 2K
- Replies
- 10
- Views
- 3K
For Sale
15 Gallon Electric Brewery (Ontario)
- Replies
- 0
- Views
- 316
Latest posts
-
-
-
The Dysfunctional-Palooza Obnoxious Masshole BS Thread
- Latest: homebeerbrewer
-
-


![Craft A Brew - Safale BE-256 Yeast - Fermentis - Belgian Ale Dry Yeast - For Belgian & Strong Ales - Ingredients for Home Brewing - Beer Making Supplies - [3 Pack]](https://m.media-amazon.com/images/I/51bcKEwQmWL._SL500_.jpg)


