You are using an out of date browser. It may not display this or other websites correctly.
You should upgrade or use an alternative browser.
You should upgrade or use an alternative browser.
Show us your sculpture or brew rig
- Thread starter Onescalerguy
- Start date

Help Support Homebrew Talk:
This site may earn a commission from merchant affiliate
links, including eBay, Amazon, and others.
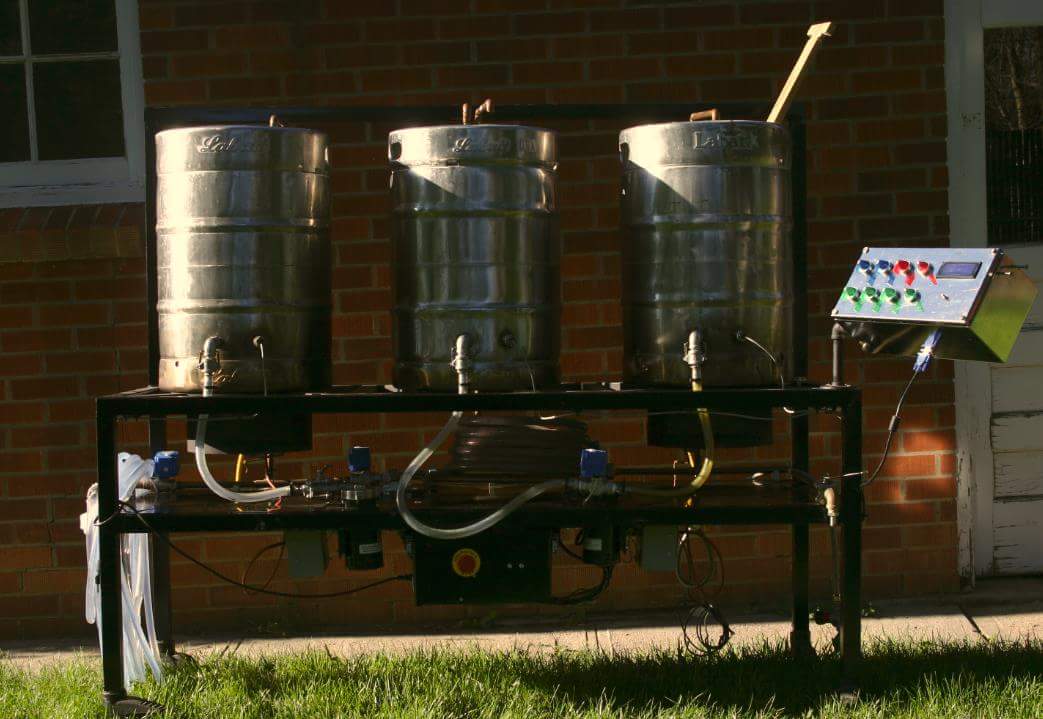
She looks purdy!
Just curious... Since it appears you plan to use pump(s), why not go with single tier??
HootervilleHops
Well-Known Member
Gentlemans_Ale
Well-Known Member
She looks purdy!
Just curious... Since it appears you plan to use pump(s), why not go with single tier??
I use the one pump and gravity both - call it a hybrid
Rivenin
Well-Known Member
- Joined
- Dec 13, 2010
- Messages
- 3,258
- Reaction score
- 342
I use the one pump and gravity both - call it a hybrid
mine is the same way...
personally i like gravity flowing from the mash tun

$22.00 ($623.23 / Ounce)
AMZLMPKNTW Ball Lock Sample Faucet 30cm Reinforced Silicone Hose Secondary Fermentation Homebrew Kegging joyful
无为中南商贸有限公司

$33.99 ($17.00 / Count)
$41.99 ($21.00 / Count)
2 Pack 1 Gallon Large Fermentation Jars with 3 Airlocks and 2 SCREW Lids(100% Airtight Heavy Duty Lid w Silicone) - Wide Mouth Glass Jars w Scale Mark - Pickle Jars for Sauerkraut, Sourdough Starter
Qianfenie Direct

$10.99 ($31.16 / Ounce)
Hornindal Kveik Yeast for Homebrewing - Mead, Cider, Wine, Beer - 10g Packet - Saccharomyces Cerevisiae - Sold by Shadowhive.com
Shadowhive

$58.16
HUIZHUGS Brewing Equipment Keg Ball Lock Faucet 30cm Reinforced Silicone Hose Secondary Fermentation Homebrew Kegging Brewing Equipment
xiangshuizhenzhanglingfengshop

$176.97
1pc Commercial Keg Manifold 2" Tri Clamp,Ball Lock Tapping Head,Pressure Gauge/Adjustable PRV for Kegging,Fermentation Control
hanhanbaihuoxiaoshoudian

$53.24
1pc Hose Barb/MFL 1.5" Tri Clamp to Ball Lock Post Liquid Gas Homebrew Kegging Fermentation Parts Brewer Hardware SUS304(Liquid MFL)
yunchengshiyanhuqucuichendianzishangwuyouxiangongsi

$53.24
1pc Hose Barb/MFL 1.5" Tri Clamp to Ball Lock Post Liquid Gas Homebrew Kegging Fermentation Parts Brewer Hardware SUS304(Liquid Hose Barb)
Guangshui Weilu You Trading Co., Ltd

$20.94
$29.99
The Brew Your Own Big Book of Clone Recipes: Featuring 300 Homebrew Recipes from Your Favorite Breweries
Amazon.com

$49.95 ($0.08 / Fl Oz)
$52.99 ($0.08 / Fl Oz)
Brewer's Best - 1073 - Home Brew Beer Ingredient Kit (5 gallon), (Blueberry Honey Ale) Golden
Amazon.com

$7.79 ($7.79 / Count)
Craft A Brew - LalBrew Voss™ - Kveik Ale Yeast - For Craft Lagers - Ingredients for Home Brewing - Beer Making Supplies - (1 Pack)
Craft a Brew
Opiate42
Well-Known Member
- Joined
- Sep 12, 2013
- Messages
- 255
- Reaction score
- 47
Daaaaaaaaamn thanks for all the inspiration guys..... still have to get my hands on a larger kettle among other gear (moving up from tiny batches to 5-10 gallon). After a couple 5 gallon trial runs, thinking of how all this is going to be put together and seeing these builds is giving me lots of ideas.
brrman
Well-Known Member
Just had my first brew day with my new single tier system this past Sunday. The brew cart is my old one just stained and polyed. Will probably get a stainless table at some point.


Carlscan26
Well-Known Member
Just had my first brew day with my new single tier system this past Sunday. The brew cart is my old one just stained and polyed. Will probably get a stainless table at some point.

That's a nice looking setup but that's a two tier my friend.
That's a nice looking setup but that's a two tier my friend.
Unless the kettle on the right isn't actually being used. Looks like it could be a Brutus 2.0
Drumminguy81
Well-Known Member
- Joined
- Jun 19, 2015
- Messages
- 710
- Reaction score
- 260
brrman
Well-Known Member
That's a nice looking setup but that's a two tier my friend.
LOL! I guess it really is two tier - though I don't think of it that way since I don't use it for gravity feed.
BadDeacon
Well-Known Member
LOL! I guess it really is two tier - though I don't think of it that way since I don't use it for gravity feed.
Quick! Someone get this man an egg crate!
Britinusa
Well-Known Member
- Joined
- Dec 23, 2012
- Messages
- 370
- Reaction score
- 49
Here is my new set up
View attachment ImageUploadedByHome Brew1447975733.659499.jpg
View attachment ImageUploadedByHome Brew1447975733.659499.jpg
Bigstaubbie
Well-Known Member
My work in progress.
![Brewery1[1].jpg Brewery1[1].jpg](https://cdn.homebrewtalk.com/data/attach/269/269882-Brewery1-1-.jpg)
![Brewery1[1].jpg Brewery1[1].jpg](https://cdn.homebrewtalk.com/data/attach/269/269882-Brewery1-1-.jpg)
My work in progress.
looks nice! if you replaced that union with a flex connector and threw castors on the stand, it would make for easy cleaning behind/under the stand.
heapyjeepy
Active Member
Been working on this thing for a while now. Just added a tipping mash tun to it. Built, not bought.


KevinP
Well-Known Member
Been working on this thing for a while now. Just added a tipping mash tun to it. Built, not bought.
Oh that tippy is fricking cool man!
My stand is so way too light to do something like that.
Damnit.
This thread is bad for my wallet...
Drumminguy81
Well-Known Member
- Joined
- Jun 19, 2015
- Messages
- 710
- Reaction score
- 260
Been working on this thing for a while now. Just added a tipping mash tun to it. Built, not bought.
I have been thinking about building a tipper for mine, love the design. Where did you get the brackets around the keg? Any interest in building another identical? Pm me
heapyjeepy
Active Member
All made in my garage. But it wouldnt be a problem making another one tho. Let me cruncch some numbers and I'll let you know what it would cost to do again.
Id use 1/8" instead of 3/32" next time. Man that stuff was a pain to bend. Thing worked great tho with the adjustable screw stops. I need a better design on the lip of the keg tho. Like a rectangular hole. Its difficult to entirely clean the keg well but sure beats scooping and scooping and scooping......
Id use 1/8" instead of 3/32" next time. Man that stuff was a pain to bend. Thing worked great tho with the adjustable screw stops. I need a better design on the lip of the keg tho. Like a rectangular hole. Its difficult to entirely clean the keg well but sure beats scooping and scooping and scooping......
I just hose mine out quick while in the tipped position.I need a better design on the lip of the keg tho. Like a rectangular hole. Its difficult to entirely clean the keg well but sure beats scooping and scooping and scooping......
mjfuson
Member
Just had my first brew day with my new single tier system this past Sunday. The brew cart is my old one just stained and polyed. Will probably get a stainless table at some point.

That's a beauty
heapyjeepy
Active Member
That's what I did but those little holes where the top meets the outside dump water everywhere.
Here's the one that Troyzer and I brew on, realized I haven't posted any new shots of it:
View attachment ImageUploadedByHome Brew1449769803.724799.jpg
View attachment ImageUploadedByHome Brew1449769803.724799.jpg
- Joined
- Oct 20, 2013
- Messages
- 129
- Reaction score
- 124
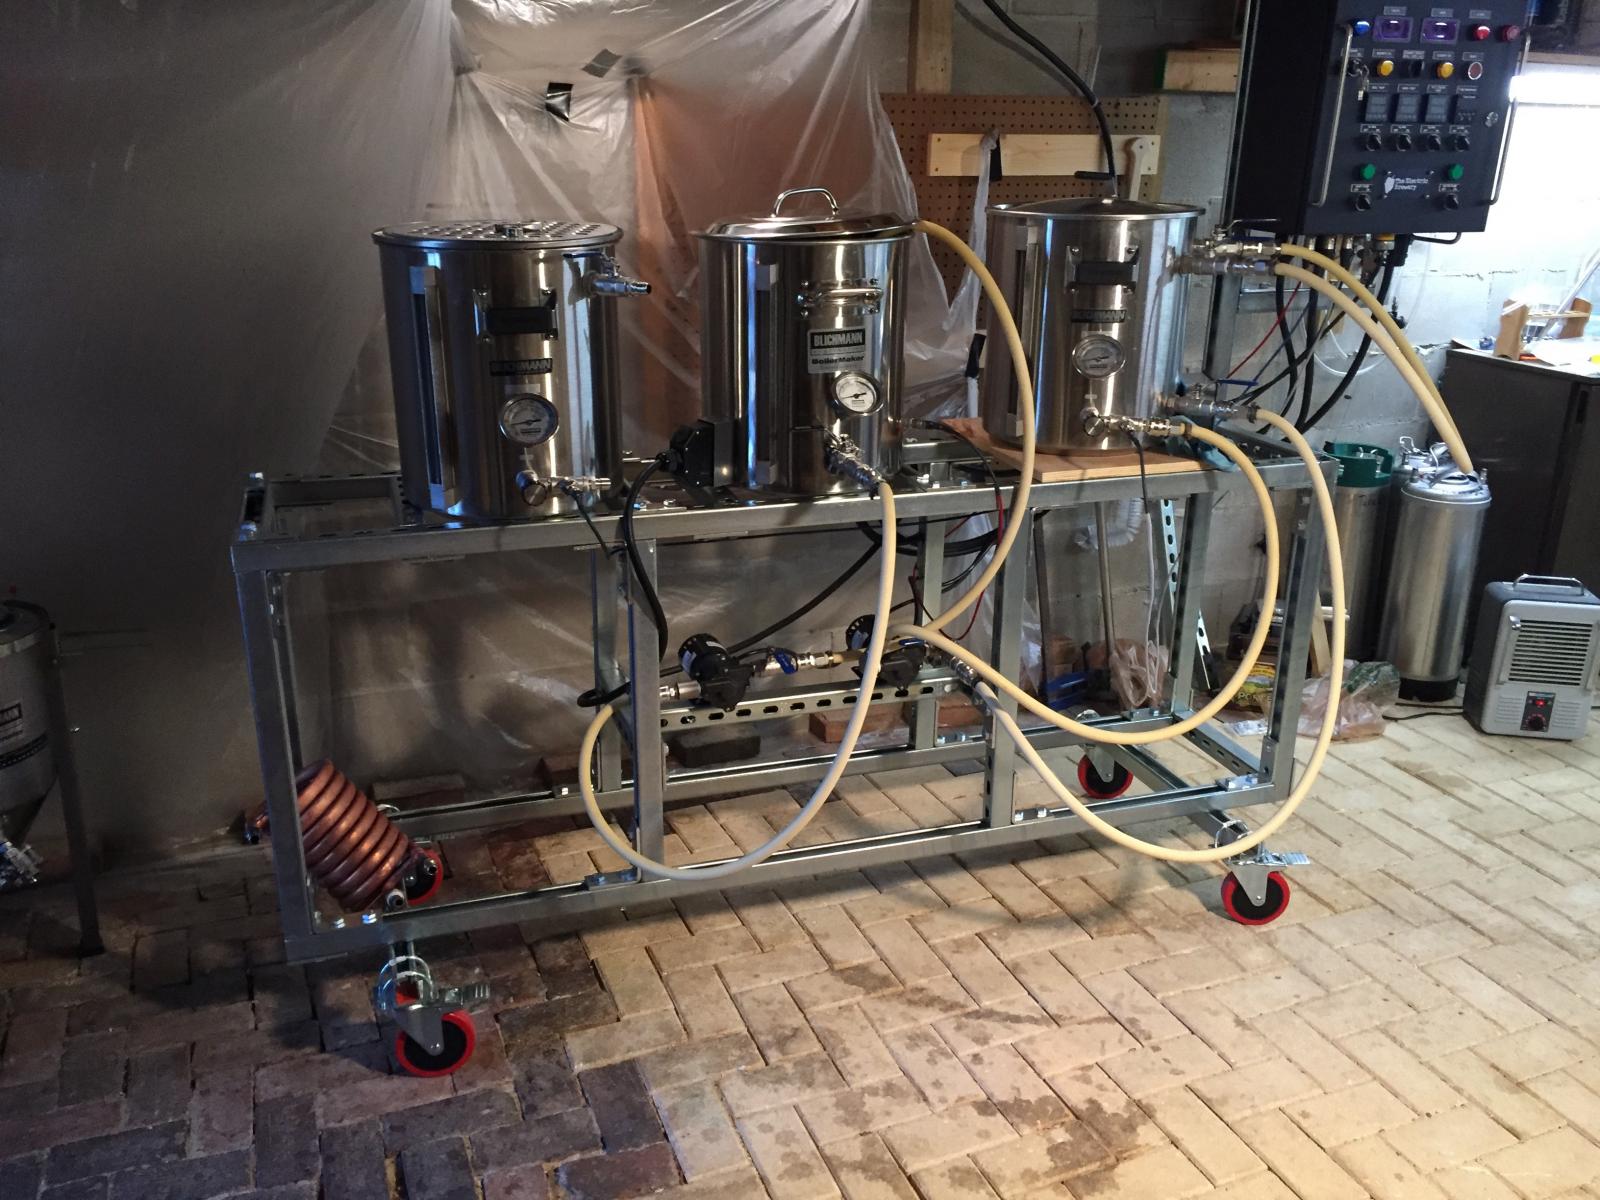
I know this isn't of the caliber of some of the brew stands on this thread, and I can weld (badly), but I figured this is an easy solution which is easy to change form, and relatively cheap. I can't claim originality as there was an article in Zymurgy a couple of years ago showing how this is done. I just changed the design slightly to a single tier, and added a couple of shelves for pumps. I brew under the house in a small room off of the crawl space, so it had to be electric and vented well. So far it is working well. I also had Kal build a controller for me, to save both time and the frustration I would have at trying to get it running correctly.


BadDeacon
Well-Known Member
I know this isn't of the caliber of some of the brew stands on this thread, and I can weld (badly), but I figured this is an easy solution which is easy to change form, and relatively cheap. I can't claim originality as there was an article in Zymurgy a couple of years ago showing how this is done. I just changed the design slightly to a single tier, and added a couple of shelves for pumps. I brew under the house in a small room off of the crawl space, so it had to be electric and vented well. So far it is working well. I also had Kal build a controller for me, to save both time and the frustration I would have at trying to get it running correctly.
I like the brick floor!
- Joined
- Oct 20, 2013
- Messages
- 129
- Reaction score
- 124
Thanks BadDeacon,
Long story short, that room is underneath our sunroom, off of the crawlspace. It's 10' X 20', so I'm turning it into my brew room. The only drawback is it's only 6 1/2' high, so it feels a little cramped. The plastic sheeting in the background was to mitigate some of the moisture from my brew sessions, but I have a bigger fan with 430cfm now. I plan to pull up the floor and dig down 8-10" to give me a little more headroom, but I'm not sure what kind of floor I want to put back in to deal with spills! So the look should change in the near future.
Dave
Huaco
Well-Known Member
I like the paver stone floor too... But if you are going to rip it out, you might as well trench a floor drain to a sump pump to evacuate any liquid. That way if there is a major clean-up needed, you can simply hose down the floor into the trench drain.
I've seen some nice epoxy coated concrete floors. Just make sure you have enough grit in the coating... that stuff is slick sometimes when it's wet!
I've seen some nice epoxy coated concrete floors. Just make sure you have enough grit in the coating... that stuff is slick sometimes when it's wet!
- Joined
- Oct 20, 2013
- Messages
- 129
- Reaction score
- 124
Huaco, Great Idea! I'll have to see if I can work it in, as the stains in front of the stand are from spills while brewing. Thanks.
Drumminguy81
Well-Known Member
- Joined
- Jun 19, 2015
- Messages
- 710
- Reaction score
- 260
Delete
Similar threads
- Replies
- 11
- Views
- 1K
- Replies
- 132
- Views
- 9K
- Replies
- 45
- Views
- 5K


![Craft A Brew - Safale S-04 Dry Yeast - Fermentis - English Ale Dry Yeast - For English and American Ales and Hard Apple Ciders - Ingredients for Home Brewing - Beer Making Supplies - [1 Pack]](https://m.media-amazon.com/images/I/41fVGNh6JfL._SL500_.jpg)


