• Please visit and share your knowledge at our sister communities:
  • If you have not, please join our official Homebrewing Facebook Group!

    Homebrewing Facebook Group

Show us your sculpture or brew rig

Homebrew Talk

Help Support Homebrew Talk:

This site may earn a commission from merchant affiliate links, including eBay, Amazon, and others.
That looks like something sold at IKEA, like art deco. If the welds are good it should be strong enough. Just freekey to look at.
Whats the muffler on your plate chiller? I've never seen it, I think I want one?

Yes it is the filter from brewers hardware. For me it didn't work well they way it's designed. Your supposed to hook it up on the discharge of you BK. I could never get a good prime with my chugger due to air in the filter. But hooked it right I front of the plate chiller and pump throught it. Works great. That for all the complements. And trust me the open front is awsome and I did a weight test on all the burners stands with me and a 300# buddy first.
 
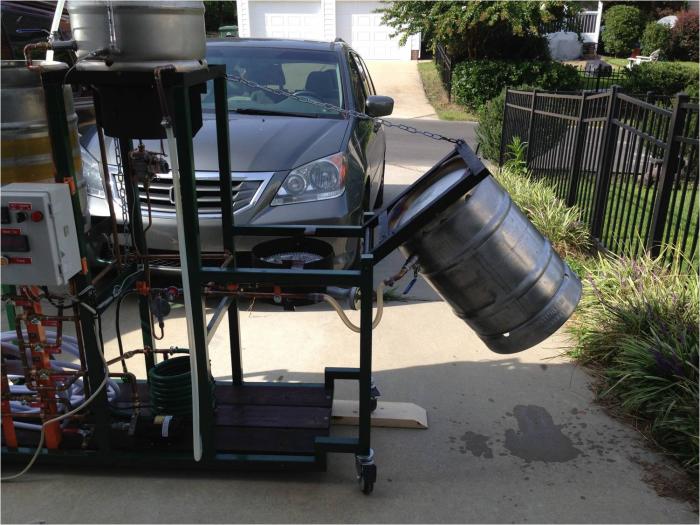
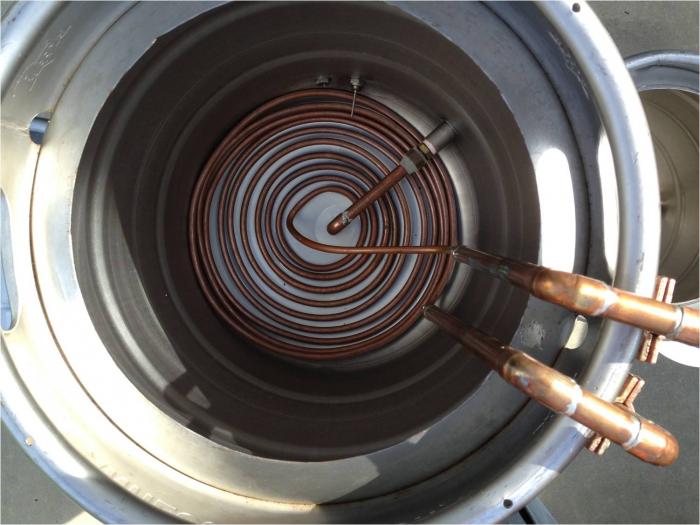
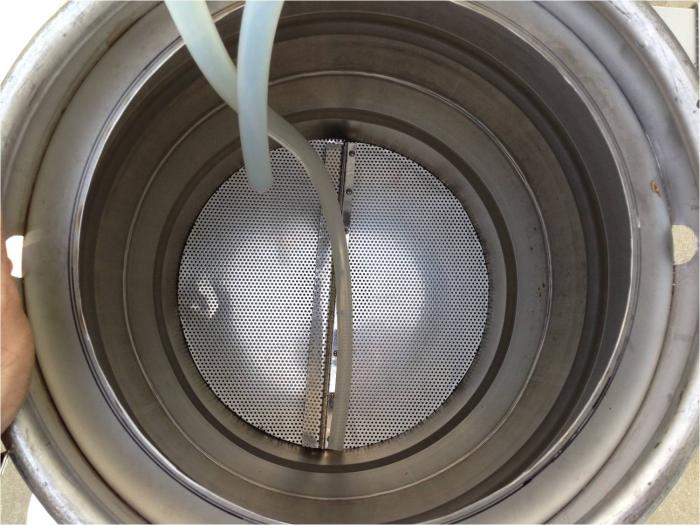
First time post for me. I went through this epic thread several months back and got tons of inspiration from all of the clever approaches I saw. So inspired, that I parked my cooler MT, got a welder, some steel and other parts to make my latest rig. It's a keggle based, 2 tier, single pump, HERMS setup. The dumps of the MT and BK are real handy and the CFC is the bomb. Three batches so far, so I'm still learning the flow. Now I'm working on how can I get done in less than 6 hours. I'm considering skipping mashout... It's making me quite popular on the alleyway. I guess the neighbors deserve some benefit after weeks of hearing a screeching grinder :mug:

Overall View_1.jpg


Dumping_1.jpg


HERMSCOIL1.jpg


Homemade flase bottom1.jpg
 
fdemt84 said:
Being military and moving around A lot don't always have a lot of space and time. So I like my mobile rigged together stand.

You,sir, have a portable three-tier system. And I am sure it works well. Thanks for sharing. I love the ingenuity.

Mark
 
jstebell said:
Operational not finished tho. New Stout kettles 20 gal all the way around w/ herms and hard plummed in the near future.

And people told me I needed a center brace on my stand. Nice design work, me thinks you may have plenty of folks will be adopting that design, after all form should go with function.
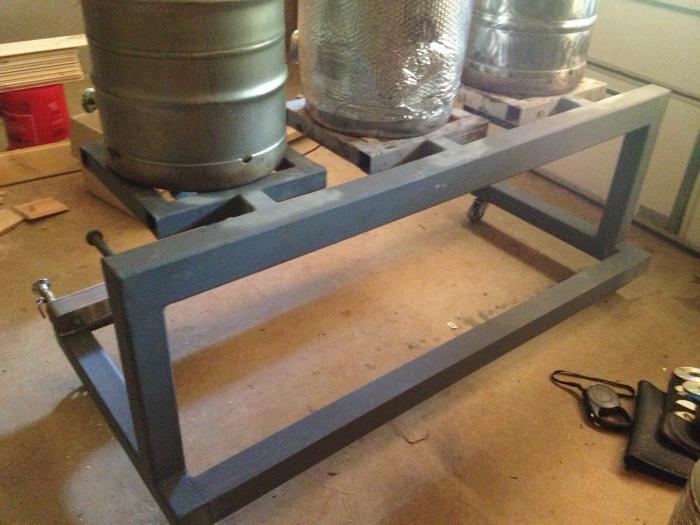
 
And people told me I needed a center brace on my stand. Nice design work, me thinks you may have plenty of folks will be adopting that design, after all form should go with function.

Thanks. Here's a pic of the back of the stand just after welding and primer. Stall haven't got a chance to paint it yet.

image.jpg
 
I built my stand out of galvanized strut. Is there a paint I could use that won't just burn off around the burners like the galvanized finish did?
 
I finally got done with my new brew stand! Brewed with it this last weekend everything went really good besides the rookie mistake of a boil over.....just learning the ins and out of the stand!!


image-3690645495.jpg
 

I built my stand out of galvanized strut. Is there a paint I could use that won't just burn off around the burners like the galvanized finish did?


Before painting over galvanized metal, wipe it down with vinegar. I don't understand the chemistry behind it, but it is a night and day difference getting paint to "stick" to galvanized surfaces.
 
Last edited by a moderator:
fur_252 said:
I finally got done with my new brew stand! Brewed with it this last weekend everything went really good besides the rookie mistake of a boil over.....just learning the ins and out of the stand!!

Fermcap-S!!!! I can't believe how great this stuff works! One drop per gallon in the boil and you couldn't boil over if you tried. Also works awesome in a yeast starter or in the fermenter. It's supposed to be made of food grade liquid silicon and somehow doesn't affect head retention, I guess it drops out of suspension.
 
501irishred said:
Before painting over galvanized metal, wipe it down with vinegar. I don't understand the chemistry behind it, but it is a night and day difference getting paint to "stick" to galvanized surfaces.

Awesome thanks for the tip
 
AlleyBrewer104 said:
First time post for me. I went through this epic thread several months back and got tons of inspiration from all of the clever approaches I saw. So inspired, that I parked my cooler MT, got a welder, some steel and other parts to make my latest rig. It's a keggle based, 2 tier, single pump, HERMS setup. The dumps of the MT and BK are real handy and the CFC is the bomb. Three batches so far, so I'm still learning the flow. Now I'm working on how can I get done in less than 6 hours. I'm considering skipping mashout... It's making me quite popular on the alleyway. I guess the neighbors deserve some benefit after weeks of hearing a screeching grinder :mug:

Awesome looking system! How well does that HERMS coil work? Mine has the coils spaced vertically up to about half the height of my HLT. It seems like you'd have cooler water in the bottom around your coils. Great setup!
 
I think the HERMS coil works well, but since I don't have anything to compare it to directly, so that's just my opinion. In equilibrium, it heats the MT to about 6F cooler than the HLT pretty quickly, so I just use a 6F offset for my setpoints, when I step mashed a wit, I used 10F to speed it up. Maybe the coil works well enough for me because of the way I use it though. When I am recirculating, I only have ~2 gallons in the HLT, which only covers the coil by a couple of inches, plus I can I heat it up really quick with that massive banjo burner. I think that the lower amount of water and having the temperature sensor above the coil helps keep the heat moving. My 2C, but it sure is fun to tinker with.
 
AlleyBrewer104 said:
It's a keggle based, 2 tier, single pump, HERMS setup. The dumps of the MT and BK are real handy and the CFC is the bomb. Three batches so far, so I'm still learning the flow. Now I'm working on how can I get done in less than 6 hours. I'm considering skipping mashout... mug:

I fairly consistently do 4 hr brew days on a similar setup from starting HLT burner to pitching yeast (and mostly cleaned up) barring major mishaps. Here are some things that speed up my brew day:

1. Crank your home's hot water heater up all the way the night before. Then I use 5 gal buckets filled directly from the hot (filtered) water on my garage sink to fill my HLT. There is more heat loss if you use a hose run from hot water to your HLT which is why I use a bucket. Then I mill grain while HLT is heating but I have to hustle milling because water is almost at dough-in temp. (Warn SWMBO that the water is scalding then turn it back to normal during boil).

2. I choose to continue heating my HLT to the next infusion temperature or to mash out temp while I'm mashing (I recirc continuously). I have a bypass valve on my HLT that I throttle open as the HLT gets hotter. This way, when I hit my 60 min mash, I'm already at mash out temp and can do an infusion and start recircing at mash-out temp to quickly hit mash-out temp in Mash Tun.

3. I use the time between stages to prep for next stage: milling while heating sparge water; weighing hops while mashing; sanitizing fermenter, chiller and hoses while boiling; dumping spent grains and starting cleaning while boiling; and finally getting to enjoy some homebrews during boil;

4. I found a 3 compartment commercial stainless sink on Craigslist for cheap and plumbed it with two faucets both with hot & cold. This saves me so much time and back-breaking effort cleaning keggles. (I admire your side dump mash tun!...looks like you could dump it right into a wheelbarrow).

5. Periodically clean your burners especially if they start putting soot on your keggles. For the two piece turkey fryer burners, take them apart and wire brush and steel wool the internals to maximize the heat transfer to your keggles.

6. I don't get much time to "Relax and have a homebrew" during the brew. When I have had a few homebrews it tends to make the day longer and sorties leads to mishaps...and memories...like the epic "Linbach 13" flavored with "a drop" of grilled cheese sandwich. I have a hard time sitting still when there is something to do. When I have friends over during the brew I tend to be a lot more relaxed and it adds an hour or two to my brew day.

Hope that helps speeding up your brew days, if you desire. I also like to load up my Keggle with up to 36 pounds of grain and do a parti-gyle double batch. I can do two 10 gal batches in about 6 -7 hours.
 
fur_252 said:
I finally got done with my new brew stand! Brewed with it this last weekend everything went really good besides the rookie mistake of a boil over.....just learning the ins and out of the stand!!

First, congrats. It's a long process to build these suckers. Second, is your wife a scrap booker who made you pose for that picture? Mine will try to make a scrapbook page when I'm fine and ill be sure to mess up all the pictures.
 
"Linbach 13" flavored with "a drop" of grilled cheese sandwich.

Love this image. I like your ideas to speed up the process. Especially liking a bypass on the HERMS outlet to allow heating sparge water while recirculating. Currently, I heat ~8 gallons of sparge water in the BK, pump it to the HLT after mashout and then start sparging. I can pretty readily add the bypass though, so I'll give that a shot, too. A "handicap" I do have is once I start brewing, friends seem to congregate and help themselves to my taps, and I just can't let a friend drink my beer alone, so yep, that does take some of the urgency out of the proceedings.
 
Bensiff said:
First, congrats. It's a long process to build these suckers. Second, is your wife a scrap booker who made you pose for that picture? Mine will try to make a scrapbook page when I'm fine and ill be sure to mess up all the pictures.

Thanks...with any project I start I always think its going to be easy and not take that long. Well I shortly found out with this build! Always researching second guessing myself. It was a fun build...but I don't want to do it anytime soon....I just want to brew! With my wife she love to take pictures....she took the pic to show her cousin which gave her the idea to buy me a brew kit.
 
Damn, there are some sweet looking brew sculptures here! Mine is simple. Let gravity do the work.

ForumRunner_20130904_221259.jpg
 
15 gal full boil BIAB rig.

I have to keep things civilized since I live in an apartment..

Edit: My blog must be down. Here is a direct upload pic.

IMG_0448.jpg
 
Back
Top