Shawn's Basement Keezer Bar Build

Homebrew Talk - Beer, Wine, Mead, & Cider Brewing Discussion Forum

Help Support Homebrew Talk - Beer, Wine, Mead, & Cider Brewing Discussion Forum:

This site may earn a commission from merchant affiliate links, including eBay, Amazon, and others.

Swilliams603

Active Member
Joined
Jul 2, 2013
Messages
34
Reaction score
37
keezer build final close.jpg


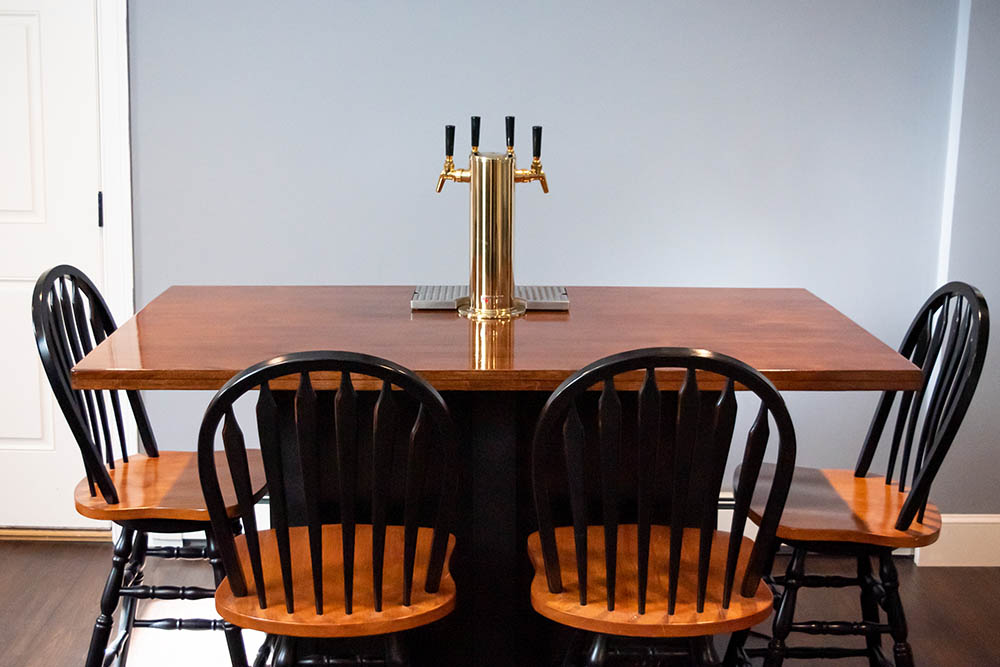
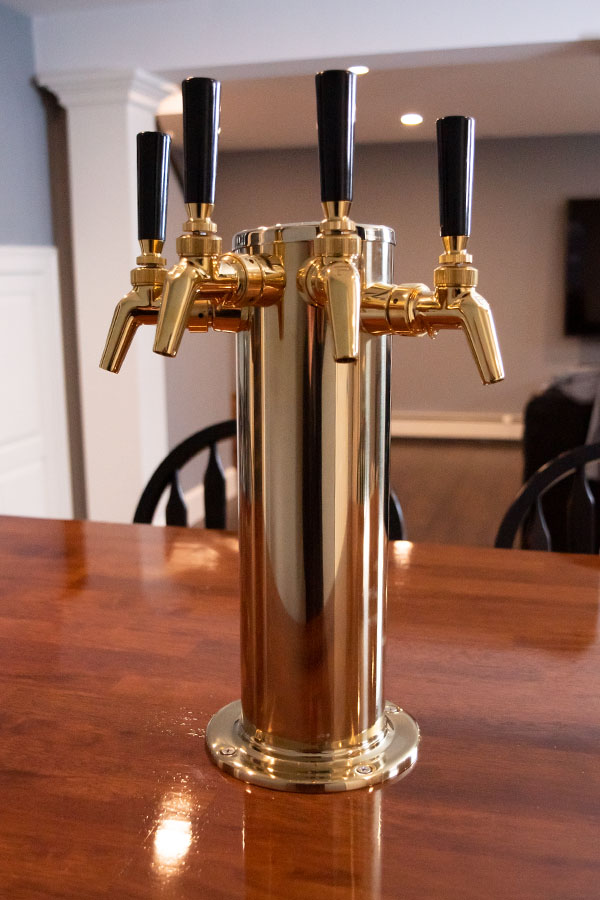
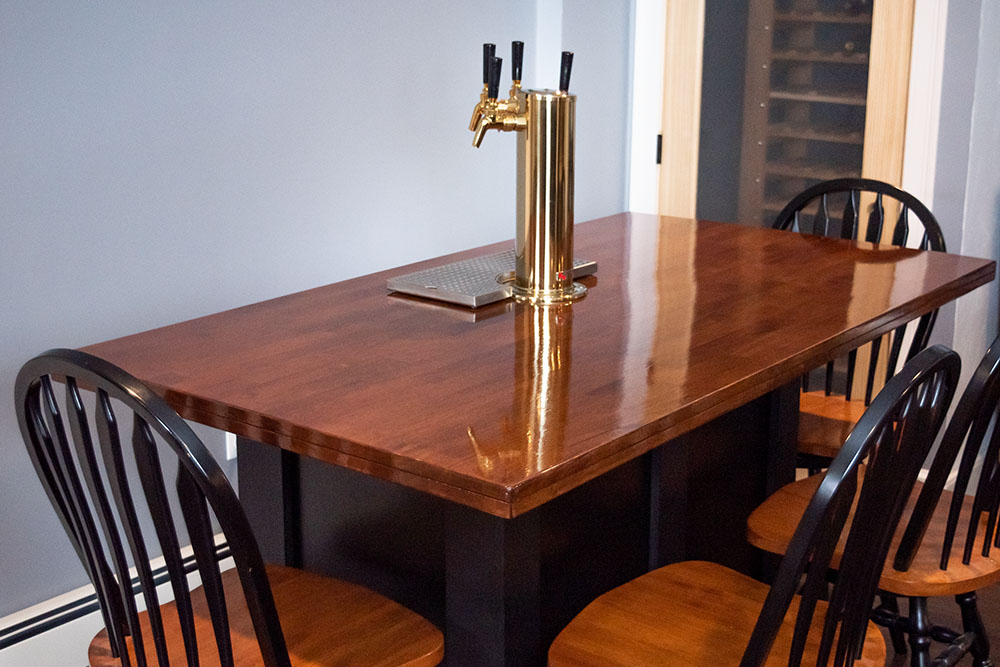
I was looking for a different kind of keezer build. I would say my end result is probably not your typical keezer. While it’s certainly a keezer, it’s more of a bar to be honest, which is exactly what I was looking for. I wanted a walk-behind bar that could also serve as a tabletop with seating. I love the look of tap towers so I opted for that over the common coffin tap design. Which to be honest seems like a lot of work and I’m just not crazy about how they look.

The top of my keezer is borrowed from a pub table my wife got at Building 19 10 years ago. We decided it was worth sacrificing for the cause given the table was nice hardwood and just needed a little love Overall, I’m really happy with the results and hope you enjoyed the read! I have some serious beer to brew.

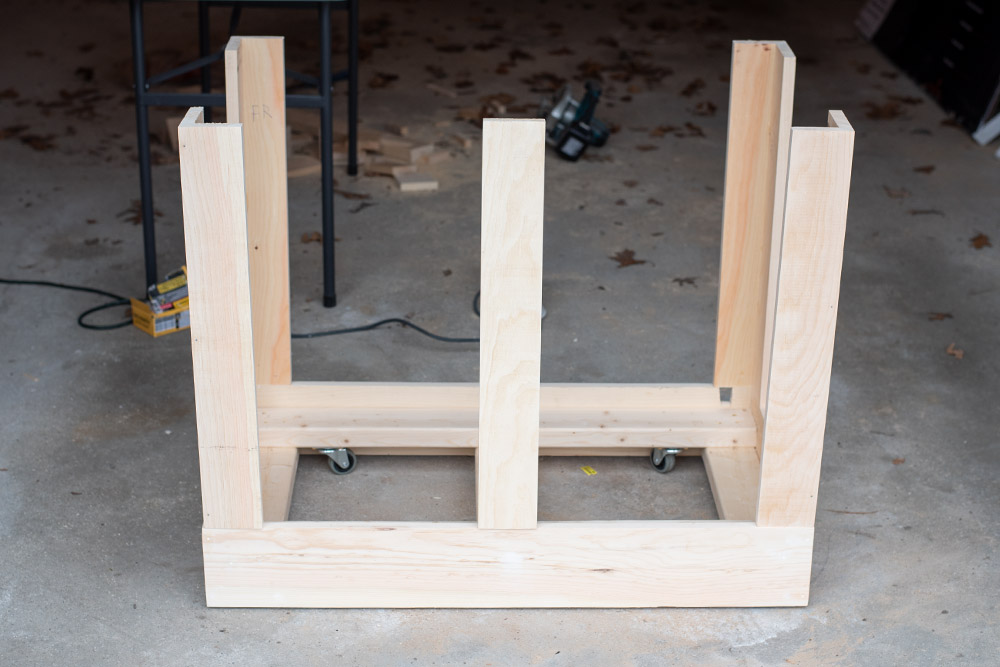
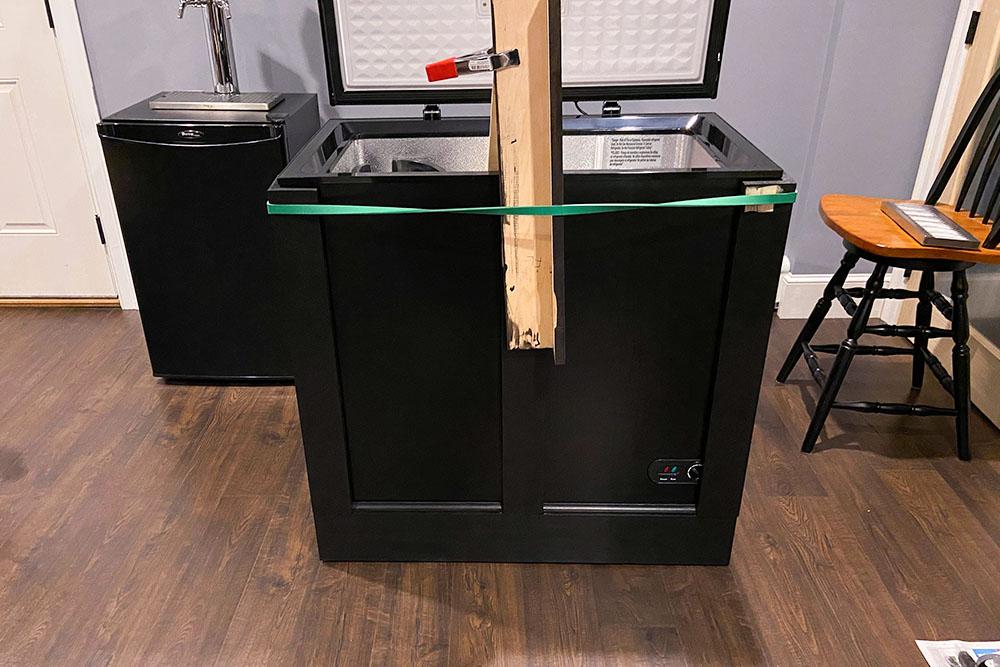
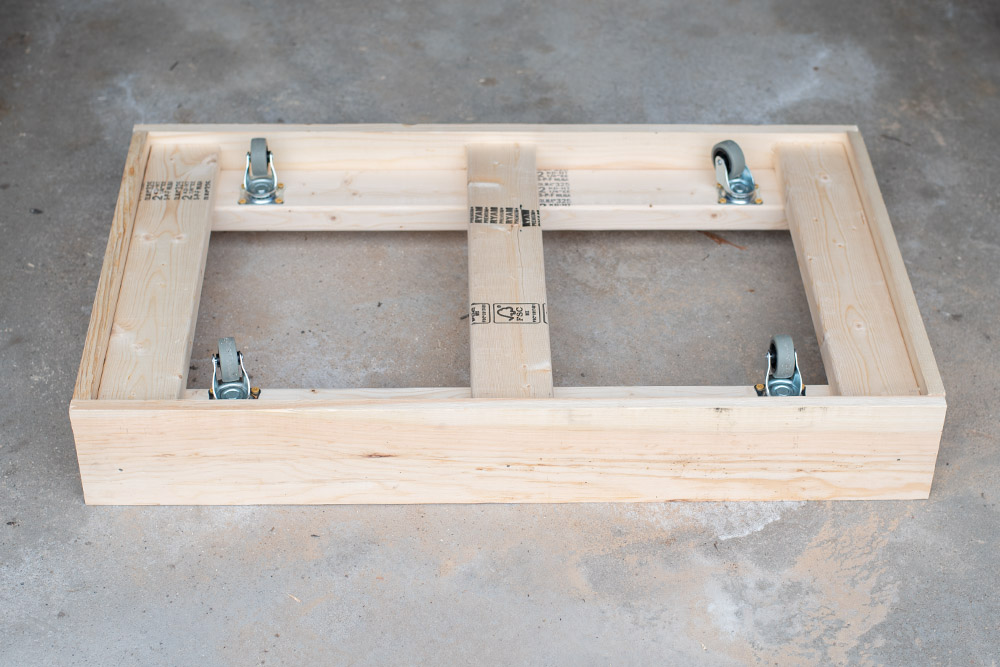
Some process pics below but more pics and lots of details outlined here if you're interested: My Keezer Bar Build
keezer build side angle.jpg


keezer build wide bottom base wheels.jpg


keezer build wide sides.jpg


attaching sides.jpg


poly final top.jpg


4 tap tower.jpg
 
NIce. |Looks real elegant.
Building 19, eh? So you're a Massachusetts / New England guy, eh? (or at least she was after college...) Used to really like that place. You never knew what you'd find there.
 
NIce. |Looks real elegant.
Building 19, eh? So you're a Massachusetts / New England guy, eh? (or at least she was after college...) Used to really like that place. You never knew what you'd find there.

Born and raised! Absolutely, you could really find some gems there
 
I've been looking to do something similar with my Magic chef. Bought the Home depot butcher block (forgot the brand name) that was big enough to fit it but didn't go through with it because of how heavy it was. Are you worried about the hinges for the lid not being able to take the weight?

Also, I noticed you place the tower in front of the light that is inside the lid. Did you find that there was nothing interfering when you drilled that hole? I was thinking of doing two, two tap towers on the left and the right of the light with a drip tray and glass cleaner in front of light.

Cheers! One of my favorites I've seen!

The hinges seem to hold up fine. I was a little skeptical myself however I decided to give it a shot after putting a lot of my weight on it while in the open position (some real scientific testing). My lid prob weighs around 40-45 pounds or so. I did end up adding two 47lb rated gas struts and the door will stay open on its own. I'm careful with it when opening and closing of course but I'm sure the struts help a little as well.

Assuming your butcherblock is about the same weight you should be ok. Regarding the light - I had no issues. I drilled just past it (towards the front from the back) and didn't see any wires. You can unhook the electrical connection from the main freezer as well...at least mine can. The little housing on the back unscrews to reveal the wire and a plug connection so I figured if I did drill through a wire I could just cut it off and say screw it without the risk of anything being live. Good luck!
I saw your link for those struts and would be awesome if you could post a follow up photo of how you installed them. That was my main concern with trying to build one of these.

If i could pick your brain further... How has pouring been with the towers in relation to foam and temperature of the lines? Do the lines stay cold through the tower? Did you install any insulation?

Thanks again for the post, super resourceful! Cheers!
 
Last edited:
I saw your link for those struts and would be awesome if you could post a follow up photo of how you installed them. That was my main concern with trying to build one of these.

If i could pick your brain further... How has pouring been with the towers in relation to foam and temperature of the lines? Do the lines stay cold through the tower? Did you install any insulation?

Thanks again for the post, super resourceful! Cheers!

Just updated the post on my blog with strut photos! Haven't had an issue with foaming yet. The tower feels about room temp to the touch. Not currently doing anything additional to cool it however the hole is 3 inches so hoping some cool air makes it up there. The tower itself is pretty well insulated with foam so that likely helps as well. This is basically the same setup as my previous kegerator and I never had foaming issues with that either. My lines are currently short too, about 5 feet (preinstalled on tower). May have to increase length but ill see how it goes.
 
Just updated the post on my blog with strut photos! Haven't had an issue with foaming yet. The tower feels about room temp to the touch. Not currently doing anything additional to cool it however the hole is 3 inches so hoping some cool air makes it up there. The tower itself is pretty well insulated with foam so that likely helps as well. This is basically the same setup as my previous kegerator and I never had foaming issues with that either. My lines are currently short too, about 5 feet (preinstalled on tower). May have to increase length but ill see how it goes.
Awesome, thanks for the update! One last thing, did you fill the space between the lid of the magic chef and your wood countertop? Maybe with a silicon caulking? When I originally had a slab of wood on the top I was worried that it would let cool air escape because of the plastic ridges that are on the left and right of the chest freezer.
 
Awesome, thanks for the update! One last thing, did you fill the space between the lid of the magic chef and your wood countertop? Maybe with a silicon caulking? When I originally had a slab of wood on the top I was worried that it would let cool air escape because of the plastic ridges that are on the left and right of the chest freezer.

Yes, I put a small block of 3/4 inch PVC board in the gap and drilled a 3-inch hole through that as well. This way it was fully sealed. I then sealed the hole with aluminum duct tape for moisture and insulation.
 
Yes, I put a small block of 3/4 inch PVC board in the gap and drilled a 3-inch hole through that as well. This way it was fully sealed. I then sealed the hole with aluminum duct tape for moisture and insulation.
Shoot! I see that in your post now, my apologies. Congrats on your project!
 
Back
Top