• Please visit and share your knowledge at our sister communities:
  • If you have not, please join our official Homebrewing Facebook Group!

    Homebrewing Facebook Group

Seriously the easiest DIY ever for bottling bucket dip tube

Homebrew Talk

Help Support Homebrew Talk:

This site may earn a commission from merchant affiliate links, including eBay, Amazon, and others.

davekippen

Well-Known Member
Joined
Dec 28, 2011
Messages
1,256
Reaction score
172
Location
Grand Ledge
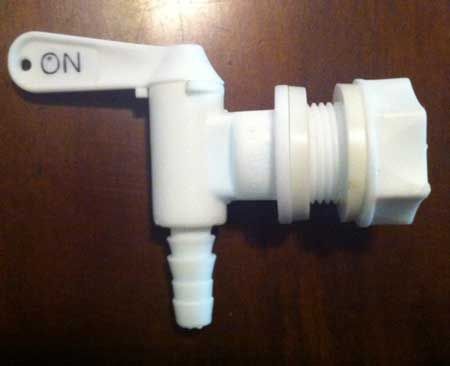
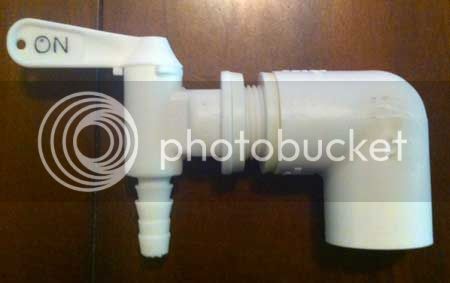
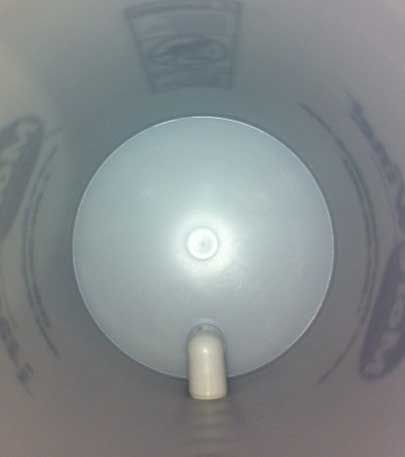
I found this on another thread but had to post again because I am so amazed at the simplicity and effectiveness. I was tired of tipping the bucket and trying to get the last little bit of beer so I looked for dip tube options. This simple 69 cent off the shelf PVC elbow takes 3 seconds to screw on and eliminates the need to tip the bucket. It leaves at most 1/8 of an inch of beer in the bottom. Perfect.

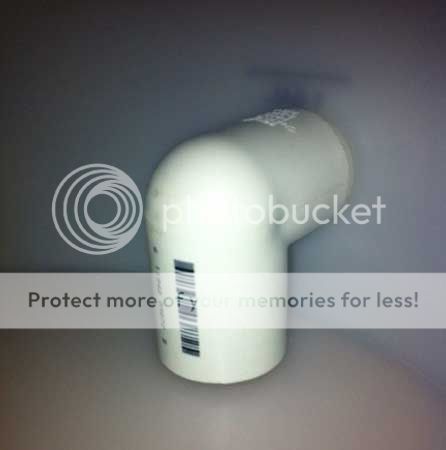
Its a 3/4" PVC right angle threaded on one end. It screws right on to the exposed threads on your spicket.

images.jpg
 
I used the CPVC one. I had to shorten the dip side a little. I just used a hacksaw and sanded it as smooth as I could. I sits about 1/16 inch above the bottom of the bucket and leaves very little behind. Enough that any transferred trub stays in the bucket.
 
this is a great idea. i just cant figure out a precise method of measuring the size of the thread on the inside (i do not want to take it apart). i have the basic 6.5 gallon Ale Pail with the red spigot. anyone know the size of thread? im thinking 3/4 inch but not sure
 
Hey thanks alot for this!!
Going to bottle today and was getting ready to go through the hassle of finding a stopper and trying to drill the rubber for the copper tubing. Screw that!! I'm on my way to Home Depot with some pocket change!!

OK, I'm back.
That took maybe 15 minutes! Went to the local to the local True Value, spent buck fifty eight, came back, cleaned the bar code price tag off, screwed it on and I've got an extra 6-pack with out a balancing act!!!
YEA!!! More Beer!!

been using the same thing fr a year, works great. homebrew stores should start carrying them.
 
just installed it, this is very weird but the beer will not come through it. cant, for the life of me, figure this out. the valve on the bottling bucket is open but nothing is flowing through. now i got to figure out a way to take the dip tube off while the bottling bucket is full.

edit - it wouldnt prime for some reason, eventually got it to work by opening the bottling wand valve. weird problem though, but ah well the dip tube worked great. still lost a bit of beer, but it was a pretty messy transition from carboy to bottling bucket so most of what i lost i didnt want.
 
Yeah, the bottling tube will not fill up even with the valve open until you depress the bottling wand thingy. Mine does the same thing. Once you relieve that back pressure in the tube it should flow fine.
 
after reading this last night, i bought the same right angle 3/4 thread fitting for a whopping 63cents. i have a true brew bottling bucket-... i had to cut the 90deg fitting by about a 1/2". i had to remove the platic nut from the back completely and replaced it w/ the 90deg fitting. i re-used the gaskets.

i took it for a test drive w/ some water-... no leaks, worked as everyone said, and only had about 1/16" of water @ the bottom!
 
You guys with the books and pucks - drop the big loot and buy the damn thing! You will thank me (well, you can actually thank the original poster which I should probably find again and thank!)
 
A 3/4 elbow pipe ran me 79 cents at Ace. Just did a water run in the bottling bucket, all but 1/2 cup came out. Amazing! I told the guy at Ace it was going to change my life. :)
 
I'm actually looking forward to bottling in 2 weeks. New dip tube for the spigot, new sulfiter and bottle tree. If only I could afford a slick bench capper to I'd be in bottling paradise.
 
Man do I wish I would have seen this sooner, very slick! Thank you! I got one that has some molding defects with some pitting in spots, shouldn't be a problem if i soak in Star San though should it?

Stevo
 
I used the same but went with normal non threaded pipe, then I used a threaded street adapter screwed to the spigot to connect the 90 to. I was concerned about the threads holding nasties.
 
its the simpler things that make life so great. Thanks for this. :rockin:
 
BullGator said:
I can't pull the photo up on my phone. Does anyone have more pics or a part #?

Just read the OP description. It's literally a 90 degree PVC connector with threads on one end. You screw it onto the spigot on the inside and it syphons from the bottom. It's pure genius.
 
copy paste from the awesome revvy thread
The before
old-spout-1.jpg


After:
with-pvc-90---2.jpg


view from top
view-down---3.jpg


bottom of bucket inside
inside-4.jpg
 
Bottled my friends' batch last weekend after doing thisand it was a great experience. Almost no wsted beer at all.

Oh I also bottled over the door of the open dishwasher and that worked like a champ. Super easy cleanup.
 
I picked up an elbow and found the spigot to be so near the bottom that the elbow was to long. I'll cut a bit off and refit it, so there is about 1/8 inch between the elbow and bucket bottom. The cut edge may have to be treated with a torch for that nice shiny finish, only have .93 invested.
 

Latest posts

Back
Top