Great looking build thus far getting me motivated to start back again on my eHERMS build too....think I have a few honey do list things to tackle first myself....and a few more loads of wood for winter, keep us posted looks great!!!
All of the components are in. I started wiring it last night. I'm going to take my time and test it out as I go so there won't be (hopefully) any surprises at the end. The main power relay and the power switch works. I must say, the CLUNK it makes when you turn it on is quite satisfying. I'll post more as I get further along.
And the wiring continues. It sure takes a long time. I still have a lot of organizing to do but that should be pretty easy since I have been paying attention to wire length. Everything works so far and I've been lucky and kept all of the magic smoke inside the components.
Ok, getting back on track working on this project. Getting the other more important ones (priority set by SWIMBO) around the house done, so I can concentrate more on this one.
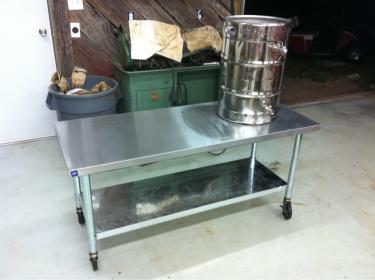
Table/Brewstand is almost done. Got the legs cut to lower the height and to accommodate the casters.
Still need to punch holes for control panel mount and paths for wiring/hoses.
The control panel is taking shape.
And all the hardware and tubes have been added to the keggles.
The controllers and timer have power now. This is really helping with two people attacking this build. I have to wire the alarm circuit and the temperature probes and the control panel will be done.
Subscribed. Your thread has me rethinking going with Blichmann kettles on Kal's plans. The converted and polished Sanke's just look so much better IMO.
Beautiful job so far, I'm going down this exact same path very soon. Like yourself, I find myself juggling other projects as well, especially those that my wife puts to the top of the list. She has been supportive of my brewing and my brewing projects, so I have to keep her happy. I'm just wrapping up my basement finishing project and then I'm building the brewery on the unfinished side of my basement this winter. Just started the keggle conversions, but realized that I need to finish one project (the drop ceiling in my basement) before I start another. I have read every last bit of Kals website and find it to be an excellent resource. Again, great work on your build and I look forward to more pics as it progresses.
This is probably the coolest thing I have ever seen in my life! Are you following any sort of plan with this? If so, is there any detailed information on the web for this type of set up? What is the cost behind this setup?
We followed a lot of Kal's build on www.theelectricbrewery.com but added a bit of our own designs in it.
There are 100s of threads to help you out on this site. I don't think I would have even tried this without help from here and people local with previous experience.
BTW, welcome to Homebrewtalk.
Great place to learn.
The SWIMBO is ready to start brewing some yummy stuff.
She is almost as excited as I am. ALMOST.
Neither one of us thought it would be as big of a project as it has turned out to be.
That is exactly what we did. It is hard to see in most pictures, but it is pretty smooth and polished.
It just depends on the direction of light and from where you look from.
Here is a better angle.


 Subscribed!

![Craft A Brew - Safale S-04 Dry Yeast - Fermentis - English Ale Dry Yeast - For English and American Ales and Hard Apple Ciders - Ingredients for Home Brewing - Beer Making Supplies - [1 Pack]](https://m.media-amazon.com/images/I/41fVGNh6JfL._SL500_.jpg)