wyzazz
Well-Known Member
Looks great! Have you used it in this configuration yet?

Looks great! Have you used it in this configuration yet?


![Craft A Brew - Safale S-04 Dry Yeast - Fermentis - English Ale Dry Yeast - For English and American Ales and Hard Apple Ciders - Ingredients for Home Brewing - Beer Making Supplies - [1 Pack]](https://m.media-amazon.com/images/I/41fVGNh6JfL._SL500_.jpg)


OCBrewin said:In general people use pumps for transferring hot liquids like the strike water and for chilling boiling wort. This becomes more important with larger batches where you don't want to be lifting 100 lbs of boiling liquid.
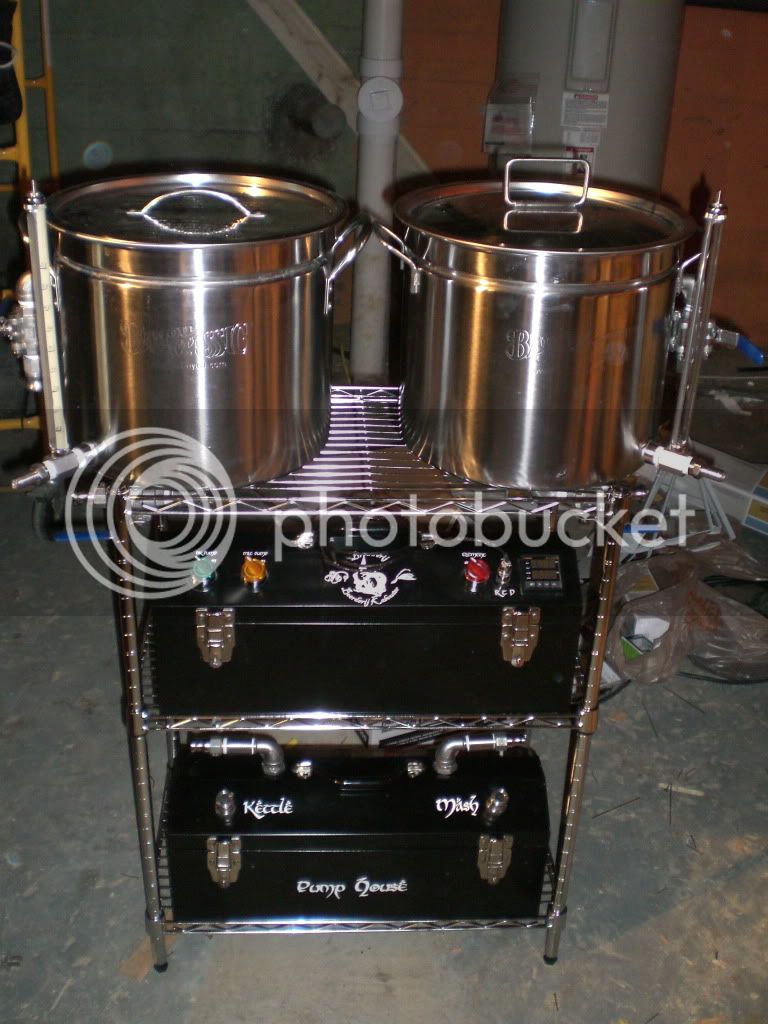
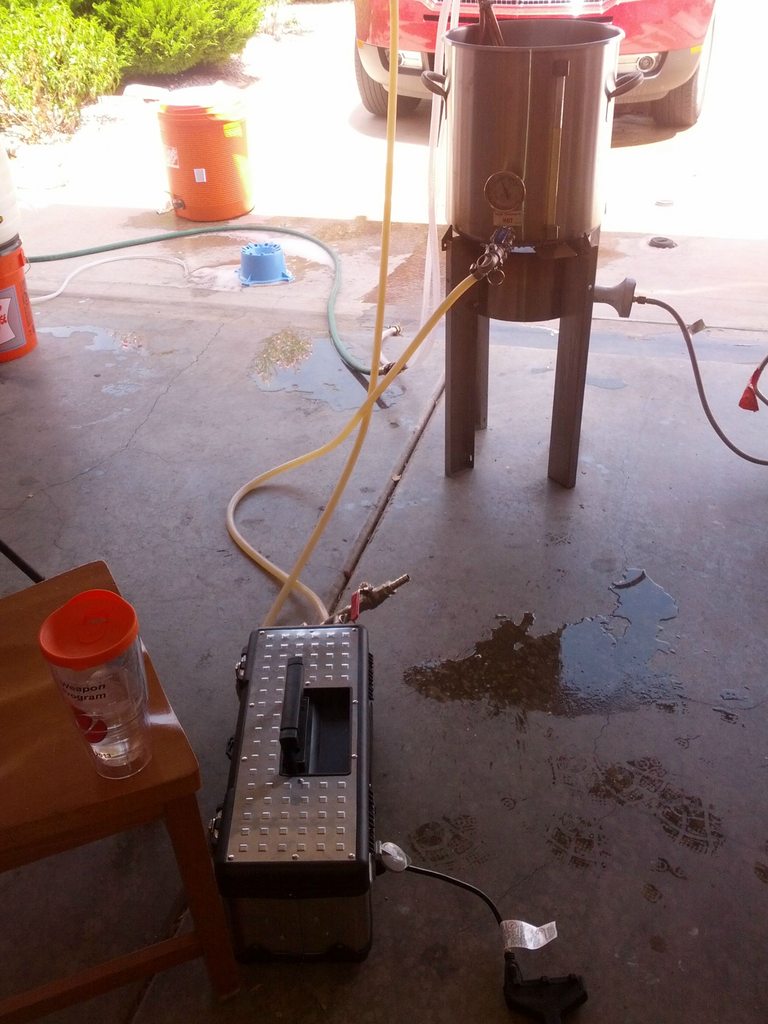
This design also now incorporates a RIMS system for even more.control during the mash. It allows me to constantly recirculate through the grainbed at a very specific temp for as long as I want. This creates a very clear wort preboil, and gives really good conversion consistency and replication of recipes. Search RIMS to learn more on that...
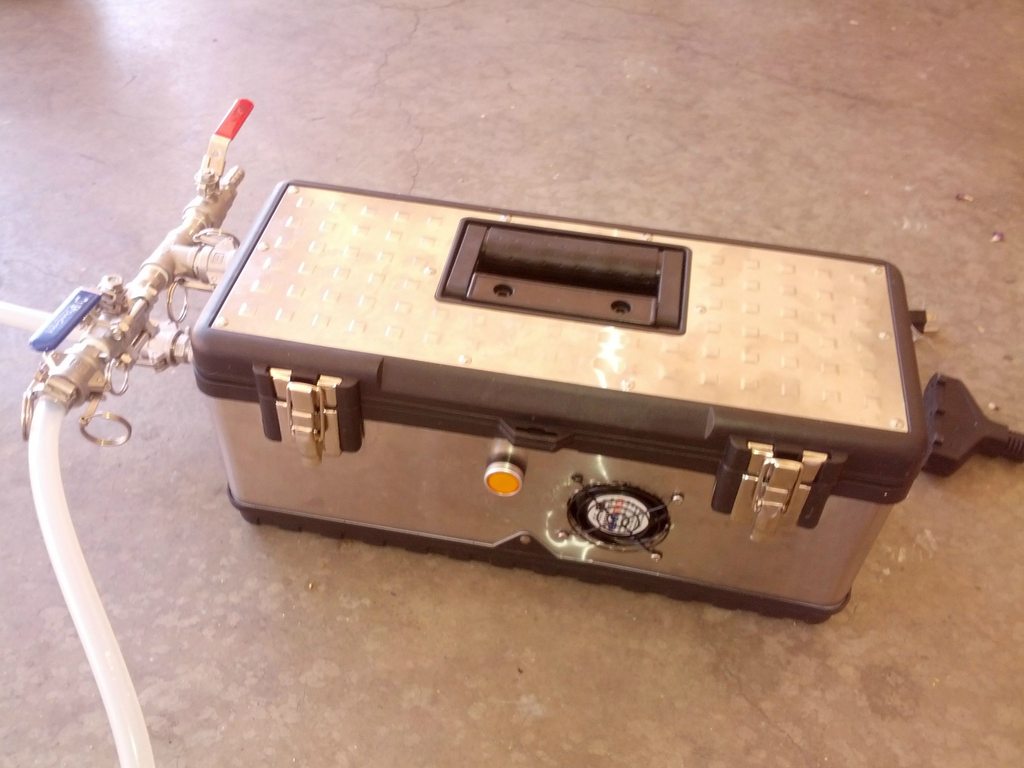
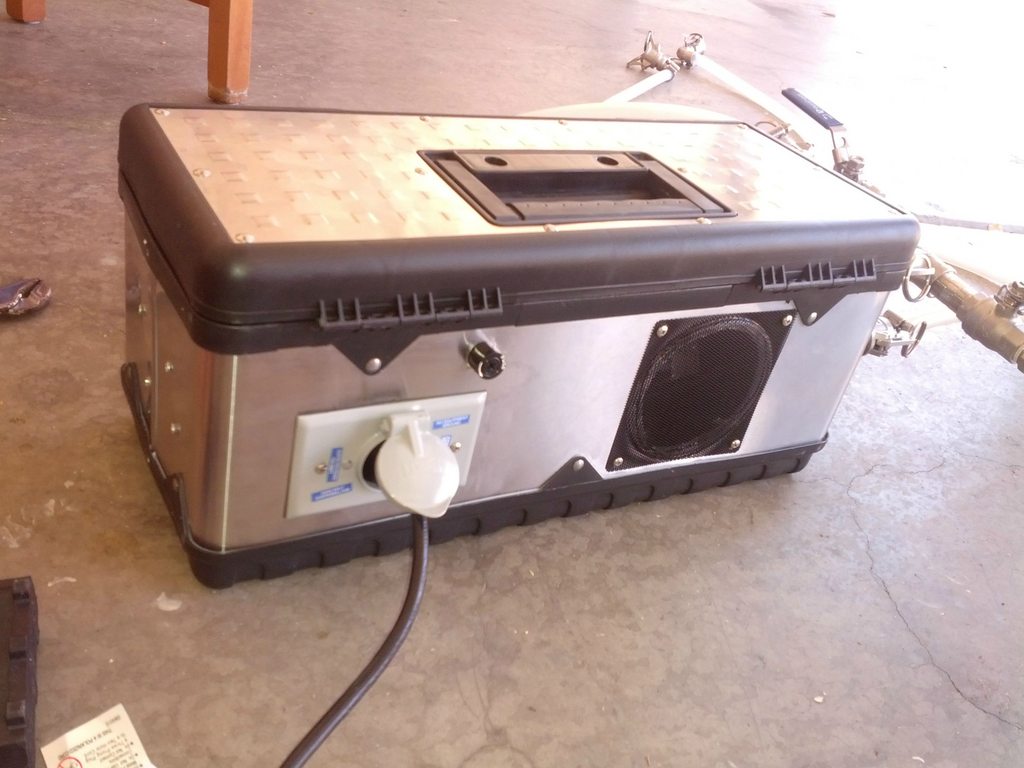
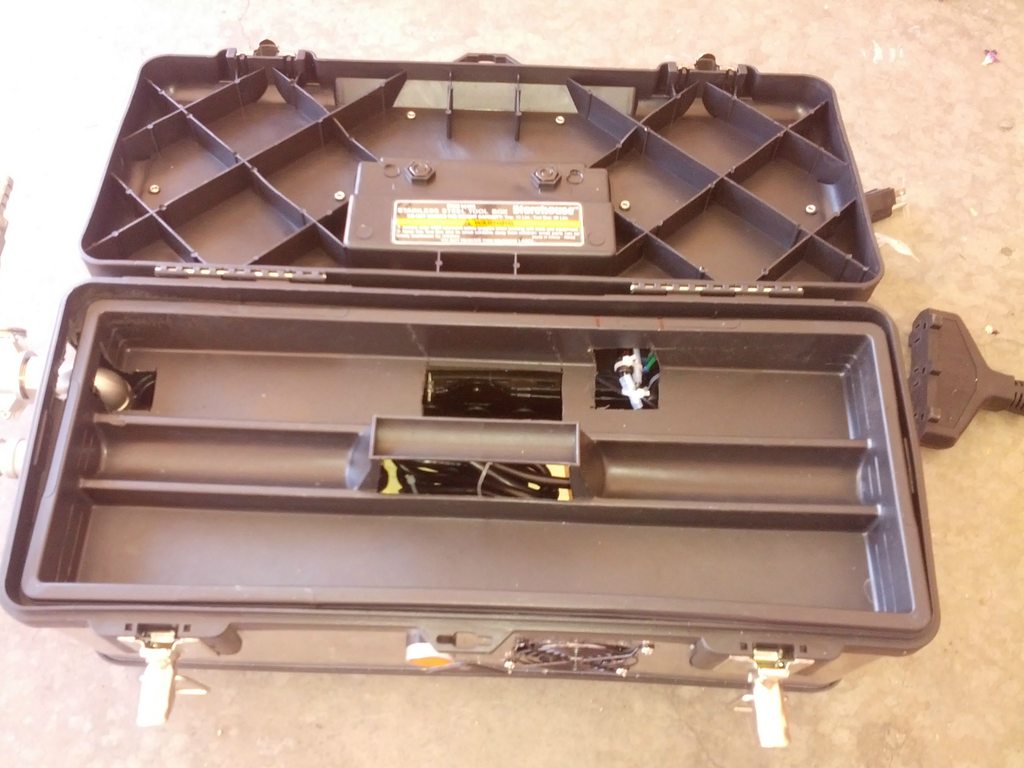
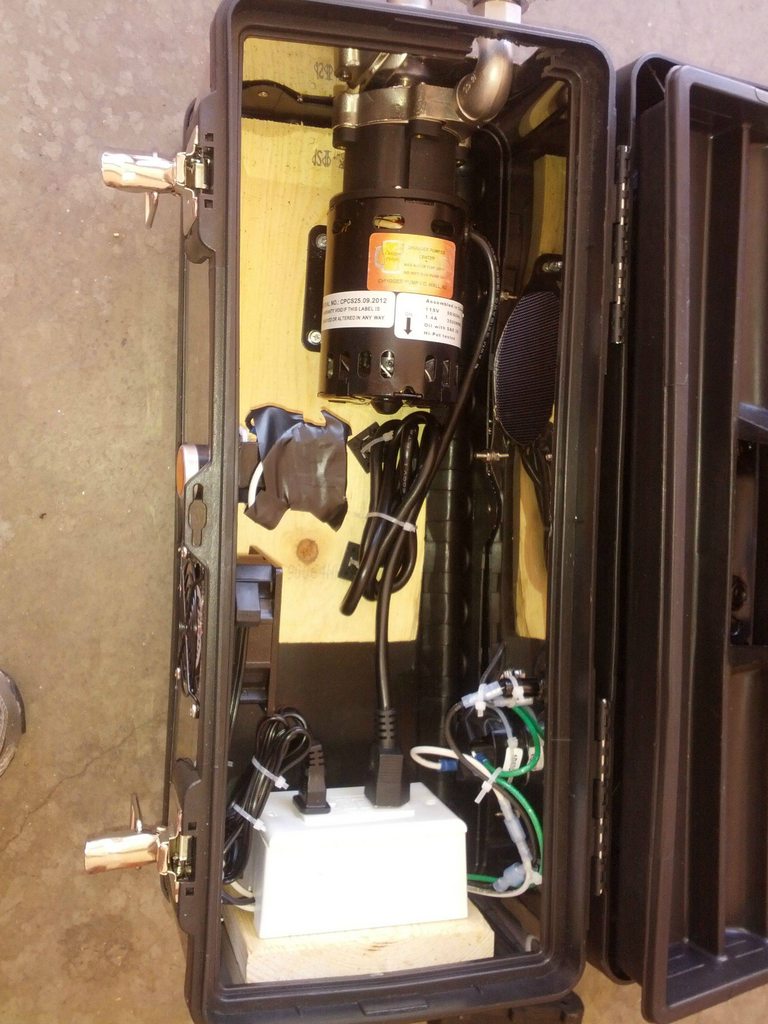
I made a similar box last year. I used a steel tool box from Home Depot, an Auber 1/4 DIN PID, a 5 inch AC computer fan, 40 amp SSR with heat sink and a March pump. The pump was mounted through the box. It already had a ball valve for flow control and a Blichmann brewmometer, as it started as a direct fire RIMS system on my stove (see photo below). The return system also was repurposed. The fan blows air past the SSR heat sink and pump with the exhaust on the back. It's wired so the fan comes on with power up and the heater won't run unless the pump and PID are turned on. I use a RIMS tube from Brewers Hardware with a 4800 watt 240 volt element. It drops into a couple of u-bolts I attached to the side of my brewstand and is easily removed for a cleaning soak. The system has worked great once I started using 1/2 lb of rice hulls per batch and keep the flow rate to < 2 gpm.
BBQBrew01 said:I almost used that same toolbox but was worried about the diamond plate....did you have any issues mounting the pump head? Did you have to grind down any of the "diamonds"?
It wasn't a problem. All the components could be fit between the diamonds pretty easily, including the PID.

That box is very nice. Good job.
One thing that I want to point out is that the only really departure from all of the other boxes that I found on this site was the mounting of the pump head inside the box. That is really why I started this thread - with the plastic head on the outside of the box it is very susceptible to being struck and breaking, as many have done.
It looks like you have room inside the box to mount the pump backwards and plumb disconnects on the outside as I show in the original post and how others have done. Just my $0.02 if others are wanting to build a box following these ideas. I do have to say that your box looks a bit sturdier. The one from Harbor Freight is nice and shiny, but could be a bit heavier duty IMO. Cant beat the price though - I think I picked up the box for like $15.
OCBrewin said:That box is very nice. Good job.
One thing that I want to point out is that the only really departure from all of the other boxes that I found on this site was the mounting of the pump head inside the box. That is really why I started this thread - with the plastic head on the outside of the box it is very susceptible to being struck and breaking, as many have done.
It looks like you have room inside the box to mount the pump backwards and plumb disconnects on the outside as I show in the original post and how others have done. Just my $0.02 if others are wanting to build a box following these ideas. I do have to say that your box looks a bit sturdier. The one from Harbor Freight is nice and shiny, but could be a bit heavier duty IMO. Cant beat the price though - I think I picked up the box for like $15.
Nice build and I see your advantages but I like the access to my pump head as I have gotten my pump gummed up to the point I had to disassemble it to clean it out. Also, I could see a seal failing and all the electrical components getting soaked in sticky mash fluid and grains. If there was a way to get the pump inside but still walled off/isolated from the electrical stuff and yet easily removed for service issues then that may solve all concerns.
Somebody build one and post up.

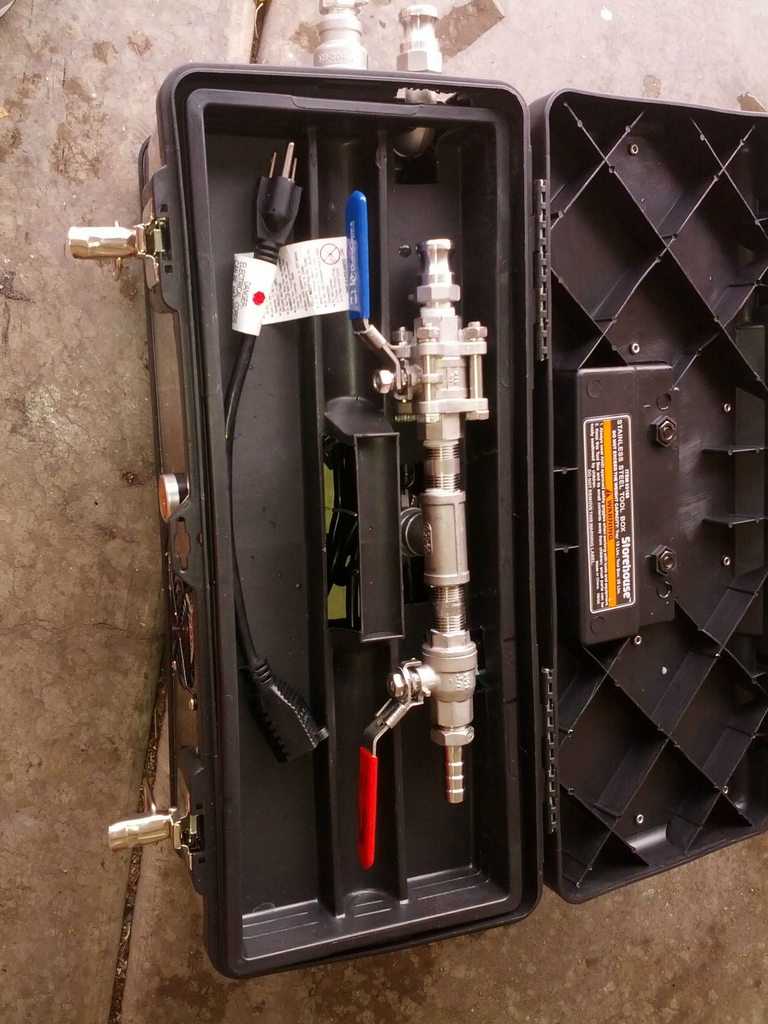
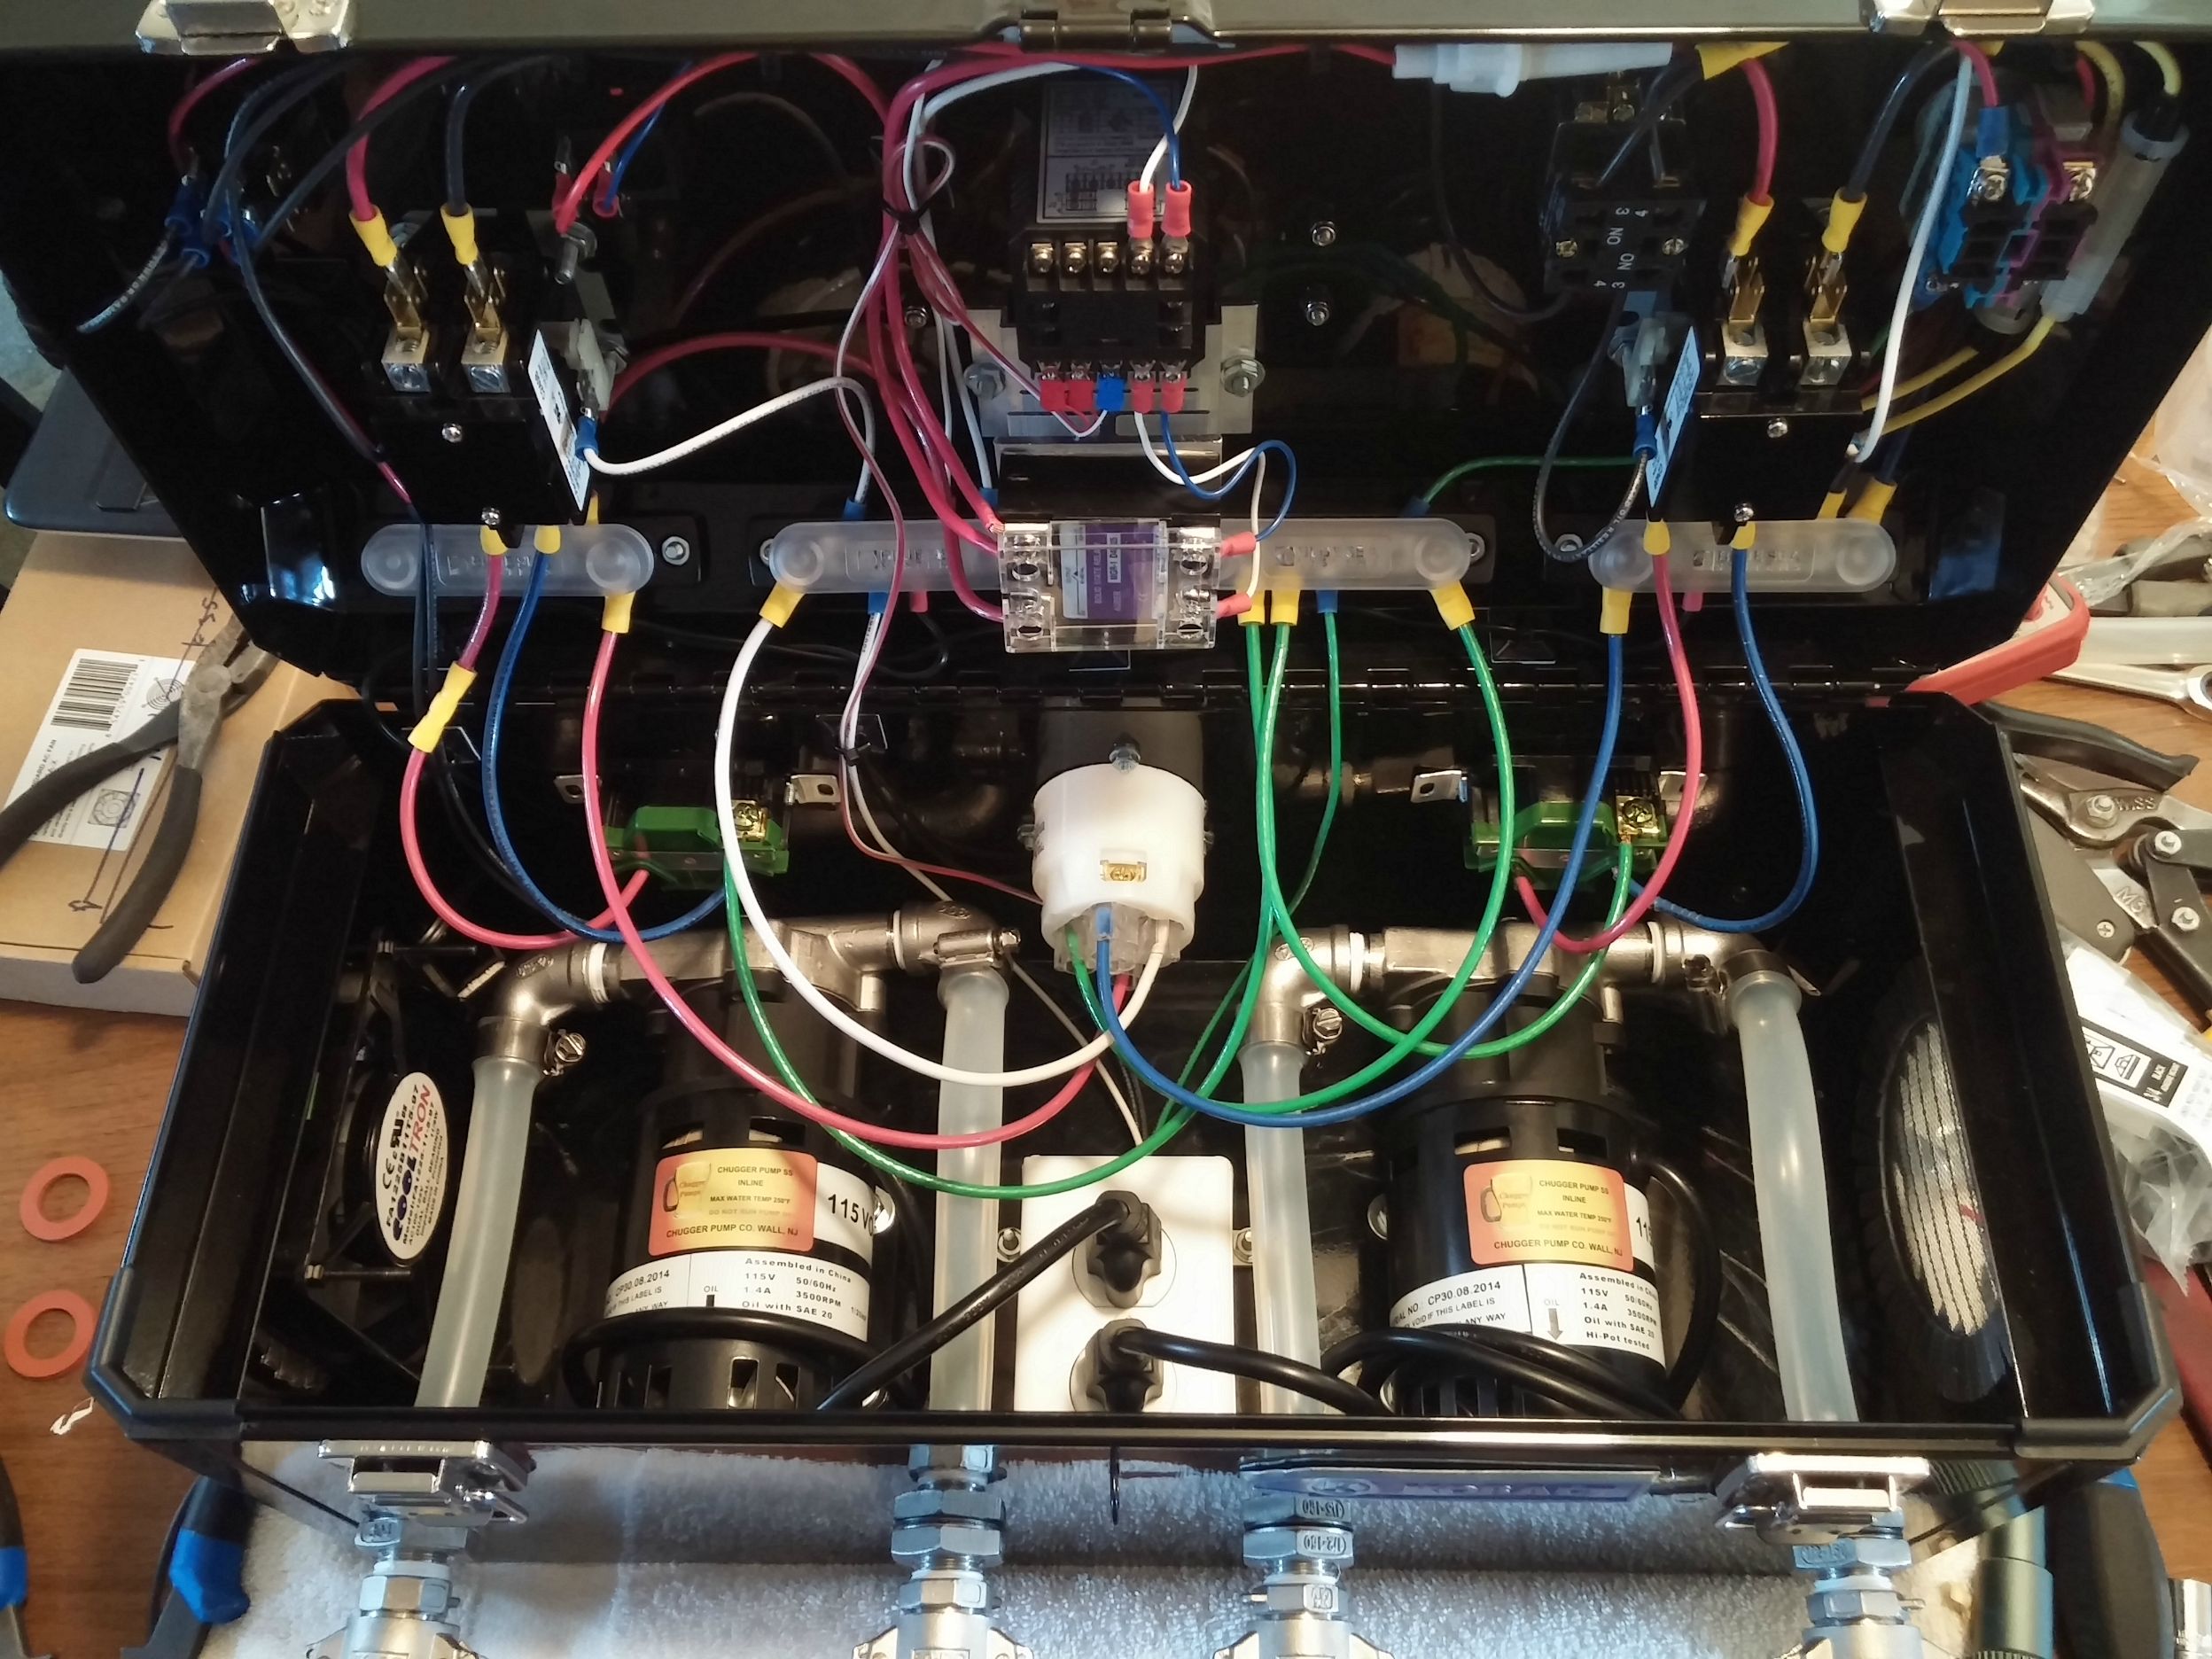
Which fittings are you guys using through the side of the box to have the pump IN the box with just the quick connect on the outside? It's hard to tell from the pictures.
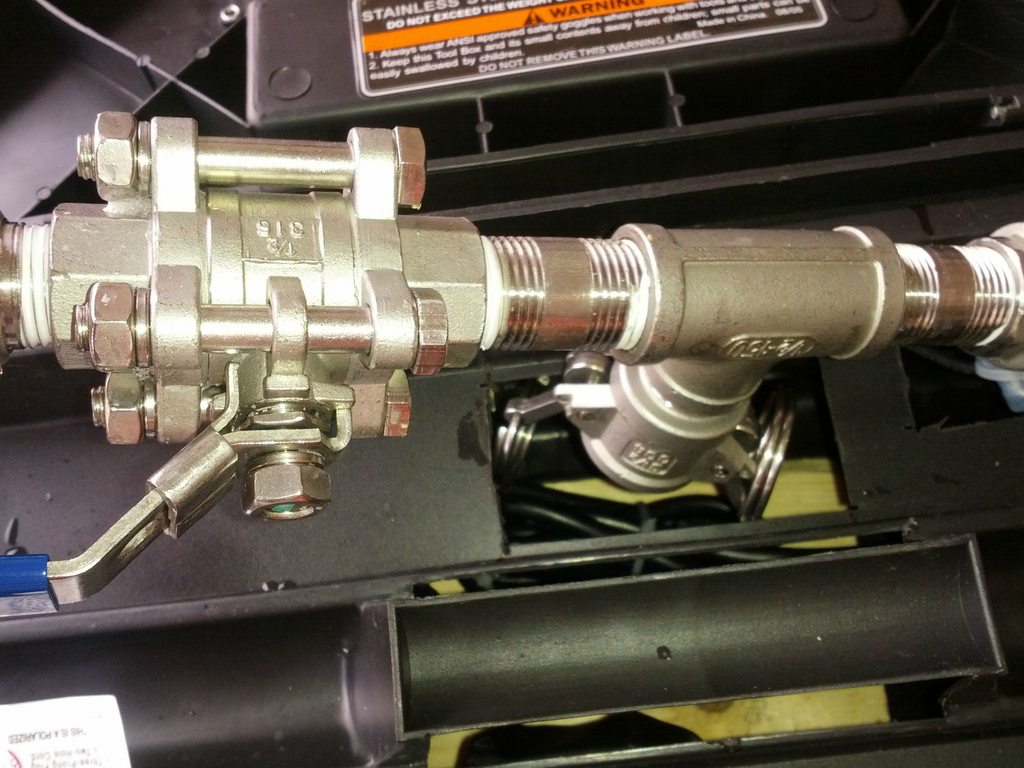
Camlock fittings and high flow hose barbs. I also suggest reinforcing the wall with an additional plate or something because the stainless is pretty thin. I used a thin piece of hardwood board. You can either use camlock type A fittings with male threaded barbs, or type F fittings with female barbs - up to you.


I do not use a ball valve on the pump outlet. Only one ball valve is needed in series to restrict the flow.
My pump box is on the bottom. I use the ball valves on the kettle returns to throttle the flow. Less parts, simpler layout. During hose changes, I just pinch the tubing while making the change to maintain my prime. Both ways work just fine.
Note: this tubing is not rated for high pressures. Do not restrict the output when fed by city water pressure or a pump. All silicone (or at least most) of similar dimensions and duro hardness is rated to approximately 10 psi working pressure. As far as tubing goes, that's not a lot. Several customers have pointed out that they have used this tubing between a pump and a restriction point such as a vessel-mounted valve with no problem at all. That's fine and likely true because most homebrew pumps such as March 809/815 and Chuggers can only generate about 7 or 8 PSI or 17 ft of head pressure which is obviously below the typical silicone rating. Please be careful and practical here though. Be sure to use hose clamps on all barbs and beware of tubing clamped over non-barbed tubing. Also, if you're using a pump more powerful than 1/20th HP, all bets are off. Realistically, the most safe way to use this kind of tubing is to put your flow control ball valve directly on pump output. It's not the ONLY way to be safe but it is the best way and the only one we can officially endorse. Kapeesh?
Very nice! That's a tight space, how hot does she get with the fan on?
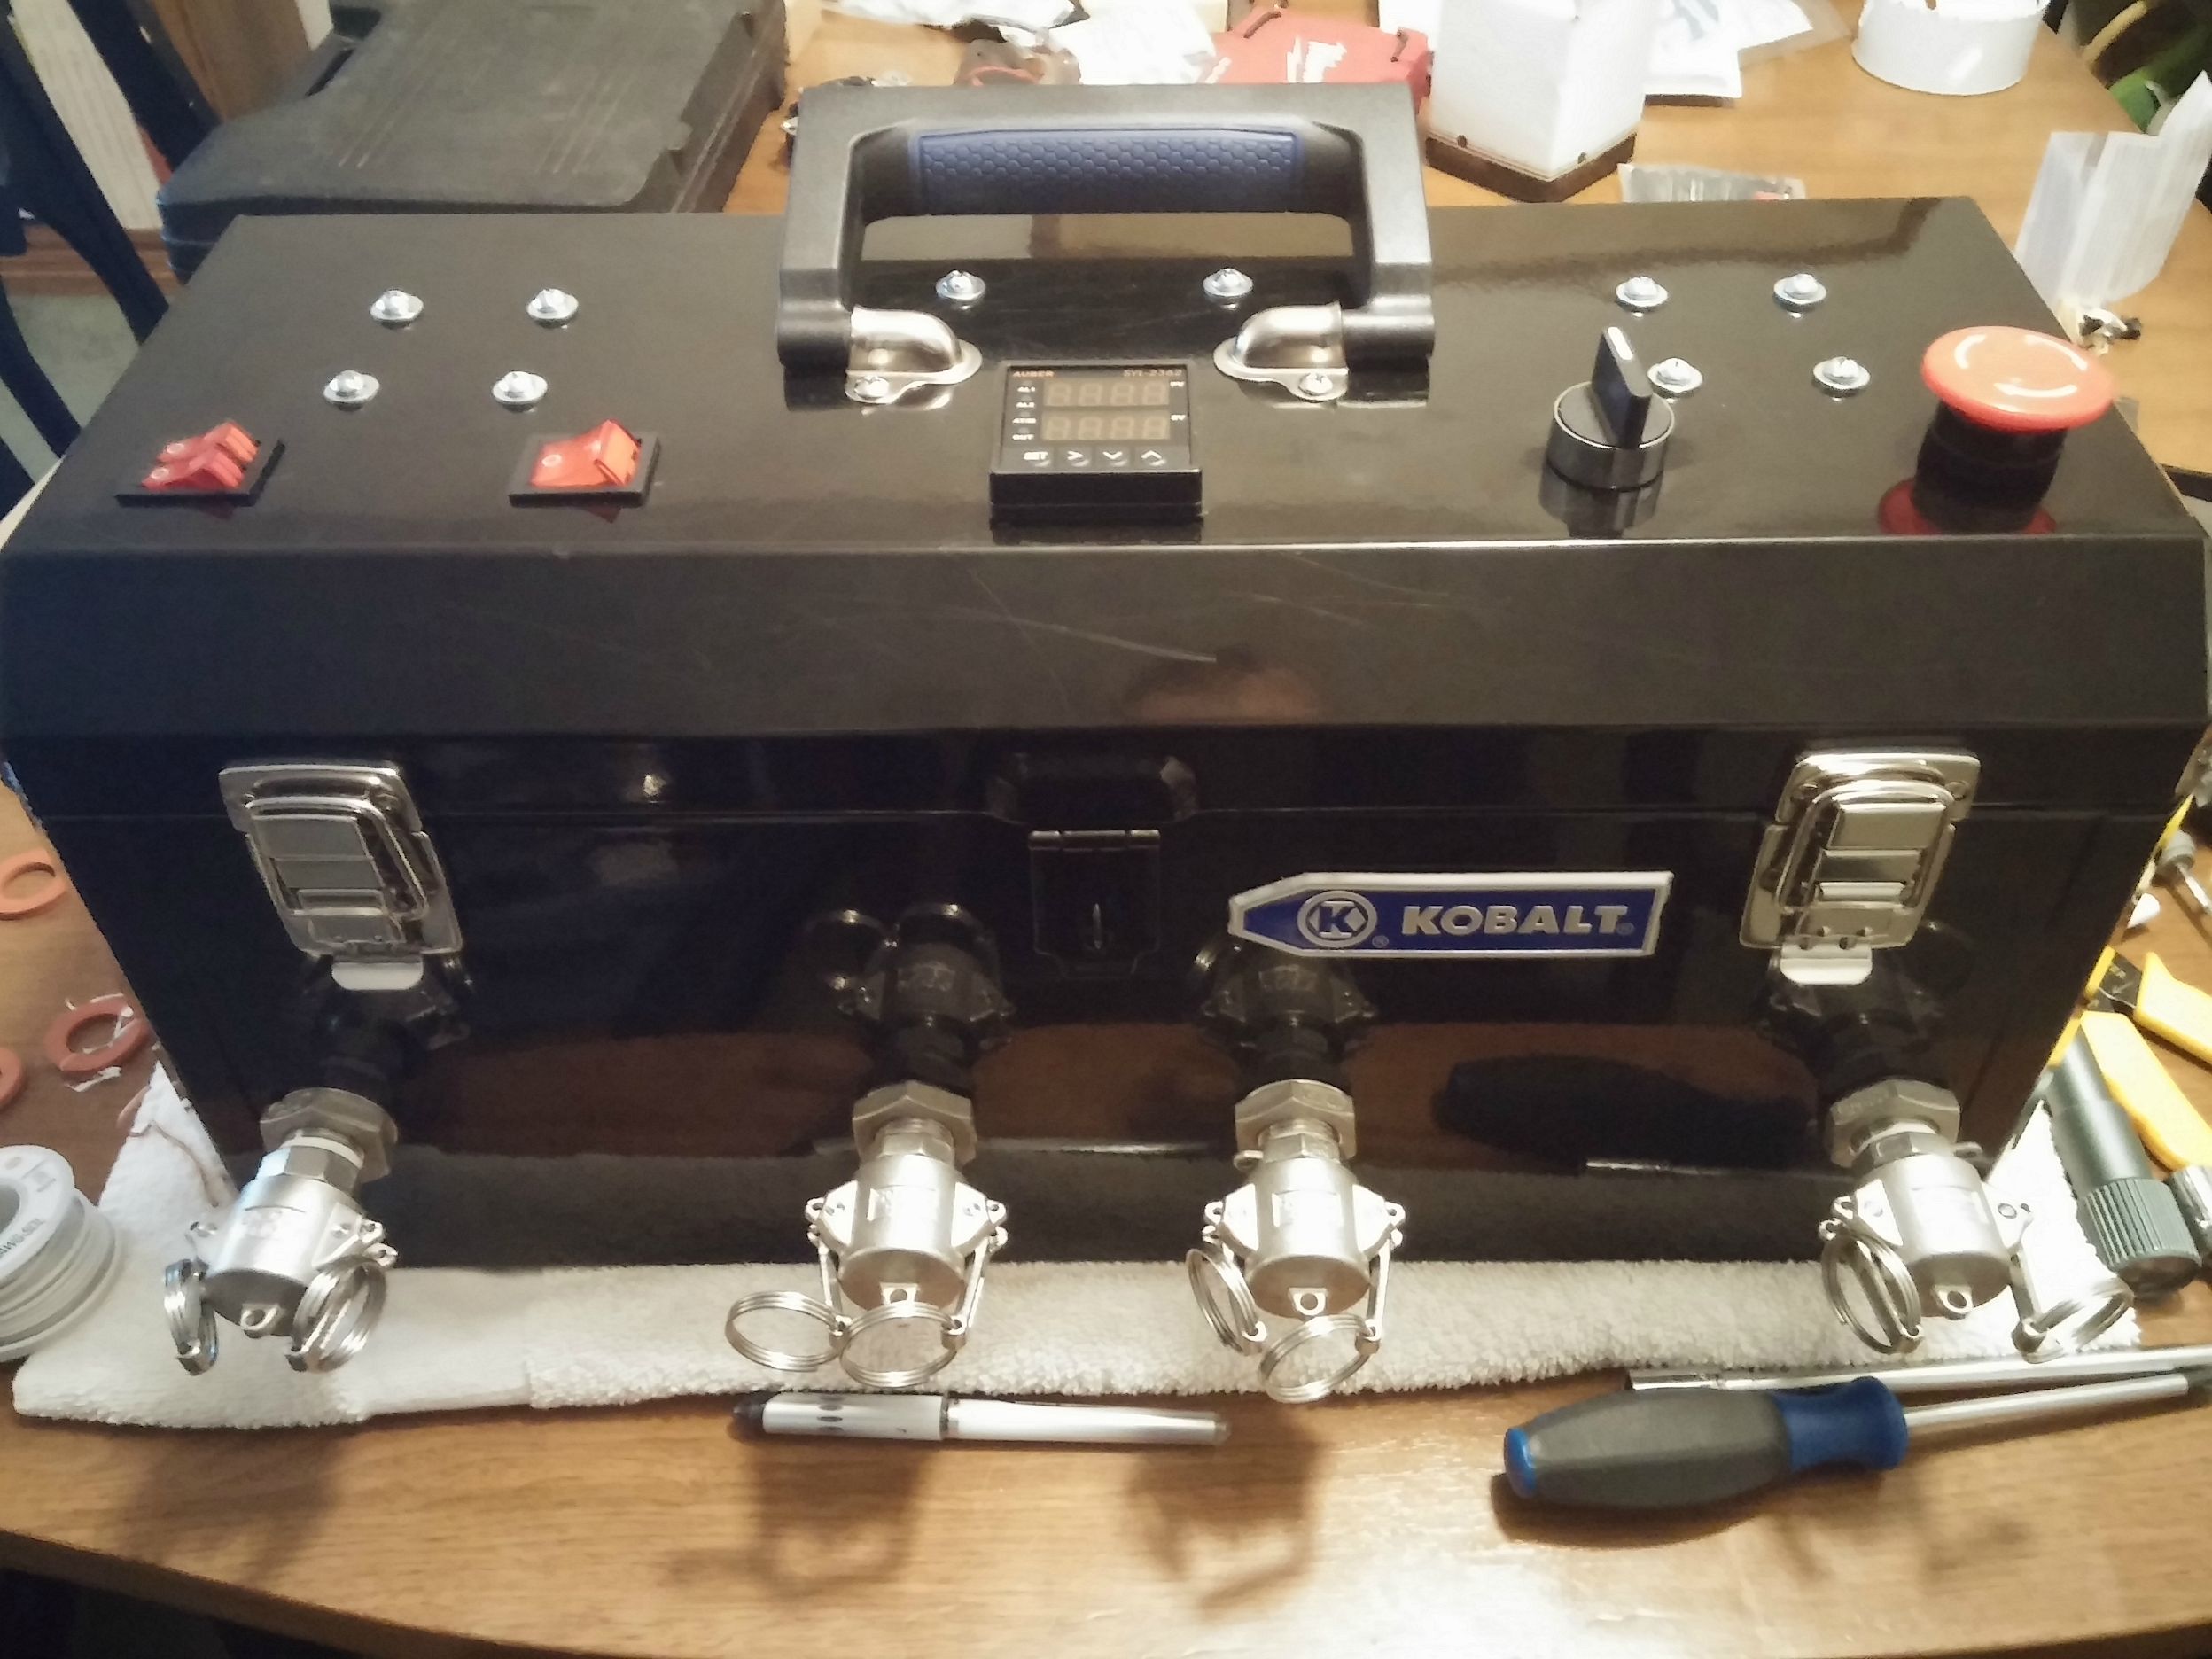
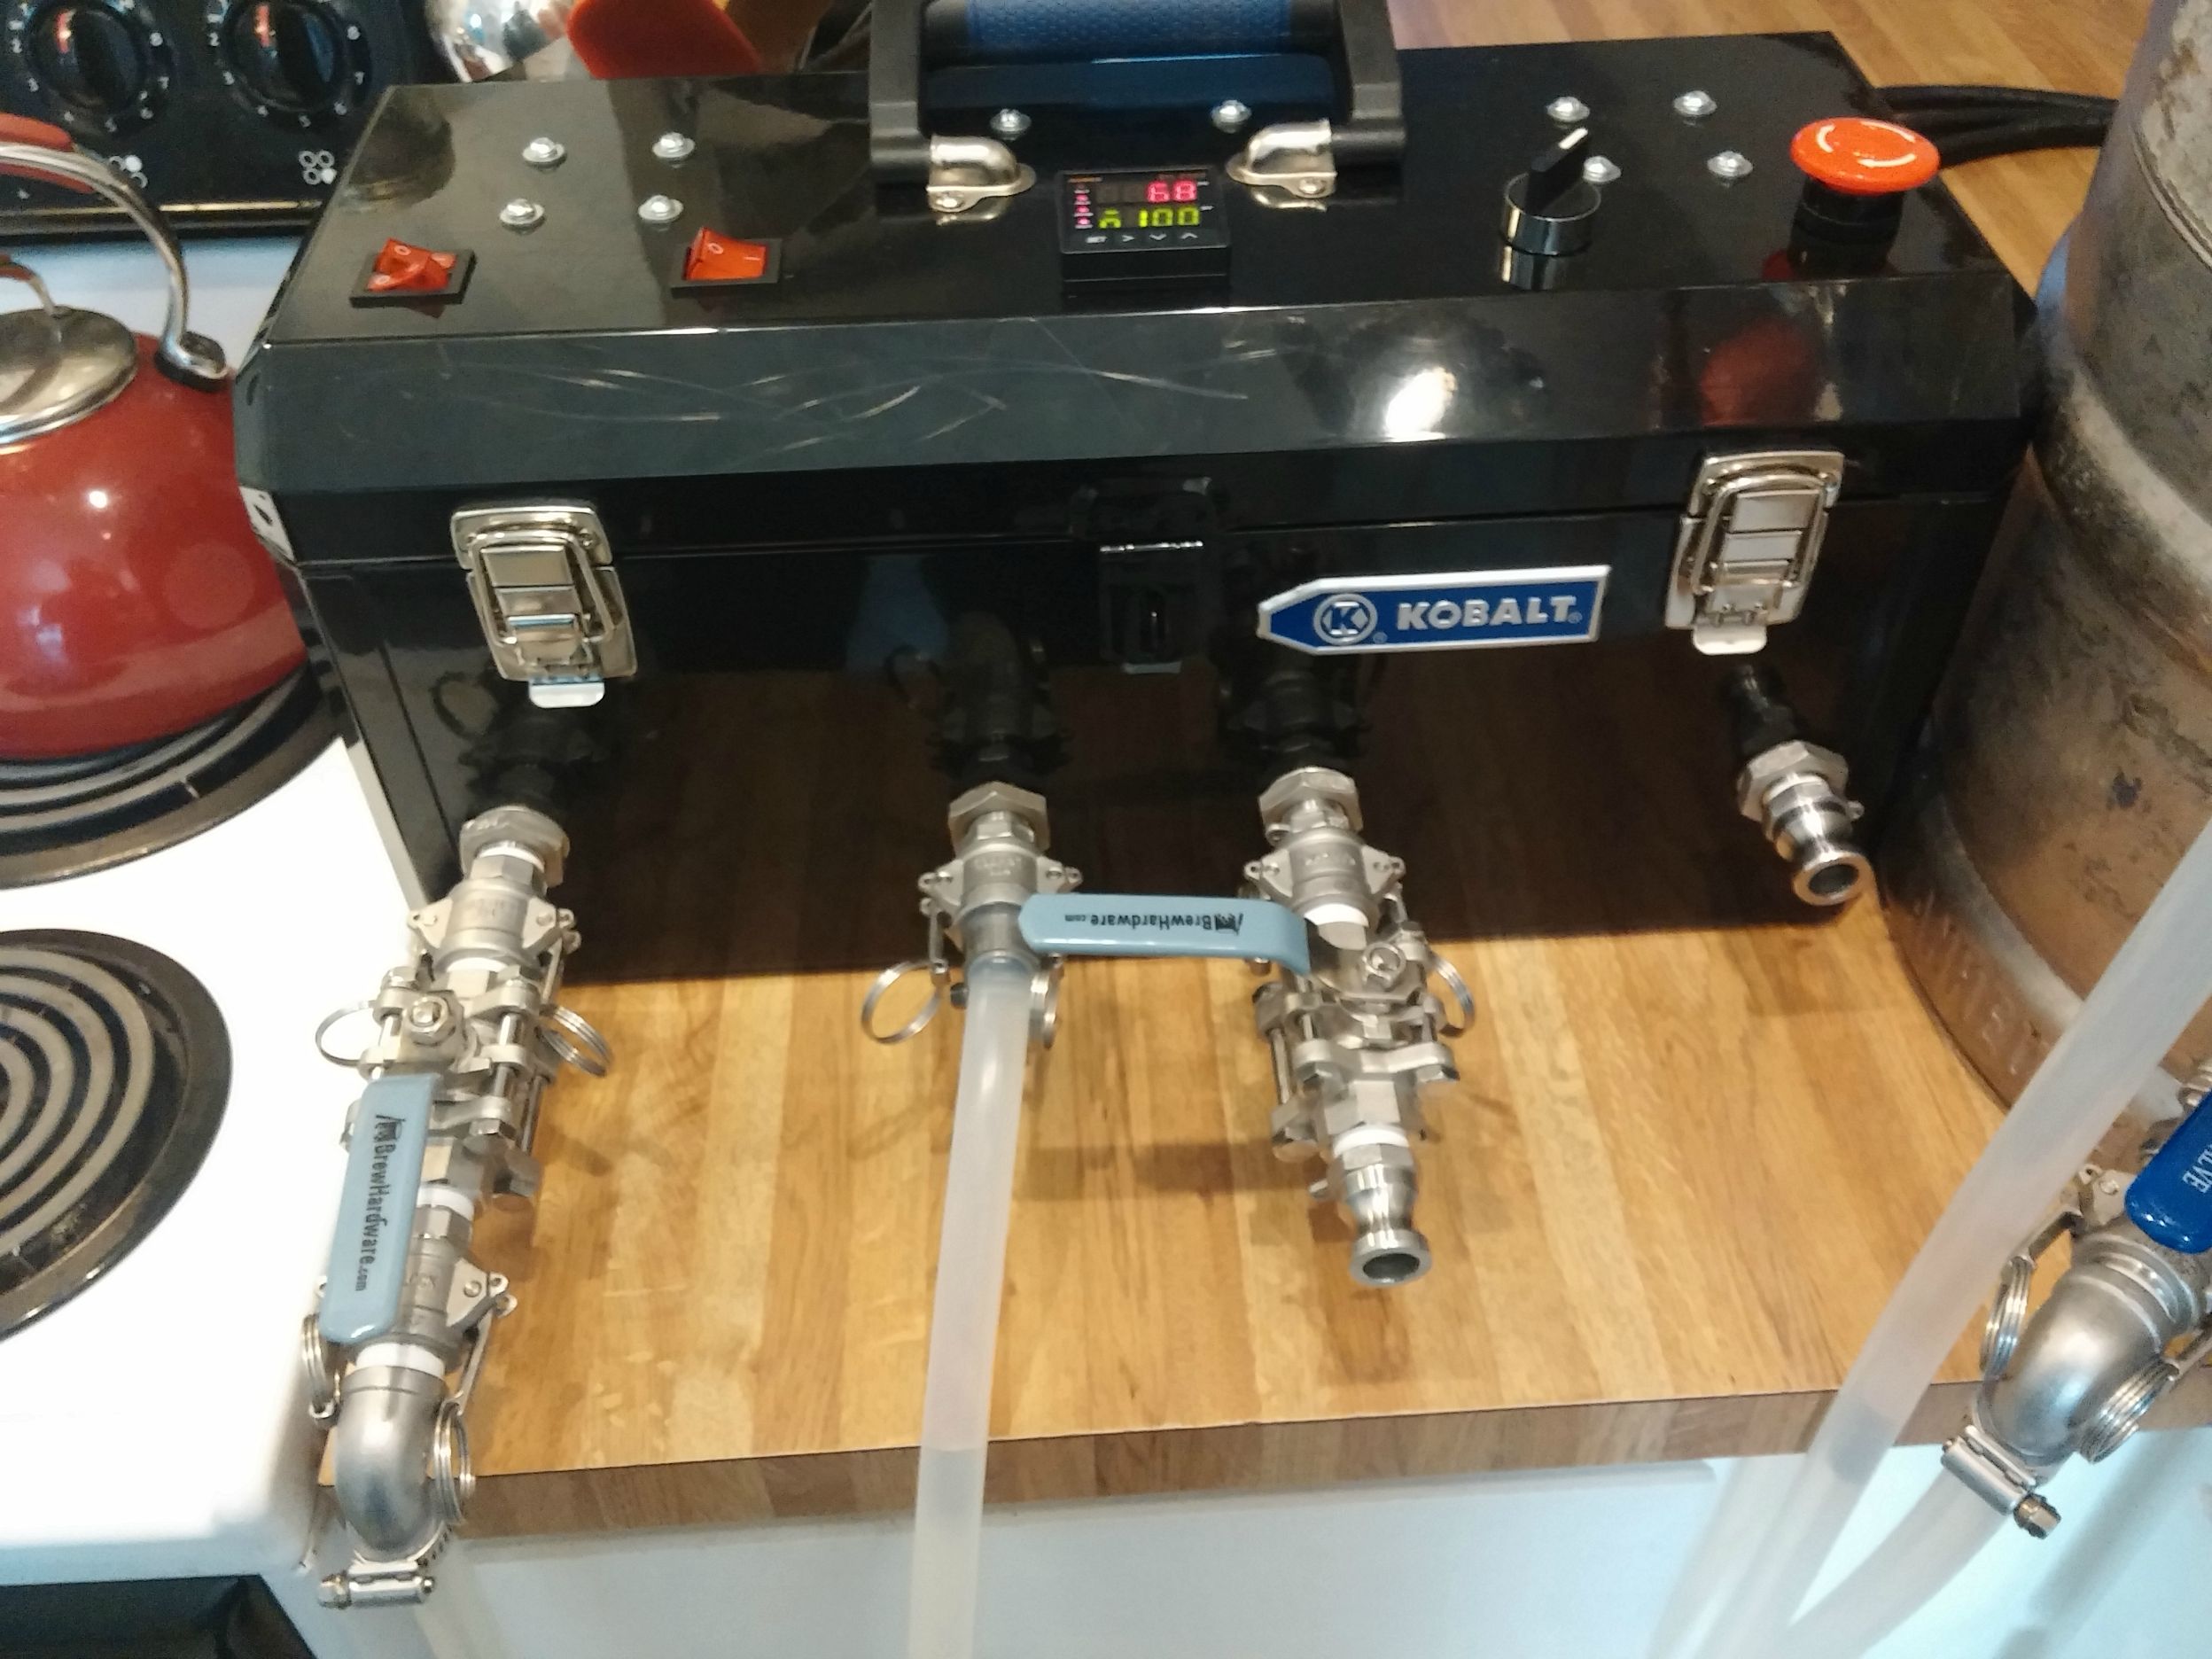
Love your set up! Any wiring diagrams or build sheets?Thought I would share my take on this one. I mounted two chugger pumps inside my eHERMS control box. Happy how it turned out.
I would recommend using high pressure reinforced silicone on the inside. The regular stuff will pop like a balloon with very little pressure, especially when it's hot.


