(Not Quite) Ugly Junk, Graphically Changeable Tap Handles

Homebrew Talk - Beer, Wine, Mead, & Cider Brewing Discussion Forum

Help Support Homebrew Talk - Beer, Wine, Mead, & Cider Brewing Discussion Forum:

This site may earn a commission from merchant affiliate links, including eBay, Amazon, and others.

Revvy

Post Hoc Ergo Propter Hoc
HBT Supporter
Joined
Dec 11, 2007
Messages
41,288
Reaction score
3,773
Location
"Detroitish" Michigan
f229e96d.jpg


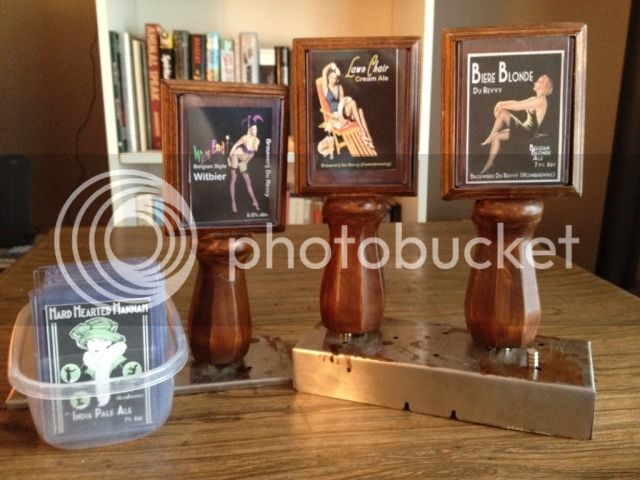
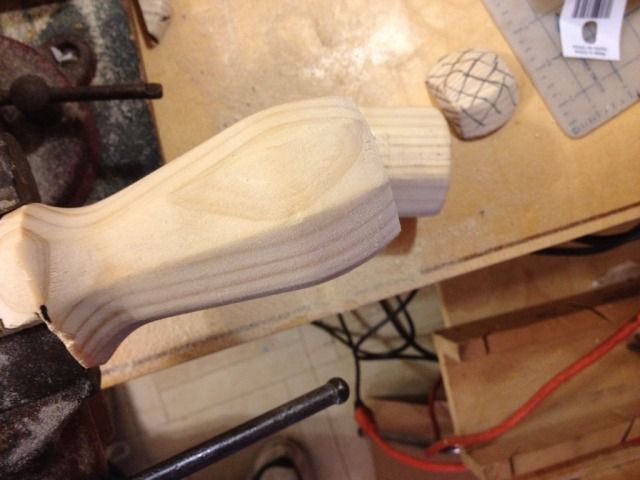
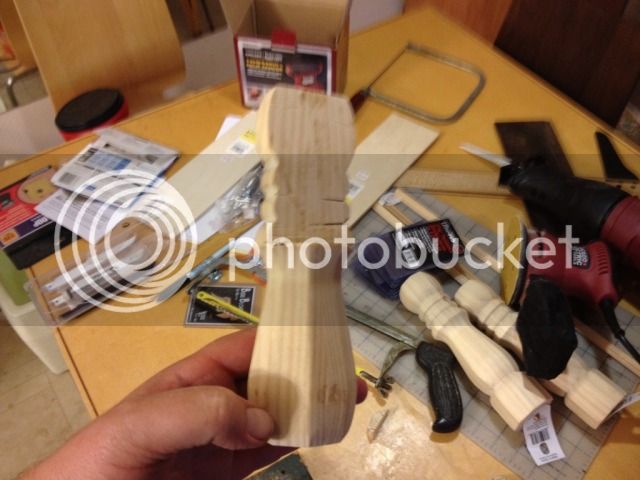
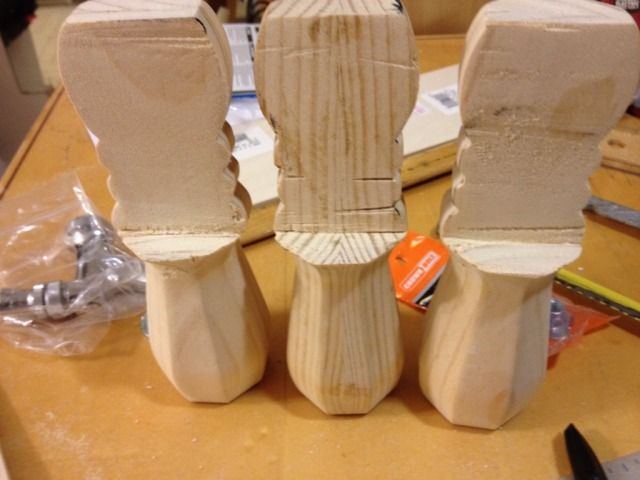
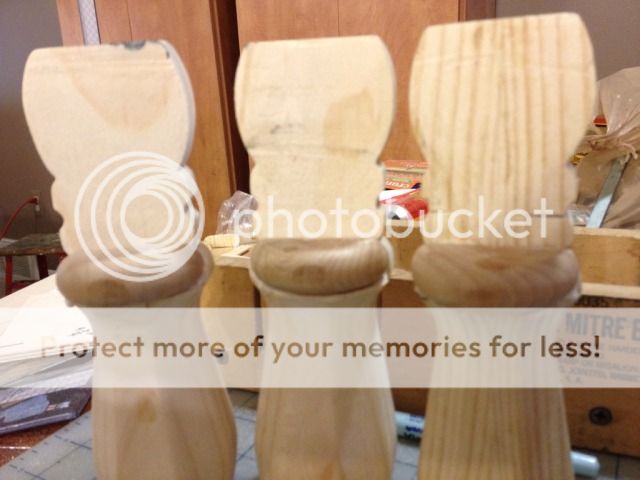
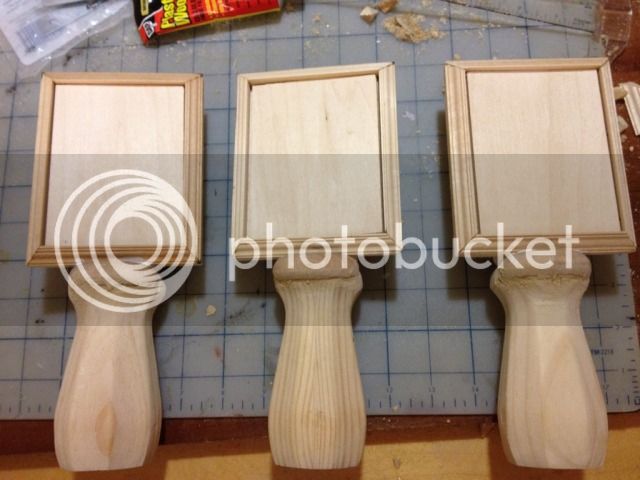
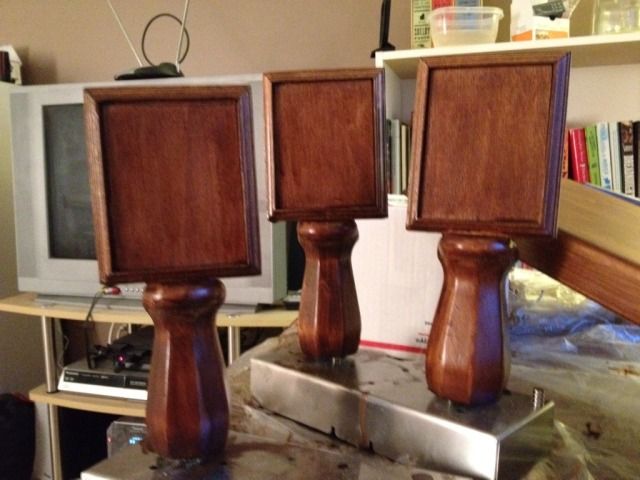
When trying to come up with tap handles I wanted something that I could change whenever I changed a beer. But the only alternatives seemed to be the blackboard/white board style.

I wanted something a little more graphically appealing (plus my handwriting sucks,) and something that I could express my creativity in label design as well.

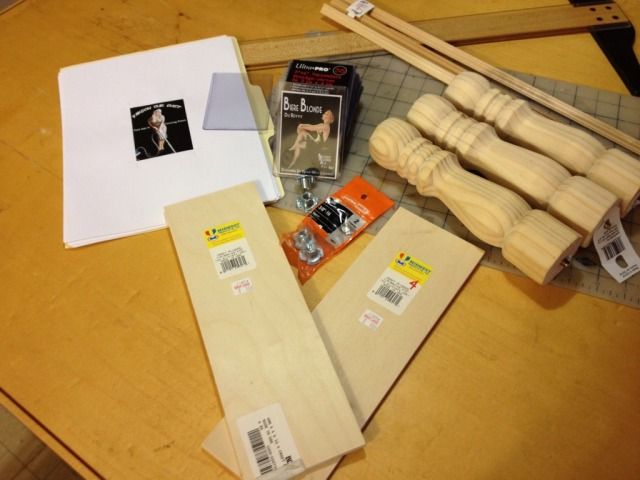
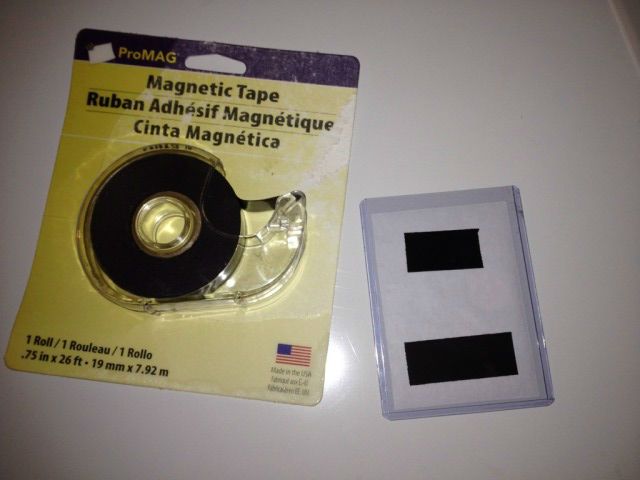
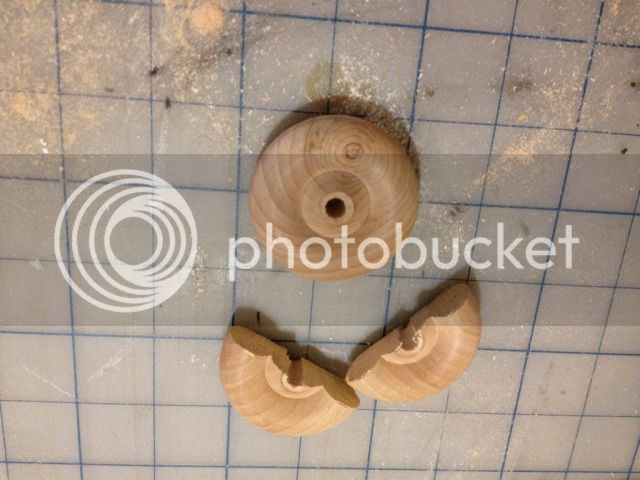
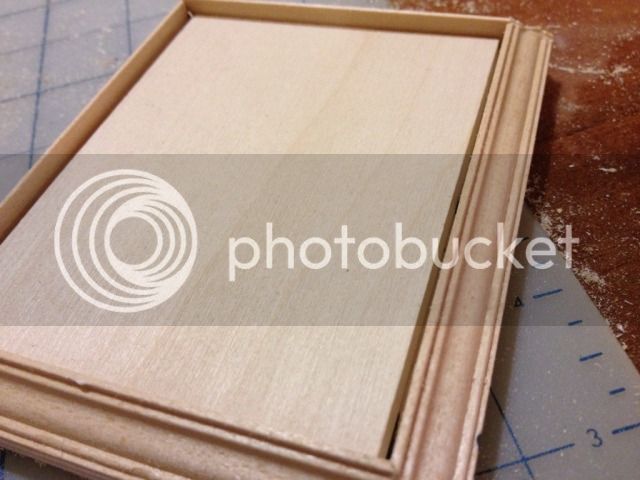
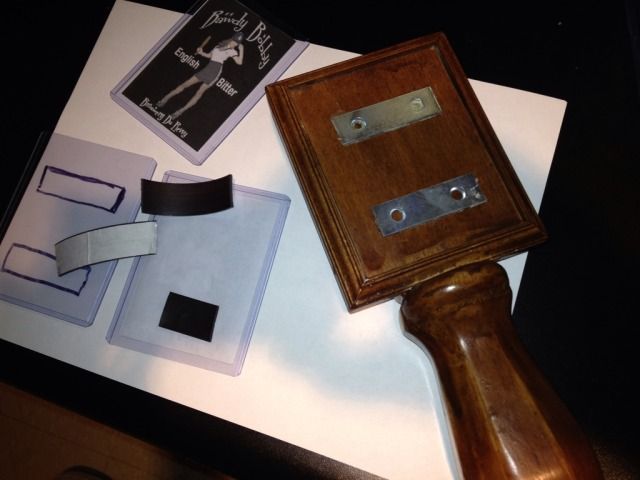
I was looking at various tap designs and other display ideas on the web and stumbled upon “Top Loader” plastic sports and collector card sleeves. So I decided to incorporate that into my design.

They’re available in the toy department of any big box store, where the collectable card sets are.

981043dc.jpg


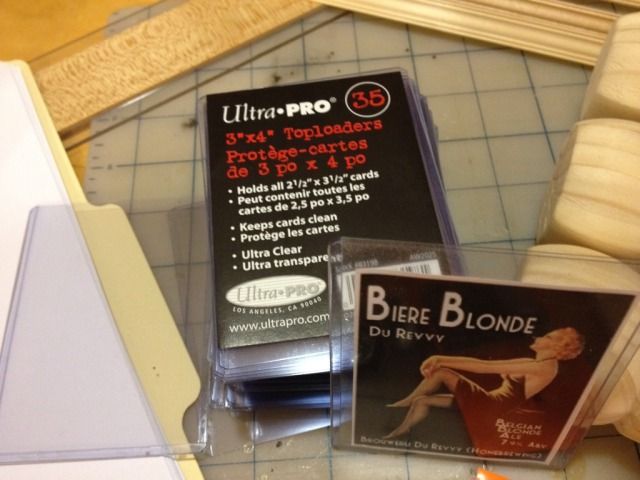
The typical collector card size is 2.5” w X 3.5”L, and the sleeves themselves measure 3” X 4”.

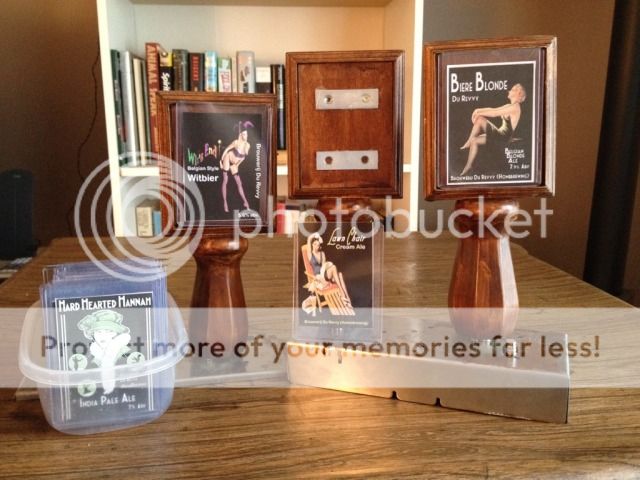
The first thing I did was made up a bunch of labels in photoshop the size of baseball cards. Since I’ve always been a fan of pinups, both vintage and modern, I decided to make that the overall theme of my labels. Though a few of my older recipes I used other graphics.

pumpkin_copy-55214.jpg


wit_s_end_copy-55216.jpg


283743_10150905648624067_969437029_n.jpg


575504_10150909561079067_1595732291_n.jpg


562720_10150909833794067_1997156930_n.jpg


I also made a few for empty taps.
dust_copy-55206.jpg


comingsoon_copy-55208.jpg


(More graphics in my gallery, and on my facebook page.)
 
The materials for the build are;

5a9f9238.jpg


Some of them I bought at Home Depot, some at Michael’s Art Supply Store, and Some were from a hobby shop specializing in model train and dollhouse building. I’ll indicate where with the codes HD, MA & HS, respectively.

1) Replacement Table Legs for the actual tap handle (HD.)
2) Hobby /Craft Plywood ¼ x 4 x 12 for backing of card holders The actual width of this is really determined by the thickness of any trim you might be using. (HS,MA)
3) Hobby/Craft Plywood ¼ x 3x24 to raise the backing due to thickness of Trim Molding. (HS,MA)
4) Dollhouse Trim Molding. 12” for each tap handle. (HS)
5) 3/8 x 16 thread “T-nuts” for the insert to screw the tap handle onto the tap itself. (HD)
6) (Optional) Hardwood “wheels” (MS)
7) Self-Adhesive Magnetic Tape (MS and Meyer’s )
8) 2” Mending Plates, 2 per tap handle (HD)

The Plywood;
1f4a2824.jpg


The Trim;
1ab1d10e.jpg

(There are a few different types of trims available, you can even use half rounds. )

The “T” Nuts;
ce339ba6.jpg


2” “Mending Plates;”
8211a206-26e6-43a3-b253-5a5c552d6196_300.jpg


There are two types of Self Adhesive Magnetic Tape, the kind found at most stores like Michael’s and Home Depot is fairly thick and comes in a roll.

b50184f8-d14f-4c85-a31c-925376348ef0_300.jpg


But after running out, I found this even thinner version in the arts and craft section of Meyer’s (Walmart sells it also)

Untitled.jpg


Also needed.; Saw to cut wood, a miter box to cut trim (I used an exacto miter box with mini sawblade) stain, wood glue, a glue like Gorilla Glue to bond any metallic parts to wood, wood putty to fill cracks, Johnson Paste Wax and a buffing wheel for a drill, or a cloth to polish the handle (optional,) a vice to hold things while sawing, various grits of sand paper to smooth the wood.
 
The first thing I did was to cut down the chair leg to a size I wanted. In the case of mine, I simple sawed off the squared section at the bottom.

33f381e8.jpg


I then marked out the part I wanted to cut away to be able to seat the backing board onto the handle.

a69eeaaa.jpg


And I cut it away.
f00e54bb.jpg


The complete handle;

a17fd160.jpg


But it turned out, when I dry fitted the frame to the handle; I didn’t like how the bottom of the frame sat on the notched out piece of the handle, especially with the trim in place. In retrospect I would have cut the handle higher, leaving that rounded part intact.

759d1bbd.jpg


So I picked up a couple of wooden wheels, and cut them in half.

684594dc.jpg


I glued those in position.
9650dd41.jpg


And filled any cracks with wood putty;

cc581419.jpg
 
Next I assembled the backing board for the graphics.

I measured the width of my trim to determine actually how long my board had to be, and determined that mine had to be 4 ¾ “ long.

I measured out and cut the miters for my trim pieces.

a27de22f.jpg


And glued the trim in place;

37015be4.jpg


Since the trim was so thick I decided to prop the top loaders up by inserting another piece of wood in the frame. You don’t have to if your trim is shallow or you don’t mind having to dig a nail into the frame to get the graphic. I just found it easier to put a piece of wood in.

c90ca487.jpg


d79731be.jpg


I glued the frames in place and filled any more cracks with putty.

6209b1b7.jpg


The final step before staining is to mount the “T-Nut” on the underside of the taps.

I located the center of the base and drilled a 3/8” hole about 1/2” into the base. The I screwed the “T-Nut” onto the beer tap, and marked where the front of the nut fell. That way it would be in the right position when the tap was screwed back on.

I used some Gorilla Glue to mount it and tapped the nut in place. (If using the foaming kind of Gorilla Glue, keep and eye on it to make sure that the foaming glue doesn’t get up into the threaded area. I found that if it does, a Q-tip with some mineral spirits worked great to clean the glue out.

0cff2a04.jpg


Next I gave them a good sanding with progressively finer grits of sand paper until they were smooth and any the filler putty was even. I the applied 3 coats of Miniwax Stain and Poly the same Walnut shade as I planned for my Keezer collar, sanding with ultra-fine grit paper between coats.

When the stain was dry I applied a thick coat of Johnson’s Paste Wax, and then when the wax clouded I buffed it with a buffing wheel on my drill. I did this for my keezer collar as well. This is optional. I think it gives it a depth of shine, and has an old timey English Pub feel to the wood.

Johnsons-paste-wax-JPW.jpg


a2dcb0b5.jpg
 
The final step was to glue the 2 mending plates to each backing board. I measured ¾” from the top and bottom of the frame and attached them with more Gorilla Glue.Then after knowing the location of the metal plates, I applied the magnetic tape to the back of each of the top loader encased graphics.

242bf22f.jpg


And the tap handles are ready to be installed on the keezer collar when plumbing is complete.

55eceb96.jpg


As you can see, the label cards store nicely in a Tupperware style container. But once the keezer is built, I am going to frame a piece of sheet metal and hang it above the keezer where I can display my handle graphics in nice way. That way I can keep them were I can see them, and show off my graphic skills. (I’ll post a picture of the frame when I have it finished.

Finally. You don’t need to make fancy tap handles to utilize the Baseball Card Holders/Magnets. You can just make up your graphic and stick them right on the lid of the keezer behind, or below the taps. This would be especially effective for through the door kegorators in stand up refrigerators. Just stick the magnetic cards right on the fridge above the taps. You could even display your graphic cards on another part of the fridge or freezer.

Hope this thread gives you some ideas for your own tap handles, and sparks some graphic creativity.
If you have any questions, let me know.

:mug:
 
What is this that my eyes hath just seen? Is this NON-UGLY JUNK??!?! My head literally just exploded.
 
looks great man, love the idea of changeable inserts. what was the cost for the materials?
 
looks great man, love the idea of changeable inserts. what was the cost for the materials?

I don't know, I bought this stuff while buying stuff needed for the keezer build. But I don't think it was all that much. I think the most expensive part were the legs which might have been between 4-5 dollars apiece. Probably cost a total of 35.00 to make all three.

Heck you could probably garbage pick an old table or chair and you'd have some nicely turned legs.
 
I am stealing this. The misses and I weren't sure wtf we were going to do and now we do. Thanks!
 
Post pics when you're done. :mug:

I will. I'll be cutting up a kitchen cabinet to shove the kegorater in as i don't have a lot of room in my rental. That, plus us copying your handles, will definitly be posted.
 
i saw those wooden legs in HD and thought i would do something similar with them when i'm done with my keezer.. where did you find the threaded inserts in HD for them? when i asked about it in lowes they said they didn't carry anything like that.. from the packaging it looks like it would be with the bagged screws
 
i saw those wooden legs in HD and thought i would do something similar with them when i'm done with my keezer.. where did you find the threaded inserts in HD for them? when i asked about it in lowes they said they didn't carry anything like that.. from the packaging it looks like it would be with the bagged screws

In the same section as the nuts and bolts. They're pretty common. Did you ask for them by their "proper" name, "T-Nut?"
 
StainlessBrewing said:
Very nice! Any pics of it installed?

I've been working on the keezer all day. Just screwed on the tap handles.

The second pic just shows how you can use the baseball card holders and magnets to stick your graphics on without a tap handle. It's actually a graphic I made for the temp conversion between c and f using my ebay temp controller. I just figured having the rough range of temps we'd be using would be handy. As you can see, the keezer is just firing up and cooling off.

image-3127238398.jpg


image-2931669660.jpg
 
WOW, 710 view in 24 hours?!?! I didn't know tap handles were so popular.....I don't even think my bottling thread got so many hits so fast..If you do this let me know, and post pics. If you like this design, you could comment or thumbs up or something...This is the most artsy thing I've done in awhile. If you like it let me know.
 
Are they pretty heavy ? I always wanted something other than the plastic tap handles. They look great. I wish I had the tools, the patience and skill to make those. How much do you charge ? ;)
 
Those look great. I need to remember this once the keezer built. My 14.8 chest freezer is set for delivery on Saturday. Revvy how are you making decals? Is it any special program?
 
Those look great. I need to remember this once the keezer built. My 14.8 chest freezer is set for delivery on Saturday. Revvy how are you making decals? Is it any special program?

I'm just using a free version of photoshop element. But any photo editing program that allows you to change the size of the image, and play with it will do.
 
Back
Top