Simple DIY Keg Management

Homebrew Talk - Beer, Wine, Mead, & Cider Brewing Discussion Forum

Help Support Homebrew Talk - Beer, Wine, Mead, & Cider Brewing Discussion Forum:

This site may earn a commission from merchant affiliate links, including eBay, Amazon, and others.

FloppyKnockers

Well-Known Member
Joined
Nov 11, 2014
Messages
2,605
Reaction score
3,042
Location
Fort Worth
I've been in search of a keg management system for a while now. Until recently, I've been using the method of when you pull the handle and beer comes out, that means there's still beer in the keg. When no beer comes out, the keg is empty.

Although they would probably be the most accurate, I don't like the idea of in-line flow meters. The ol' ball and magnet thing was a good idea, but way too annoying and cumbersome. The Plaato system came out not too long ago and I really like the idea of it. I just couldn't pull the trigger on $130/scale and I need 3. I ran across a YouTube video of a guy who made a scale out of a piece of plywood and some electronics on the cheap. Not just a little cheap. I mean cheap, cheap. I was intrigued...

More research on the YouTube I found a guy who took the same bits and took a few steps further. Still using the same load cells, HX711 amp, and a NodeMcu, but he 3D printed a housing and added LEDs to the base. My only problem with his design is that the diameter was larger than the keg (and my printer). I have a standard sized kegerator and the kegs fit in there snugly as it is. So... Time to design my own. To the SketchUp!

I took the design aspects of the design that I saw and modeled one to suit my needs. I omitted the LED lights because I found them to be an unnecessary accessory. Along with the body, I also made feet and clips to keep the load cells in place.
STL Scale.JPG


After the scale was designed, I printed out the first prototype and assembled it.
Assembled.jpg


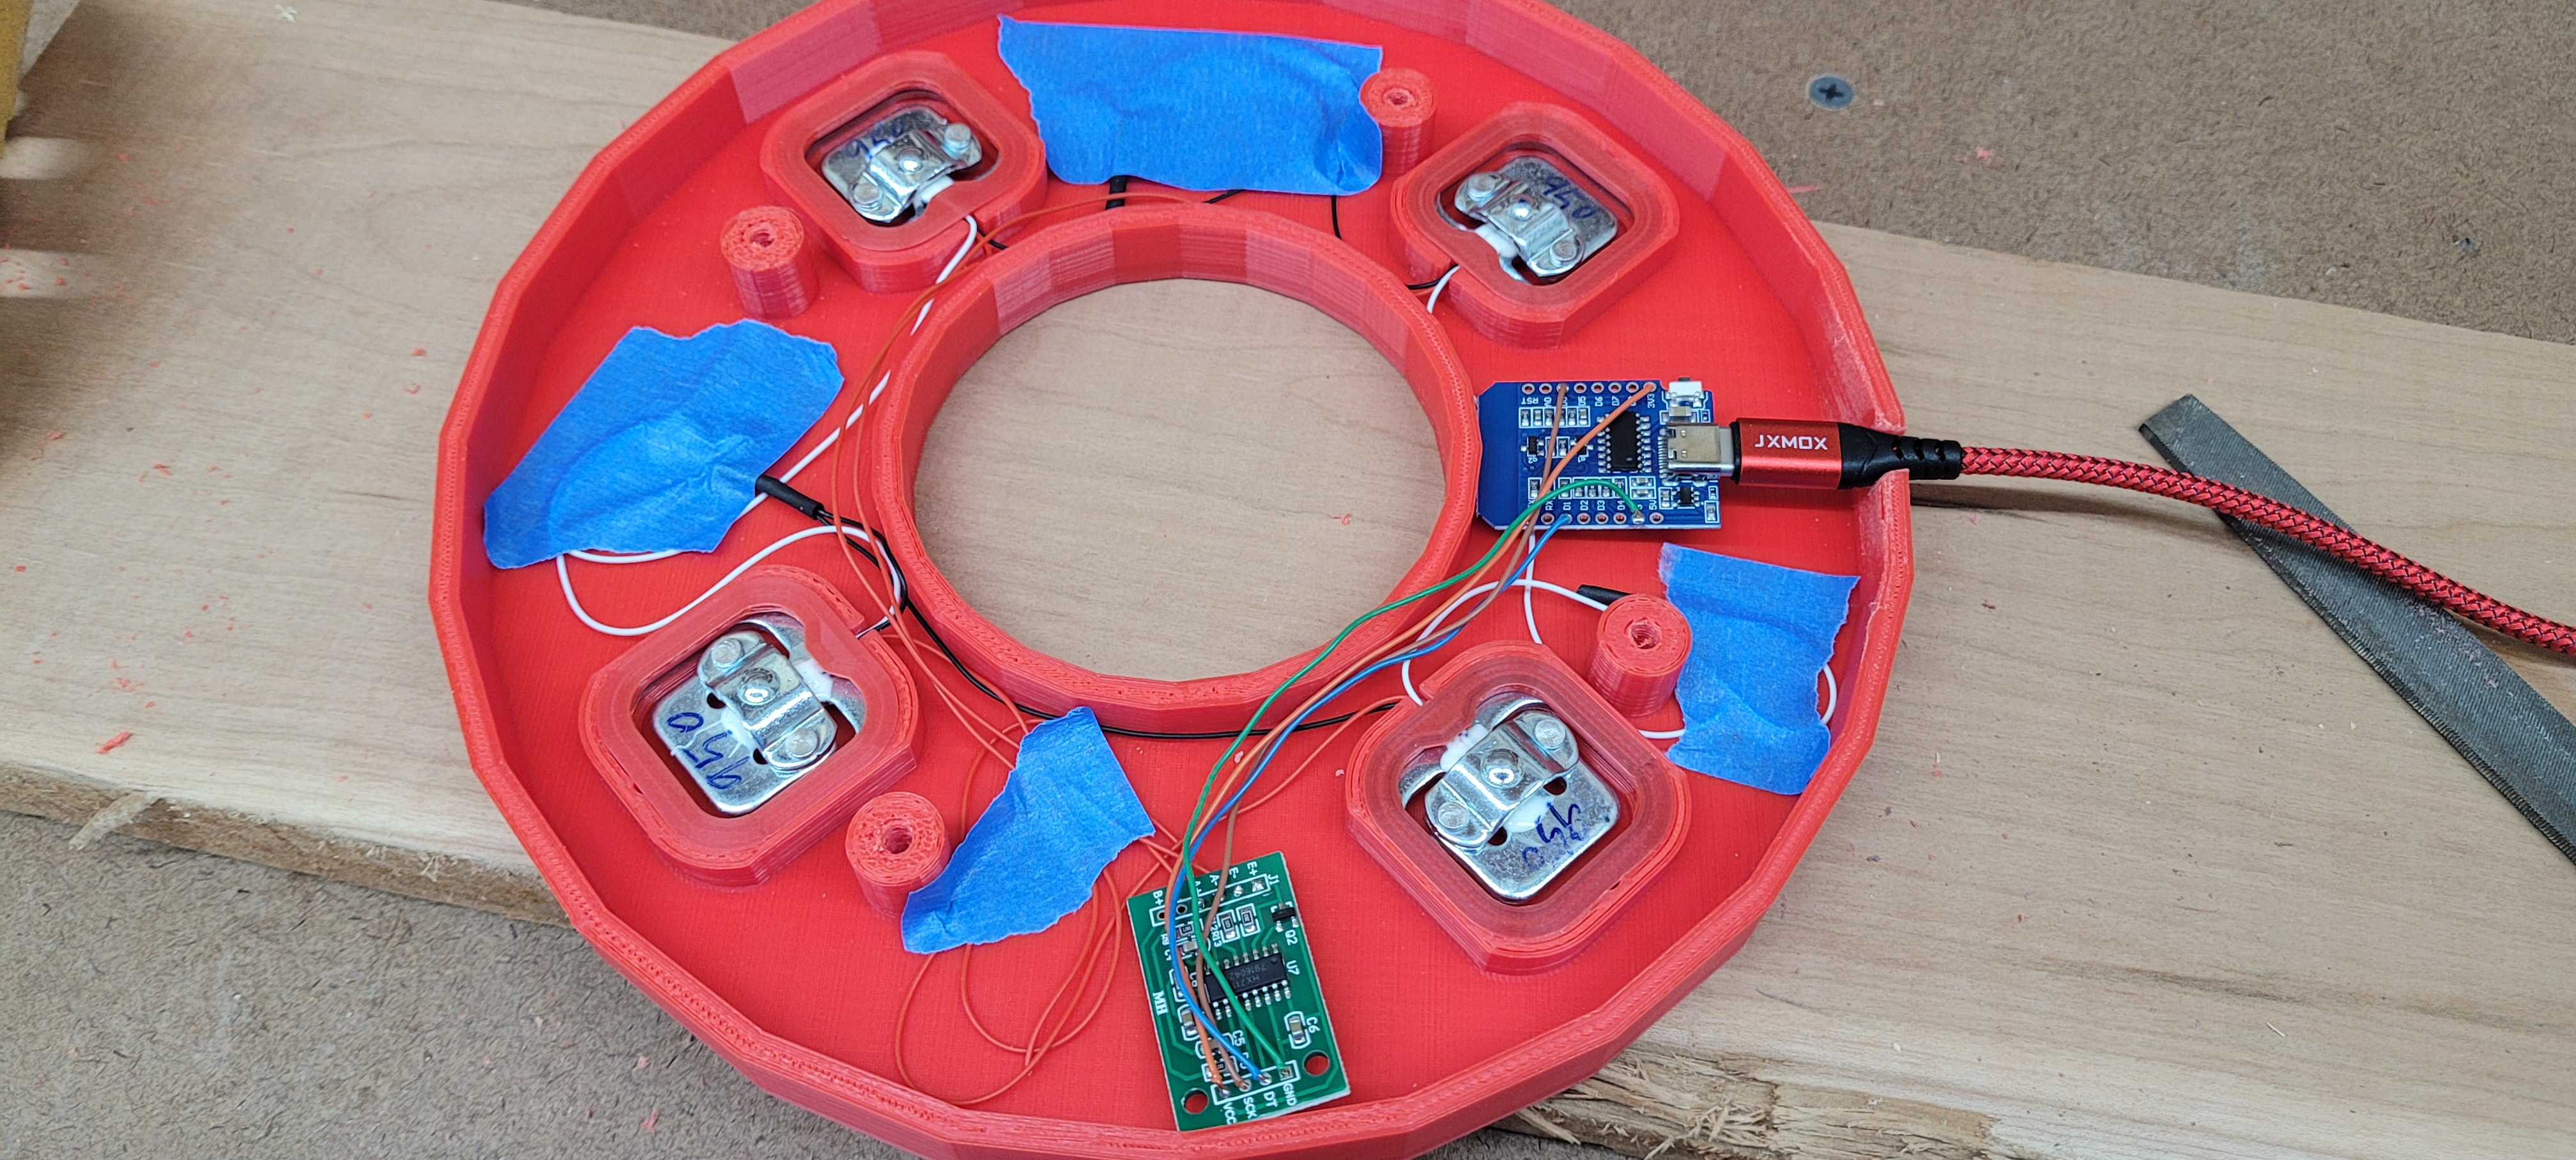
After I had a working model, I printed the first one out and wired it all up. This part was pretty straightforward as there are tons of diagrams, forums, and pages on how to wire the two boards. Some tape to hold the stray wires in place and hot glue to hold the boards.
Wiring.jpg


There ends the "this is going really smooth" part of this build. Now to get the scale to do what I want - display the weight of whatever is on it. Much like the YouTube and other online how-to pages did, I am using HomeAssistant and ESPHome to do all the configuring. First time setting anything like this up.

I had an old Intel NUC so I figured I can run HomeAssistant on that. It wasn't easy, but I managed to get it installed with the help of one of my best friend... YouTube.

Once installed, I had to add ESPHome to configure the scales. Although there are plenty of tutorials out there, I just couldn't get the scales to do anything except say 'HX711 is not ready for new measurements yet' (or something like that). This was extremely frustrating as everywhere I looked, I just couldn't find where to start troubleshooting.

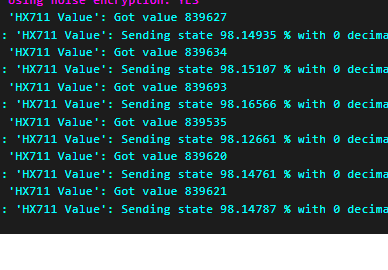
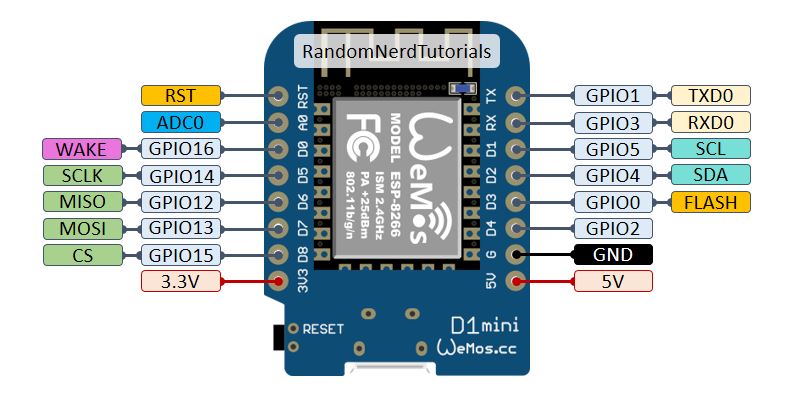
I finally ran across this little gem showing how my NodeMcu should be programmed. Every other reference said to apply the actual name of the pin (eg D5) in ESP Home. This guy says to do something entirely different. Once those values were updated, boom! we have weight values! (This literally took days to find).
Life saver.JPG
ESP Home.JPG


Okay, so good. We have one working scale, we know how to program it, should be smooth sailing from here. Well, all up until the extruder gear on your printer decides to wear out in the middle of the night and you think it was just a clog, so you clear it and try again (twice) only to have the same result. It took a hot minute, but I found the problem and ordered a new extruder.

After some calibration and test prints, we're back in business. At about 30 hours printing time per scale, it's time to work on something else.

I want a cool way of displaying the kegs so I got an old iPad and installed a kiosk app on it. I set the iPad to never turn off, but set the kiosk app to black the screen after X minutes of inactivity. This way I can just tap the screen and see the kegs.

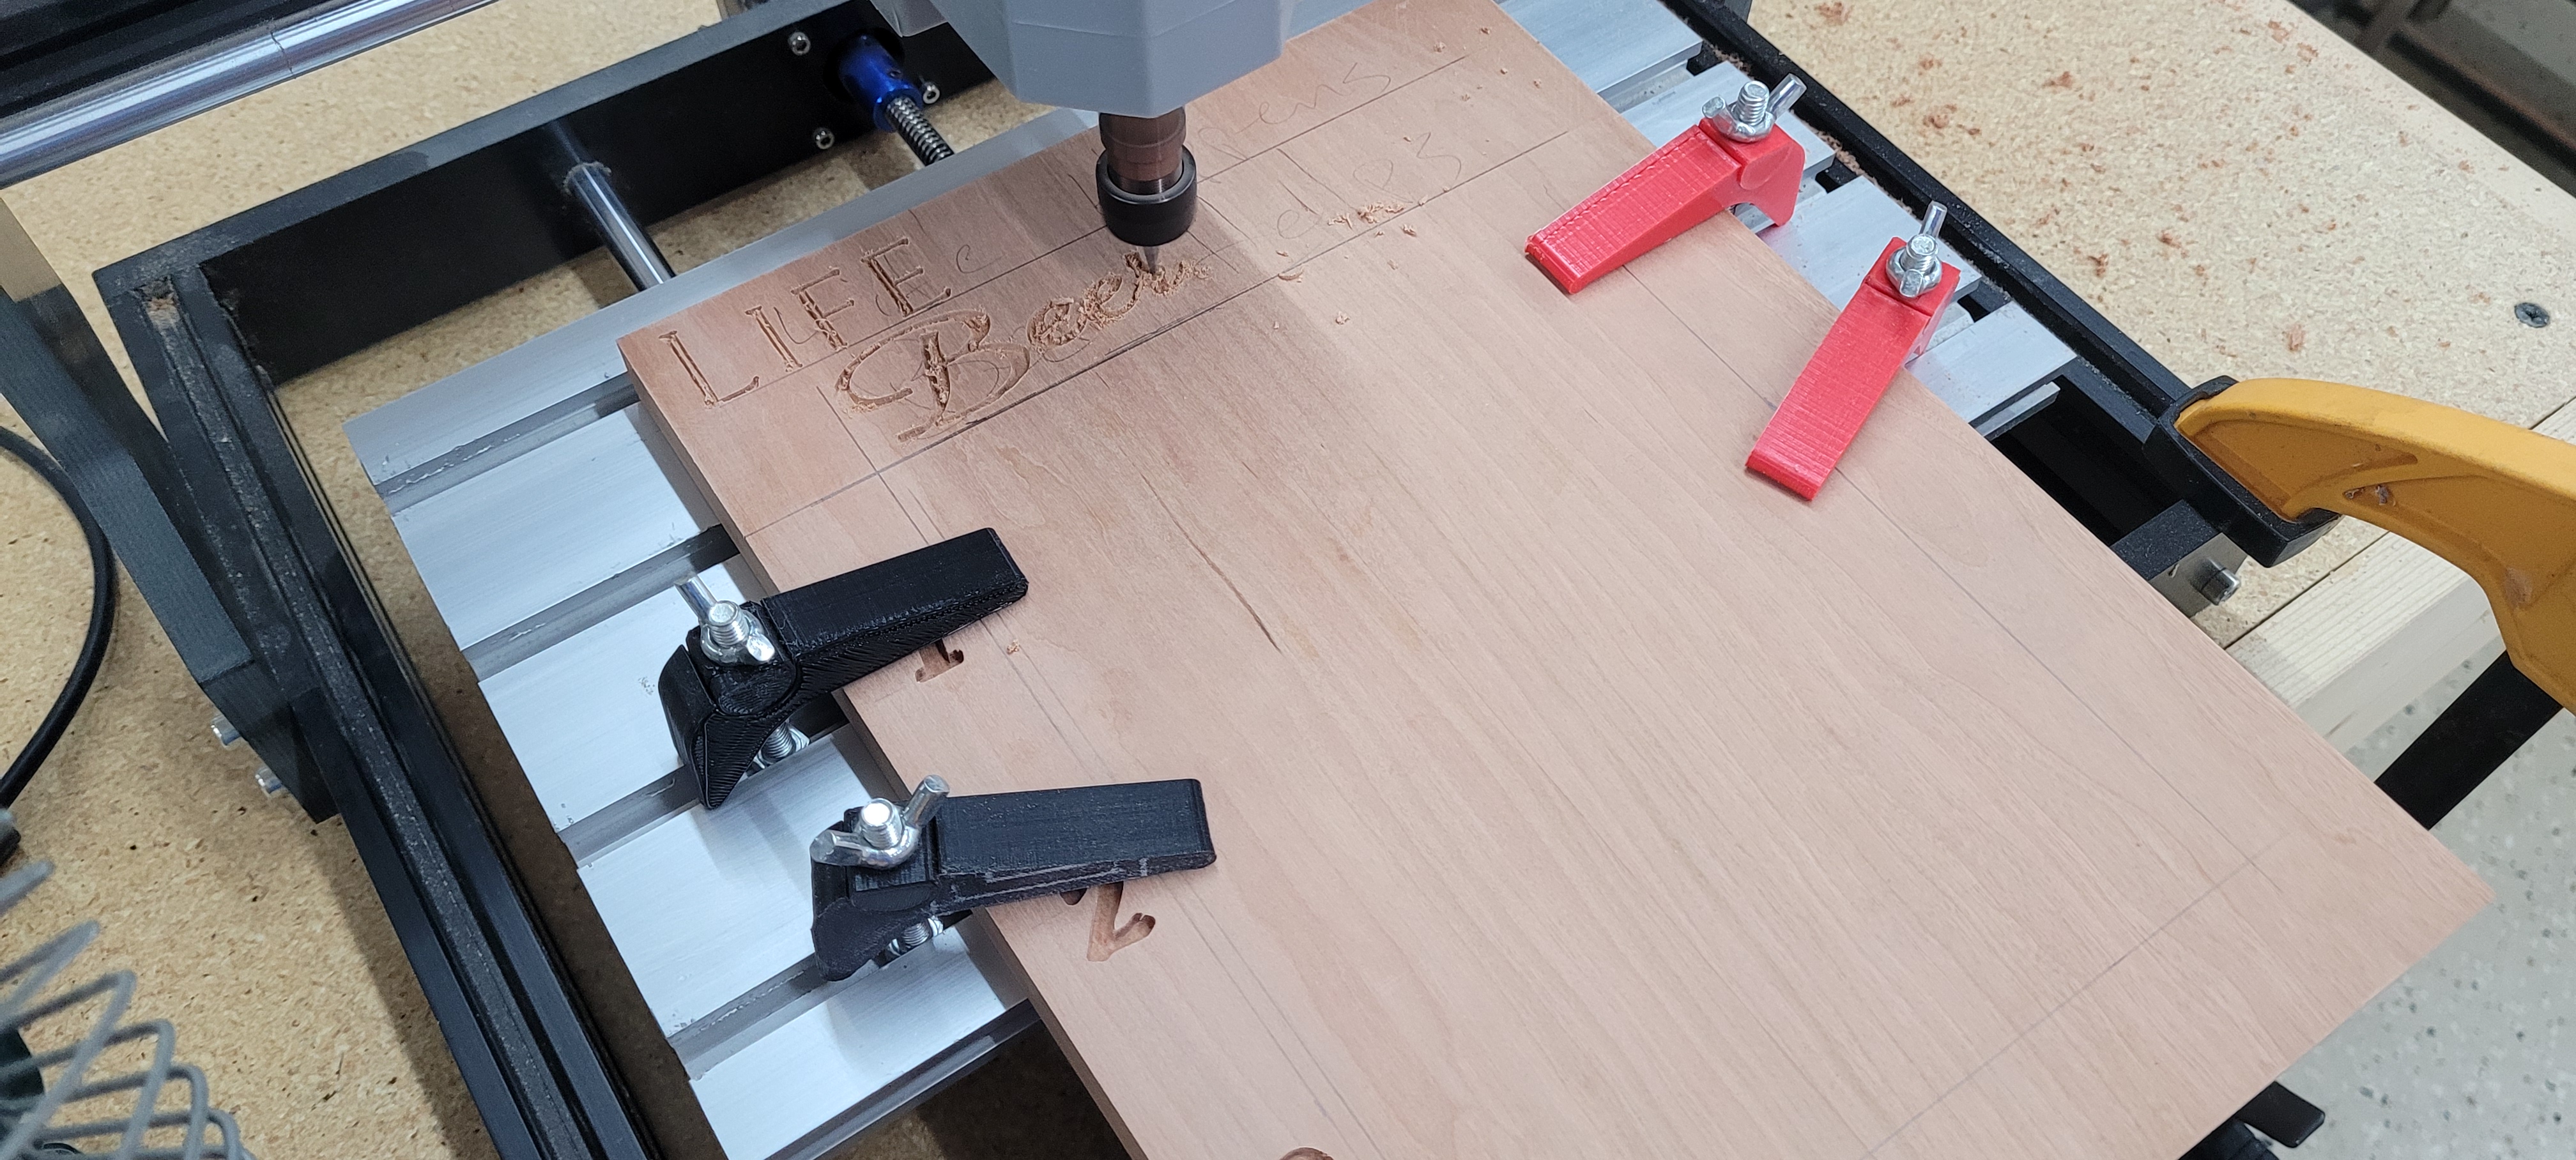
So you just lay the iPad on the counter or something? No way, dude. That would be way too easy. We didn't come this far to have a janky little set-up like that. Off to the CNC router!

I glued up a piece of scrap cherry and planed it down. My router travel is a bit too small to do the whole thing, so I had to break it into segments and route out by hand the opening for the iPad.
CNC2.jpg
CNC1.jpg


A few coats of finish and some fancy cable management later, we have a display!
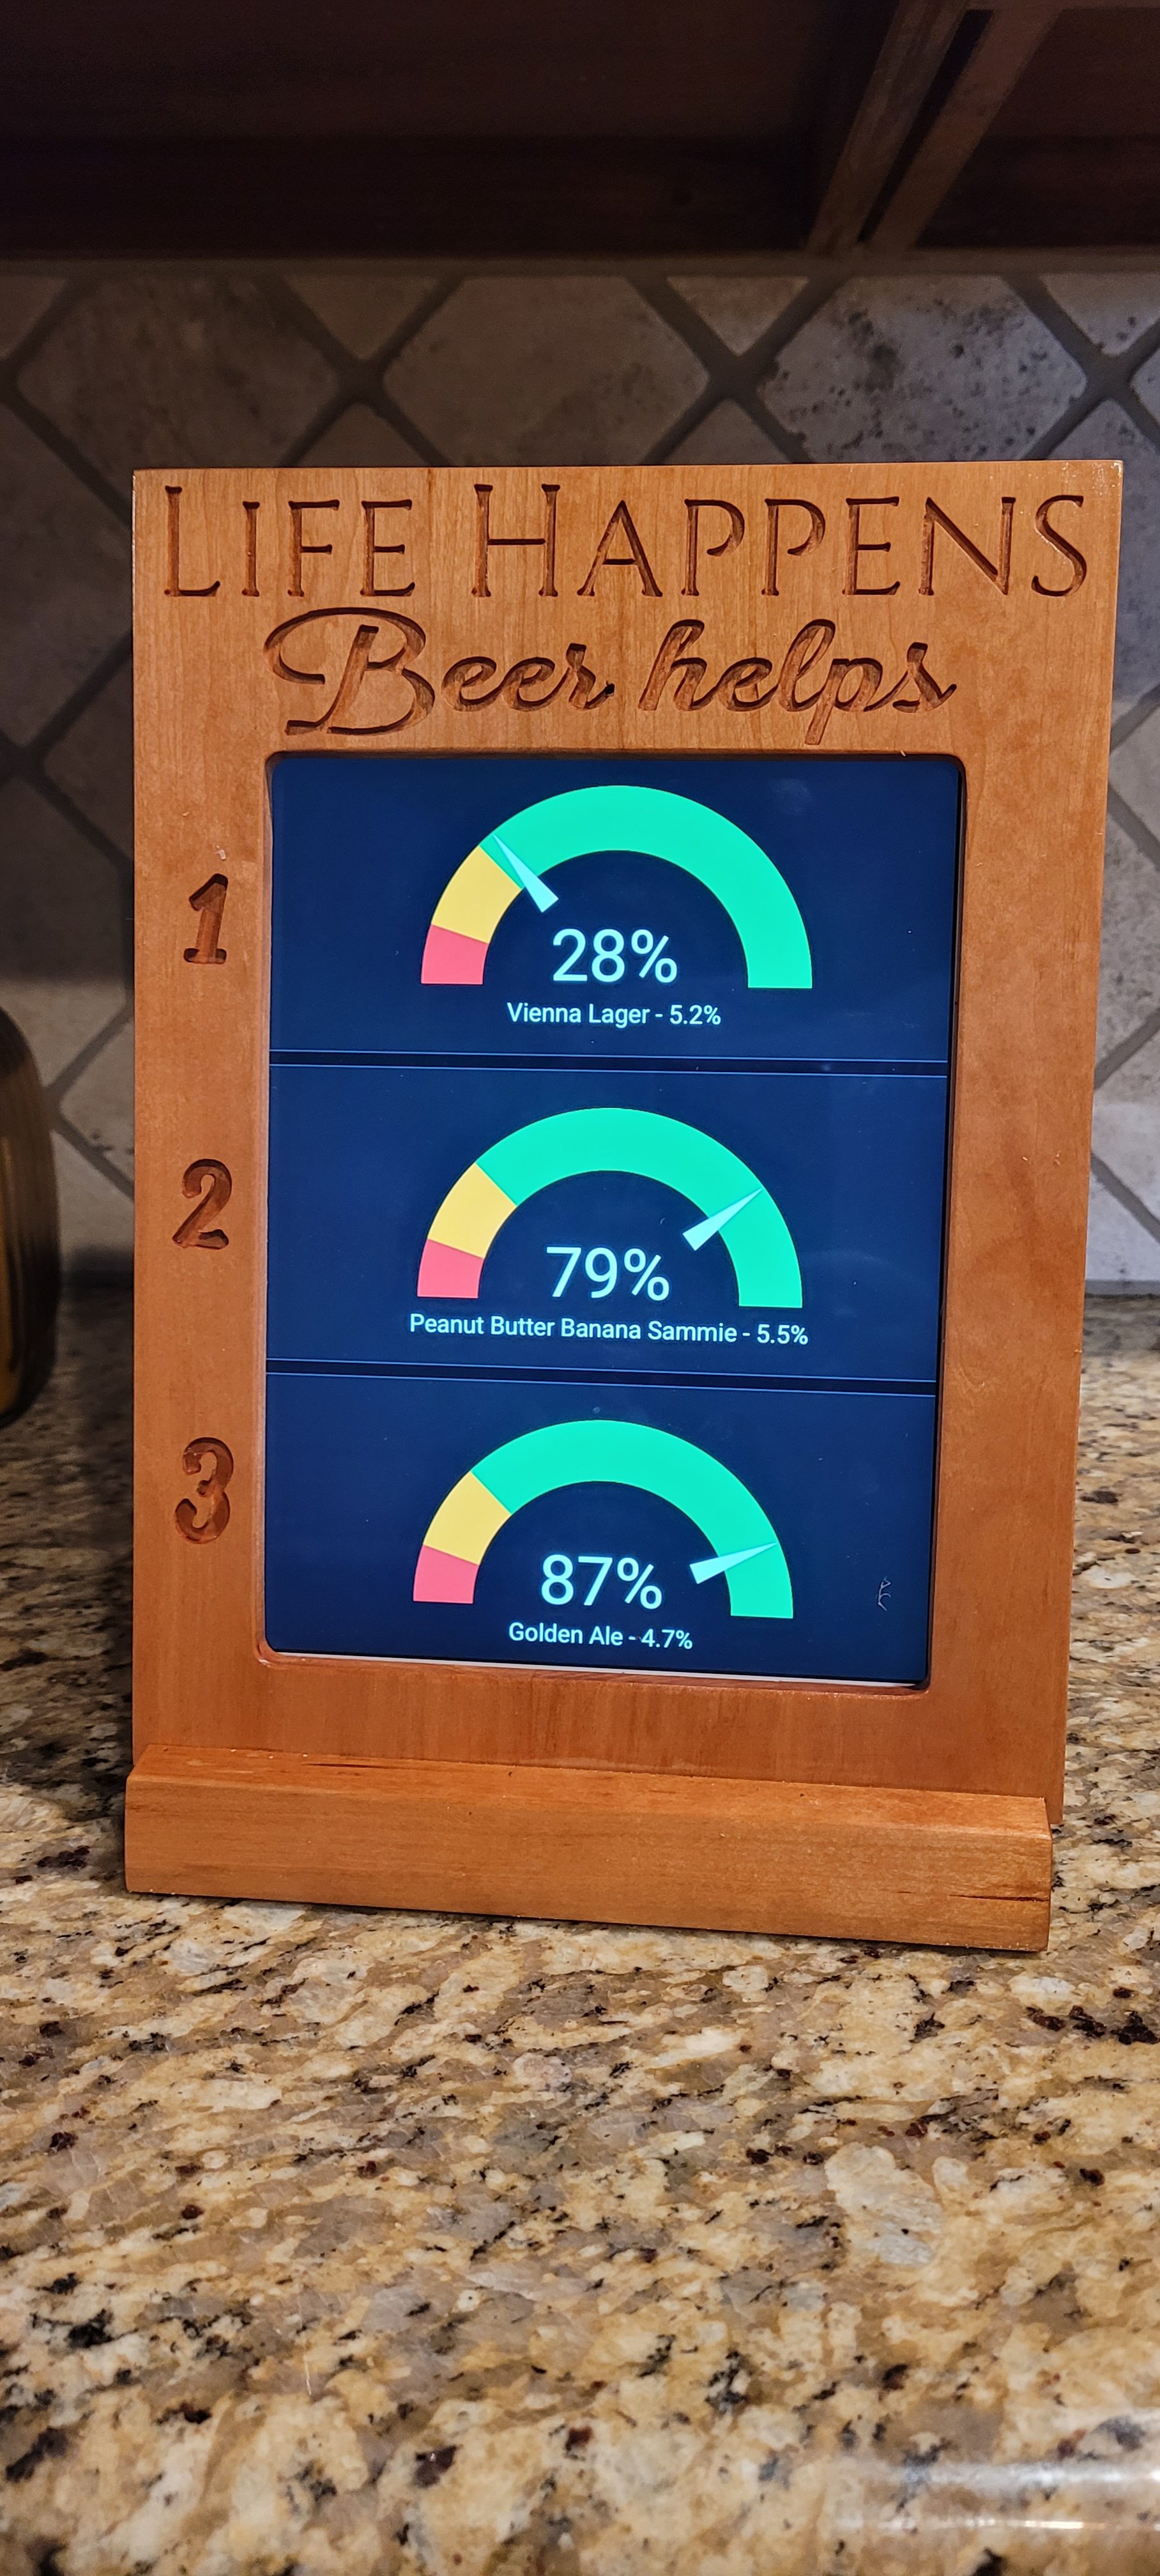
Display.jpg


I made each scale a different color and named them such in ESPHome to make them easier to identify and troubleshoot later on.

Not shown: I ran a USB power hub into the kegerator so I would only have to run one wire out instead of three. Much cleaner, I think.

At the end of the day, I think each scale only cost around $12 not including filament, which would probably only increase the price about $5 or $6 per scale.

Thanks for checking it out and If anyone want to print their own, here's the Thingiverse link.
https://www.thingiverse.com/thing:6007574
 
That is way to cool! Very impressive execution across all those different mediums. I’ll take 2 when you finally decide to go into production 💸
 
The raspberry pi and a wii balance board can be used to make a scale with a high weight tolerance.
Trouble is you'd need to weigh the whole fridge and it couldn't know what specific beer was being taken out unless you had a button to provide this info. Your build is very clever.
Trouble is my kegs are all jammed tight to themselves and the sides of the keg fridge, so I think flowmeters my only option.
But I'll keep watching this one.
 
This looks really cool, but unfortunately the top of the keg literally rubs under the bottom of the freezer compartment. I don't want to mess with trying to bend the freezer compartment in fear of breaking the pipe that keeps it all cold. LOL. So, for now, I will do it the old fashioned way, beer stops pouring out means i need another batch made. LOL. Rock On!!!!!!
 
Awesome work! I'm curious how accurate it's been. Have you used them for very long?
Only one of the three has seen full to empty, so I was able to calibrate that one. The keg foamed right as the gauge hit 0% - I was impressed. When I put a new keg on, it read 102% (I did overfill a little). The other two are fairly new. The age gap was thanks to my printer failing and having to get it working and calibrated again so the last two were only calibrated with an empty keg without fittings at room temp, so the percentage isn't entirely accurate.

I'll definitely update as I kick a couple more kegs and tweak the calibration. It's a lot of beer I'll have to drink, but I'm willing to put in the work for science.
 
So.. I've been considering doing something like this for a while. I found your Thingiverse before I found this thread. Do you have instructions on the whole process or did you just use the instructions from the original maker?
I have a tight keezer that I put 5 kegs in and would like to try and see if I can get this working.

I don't have instructions on the whole process as it was quite the process with several steps and landmark moments. I found the video from the original maker pretty informative, but lacked in certain areas and had to either figure it out myself or seek out another video/site for more information.

The original maker of the scale and his video did help quite a bit, but I think it was kinda hard to follow since he didn't do it from scratch and some of his yaml coding did not work for me. No idea why.

If you are at least a little tech savvy and wanna jump into this, but are unsure about a thing or two, lemme know and I'll see if I can help you along with it. Wiring schematics, coding, assembly, etc. After you get your first one dialed, it'll be like an assembly line from there.

Awesome work! I'm curious how accurate it's been. Have you used them for very long?

I have had two more kegs kick since I've been using the scales. One foamed right at 2%, the other at -1%. When they kicked, I went into the code and edited their current weight to 0%, and when I put another keg on I set that weight to 100%. So far I'm impressed with the accuracy. Still waiting on a couple more keg cycles before I pass judgement. I need to drink more beer, but, you know... science.
 
How about drift? I've read a lot of cheaper load cells need to be calibrated often, they are accurate after that but drift quickly.
 
How about drift? I've read a lot of cheaper load cells need to be calibrated often, they are accurate after that but drift quickly.
I have read about the dreaded drift. From what I understand, much like what you just mentioned, it happens with the cheaper load cell/strain gauges. If I could find higher quality load cells than the ones that are readily available, I would have purchased those. The cheap-o ones, at 5 bucks a set, I figured they were worth a shot.

I don't think I have noticed any drift yet, but I'm not measuring fractions of a gram either - just a good percentage of what's left.

I have mine reporting measurements every 60 seconds. You can see a slight variance up and down as they sit idle. However, I think most of your drift is going to come as you reach the maximum capacity of the load cell and/or a load sitting on it for prolonged periods. Neither of which is this case. These are 50 kg cells and a keg only sits on them for 2 - 3 weeks at a time. Between kegs they are calibrated, not so much for drift, but for the differences in the kegs. Mostly the starting weight.

1688215895579.png
 
Question about the thingiverse files. Are these sized for ball lock kegs (8.5") or do they fit pin lock kegs (9") as well?
I don't have a 3d printer and am looking for someone local that has one. Does anyone know a good online service that could print these? Not sure if there would be a minimum order size.

Great question. I actually have them at 8 3/16" for ball locks so they don't touch each other. I didn't consider the size difference of pin locks.

Give me a little while and I can edit a couple of those files for pin locks. all the other anatomy will stay the same, I'll just increase the outer diameter of the top and bottom by 1/2".
 
I would think just the top would need changed to about 8.75"
That could work, but the seam between the two sizes wouldn't line up. The bottom would want to seat into the top with the screw bosses being the only thing there for support. I did add a new (wider) top and bottom to Thingiverse.

As far as local shops or places that do 3D printing, I just don't know. There's gotta be a place though, right? Please feel free to send my STLs or Thingiverse link to anyone that's willing to give you a quote.
 
got one quote just for the top and it was $74.85
At that price I might just buy a printer. Any advice or suggestions on what to look for?
ENDER 3 MAX NEO is on sale for $272 which has a 300 x 300 base
 
got one quote just for the top and it was $74.85
At that price I might just buy a printer. Any advice or suggestions on what to look for?
ENDER 3 MAX NEO is on sale for $272 which has a 300 x 300 base
I don't claim to be a printer aficionado by any means. The only printer I have experience with is the Ender 3 Pro. That said. I would totally get the Max Neo of mine blew up tomorrow.

What I do know for certain is unlike a 2D printer, the 3D ones can be finicky, challenging, and just plain jerks sometimes. They can also be extremely rewarding and indispensable.

If you go down that road, there's no turning back [evil laugh]

Edit: To answer the other part of your question. The things I would look for in another printer are: larger build plate, solid reputation, auto bed leveler (which is what I spend most of my troubleshooting doing). All of which the Neo Max has.
 
Last edited:
Also most need a ton of upgrades to do really good jobs, or you spend a fortune on one with the upgrades from the mfg.
 
Also most need a ton of upgrades to do really good jobs, or you spend a fortune on one with the upgrades from the mfg.
I can say that was not my experience at all. I got an entry level, no bells, no whistles, Ender 3 Pro for a couple hundred bucks and it printed like a champ out of the box.

I did have to replace my extruder because the stock one wore out after about 100 printing hours. I decided to get a better than stock one. A cheap upgrade at ~$20.

Where I find most of the money goes is in filament. Spools range from $20 - $30 and up. You always find a need to get a different color or material so that can add up quick.
 
WOW. Awesome!

I used to use check marks every time I poured a beer, but after a few beers, I got worse and worse at actually tracking the pours. Such is life...
 
18 kegs? I really need to stop over!
30 taps in the garage. Two are always tea or coffee. One or two are usually empty. There are often a couple on picnic taps, though. It's funny, but in the event that I retire and open a brewpub, I'll almost certainly have fewer beers available.

Now the ones in the garage aren't always all good. Sometimes it happens and I'm proud of pretty much everything. Usually, though, there are 5-10 that I think are first-rate.

I'm happy to share. In all seriousness, anyone who plans to be in NW Indiana at any point and wants to drink should drop me a DM.
 
One never knows where my travels take so if I get down that way a stop it'll be. Same goes for my direction but you won't find a selection like yours. Three on tap, all beer though and always my best.
 
Man i'd love to have 10-12 things on tap! Not that I drink like a fish but just for variety!
 
Maintaining variety to that extent with quality ain't no cakewalk.
Makes oxidation avoidance hyper critical lest one is dumping browning beers and brewing at a crazy pace to replace them...

Cheers!
 
Here I was thinking that lifting a keg up every now and then was enough to gauge how much was left in it...:agressive:
 
Good work, nice to see some more of these projects with keg monitoring. Ive also played around with this but ended up writing my own esp software to get more accurate readings and do pour detection.

If anyone needs a bigger scale base i have published one on printables that fits a cornykeg.

I have my project here, GitHub - mp-se/kegmon: DIY scale for beer keg monitoring
 
I love watching the progression of a person who has never done one of these DIYs and they see one and “just need to get a cheaper printer.” I’m not sure they ever come back and admit having a printer is a project all by itself. :)
 
The ol' ball and magnet thing was a good idea, but way too annoying and cumbersome.
Just wondering, did you try the Ballandkeg unit? I have a few and they are anything but cumbersome. In fact they are pretty stupid easy and reliable. They are definitely not as flashy as your concept though.
 
Just wondering, did you try the Ballandkeg unit? I have a few and they are anything but cumbersome. In fact they are pretty stupid easy and reliable. They are definitely not as flashy as your concept though.
Oh, for sure, and you're right. Their accuracy is unparalleled. Aside from unsuccessfully trying to connect it to Wifi, my two biggest complaints are, one, in a three keg kegerator, you can't see the back keg rendering the ballandkeg pretty useless. The second thing is that I will rock and roll the keg to carb a lot of times. Most of the time the magnets will get separated. It's fairly easy to get them to connect again, but can be annoying.
 
OK, great, glad to hear you did try them as they could save you quite a bit of money. I do like the tech projects though and yours looks very cool. My friend uses the Ballandkeg units in a keezer, but he does kind of stagger his kegs so he can see the level indicators from the top. I have the old fridge kegerator that holds 4 kegs and they are definitely perfect for that.
 
OK, great, glad to hear you did try them as they could save you quite a bit of money. I do like the tech projects though and yours looks very cool. My friend uses the Ballandkeg units in a keezer, but he does kind of stagger his kegs so he can see the level indicators from the top. I have the old fridge kegerator that holds 4 kegs and they are definitely perfect for that.
I'm also using them in a kegerator, and it works well enough I haven't upgraded to anything more involved, although I'm intrigued with both the pour monitors and scales.
 
OK, great, glad to hear you did try them as they could save you quite a bit of money.

I just looked into pricing these Ball and Keg level indicators and they are $22.95 + $5 shipping for just one. Seems overpriced honestly.

FWIW, I just put together 2 of these keg scales for less than $22.95.
 
I just looked into pricing these Ball and Keg level indicators and they are $22.95 + $5 shipping for just one. Seems overpriced honestly.

FWIW, I just put together 2 of these keg scales for less than $22.95.
Well, you could probably make the Ballandkeg thing for $10 if you wanted to do it yourself and ignore all your time. My time has value so I tend to understand why I would pay an extra $10 for something versus spending hours of my time trying to replicate it.
 
Well, you could probably make the Ballandkeg thing for $10 if you wanted to do it yourself and ignore all your time. My time has value so I tend to understand why I would pay an extra $10 for something versus spending hours of my time trying to replicate it.

Right, I was just giving some insight into your saving money claim. If you compared the cost savings of this keg scale to a real plaato scale then you could see more of a justification for doing it yourself...

I enjoy tinkering so for me the 15 minutes wiring/soldering up the scale was enjoyable to me. Can't say I'd find the same pleasure getting a magnet inside a ping-pong ball but YMMV.
 
Back
Top