• Please visit and share your knowledge at our sister communities:
  • If you have not, please join our official Homebrewing Facebook Group!

    Homebrewing Facebook Group

[Not a] Bike Pump Keg [Evolution]

Homebrew Talk

Help Support Homebrew Talk:

This site may earn a commission from merchant affiliate links, including eBay, Amazon, and others.
About to head out to Lowes to do some sizing and hopefully buying of pvc...as I was finishing my coffee I had an idea for automatic release of CO2, sort of a push-button system. Have a looksee and tell me what you think:

The top half of the tube isn't permanently attached, and can slide up and down the smaller middle tube, which is permanently attached to the bottom tube. When you want a drink you press down on the top of the tube, which activates the CO2 cartridge, forcing beer through the feed tube.

MK4a.jpg
MK4b.jpg


Would having the feed tube constantly open to the bottom of the minikeg cause any oxidation issues?
 
Here's the cap before applying cement:
mk1_004.jpg


The bottle with everything assembled, prior to sealing:
mk1_003.jpg


Once cement is dry I'll do a pressure test and post the results and a diy guide.
 
The first attempt failed to hold pressure. I am rethinking the overall design, still trying to keep it under $10. I did learn that a 1/2" pipe fits snugly inside of the rim of the 2 liter, which may be useful. I'll probably end up doing something with brass similar to what I have seen others do...
 
My second attempt after much more thought has produced a working result. It's not pretty, but it is cheap and effective. I took the schrader valve I had, stripped the rubber off the metal core, and wrapped it in threading tape. Then I inserted it into a short piece of 3/8 tubing, wrapped the tubing in a thin strip of duct tape covered with threading tape. The tube is inserted in a water bottle cap with enough room left for one more tube of equal size to be inserted in the same cap. To my surprise, the water bottle held 20 psi with no leaking. My next purchase will be a picnic tap which I will attach to a second tube attached to the lid next to the schrader tube in the same way, with the tubing running straight to the bottom. Once I have this all setup, I'll report back with more pics and info before taking everything apart and moving it to a 2 Liter setup, and, hopefully, reporting back to write up a full blown diy project.

mk1_010.jpg
mk1_012.jpg
 
Not to harsh your buzz, but these are 2 liter bottles that you're going to start oxidizing as soon as you pump in air. They're not too heavy to lift, and that's only 4 pints of beer.

What's the real advantage over just treating it like a regular soda bottle and pouring the 4 glasses of beer? Is it to try to avoid stirring up the sediment, or just for fun? (fun is a reasonable answer)
 
After sitting for three hours the psi has dropped down to 10 psi, which is obviously not good. I'm gonna try to find some 3/8" compression fittings to use instead of the tape method, which I assumed wouldn't work from the start, but had to try anyway for experimenting sake. It's looking more and more like I'm gonna have to shell out the $10 to make this legit.
 
SumnerH, while the main reason for doing this is just for fun...I do have a few other reasons. The 2 and 3 liter caps are interchangeable, so eventually I want this to be a 3 Liter system, which is just short of a gallon, which equals 9 - 12oz bottles, or when served into 8oz cups equals 13 servings. I want to be able to take 5 or 6 different 3 Liter bottles of beer, stick them in a cooler, and serve them up one at a time amongst myself and my disc-golfing buddies while playing a course. The only problem with just pouring them out is that while I drink waaay too fast, my wife drinks waaay too slow, and everyone else is somewhere in between. So at some point the wife would be complaining that she's not getting her fair share and blah blah blah she's got another black eye(just kidding). But again, this is mainly just for fun.
 
My second attempt after much more thought has produced a working result. It's not pretty, but it is cheap and effective. I took the schrader valve I had, stripped the rubber off the metal core, and wrapped it in threading tape. Then I inserted it into a short piece of 3/8 tubing, wrapped the tubing in a thin strip of duct tape covered with threading tape. The tube is inserted in a water bottle cap with enough room left for one more tube of equal size to be inserted in the same cap. To my surprise, the water bottle held 20 psi with no leaking. My next purchase will be a picnic tap which I will attach to a second tube attached to the lid next to the schrader tube in the same way, with the tubing running straight to the bottom. Once I have this all setup, I'll report back with more pics and info before taking everything apart and moving it to a 2 Liter setup, and, hopefully, reporting back to write up a full blown diy project.

mk1_010.jpg
mk1_012.jpg
Switch valve stems to a all metal truck tire stem. It has a nut to hold it on from the outside. The inside is a flat base that is rubber coated so it will seal against the inside of the cap when the outside nut is tightened down. Maybe I missed it but why all the extra work to add a faucet when you can unscrew the cap and pour a beer? 2L is only about 4 pints. Most people would kill that in 1-2 hours.
 
I've looked everywhere for those metal stems and can't seem to find one locally. I tried lowe's, home de-pot, ace, even autozone.

As far as your question, aside from the 10 different reasons I've given in previous posts, I just thought of another one. My *ahem* brewing method is 1 week in primary and 1 week in the bottle. Scoff and curse all you want but it works and it's damned fine beer. The only downside is the thick layer of sediment in the bottom of the bottles. I've tried different yeasts to counteract this, but they all affected the taste. I've tried racking to secondary, but then I have to wait another 2 months before it's drinkable, and is not any clearer and doesn't taste any better than my 2 week start to finish method, there's just less sediment. So, with all that said, I need a cheap, homemade way to dispense beer into peoples cups without disturbing the sediment, which means no moving of the bottle, and especially no pouring. Combine that with all my previous responses and you've still only really got a half-assed answer so once again my real reason for doing this is the same reason I make my own beer in my bathtub.

Because I want to and I can.
 
Another reason for building something so silly: I have mentioned that the 2 and 3 liter bottles have the same cap shape and size(38mm). It's also true that the 6 liter PET bottles made for Tap-A-Draft use a 38mm cap. So once I have a working model, I could purchase three of these 6 liter bottles and have enough to hold 5 gallons of brew.

These bottles can be purchased here for $7.95 with free shipping, this is the cheapest place I have found: https://morebeer.com/view_product/18295

6LTapKeg.jpg


[EDIT]The free shipping only kicks in for orders of $59 or more, so you'd have to buy 8 to get it...shipping for one is about $6 for USPS. You can get three 6 Liter bottles for right at $30 with shipping. The price of the whole TAD system is $70 plus shipping, the price of what I'm building is about $15; $15 + $30 = $45, savings of about $35 when you count shipping costs.[/EDIT]
 
After a bit more tinkering and about an hour of walking around Lowes looking at compression valves and talking with plumbing experts, I have found that the only way to make any of the previously made plans work is with a welder to secure a washer to the nut attached to the bottom of the brass tee in order to make a secure fit. They would also require the use of copper tubing within the tee itself to attach the vinyl tubing to, as brass compression tees have no way of sealing to any sort of flexible tubing. I can see that now looking more closely at the plans I have posted the urls to.

Luckily I learned these little bits of knowledge before purchasing anyting other than my $2 pvc purchase. I will be returning to Lowes tomorrow to buy Aqua Marine Epoxy and trying for another cheap effective approach. This epoxy is used to seal plastic, metal, ceramics, fiberglass, and tile, works underwater, even dries and makes a water and airtight seal when applied underwater. Sounds like some kind of elven magic to me. 0.85 Fluid Oz is about $5, so I'm gonna buy some and bring it home. My plan is to drill two 1/4" holes in one of my PET bottle caps and run one 3/8" vinyl tubing line through for the feed line, another tubing through for my schrader valve. I'll probably wrap the lines in threading tape just for the hell of it. Once they are in place I will apply the expoxy carefully to the top and bottom of the cap, being sure not to get in the way of the seal on the underside. I'm debating whether or not to make the holes in the caps big enough for the epoxy to make a connection through the top and bottom, I think doing this would make the seal stronger, but possibly weaker physically...I do have lots of PET bottle caps laying around so I may experiment and try both ways. If this idea works, the total cost of my diy keg will be right at $10 counting the cost of the picnic tab, vinyl tubing, and epoxy. The nice thing about this concept(if it works) is that once the initial investment has been covered, additional caps can be built incredibly cheaply.

Here's a purdy little pic of what the finished product should look like:
MK7.jpg
 
I've looked everywhere for those metal stems and can't seem to find one locally. I tried lowe's, home de-pot, ace, even autozone.

As far as your question, aside from the 10 different reasons I've given in previous posts, I just thought of another one. My *ahem* brewing method is 1 week in primary and 1 week in the bottle. Scoff and curse all you want but it works and it's damned fine beer.

I would scoff and curse at no mans beer or method. Your method makes perfect sense now knowing its young and settling. For the all metal valve stems you might try a truck repair center, heavy equipment dealer or repair, probably even NAPA. The suggestion for these stems is just to make your project a little easier to copy for a fleet of bottles. For easy drilling of the cap, I sacrificed one bottle and cut the top 1/3 off. Then with a cap screwed onto the cut bottle I drilled from the inside. This kept the cap gasket pinched between the cap and bottle and made for a cleaner hole. Of course there was a block of wood under it when drilling.
 
Good idea about cutting up a bottle for drilling the cap. I had read somewhere about doing that but thought it was just because they were afraid to hold the cap in their hand while drilling a hole in it. I hadn't even considered that it would keep me from damaging the gasket. Thus far the only place I have actually searched for the metal schrader valves has been online, but at every hardware/auto parts store in my city; I'm sure someplace carries it and just doesn't list it online. However, I'm hoping I will be able to make this work without needing to buy anything but the epoxy.
 
San Antonio has no NAPA(National Auto Parts Association)? I like the metal stems because they "bolt on" instead of needing epoxy or glue. The plus side is when the cap wears out or strips the valve stem can be "bolted on" the next one. Safety is a concern while drilling something in your hand, I have two thumbnails on the left thumb from a drilling mishap, but as you deduced the cut bottle is more for the secure holding of the gasket. If you want the metal stems and can't source them, shoot me a PM. I'm planning on getting some more for the barleywine trade occuring soon.
 
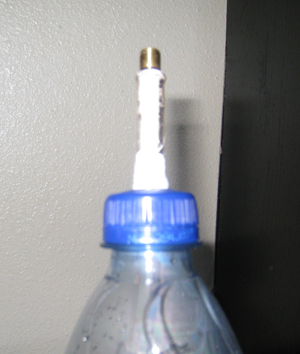
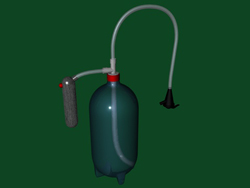
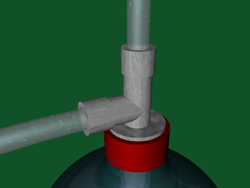
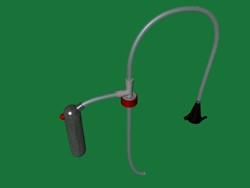
I purchased what looked like the strongest epoxy available at lowes. I carefully applied it to both sides of the cap after securing the two lines in place; it dried nice and solid on both ends. After waiting twice the recommended time just to be sure it was dry, I did a test run. While the seal is air and water tight, it is not able to hold any amount of pressure over about 5psi. This obviously is useless for my application.

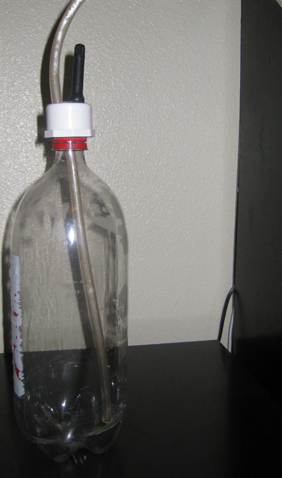
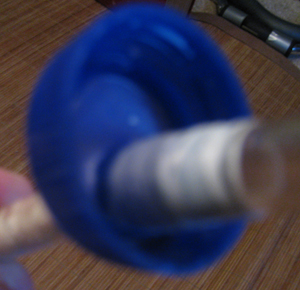
So the general problem I have had in designing this thing is that I don't want to have to use any kind of brass tee as 1)the brass is not made to make any kind of seal with anything other than brass or copper tubing and 2)I don't like the idea of the fittings for the co2 valve and feed line costing more then the co2 pump, feed line/tap, and keg all put together. All the tutorials I have found and posted here so far have been able to jerry-rig it into a working state, but all required some specialized tools and soldering, neither of which I have. The easiest and most effective way I can think of to make this work is to do what I have been trying to do, which is have two seperate holes in the cap, one for the air valve, and one for the feed line. This is very difficult to do with a standard 38mm cap as you only actually have about 25mm or so to work with before you start affecting the gasket. You could possibly do it if you could find some 1/8 or 1/16 compression couplings, but I have not been able to and am not sure they even make them that small. If they do, and someone can find them and make that idea work, please post your results here.

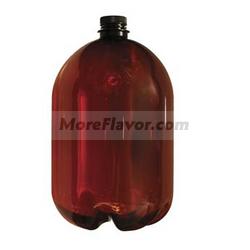
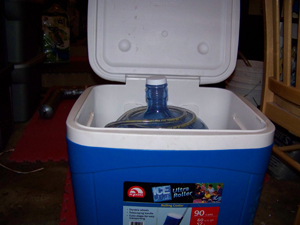
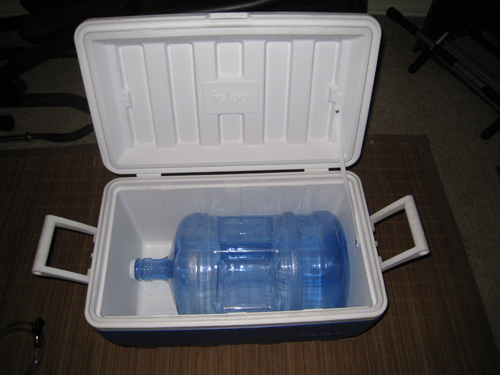
Since I am unable to make the compression pieces small enough to fit into a cap so small, I am now looking at just making the cap bigger. I actually thought about doing that somehow in the past; anything I could've done probably would not have been a very strong seal. Then I was wandering around my local HEB yesterday, and I stumbled upon a 5 gallon water bottle with handle, on sale for $5. I grabbed one, should've grabbed all five of them...then after getting home I find this thread: https://www.homebrewtalk.com/f35/homemade-keg-5326/ After a quick chat with denny, I have deduced that the 5 gallon water bottle will hold the pressure, so long as it is properly regulated. He suggested a pressure relief valve, which I found for about $10. I then found a PSI regulator with built in gauge for $10. I've already ordered a CO2 bike pump, so am now waiting for both of these to arrive. Once they do, it's back to lowes to get the compression fittings to attach to the water bottle lid(one for the feed line, one for the regulator/co2 pump assembly). Clearly this is no longer a bike pump keg, and it's not even an original idea anymore, but damn it I've come this far, I might as well finish what I started.
 
I've just added up the prices for everything I still have to purchase, and everything I've purchased already. I went a bit over my budget. Here's a list of what I've already got:

5gal bottle: $5
Tap & Feed line: $8
CO2 Pump: $10
PSI Regulator: $10

Total: $33


Here's the list of what I need to buy from Lowes to make everything fit together:

Feed Line:
3/8 hex nipple $1.88
washer/gasket $1
3/8 barb x fip $2.88
3' 3/8 tubing $0.50

CO2 Pump:
1/8 air valve $3.39
1/8 x 1/4 bushing $1.38

PSI Regulator:
1/4 x 3/8 busing $2.02
washer/gasket $1
3/8 nut $1

Total: $15.05

Spent $33 already, need another $15.05, for a grand total of 48.05.

There is a bright side to this. When I want to buy more kegs, they will only cost $5 each for five gallons, as the whole assembly is built into the cap which is interchangeable. One down side is I won't have any mini-kegs, which I originally wanted so I could at least keep them in the fridge. I have seen these same water bottles range in size from 1 gallon up to 7 gallons so I'll definitely have to go take a closer look at them and see if they use the same caps(crossing fingers). If this is the case then I will be able to have an assortment of keg sizes for $5 or less each, and only need to one tap system.

Another down side is that the water bottle could still explode once I get everything together and test it. I plan on setting the regulator to 12-15 psi, and leaving it there. As long as I am able to prime correctly before kegging, I shouldn't have to worry about an explosion. From the very beginning I had been worrying about over-pressurization; mainly because I know that none of my friends know anything about homebrewing or kegging and would either "forget" to add pressure to the keg, or they would over-pressurize it or something stupid like that. It is a relief knowing that the regulator will take care of all that for me.
 
Decided to see how well the 5 gallon bottle would fit inside my "Ice-Cube" rolling cooler. As you can see from the pics it fits snugly inside, leaving enough room for plenty of ice. I could make one hell of a rolling-kegerator by cutting a hole in the lid just big enough for the top to fit through, and it would still have the four cup holders surrounding the hole.

MK1_014.jpg
MK1_015.jpg


Here's a pic of what the cooler looks like closed, without the bottle inside(for anyone who doesn't know how awesome the Ice-cube cooler is:
MK1_016.jpg
 
I was outbid on my co2 bike pump at the last minute. I did get the psi regulator for $10, which really was the hard thing to find for a decent price. If nothing else there's a bike shop down the road from me that sells okay pumps for $10, and good pumps for $15-20.

I have been wondering something recently....since I have a psi regulator and the CO2 will not really need to go through a pump, is there a way I can just build a valve to screw directly onto the co2 tank? I'm sure there has to be a simple way to do this...
 
From the looks of this photo, I would assume I could just buy a screw-on valve for the co2 tank, and attach it to the input of my psi regulator. If I were to do this, I would probably want to have some sort of on/off switch in between the tank and the regulator. This tank is $19 for 9oz(roughly one 5 gallon keg), $22 for 12oz(1.5 kegs?), and $37 for 24oz(about three 5 gallon kegs).


Anyone have any thoughts on this? Has anyone found or made a cheap valve for co2 tanks? Is there a standard size for these tanks?


co2.jpg


[NOTE]These are labeled as refillable tanks[/NOTE]
 
....I answered my own questions here: co2 info

Now, rather than looking for prices on a bike pump, I'm looking for prices on large(~24oz), refillable co2 tanks, and prices on a CGA320 valve.
 
Decided to test-fit the bottle in one of my other coolers:
mk11.jpg


It fits perfectly! Lid closes and everything.

Waiting for the regulator gauge I ordered to get here, I'm a bit concerned that it won't work for this project...got it on ebay for $10 so if it does work it'll be a steal. I'm not sure why it wouldn't work, the seller said it's new and works from 10-150 psi..I guess I just don't know enough about regulators to make a fair assessment. As soon as it arrives its off to lowes to buy fittings for it. I've found a 12oz co2 tank on craigslist for $5, also one on ebay for $10 w/shipping...hopefully one of those will pan out before the regulator arrives so I can buy the fittings for everything all at once.

Here's a pic of the regulator, anyone think this will/won't work for regulating psi of co2 as long as I get the valves hooked up properly?
Airregulatorfront106psi.jpg
 
For anyone who's still keeping track...after doing some more research, I'm very glad that I was outbid on the co2 bike pump. Each 12gram refill would've cost me $2, which is about the same price it costs to refill a 9-12oz tank. 9oz = ~255grams, therefore you would have to buy 21 : 12 gram cartridges to equal the volume of one 9oz tank. Even if you buy these in bulk to save money, you're still looking at a good $10+, compared to the $2 refill.
 
Whoo Hoo!!! I just won a 9oz co2 tank on eBay for $4, and a UFA adaptor for $7. Goth both items togehter with shipping for less than a co2 bike pump with 12gram co2.
 
I have just confirmed as many before me have, that a 5 gallon water bottle will not hold suitable pressure for use as a keg. The lid had no seal at all, after wrapping the threads in threading tape it was able to hold a seal, however the bottom of the bottle began to bulge out as the psi reached a mere 5. Not sure how denny was able to do it, maybe he had a different water bottle. Either way, I have ditched that idea, and am rethinking the design. I've got about a week before the co2 parts I ordered arrive, so plenty of time to come up with some sort of cockameemee plan. I'm thinking I'll probably end up ordering some 6 liter PET bottles at $10 a pop, as this is the all around cheapest solution. That and the 6 liter bottles for the tap-a-draft system have a proven track record for use in kegging.

I am still considering using 3 liter bottles, with some sort of daisy chain setup:
DCK1a.jpg


Two 3 liters would give you about 1.5 gallons, and Six 3 liters or Nine 2 liters would give you about 5 gallons:
DCK2a.jpg
 

Latest posts

Back
Top