
BrewCityBaller
Well-Known Member
One last question: I got everything working and so I got ambitious and installed a physical i2c LCD screen. The screen works and displays the correct information, but it does not update. It displays whatever information was on there at startup. Any idea why this might be the case?


![Craft A Brew - Safale BE-256 Yeast - Fermentis - Belgian Ale Dry Yeast - For Belgian & Strong Ales - Ingredients for Home Brewing - Beer Making Supplies - [3 Pack]](https://m.media-amazon.com/images/I/51bcKEwQmWL._SL500_.jpg)


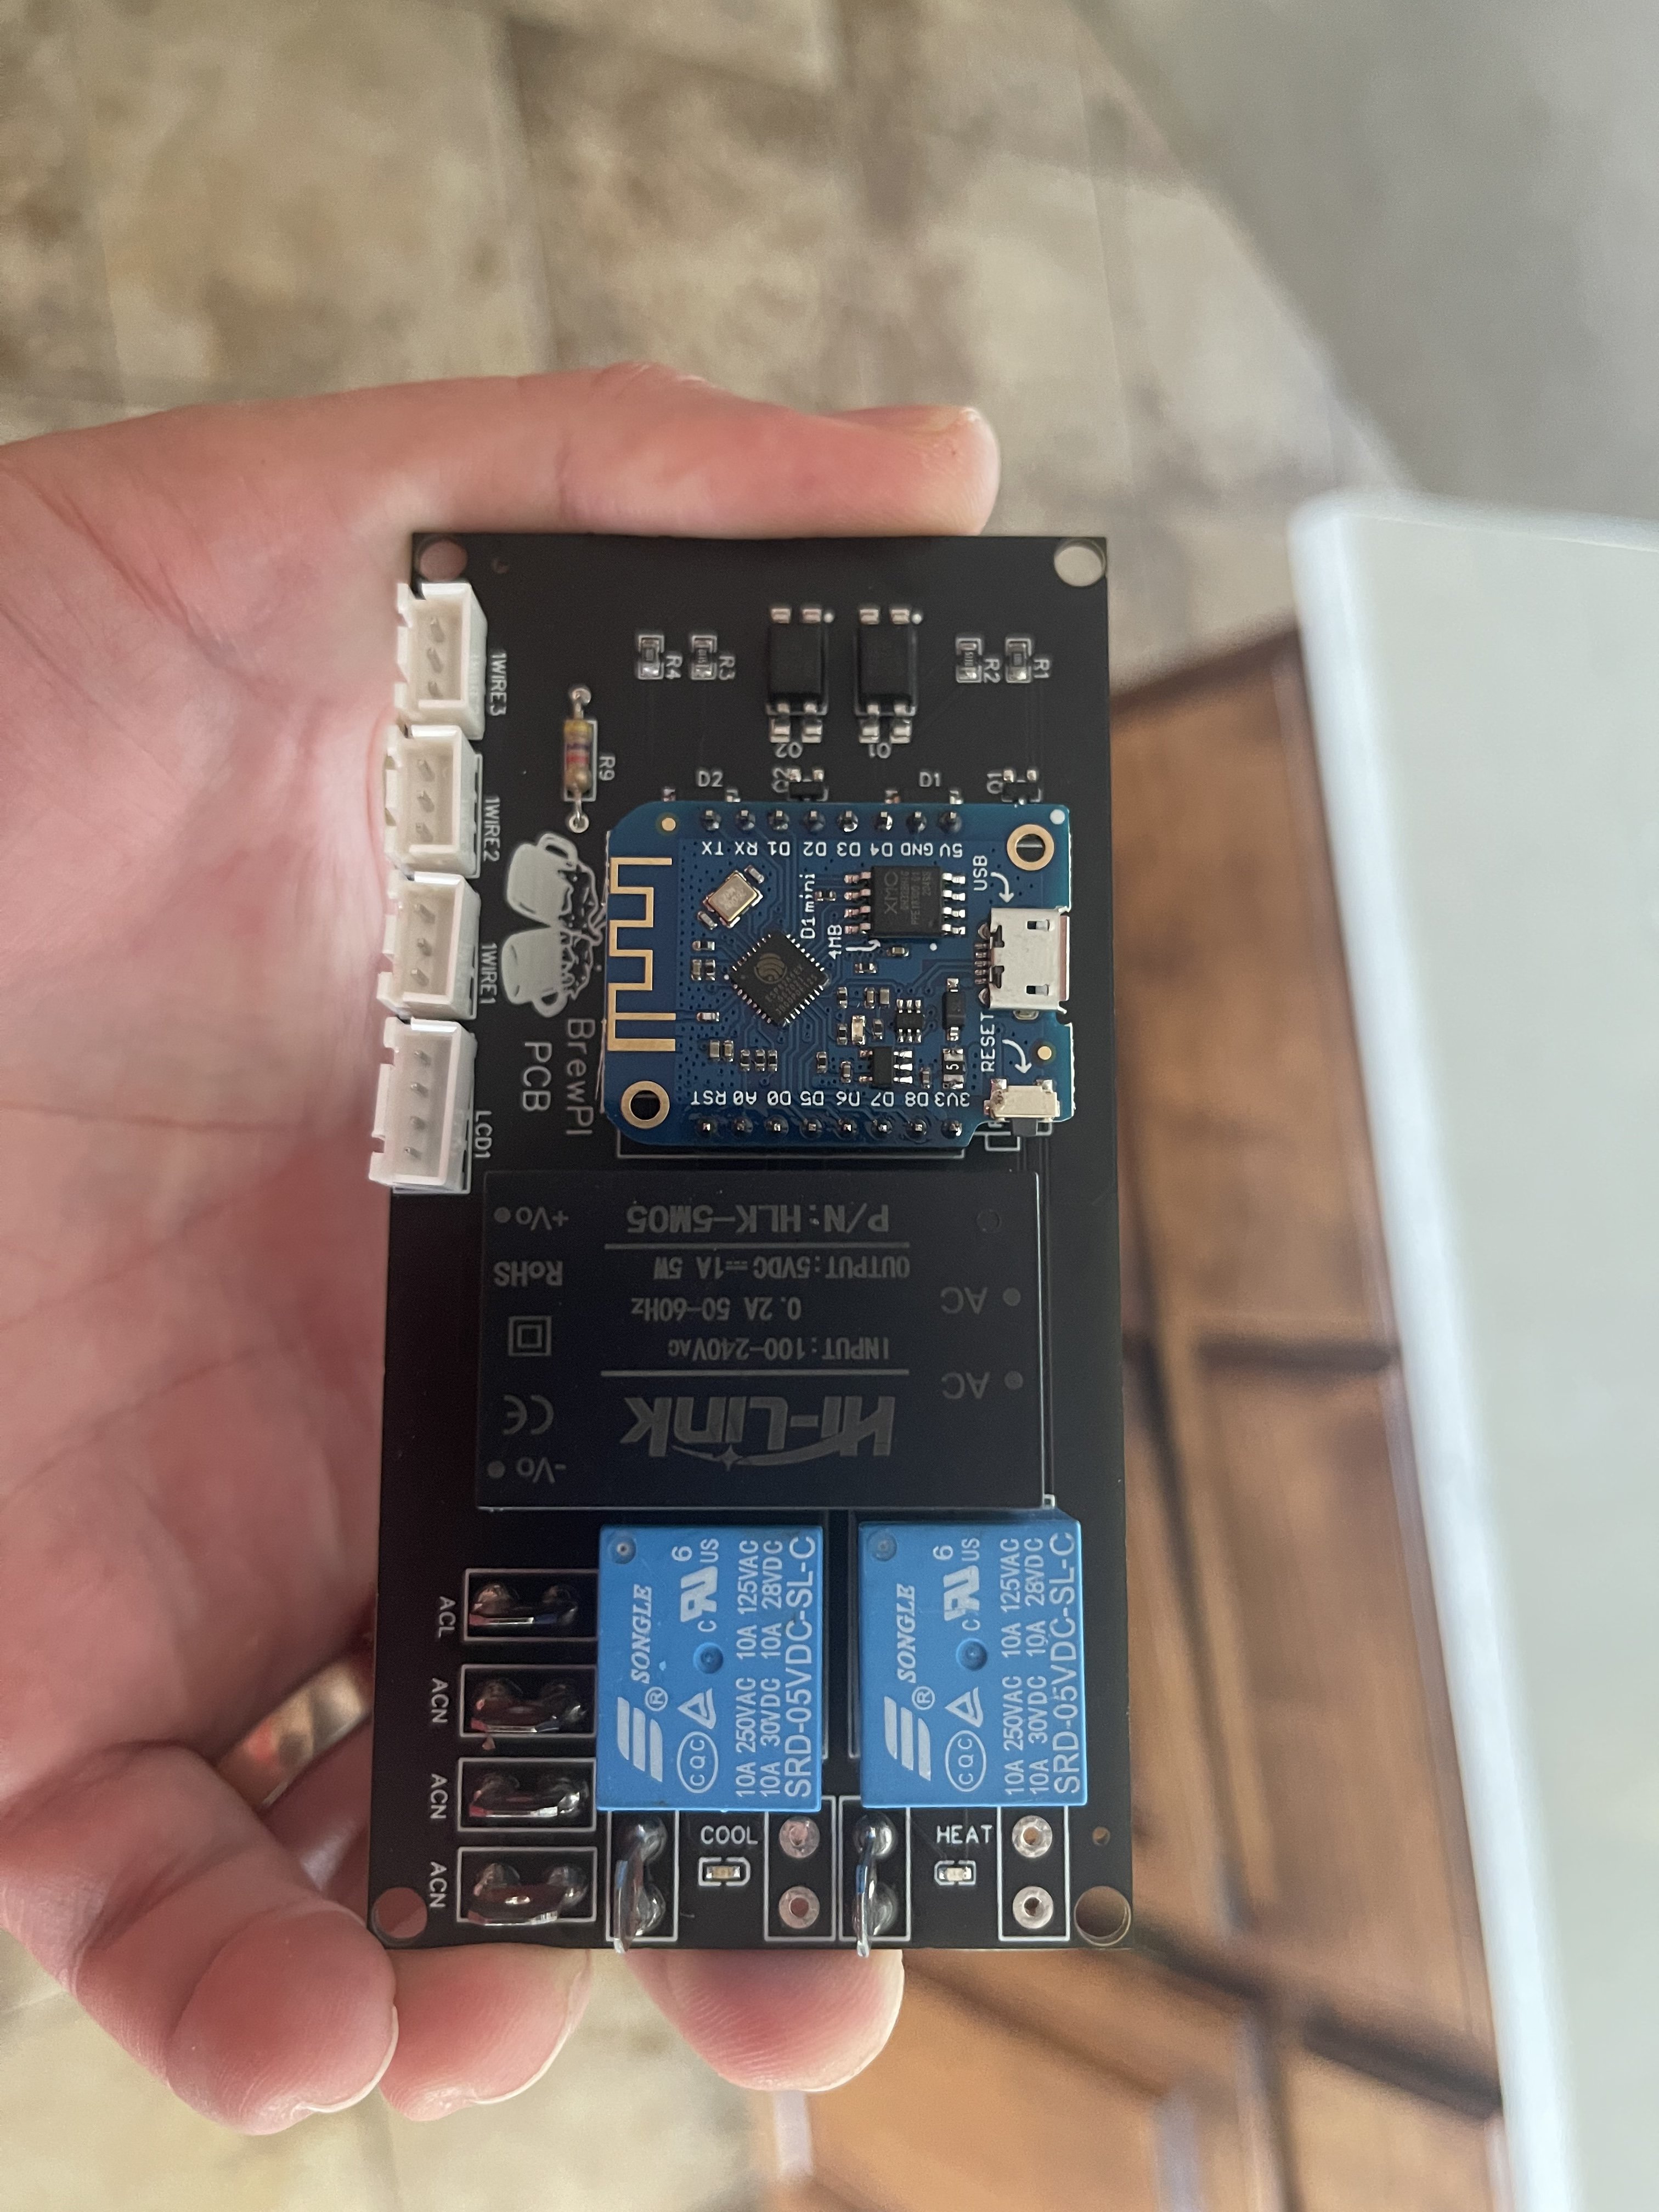
") I haven’t finished/posted my design for this yet, but the two things I added - both for circuit protection - were fuses on the AC lines and a varistor for the same. I also am using a 2A supply rather than 1A, but my design targets the ESP32.
I haven’t finished/posted my design for this yet, but the two things I added - both for circuit protection - were fuses on the AC lines and a varistor for the same. I also am using a 2A supply rather than 1A, but my design targets the ESP32. 


 awesome and thank you for the help. I've got another round of soldering to do and will get that installed then. I have been finding that process somewhat enjoyable, much more so after I got things dialed in, my first resistor... Was not pretty haha

