• Please visit and share your knowledge at our sister communities:
  • If you have not, please join our official Homebrewing Facebook Group!

    Homebrewing Facebook Group

My insane 25 Gal, 100 Percent Hard Plumbed Tri-Clover, Automated Tippy Build

Homebrew Talk

Help Support Homebrew Talk:

This site may earn a commission from merchant affiliate links, including eBay, Amazon, and others.
Some more parts so I can get some stuff done tonight!
image-1173419297.jpg
 
Ha yeah I'm up to 14 seperate orders through them. I am building quite the personal relationship over the phone too. Ha I'm glad I can support a small business and put shoes on their children's feet.
 
If you ever decide you want to start selling Chugger pump heads with that tri-clamp modification, let me know!
 
Uber, That's a pretty good idea, Maybe do an exchange program, you guys send me your stainless heads and I modify them for you? Or sell the complete head? Just a thought.

AJ,

I did actually consider this route, but then I would have to be more "hands on". Funny enough its something I wanted to avoid. Funny enough its not as many connections as you think.
 
I want tri-clover ferrules on my Chugger pump heads! Let me know if you do an exchange program...
 
Received my burners and water filter!

image-4141813819.jpg

This is the lock for my tippy dump.. Probably the worst thing to get level for some reason. After I drilled the hole in it the tack weld broke, turned into a mess to get everything back.


image-1097157178.jpg

Soldered tri clover caps onto the counter flow. Which turned out to be extremely easy. Just like soldering copper. I drilled a hole to match the OD of the copper. Added some flux, heated it up with the torch and filled the joint. I highly recommend this to everyone. The caps are $3 a piece and you remove any threads that would be in contact with wort.

image-787069863.jpg
 
Making pipe mounts, I took a 3/8 stainless bolt, cut the head off and tack welded to the TC clamp

image-2947810370.jpg


image-4211225957.jpg

Then I drilled a hole in the frame then welded a bolt down. Viola

image-4162117740.jpg
 
Put some serious work in today, HLT recirculating return. I did this because the pump was free and it would keep more accurate temps.

image-152502771.jpg

Mounted my convoluted counter flow chiller, really hard to get mounted, but it fits perfect.

image-3027541037.jpg


image-3348517166.jpg
 
Uber, That's a pretty good idea, Maybe do an exchange program, you guys send me your stainless heads and I modify them for you? Or sell the complete head? Just a thought.

I'm in. Tell me where to send the head and how much extra to include for your troubles.
 
lookn sweet bro!

be sure to post pics of your first brewing session when you get there. hope it all comes together nicely for you
 
When I get done I have a tech company writing an article about my brewery:) 
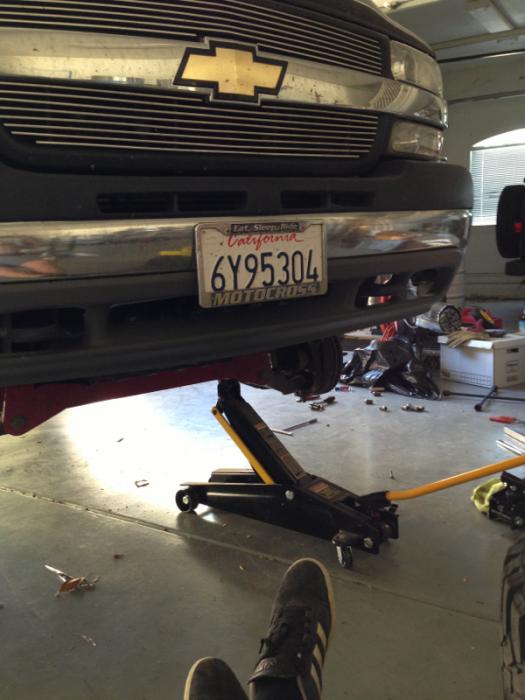
and yes I will make sure I post all the way through .
 
Thanks guys for following. I wanted to work on my brew stand but I am currently working on my truck. Upper control arms are shot.

image-986268257.jpg
 

Attachments

  • image-1285167376.jpg
    image-1285167376.jpg
    46.9 KB
kickflip_mj said:
Thanks guys for following. I wanted to work on my brew stand but I am currently working on my truck. Upper control arms are shot.

Bummer! Happened to me today too, lost half the day working on and ultimately replacing the garage door opener... What a pain.
 
Back action, I received 20 tri clamps, 20 gaskets and 9 elbows, and the last 4 feet of piping! Thanks brewers hardware!

image-990006860.jpg
 
Kickflip

Do us all a favor and use a proper jack stand next time you are working under your truck. It would be a shame to see something silly happen that prevents you from finishing your sweet build. Nice d'max too, I just got one myself...

Happy building and brewing!
 
Biggie, I agree with you completely. I wasn't under it, but i definitely should have used my brain more and put the jack stands under it.

The dmax has been with me for ten years and she is going strong. Inside is falling apart, but overall she has gotten me everywhere i need to go.
 
This is impressive - both in craftsmanship and bling factor. :cheers:

But it seems like a common theme on these builds is to mount the chiller outside the frame...it seems like it will be easy to hit/damage that way. Why not extend the frame out and protect the chiller, maybe give yourself a little table space, etc.?
 
Carl,
I like the way you think! I am actually mounting the control panel right above it. Originally i planned on having everything contained under the frame, but that didn't work as planned to with the hard plumbing.

Some of the things I notice is people mounting them horizontally, which makes no sense to me at all. Why would you want stuff sitting in the coil till your next batch?
 
Do us all a favor and use a proper jack stand next time you are working under your truck. It would be a shame to see something silly happen that prevents you from finishing your sweet build. Nice d'max too, I just got one myself...
Ha, I was thinking the same thing. I usually leave the car on the jack, but prop a jack stand under there as well "just in case".
 
Tonight I managed to complete the chiller return and sight glass. When I tried to dimple the pot, it decided to dimple one side, such a pan, I had to use a small pipe to make all sides of the hole even. Oh and I don't care about whirlpooling since I have an in line filter, the return In the pot is to keep the liquids inside the pot

image-518882660.jpg


image-1760506214.jpg


image-2732211235.jpg
 
Back
Top