My HLT project

Homebrew Talk - Beer, Wine, Mead, & Cider Brewing Discussion Forum

Help Support Homebrew Talk - Beer, Wine, Mead, & Cider Brewing Discussion Forum:

This site may earn a commission from merchant affiliate links, including eBay, Amazon, and others.

WortMonger

"Whatcha doin' in my waters?"
HBT Supporter
Joined
Nov 27, 2006
Messages
3,160
Reaction score
62
Location
Edmond, OK
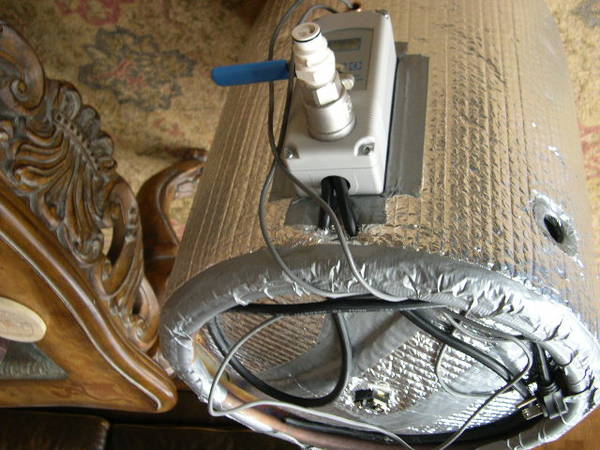
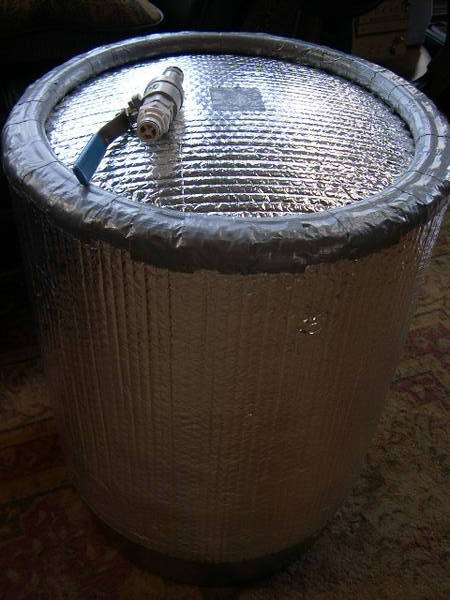
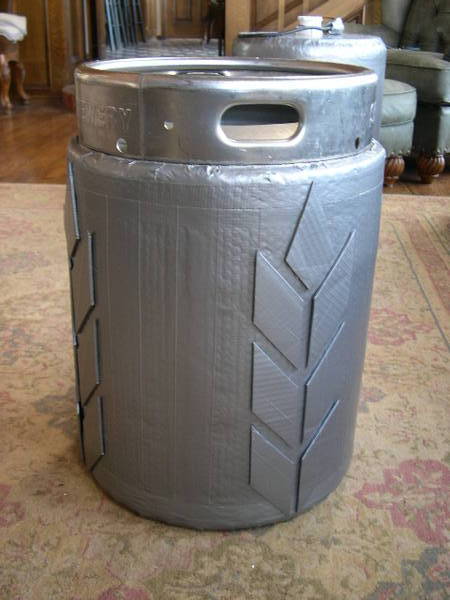
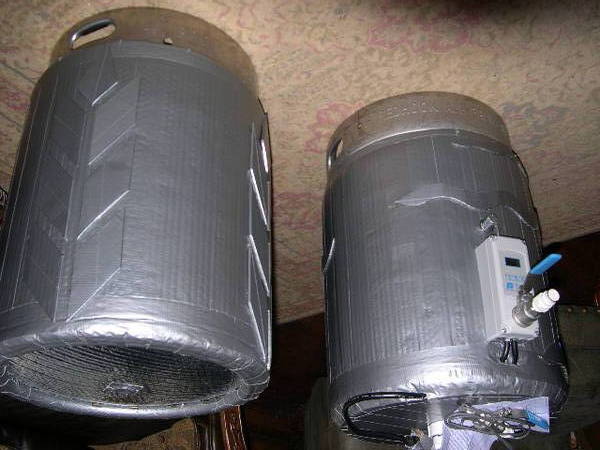
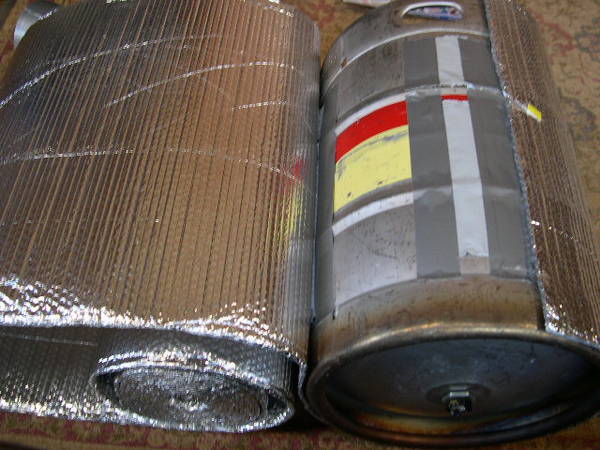
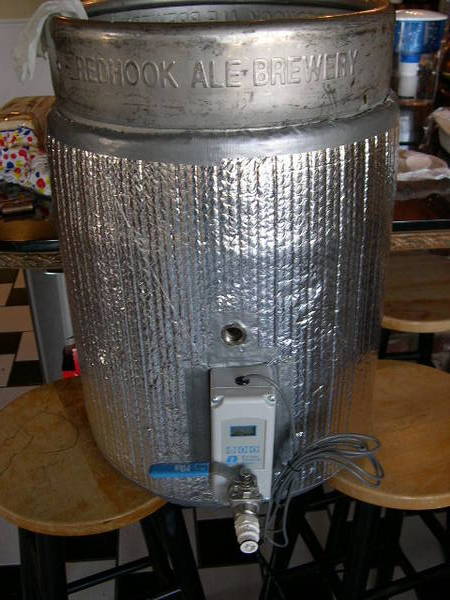
OK, I have been needing to do this for a while and finally have the time, so I thought I'd share as I go along. If you find this helpful or entertaining, please Prost This Thread. I have had to swap my burner for years under my HLT and kettle and never get the right temperature water for dough-in or step infusions. So........ I added a 240V 5500W water heating element to the bottom of my HLT and will be controlling it via a Ranco 111000 ETC. The element will be ran on 120V so the wattage will go down to 1/4 of its wattage to 1,375 Watts. I will be making another lid like in this project I did earlier that will have a fan type stirrer built in to keep the temperature even inside the tun. I will also be insulating and then beautifying/protecting the insulation with Rhino-liner from a local shop. So far here is the progress and I will provide more pictures as the project continues.

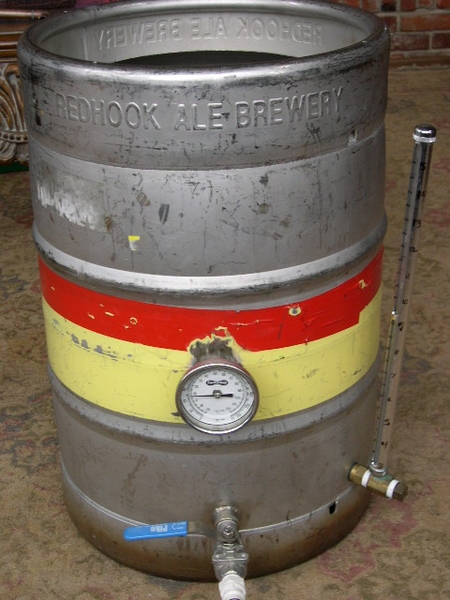
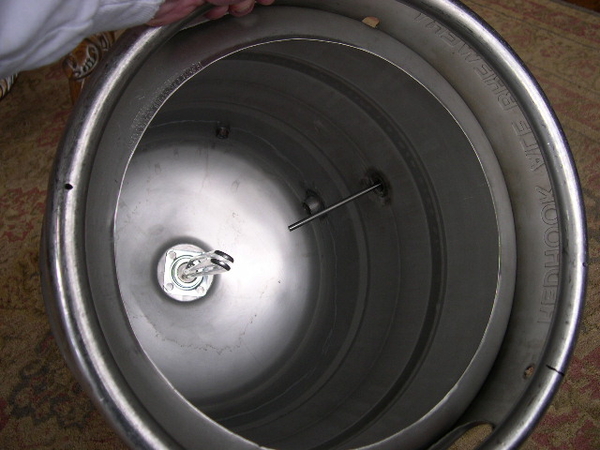
This is what my HLT looks like now. I will be replacing the gauge style thermometer with a thermowell for my Ranco unit.
6533-DSCN1714.JPG


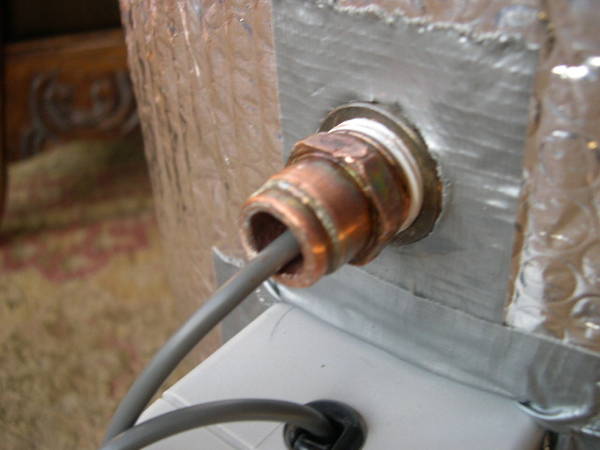
Here is the element installed, but the only thing you can't see is the 1-1/4" hole I had to put in the bottom of the keg with a bi-metal hole saw to fit the element. Read here to see how my trip to HomeDepot went, lol.
6533-DSCN1713.JPG


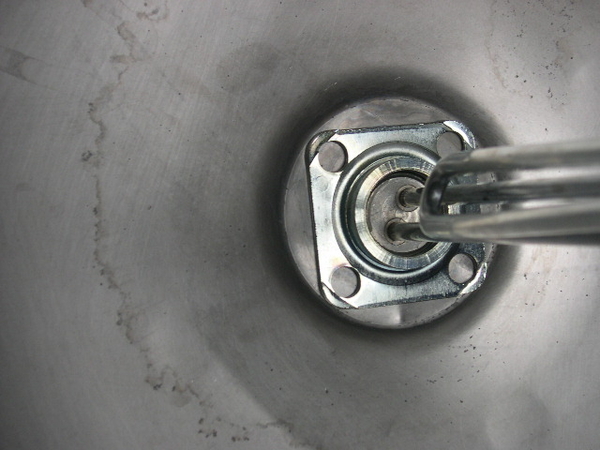
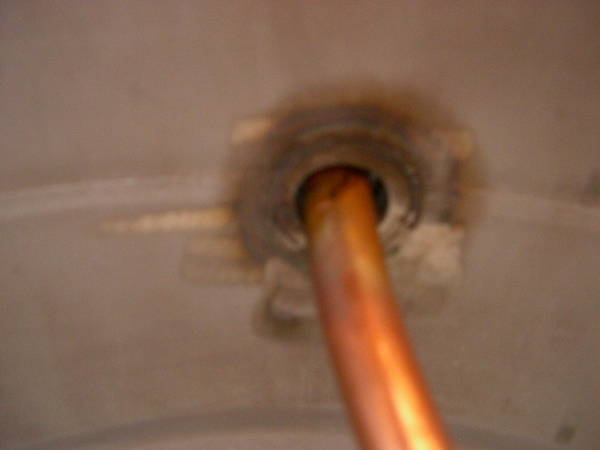
Notice the element fits very nicely in the flattened bottom of the keg.
6533-DSCN1711.JPG


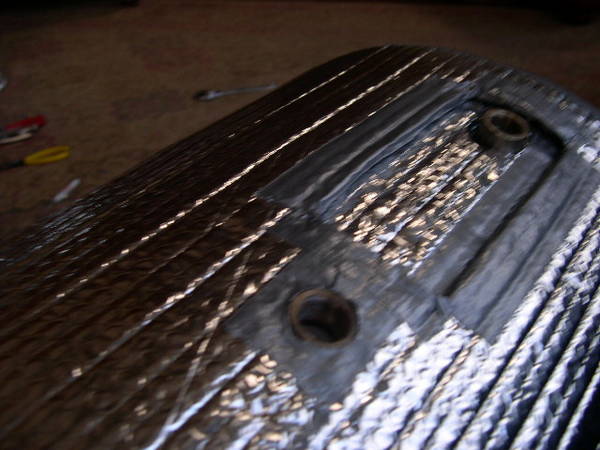
Here is a better shot of it centered in the bottom of the keg HLT.
6533-DSCN1712.JPG


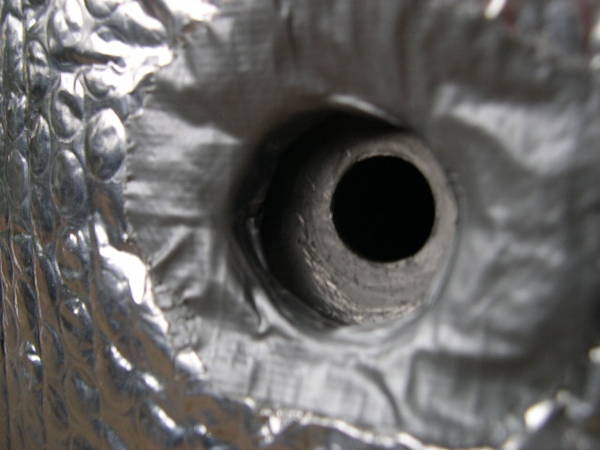
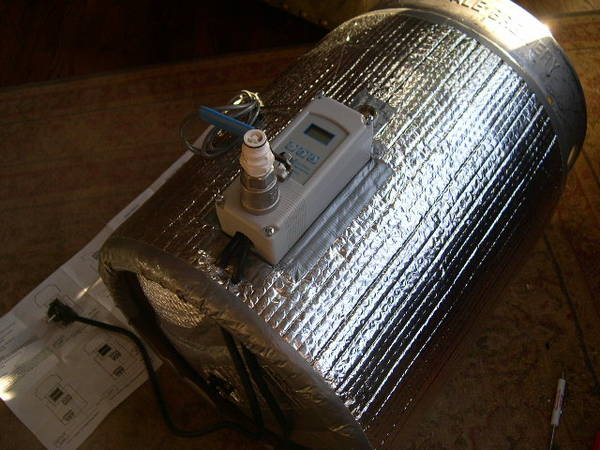
I just did a leak test and it holds its own so I can move on to wiring up the Ranco 111000 ETC. Until next post...... hope you enjoy the visuals, lol.
 
Looks great.

I would have mounted the element horizontal and close to the bottom. You do not want to expose it to air while it is on.
Its hard to tell how long the element is. If it is fairly short I wouldnt worry about it.
 
I will post with every bit of info I can. I know how we all are :D

As for going horizontal, this element is supposed to be horizontal, but I couldn't find a vertical one so I will just have to be careful. I like how it fits in the flat bottom as opposed to having to worry about the curve of the side. The element is around 9.5" long and would be below the 7 gallon mark on my site glass. Right now in order to mash-in I use around 5 gallons, then another 5ish to get me to my sacch rest, then I always have to refill and sparge with around 7ish gallons so I should always be above the element. Plus my site glass starts to read at 3 gallons so I always have to have my water to use plus 3 gallons to know what I am adding, lol. All, the infusions/sparge depend of course on what I am making, but I shouldn't have a problem. Good to point out to others though, as this would suck to burn your element out halfway through a beer.
 
Ok, I finished a little more of the project and wanted to post some pics for everyone following. Here you go.

Here's how I attached the Reflectix Insulation to the keg. I made a couple of Duct tape attachment points all the way around the keg as I moved around it.
DSCN1737.JPG


DSCN1746.JPG


Ok, so I made it where the valve comes through the Ranco. This was a bear to do, but it allows me for a cleaner looking install for the temperature sensor and the power cords below the unit as well.

DSCN1749.JPG


There is only one layer of Reflectix behind the Ranco and I duct taped the insulation so it would be a clean transition to the Ranco. I will later cover all the insulation with either Rhino-liner or Plasti-Dip to complete the project and make it look great.
 
Is there a technical reason why the valve goes through the Ranco, or is it just for a cool/compact factor? Looks awesome
 
It goes through the Ranco because it makes for a clean install of the temperature sensor, and it gets the electrical cords closer to the bottom where they look better. I drilled two 3/8" holes in the skirt of the keg below the Ranco so they can be hidden in the bottom dome of the keg once I insulate and seal it up you won't even see the element, just a power cord going to the outlet (I am going to rig my tree up for 110V with outlets so my cords are short on all my tuns)
 
Ok, so far no leaks. I have the weld-less sight glass and everything but the temperature sensor hooked up, that is another whole job as now I have to thread the inside of the stupid coupler they welded on the keg. I will wait to put any more pictures up until it is finished, or at least finished other than the rhino-liner/Plasti-Dip for beauty and protection of the insulation. Whew, I am so glad I don't have any leaks.
 
OK, it took forever to track down copper tubing that wasn't from a 25' roll. I was happy that my LPG company where I buy my propane cut me a 12" piece for $3. There was only one problem. I asked the lady (a tank refiller/secratary) for 5/8" OD tubing. I go the next day to get a refill and it turns out to be 3/8" OD. Ok, that's gotta work because I am not waiting even another day for this part of the project to come to completion. I have a 3/8" end cap at home and a 1/2" threaded fitting to get me attached to the tun. Another problem, the coupler on my HLT is only threaded from the outside in. No problem, I just had to make everything go in backwards. Ok, after a ton of soldering and hand sanding the pieces fit in one another so I could solder them together for the final time. I fluxed the end tip of the thermowell and bent it together and soldered it shut.

Here's a pic of the outside or the thermowell.
DSCN1750.JPG


And, here's one of the inside. I had more room than this around my old thermometer so I'm all good.
DSCN1751.JPG


After I taped and threaded the new thermowell through the HLT I bent the themowell slowly and evenly so the temperature sensor could be inserted and removed easily. Man, those are water stains from the test water. That is why I have to pre boil and settle out the junk before brew day. Hard, hard water here.
DSCN1753.JPG
 
Here are some more pictures for you. This is what the backside of the Ranco looks like. I indented the insulation one layer which still gets me enough to keep the Ranco cool enough.
DSCN1745.JPG


Here is how I taped off the sight glass hole in the HLT. I did this so when I line the tun with truck bed liner I have a big enough opening to get my tools around the sight glass hardware. I didn't need to do this for any other holes in the tun.
DSCN1756.JPG


Here is a picture of the whole bottom and the electrical rigging. I still need to attach the ground wire to the keg skirt and wire the element. I am planning on a PVC cap for the element and lots of silicone around it so the wires could never touch or short each other out. Then I am making a bottom out of wood to have a hard cover on the bottom with only a power cord sticking out. This will be lined as well with truck bed liner. I will be sure to get pictures of everything once done. Sorry everything but the HLT is upside down, lol.
DSCN1759.JPG
 
Wow, that looks like a lot of work!

Are you worried about the duct tape standing up to the heat? Any idea what its temperature range is? It seems like most people that add reflectix have used the silver, hi-temp tape. I really like the reflectix idea. I'm thinking about adding it to my MLT.
 
The plan is to coat the insulation with bed liner, but I am asking them today if I need something sturdier behind the liner. As for the tape, the stuff on the keg that started the project off doesn't matter if it holds or not. Once it is lined it won't matter. The other tape shouldn't get any hotter than a hot summer day, so I am not worried, and the insulation should keep it even cooler than that. Again, once lined won't matter. If there are any open places on the top where the liner starts, I will caulk it with the same color caulk for assured water protection behind the liner.
 
OK, took my tuns in to see what the Line-X guy would charge me to bed liner them. $35 each. Wow, I can't wait. I am thinking silver with the tops polished stainless and the stand John Deere green. Man, I am soooo excited.
 
whiskey_pickle said:
You are a sick bastage !:mug:

LOL, well thank you very much. I try my hardest for the sickness factor, lol. My brain overworks things and I have to put more into projects than just what will get it done. Must be the German in me. I mean have you ever seen how they name things? LOL

Oh, and I am loving documenting this project, so there should be plenty of pictures. I am hoping that once done I have a good long thread of questions, because they are so fun to answer on projects like these. I am actually doing both my HLT and MT the same way, just figured I'd combine the two during the insulation and lining stages. Then, I will write-up a dedicated MT thread with a motorized mixer and manual steam injection so I can do this all over again. Can you tell I am just a little excited, lol? Well, I'm off to complete the bottom covers for both and get everything ready to be shot next week with liner. Honestly, for other projects you guys should check for Line-X dealers in your area. This stuff would be so handy on all sorts of stuff, and they have a minimum of $35 just for their time on small stuff. Ceramic military body armor is covered with this stuff. On the bottom of your car and body you're protected from scratches. It slices, it dices, it juliannes....... wait, that is the handy dandy food slicer.
 
OK, having trouble finding a "cap" to cover the electrical on the bottom of the element. I have heard of PVC end caps used, but which size. Maybe I should mic the thing and take the calipers with me to the plumbing store.are water heater element fixture measurements the same?
 
wortmonger:

I think the cap I used on my Corny keg HLT element (2000 w/120v) was 1 1/2" PVC. I had to boil it in water to soften and push over the element, then leave it to cool in place. It works fine. I'm at work so can't measure it, so this is a fading memory guess.

Nice work by the way...
 
Ohh, I just wired up the element and had a flash. Is it hooked up right? I know from reading several posts that the Ranco is hooked up properly and my only concern was the element. I grounded the wiring to the keg shell with the green wire and am wondering if it matters which wire (Black or white) I hook to either connection on the water heater element.

2nd Question, I need to test the element after it is hooked up to see if the system works. Will a simple no water test done quickly tell me without the element getting to hot (if it comes on I know it will work) or do you have to have water? My element is vertical and I do know it is supposed to be horizontal, but with water and a fan constantly stirring the element shouldn't get to hot which is the main concern for the mounting. Please, information is needed because in the mean time I can only insulate my other tun until I get the knowledge for this one.
 
Doesnt matter which side you have the black and white wires on.

Are you sure the black and white wire are line 1 and line 2? Dont know why it would flash like that.

Do not dry fire that element. You will cook it in a heart beat.
 
Great information. I was worried about the dry fire. Oh, sorry no "flash" so to speak like sparks, I simply meant a flash thought, lol. I don't even think about things before I say them sometimes, but yes the Ranco and other wires are hooked up right. I didn't think it would matter on the element wiring since it is just a big resistor isn't it?
 
While I was at it I decided to give the old mash tun another coating of insulation (3 total now) and insulated the bottom as well. I have had good temperature holding in the tun, but I figured why not with all the extra Reflectix I had. I put the mash tun on its top over the insulation and cut around the keg for three circles with holes in each for the mash tun bottom drain. Afterwords, I spray adhesives the bottom of the keg and pushed in each circle of insulation one over the other spraying more adhesive on the earlier one. Lastly, I duct taped the edges down so they would make for a nicely coated surface when I get them sprayed with my HLT.
btMT.JPG


Here is a close up of the bottom drain hole. I covered it with duct tape after the insulation was level with the coupler. Once covered with bed liner, I will drill it out from the inside of the tun and then cut the rest of the liner out of the hole leaving a nice transition from liner to stainless coupler. It will be a sealed connection so will look really good and give me great access to the coupler so I can remove the union and ball valve if ever needed.
MTdrain.JPG
 
Wow, this is one elaborate keggle... are you going to have an insulated lid or anything? It seems that having the rest of it so incredibly insulated may be moot if you have a gaping 12" hole in the top?
 
I have a lid project I did already for my mash tun. I will do the same for my HLT. The only place that isn't covered with insulation will be the stainless couplers and the very thin edge where the top and bottom of the keg meets the keg shell. Then the top of the shell is exposed, but I am not afraid of this little bit. I should be good to go when all is done.
 
Leveled everything up with discs of cardboard and duct tape. I took this before I finished to show how I put it together.
DSCN1774.JPG


Here is what I am using to allow for access to the element if anything goes wrong, like me not using a high enough wattage element, lol. I cut notches in it with a Dremel sanding attachment so the wires would fit well underneath it.
DSCN1772.JPG


Glued one side of the PVC threaded cover piece. I will glue up the other side tomorrow after it has dried. The wrench is there to hold it down with weight so I get a good connection.
DSCN1776.JPG


Here is a better picture of the finished preparation bottom. Sorry the sun went down so I can't get better pictures and was just too anxious to publish them. Can you tell I am getting even more excited? LOL
DSCN1777.JPG
 
Ok, I had some time to kill before I could get the tuns lined from the Line-X guy. I decided a pattern would make the project look that much more professional and set out to make something very "beery." After several different pattern design thoughts, I decided on a very squared style barley design. It is made from cardboard that I wrapped with duct tape for protection.
DSCN1784.JPG

Since it is my mash tun, I thought it fitting and am very pleased with the way it turned out. It has a total of 4 barley designs going around it. I was so pleased in fact that I have now decided to do another design for my hot liquor tun. I think something wavy like water but still sharp in line so it fits well with the barley design. I hope I am as pleased as I was with the mash tun. Boy, I cannot wait to get these lined and looking even better. With that latest thread about the Gator-Grit keg polisher, I can see in my minds eye a very beautiful setup.
 
Man, what a sickness this hobby is. I'm assuming once the liner is srayed on, it really doesn't matter how well the adhesive on the duct tape holds up because it's all going to be captive inside the shell. You're gonna have it run up and securely adhere to the top skirt of the keg right? That will probably lock it in well. I think I would have let the bottom skirt have some exposure for that reason as well, but I guess it's fine.
 
I wanted the bottoms covered since they have insulation on them as well, but I do think a little stainless showing on the bottom skirt would have looked nice. The way I did the HLT though would have showed the power cord if I hadn't closed up the entire bottom. The adhesive doesn't matter once lined, and I don't even have to worry about the top, because the liner will fill everything. I am having everything below the top skirt weld line covered, and they use a masking tape with a wire in it for a clean break line between stainless and liner. Sweet!
 
Thank you very much. I am so excited and can't wait for completion. I am trying to work out color and stuff right now. I am already starting to re-think my stand color.
 
Ok, so I am through with putting the design I want for the 3D raised artwork. I chose a wavelike pattern for my hot liquor tun. Again, I just cut out the pattern with cardboard and wrapped it with duct tape to protect it from the liner until it is dry. The tape also fills in the holes on the sides of the cardboard. Then 3M spray adhesived them to the tun in a random pattern. I can't wait to see these lined and protected. I am starting to wonder if I should just paint my stand a different color and go with black liner on the tuns. I was thinking glossy engine paint of some color. I need to look that up so I see my choices. Anyways enjoy some more pics. These are the last until the project is finished. Sorry they are turned upside down, I am protecting them until they get lined.
DSCN1787.JPG


DSCN1788.JPG
 
Ok, I decided not to take any more pictures of before and surprise everyone that has been watching a little bit.

I have been so excited and have posted way too many unfinished pictures of this project. I went with a little more design on my HLT than just the waves. Also, the color choice has changed once again from all the other changes made, lol. I am so excited the guy was just busy and really did want to do the project.

I called Friday and he said he could squeeze me in sometime this week, but to go ahead and drop them off on Monday so he could at least get them taped up and ready for a break from all the cars and trucks he was doing. He talked to me for about a half hour about brewing and other stuff relative to the project and was rather impressed. He said this project definitely makes it into their picture book for corporate, so it may make it to their website, lol. I told him how this is the biggest project I have done in a while and how long it has taken me to this point all for something I could have just replaced with a frickin picnic cooler and the same valves, lol. He assured me that he would make sure this is an admirable project when finished on his end and to not worry about a thing......so we wait!

Hope you guys are having as much fun following this as I am doing it. I love to follow Yuri and others threads on builds and stuff here at HBT. Seems everyone has the same type of wanting to share and man do I get some great ideas from all you members, so thank you HBTer's. Both of these tuns are beautified in your honor, so I have to make them look good :D Ok, maybe tun dedications are a little over the top (he he), but I really do appreciate all the information I have gathered from this forum. I will always keep this new brewery, even as a pilot brewery if I go larger one day. Anyways, I hope to have these tuns back quickly and I will post immediately with pictures so you guys can ask away. :rockin:
 
Damn you and your baited breath Wortmonger! I want pics! I am really excited to see how this works out for you and how well the insulation and lining performs under use. If all goes well I am going to borrow your idea for my setup ;). Tell the Line-X guys to get the lead out.
 
LOL, I knew I'd pull at least one of you guys in, lol. I tell you what, this stuff has great potential in everyday applications. I think I did enough with the insulation, but wait till you see my HLT design. The guy was really impressed and said this would be the first time they sprayed a pattern on purpose. He said the 3/16" cardboard will make for some good 3D shadowing which is all I was asking for. As excited as this guy was about the project, I think I may have them back tomorrow, but he did say later this week so.... could be Monday, lol. I told him I'd give him some beer, but after talking to him I don't think I could ever make anything the guy would drink. He's a Miller Genuine draft kinda guy. His ears perked up when I told him about apfelwein though, lol. I told him I'd get him the recipe next time I came in. God I can't wait, I'm like a frickin kid at 2 days till Christmas.
 
Your project looks great so far.

I have wanted to moved toward electric for the HLT for a long time. How did you decide on the size of the element to use ?
 
I hope the guy is good. Man, I have seen some horrible Rhino and LineX jobs as if it was their first time on the gun. I've also seen some amazing jobs. What do you suppose the max temp for that stuff is before it starts emitting noxious fumes?
 
Back
Top