• Please visit and share your knowledge at our sister communities:
  • If you have not, please join our official Homebrewing Facebook Group!

    Homebrewing Facebook Group

My first keezer build

Homebrew Talk

Help Support Homebrew Talk:

This site may earn a commission from merchant affiliate links, including eBay, Amazon, and others.

Phildo253

Well-Known Member
Joined
Jul 30, 2015
Messages
127
Reaction score
91
Location
Elk Plain, WA
After bottling for the past 5 years, I finally made the leap to kegged beer. With the go-ahead from SWMBO, I go started planning last summer. i figured that if I was going to do it, i would do it right and not skimp on the important parts and take my time building it.

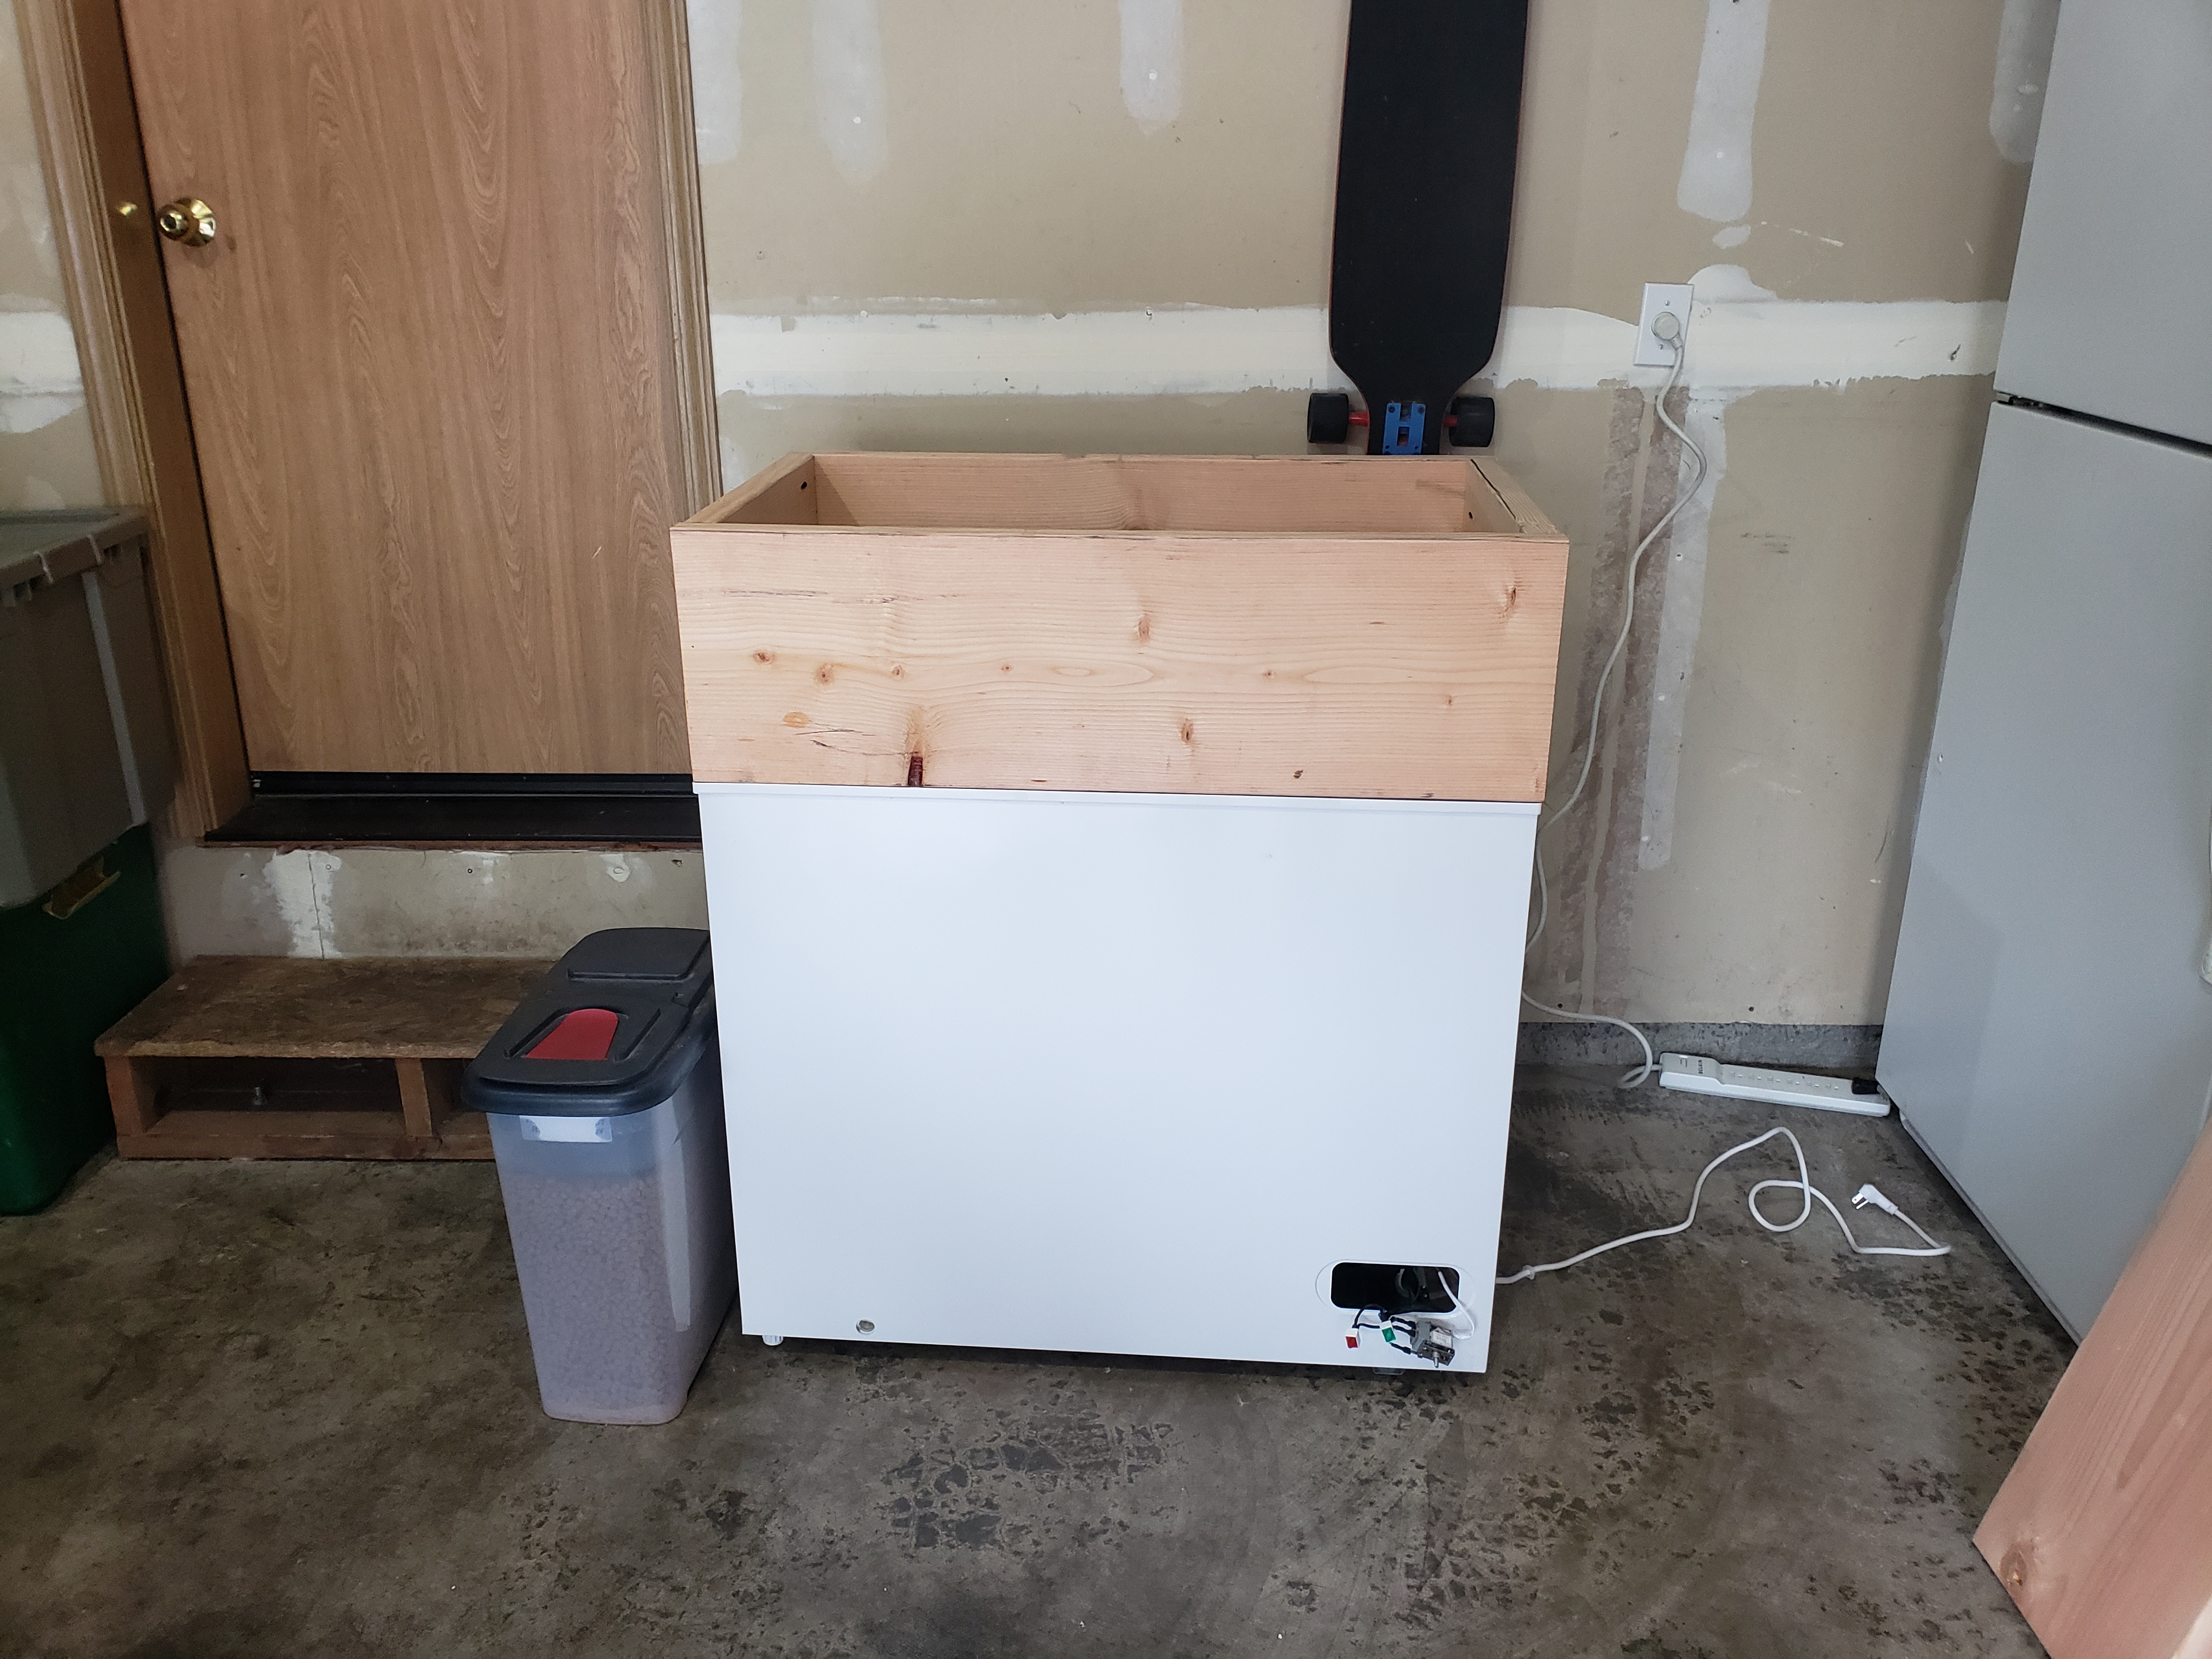
I purchased a 7 cu. ft. freezer at Home Depot during their 4th of July sale last summer. I knew that I wanted to have 6 kegs (4 c02 taps, 1 nitro tap and 1 seltzer water), so that meant that i had to have a larger than standard collar. I ended up going with a 12 inch collar.
20181215_115000.jpg


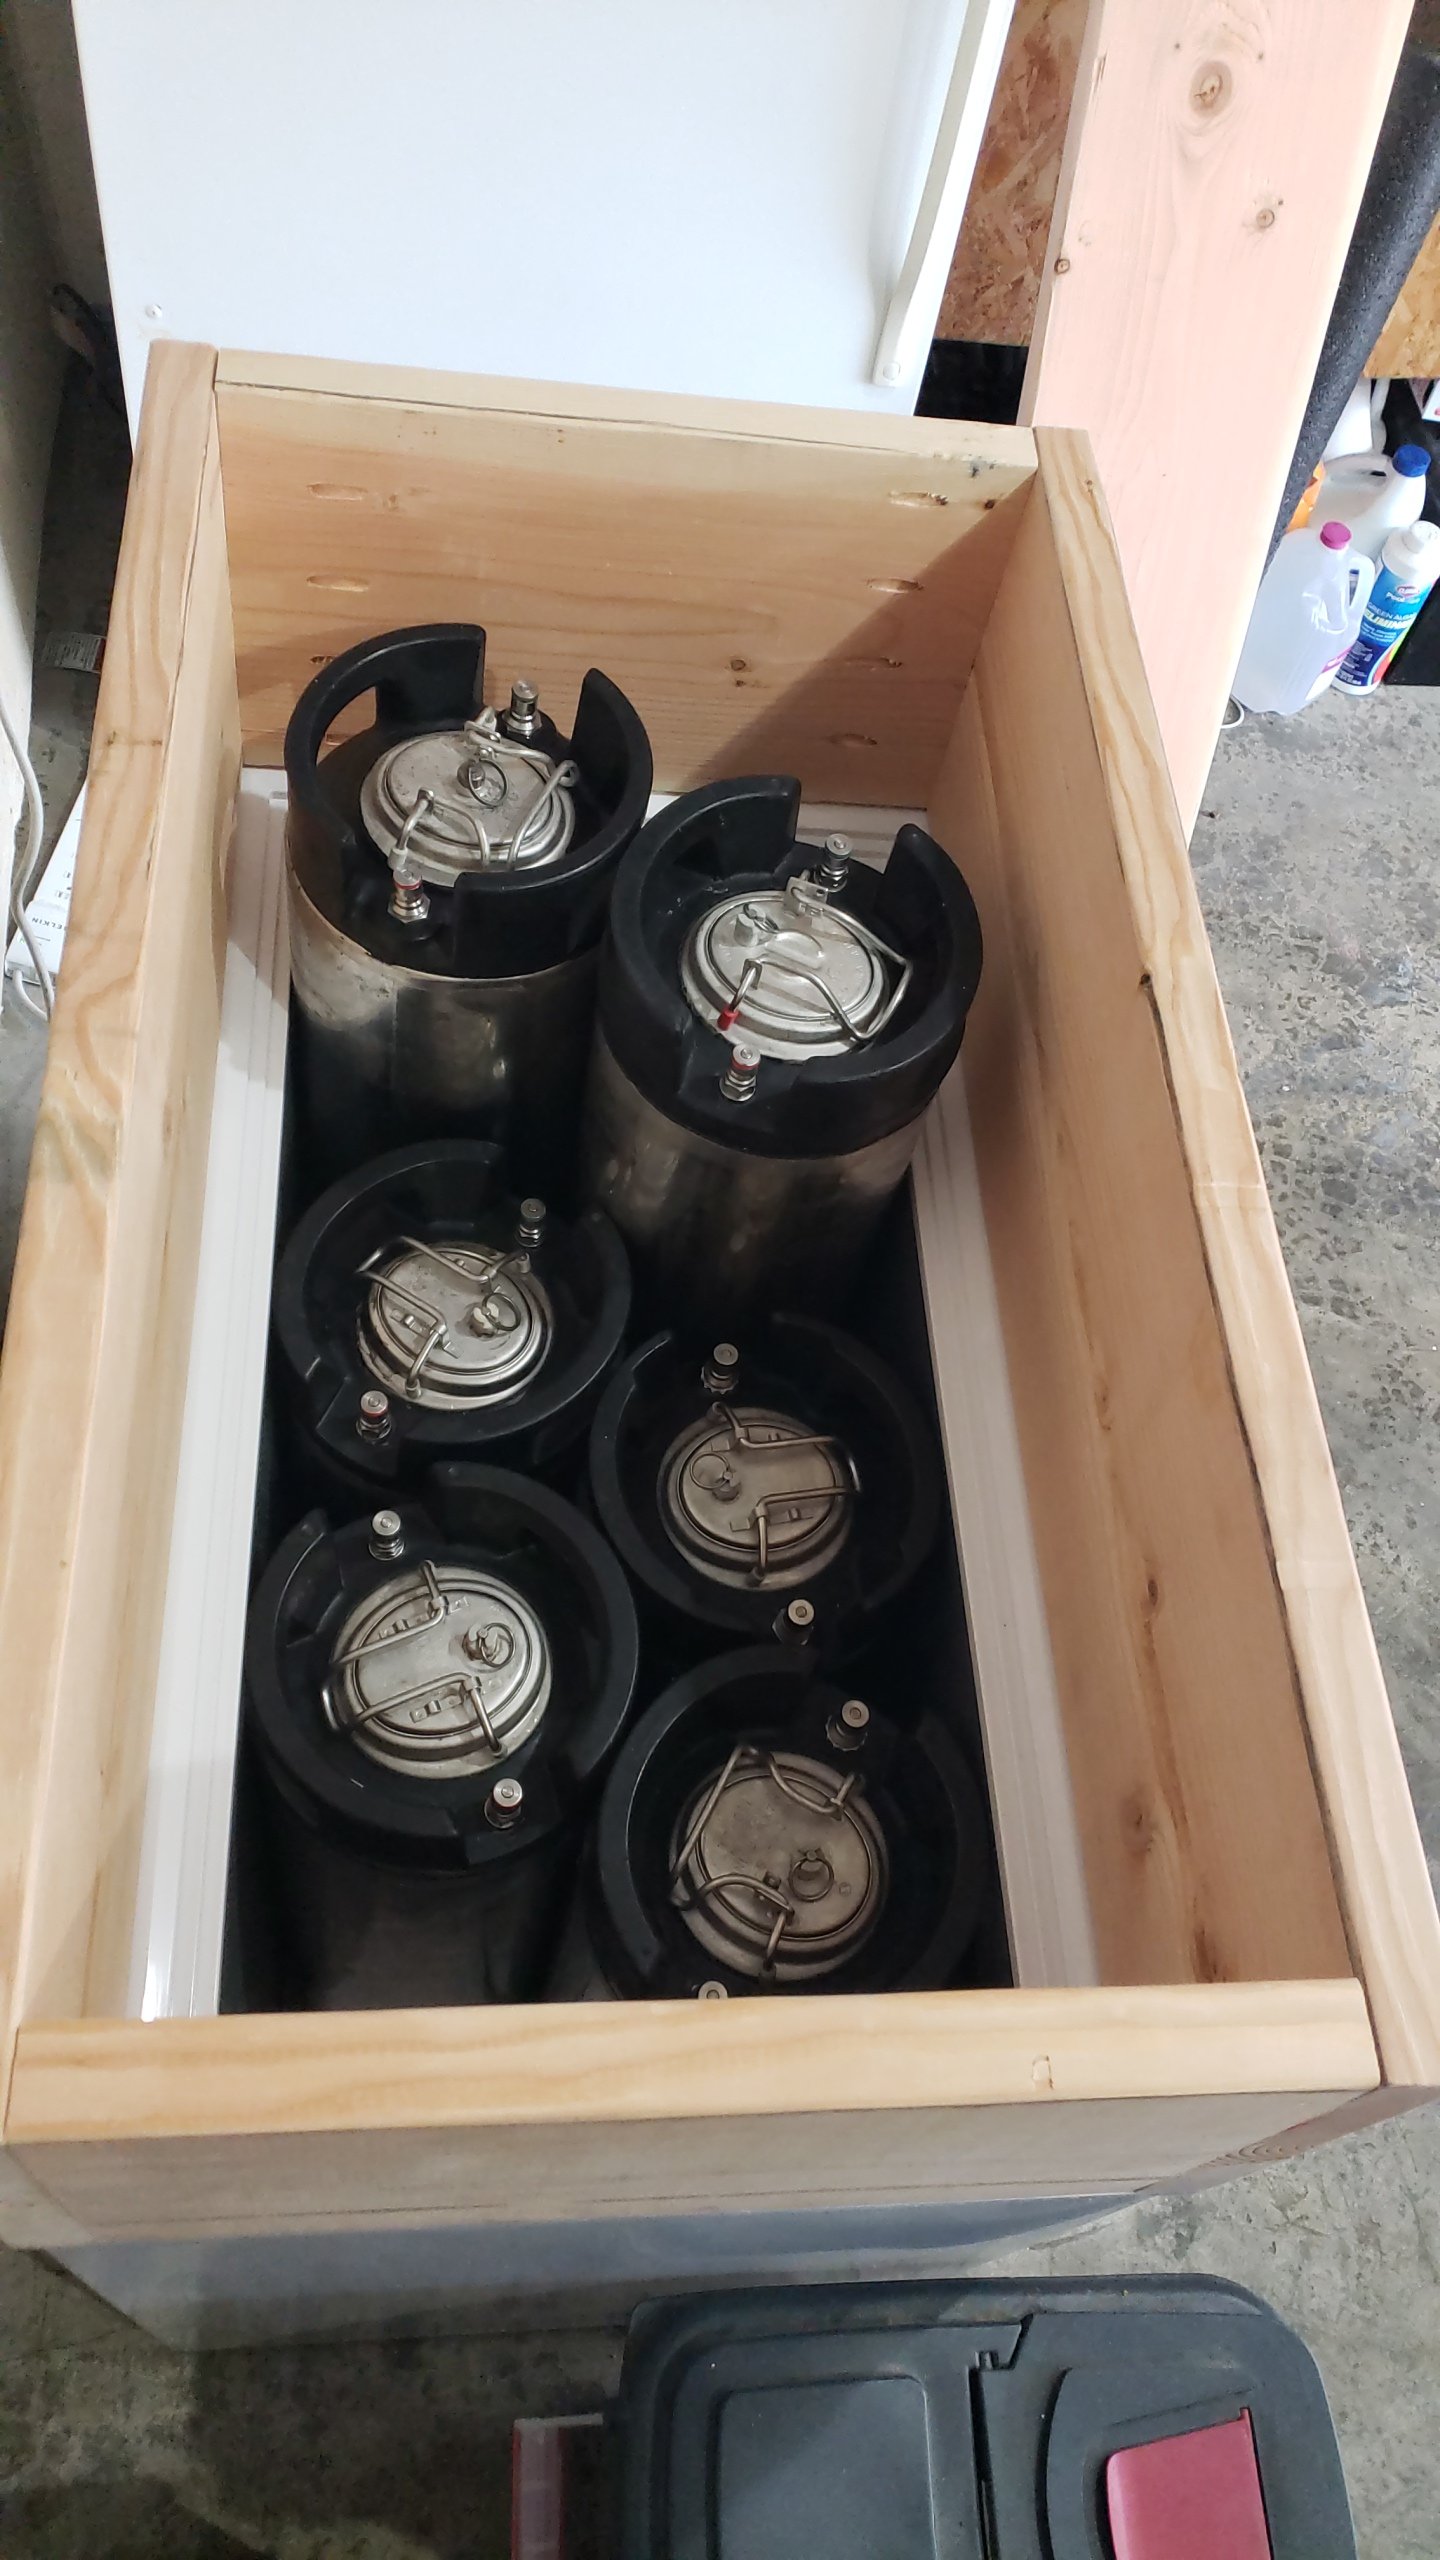
Here is a shot with all of the kegs in. She's a tight fit, that's for sure.
20181215_115404.jpg


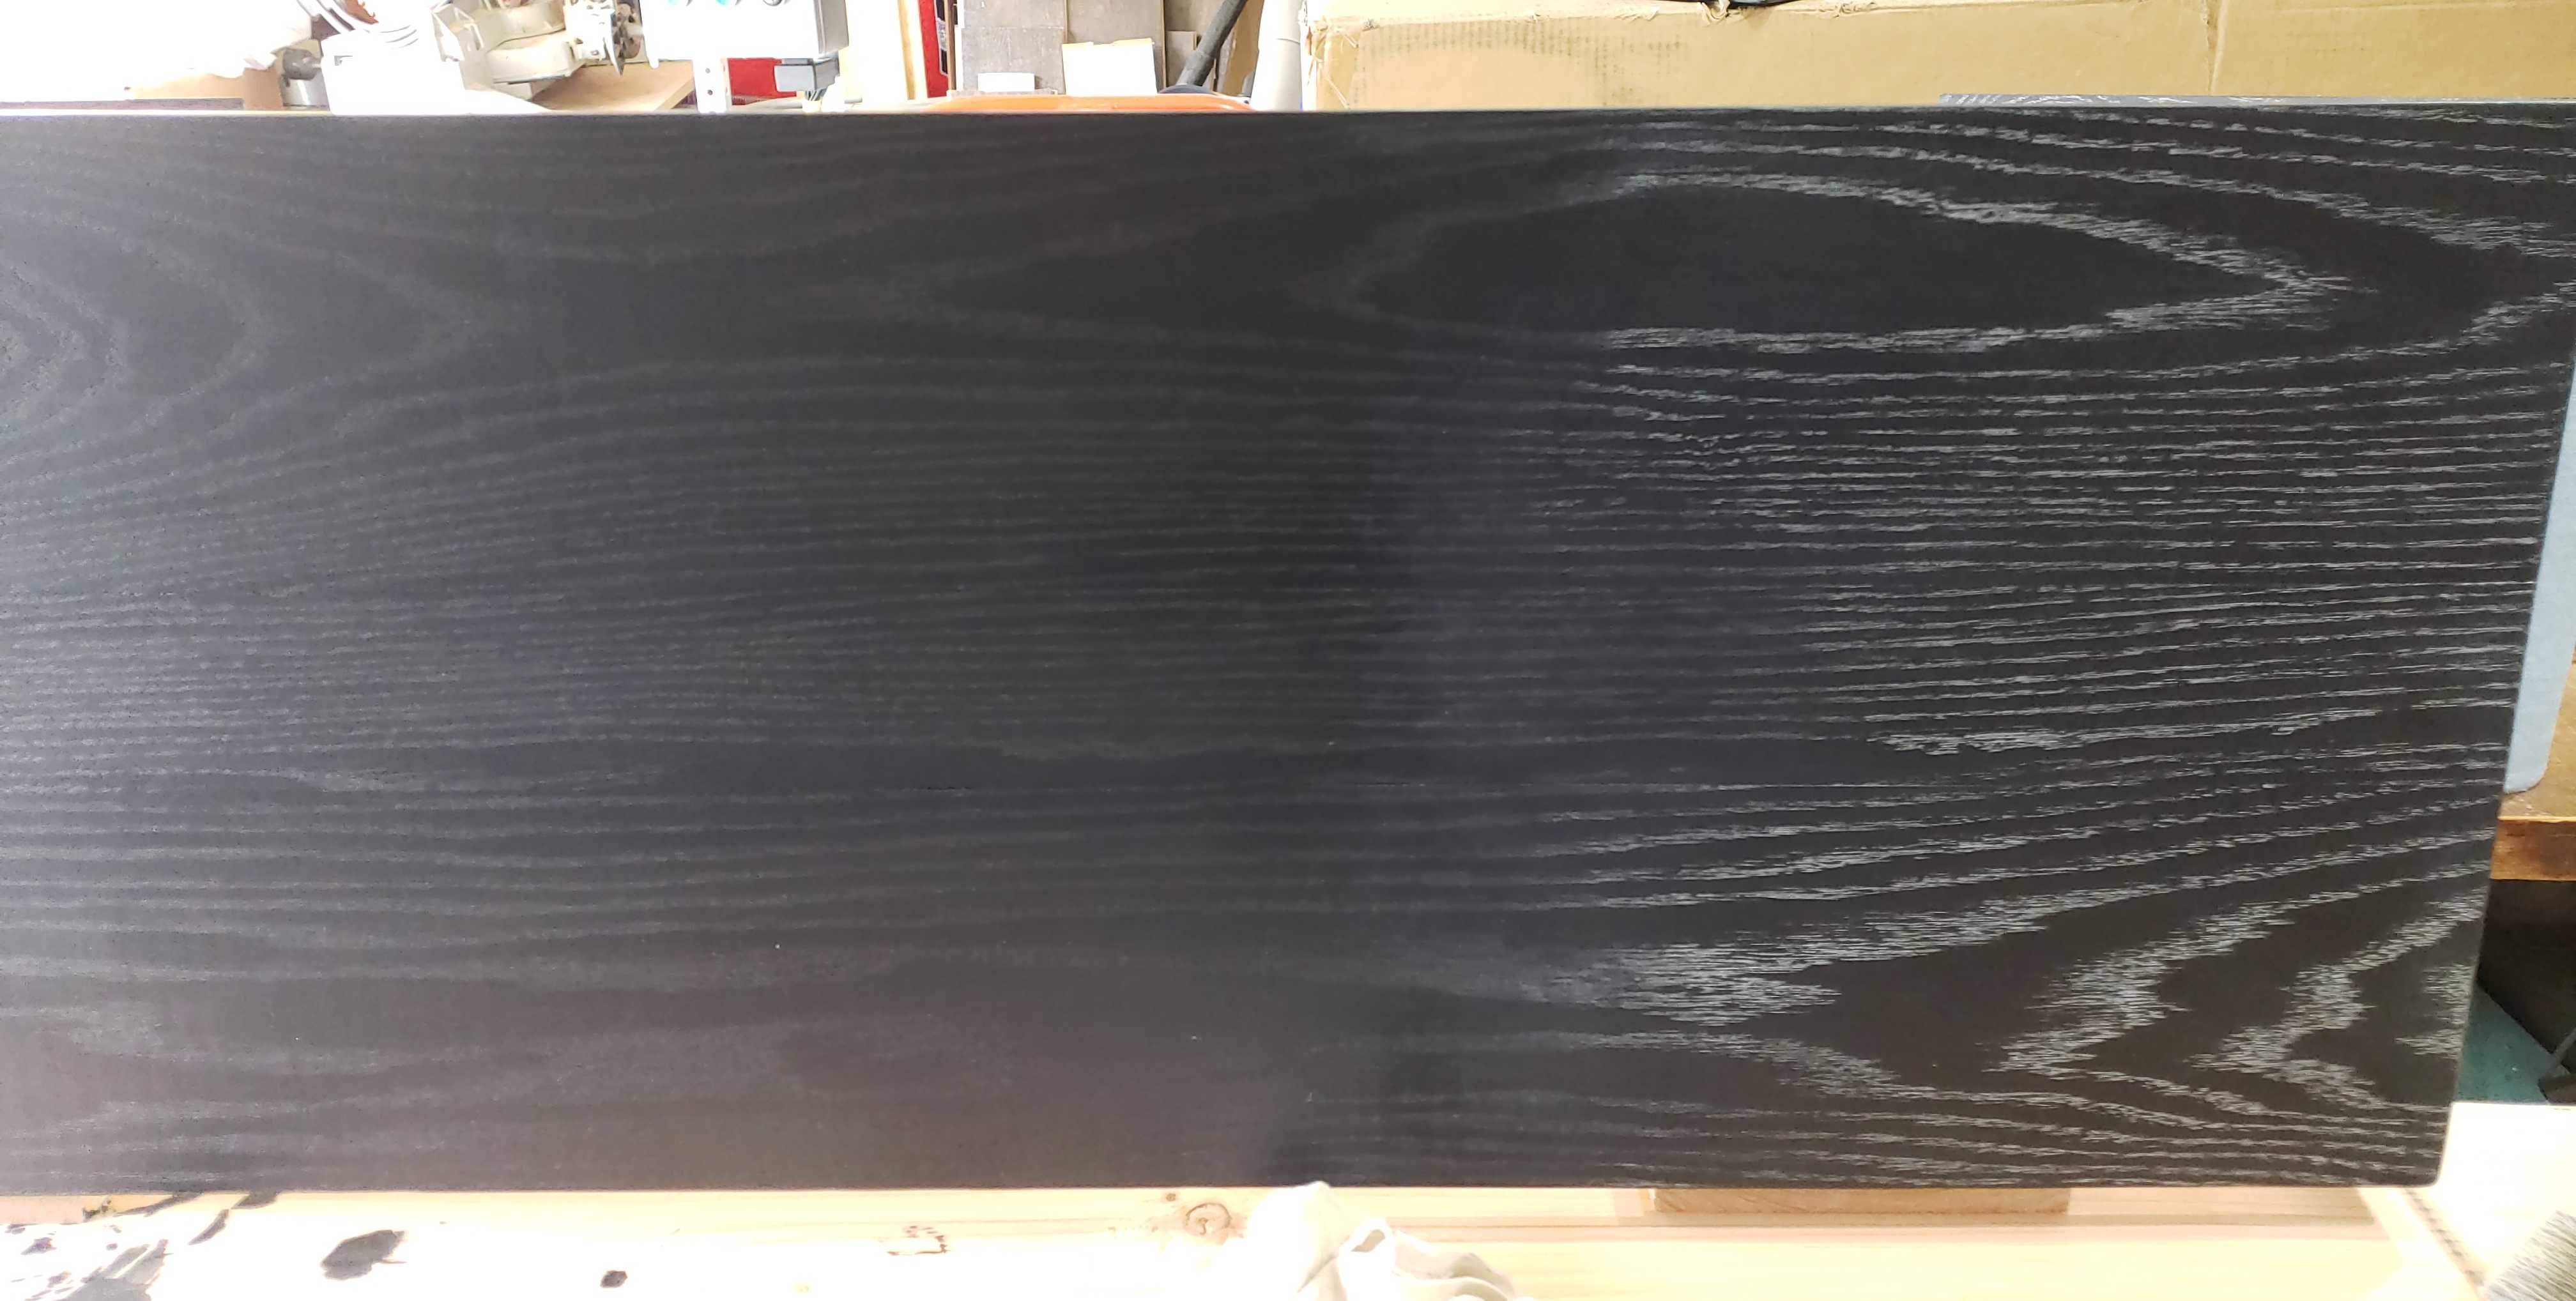
I wrapped the inner collar with a nice oak outer collar. I stained the oak collar black with india ink, then sealed it with sanding primer, then applied white wax to accentuate the grain. I then applied 4 coats of clear wax to seal everything in.
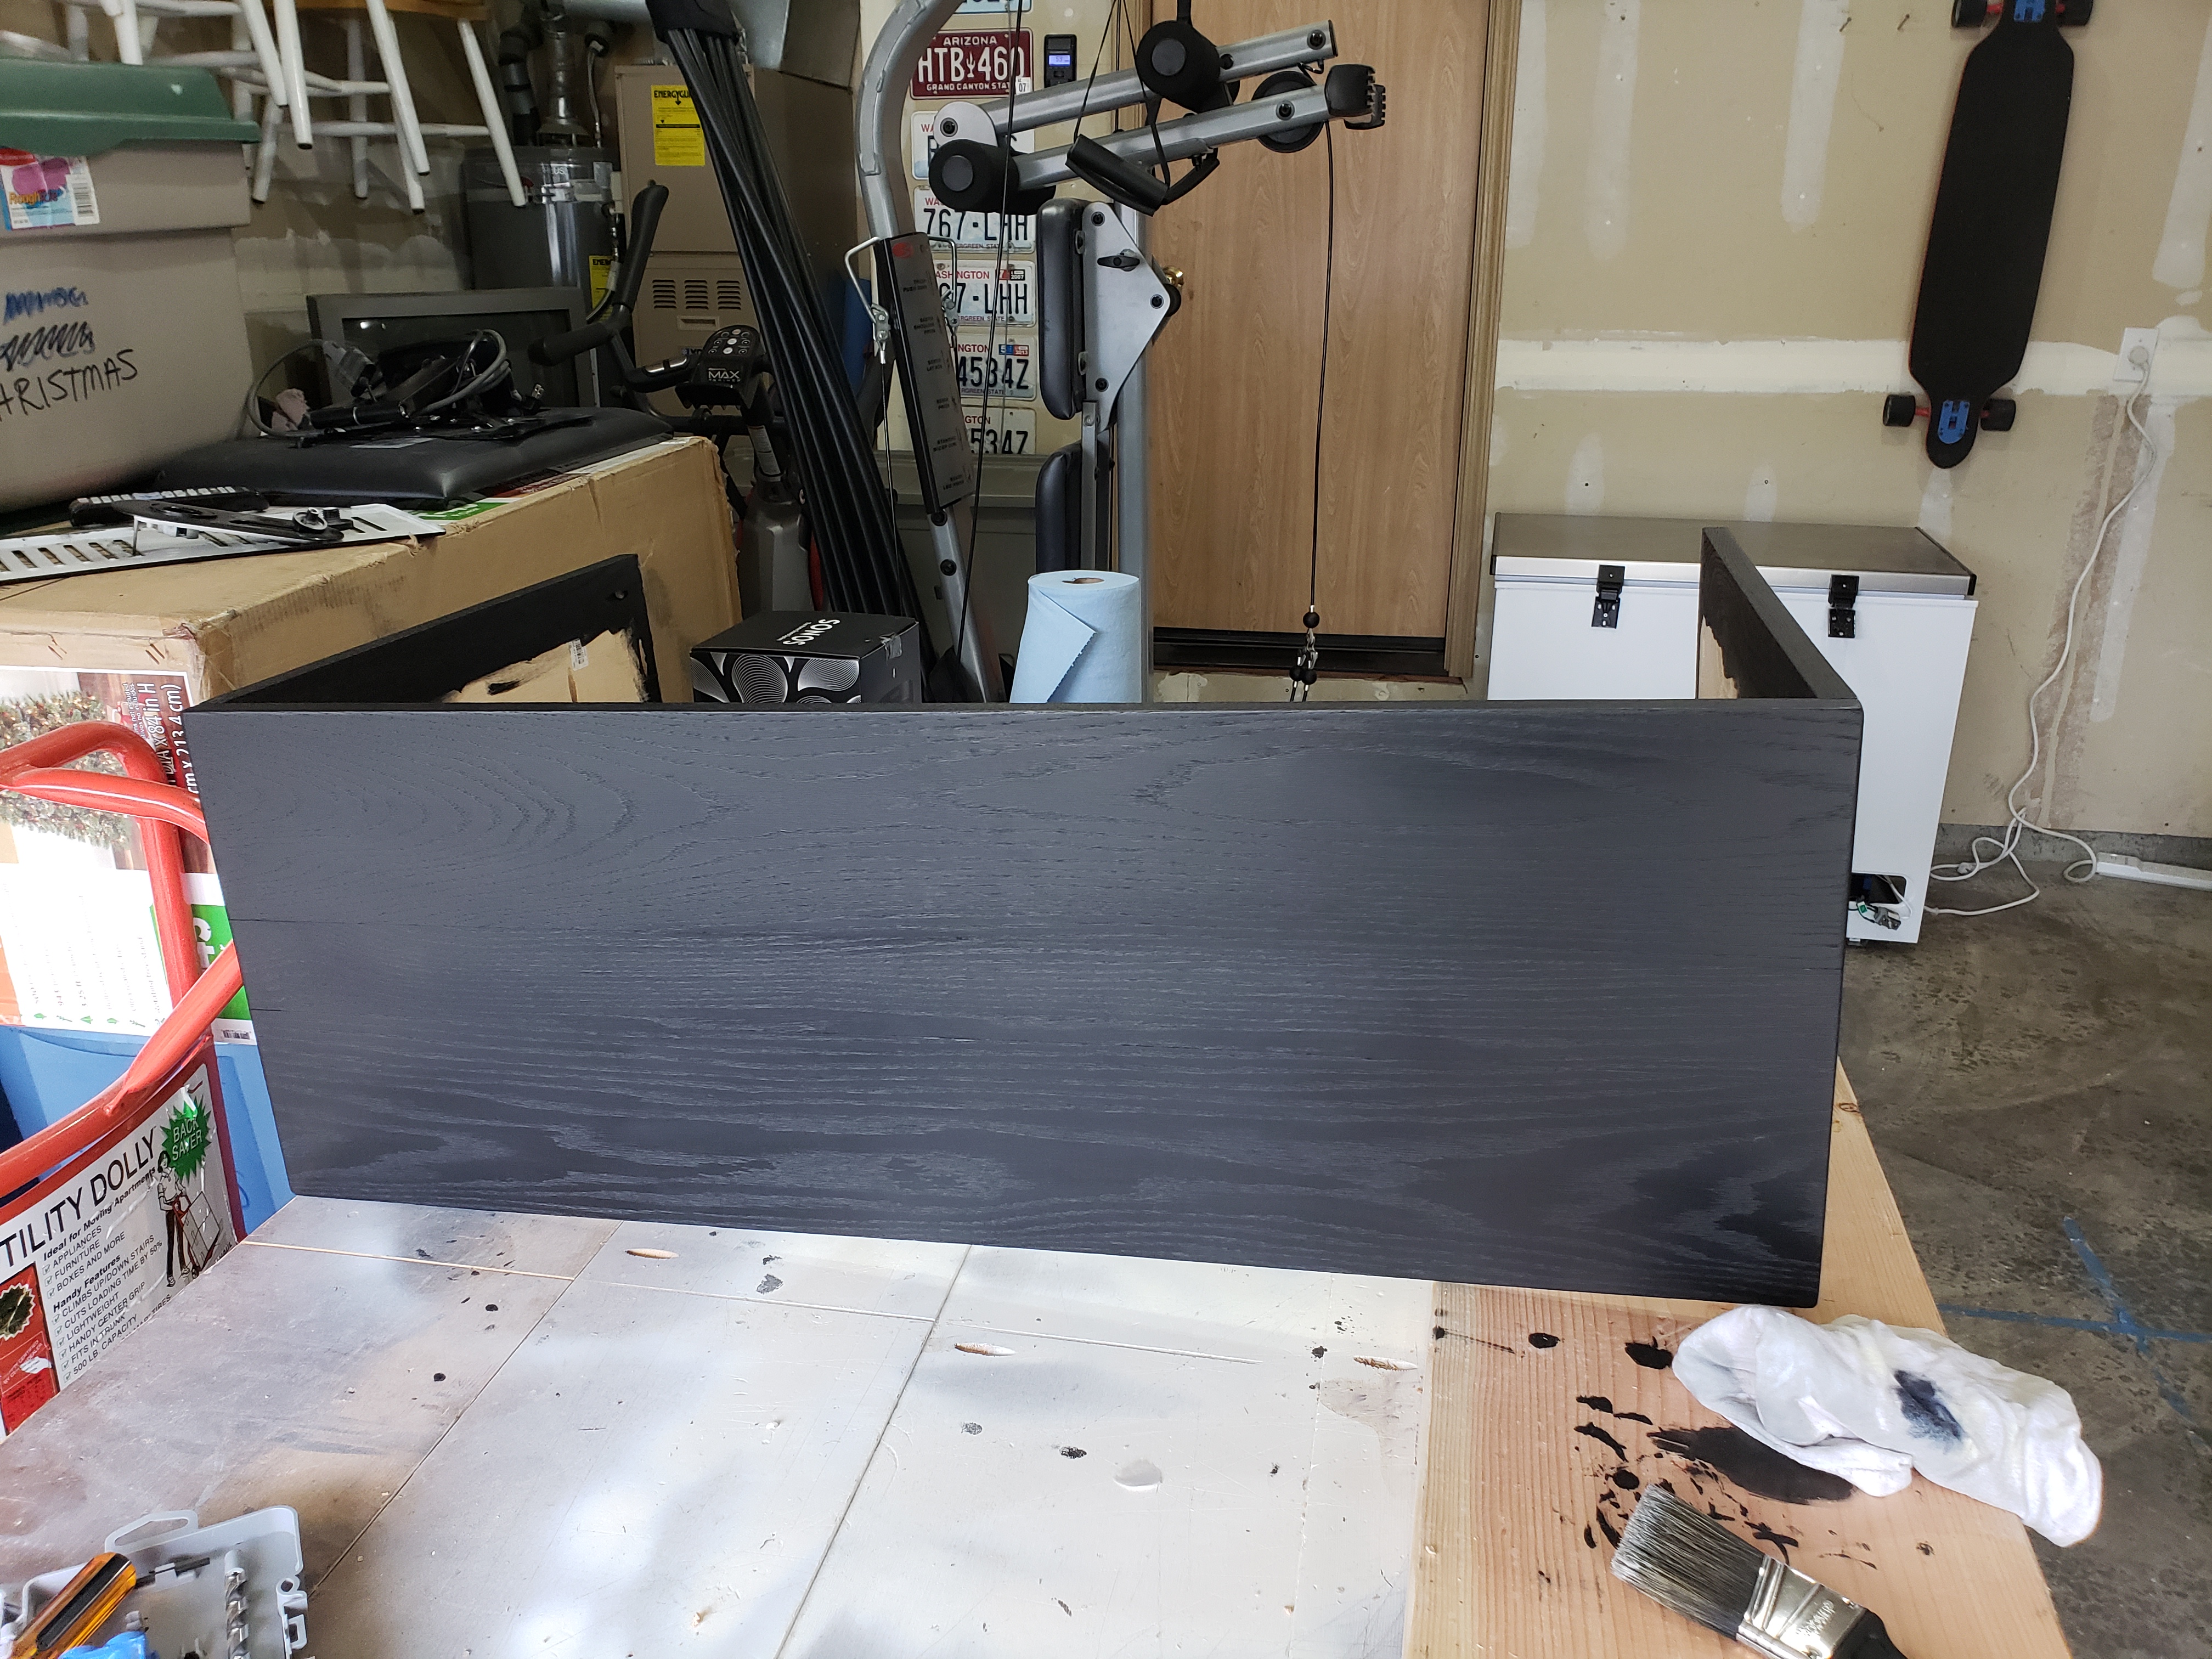
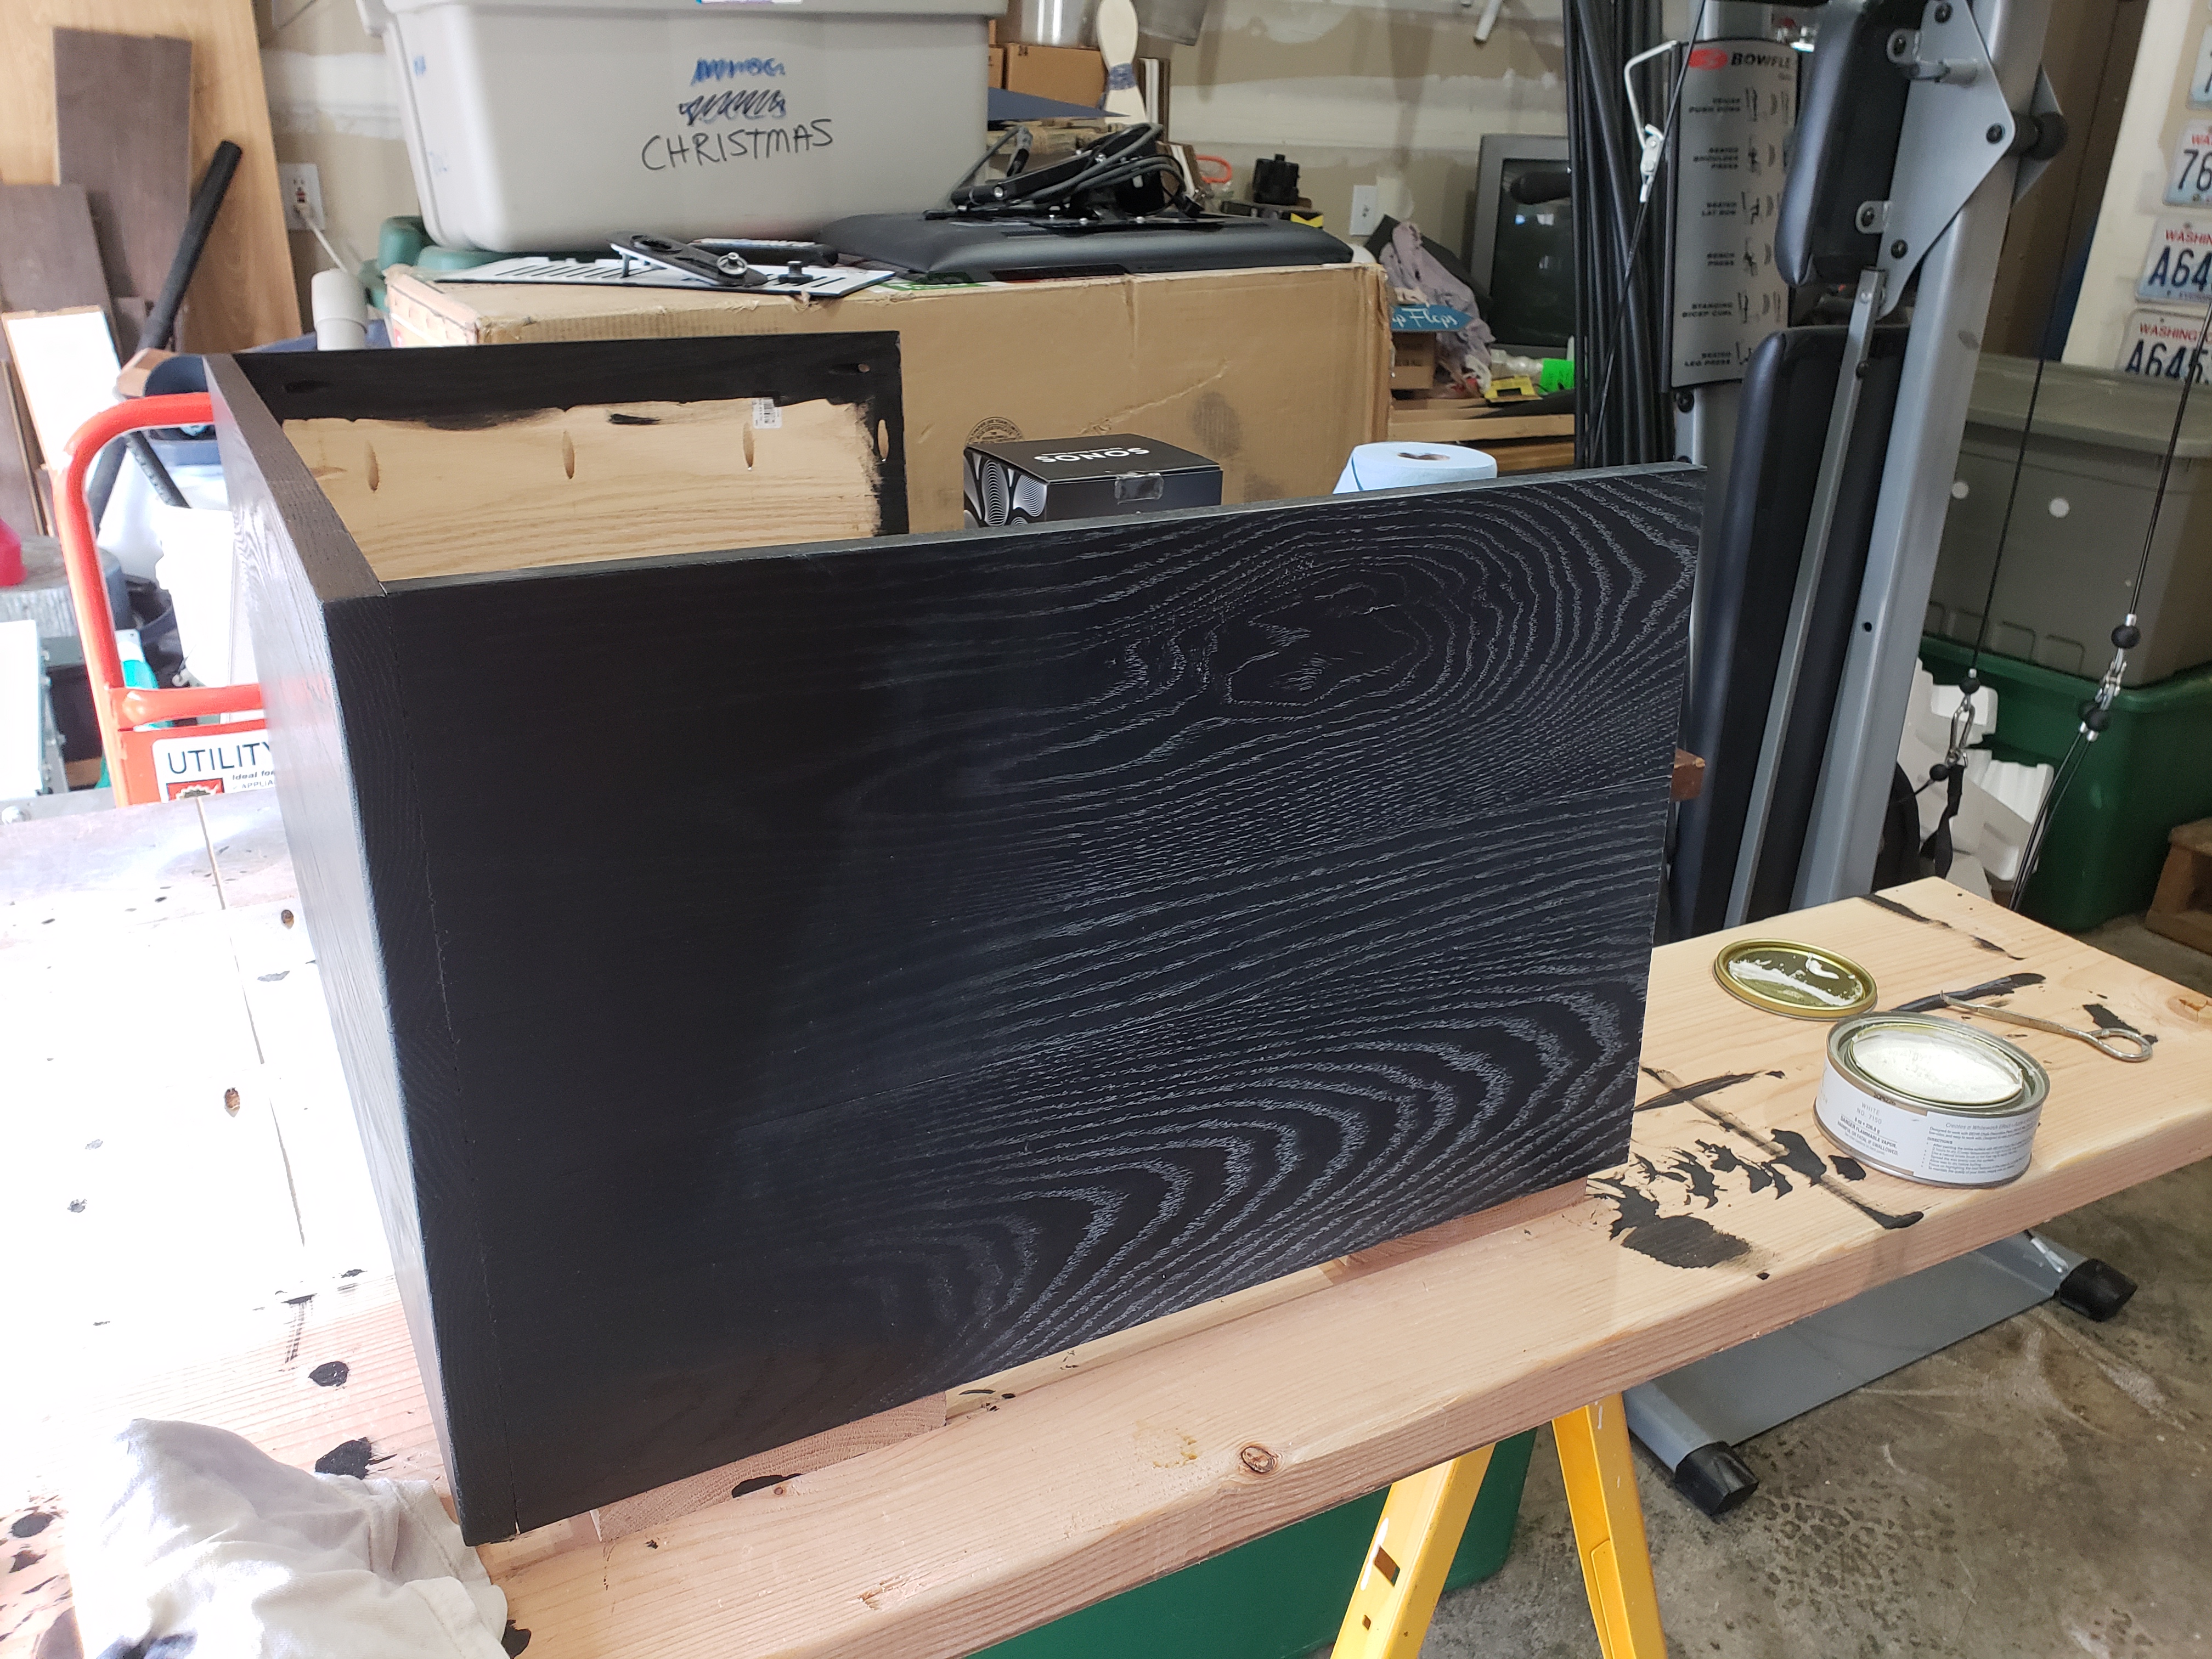
20181227_125401.jpg
20181227_125409.jpg
20181227_131718.jpg


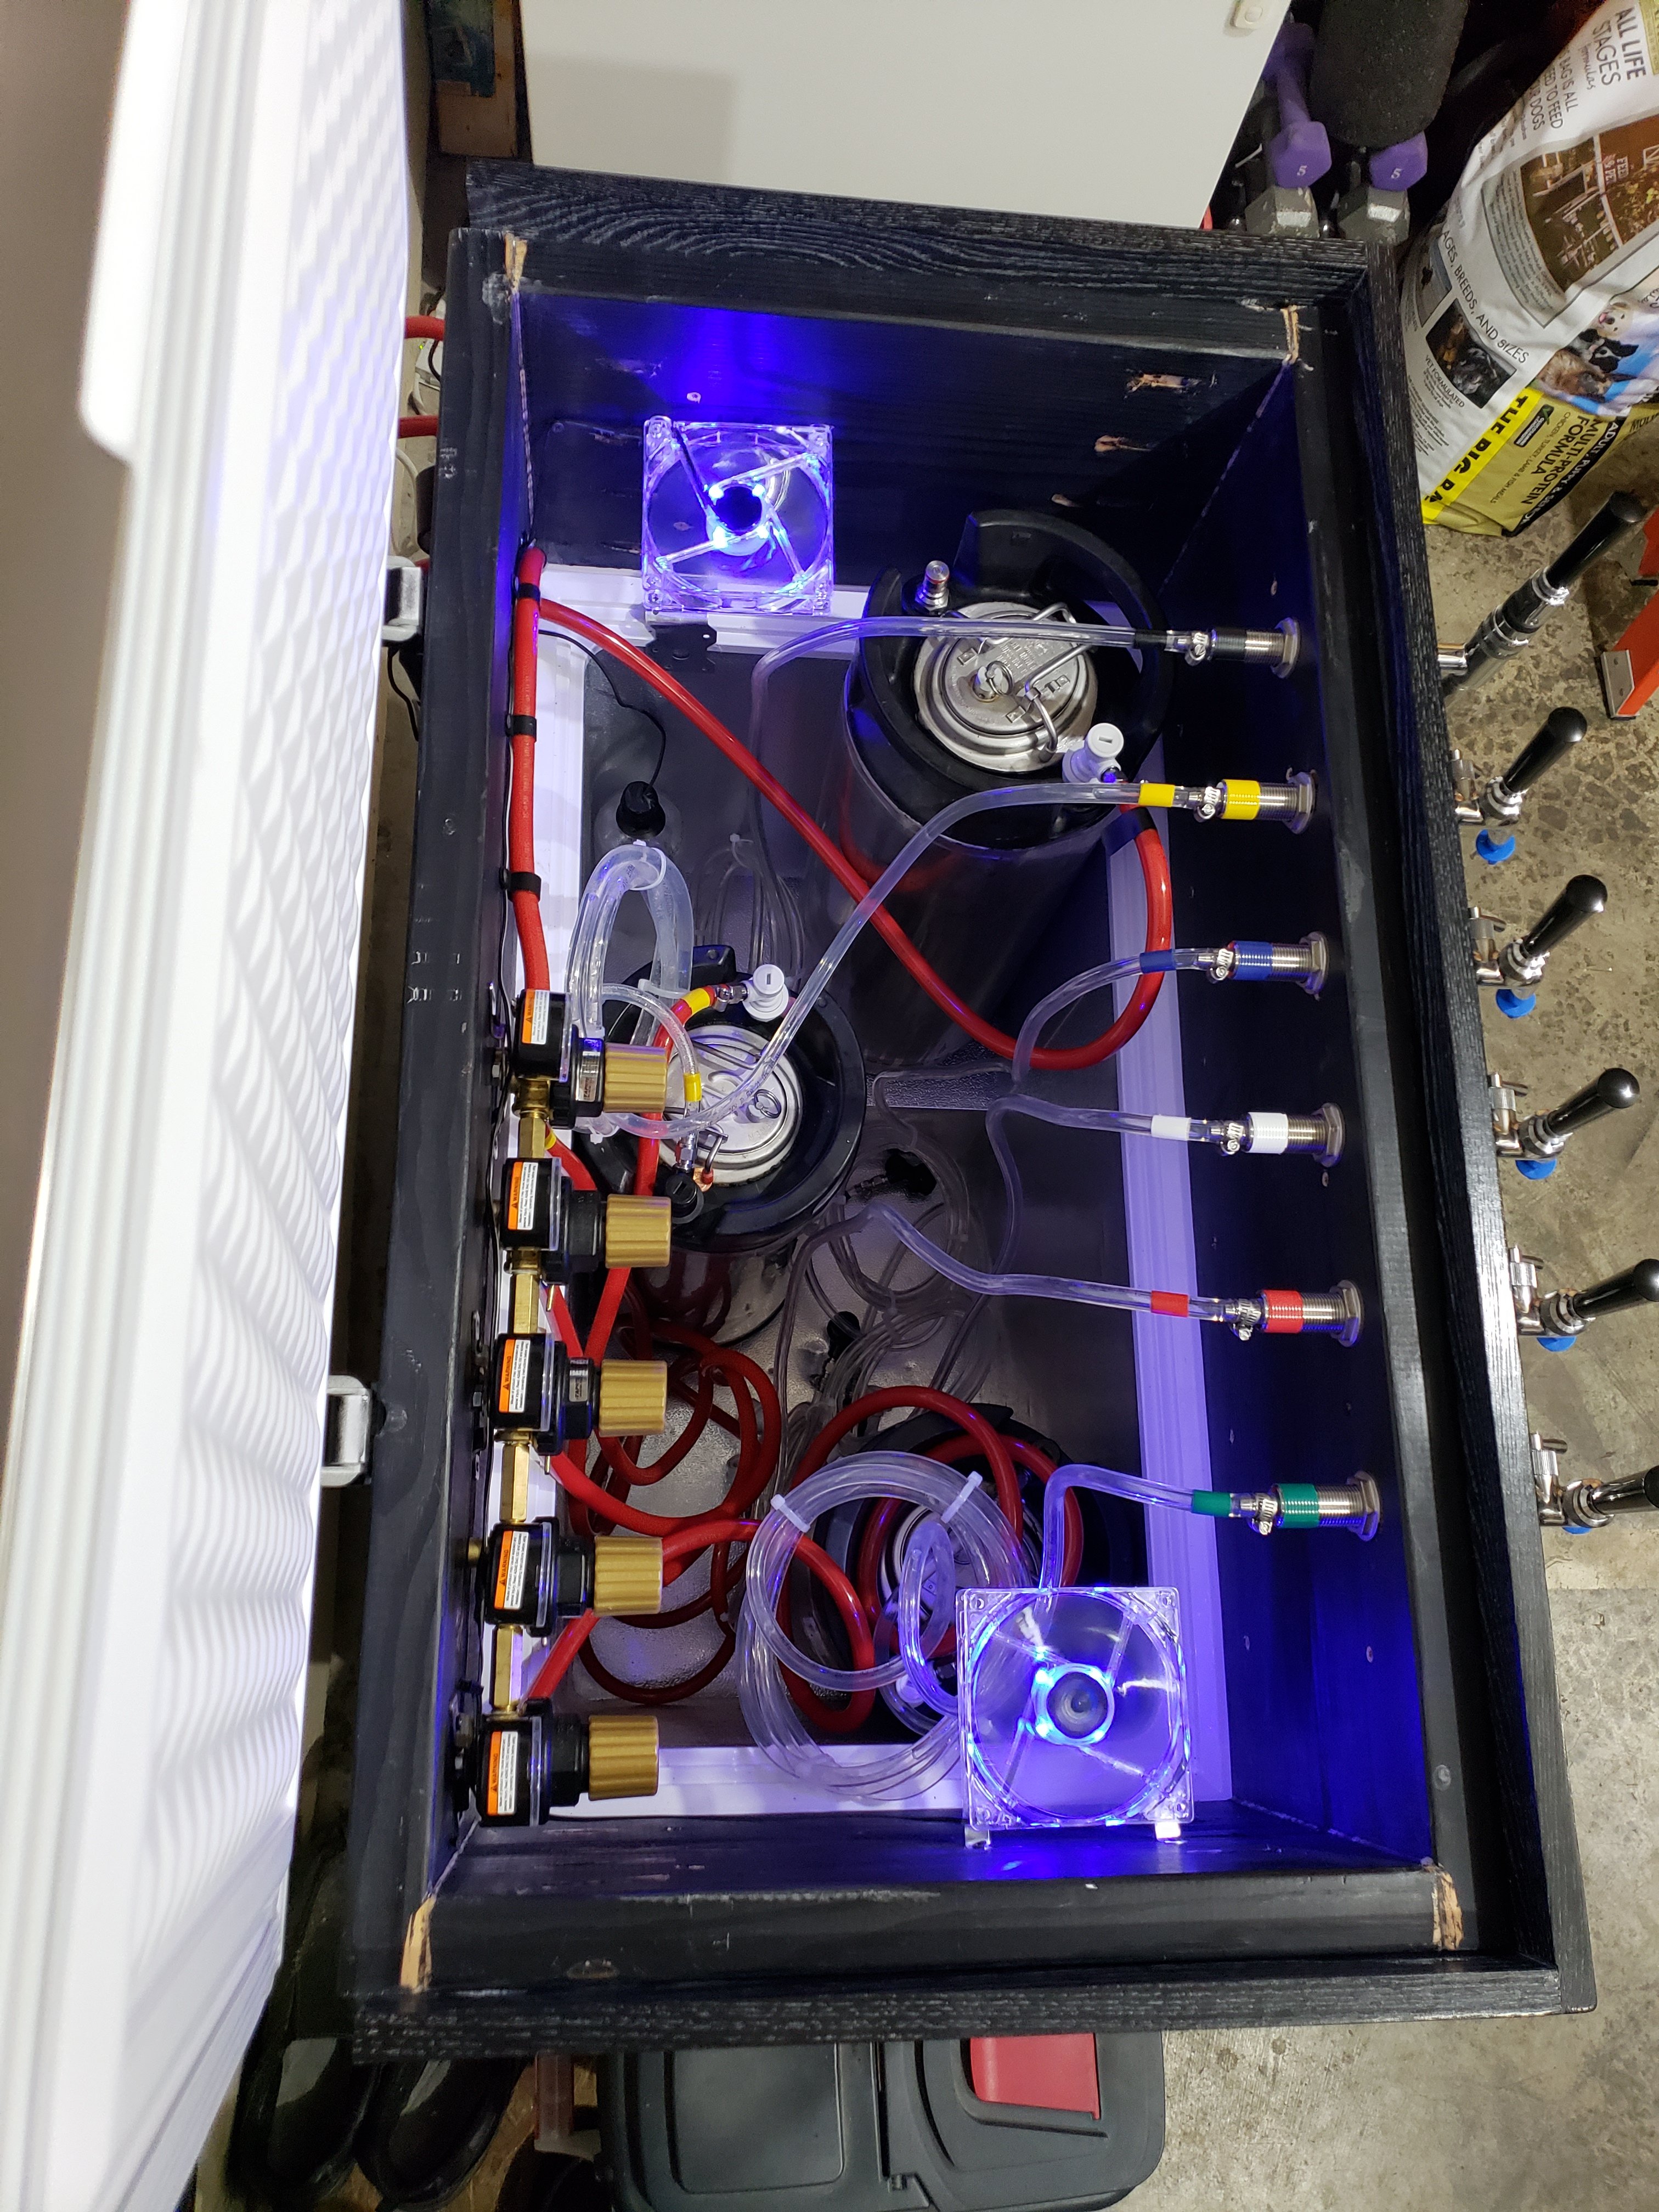
Checking the collar for fit. I also have the lid hinging and the bottom of the collar hinging as well. This allows me to lift the lid as normal and, if needed, i can lift the entire collar, which will allow me to easily add and remove kegs without having to worry about the regulators, fans or hoses.
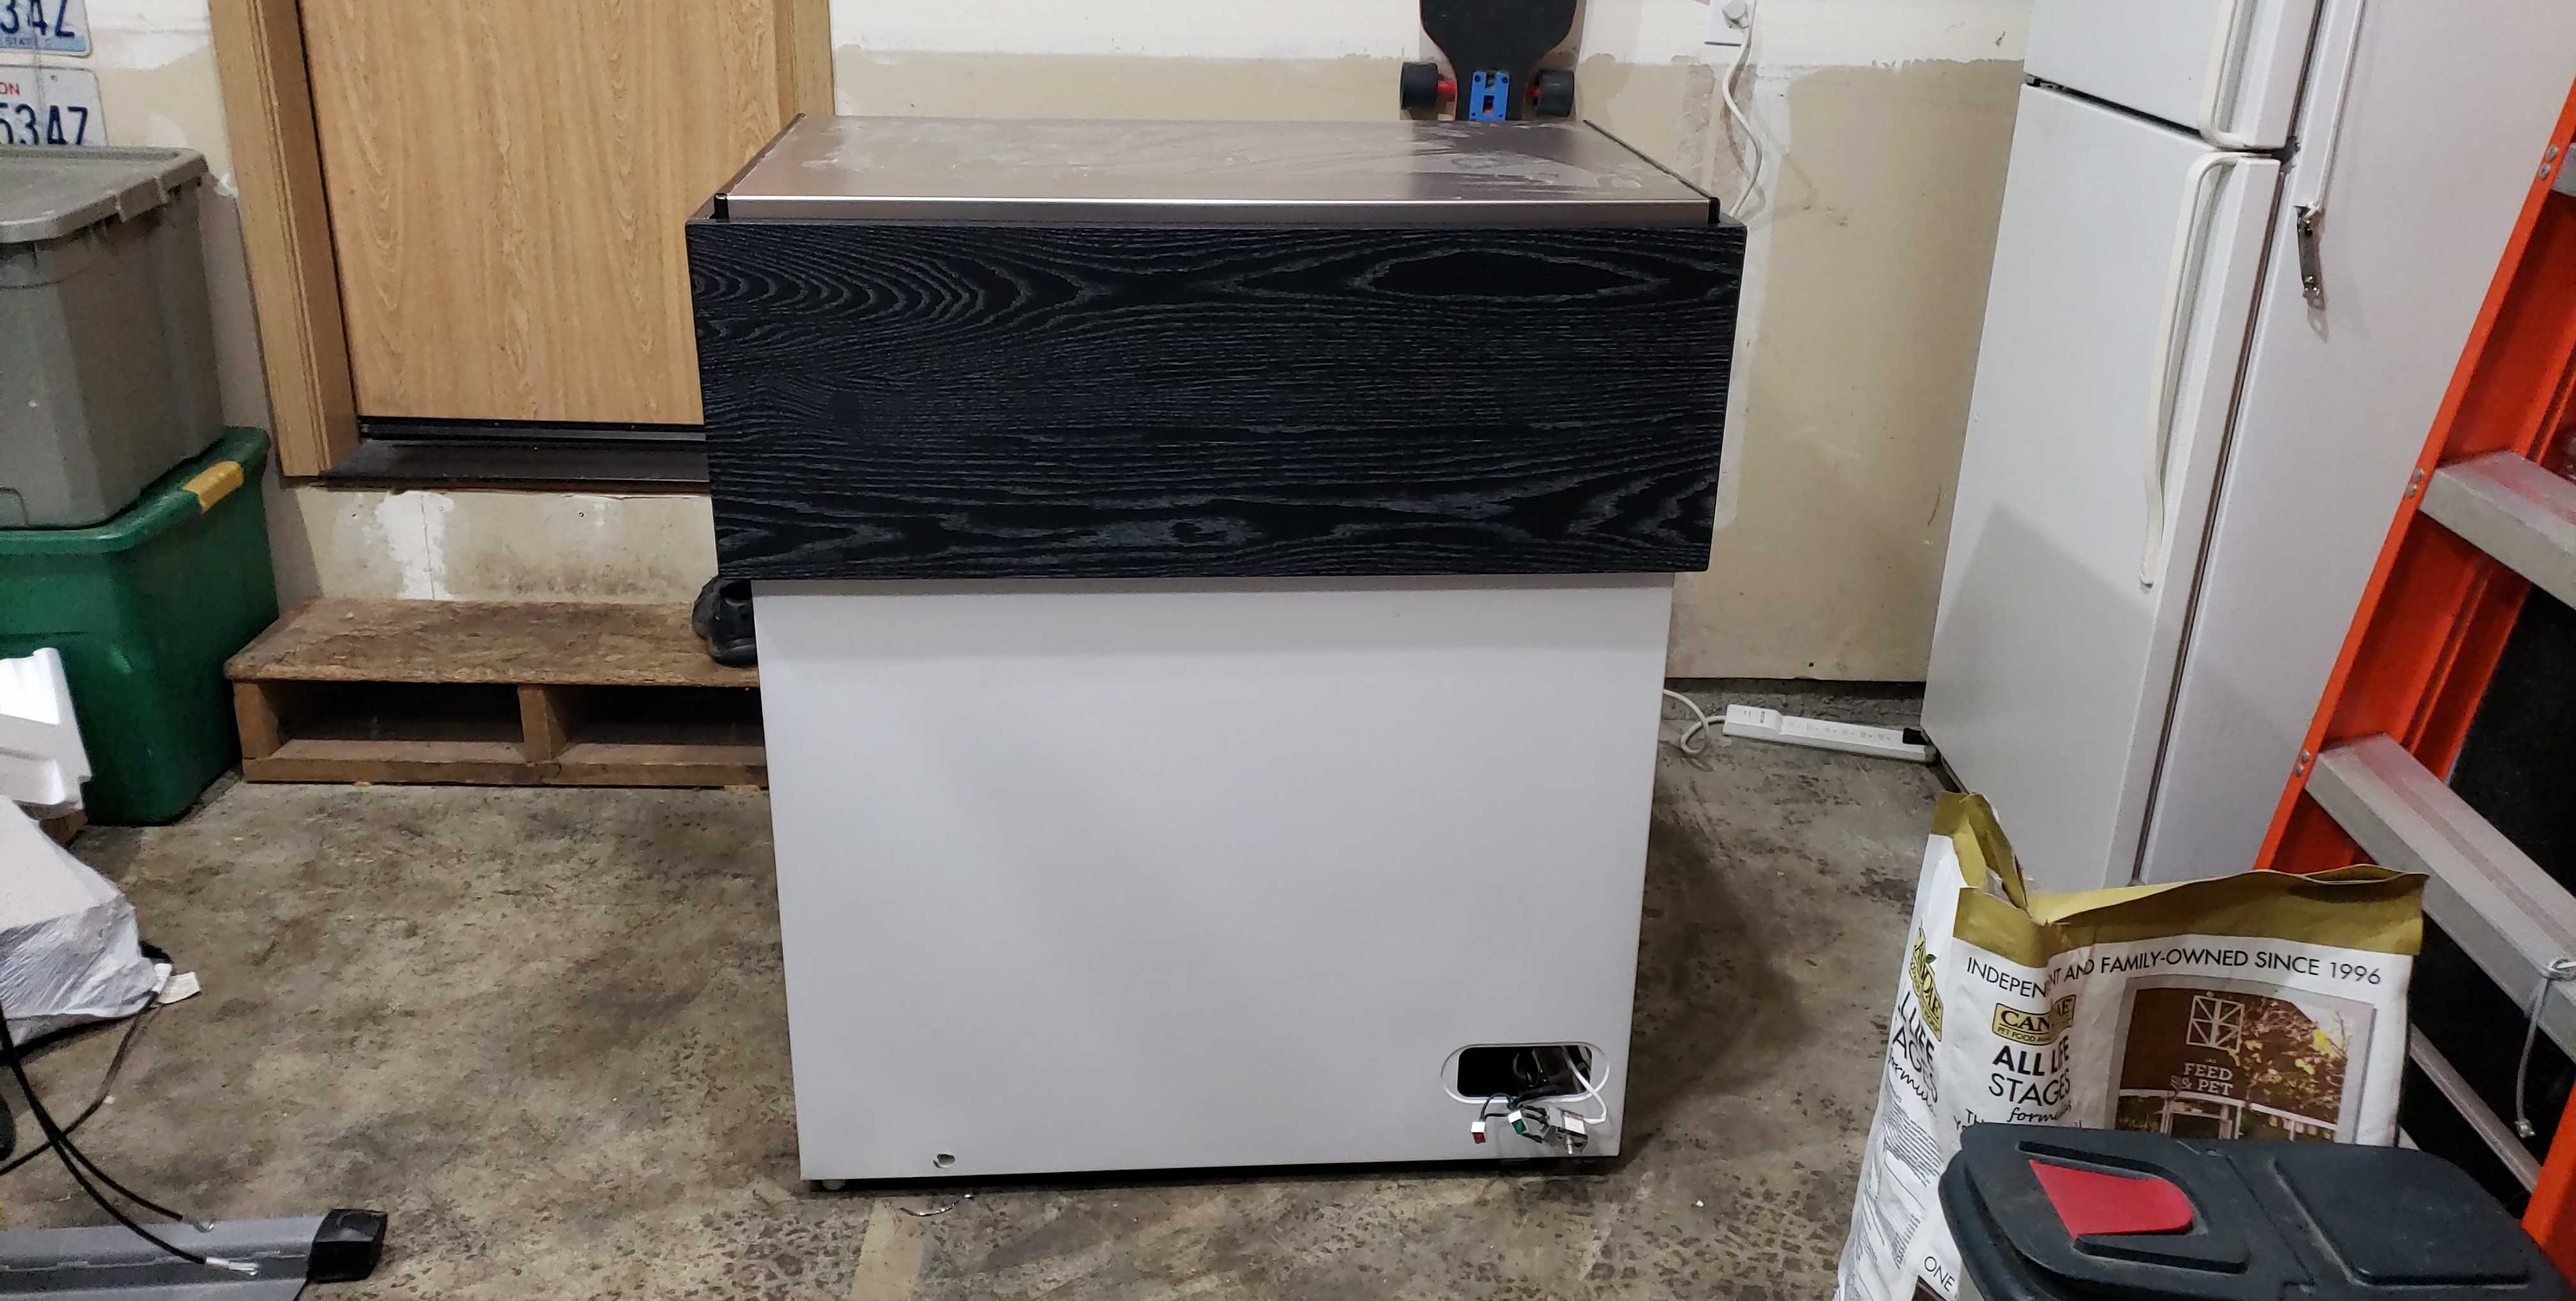
20181228_123555.jpg


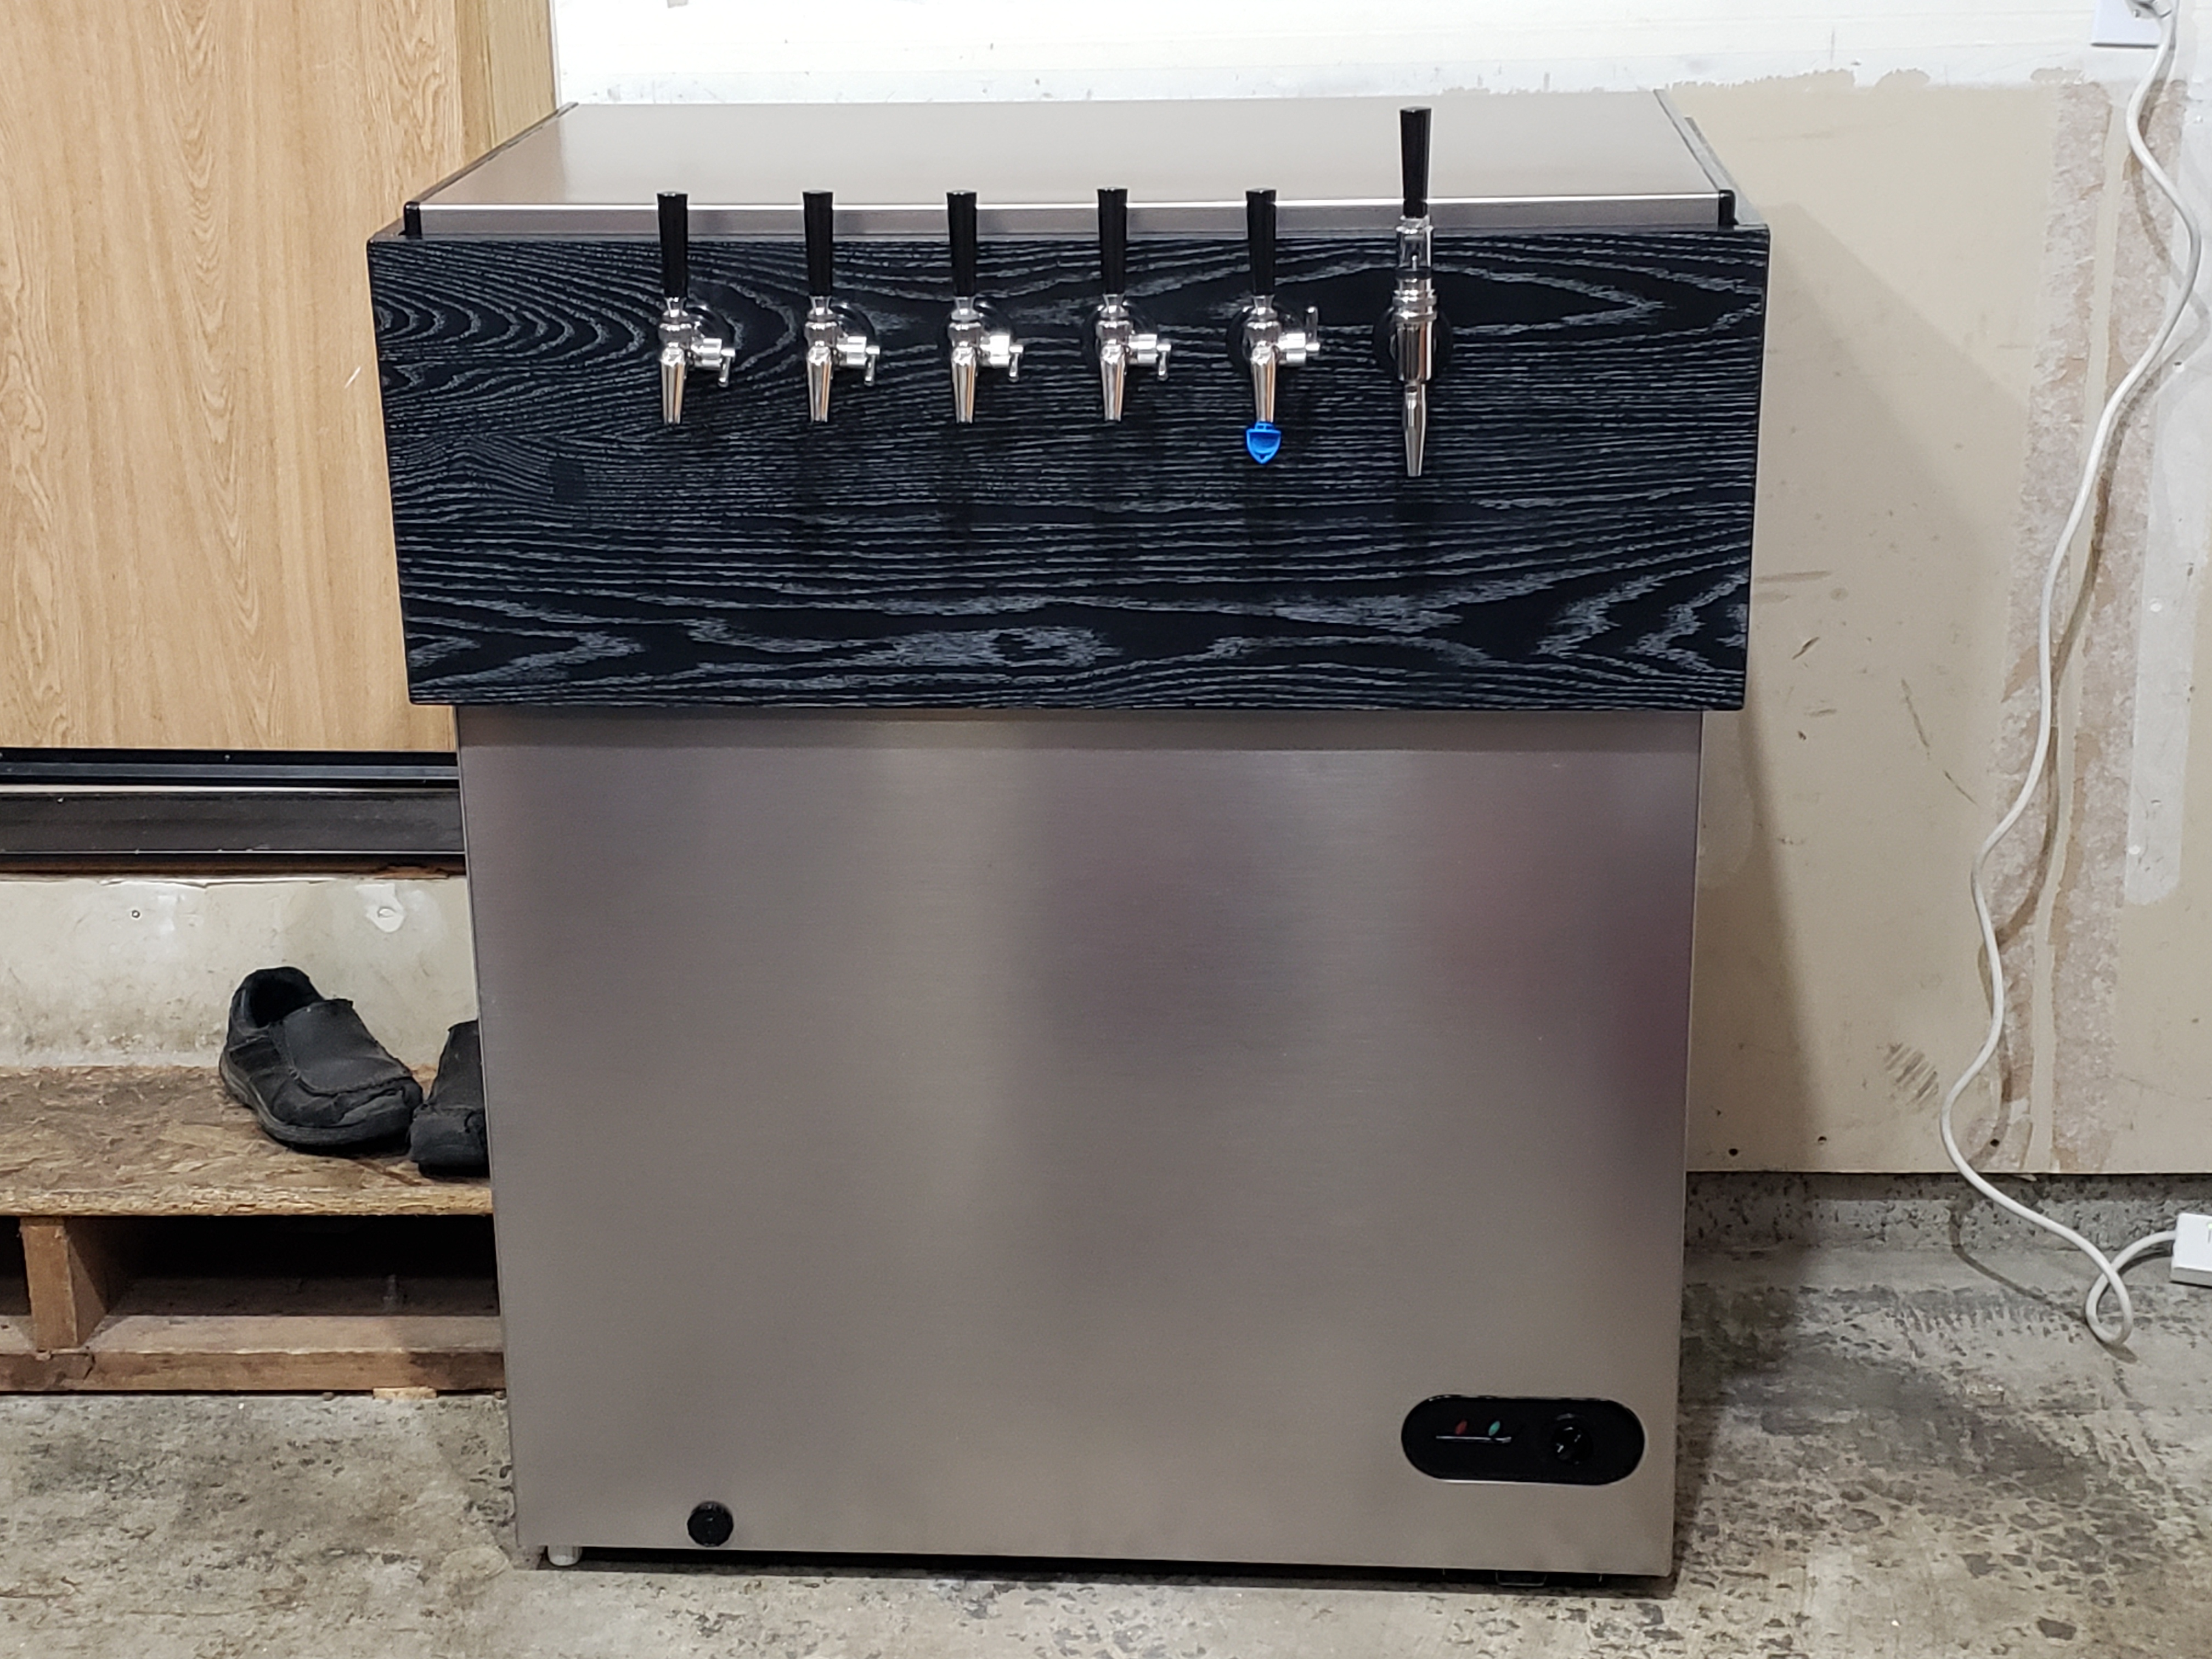
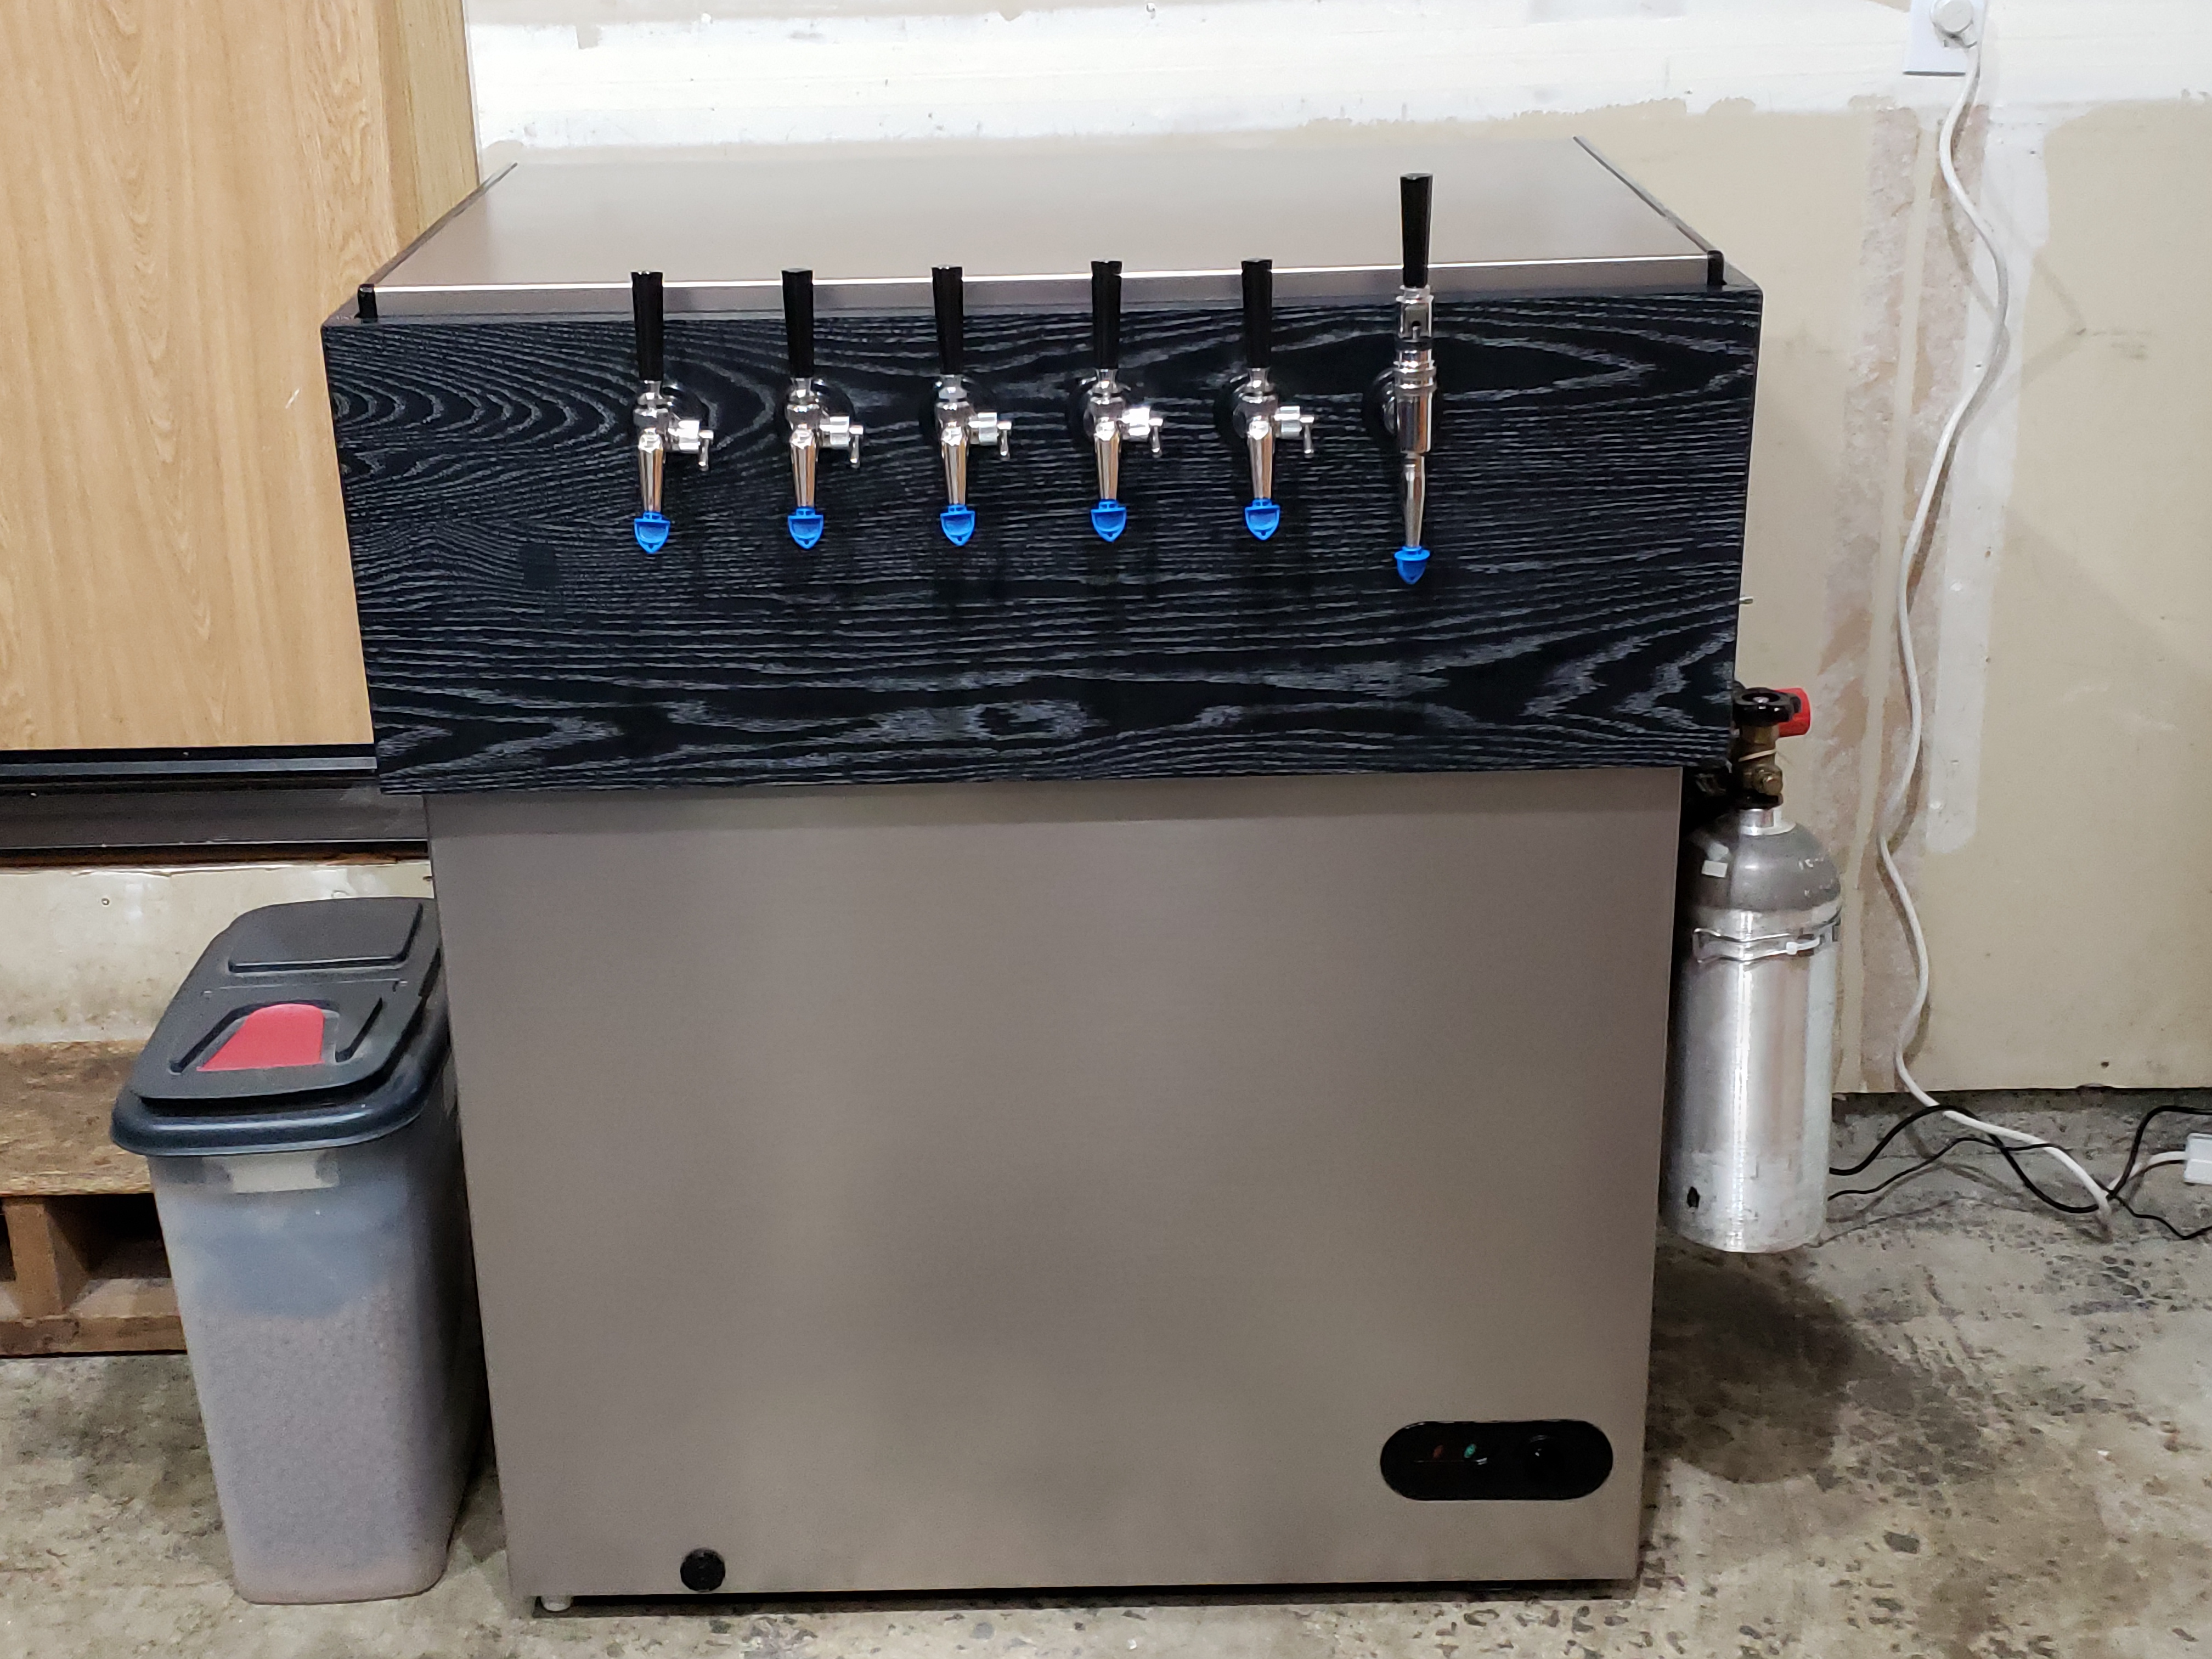
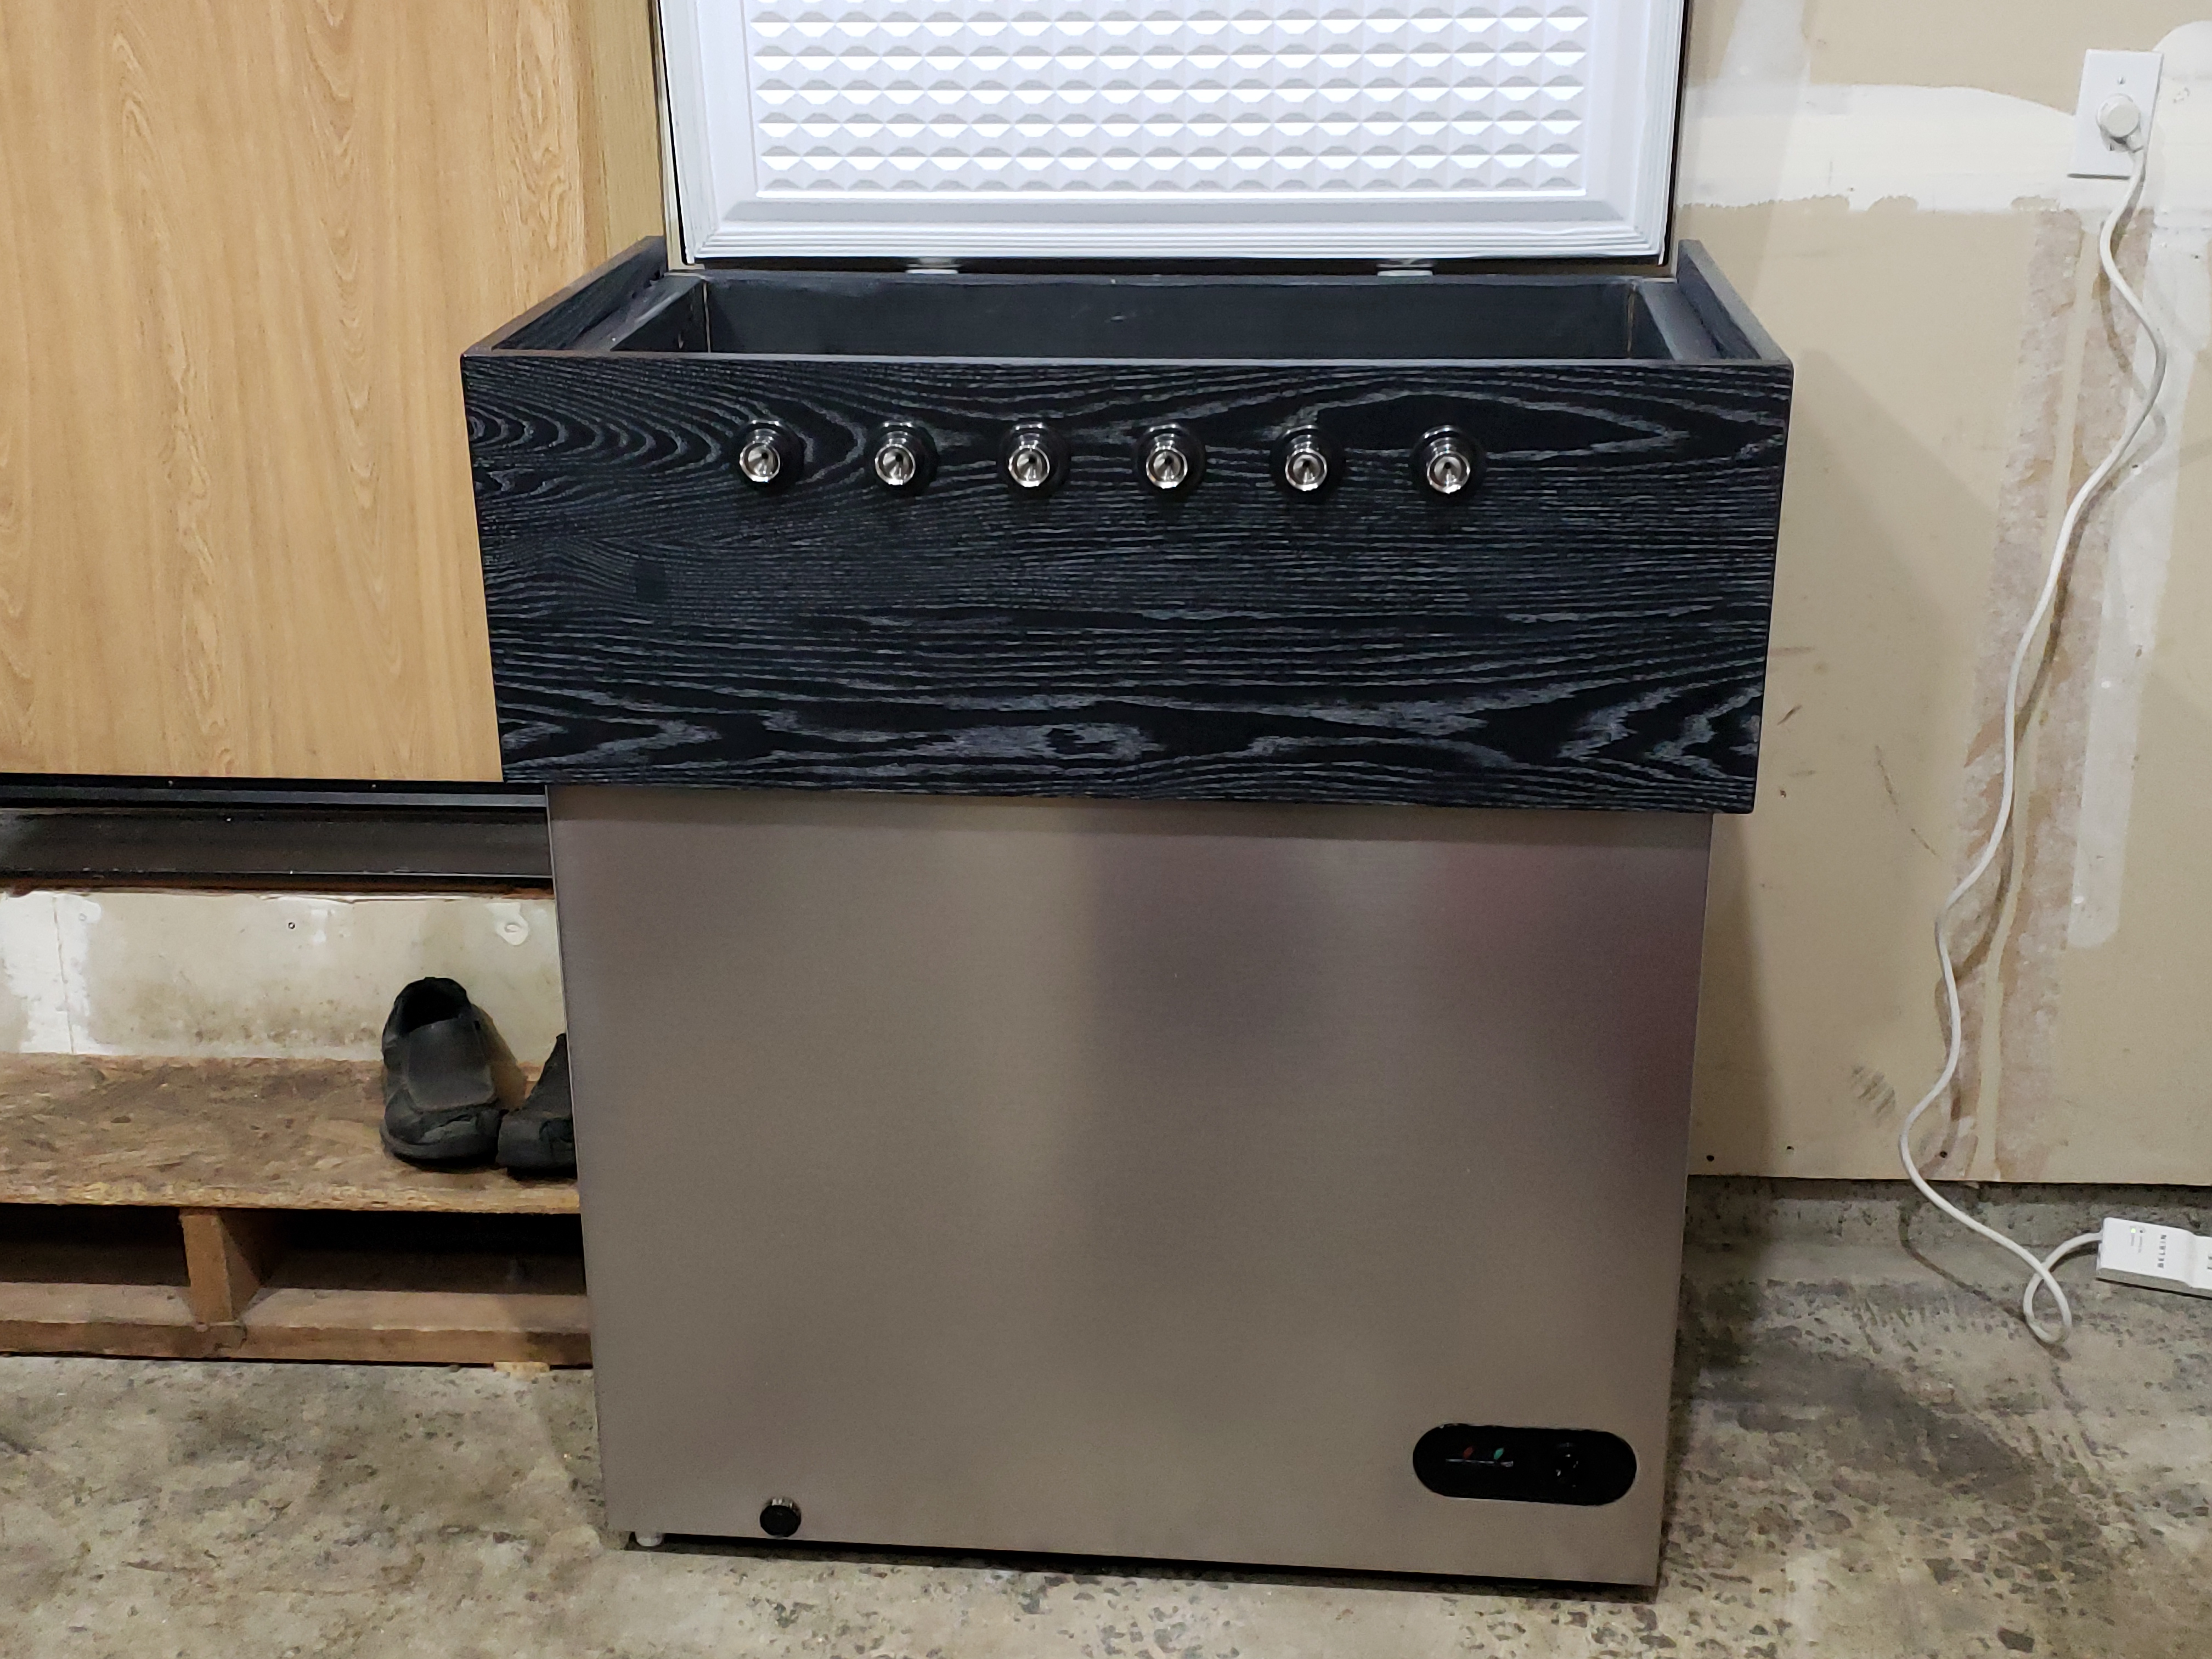
I wanted something that I had not seen before. I wanted to do a stainless keezer with a black collar. I found some brushed stainless steel wrap on Amazon, which worked awesome. I can't tell the difference between the wrap and my actual stainless fridge.
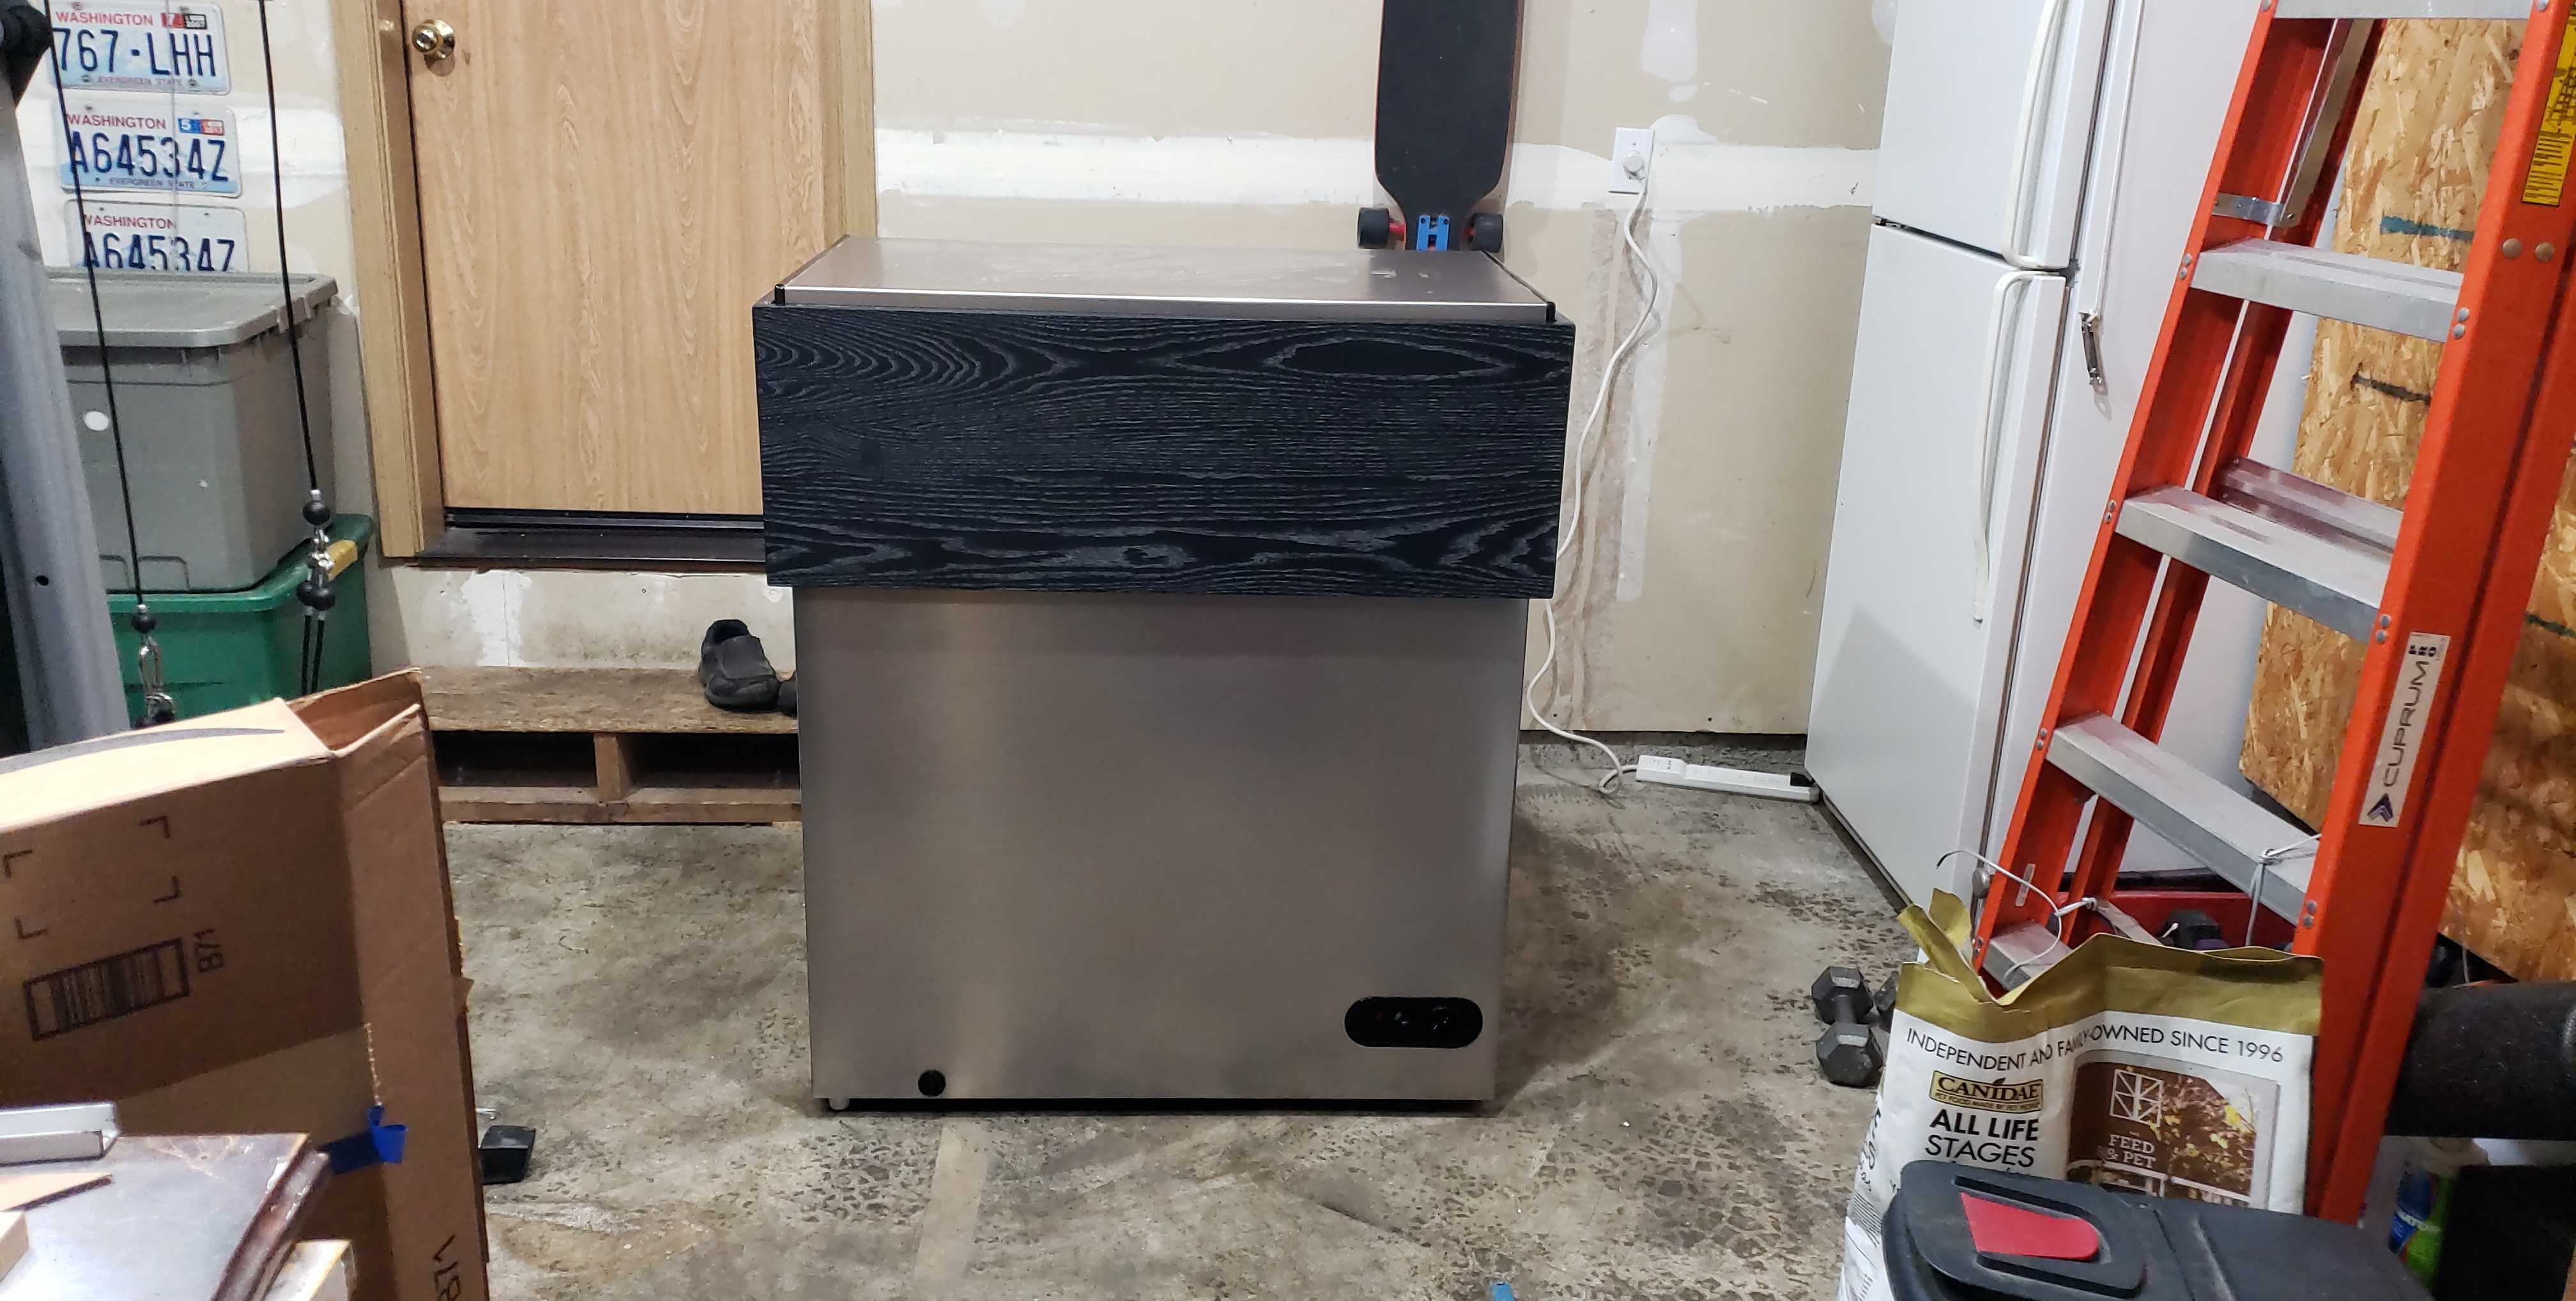
20181228_140746.jpg


Added the shanks and faucets (perlick 650ss w/ flow control and kegco stout faucet).
20181228_152114.jpg
20181228_155457.jpg


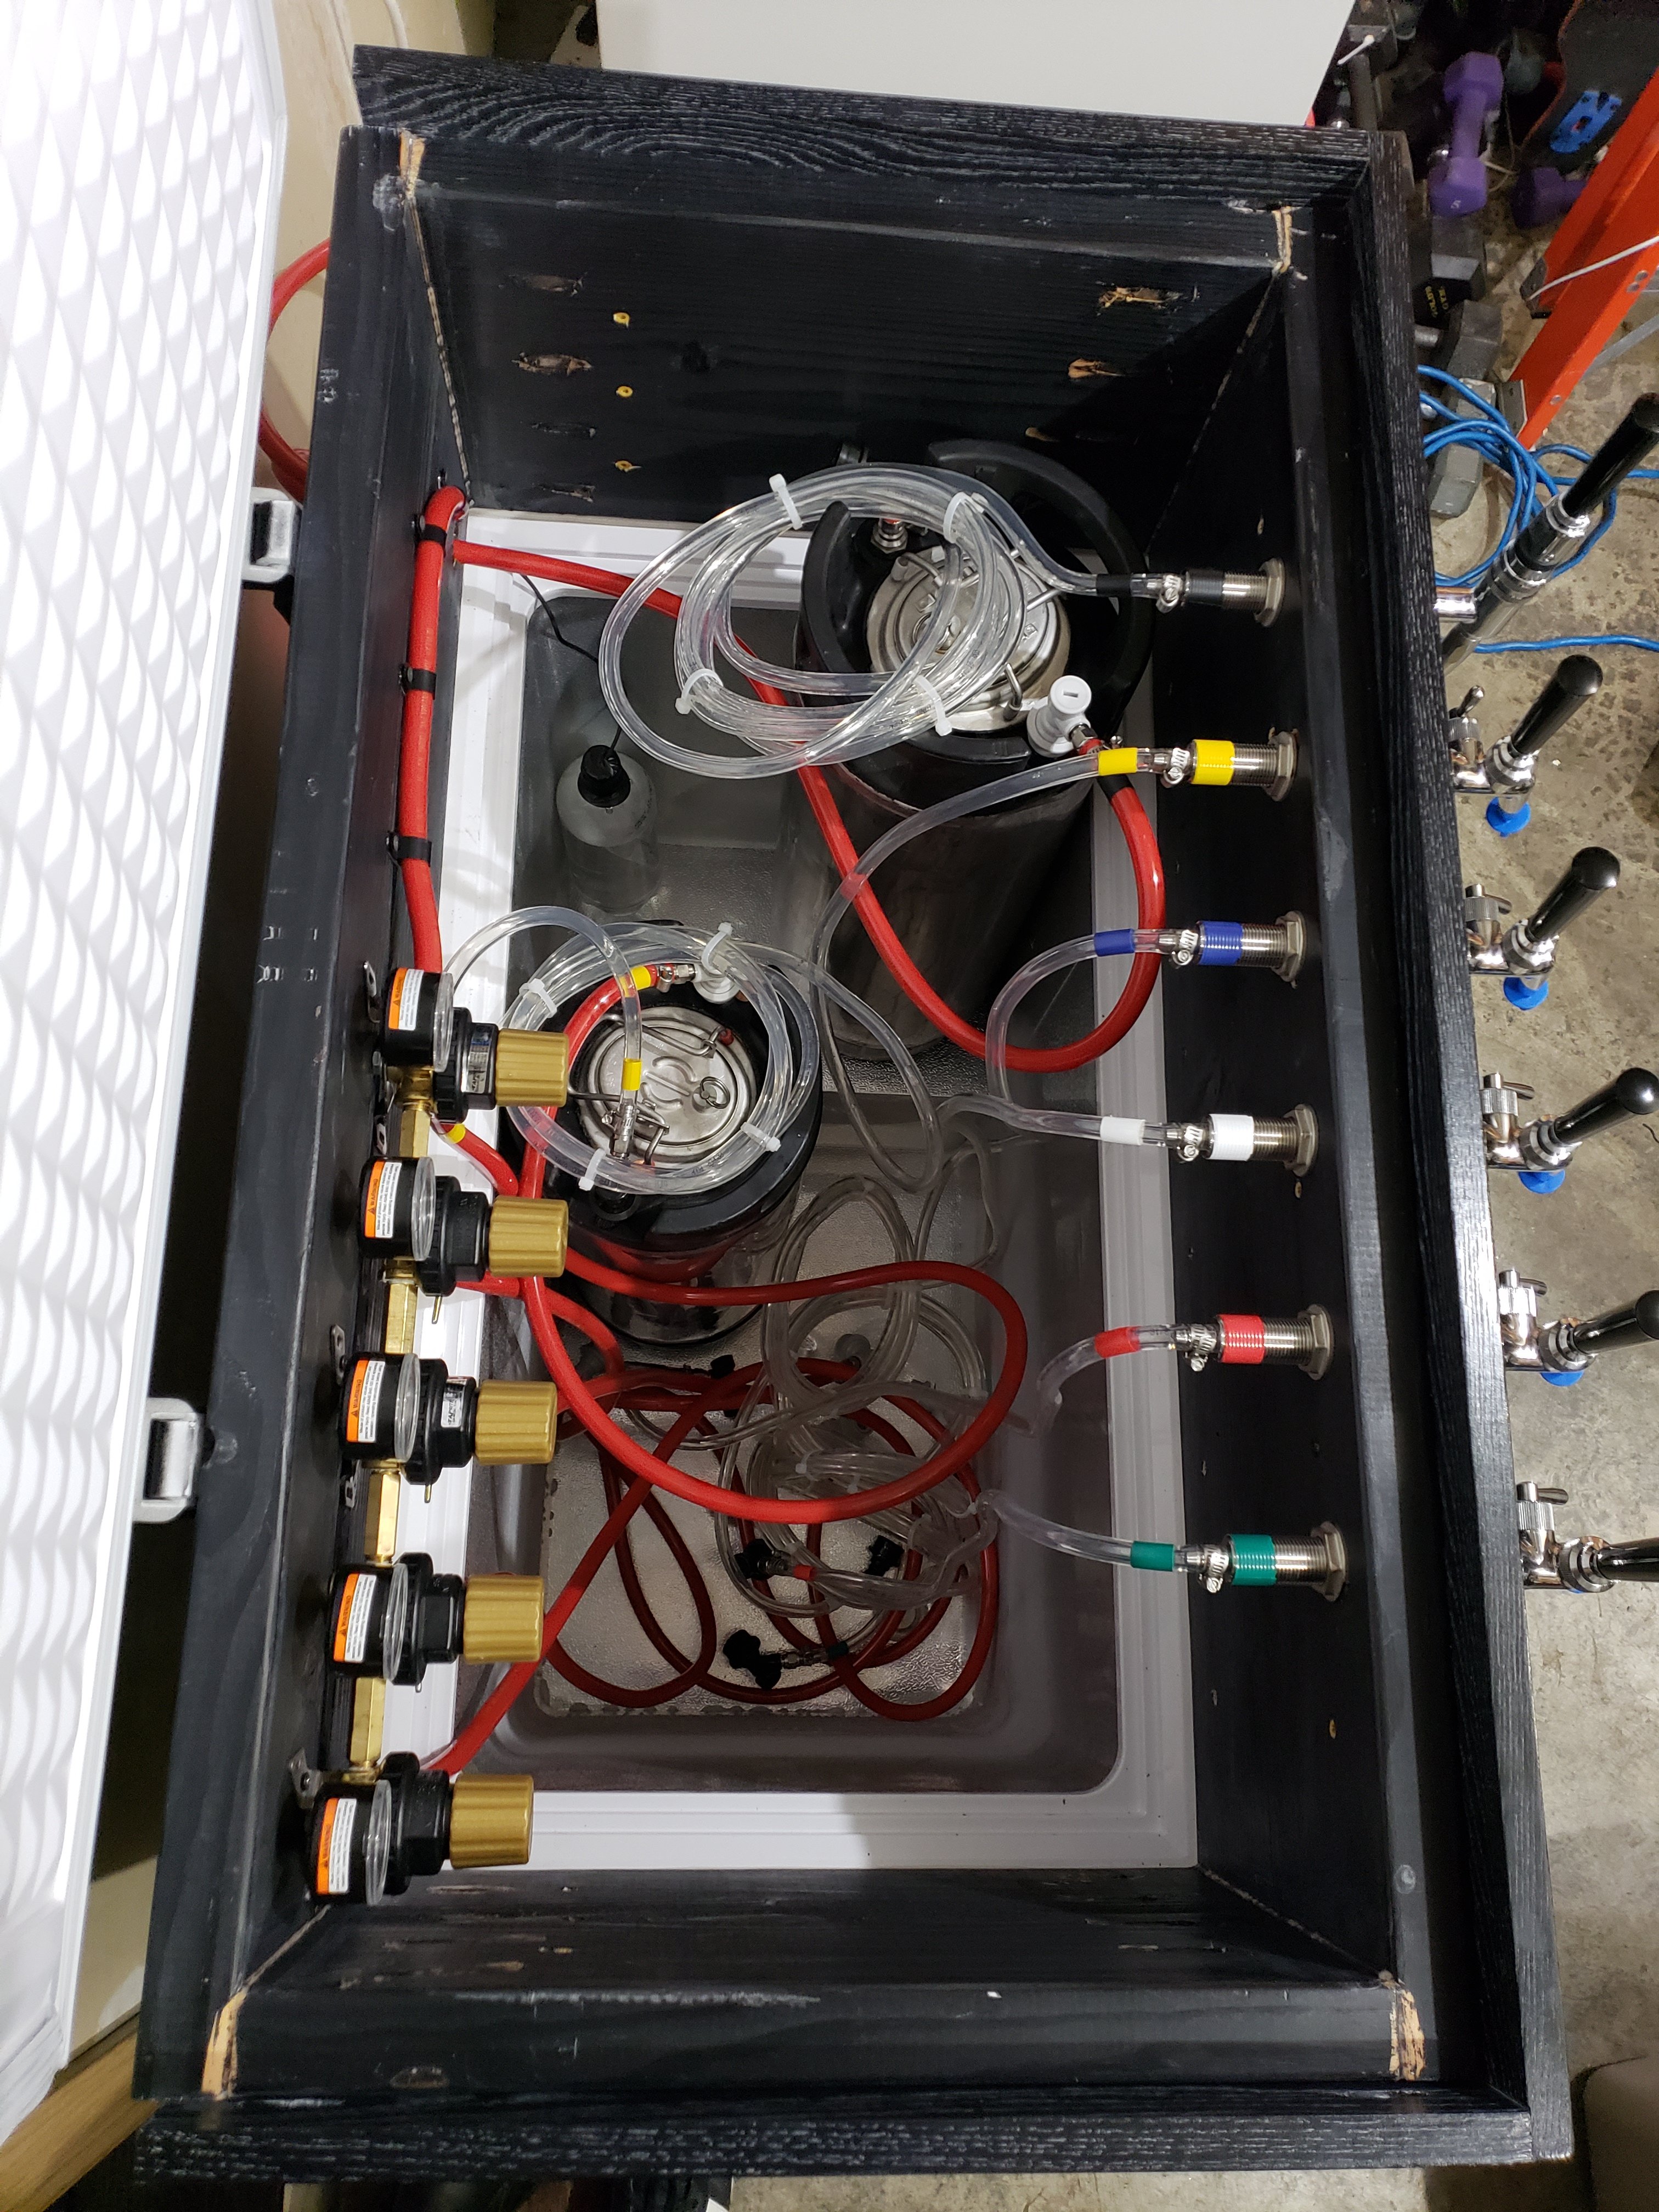
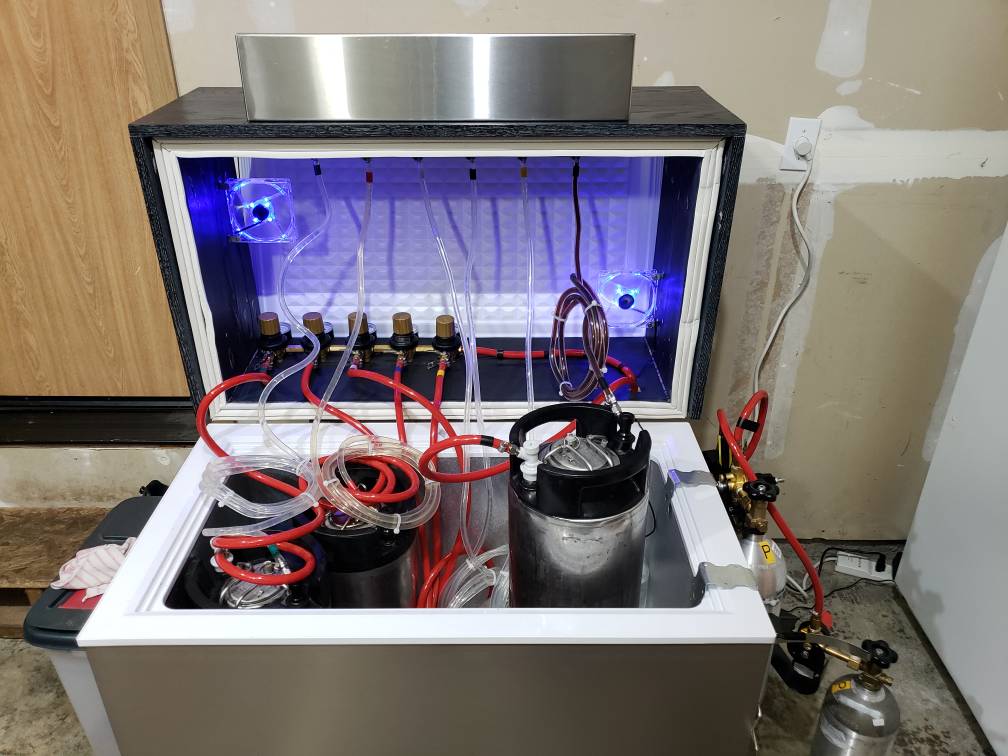
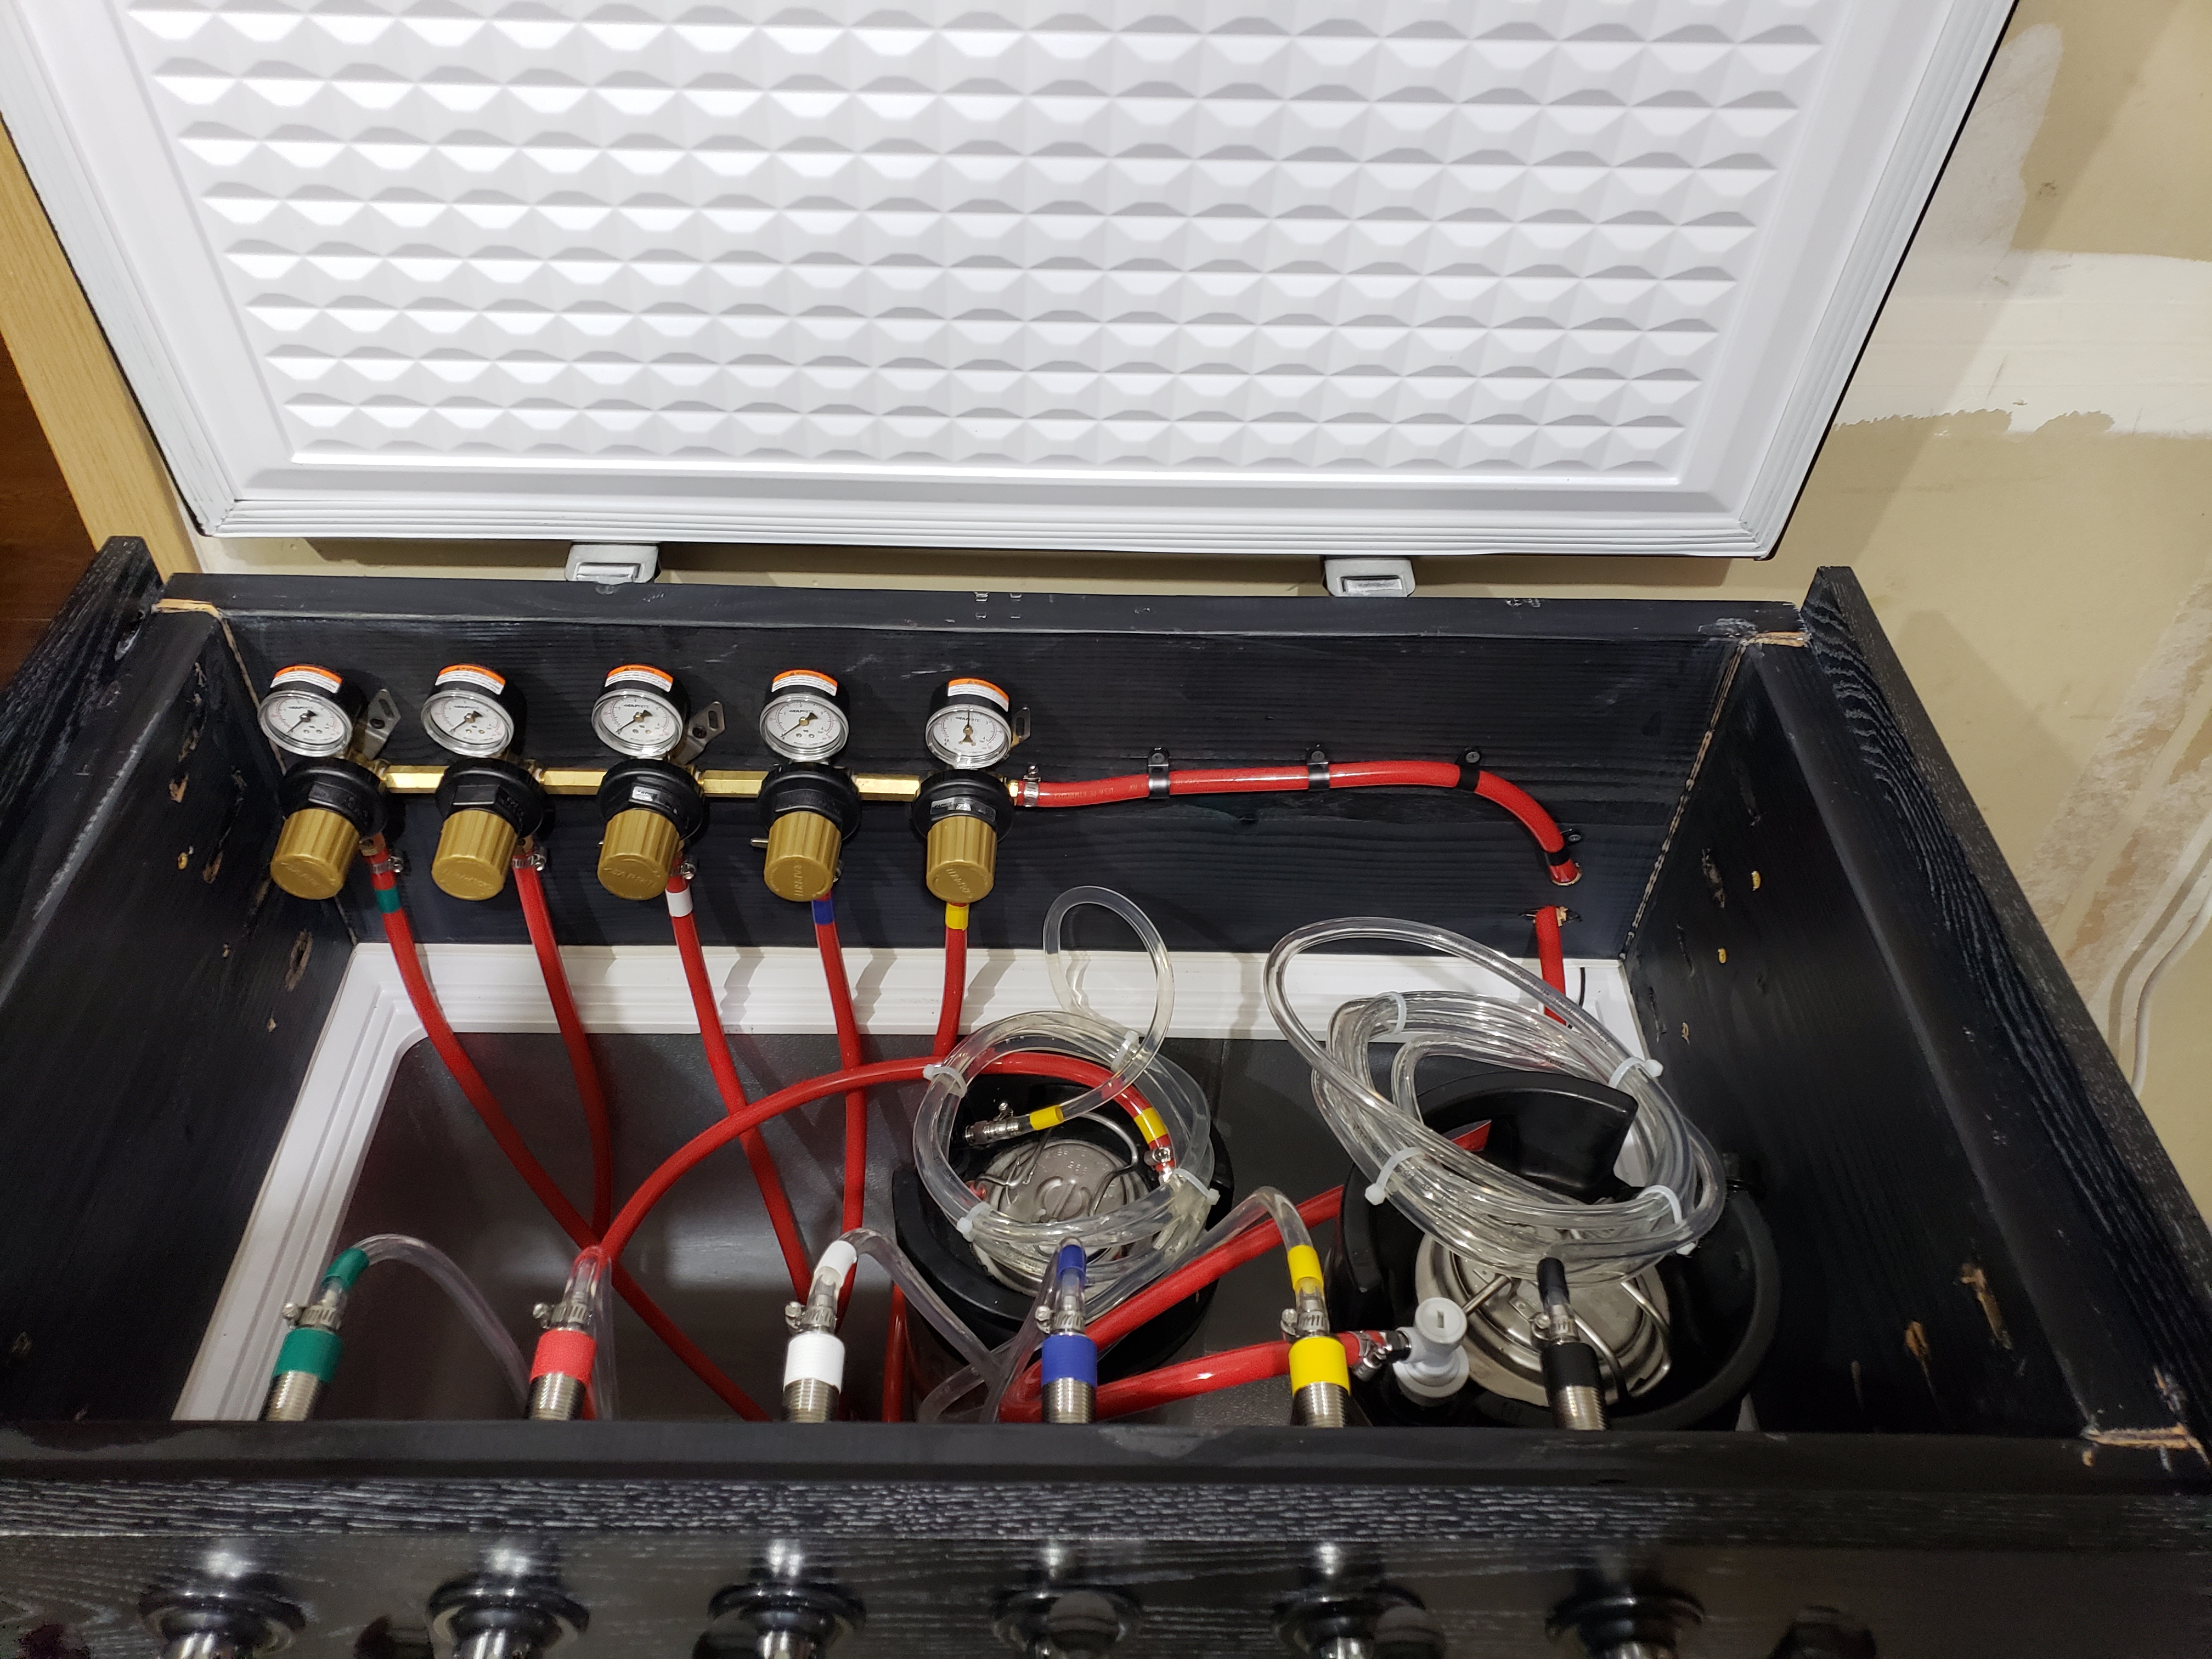
Here are a couple of shots of the inside. I installed a 5-way secondary regulator, because I want the ability to easily change the pressure for each line. I also color coded each line, so that I can easily tell which regulator goes to which line and then goes to which faucet. The nitro faucet is connected directly to the beer gas primary regulator.
20181230_221858.jpg
 
20181230_221918.jpg


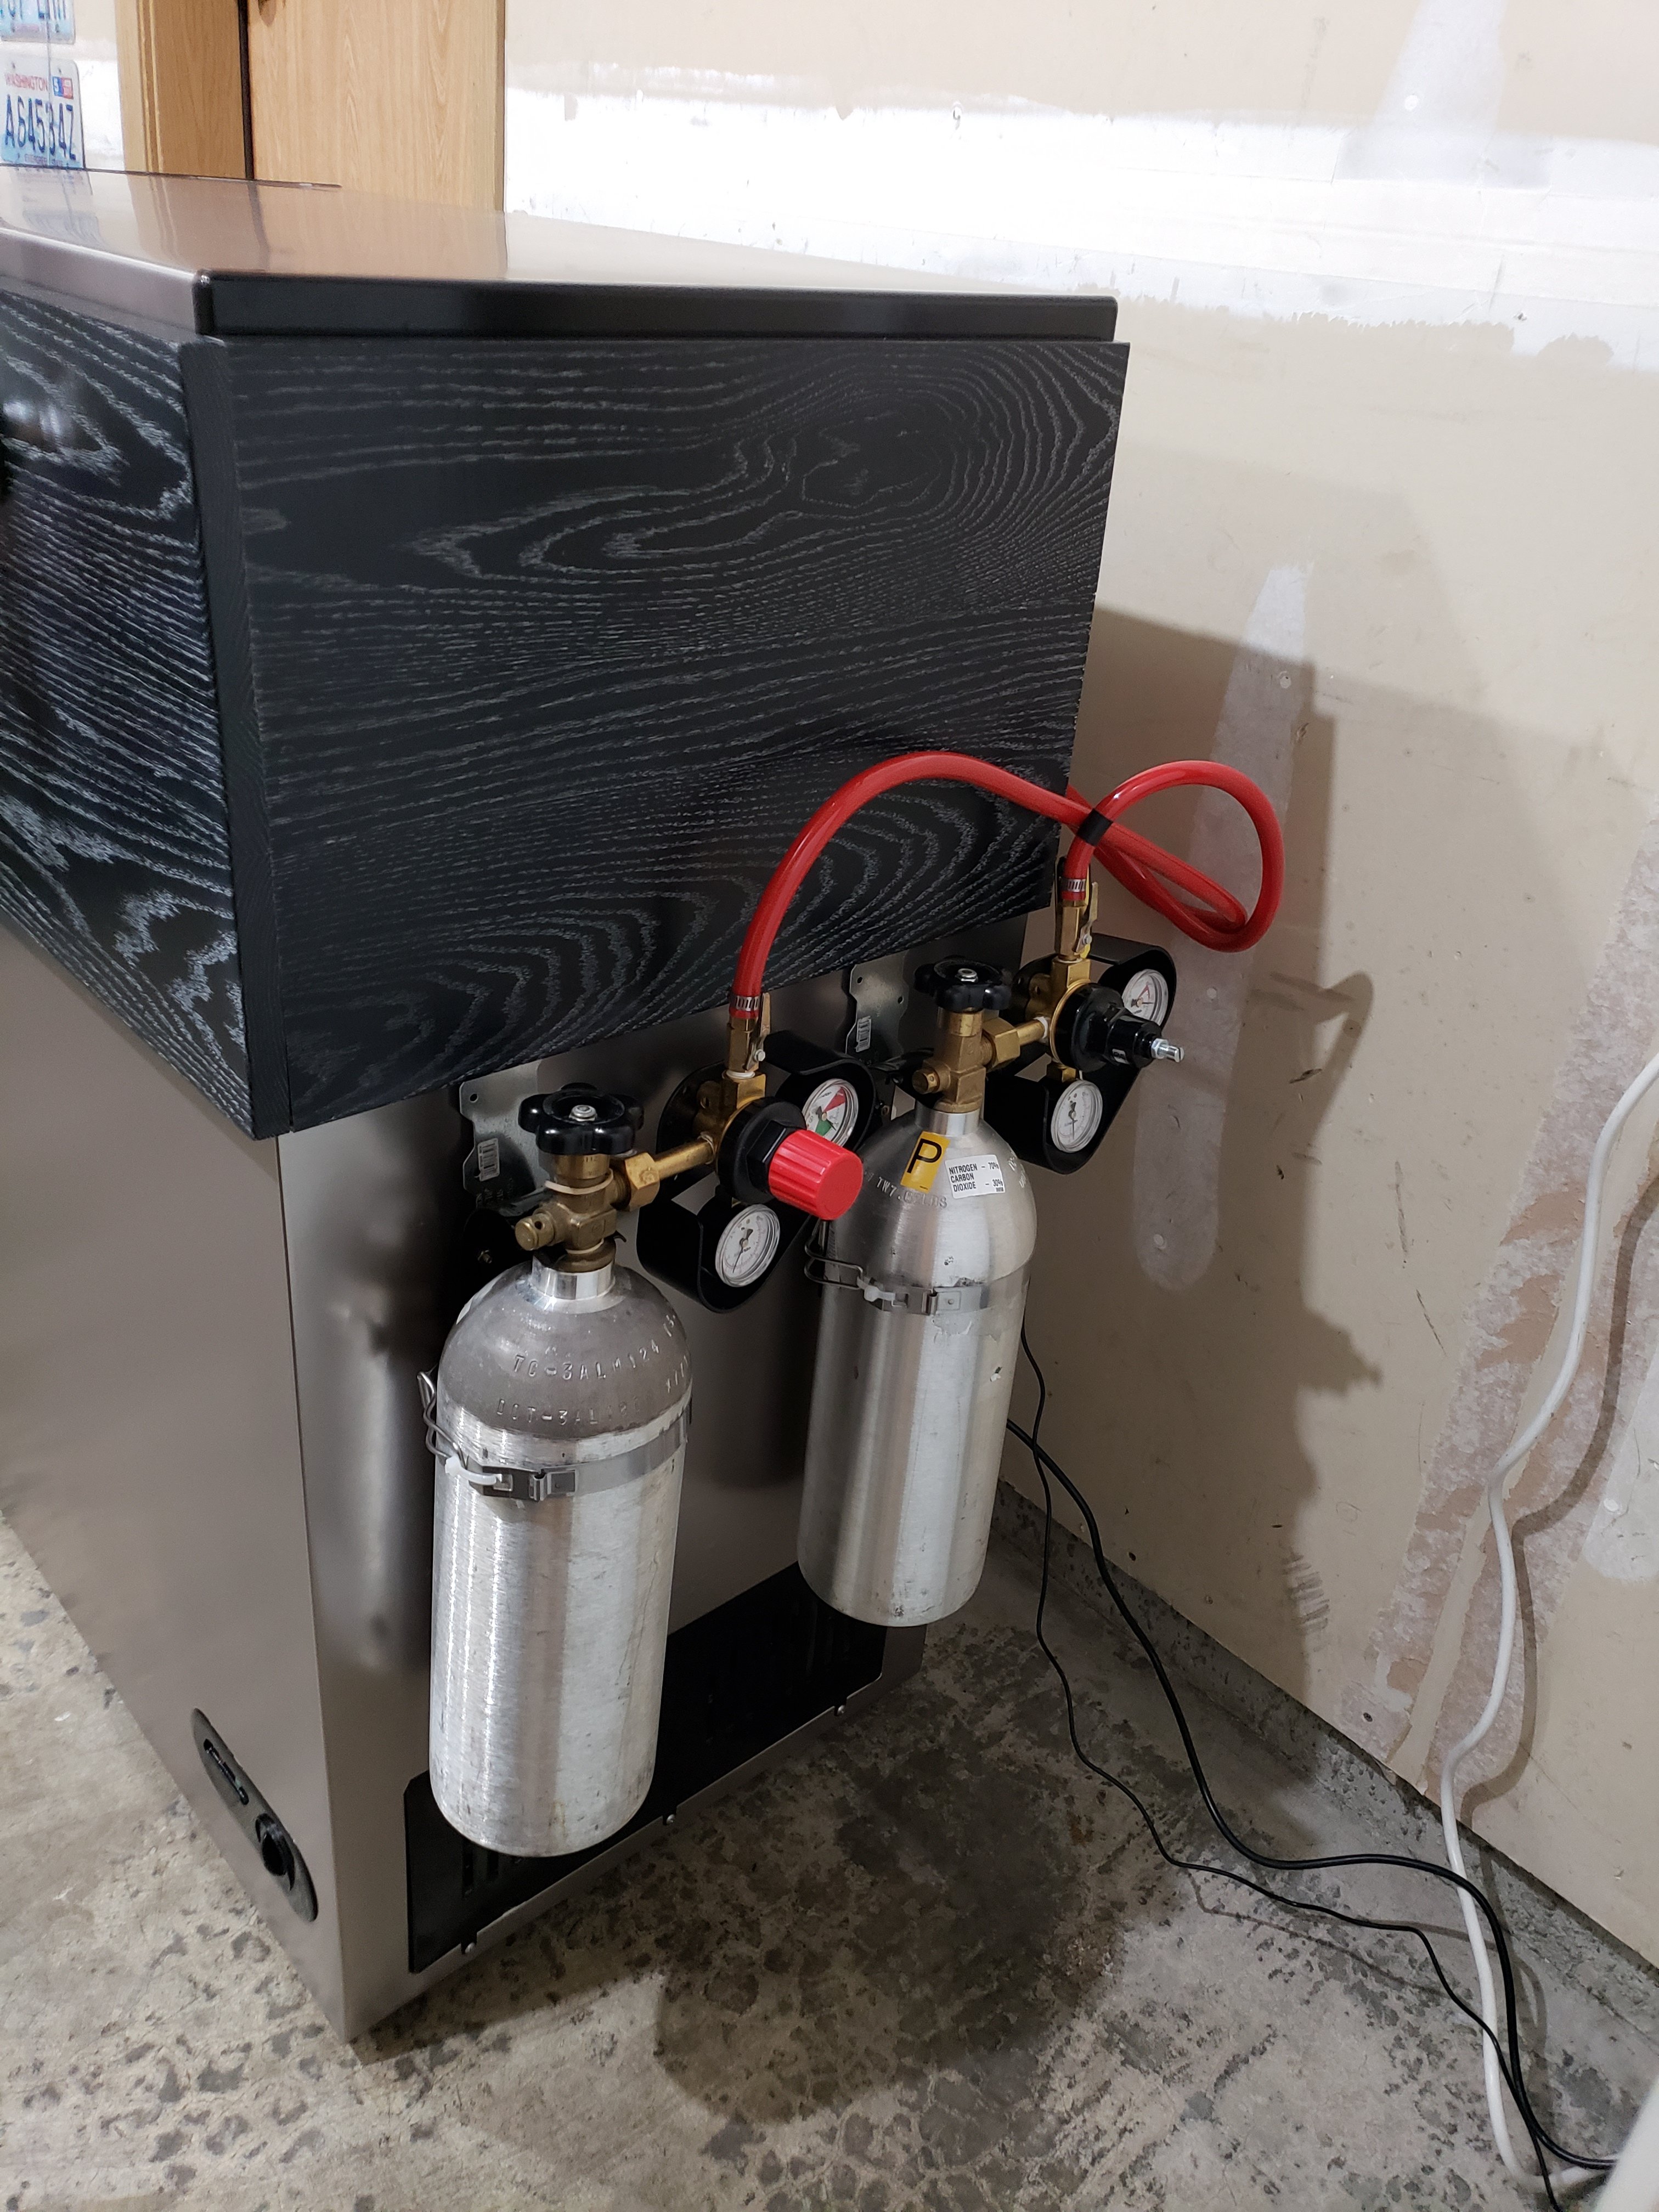
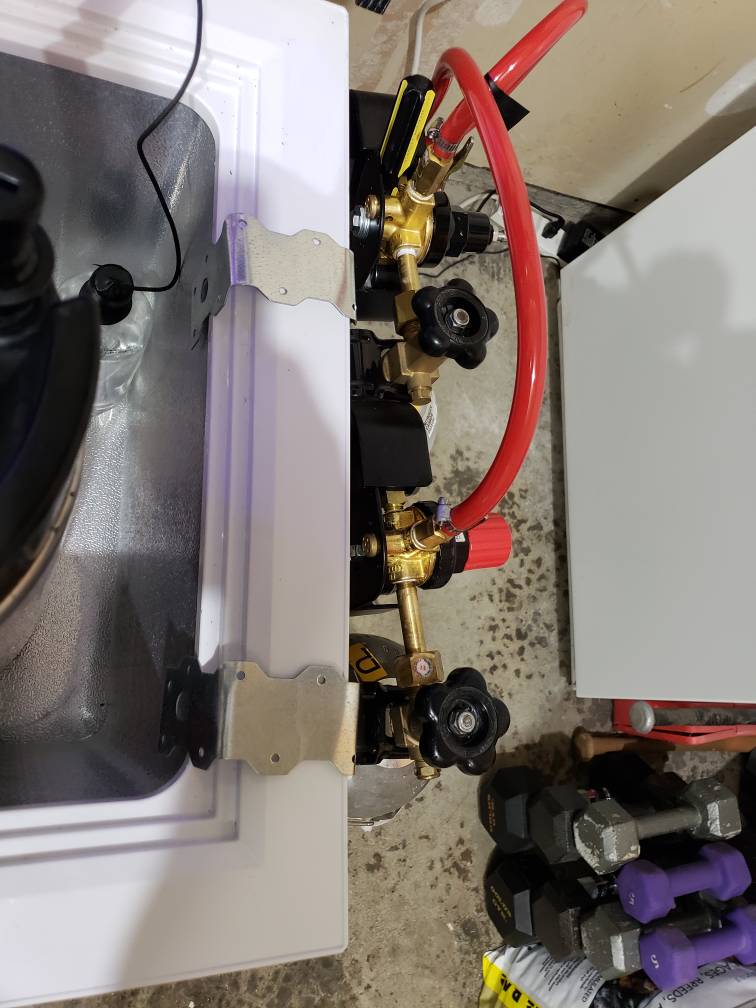
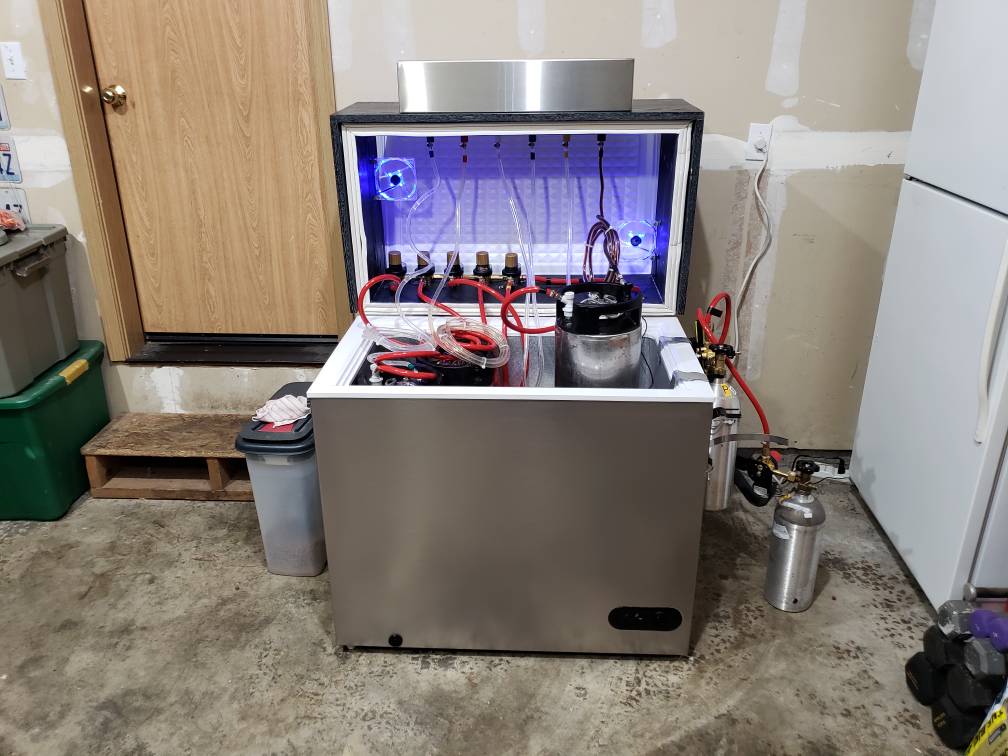
I mounted the co2 and beer gas talks to the side of the keezer to keep them off of the ground and to keep them from getting knocked over.

20190103_145643.jpg


Here are a couple of final shots. Don't mind the blue lights. I didn't know that the fans had them until I turned them on. I will just have to connect them to a speaker and have them flash whenever dubstep or EDM music is playing and the lid is opened.

20190103_145656.jpg
20190103_145727.jpg


The only things not shows are the inkbird controller that is mounted to the back and the 24 inch full length stainless drip tray that I mounted to the collar.

It was a fun project. I have been learning a ton about kegging. Just poured the first two beers from it last night, a Centennial blonde and a Left Hand Milk Stout clone on nitro. Tasted so freakin good and everything is working flawlessly.
 
Awesome job Phildo, everything looks neat and organized inside. I’ve been looking at the 5-way secondary as well as a nitro faucet for a new kegerator, and this has inspired me!
 
Awesome job Phildo, everything looks neat and organized inside. I’ve been looking at the 5-way secondary as well as a nitro faucet for a new kegerator, and this has inspired me!

Thanks. Those were probably the two highest costs items, but i knew going in that I HAD to have a nitro tap and I like having the ability to change the serving pressure for each line. It already works well for seltzer water @ 30 lbs and the blonde at 11.5 lbs.
 
Very nice build, especially the stainless steel wrap. How do you hang those gas tanks? Any pic for those setup without the tank?
 
Very nice build, especially the stainless steel wrap. How do you hang those gas tanks? Any pic for those setup without the tank?
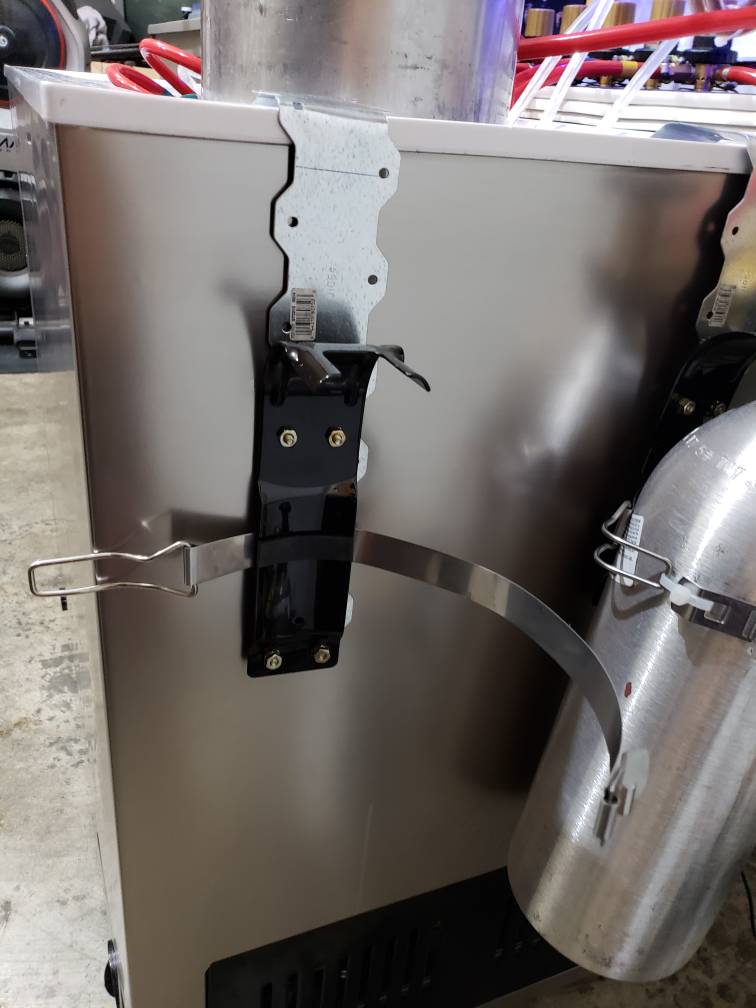
I dont have any pics, but it was pretty basic. At Home Depot, I bought a 24" structural strap and a fire extinguisher wall hanging kit. I then screwed the fire extinguisher hanger to the holes in the structural strap and the bent the end of the strap into a J, so that it hung off of the lip of the freezer.
 
If I can make a suggestion....

...using clear silicone, though any type of caulk will work, caulk the inside corners where the collar pieces meet, as well as fill in any depressions/cracks on the top where they meet. The trick to avoiding condensation is having a sealed compartment, and any air leaks will allow moist warm air to enter, the moisture will condense, and you'll get water on the bottom.

Also make sure the lid is fully seated; you probably have already done this, but be sure.

My first keezer didn't have perfect seals and I had condensation; my new one has much better joints and the lid sits much more squarely, and no condensation.

I like the stainless/black look. How did you attach the CO2 tanks? Did you know there were no lines in the side where you connected them? How did you determine that?
 
Very nice build, especially the stainless steel wrap. How do you hang those gas tanks? Any pic for those setup without the tank?
I just got home. Here are a couple of pics of the tank hanger and a couple of the keezer with the collar open.

20190110_170707.jpeg
20190110_170739.jpeg
20190110_170759.jpeg
20190110_170809.jpeg
 
If I can make a suggestion....

...using clear silicone, though any type of caulk will work, caulk the inside corners where the collar pieces meet, as well as fill in any depressions/cracks on the top where they meet. The trick to avoiding condensation is having a sealed compartment, and any air leaks will allow moist warm air to enter, the moisture will condense, and you'll get water on the bottom.

Also make sure the lid is fully seated; you probably have already done this, but be sure.

My first keezer didn't have perfect seals and I had condensation; my new one has much better joints and the lid sits much more squarely, and no condensation.

I like the stainless/black look. How did you attach the CO2 tanks? Did you know there were no lines in the side where you connected them? How did you determine that?
Thanks for the tips.

I fully caulked all of the joints and screw holes on the inner collar with silicone. The outer collar is actually just for looks. The inner collar has a seal where it sits on the freezer and I retained the original seal in the lid where it sits on the inner collar. The only holes in the collar are where the two gas lines come in from the back. I was originally going to hang the tanks off the back for a cleaner look, but it would have sat too far from the wall. That's why I opted for mounting them on the side and why the primary regulators are upside down. I could have mounted them on the other side, but that is exposed to more traffic and is more likely to get bumped on that side.
 
If I can make a suggestion....

...using clear silicone, though any type of caulk will work, caulk the inside corners where the collar pieces meet, as well as fill in any depressions/cracks on the top where they meet. The trick to avoiding condensation is having a sealed compartment, and any air leaks will allow moist warm air to enter, the moisture will condense, and you'll get water on the bottom.

Also make sure the lid is fully seated; you probably have already done this, but be sure.

My first keezer didn't have perfect seals and I had condensation; my new one has much better joints and the lid sits much more squarely, and no condensation.

I like the stainless/black look. How did you attach the CO2 tanks? Did you know there were no lines in the side where you connected them? How did you determine that?
I haven't had an issue with condensation since I finished the build and stopped opening the lid every 5 minutes to admire my handiwork. The fans are more to keep the whole keezer the same temp and just move air around. I am definitely keeping an eye on it though.
 
Brilliant way to hang the gas tanks! Without those pictures, I thought you fastened the structural strap on the collar.
 
Brilliant way to hang the gas tanks! Without those pictures, I thought you fastened the structural strap on the collar.
Thanks. Yeah, that was my original thought, but then I wouldn't have been able to lift the collar without removing them every time. It was kind of a last minute decision. I might church it up a bit, since every other part of it is overdone, but it works for now.
 
Back
Top