My First Brew Stand - an open exchange of thoughts and ideas

Homebrew Talk - Beer, Wine, Mead, & Cider Brewing Discussion Forum

Help Support Homebrew Talk - Beer, Wine, Mead, & Cider Brewing Discussion Forum:

This site may earn a commission from merchant affiliate links, including eBay, Amazon, and others.

ABrother

Member
Joined
Jun 4, 2014
Messages
22
Reaction score
2
I have been brewing about 20 or 25 years and have always dreamed of building a brew stand/system. Well I'm not getting any younger and I'm tired of horsing kegs full of hot liquids around to try to do an occasional all grain. I figured I'd share pictures and ideas as this project goes along and tap into the experience and expertise available in this forum.

So here goes:

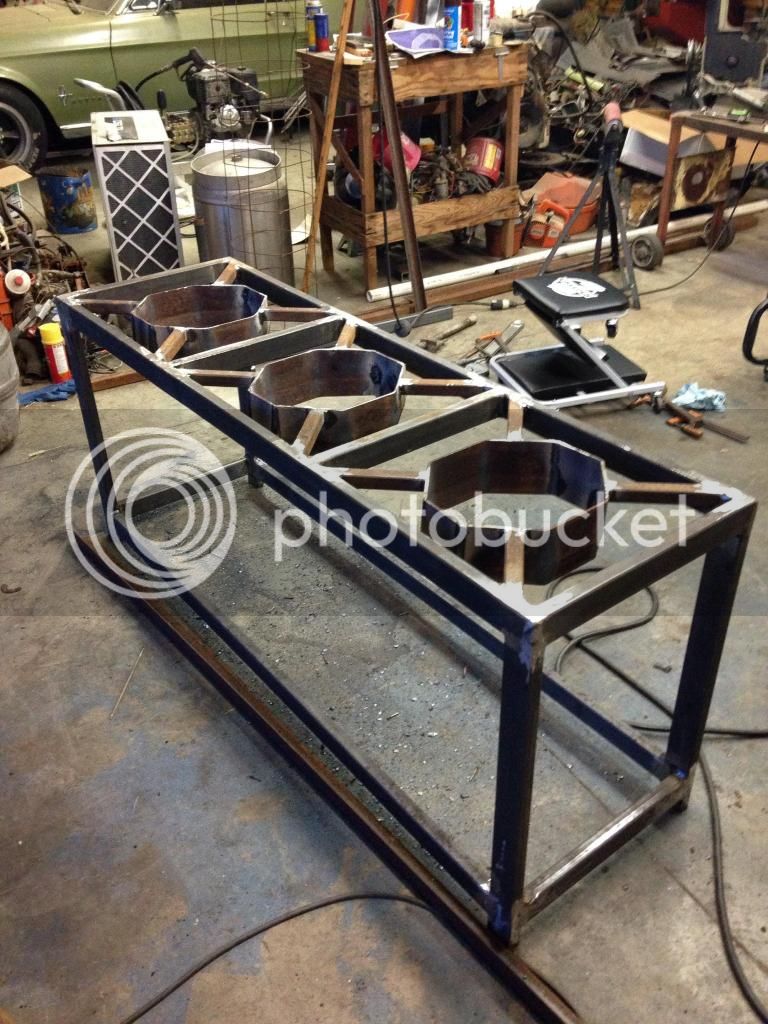
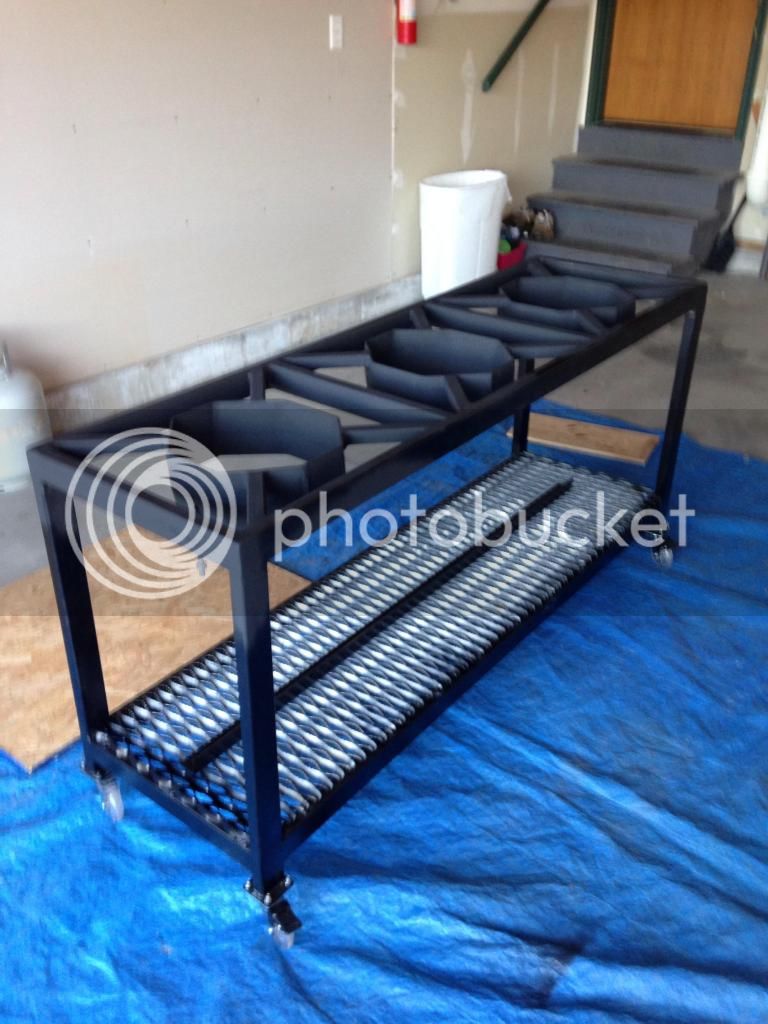
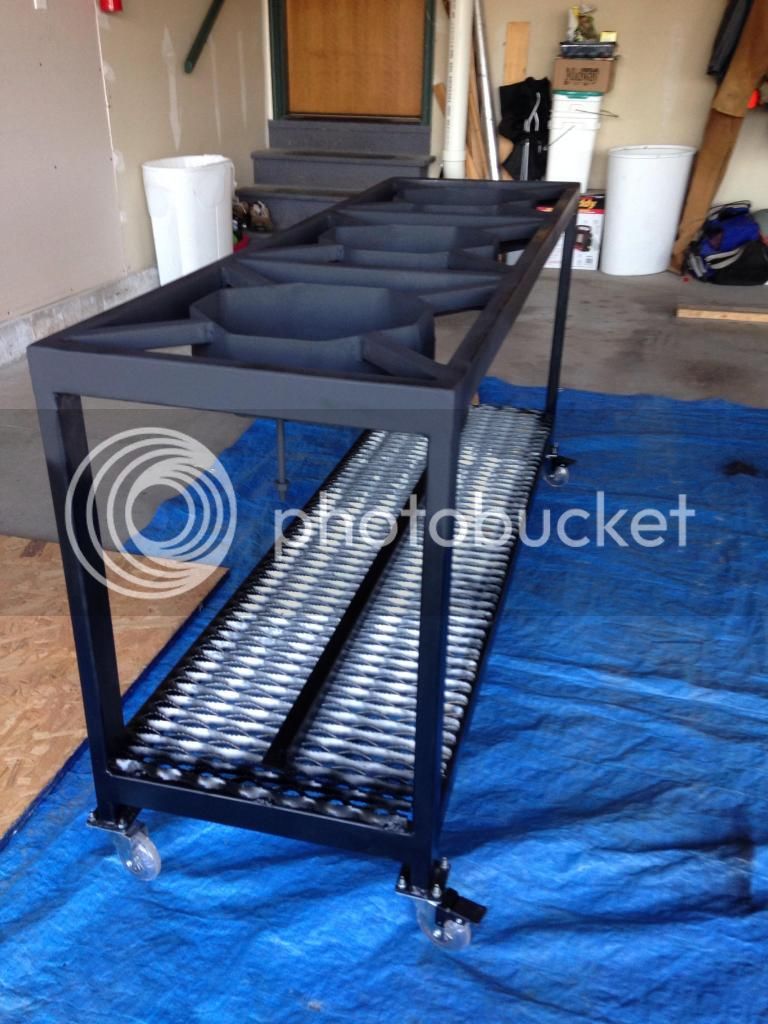
I've settled on a single tier HERMS system. I'm hoping to start simple with manual heat control, hoses and a single pump and add to it as time and finances allow. This way I hope I can start brewing some all grain batches on it pretty quickly.

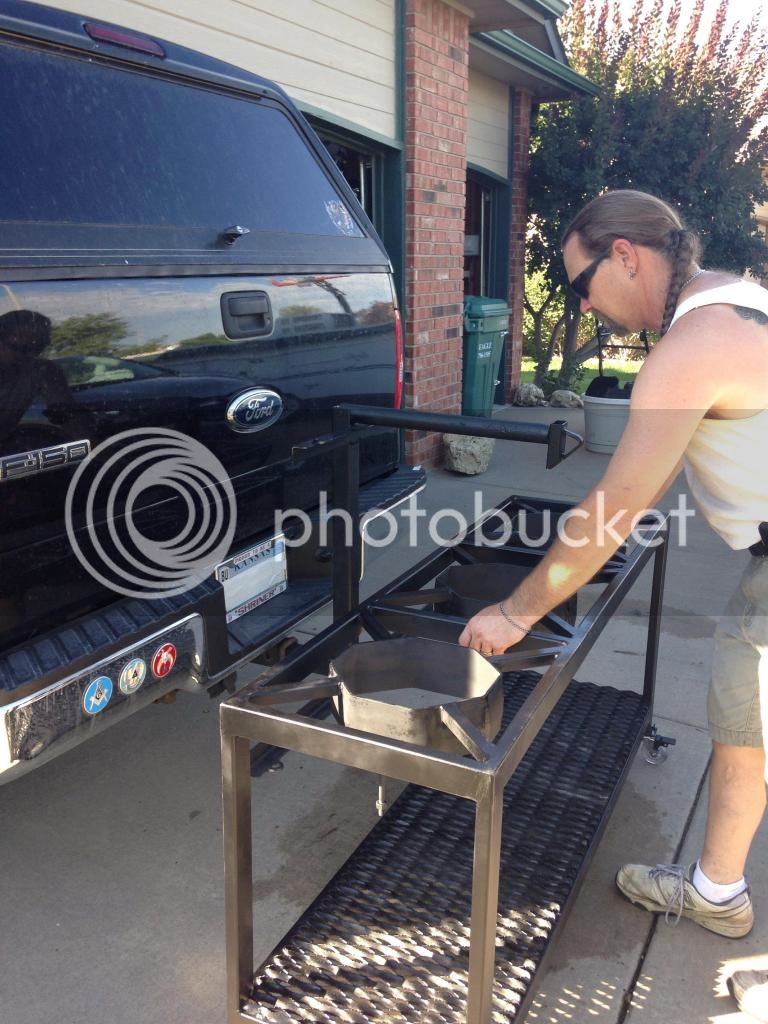
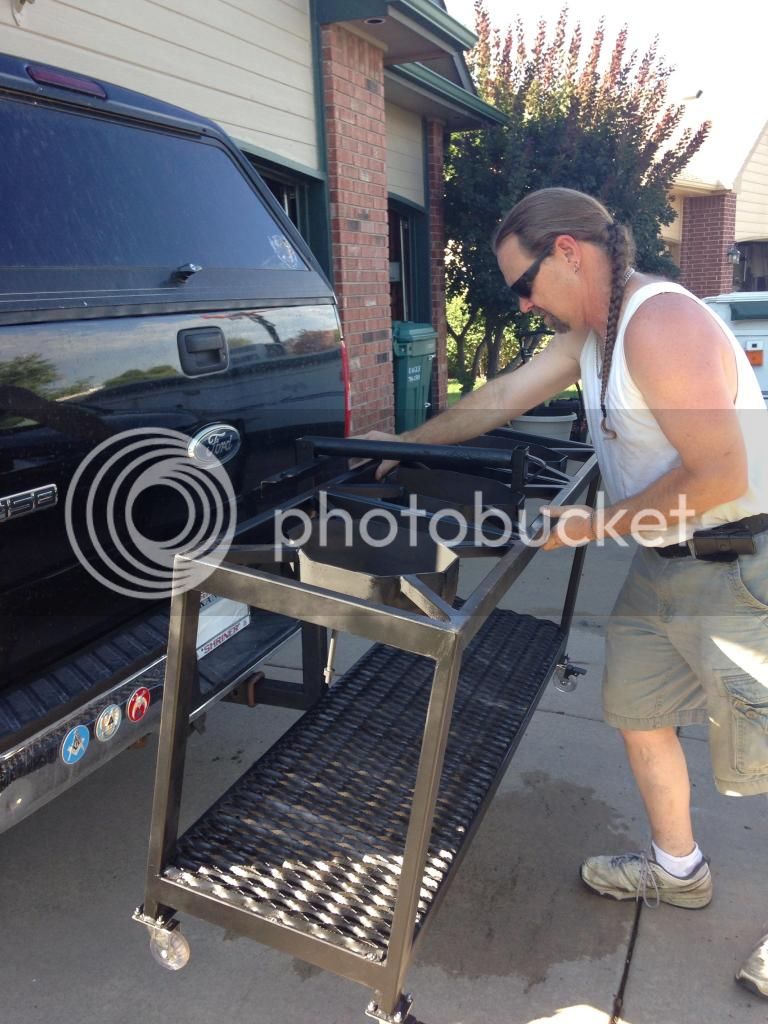
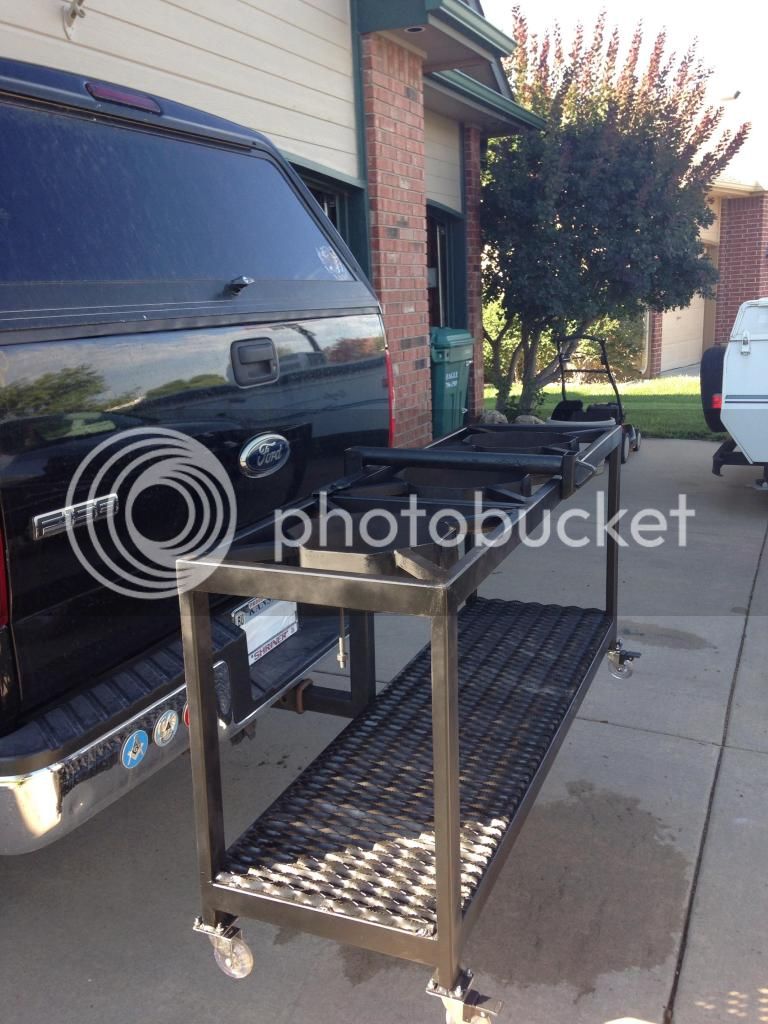
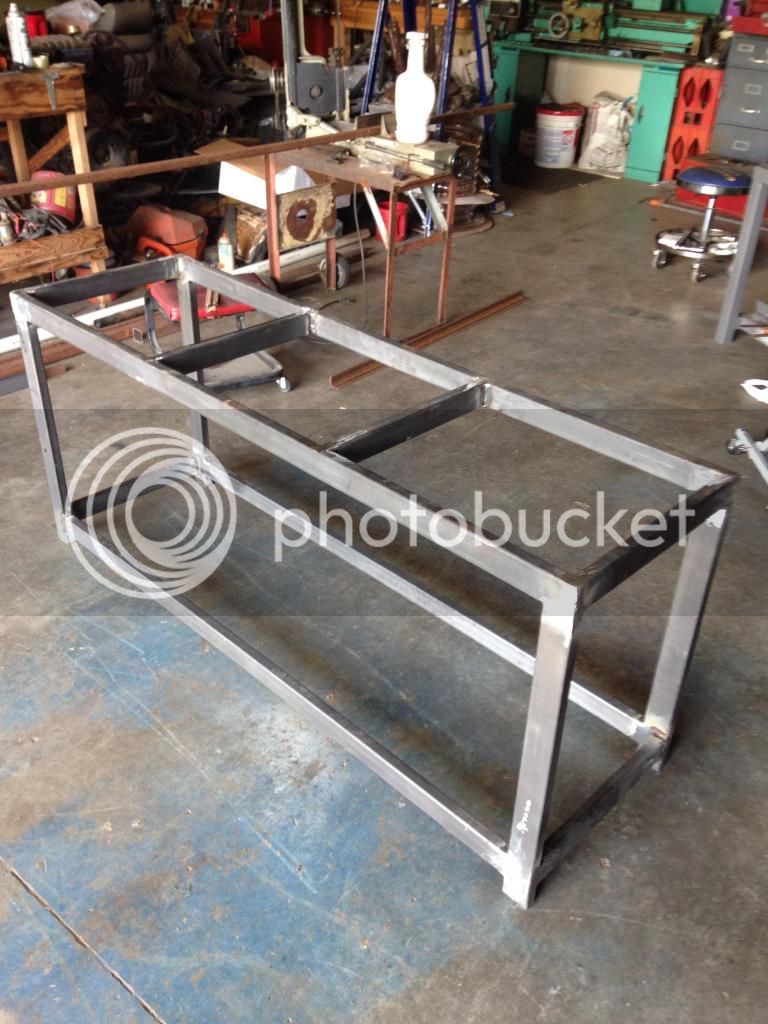
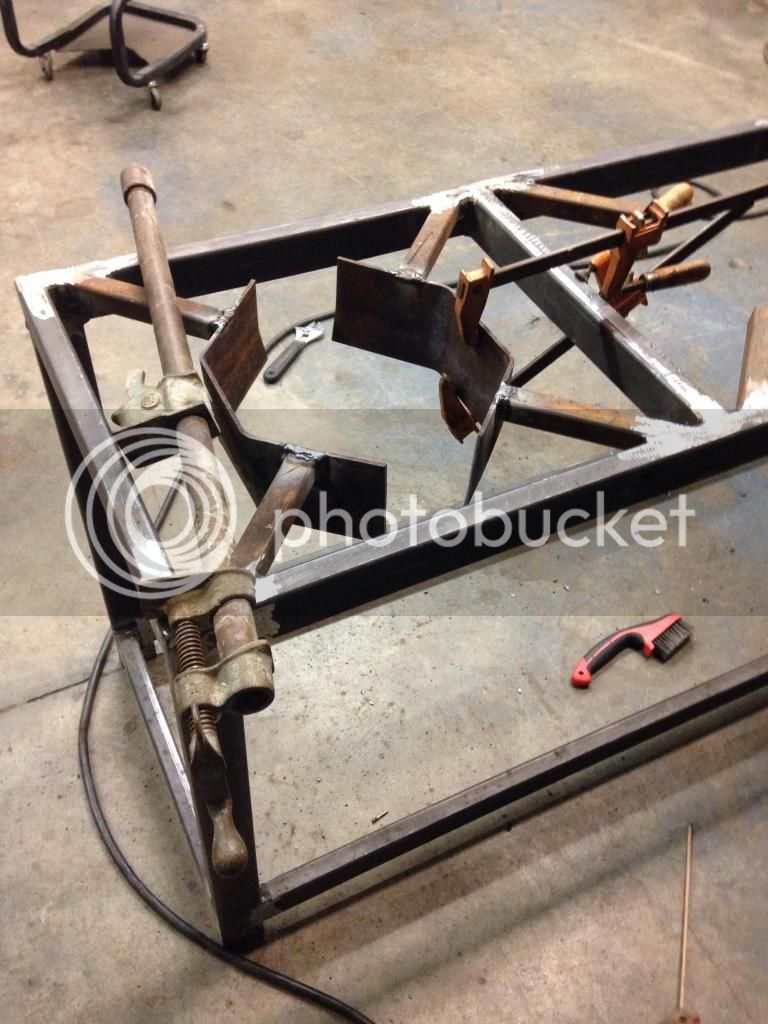
First thing of course is a bench

image.jpg


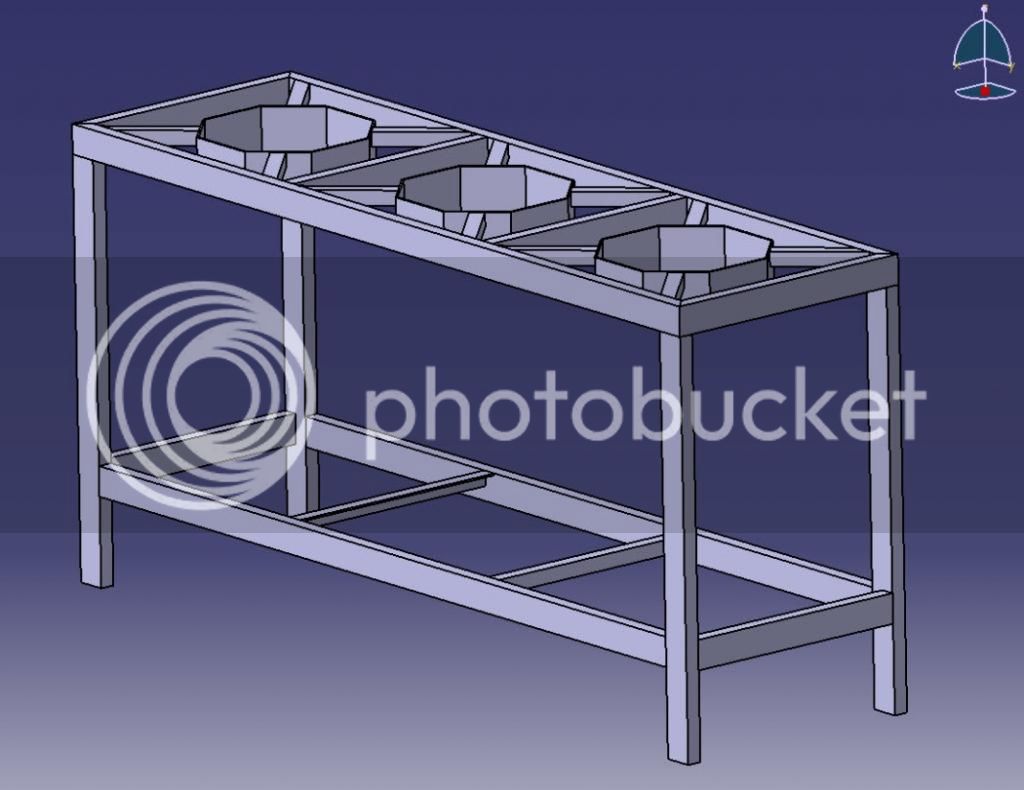
which a good friend who I introduced to home brewing is helping me

image-1.jpg


image-2.jpg


That's kinda where I'm at. A lot of thinking and a little doing. So let the flow of thoughts and ideas begin.

Happy Brewing
 
Looks pretty good so far. Seems like you have everything figured out with exception of maybe a pump mount. Maybe add some wheels?
 
Yea, we got some scrap expanded metal to use for a shelf. I didn't think mounting the pump on or around that would be to big of a deal. I have no idea how they mount so I'll wait and see once I get it ordered and in. I'm planning to use a Chugger pump. Since I've never used a pump it might be good to play with it to see what way primes the best. I was looking at the plastic inline head mainly for price but I'd like to get the SS center inlet if I can convince myself I can operate this with one pump. Thoughts?

Definitely got casters in the plan, I'm just to lazy to draw those and the shelf up.
 
You are 6 months ahead of me on similar project. I'm still thinking mine through and will be very interested to see how the all manual HERMs works out.

A couple questions...

First, if it is going to be HERMs do you need the burner under the MLT? Won't you be circulating the mash liquor through the coil in the HLT?

Second, I guess you are planning to batch sparge. I only batch sparge now but have been thinking a proper stand should be built with fly sparge in mind. Don't know why I think that maybe spending too much time in here...

Good luck, looking forward to watching your progress.
 
Yes, I am only planning to use burners under the HLT and brew kettle. I'll heat the strike water in the BK to begin and the HERMS water (not sure what the right term is there) in the HLT. Pump into the MLT from the BK then start the recirculation until temps stabilize at my strike temp then I'll dough in, heat back using re circulation and start the timer. Using the BK for strike water seems like it keeps the HLT volume up and at temp. If you had a burner you could hear your strike water there and maintain after dough in with the HERMS. I only have the burner ring planned at the MLT location cause it looks cool, I'm not planning to install a burner there.

I am planning at least initially to batch sparge. How I've always done it manually but I may expand down the road so I can fly sparge by adding a second pump as finances permit. Initially I'd much rather tackle automating the mash temp control.
 
I planned all my steps and the only step that needs a second pump is fly sparse. I was thinking might try one of those little plastic pumps fops argue water and use my chugged everywhere else.


Sent from my iPad using Home Brew
 
I planned all my steps and the only step that needs a second pump is fly sparse. I was thinking might try one of those little plastic pumps fops argue water and use my chugged everywhere else.


My process seems similar. The only thing I need a second pump for would be to fly sparge. What pump are you planning to use?
 
A little more progress tonight.

image-6.jpg


I'll be installing burners before you know it. I was planning to use BG-10 high pressure burners because it's what I'm familiar with. I'd really rather use a low pressure burner with enough BTUs to heat the large volumes in around 30 minutes. The BG-14 seems a little to big but I'm not sure if the BG-12 is big enough and I'm not sure if either work on low pressure with the right orifices.

Thoughts or suggestions?
 
Food for thought...If you read other threads on here, people have mentioned that you will need some kind of venting under you kettles so the heat and combustion can escape from the burner ring. Take a look for some if those posts. If you have flat kettles, they will sit against your ring from the looks of it. No way for the fire/heat to spread out from there without going down under the ring and out from there.
 
you will need some kind of venting under you kettles so the heat and combustion can escape from the burner ring.
+1. you could cut some piece (like semi-circles) out of the tops of the rings/wind-guards.

if the pot makes a perfect seal over the rings, flames won't travel up to the pot. in fact without upper ventilation, the O2 in that trapped space will be quickly consumer and the burner might not burn at all (or at least very inefficiently).
 
I'm using converted Sanke Kegs so I don't think they will seal like flat bottom pots will they? I was going to test the burners so I'll be sure to pay special attention to how well they seem to be breathing. I'll also check the forum for posts related to burner installation and efficiency.
 
Note to self... BBQ Black and Satin Black are NOT the same color.

image-8.jpg


image-7.jpg


One more coat of the right color paint and I'll be ready to install the burners and figure out how to run the gas plumbing.
 
I recommend a tippy dump for the MLT, i'm sooo thankful that i added mine (and so does my back).

I second the venting comments above. If you're using keggles then you can cut holes in the skirt to do the same. Otherwise a good quantity of hot gasses will go "around" instead of hitting the keggle directly, you'll see evidence of this when your frame heats up (instead of the vessel). After cutting vent holes my boil times went down and i saved $ on propane.
 
I like to brew with friends so it was important that I be able to transport my brew stand. Here is the really cool solution to that challenge my friend helping me build came up with.

image-9.jpg


The transport rig on the back of my truck.

image-10.jpg


Wheel the stand up...

image-12.jpg


Tip it up...

image-13.jpg


Lift...

image-14.jpg


And lock...

image-15.jpg


Let's go brew something!

I think I'll put him to work on the tippy-dump next.
 
A buddy in my brew club has a gravity type stand, with 2 wheels and a receiver hitch bar added to the construction.
Slips into the receiver, put in the pin, and haul ass!
He's not gentle in the handling of it, and has done over 400 batches on his setup.

I like your transport setup!
 
Back
Top